Best Backpack for Thailand | How to Pick a Backpack for Thailand

best backpack for Thailand

How do you pick the best backpack for Thailand? A travel backpack is essential for traveling in Thailand, but what features should it have? What size should it be? 

When I backpacked along the Banana Pancake Trail years ago, I used a small shoulder bag.  It was definitely more practical than a roller suitcase for moving along the sometimes sandy and usually potholed roads. Unfortunately,  it was incredibly cumbersome to lug around on motorbikes and I’d pray it wouldn’t fall out from between the drivers legs as we ripped through the chaotic traffic. Even worse, it left me counting my steps as it pulled my entire body to one side.  If you travel with a backpack you’ll breeze over the potholed or dirt roads, jump on and off motorbikes, and do it all without killing your back!  

What features should you be looking for in the best travel backpack for Thailand?  What are the deal breakers and what could be considered optional ? Our Khmer Explorer Travel Set was built to be the best backpack for Thailand or epic adventures across the Banana Pancake Trail. That said, this post will help you make an informed decision in choosing the best backpack for your trip to Thailand. So let’s dive in! 

How big of a backpack do you need for Thailand?

Most people backpacking Thailand seem to like traveling with backpacks 35L – 70L in size. There’s a large minimalist mob out there that seems intent on convincing the world that if it’s not a carry-on (typically under 40L) you’re doing something wrong. In my opinion, that’s completely false. Yes, it’s nice to avoid picking up a bag at the luggage carousel, but it’s really annoying having to be forced to be hyper aware of accidentally exceeding your liquid quota, accidentally packing your favorite swiss-army knife, or meeting the strict weight restriction  issues you inevitably run into with checking a carry-on backpack. Additionally, I didn’t even mention the annoyance of fighting with everyone on the plane for an overhead bin spot!

Perhaps most importantly, everyone values items on their packing lists differently! For some, it may be worth it to pack a couple nice clothes and a fancier pair shoes for a night out at Skybar in Bangkok, or have the space to bring their own scuba mask, or room for their camera case for their mirrorless camera and a couple lenses. 

I’ve traveled with both a 30L pack and a 60L pack in Thailand, both worked great. Ultimately, traveling with this 60L pack,  allowed me not to won’t worry about having space for that extra Chang Beer tank top 😉 and I was under no obligation to fill it to the brim. I also find it much more enjoyable to have an emptier pack then one that is bursting at the seams. 

What features should a travel backpack for Thailand have?

There are a couple key features to look for when choosing the best backpack for traveling in Thailand. 

organization inside the best backpack for thailand travel

Impeccable organization

This should be your number one priority when choosing a travel backpack for Thailand!  In fact it was this reason that led us to start this company and build the best front-loading backpack. When traveling in Thailand, you’ll consistently see disheveled looking backpackers on street corners or at bus stations frantically unloading their lives belonging from a top-loading hiking backpack. Your life doesn’t have to be like this! The right travel backpack should open like a suitcase, have tons of pockets and provide you with complete access to everything inside. It should provide a spot for keeping dirty gear or shoes separate, and packing cubes are always a plus! We even put a secret pocket into our backpack for those times that you need to stash a small valuable like your bank card or passport. Take it from me, there is nothing worse than scrambling to pack for an early morning bus after a late night out with too many Chang! Make this process as easy as possible with a pack that focuses on organization.

Weatherproof

If you get stuck in a tropical downpour in Thailand it will leave you drenched. If you pick the right backpack your stuff doesn’t have to join you. Any good travel backpack should be weatherproof and utilize a coated fabric to help water bead off and keep your stuff dry. It’s not waterproof, meaning you can’t drop it off the party boat and expect your stuff to stay dry, but it will keep everything dry even in a monsoon downpour. Ensure the backpack has a PU coated fabric or something similar. 

travel backpack with locking zippers for thailand

Theft resistant

Thailand is a safe country to travel in and you can feel incredibly relaxed here. Unfortunately, minor theft and pickpocketing can be common. Ensure you pick a travel backpack that offers lockable zippers and put your locks on when you leave your room or during any transit days to keep unwanted hands out. 

Ergonomic and height adjustable

If you’re sitting on the back of a motorbike or walking for a kilometer or two in the equatorial heat, comfort and adjustability go a long way. Plus, not everyone is the same height or shape making it absolutely critical you can adjust a backpack to your height and torso size. Hiking backpacks get used so often because they’re comfortable to carry. Fortunately a good travel backpack can do the same thing, without forcing you to carry your gear in an organization-less potato sack. 

I actually field tested our Khmer Explorer Travel Set as a hiking backpack on a 75 km journey on Canada’s rugged West Coast Trail. It was comfortable even with 60 lbs in it, proving the point that a good travel backpack can be the best of both worlds. 

Stowable hip belt

A robust hip belt takes the majority of the weight off your shoulders and back, making your pack more comfortable to carry. I know, you don’t see runway models wearing backpacks with hip belts, but they’re incredible to have for the times your shoulders and back get a bit sore. Plus, some travel backpacks provide a small hip belt pocket for phone storage and let you stow the hipbelt away and completely out of sight when you wish! 

Optional features to consider in a backpack for Thailand

Depending on your personal preferences these features may also be worth considering

laptop bag

Laptop storage

If you plan on traveling with a laptop and only using one bag this may be a feature that you consider.   Personally, I often prefer to use a small daypack for my laptop or use a laptop sleeve with a shoulder strap

Water bottle holder

Generally, I don’t find it essential to have my bottle instantly accessible at all times, but if you do this may be a feature you look for in a travel pack. Another option would be to consider a multi-functional approach – using a detachable bottle holder that can also act as bottle sling like our Bottle Sling Bundle

That sums it up! Hopefully this was helpful in narrowing down your search for the best backpack for your trip to Thailand. Drop me a line in the comments below if you have any questions about choosing the perfect backpack! 

Happy travels! 

36 Epic Things To Do In Vancouver, Canada

Vancouver and North Shore Mountains

There are so many incredible things to do in Vancouver! Squished between the ocean and the North Shore mountains this majestic place is unquestionably one of the most beautiful cities in the world. With this location, it’s no surprise that the city is jam packed with epic things to do!  The biggest challenge in visiting Vancouver is picking the best things to do in the limited time you have. Fortunately that’s why I wrote this post, to help you pack your time in Vancouver with the highest percentage of truly awesome activities.

That means we’re going to gloss over the boring stuff, like fighting with cruise ship passengers for a photo of Gastown’s steam clock. We’re also going to gloss over the token tourist punch card items, like pushing through the hoards at the overpriced Capilano suspension bridge.  So, if you’re planning a trip to Vancouver and looking for some truly epic things to do, you’ve come to the right spot!  

I should also note that I’m not a travel blogger that visited the city once, I lived there for years and subsequently developed a strong opinion on the best things you should do on a trip to Vancouver.  These epic things to do  are the same recommendations  that I’ve given to some of my closest friends.

 Let’s dive in!

Revolver Coffee Vancouver

1. Indulge in Epic Coffee

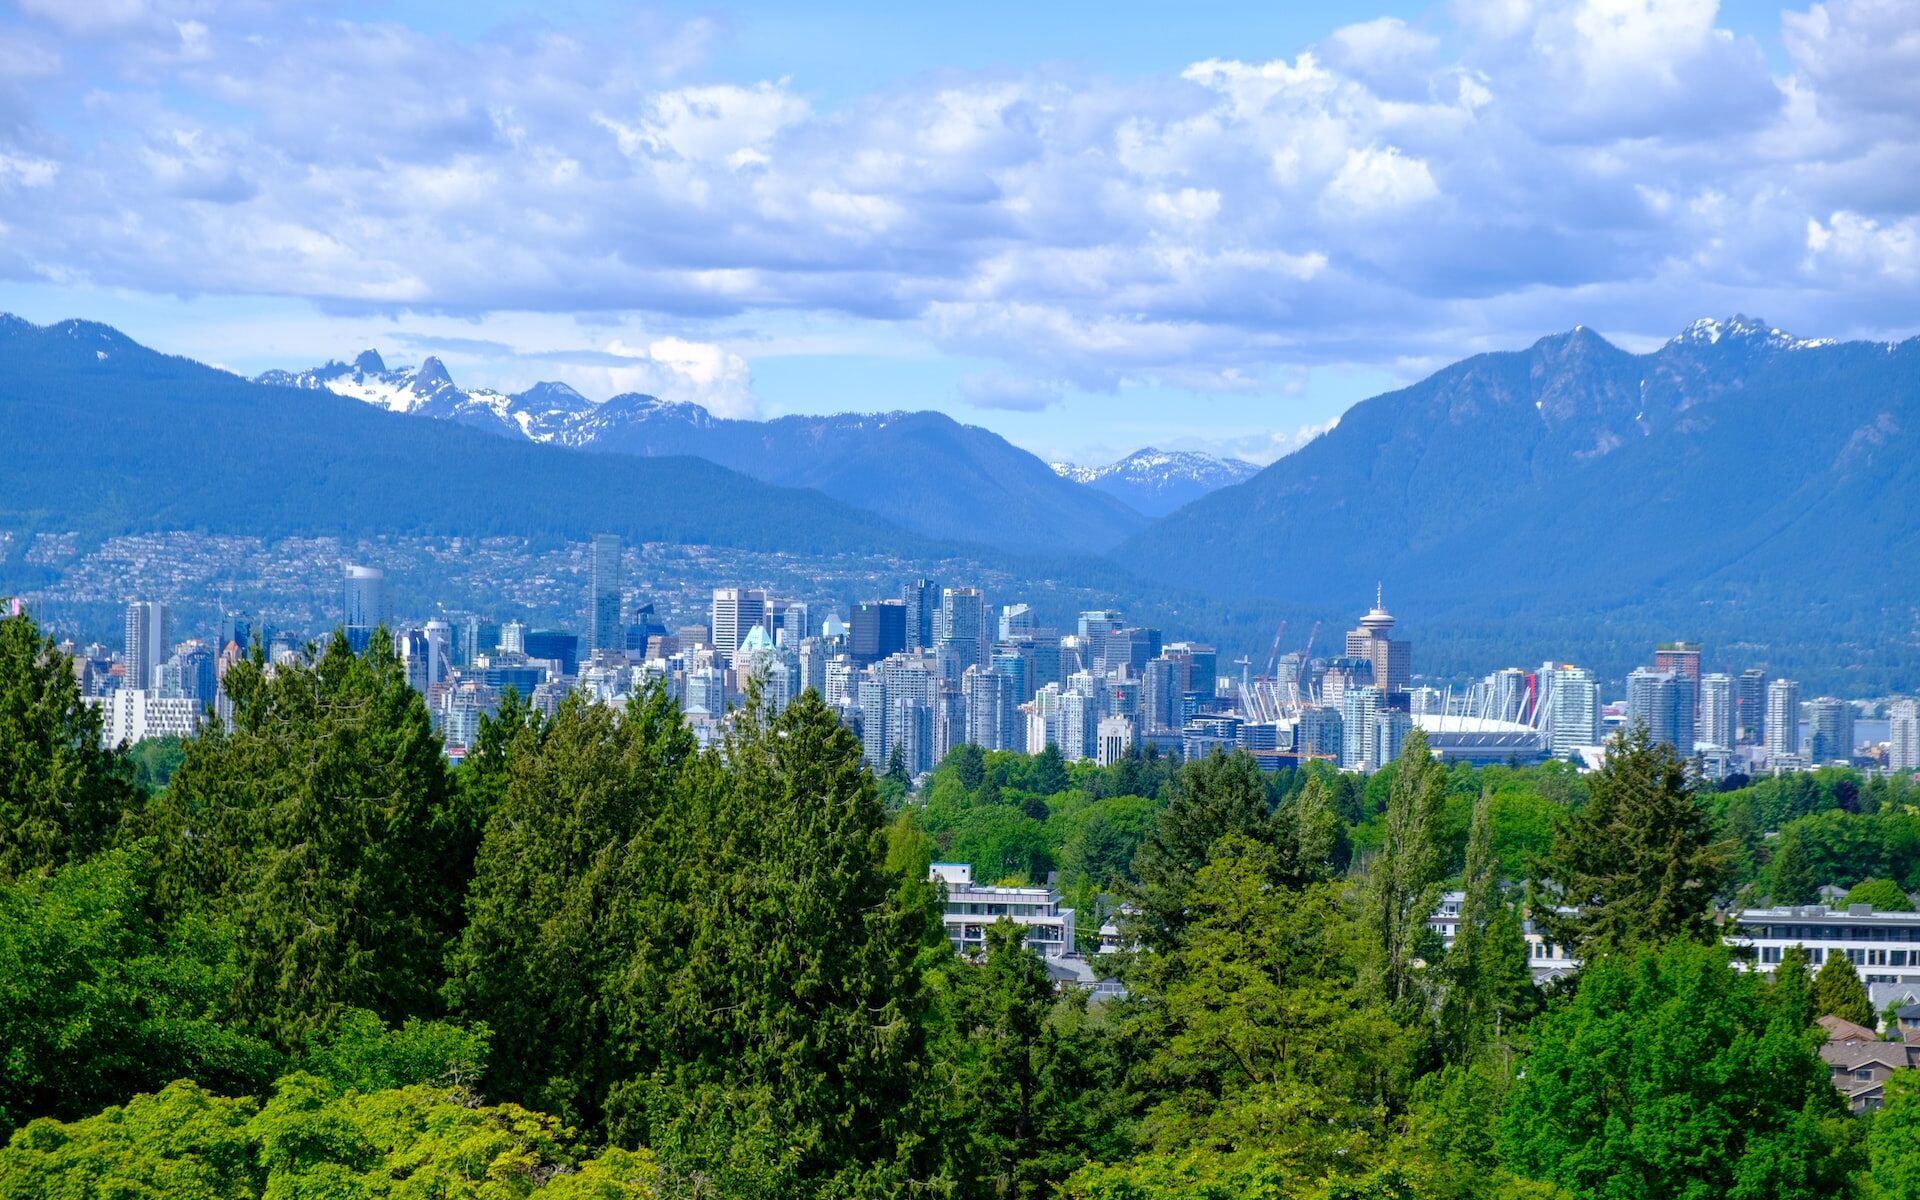
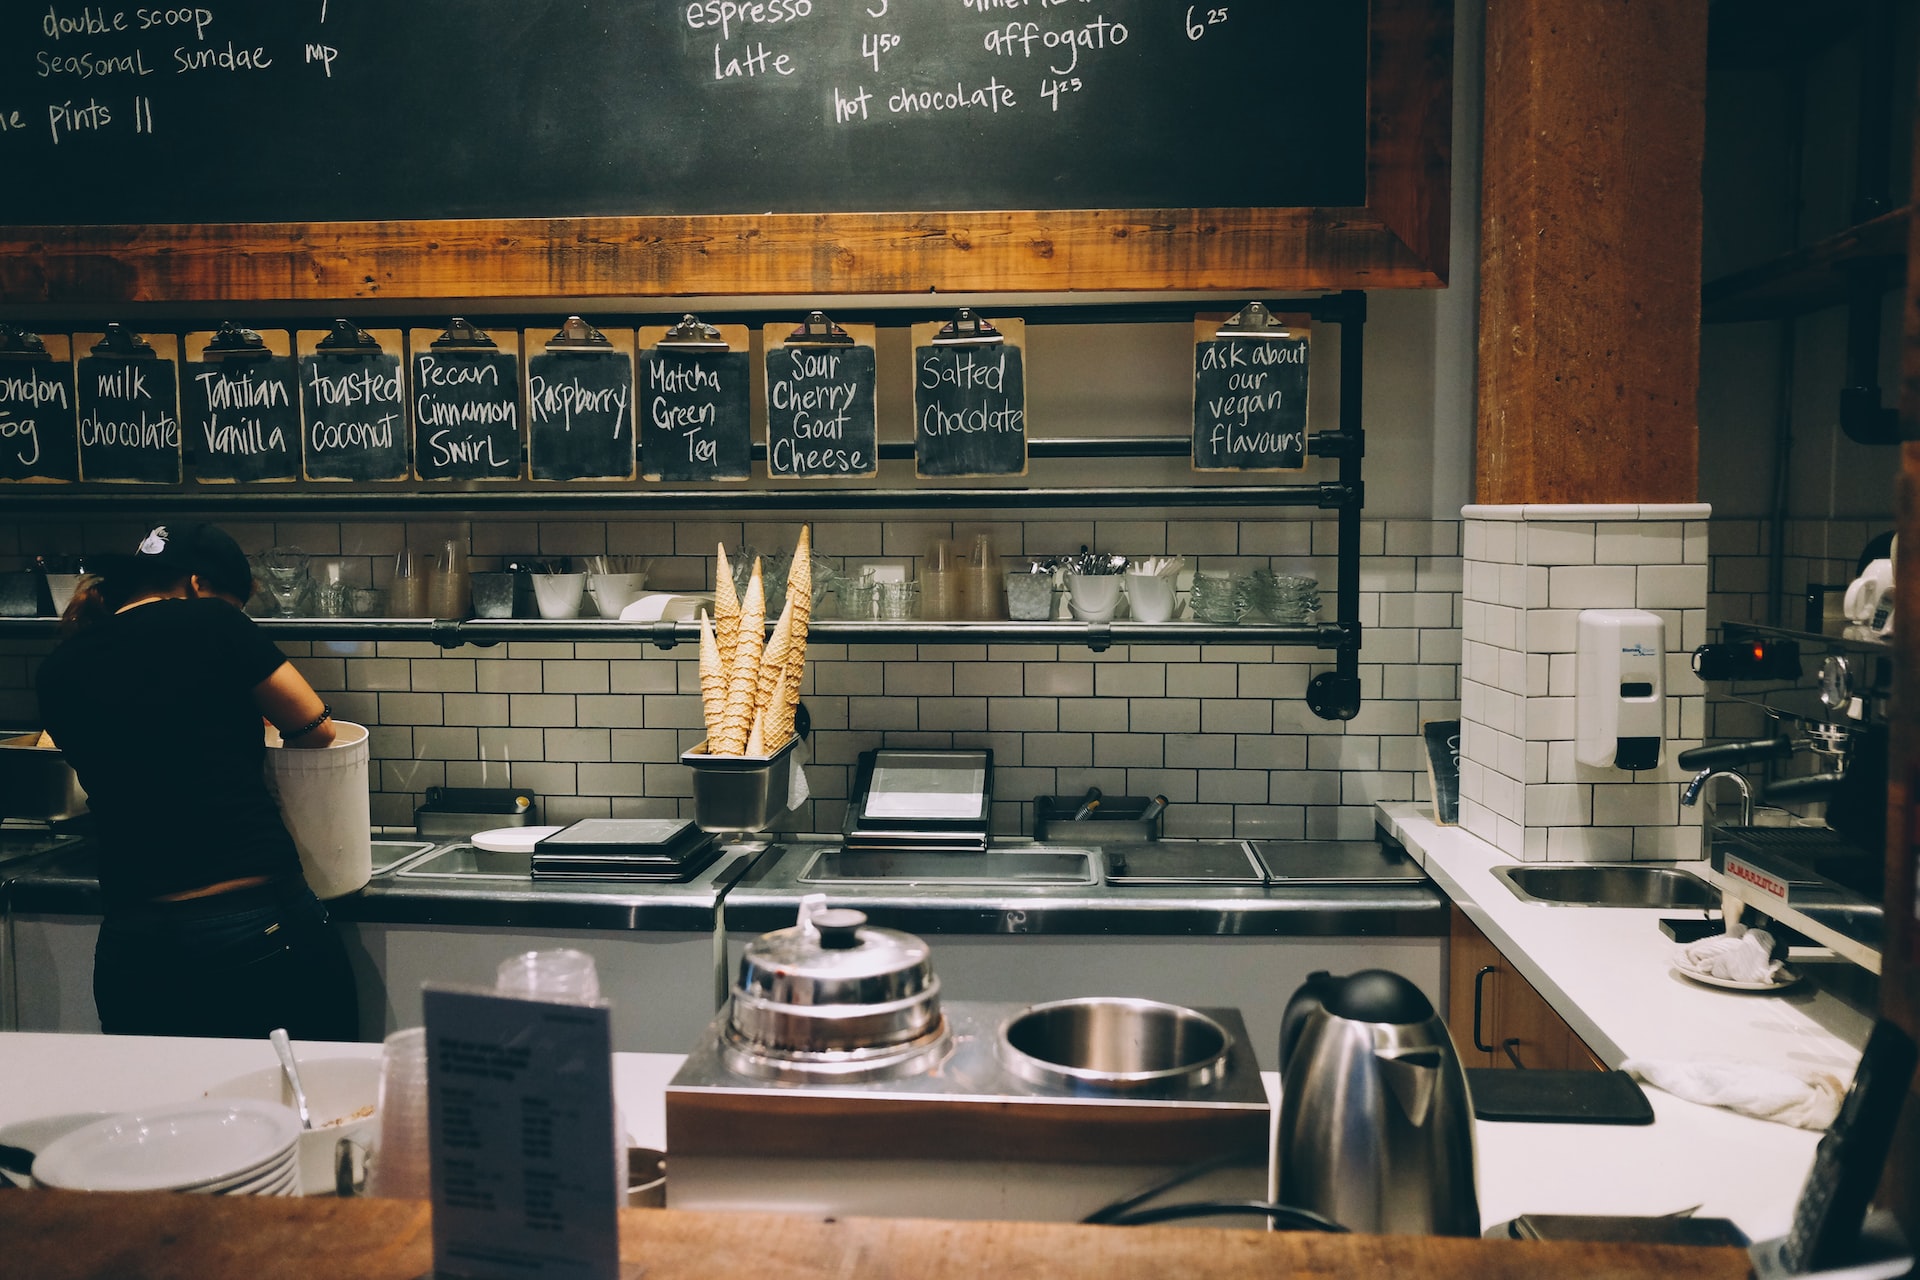
Maybe you’re tired from your long flight or drive into Vancouver or you’re worn out from the other epic things to do on this list. Fear not! Vancouver’s fantastic suite of coffee roasters and coffee shops will get you wired up fast. In fact, I’d go as far as to say the city’s obsession with great coffee is almost on par with its obsession with another plant based intoxicant…

Here’s a few solid places to get your caffeine fix:

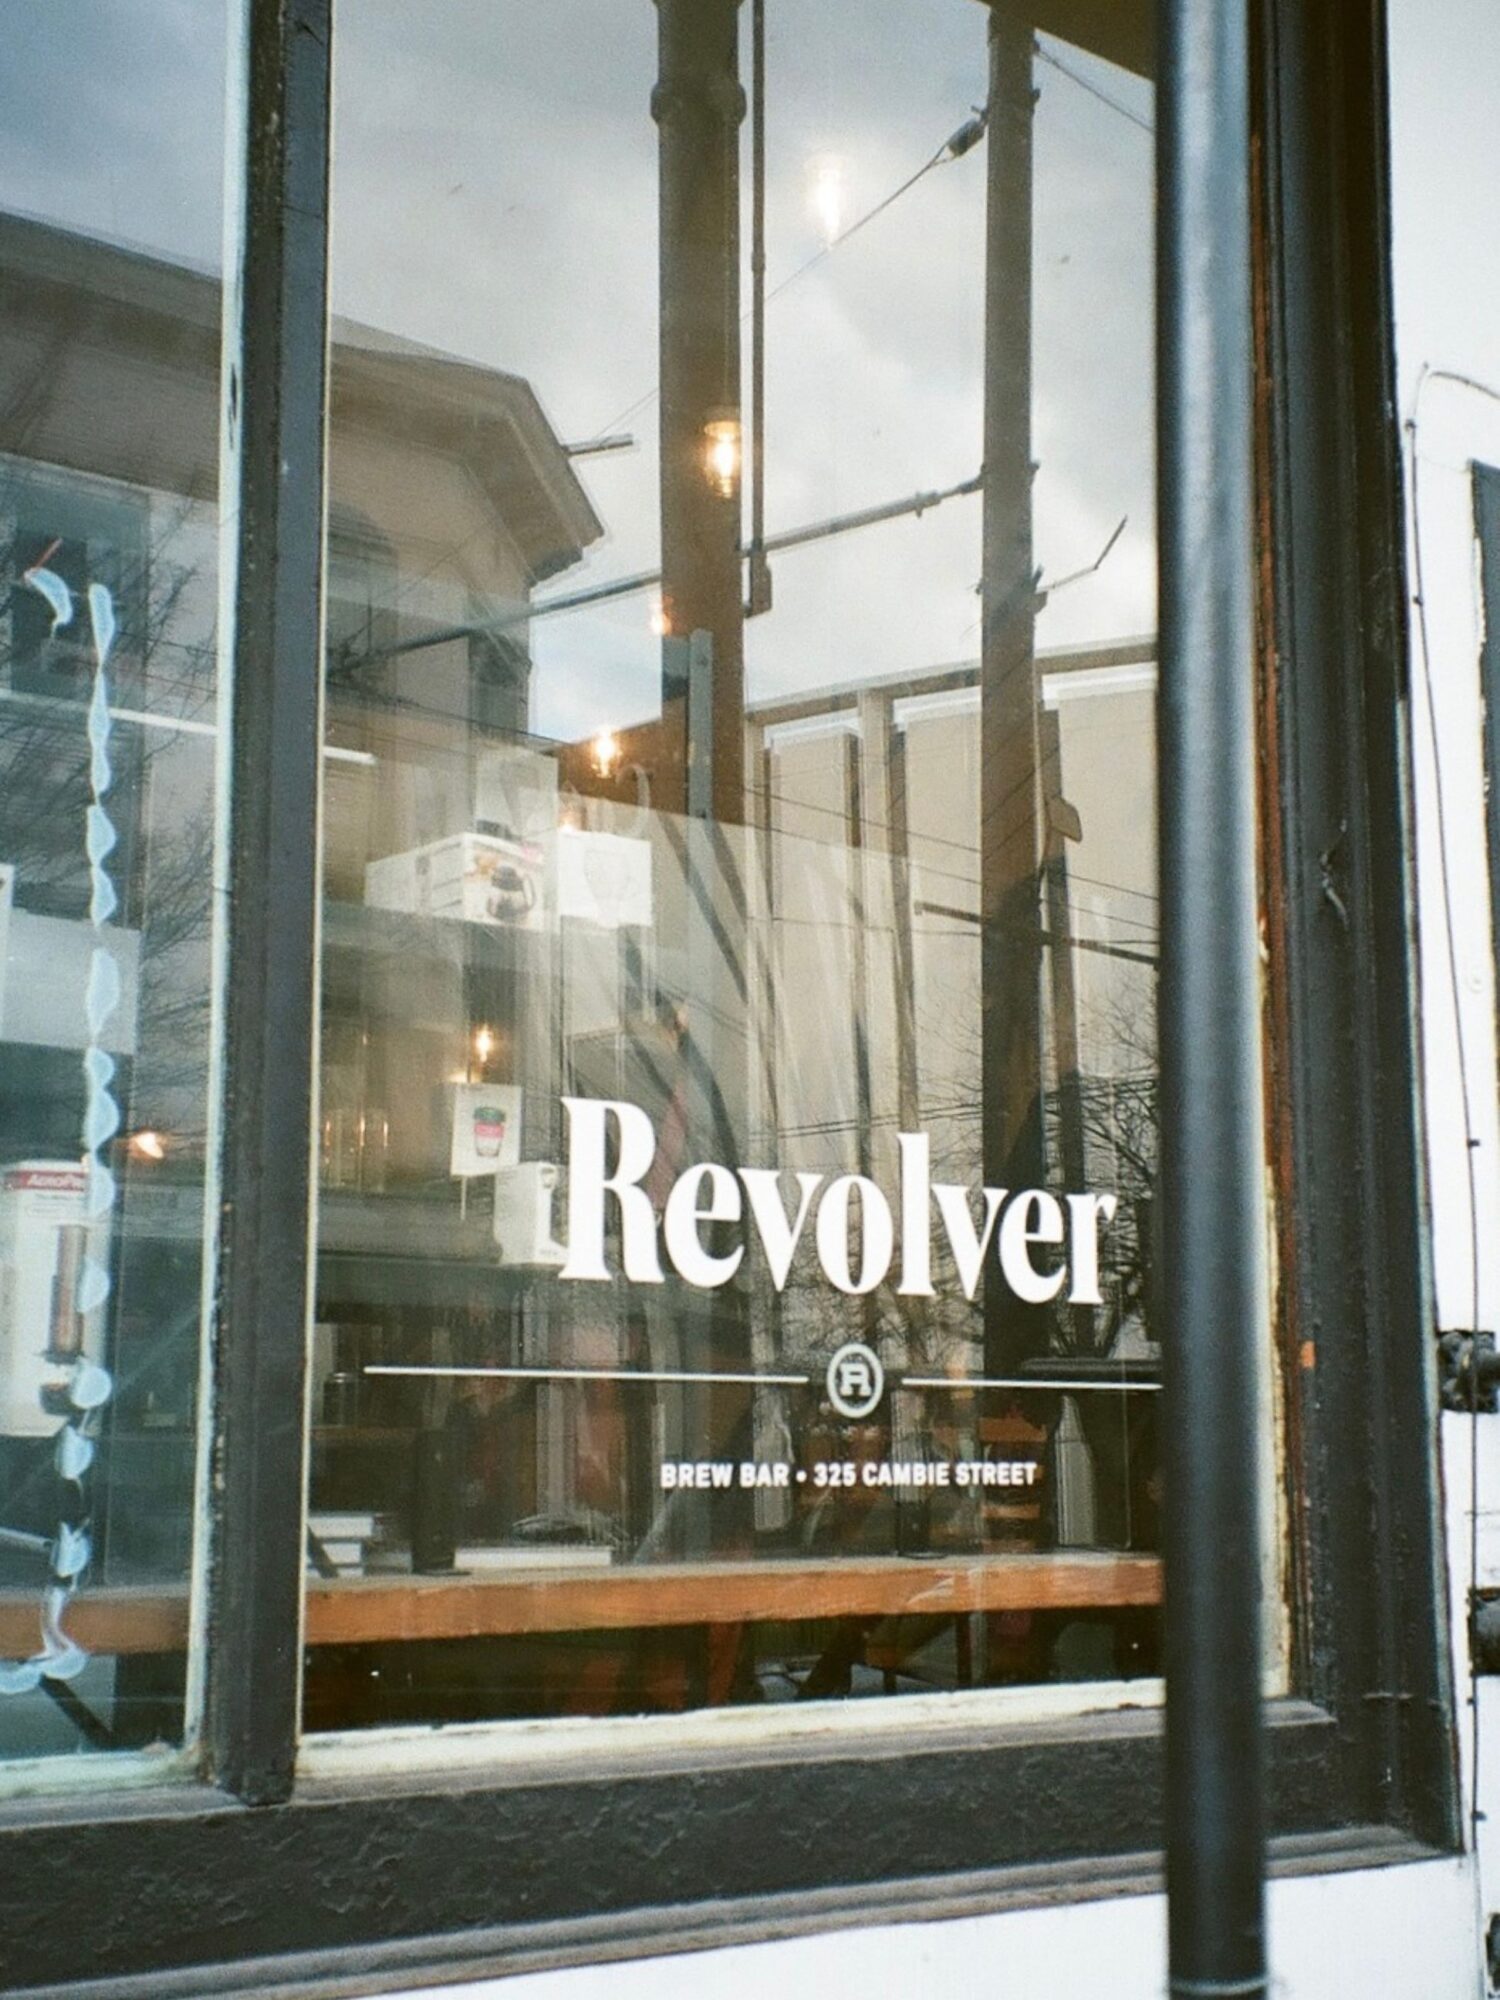
Revolver – This coffee shop on the edge of Gastown exudes a Brooklyn-esqe charm. They serve a curated selection of beans from around the world.

Nemesis -Located near Revolver, this light spot excludes a modern feel with polished concrete floors, light wood accents, and big windows. They also have several other locations in the city, including the Polygon Art Gallery in North Vancouver. 

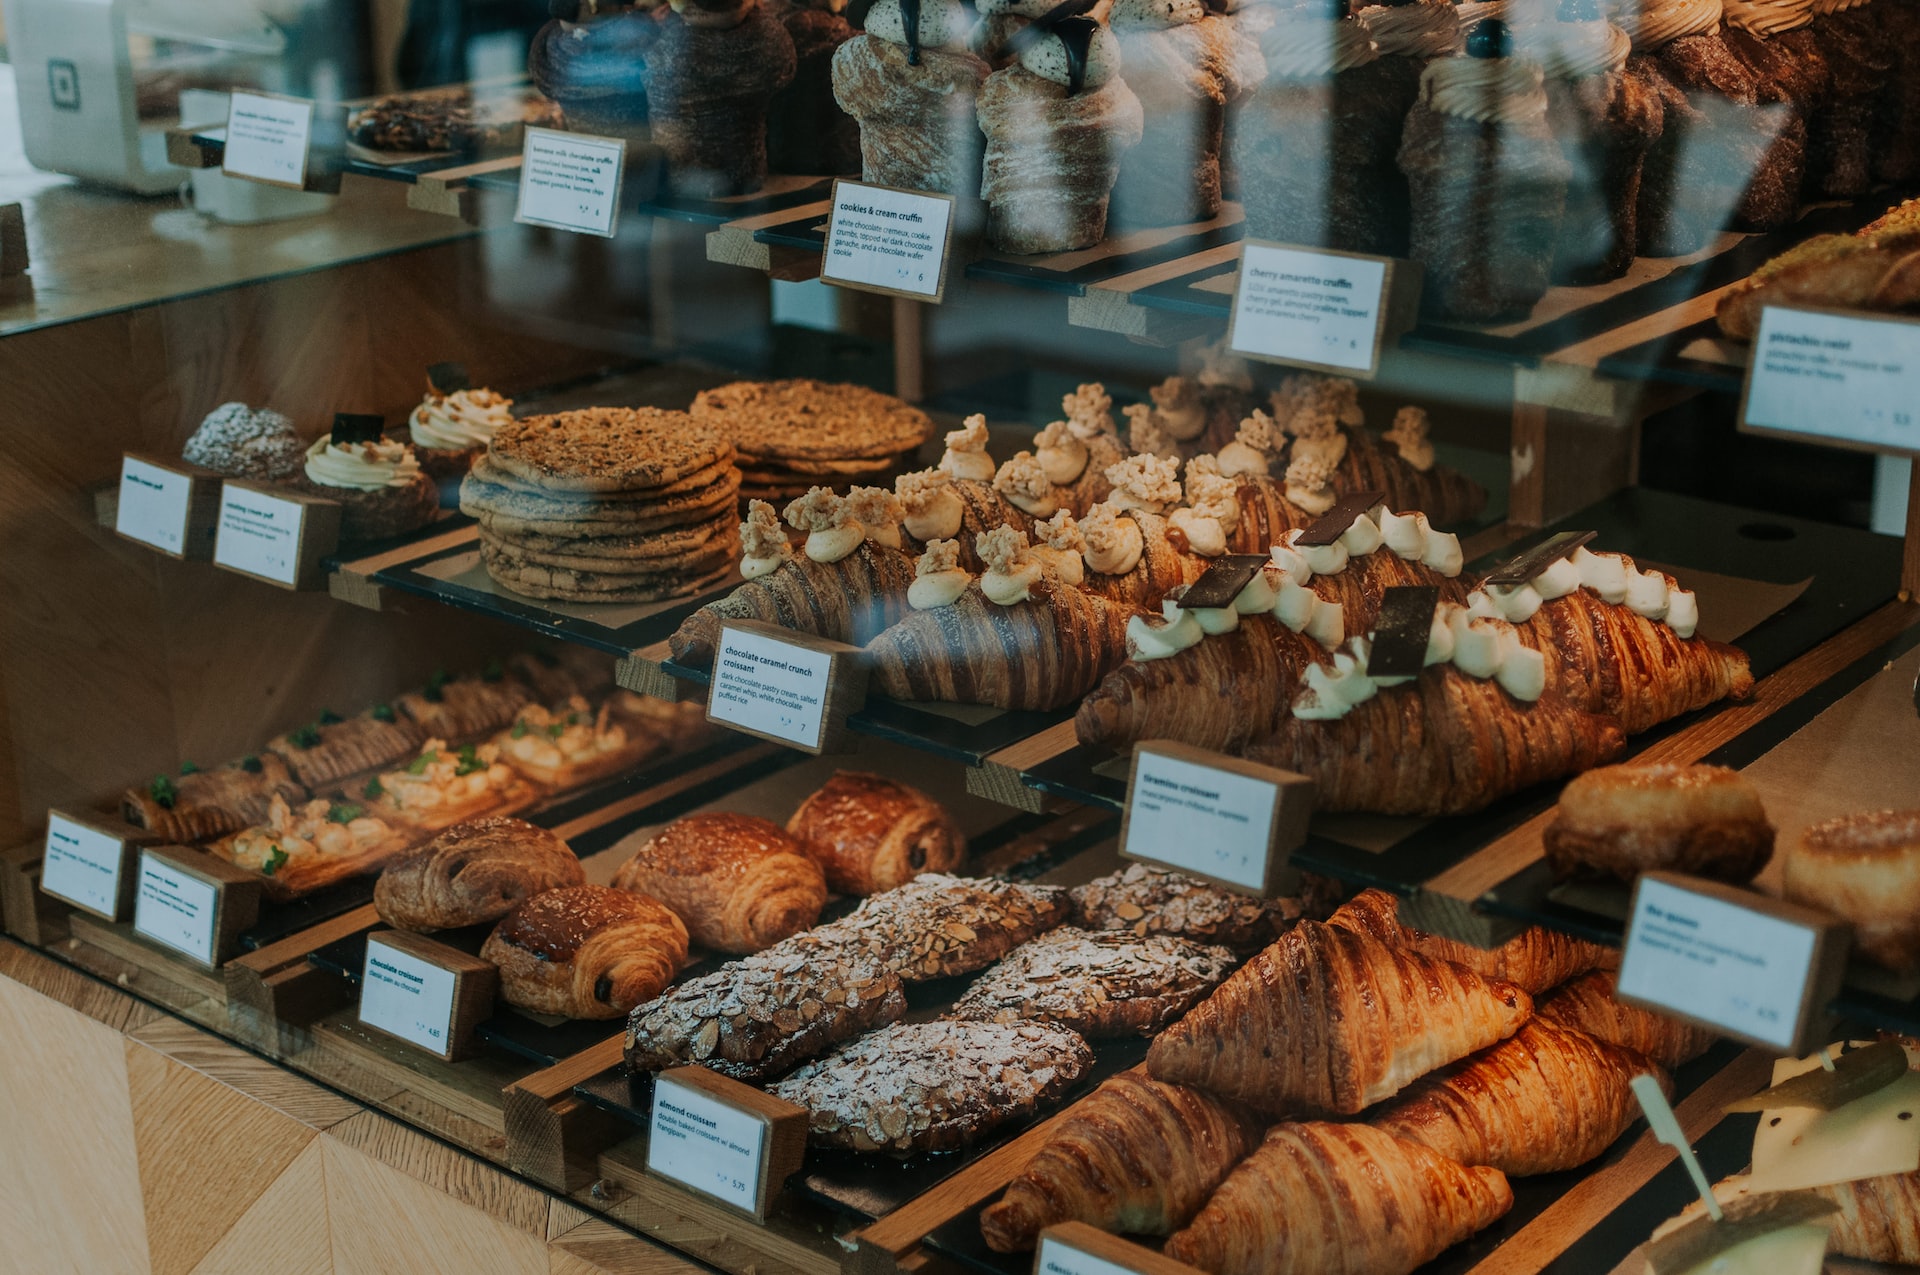
Matchstick – With 5 beautifully designed cafes across the city, Matchstick offers delicious house roasted coffee and baked goods.

Elysian – A bit of a puritan coffee shop with fantastic coffee and 1 or 2 types of baked goods. If you’re into a minimalist aesthetic this is your spot. If you like drinks with caramel, this isn’t your vibe at all.  Don’t even dare asking if they have wi-fi… 

JJ Bean – a Vancouver institution that started in Granville island market and worked its way across the lower mainland. Despite their omnipresence they have excellent coffee with a great selection of roasts. 

Biking the North Shore Vancouver

2. Bike the North Shore

This item is likely top thing on your Vancouver to do list if you came to Vancouver with a death wish alongside this epic to do list.  Mountain biking was essentially born on Vancouver’s north shore! The trails are devilishly challenging and many are downright terrifying. Accomplished mountain bikers frequently find themselves pushed to a new level on the green level runs, psychically shaking on the blues, and fearing for their lives on the blacks. I don’t even know who rides the double blacks out here… If this sounds like your cup of adrenaline, check out endless biking they have top-tier rentals, tours and even lessons so you can learn how to ride these trails without leaving in a body bag.

3. Check Out Vancouver’s Incredible Beer Scene

If you like beer, delicious craft beer, Vancouver is pretty much a shoe-in to become one of your favorite cities to knock back a cold one in. There are over 48 craft breweries in this town, making it next to impossible for a mere mortal to visit them all in one trip. Don’t go to Granville Island Brewing or Stanley Park Brewing; they’re simply masquerading as cute microbrews, and are owned by major beer conglomerates Molson and Anheuser-Busch InBev respectively. A couple of my personal favorite microbrews to check out are:

R & B Brewing – One of Vancouver’s original microbrews. R & B has a relaxed environment with awesome beers and pizza.

33 Acres – Always felt like the “cool” micro brewery leaning on a real west coast minimalist design where you drink great beer. This spot is like the person that was cool in high school, somehow stayed cool in college, but now they’re in their late twenties and maybe they’re losing the cool factor, but maybe not? Awesome beer though.  

Howe Sound Brewing – If you make the trek out to Squamish this is the spot to go after a big day of adventuring that is synonymous with Squamish. They even have an inn attached, should you get a little carried away… 

If you’re itching for an easy way to see multiple breweries, check out Vancouver Brewary Tours, but inquire if they plan on making stops at Red Truck (fake micro), Big Rock (fake micro) or electric bicycle (people either love this place or hate it as they make some pretty weird beer…).

Crown Mountain Hike in Vancouver

4. Climb Crown Mountain in North Vancouver

Looking across Vancouver harbor and to the North Shore mountains several prominent peaks catch your eye: the two sand castle looking bulges, the Lions, and the crown looking mountain to the North. If you’re looking for an adventure, have come equipped with the required gear for an intense hike and are comfortable with hiking and scrambling, Crown Mountain provides unprecedented views of Greater Vancouver, Mount Baker, and the Coast mountains. This hike is accessed from the top of Grouse Mountain which can be reached via Gondola or by hiking the Grouse Grind or BCMC up. From the top of Grouse to Crown mountain it’s a 10km round trip, with over 850m of elevation gain. If you’re looking for a walk in the park, go to Stanley Park, if you’re looking for an epic thing to do in Vancouver, summit the crown. 

5. Watch Live Music with a Drink at Guilt & Co.

For people itching to party it up until 4am on a Tuesday night Vancouver may leave you wanting… Fortunately, for those that lean towards a good cocktail in a quaint setting there are a few great options to choose from, perhaps none better than Guilt & Co. Hidden underneath the banal Local, this charming little live music and cocktail den delights visitors with 2 live shows a night.  Check their site for the show schedule.

6. Visit One of Canada’s Best Cocktail Bars

Dark and moody, the Keefer Bar. is an apothecary themed bar mixing up over 25 unique cocktails. Since it opened the Keefer Bar continuously rakes in awards as one of the best cocktail bars in Canada.  A reservation is required, it’s a popular spot. 

Medina Waffles
Image Source & Credit: Medina

7. Go for Brunch

Make sure you’re well nourished for all these epic list things to do by starting with an early brunch! Here are a few great options: 

Medina – A Vancouver brunch favorite. Make sure to try the Liège Style Waffles. 

The Belgard Kitchen – Located in the beautifully restored historic settlement brunch here is worthwhile for the aesthetic alone. 

The Acorn – For an incredible vegetarian and vegan brunch check out this storied Vancouver restaurant which offers a weekend brunch from 10 am to 2pm. 

Jam Cafe –  People line for hours to brunch at Jam. If the lines short it’s worthwhile, but no brunch is worthy of a 2 hour wait. 

MeeT – Epic Vegan brunch options. 

What about OEB? Yes, OEB breakfast has invaded Vancouver. Sure, they have great brunch options, but you can also find them in numerous other locations across Canada and the United States. 

8. Escape to Deep Cove

I absolutely love Deep Cove. This little community with a tiny strip of shops and a marina is only  17km from downtown Vancouver, but feels like a thousand miles away! Grab a coffee from Cafe Orso, a donut from the ever popular Honey Donuts, or have dinner on the patio near the water at Arm’s Reach Bistro. It took me an hour to find parking here once, so come early, bike, or take public transit. Also note that unfortunately, the popular walk to the Quarry Rock viewpoint remains closed at this time.

9. Kayak from Deep Cove

Tagging onto the last point. Deep Cove offers incredible exploration from the water and there is no better way to do it than from a kayak. Deep Cove Kayak offers tours, courses, and rentals for kayaking as well as a number of options for SUP Boarding. If you thought deep cove felt like a million miles away from the city, just wait until you get out on the water exploring Indian arm. 

10. Dine at Tacofino, a Vancouver Institution

Tacofino started as a food truck in the surftown of Tofino on Vancouver Island and quickly spread to Vancouver. Today, you’ll find 5 Tacofinos spread out across the city, each with their own individual flair.  Inspired by the surfside BBQ’s around the world, these restaurants pull off their goal of making you feel like you’re having a surfside recharge while enjoying their epic food. 

Minami Vancouver
Photo Credit Minami

11. Sit Down for Incredible Sushi

People often say Vancouver has some of the best Sushi outside of Japan. Who are these people? I dunno, but I think they’re onto something. If you love Sushi check out these spots: 

Minami – Upscale bouji sushi, but if you’re looking for a splurge this is the spot. 

Toshi Sushi – Compact little sushi shop. This place takes the cake for authentic japanese sushi.

12. Eat the Best Fish and Chips in Vancouver

Are there more idyllic spots to grab Fish and Chips then from a fish mounger off main street? Probably, but not will you find better tasting and more sustainably sourced fish than at the Fish Counter. This little spot inside the fish shop is quite literally a counter, but they serve the best fish and chips in the city. The fish can be made with either Halibut, Pacific cod, Wild Salmon, or Lingcod. They even offer a gluten-free batter with a dedicated gluten-free frier for any celiac travelers in the group. The founders have been instrumental in starting numerous conservation efforts, including the Ocean Wise seafood label. 

13. Sample Vancouver’s Best Ice Cream

You wouldn’t think a city that averages over 2351 mm (92.6 inches) of rain per year would be so into ice cream, but it is! Check out Rain or Shine ice cream or Earnest Ice Cream. I don’t typically have a sweet tooth, but when one of these shops opened up a block from my old house, it spelt big trouble for me. I shamelessly devoured double waffle cones daily for a week before reigning myself in… It’s not something I’m proud of, but I now can truly attest to the quality of their cream. Enjoy!

Nemesis Coffee

14. Indulge on Incredible Pastries and Baked Goods

If you’re a fan of delectable baked goods, you’re in luck, Vancouver has a plenty of incredible spots to indulge including: 

Small Victory- This cafe and bakery whips up incredible croissants, cakes, and quiches. The almond croissant used to be a personal favourite indulgence of mine util turning plant-based ruined my fun. They have 3 locations around Vancouver.

49th Parallel  & Lucky’s Donuts – Don’t let the omnipresence of Tim Hortons turn you off donuts, try Lucky’s donuts at one of the Parallel 49 locations. They even offer a gluten-free/vegan donut so everyone can indulge!  

Best Gluten-Free and/or Vegan Bakeries in Vancouver

If you’re looking for a bakery with plenty of gluten-free or vegan options in Vancouver, fear not there are plenty of great options. Check these ones out:

Lemonade Gluten Free Bakery – 100% gluten-free bakery with many vegan, nut-free, and dairy free options.

Gluten Free Epicurean  – 100% gluten-free bakery offering breads, cakes, frozen meals and mixes.  

Level V Bakery – 100% Vegan bakery that offers everything from almond croissants to wedding cakes. Delicious! 

15. Experience Epic Plant-Based Food in Vancouver

A few years ago I gave up eating animals and things that came from animals, but don’t worry I’m not going to go all annoying vegan on you. I am going to tell you about a couple awesome vegan restaurants to check out in Vancouver, if you’re vegan, veg or simply plant-curious.

Meet– What a pun! This place whips up incredibly homestyle, hangover destroying favorites on the off chance you had a few too many at Keefer bar. Burgers, poutine, and brunch all 100% plant-based, this is vegan comfort food at its finest.

Virtuous Pie – This place took two of the best foods, pizza and ice-cream, and made them 100% plant-based with the mission of creating food that tastes great, is good for your body and supports a healthy planet. Sounds like a good reason to feel good about eating pizza and ice cream!

The Acorn – This award-winning vegetable forward restaurant crafts imaginative, seasonal plates with premium ingredients from the local foraging and farming community. A chefs tasting menu is offered here for an elevated dining experience.

Wreck Beach Vancouver

16. Spend Time at the Beach, But Maybe Not Kits Beach

Before I moved to Vancouver, I always heard the mystical name Kits Beach and envisioned it as the beach to visit in Vancouver.  Sadly, not. Don’t get me wrong, it’s nice.  I thoroughly enjoyed running along it on my daily jogs, but there are far better beaches to visit in Vancouver! Check out Third beach in Stanley Park, Spanish Banks, or Wreck Beach. Wreck beach is one of the nicest beaches in Vancouver and offers incredible views across the Strait of Georgia to Vancouver Island. Wreck Beach is also North America’s largest naturist beach, making it likely Vancouver island isn’t the only view you’ll see on your visit here… Don’t worry, clothed people are equally welcome here.

17. Purchase Your Own Nimbus 2000 and Explore Granville Island Market

I bet you never thought you’d get excited about going broom shopping?  With Granville Islands Broom Co. that’s exactly what will happen! Brave the crowds at the ever popular Granville Island and stop in to purchase your own beautiful and functional Shaker Style broom. Maybe you’re into quidditch or maybe you’re into cleaning, either way you’ll be enthralled with your new broom.  When you’re finished explore Granville Island Market, eat a bagel at the ever popular Siegel’s Bagels, grab a coffee at the original JJ bean location, and then take a quick look at the vegetables and other market vendors (Gourmet pickles anyone?). Granville Island can get jammed with other vegetable admiring tourists, so consider yourself warned. 

18. Experience Vancouver's Bud Culture

Vancouver is a bit like North America’s Amsterdam. There are lots of bikes and lots of weed. Well before marijuana was legalized in Canada, it was readily available at numerous brick-and-mortar stores throughout the city that managed to tippy-toe around the law. Since Marijuana’s legalization in Canada you’ll barely walk a block without coming across a dispensary. Take a pop into one, even if you’re simply curious about BC’s most famous export. In many, the experience feels more akin to perusing a luxury retailer than tucking into a pot shop.

19. Circumnavigate the Stanley Park Seawall by Bike

Biking around the Stanley Park Seawall is a particularly wonderful way to take in the sublime beauty of Vancouver’s surrounding oceans, trees, and mountains. Unfortunately, every other tourist in the city seems to think so too, including the ones that haven’t ridden bicycles for the last several decades. This is a remarkably beautiful thing to do in the city, but if you’re visiting Vancouver during the peak summer season, try to do it early in the morning or in the late afternoon to beat the crowds. Don’t bother with renting a bike from the innumerable number of bike shops in Yaletown, Coal Harbour and False creek, just download the app and rent a Shaw Mobi bike. Going this route gives you the option of being able to terminate your rental at one of the many stations throughout the city as opposed to having to return to the bike shop you rented from.  I’ll be honest, I made a point of biking this loop a couple times a year even after doing it dozens of times. It’s really that nice, despite sometimes feeling as backed up as an LA freeway.  Checkout this map for directional guidance as bikes are only allowed to travel counter-clockwise.

20. Go to Pitch and Putt at Stanley Park

Maybe you’re an avid golfer. Maybe you’re a total hack that likes to bat the ball around with friends over a couple drinks (that’s me). Whatever camp you fall into, you’re sure to love Stanley Park Pitch and Putt. Situated in the heart of Stanley Park near English Bay, Pitch and Putt features 18 mini holes ranging in distance from 40 to 100 yards. The course is first-come, first-served, so stop in during your exploration of the park and play a few holes. It can back up at times, but you’re under no obligation to complete the entire thing and multiple opportunities present themselves to opt out early. 

21. Enjoy the Ultimate in West Coast Relaxation at Willow Stream Spa

If all the epic things to do on this list have worn out and you’re looking to relax, visit the Willow Stream Spa. For those that don’t feel up to making the drive out to Scandinave Spa in Whistler, the Willow Stream Spa at the Fairmont Pacific Rim Hotel provides the ultimate in relaxation in Vancouver. The steam room, sauna, and terrace with North Shore Mountain views consistently propel the Willow Stream Spa to its spot as one of the best spas in the world. 

Penguins at the Vancouver Aquarium

22. Make an Informed Decision on Visiting the Aquarium

In the past, no trip to Vancouver would have been complete without a stop at the Vancouver Aquarium.  Situated in an idyllic location in the heart of Stanley Park, the Vancouver Aquarium is Canada’s largest aquarium and lets you get up close and personal with sea otters, sea lions, and penguins. Awesome, right? Well, that depends on which camp you fall into. For years Vancouver Aquarium was owned and managed by Ocean Wise, a non-profit dedicated to protecting and restoring the world’s oceans. Unfortunately, Coivd-19 devastated the aquariums finances and Ocean Wise was forced to sell Vancouver Aquarium to a for profit theme park operator, Herschend Enterprises. Make your own decision and decide what works with your moral compass, but I believe that the world’s best Zoos are those like the San Diego zoo that function as non profits and focus all their energy on animal welfare and conservation as opposed to to cost-cutting and profit maximization. Your call. 

the raven and the first men at MOA vancouver

23. Visit the Museum of Anthropology

Vancouver is situated on the unceded traditional territories of the xʷməθkʷəy̓əm (Musqueam), Sḵwx̱wú7mesh (Squamish), and səlilwətaɬ (Tsleil-Waututh) Nations. To learn more about the incredible cultures and history of the indigenous people of the pacific northwest, make sure to visit the Museum of Anthropology. Situated on the University of British Columbia campus, the building itself is a site to behold. Designed by the world-renowned Canadian architect Arthur Erickson, this stunning glass and concrete building sits perched above the western most point of Vancouver overlooking the Strait of Georgia. The immaculate landscaped grounds include multiple Haida Houses constructed with the aid of famed Haida artist Bill Reid to replicate a 19th century Haida village. 

Inside, the spectacular Great Hall area displays Northwest Coast sculptures, textiles, bentwood boxes, canoes, poles, house posts and carved figures dating from the 19th century.  The museum features an unparalleled collection of artifacts from the original cultures pacific northwest and the world’s largest collection of works by Haida artist Bill Read, including his famous sculpture The Raven and the First Men. 

**** The Great Hall is closed for seismic upgrades until 2023. ***

24. Skip the Grouse Grind, Do BCMC or Neither

So many recommendations for things to do in Vancouver include hiking the Grouse Grind. I’m not sure why…  It’s a hike predominantly in the trees, that’s unbelievably busy, that’s only real claim to fame is gaining close to 800M of elevation in 2.5 KM and referring to itself as “mother nature’s stairmaster”. If you’re hiking it to skip paying the gondola fee to hike something worthwhile like Crown Mountain, ok. If not, skip it. If you insist on picking a subpar hike for the only reason of obtaining bragging rights, go for the BCMC. It starts from the same trailhead and also gains a ton of elevation in a short period of time to end up at the top of Grouse Mountain. It’s still busy, but not quite as busy. 

If you are dying for elevation gain, consider hiking to Eagle Bluffs from Horseshoe Bay, or drive out to Squamish and do the Chief, a very busy but worthwhile hike. 

Ski Cypress Mountain

25. Ski the Local Mountains

This post is about the best things to do in Vancouver and the immediate vicinity, so, unfortunately, I can’t add have a super epic day skiing at Whistler to this list! That said, somehow Vancouver is absurdly privileged and endowed with 3 local mountains all within eyesight of downtown! If you’d like to get out on the slopes,  but can’t sacrifice an entire day or an entire paycheck to visit Whistler, head out to Cypress, Grouse, or Seymour. Of the three, Cypress Mountain would be my top choice. 

trail run

26. Go for a Run, on a Trail, in a Park or up a Mountain

Vancouver’s mild climate, incredible geography, and unparalleled pathway system make it a runners paradise. Road runners head to the 22km (13.7 miles) Seawall which runs from Coal Harbour all the way around Stanley Park and False Creek to Kitsalano Beach. This flat path is the perfect track for stretching your legs, with scenery so gorgeous the distance flies by. I ran my first half-marathon here completely by accident, I just got distracted by the views. If you’re up for something more rustic take a run through the trails in Stanley Park or Pacific Spirit Regional Park. If you’re an avid trail runner, Vancouver offers plenty of options to push your limits.  The rugged and stunningly scenic 26 KM Howe Sound Crest Trail (HSCT) is the ultimate confidence builder. For something less ambitious, run the first part of the HSCT to St. Marks Summit or run the 14 km to Norvan Falls in Lynn Headwaters Regional Park. 

View from the campsite at magnesia meadows on the Howe Sound Crest Trail

27. Go Backpacking

Vancouver is a hikers paradise, so naturally, it’s also incredible for backpacking and spending a night or two in the wilderness.

If you’re new to backpacking, cut your teeth by hiking into Elfin Lakes in Garibaldi Provincial Park. This 11 KM hike with 600 M of elevation gain takes you into a well equipped backcountry campsite with 35 tent platforms, a day-use shelter, and pit toilet facilities.  The trail follows a beautiful ridge before coming to the campsite which offers stunning mountain scenery. Reservations are required here and it’s a popular spot, so book your site well ahead of time.  

If you’re an experienced backpacker, the Howe Sound Crest trail is an incredible  backpacking trip only minutes from Vancouver. Starting from the base of Cypress Mountain, you traverse the spine of mountains that tower above the city and parallel the Howe Sound. This is a rugged trip with no amenities or designated campsites, so if you have to google what digging a cathole means, this trip isn’t for you, at least not yet.  

Porteau Cove Provincial Park

28. Go Car Camping

If backpacking isn’t your thing, but you love spending a night under the stars, go car camping! Porteau Cove is one of the most beautiful car camping sites you’ll find anywhere. Backing right onto the Howe Sound with incredible views to the mountains across the water, this campsite is the best outdoor adventure commercial made manifest.  Better yet, it is only 45 minutes down the Sea to Sky highway from Vancouver. So bring your tent, or rent a campervan for some of the best oceanside camping you’ll find anywhere. Make a reservation early, Porteau Cove fills up months in advance!

29. Go Scuba Diving

At first thought you might not think of Vancouver as a premier scuba diving destination, but guess again! British Columbia was named the #1 diving destination in North America by Scuba Diving Magazine.  Incredible biodiversity and vibrant life make this area a divers paradise. Check out the diving locker and consider taking a dry-suit course, the diving’s beautiful, but not exactly tropical.  

30. Take a Day or Half-Day Trip to Bowen Island

Only a 20 minute ferry ride from West Vancouver’s Horseshoe Bay, Bowen Island is the perfect day or half-day destination. The island features over 20 km of hiking trails with epic views of the surrounding Howe Sound, including the climb to the island’s high point, Mt. Gardner. If you’re hiked out, explore Bowen Island by bike (or e-bike), go sea kayaking, or play 9-holes of golf. Fuel up for your adventure with coffee, lunch, or breakfast at the Snug

Dr. Dun Yat-Sen Garden Vancouver

31. Visit Dr. Dun Yat-Sen Garden

Mere blocks from Vancouver’s notorious and dystopian Downtown Eastside, lies Chinatown and the tranquility of the Dr. Sun Yat-Sen Classical Chinese Garden. This authentic representation of Ming Dynasty-era tradition was the first of its kind outside of China and features numerous winding paths, rocks, water lily-covered ponds, and a pagoda. It’s a remarkably peaceful place to sit and read or watch the Koi fish assuming they’re not being terrorized by a rogue river otter.

32. Visit Science World or Send the Kids to Space

The unmissable silver golf ball looking building along the False Creek segment of the Sea Wall is home to Vancouver Science World. This is an amazing place to ditch your spouse with your young aspiring scientists while you enjoy a few hours of bliss at the spa, a brewery, or yoga. That said, the frequency of awesome exhibits here ( T- Rex : The Ultimate Predator anyone?) make it likely that you may find yourself equally entertained. They even offer frequent adult nights for those looking to explore their inner scientist sans children and with music and adult beverages. 

For another kid friendly science oriented activity check out the  H.R. MacMillan Space Centre in the UFO shaped building not far from the Kits Beach area. 

33. Dine at One of Vancouver’s Finest Restaurants

If you’re looking for an earth shattering culinary experience, Vancouver has plenty of options to satiate your palate. From rich Quebecouis inspired cuisine to premium farm to table, and innovative Thai, there is no shortage of remarkable restaurants to experience. Check out this list of 7 restaurants to try in Vancouver written by Michelin, the same company responsible for both the coveted Michelin star restaurant guide and of course the car tires. 

34. Go to an Awesome Pool

Remember how I mentioned earlier that  you should skip Kits beach? Well, I sorta lied. Although you may wish to skip the beach for the aforementioned reasons, you should definitely visit the Kitsilano Pool if you’re looking for an exceptional place to perfect your front crawl! Backing onto the ocean, this saltwater pool delivers epic views of the North Shore Mountains and downtown Vancouver without the risk of Ecoli that seems to show up in the ocean here from time-to-time.  The Second Beach Pool in Stanley park is another terrific option that delivers a similar ambience.

35. Work on Your Yoga Practice

Vancouver’s love for Yoga spawned the stretchy pants and athleisure apparel movement that spread across the world. So, it’s only fitting that there are plenty of terrific spots to work on your yoga practice. Here are couple great places to check out:

Modo Yoga (East Vancouver or North Vancouver) – These studios offer some of the best Yoga classes I’ve taken anywhere. Classes here do a marvelous job of fusing the traditional elements of yoga practice with a challenging workout (more relaxing classes are also offered).  Both studios also offer a weekly Karma donation based class (typically $5). 

Free Outdoor Yoga (summer months) – The big stretchy pant empire company, Lululemon, frequently offers free outdoor yoga classes during the summer months. So, if you’re interested, do a quick search for free outdoor yoga Vancouver for the where and when.

lonsdale quay

36. Take the Sea Bus to Lower Lonsdale and Explore the Area

Being surrounded by water, you may feel yourself called to book an overpriced dinner-on-a-boat trip just to eat mediocre food with an ocean view. Don’t waste your time. If you’re itching to see Stanley Park and downtown Vancouver from the water, board the Seabus from waterfront station and take it across to Lonsdale Quay. You’ll be treated to epic views of Vancouver harbour and downtown Vancouver along the way. Better yet, a ticket costs $3.10 one-way. Once you get across you’ll have the opportunity to explore the Lonsdale Quay market, a smaller and much less touristy version of Granville Island market. The adjacent Lower Lonsdale neighborhood is also worth exploring with numerous decent restaurants, bakeries, cafes, and of course, multiple breweries. 

Where to Stay in Vancouver

Backpackers Budget

Accommodation in Vancouver can be expensive, especially during the peak summer months. If you’re travelling on a budget or are looking to meet fellow travellers check out the following hostels:

HI Hostel Downtown Vancouver–  Daily planned activities, a rooftop patio, and convenient Yaletown location make this a great choice. 

Samesun Vancouver – This hostel consistently ranks as the best overall hostel stay in Vancouver.  Complementary breakfast and the attached Beaver Taphouse  with cheap food and social gatherings make this a backpackers favourite. 

Cambie Hostel – Lively atmosphere in the heart of Gastown. The patio bar here is always a great spot for a beer with good company. 

Mid Range

EXchange Hotel Vancouver –  Located in the heart of downtown this historic building in the home of the original Vancouver stock Exchange and is Vancouver’s first LEED™ Platinum Heritage Conversion. Exceptional service and great rooms adorn this character hotel. The perfect blend of style, comfort, and value that feels boutique without the boutique price. 

Hyatt Regency Vancouver – If the EXchange is fully booked or pricing high, this Hyatt offers exceptional service in a convenient location for a consistently great stay.  

Luxury

the Loden – Consistently ranking as one of the best boutique hotels in the country , the Loden prides itself in its personalized service, high-end amenities and being a central, quiet oasis within the city.

L’Hermitage Hotel –  One of Vancouver’s most elegant Boutique hotels, L’Hermitage is located in the heart of Vancouver’s  shopping, financial and entertainment district, and steps from Canada Place. This 60-room, luxury, boutique property combines Parisian chic and West Coast sophistication.

Skytrain in Vancouver

How to Get Around Vancouver

Vancouver is an incredibly easy city to get around in with highly efficient public transit and bike infrastructure (protected bike lanes). Rent a mobi bike, use the skytrain, or grab a Lyft or Uber. The skytrain runs directly from downtown Vancouver to YVR airport making airport access a breeze. 

If you’re planning on exploring more outside the city itself,  a car rental from YVR airport is extremely convenient, but parking and traffic can be problematic in certain areas of the city and times of day. Alternatively, short term car sharing apps EVO and Modo operate here, but require registration well in advance as drivers abstracts are usually required to register.

What to Pack for Vancouver - don't forget these things

Vancouver get’s a lot of rain, but don’t let that stop you from exploring the city and tackling this list of things to do just just dress for it.  If you’re properly dressed, you’ll find yourself becoming a local, undeterred by the seemingly endless drizzle. Make sure to include the following on your packing list for Vancouver:

A rainproof shell jacket – Umbrellas are bulky, require a hand to hold them and you forget them everywhere (at least I do). Get a solid jacket with a hood and you’ll be all good, like the Patagonia Torrentshell (mens/womens).

Footwear for rainy days – Sneakers are great for sunny days, but a pair of Blundstones are the perfect footwear for exploring Vancouver and avoiding the dreaded soggy shoe. 

Merino Wool Socks – Even if they get wet, they stay warm. I’m a huge fan of darn tough socks. They’re guaranteed for life, so say goodbye to holes.

Whatever you do, don't forget this

I broke my collarbone mountain biking while traveling in 2019 and racked up emergency medical bills in excess of $15,000. Fortunately, it was completely covered by my travel insurance! Whatever you do, don’t forget your travel insurance!  Check out World Nomads* for a quote.  Hopefully you never need to make a claim, but if you do you’ll be beyond happy you were prepared!

*We receive a fee when you get a quote from World Nomads using this link. We do not represent World Nomads. This is not a recommendation to buy travel insurance.

Final Thoughts

Hopefully, this post helps with you decide on a few epic things to do during your time in Vancouver!  I’m convinced that you’ll fall head over heels for this town with its breathtaking scenery, temperate climate, and incredible things to do. If you don’t,  it might be a you thing. 

What’s on your list of epic things to do in Vancouver? Anything you’ve done in Vancouver and loved that I missed? 

Disclaimer: Some of the links in this post are affiliate links. If you click one of the links and make a purchase we’ll earn a small commission at no cost to you. Just like the travel backpacks we build, we’re very particular . So any products or services we suggest, we test and use ourselves before making any recommendations or endorsements. 

Banana Backpacks Inc. is a participant in the Amazon Services LLC Associates Program, an affiliate advertising program designed to provide a means for sites to earn advertising fees by advertising and linking to Amazon.com

Rae Lakes Loop | The Ultimate Guide to Backpacking Rae Lakes

Upper Rae Lakes at Sunrise on the Rae Lakes Loop

Rae Lakes loop is one of the most coveted backcountry permits in Sequoia & Kings Canyon National parks. For 41 miles (66 KM) you’ll be treated to a seemingly endless supply of the Sierra Nevada superlatives. You’ll hike alongside the roaring South Fork Kings River, experience the cascading torrent of Mist Falls, marvel at the sublime sunrise reflection of the Painted Lady in Rae Lakes, and experience the catharsis of reaching 11,978′ (3651m) Glen Pass. 

Rae Lakes Loop can be completed in multiple directions and on a variety of schedules. In this guide, I’ll break down everything you need to know to backpack the Rae Lakes Loop.  Here’s what’s in this post:

** Some of the links in this post are affiliate links. If you click one of the links and make a purchase we’ll earn a small commission at no cost to you. We’re very particular about products and we only recommend products, services, or accommodation we trust and use ourselves.**

Need to know for hiking the Rae Lakes Loop

Days Required: 2-5
Difficulty: Moderate
Distance: 41 miles (66 KM)
Elevation Gain: 7200 ft (2195 M)
Elevation Loss: 7200 ft  (2195 M)
Permit Required: Yes, competitive.
Navigation: Easy, trails are well marked.
Water Sources: Plentiful, trail follows reliable creeks and rivers for the duration.
Food Storage: Bear canister required.
Best Campsite walked past or stayed at: Middle Rae Lakes or Upper Rae Lakes.

Things you’ll love about backpacking Rae Lakes

    • Sublime Sierra Nevada scenery.
    • Well marked and easy to navigate trail
    • Loop hike makes transportation a breeze.
    • Multiple entry trailheads possible.
    • Multiple side trips possible for various itineraries.
    • Opportunity to meet other backpackers and thru hikers.
    • Plentiful water sources.

Things you won’t love about backpacking Rae Lakes

    • Bugs can be viscous.
    • Solitude can be hard to find  as both the John Muir Trail and Pacific Crest Trail run through the most scenic sections.
    • There are bear boxes, yet you need to bring a bulky bear canister regardless.
    • Glen Pass can be snow covered until July depending on the snow-pack.
    • The sandy soil texture can give you mad blisters. (Bring low gaiters),
Bubbs Creek on the Rae Lakes Loop

What to pack for backpacking Rae Lakes

Here’s a quick summary of what to pack for backpacking Rae Lakes. You’ll find a detailed breakdown of each item at the end of the post with rational, alternatives and quick links to check prices at competing retailers.

How many days does it take to hike the Rae Lakes Loop?

The Rae Lakes Loop typically takes 2 to 5 days to backpack in its entirety. That said, there are many possible side trails  for hikers looking to spend more time in the area including Sixty Lakes Basin, Gardiner Basin, and Kearsarge Lakes.

How do you get a permit for the Rae Lakes Loop?

During the quota season (May 26, 2023 – September 23, 2023) there are two ways to secure a permit to backpack the Rae Lakes Loop: through a reservation or walk-up permit. Outside of these dates all permits are self-issued at the nearest visitor center. 

The classic Rae Lakes loop starts at Road’s End in King’s Canyon National park and follows either Bubbs Creek (counterclockwise trips) or Woods Creek (clockwise trips).

How to make a reservation

Permits for Rae Lakes Loop can be booked starting 6 months before and up to one week before your intended start date via recreation.gov. Up to 20 people are allowed to enter via reservation daily on both Bubbs Creek Trail or Woods Creek Trail (40 total). Once you’ve secured your reservation, you’ll still have to pick up your permit from Road End Ranger Station starting at 1 pm the day before your hike or as late as 10:00am the day of your hike. If you’re arriving later, contact the wilderness office to let them know to hold your permit or it will be given away. 

How to get a walk-up permit

5 people are allowed to enter with walk-up permits daily on either Bubbs or Woods (10 total). These permits can be obtained starting at 1pm the day prior to your hike. If you’re going this route, arrive well before 1pm to snag a spot near the front of the walk-up line. Make sure you have an idea of your itinerary  beforehand.

Do you need a park entrance pass if you have a backcountry permit for Sequoia and Kings Canyon?

Yes, you need to purchase an entrance pass to Sequoia and Kings Canyon National Park at the gate or in advance. It’s best to purchase your entrance pass in advance to save time and avoid the line.

Buy an America the Beautiful Annual Pass in advance if you plan on visiting multiple parks or visiting multiple times within a year. Sequoia and Kings Canyon charge $35 per vehicle for a 7 day pass, so it doesn’t take many visits to National Parks or any public lands to pay back the $80 dollar cost. 

If this is the only time you’ll be visiting a National Park this year, you can also pre-purchase your 7 day entrance fee at recreation.gov.

Which direction should you hike Rae Lakes?

Rae Lakes Loop can be hiked either clockwise via Woods Creek Trail or counterclockwise on Bubbs Creek Trail. Prior to booking your permit you’ll need to decide on a direction to hike this trip. Here’s more information to help you make your decision:

Clockwise, from the Woods Creek Trail

Starting your hike from Woods Creek Trail results in a more gradual elevation change. This route spreads the 6943 ft (2100 M) climb to Glen Pass out over almost 25 miles, following a steady upward trajectory with a limited number of drastic switchbacks prior to the big push up to Glen Pass

Counterclockwise, starting from Bubbs Creek Trail

Heading counterclockwise from Bubbs Creek is more strenuous, gaining the 6943’ of elevation to Glen Pass over 17 miles. If choosing this direction it doesn’t take long for the thigh burn to begin with a series of switchbacks greeting you within the first several miles and before the first campsite option at Sphinx Junction.

Verdict on direction

In my opinion, the competitive nature of the permit process doesn’t afford the luxury of being choosy. Either way the hike is fantastic.

If I had to choose, I’d start from Woods Creek Trail (clockwise) for the following reasons:

    • Your pack is heaviest with food weight at the start of your trip, so more gradual elevation is a perk.
    • Afternoon thunderstorms can be common in the summer. A clockwise trip makes it easy to spend a night at Rae Lakes and summit Glen Pass early in the morning before this becomes a factor.
    • Rae Lakes close proximity to Glen Pass makes it easier to go clockwise for those looking to include a night at Rae Lakes in their itinerary. 

Additional trailhead options for hiking the Rae Lakes loop:

Aside from Bubbs Creek and Woods Creek there are several additional access points for starting the Rae Lakes Loop on the eastern side of the Sierras.  Starting from these trailheads will add additional mileage, but may afford you the opportunity to get a permit that might not otherwise be available.

View down to Onion Valley from Kearsarge Pass

Kearsarge Pass via Onion Valley

The most common alternative trailhead for doing the Rae Lakes Loop, this trail starts from Onion Valley on the eastern side of the Sierras and climbs up and over Kearsarge pass. At 6.5 miles (one-way), it’s a great option and a common resupply trip for thru hikers on the Pacific Crest Trail and the John Muir Trail. This trail offers stunning views of the Kearsarge lakes area on the descent from Kearsarge Pass. Permits for the Rae Lakes Loop starting from Kearsarge Pass must be booked through the Inyo National Forest – Wilderness Permits.   

Baxter Pass via Baxter Pass Trailhead

This strenuous 13 mile (one-way) route takes you over Baxter Pass before dropping you down by Dollar lake to the North of Rae Lakes. I have no personal experience hiking over Baxter, but my map marks it as a route (vs. a trail) and the official National Forest description calls it steep and rugged. Buyer beware! Drop me a line in the comments if you’ve done it, would love to hear about it. Starts from the Baxter Pass trailhead and is booked via the Inyo National Forest – Wilderness Permits on Recreation.gov.

Can you have campfires on the Rae Lakes Loop?

Yes, campfires are allowed on sections of the Rae Lakes Loop below 10,000 ft and assuming current fire regulations allow it. The elevation restriction means that fires are never permitted in the section of the trail that starts in the vicinity of Dollar Lake (including Rae Lakes) and ends near lower Vidette Meadow (if traveling clockwise). If you’re making a fire in the allowable areas make sure to follow minimum impact principles, use only existing fire rings, and ensure it’s doused repeatedly, cold to touch, and dead out before hitting the sack. Check with a ranger for all up to date restrictions before heading out.

Snow Going Up to Glen Pass on the Rae Lakes Trail

Is the hike to Rae Lakes challenging?

Like any hike the difficulty of hiking the Rae Lakes Loop is very subjective. Your conditioning, experience, and backpack weight are all major factors. Overall, I’d rate this hike as moderate. It’s well signed and offers multiple campsites to break the mileage up over multiple days. That said, there is significant elevation gain up to the highpoint at Glen Pass and its’ difficulty is compounded by the high elevation that comes with hiking in the Sierra Nevada. Furthermore, the potential for snow travel and river crossings in early season ups the difficulty level.

When to backpack the Rae Lakes Loop

The Rae Lakes Loops can be hiked from early-June through to October. The sun in the altitude of the high sierra is intense during the peak summer months and thunderstorms may pose a risk. Early season travel faces the challenge of snow on Glen Pass and potential for dangerous river crossings. In fall, temperature begin to drop and the potential for snow rises. If going early or late season, contact the wilderness office for questions on conditions. At all times of the year the trail will be heavily trafficked. Aside from Rae lakes being a popular backpacking destination in its own right, trail joins the John Muir Trail and Pacific Crest Trail for about 14 miles from Lower Vidette Meadow to Woods creek bridge.

How to get to the Rae Lakes Loop?

The traditional Rae Lakes Loop starts from Road’s End in Kings Canyon National Park. It can also be started from multiple other trailheads on the eastern side of the Sierras. It’s a loop hike and thus no shuttle is required.  Rent a car or drive your own, park at the trailhead and go nothing beats easy logistics! Am I right?

Hiking Past Upper Paradise on the Woods Creek Trail

Where to stay before hiking the Rae Lakes Loop

Arriving the day before to pickup your permit or looking to explore before your hike? Staying near to Road’s End in the Cedar Grove area is extremely convenient and there are several accommodation options that can facilitate this. Make sure to book these early as they fill up quickly during the busy summer months. 

Camping Options

Several campsites are conveniently situated in the Cedar Grove area making car camping the night before (or after) a snap . Book any of these sites through recreation.gov

Sentinel Campground – I stayed here the night before my hike. It’s a decent site, but many of the sites feel close together.

Similar and next to Sentinel in Cedar Grove are Sheep Creek and Moraine Campground which seem very similar to Sentinel just slightly larger.

If these options are full, consider Azalea CampgroundCrystal Springs Campground, or Sunset Campground in Grant Grove about an hours drive from Roads End.

Lodging Options

If you feel like getting off your thermarest and out of the tent for a night here are few great options:

Cedar Grove Lodge – Only 5.9 miles from Road’s End in Kings Canyon this is the most convenient option for spending the night before your hike. 

For other options inside Kings Canyon National Park check out John Muir Lodge or Grant Grove Cabins about an hour away from Road’s End in Grant Grove Village. 

Trail sections

I’ve described the sections of the Rae Lakes Loop based on my own experience hiking clockwise. If you’re planning a trip the opposite way you’ll have to get creative and try to think backwards. 😉 All distances and elevations are rounded and approximate. 

Roads End to Mist Falls

4 Miles (6.5 KM)

850ft (250M) Elevation Gain

After departing from the Road’s End Ranger Station the trail follows a wide path through an open forest with excellent views to cliffs and peaks surrounding the canyon. Sun exposure in this section is high and shade is limited. After a couple miles, you’ll hit the junction for Bubb’s Creek trail where counterclockwise hikers take a right crossing the bridge over the South Fork Kings River.  Clockwise hikers continue along the Paradise Valley trail which follows along the rivers west bank, The trail becomes quite lush with the moisture, nutrients, and spray from the river transforming the forest and providing some shade. The contrast is stark, where minutes ago there was a sandy wash, ferns and significant understory abounds. For 2 miles after the Junction with Bubbs the trail steadily climbs adding about 650ft (200 M) elevation before reaching the aptly named Mist Falls where an incredible torrent of water shrouds the entire trail in vapor and mist.   This is a spectacular and refreshing location for lunch or a snack, just be mindful of the slippery rocks.

Paradise Valley on the Rae Lakes Loop

Mist Falls to Upper Paradise

5 Miles (8 KM)

1650ft (450M) Elevation Gain & 350 ft (100M) Loss

Leaving Mist Falls the trail continues its steady ascent navigating a short series of switchbacks half a mile after the falls. Views back down the river valley are spectacular and amplified in the morning as the sun’s rays highlight the canyon walls. The trail follows the river up the drainage as it flows through a series of deep and dramatic pools before widening and shallowing out near Lower Paradise Valley. Lower Paradise Valley is typically the first spot where camping is permitted, but for 2022 it was temporarily closed due to the presence of numerous dangerous trees. If you’re looking to camp in this area for the night continue on to Middle or Upper Paradise . This section of the trail provides numerous forested sections that serve as a lovely reprieve from the scorching Sierra sun. I was fortunate enough to see a bear about 150 ft in front of me on this section. Naturally, he took off the minute he heard me singing…

Hiking Past Upper Paradise on the Woods Creek Trail

Upper Paradise to Woods Creek

5.5 Miles (9 KM)

1650ft (500M) Elevation GaIn

After departing Upper Paradise you’ll encounter the largest river crossing of this trip. There was once a bridge that crossed the South Fork Kings River here, but it was washed away in 2016. As of June 2022, there was no new bridge and a stream crossing is required here. The conditions are season dependent and day dependent.  I encountered no issues with this crossing in early June , but every year/day can be different. Ask the ranger for any guidance when you pick up your permit as from time-to-time log jams form in the vicinity that can make the crossing easier. Look for the old bridge foundation to give you a bearing of where to head and avoid walking to far. Additionally, once you’ve made the crossing, find the remnants of the old bridge’s concrete foundation again to re-discover the trail. There are a couple trails that lead north (or to the left of the old fountain), do not take these, stay on the trail that heads straight then to the right and you’ll quickly rediscover the main trail. You’re now on the Woods Creek trail!  Over the next 6 miles you’ll gain over 1600 ft of elevation (500M) in a steady fashion. Who said going up was hard!  Following your crossing, you’ll initially hike out of sight of Woods Creek before the creek becomes visible a couple miles down the trail.  Upon reaching Castle Domes Meadows area the views really begin to open up and you’re given a sampling of what’s to come.  After staying right at the junction and joining up with JMT/PCT you’ll come to the suspension bridge and cross over Woods creek.

Lower Rae Lake

Woods Creek to Middle Rae Lake

6 Miles (10 KM)

2000ft (650M) Elevation GaIn

After crossing the suspension bridge over Woods Creek the trail climbs 1600 ft ( 500 M) to reach Dollar Lake and the junction with Baxter Lakes Trail. This climb is steady over the duration and crosses over various tributaries that flow into the South Fork Woods Creek. None of these crossings are technical and are likely seasonal flows, unfortunately in early June several were not crossable without conceding wet feet. After reaching Dollar Lake the trail remains relatively flat and you’ll cross another small flow that connects Arrowhead Lake with Dollar lake and re-soaks your feet just as they were starting to dry. Arrowhead lake offers a decent size camping zone with food storage boxes, should your legs be too weary to go any further or are looking to avoid the crowd at Rae. Arrowhead is also a great second night option for those looking to stay near Rae Lakes for longer than 1 night. At this point the trail makes one more climb  to reach the majestic Rae Lakes. There are several spots to camp near lower Rae lakes, but many backpackers continue past the ranger station to Middle Rae Lake. Camping here provides an optimal view over Middle Rae Lake to the Painted Lady and peaks behind.  Sunset and sunrise here is guaranteed to delight!

Alpenglow at Rae Lakes

Middle Rae Lakes to Glen Pass

2.5 Miles (4 KM)

1500ft (450M) Elevation Gain

If you’ve stayed at Middle Rae, you’ll start your day with incredible views as you follow the shoreline along the northern side of Upper Rae Lake. After walking for about ½ mile (1 KM) you’ll encounter another small water crossing where Upper Rae drains into Lower Rae. There were no rocks to cross during my trip. If you have an alternate pair of shoes/sandals you’ve been using for river crossings, I’d consider wearing them from camp to this point given. It’s a short distance and you’ll save the hassle of making the change. If not, embrace the morning footbath! Shortly after negotiating this crossing you’ll encounter the junction for the Sixty Lakes Basin to the right, a great place to explore for those spending additional time in the area. If not, continue to the left, it’s time to tackle Glen Pass! From Upper Rae Lakes the trail gains 1500ft  (450 M) over 1.8 Miles (3 KM) to the trail’s highest point at Glen Pass. This ascent is negotiated over a series of switchbacks that climb over loose rock and snow, in the early-season. If you’re hiking early in the year, this is where you’ll want your microspikes so have them ready. An early morning start is also helpful, as the snow is firm and far less strenuous to navigate without postholing at every step. Regardless of the season, It’s tough work making the climb, but the awe-inspiring views of alpine lakes and jagged peaks are balm to your burning quads. Following a final step set of switchbacks the trail cuts across sharply skirting the ridge to the right before reaching the summit of the pass. Be especially careful here if traveling on snow or ice as the slope to the right is steep and a fall would have consequences. After navigating this final section, take it all in. A breathtaking view greets you in all directions!

View from Glen Pass

Glenn Pass to Charlotte Lake Junction

2 Miles (3.5 KM)

1300 ft (400M) Elevation Loss

After enjoying your time atop Glen Pass, it is time to begin your descent. The path coming down navigates a series of switchbacks, but without the same level of loose rock as your ascent. Additionally, this slope south facing exposure makes it unlikely that you’ll encounter any more snow travel. You’ll descend towards a small alpine lake for around ½ mile rapidly losing 350 ft (100 M) of elevation along the way. After this first lake the trail follows along a small creek that drains into a lower lake about 1 Mile (0.6 KM) down. There are several camp spots nearby these small lakes that may be useful for hikers traveling counterclockwise and looking to get an early start going up Glen Pass. After passing the second lake, you’ll slowly leave behind the alpine environment and continue for another 1.2 miles (2.0 Km) losing  525ft (160 M) of elevation before reaching the trail for Kearsarge Pass. Kearsarge pass makes for an excellent alternative entry point or add on loop (9 KM round trip to the pass) that takes in scenic views from the pass, Kearsarge Lakes and Bullfrog Lakes. Staying on the main trail you’ll continue for ¼ mile (0.35KM) before coming to another junction with Charlotte Lake trail. Charlotte lake lies ⅔ Mile (1 KM) to the right with this trail also serving as the access point for exploring the Gardiner Basin area.

Charlotte Lake Junction to Junction Meadow

4 Miles (6.5 KM)

2600ft (800 M) Elevation Loss

Following the junction with Charlotte Lake, you’ll encounter a series of switchbacks before continuing a steady descent alongside a creek and down the valley. From Charlotte junction you’ll lose 360M of elevation in 2.7km walking through forested areas with consistent openings to the mountains above and valley below before reaching Vidette Meadow junction . Upon reaching Vidette Meadow junction you’ll stay right following the Bubbs creek trail and bidding adieu to PCT and JMT trails as they exit to the left. From here the trail parallels Bubbs creek as it descends providing innumerable magnificent views of the crashing torrent as it descends down into the valley below.  About 4km after lower Lower Vidette meadow you’ll arrive at Junction meadow. For those looking to cover move ground, an excellent camping spot with bear boxes lies an extra 0.6 miles down the trail adjacent to Bubbs Creek.

Bubbs Creek on Rae Lakes Trail

Junction Meadow to Sphinx Creek

6 Miles (10 KM)

2000ft (600 M) Elevation Loss

Leaving Junction meadow you’ll continue to parallel Bubbs Creek and walk through a mix of forest and meadow. Catch views of the surrounding cliffs that encircle the valley walls and marvel at the perfectly eroded drainages where spring runoff funnels down into Bubbs creek. After 3 miles (4.8 KM) and a 300M loss in elevation you’ll reach Charlotte Creek which offers a collection of campsites to the left of the trail and near Bubbs Creek. As you continue past this area and down to Sphinx Creek look for the looming silhouette of Charlotte Dome (10,630 ft 3240 m) to the right. A further 3.3 Miles (5KM) down the trail you’ll come to a junction at Sphinx Creek. The Campsite here is the last (first)  place to camp if completing this hike Clockwise (counterclockwise). 

Sphinx Creek to Road's End

4 Miles (6.5 KM)

1300 ft (400 M) Elevation Loss

From Sphinx you’ll walk for about ⅔ of a mile (1KM) before encountering your final set of switchbacks. As you descend, look for views of the Sphinx 2786M to the southwest. Once you’ve reached the bottom of the switchbacks you’ll make your way across Bubbs Creek (unbridged) before crossing the bridge over South Fork Kings River and retracing your steps back to Road’s end and your car. 

Mountain Hardwear Strato UL2 Tent in Sequoia National Park at Rae Lakes

Campsites on the Rae Lakes Loop

Unlike popular treks like the Grand Canyon’s rim to rim, there are no truly established campsites on the Rae Lakes Trail. Specifically, you will not have luxuries like tent pads or outhouses, but you have the luxury of getting to camp (mostly) where you please! There are multiple locations that are frequently utilized by backpackers and often feature well used/obvious tent sites, food storage boxes, and established fire rings. Bear canisters are mandatory for hiking the Rae Lakes Loop and priority in the food storage boxes is given to thru hikers on the PCT and JMT. However, if there is room many hikers pop their bear canisters inside to make it easily discoverable and eliminate the risk that a bear will accidentally roll your cache into a nearby lake or river should it attempt to get inside. You’ll find food storage boxes at the following locations:

    • Sphinx Creek
    • Charlotte Creek
    • Lower Junction Meadow
    • Junction Meadow (East Creek)
    • Vidette Meadow
    • Woods Creek crossing/John Muir Trail
    • Upper Paradise Valley
    • Middle Paradise Valley
    • Lower Paradise Valley
    • Arrowhead Lake
    • Middle Rae Lake

Itinerary options for hiking Rae Lakes

The traditional Rae Lakes Loop can be completed in 2 to 5 days, but numerous side-trails offer multiple ways to spend more time exploring this incredible area. The following itineraries have been provided as a starting point for helping you plan your trip. Only you know what mileage you’re comfortable with, so make an informed decision. Hiking and backpacking are rare activities where faster isn’t necessarily better or more enjoyable. The last thing you want is to be stressing out about whether or not you’ll make it to camp before dark.

Please note the following restrictions when planning your trip and check for up to date restrictions prior to booking and starting your trip:

    • Camping in Paradise Valley is limited to two nights.
    • Camping at Rae Lakes is limited to one night per lake.
    • No camping at Lower Paradise Valley due to the number of dead trees in the area.

All mileages and elevations are rounded and approximate.

Alpenglow at Rae Lakes

Rae Lakes Loop in 2 days / 1 night

Crazy? Maybe a little, but trail runners tackle the Rae Lakes Loop in one day of quad destroying bliss.  So, if you’re really short on time and are comfortable logging high miles in the High Sierra this trip is for you.

Clockwise via Woods Creek

    • Day 1: Road’s End to Middle Rae Lakes via Woods Creek
      • 21.5 Miles (34 KM) 
      • 5900 ft (1800 M) Elevation Gain 
      • 300 ft (100 M) Elevation Loss
    • Day 2: Middle Rae Lakes to Road’s End via Bubbs Creek
      • 19 Miles (31 KM) 
      • 1600ft (500 M) Elevation Gain
      • 7200 ft (2200 M) Loss
Notes:

 In this short of time, clockwise is the way to go as it allows you to spend a night at the loop’s namesake (Rae Lakes) and get up and over Glen Pass first thing in the morning on day 2. Going up Glen first has a number of benefits including: reducing the chance of having to delay due to midday thunderstorm and not having to conquer the toughest part of the trail at the end of a long day when you’re fatigued.  If you’re going with this itinerary, I’d start as early as possible. I  completed this same schedule on my first day hiking to Rae Lakes.  I picked up my permit at 7:00am and finished at middle Rae Lake shortly after 5:00pm with about 30-45 minutes of stoppage time (for lunch/snacks). It felt tough, but manageable. On the 2nd day it’ll be all downhill after completing Glenn pass as your first order of business and you should be back at Road’s end in the late afternoon/early evening, leaving you plenty of time to drive home, get a few hours sleep, and make that early morning Zoom meeting the next day.  Weekend warrior this trip was built for you!

Upper Rae Lakes at Sunrise on the Rae Lakes Loop

Rae Lakes in 3 days / 2 nights

There are a couple ways to complete this backpacking trip in 2 nights. If you cannot live with the FOMO of hiking to Rae Lakes and not camping there you will need to have one really big day and 2 medium days. If you’re alright with passing by Rae Lakes and not camping there you can spread the mileage over the three days on the trail.

Here are the options:

Option 1 - Clockwise via Woods Creek and camp at Rae Lakes

This is the choice for you if you MUST camp at Rae Lakes! I get it, this was me. Here’s how to do it:

    • Day 1: Road’s End to Middle Rae Lakes via Woods Creek
      • 21.5 Miles (34 KM)
      • 5900 ft (1800 M) Elevation Gain 
      • 300 ft (100 M) Elevation Loss
    • Day 2: Middle Rae Lakes to Junction Meadow, Charlotte Creek, or Sphinx Creek
      •  9.5 Miles (15 KM) to Junction
      • 1600 ft (500 M) Elevation Gain
      • 4000 ft (1200 M) Elevation Loss
    • Day 3:Junction Meadow, Charlotte Creek, or Sphinx Creek to Road’s End via Bubbs Creek
      •  9.5 Miles (15 KM)  to Junction
      • 3200ft (1000 M)  Elevation Loss
Notes:

Similar to the 1 night itinerary, clockwise is the way to go as it allows you to spend a night at Rae Lakes and get up and over Glen Pass first thing in the morning on day 2. By knocking off Glen Pass first thing you reduce the chance of delay due to midday summer thunderstorms and avoid having to complete the toughest part of the trail at the very end of a long day.

Day 2 gives you some flexibility on the final campsite, allowing you to lengthen the day and subsequently reduce your hike out on day 3 should you desire. If you’re itching for more miles, trips to Charlotte Lake or Kearsarge Pass/Lakes can easily be added to the second day.  This is pretty much the itinerary I hiked, except I added a loop trip to Kearsarge Pass, Kearsarge Lakes and Bullfrog Lake to Day 2. 

Option 2 - Clockwise via Woods Creek with even-ish mileage

    • Day 1: Road’s End to Woods Creek Crossing via Woods Creek
      • 16 miles  (25 KM)
      • 3900 ft (1200 M) Elevation Gain 
      • 300 ft (100 M) Elevation Loss
    • Day 2: Woods Creek to Junction Meadow
      • 16 miles (25 KM) 
      • 3600 ft (1100 M) Elevation Gain
      • 4000 ft (1200 M) Elevation Loss
    • Day 3: Junction Meadow to Road’s End via Bubbs Creek
      • 9.5 Miles (15KM) 
      • 3300 ft (1000 M) Elevation Loss
Notes:

If you’re looking to space the mileage out, this itinerary splits the elevation gain almost equally between the first and second days while leaving the shorter day for the final day to get where you need to go post hike. Downside is that you don’t get to camp in the alpine areas which are, in my opinion, the most scenic. 

Option 3 - Counterclockwise via Bubbs Creek with even-ish mileage

    • Day1:  Road’s End to past Charlotte  Lake Junction via Bubbs Creek . Stay near one of the small lakes about 1.5 Miles (2.5 KM) North of Charlotte Lake Junction and before Glen Pass.
      • 16 Miles (25 KM) 
      •  6600 ft (2000 M) Elevation Gain
    • Day 2: Charlotte Lake Junction area to Upper Paradise
      • 16 Miles (25 KM) 
      • 1000ft (300 M) Elevation Gain
      • 5300 0ft (1600 M) Elevation Loss
    • Day 3: Upper Paradise to Roads End
      • 9 Miles (14 Km) 
      • 2300 ft (700 M) Elevation Loss
Notes:

This itinerary will park you very close to Glen Pass for day 2 and you get the majority of the tough mileage out of the way on a tough day 1. The mileage is more evenly distributed, but this first day will be very tough. 

Hikers ascend a snowy Glen Pass

Rae Lakes in 4 days / 3 nights

Completing the Rae Lakes Loop in 4 days / 3 nights seems to be the Goldiloks zone for many backpackers. Here are couple options to do it in this timeframe:

Option 1 - Clockwise via Woods Creek

    • Day 1: Road’s End to Upper Paradise
      • 9 Miles (14 Km) 
      • 2300 ft (700 M) Elevation Gain
    • Day 2: Upper Paradise to Middle Rae
      • 12 Miles (19 KM) 
      • 3600 ft (1100 M) Elevation Gain
      • 300 ft (100 M) Elevation Loss
    • Day 3: Middle Rae to Junction, Charlotte Creek, Sphinx.
      •  9.5 Miles (15 KM) to Junction
      • 1600 ft (500 M) Elevation Gain
      • 4000 ft (1200 M) Elevation Loss
    • Day 4: Junction Meadow, Charlotte Creek, or Sphinx Creek to Road’s End via Bubbs Creek
      •  9.5 Miles (15 KM)  from Junction
      • 3200ft (1000 M)  Elevation Loss
Notes:

There are tough days in this itinerary, but the mileage is manageable for most backpackers.. You get to enjoy the splendor of Rae Lakes for a night and can summit Glen Pass in the morning. A winning itinerary, if I say so myself.  

Option 2 - Counterclockwise via Bubbs Creek

    • Day 1: Road’s End to Lower Vidette Meadow
      • 13 Miles (20 KM) 
      • 4600 ft (1400 M)  Elevation Gain 
    • Day 2: Lower Vidette Meadow to Middle Rae Lake
      • 7 Miles (11 KM)
      •  2600 ft (800 M) Elevation Gain
      •  1600 ft (500 M) Elevation Loss
    • Day 3: Middle Rae Lake to Upper Paradise
      • 12 Miles (19 KM)
      • (100 M) Elevation Gain
      • 3600 ft(1100 M) Elevation Loss
    • Day 4: Upper Paradise to Road’s End
      • 9 Miles (14 KM) 
      • 2300 ft (700 M) Elevation Loss
Notes:

By making a big climb to Lower Vidette Meadow on Day 1 you put yourself in good shape to make the trek up to Glen Pass on the morning of Day 2. Ideally you’ll have a good amount of time in the later afternoon to kick back at Rae Lakes.

View from Glen Pass

Rae Lakes in 5 days / 4 nights

Spend a little bit more time in the area and break up the big up days into smaller and more manageable chunks.

Option 1 - Clockwise via Woods Creek

    • Day 1: Road’s End to Middle Paradise Valley
      • 8 Miles (12 KM)
      • 2000 ft (600M) Elevation Gain
      • 300 ft (100M) Elevation Loss
    • Day 2: Middle Paradise to Woods Creek
      • 8 Miles (12 KM) 
      • 2000 ft (600 M) Elevation Gain
    • Day 3: Woods Creek to Middle Rae Lake
      •  6 Miles (10 KM) 
      • 2000 ft (600 M) Elevation Gain
    • Day 4: Middle Rae Lake to Junction Meadow
      • 9 Miles 14 KM 
      • 1600 ft (500 M) Gain 
      • 4000 ft (1200 M) Loss
    • Day 5: Junction Meadow to Road’s End
      • 10 Miles (16 KM)
      • 3300 ft (1000 M) Loss
Notes:

This itinerary groups the lighter mileage with the larger elevation gain and the longer mileage with the larger descents. The shortest day is to Rae lakes providing ample time for relaxation here. 

Option 2 - Counterclockwise via Bubbs Creek

    • Day 1: Road’s End to Charlotte Creek
      • 7 Miles (11 KM) 
      • 2300 ft (700 M) Elevation Gain
    • Day 2: Charlotte Creek to Charlotte Lake
      • 9 Miles (14 KM) 
      • 3900 ft (1200 M)  Elevation Gain
    • Day 3: Charlotte Lake to Arrowhead Lake
      • 7 Miles (12 KM) 
      • 1600 ft(500 M) Elevation Gain
      •  2000 ft(600 M) Elevation Loss
    • Day 4: Arrowhead Lake to Upper Paradise Valley
      •  10 Miles (16KM)
      •  3600 ft (1100 M) Elevation Loss
    • Day 5: Upper Paradise Valley to Road’s End
      • 9 Miles (14 KM)
      • 2300 ft (700 M) Elevation Loss
Notes:

This itinerary once again groups the lighter mileage and larger elevation gain and longer mileage with larger descents. If you’re going clockwise and looking to split mileage evenly between the days you won’t be able to camp at Rae Lakes. This itinerary includes a 1 mile side trip to camp at Charlotte Lake on Day 2 which is a nice spot to camp and puts you in reasonable proximity to Glen Pass for Day 3. 

Trees on the Rae Lakes Loop

More time? Adapt the Itineraries!

Add a low KM day or zero KM day in the Rae Lakes and Arrowhead lakes alpine area to any of these itineraries to give yourself more time to explore. Maybe you spend the day relaxing lakeside or day hiking into the Sixty Lakes Basin (3 miles each way from Upper Rae Lakes).   Remember, if you’re staying at Rae Lakes you’ll have to move your basecamp as camping is limited to one night per lake. 

Itineraries too long? Break up a day. Camping is permitted almost everywhere on this loop, so break any of the days up into manageable chunks!

Packing list breakdown

Hikes like Rae Lakes Loop are more enjoyable the lighter your pack. A lighter backpack helps you cover more mileage and more elevation with way less effort making big days more realistic, not to mention more comfortable!

If you’re new to backpacking, don’t stress out about buying the latest and greatest equipment. Save money and use things you already own that can be repurposed for backpacking, rent gear or borrow stuff from a well-equipped friend. Later, when you’ve gained more experience, modify your kit and change out gear as you get a better understanding of what creature comforts you can and can’t live without. 

Here’s some recommended gear for backpacking Rae Lakes Loop. Treat the links below like a buffet to jump ahead to the individual item recommendation or keep scrolling down to read through the entire list. 

Essential Items

Camping by Junction Meadow on Rae Lakes Loop

Tent

I upgraded to Mountain Hardwear Strato UL2 last year and used it on the Rae Lakes Loop.  It’s semi-freestanding, double walled and weighs in at a mere 2.5 lbs. The best part is unlike many 2-person tents, it doesn’t have a tapered floor and can fit 2 extra wide sleeping pads side-by-side with no overlap. A rare feature in this class of tent!  It’s cozy, but workable for two and palatial for one!  

If you’re looking for a completely freestanding tent that offers a bit more durability, check out the Big Agnes Copper Spur UL2. It’s unique blend of functionality, livability, weight, and durability earn high praise and Big Agnes’s customer service is outstanding!  

For an incredible ultralight option, check out the single wall Durston X-Mid Pro which weighs in at a mere 20 oz (565g). There’s a reason this tent has developed a serious cult following among ultralighters.

osprey exos backpack
Using the Osprey Exos in Zion National Park

Backpack

If you’re  just getting into backpacking, there is nothing wrong with using a large-size backpack with a decent suspension system (and good hipbelt) or borrowing one from a friend. Going this route gives you time to decide what features you need and whether or not backpacking (and the gear) is something you want to invest in.  Whatever backpack you use, make sure you have a good fit before by following this guide to backpack sizing.  When I first started backpacking, I used a 60L travel backpack, our Khmer Explorer Travel Set on Canada’s West Coast Trail. While not designed for hiking, it worked great despite my ridiculous overpacking!  

If you’ve begun dialing in your backpacking kit and moving towards a lightweight set-up, check out either the Osprey Exos or Woman’s Eja. At under 3 lbs these packs provides a great compromise between barebones ultralight packs and the heavier feature-laden packs.  Their excellent suspension systems prevent the dreaded swampy/sweaty back on hot days. That’s my Exos hiking the Narrows in Zion in the photo above. 

For a similar option that checks in even a little bit lighter in weight, check out the Gregory Focal and Facet (women’s) lineup:

If you’re an extreme gram counter, you might like the Hyperlite 3400 southwest. It’s 100% waterproof and constructed from ultralight dyneema fabric.  Being ultralight you’ll sacrifice features, so if you hate getting a swampy back (that’s me) you may prefer the Osprey or Gregory despite the weight penalty. Backpacking gear is always a zero sum game! 

Check the price of the Hyperlite 3400 southwest:

Sleeping mat

I used to have terrible sleeps in the backcountry until I switched to the Therm-a-Rest NeoAir X-lite. It’s incredibly lightweight, comfortable, and packs down to the size of a Nalgene bottle. This is probably one of my favorite backpacking items! Get one. You won’t regret it. Sleep well! 

Patagonia Sleeping Bag in a tent

Sleeping bag or quilt​

Patagonia’s sleeping bags are 5 star!!  I received one as a gift several years ago and it has been nothing short of perfect. Weighing only 822 g (29 oz)  it’s lightweight and packs down small!  I found the 30°F / -1°C  to be perfect for most outings – if it gets colder you can always layer up! Like all Patagonia products, it’s not cheap, but they stand behind their gear and the quality matches the price point. If you spend a lot of time in colder environments they also make a 20°F / -7°C version .  These bags are a worthwhile splurge! 

If you’re looking for an even lighter-weight option, consider going for a sleeping bag quilt. Feathered Friends  Flicker UL Quilt Sleeping Bag has won numerous awards and is a stalwart among ultralight backpackers. With a weight starting at  526 g (1 lb 2.5 oz), I can see why!  

Backpacking pillow

Yes, you can sleep with a pillow not made of bunched up clothes in the backcountry. Check out the Nemo Fillo Elite. It packs down ultra small and provides an unprecedented level of comfort after a long day on the trail. Once you try one you won’t imagine how you lived without!  

Water purification

I love the Steripen. It’s light, portable and only takes minutes to purify a liter of water in a Nalgene. Press the button, place the pen in your bottle, and stir for a couple minutes! 

Make sure to bring tablets as a backup though should you run into any technical problems/dead battery with your Steripen.

Trowel, Toilet Paper & Hand Sanitizer

The lack of facilities on the Rae Lakes Trail make a trowel  a requirement for this trip. Follow minimum impact camping principles and be sure to dig a cathole a minimum of 6 inches deep and at least (500ft) 200m away from any established trails, campsites, or water (creeks, lakes, rivers etc.). Pack out your TP. 

Don’t forget a  small bottle (1 oz) of hand sanitizer.

Swiss army knife

For fixing gear or cutting food, make sure to bring swiss army knife.

Stove & fuel canister

Lightweight, convenient, and reliable, the MSR pocket rocket  has been my go-to backpacking stove for years. 

Lighter and matches

A little baby bic lighter is all you need. I often bring a small pack of matches wrapped in ziplock bag as well for backup or you could bring a small pack of waterproof ones.

Backcountry cookset

The GSI Halulite Microdualist II is a compact, lightweight two-person cookset that can fit a MSR pocket rocket and a fuel canister inside. 

If you’re looking to buy a minimalist stove and cookset the MSR PocketRocket Stove Kit  is an all-inclusive solution.

Water bottle or reservoir

Nalgene are always a backcountry favorite. Check prices at Backcountry /REIIf you’re cutting weight or looking for a way to save a buck, a simple smart water is the go-to for ultralight backpackers.  

Alternatively, a hydration reservoir allows you to stay hydrated continuously without stopping to grab and open a bottle. 

Water container

Extra water storage capacity makes cooking that much easier and camp life more enjoyable, so consider the MSR DromLite Bag  or Dromedary. They are a must for trips without reliable water sources where hauling extra water is essential. 

First aid kit

From blisters, to scrapes, and cuts, a first aid kit is an essential item to have.  The pre-built kits from Adventure Medical Kits offer varying sizes for party size and trip length.  At the end of your trip, write down any items you used and replace them right away so your kit is ready for your next adventure. 

trekking poles in the Grand Canyon
Using the Leki MCT Vario poles in the Grand Canyon

Hiking poles

For the big elevation gain of the Rae Lakes Loop poles make a huge difference!  I resisted getting them for years, but take it from a former skeptic, poles are incredible at reducing the strain of long, grueling descents and providing extra stability on exposed sections. Do yourself a favor and get a pair of poles. Leki makes some the best trekking poles on the market, I bought the Leki Micro Vario several years back and have no regrets. If you’re looking for a premium pole check out their new version the MCT Vario. 

Bear canister

Bear canisters are required on the Rae Lakes Loop and Rangers will check for them.  BearVault canisters are best for their transparent design that allows you to see inside. For several people go with the BV500 for solo adventures the BV450 works great. 

Headlamp

The Spot 350 has 6 modes including the night vision saving red light. Red light mode takes a minute to get used to, but once you do it’s a total game changer trust me! Hello stars!!  

GPS, compass & map

Download the GAIA app for maps and gps. I always bring a traditional compass and map as well in the case of technical problems or dead batteries.

Battery Back-up & Charging Cable

Keep your phone charged for photos and gps. View options at REI.

Luxury Items (Very Optional)

These items are extreme luxuries, but may be worth it depending on your weight priorities and the distance you plan to cover. I’d only  consider these items on a low distance or base camp style hikes given their added weight and bulk. 

Hammock at the North Rim Campground at the Grand Canyon
Putting a Hammock to good use at the North Rim of the Grand Canyon

Hammock

If you’ve never strung up a hammock between two trees deep in the backcountry, you’re missing out! Nothing beats getting horizontal with some great reading material in the pre-dinner hours or taking in an amazing sunset from your own outdoor couch. The ENO Double Nest has room for two and at ½ kg  the weight can be justified on certain trips.  

Don’t forget the straps are sold separately (view them at Backcountry / REI).

Camp Chair

After a long day on the trail there’s nothing better than finding a nice comfortable spot to rest your weary glutes. The Helinox Chair Zero is a great option and at just over 1lb, it’s light enough to justify bringing on slower/easier backpacking trips where weight isn’t as big of consideration or for trips from an established base camp. 

Clothing & Accessories

Shell jacket

An essential piece for wind, rain, and snow. The Arc’teryx Beta shell is the best all around shell jacket. This shell performs in all adverse conditions and is the perfect outer layer for cool Sierra nights or stormy afternoons. Arc’teryx gear is expensive, but impeccably designed. I was skeptical for years, until I purchased a few pieces of their trail running gear and got hooked. If you’re looking for the best reviewed hiking shell out there, this is the one. 

For another excellent option that is more economical,  check out the Patagonia Torrentshell 3L. 

Staying warm in my puffy on a cold morning in the Canadian Rockies

Puff jacket

I’ve had the Patagonia Nano Puff Hoody for years and it works great on it’s own or underneath a shell for extra warmth. It’s a perfect multi-functional item for everyday, backpacking, and pretty much anything where you might need a bit of warmth. I’m still looking for an activity it doesn’t work for. 

Rainpants

Mountain weather can change fast and rain pants can be a lifesaver in your backpacking kit. Many have the functionality for quickly taking them on and off without removing your shoes/boots allowing you to stay comfortable even if you get caught in a sudden downpour.  I’ve been happy with the Black Diamond StormLine Rain Pants. 

Alternatively, check out the Patagonia Torrentshell Rainpants.  

For a budget backup option REI branded rain pants are a great choice as well.

Staying sunsafe with the Sahara Sun Hoodie in Zion National Park

Sun hoodie

When I went backpacking in the Grand Canyon a few years back, I was shocked to see throngs of Arizona Trail thru-hikers wearing hoodies in the 100 degree (40 C) heat. Turns out they weren’t just lost tech bros in the Grand Canyon, they were really onto something! A sun hoodie has been one of the best items I’ve added to my backpacking kit. They keep you burn free, are surprisingly cool, and let you get away with leaving the bottle of sunscreen at home (or bringing way less). The Sahara Sun Hoodie from REI is one of the best items I’ve added to my backpacking wardrobe and you can’t beat the price. 

Convertible hiking pants

I never thought I’d see the day I embraced the zip-off. But they really are the best of both worlds and can’t be beat for quick changing mountain weather. Check out the Patagonia Quandary Pant.

They are also available in a women’s version. 

A pair of shorts

In addition to hiking pants, it’s nice to have a pair of shorts to change into after a long day on the trail or as a backup option. Trail running shorts are light and comfortable. 

Base layer top

In addition to a sun hoodie, I also bring one base layer top to change into at camp or have as an alternate. The  Capilene Cool trail  t-shirts work great for me on long hikes and trail runs, but pretty much any athletic quick-dry top will work fine. 

Base Layer Bottom

A merino bottom baselayer is perfect for warming up at night or during chilly mornings.

Underwear

I’ve had the best luck with these Patagonia underwear for hiking, trail running, mountain biking and skiing and found them to be more durable than the more expensive ones from lululemon. I usually bring a 2-3 pair depending on trip length. 

They also make women’s underwear, but I am unable to advise on fit, form, function, or durability on this front. Check them out for yourself at Backcountry/Patagonia.

Hiking socks 3 pairs

I typically bring 3 pairs of socks. 1 pair for hiking, 1 pair to change into at camp, and a reserve to throw into the rotation as needed.  Darn Tough Vermont makes the best hiking socks hands down. They’re guaranteed for life/replaced free of charge and they don’t stink. So go ahead and try to get holes in your socks. Really! 

Sun hat & beanie

A ball cap or tilley hat keeps your face protected from the intense mountain sun. Check out these options at REI / Patagonia/Backcountry

 A winter hat or beanie is great for warming up during chilly mornings or evenings.  

Sunglasses

Don’t forget to pack your favorite pair, the sun gets intense at these elevations! 

Gloves

I typically bring a thin weatherproof pair of trail running gloves. The Black Diamond Mount Blanc have worked well for me.

Trail runners or hiking boots

Unless you’re hiking in the winter with the potential for snow and cold or you’re carrying the gear for your whole family, I’d choose trail runners for this hike. I’ve had great luck with the La Sportiva Bushido II.

The Altra Lone Peak are also a thru-hiker favorite and award winning trail shoe! 

I do have a larger more traditional hiking boot, the Scarpa Kailash that I occasionally use when I’m carrying more gear/weight or heading somewhere with lots of snow. I typically prefer trail runners now, but these are still a great boot. 

Camp shoes

Crocs are back! Well for backpacking camp shoes they never left… They’re lightweight and ugly as ever. Many backpackers find them to be the perfect camp shoe for resting sore feat after a long day in boots/shoes. 

Low gaiters

Low gaiters are perfect for keeping rocks, sand, and snow out of your trail runners and saving you from blisters.

Additional Items to Pack

Microspikes (Season Dependent)

Kahtoola Microspikes slip effortlessly over your boots and make walking on snow and ice a breeze. If you’re tackling this hike early in the season there will be snow on Glen Pass. Bring these! Check price at Backcountry / REI.

Don't forget your wilderness permit

After picking up your permit from Road’s End Ranger Station remember to bring it along. You’ll be asked for it if you come across a ranger. 

America the Beautiful Pass

Buy an America the Beautiful Annual Pass in advance if you plan on visiting multiple parks or visiting multiple times within a year of purchasing it. Sequoia and Kings Canyon charge $35 per vehicle for a 7 day pass, so it doesn’t take many visits to National Parks or any public lands to pay back the $80 dollar cost. 

If this is the only time you’ll be visiting a National Park this year, you can also pre-purchase your 7 day entrance fee at recreation.gov.

Tooth brush & toothpaste

I recently started packing these toothpaste tabs in a tiny plastic bag/ziplock to save more space.

Duct tape (for repairs and blisters)

Food

Everyone has different takes and caloric requirements, so I’m not going to tell you exactly what to bring. I generally avoid the just add water meals you find at REI.  They’re overpriced and often don’t rehydrate as you’d like. Check out these incredible soups and chilis they taste better, are made with better ingredients, and are less expensive. As another option,  I head to the grocery store and search for things like lentil rice, ramen, or plant-based mac & cheese. They’re basically just add/boil quickly meals and taste like real food. Always rebag/repack this type of food as there is no reason to carry unnecessary packaging on the trail.

If you're coming from outside the US, don't forget this!

If you’re traveling from outside the US don’t forget to purchase comprehensive travel insurance that includes emergency evacuation. 

Check out World Nomads* for a quote. Hopefully, you never need to make a claim, but if you do you’ll be beyond happy you were prepared! I broke my collarbone traveling a few years ago, which hurt enough! I can’t imagine how much worse it would have hurt if I had to pay the $15,000 in medical bills out-of-pocket… 

*We receive a fee when you get a quote from World Nomads using this link. We do not represent World Nomads. This is not a recommendation to buy travel insurance.
View down the Valley from Mist Falls

Final thoughts on hiking the Rae Lakes Loop

    • The Rae Lakes Loop was an absolutely spectacular backpacking trip.
    • Completing it in 3 days was manageable, but day 1 was long.
    • Would love to return to check out the Sixty Lakes Basin or Gardiner Basin areas.
    • JMT and PCT section from Woods Creek Bridge to  Lower Vidette Meadow felt very busy due to thru hiker traffic.
    • Bugs were pretty bad at times in early June. Saw hikers with face nets.

Your Thoughts on Rae Lakes

Have you hiked the Rae Lakes Loop? I’d love to hear from you. Questions about backpacking Rae Lakes? Drop me a line in the comments below and I’ll do my best to help! 

More adventures you might enjoy

View along the Rockwall Trail towards Floe Lake.

Rockwall Trail | The Ultimate Guide to Hiking the Rockwall

The Rockwall Trail is one of the Canadian Rockies’ premier backpacking trips. For 55km you’ll be treated to a seemingly unending supply of sublime Rocky Mountain scenery. Here’s how to make it happen with must-read tips for getting a permit and beating the crowds.