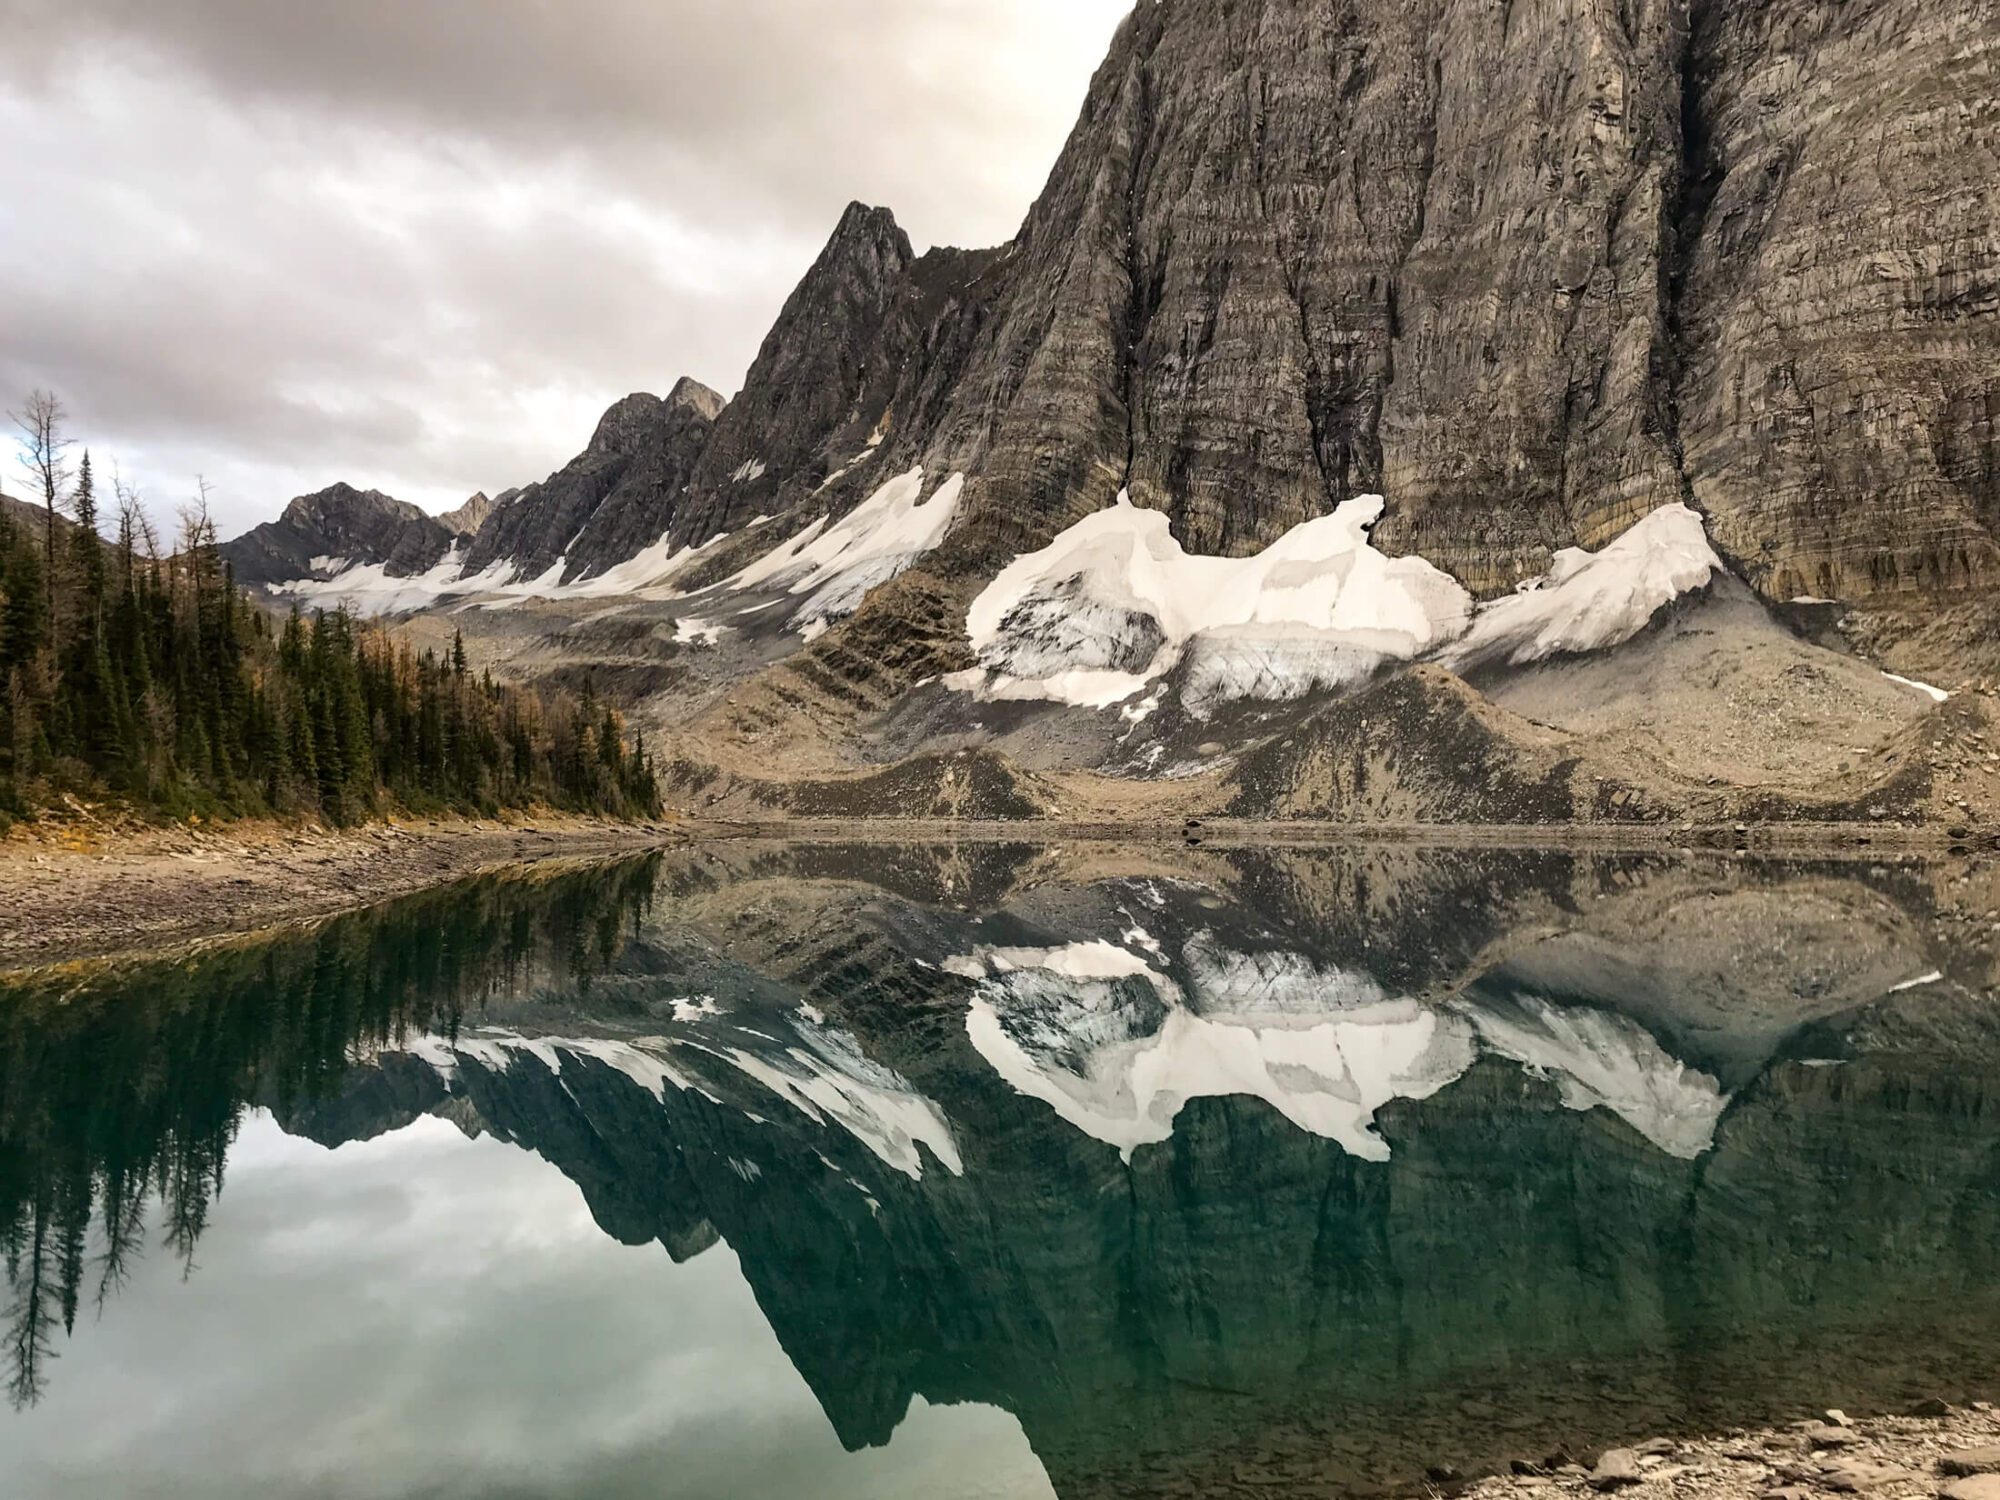
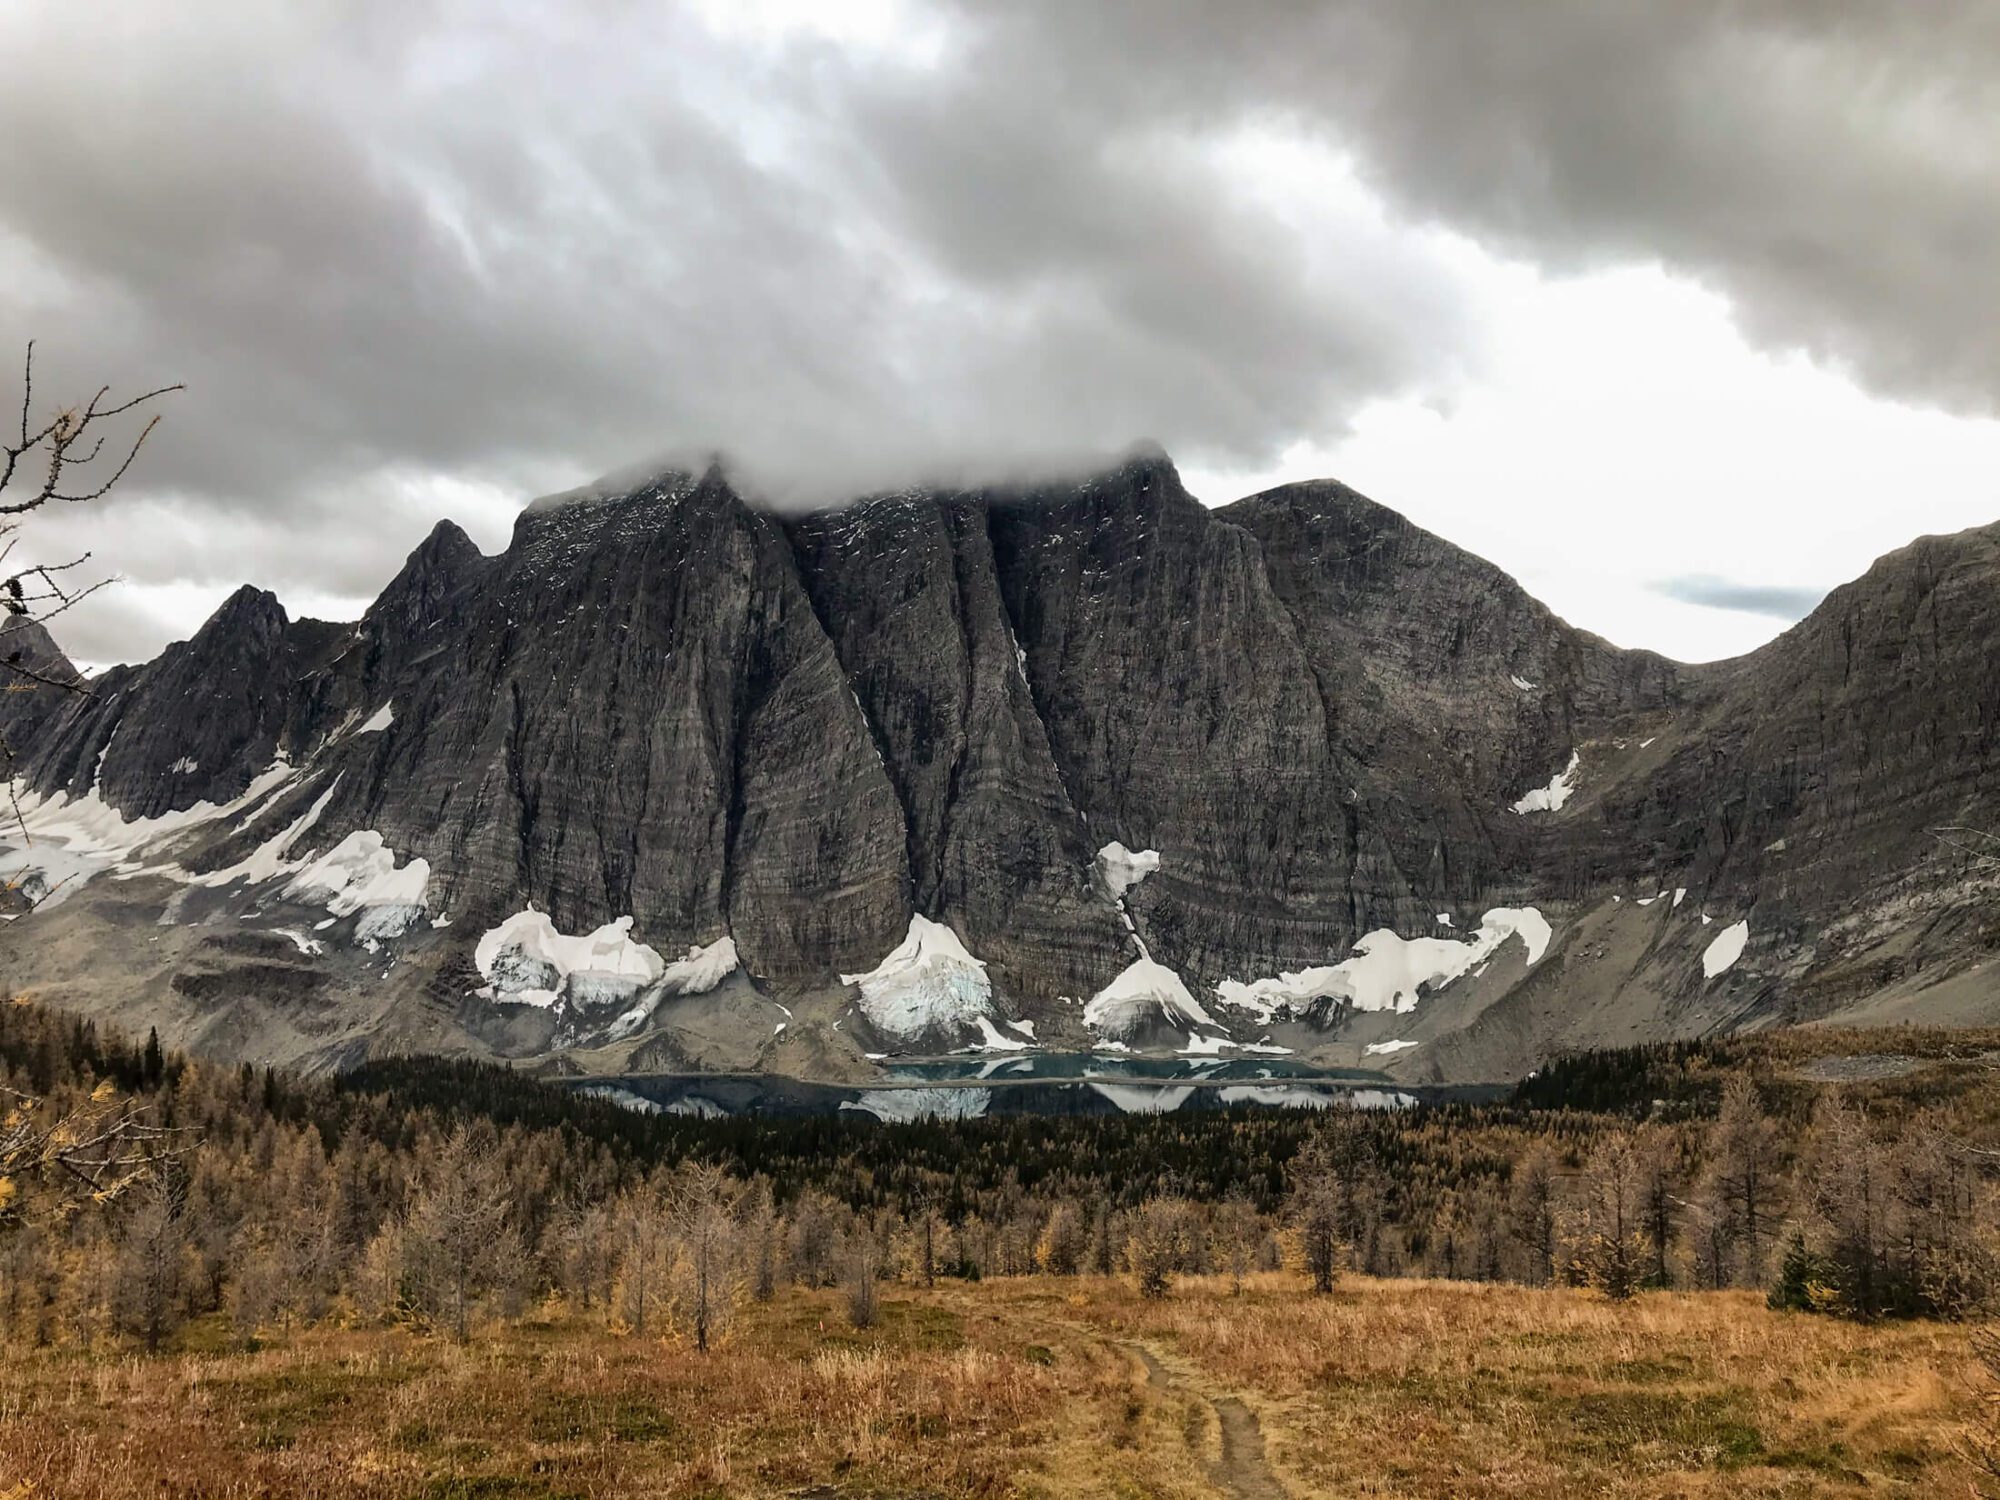
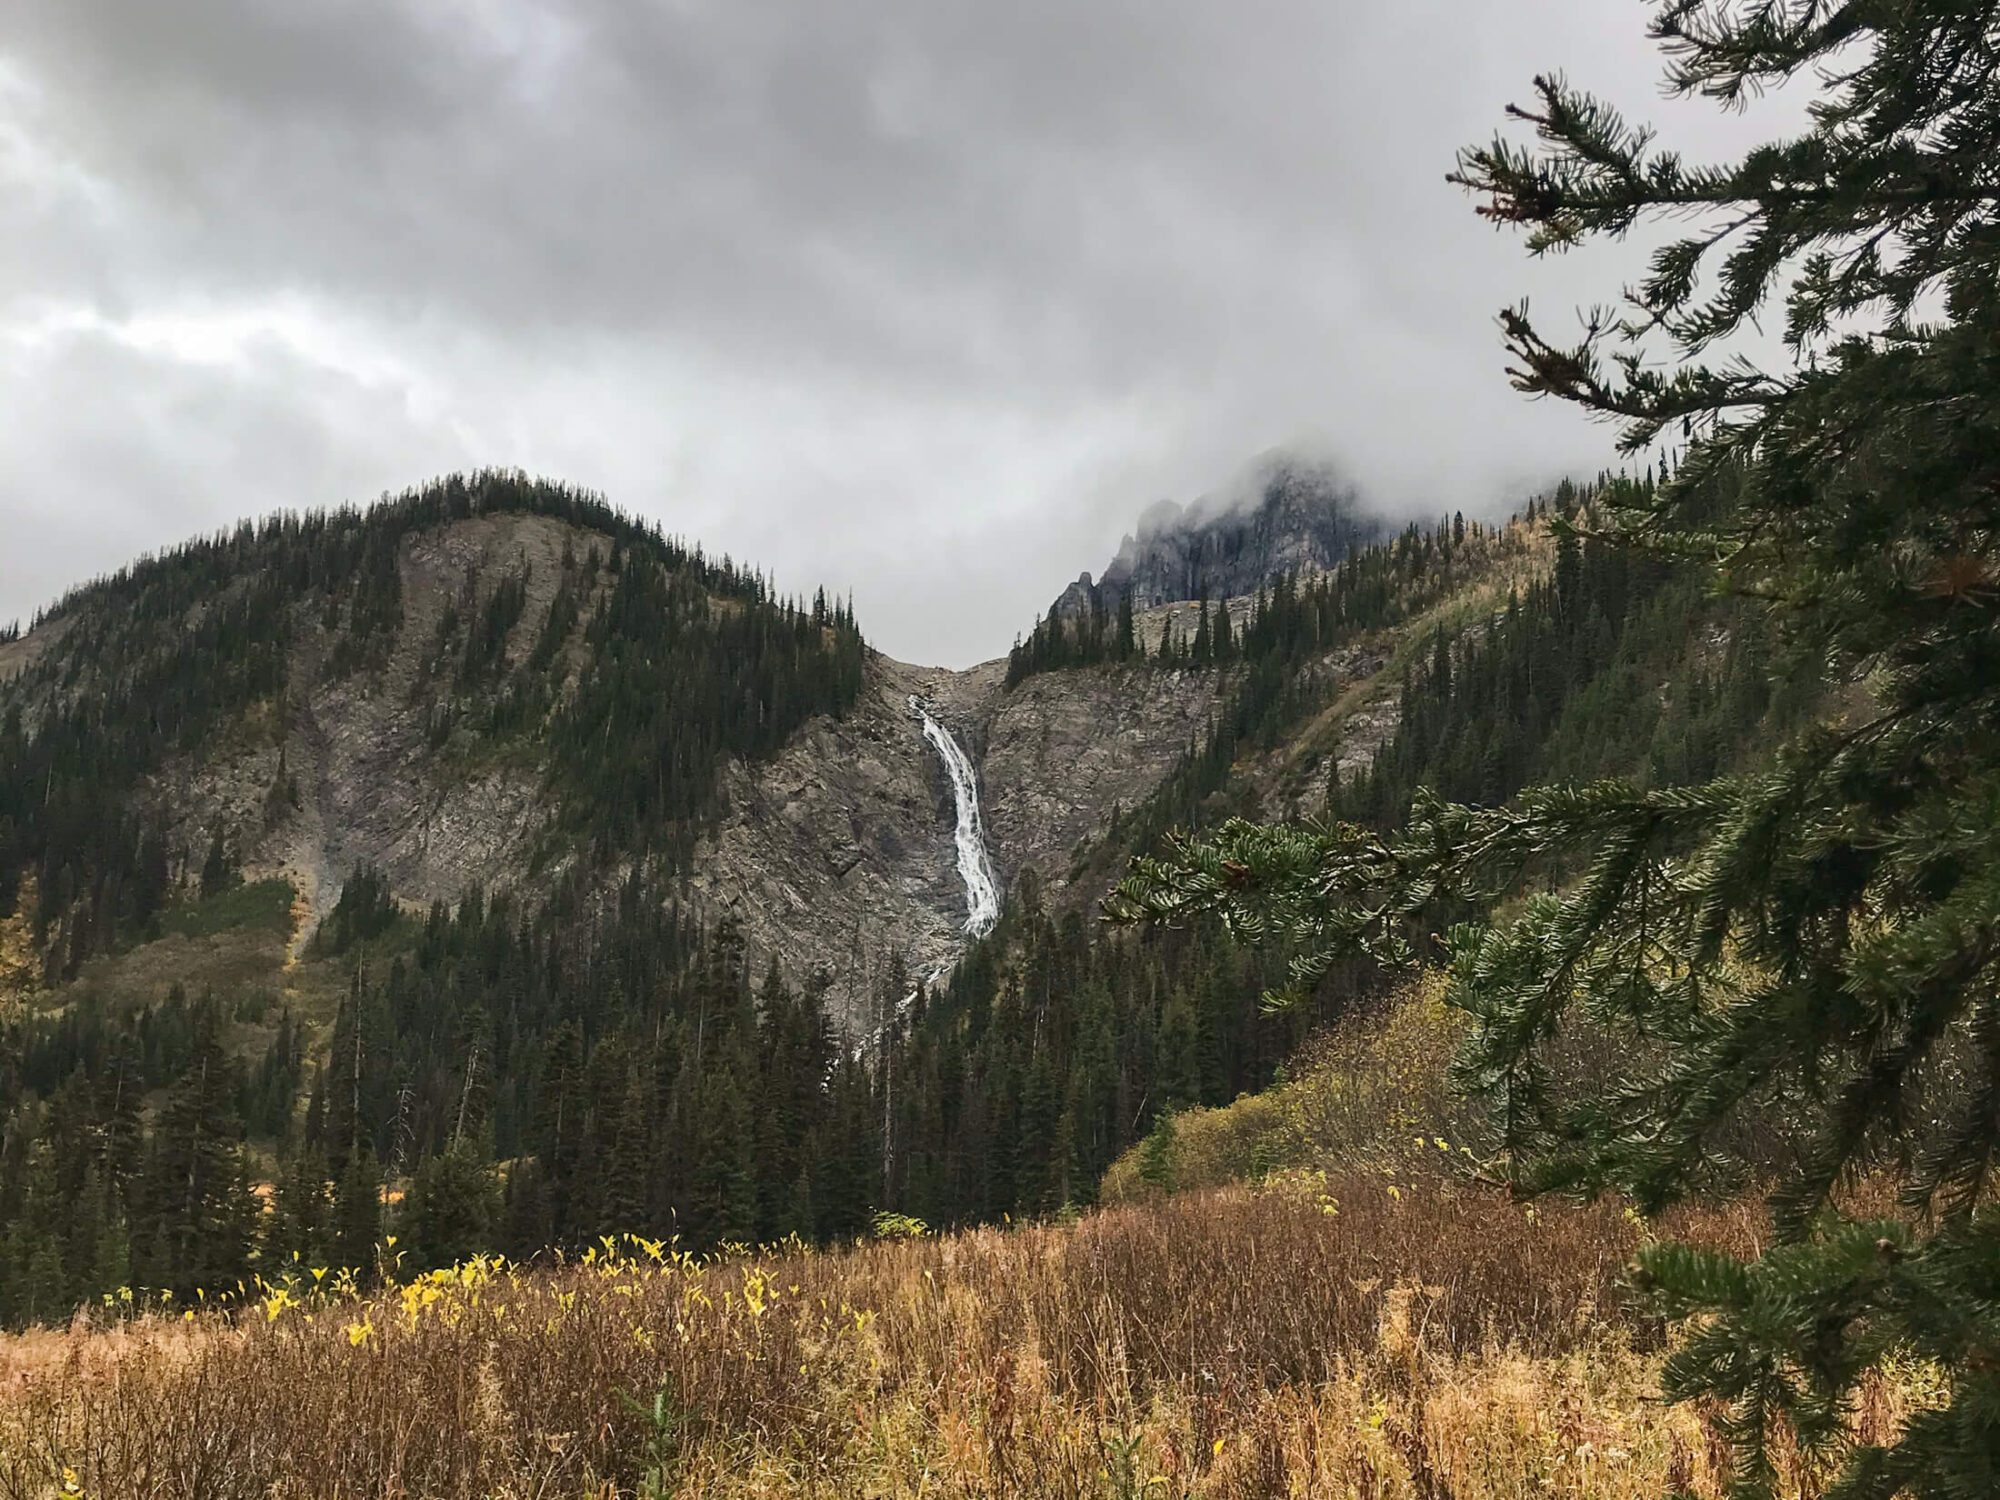
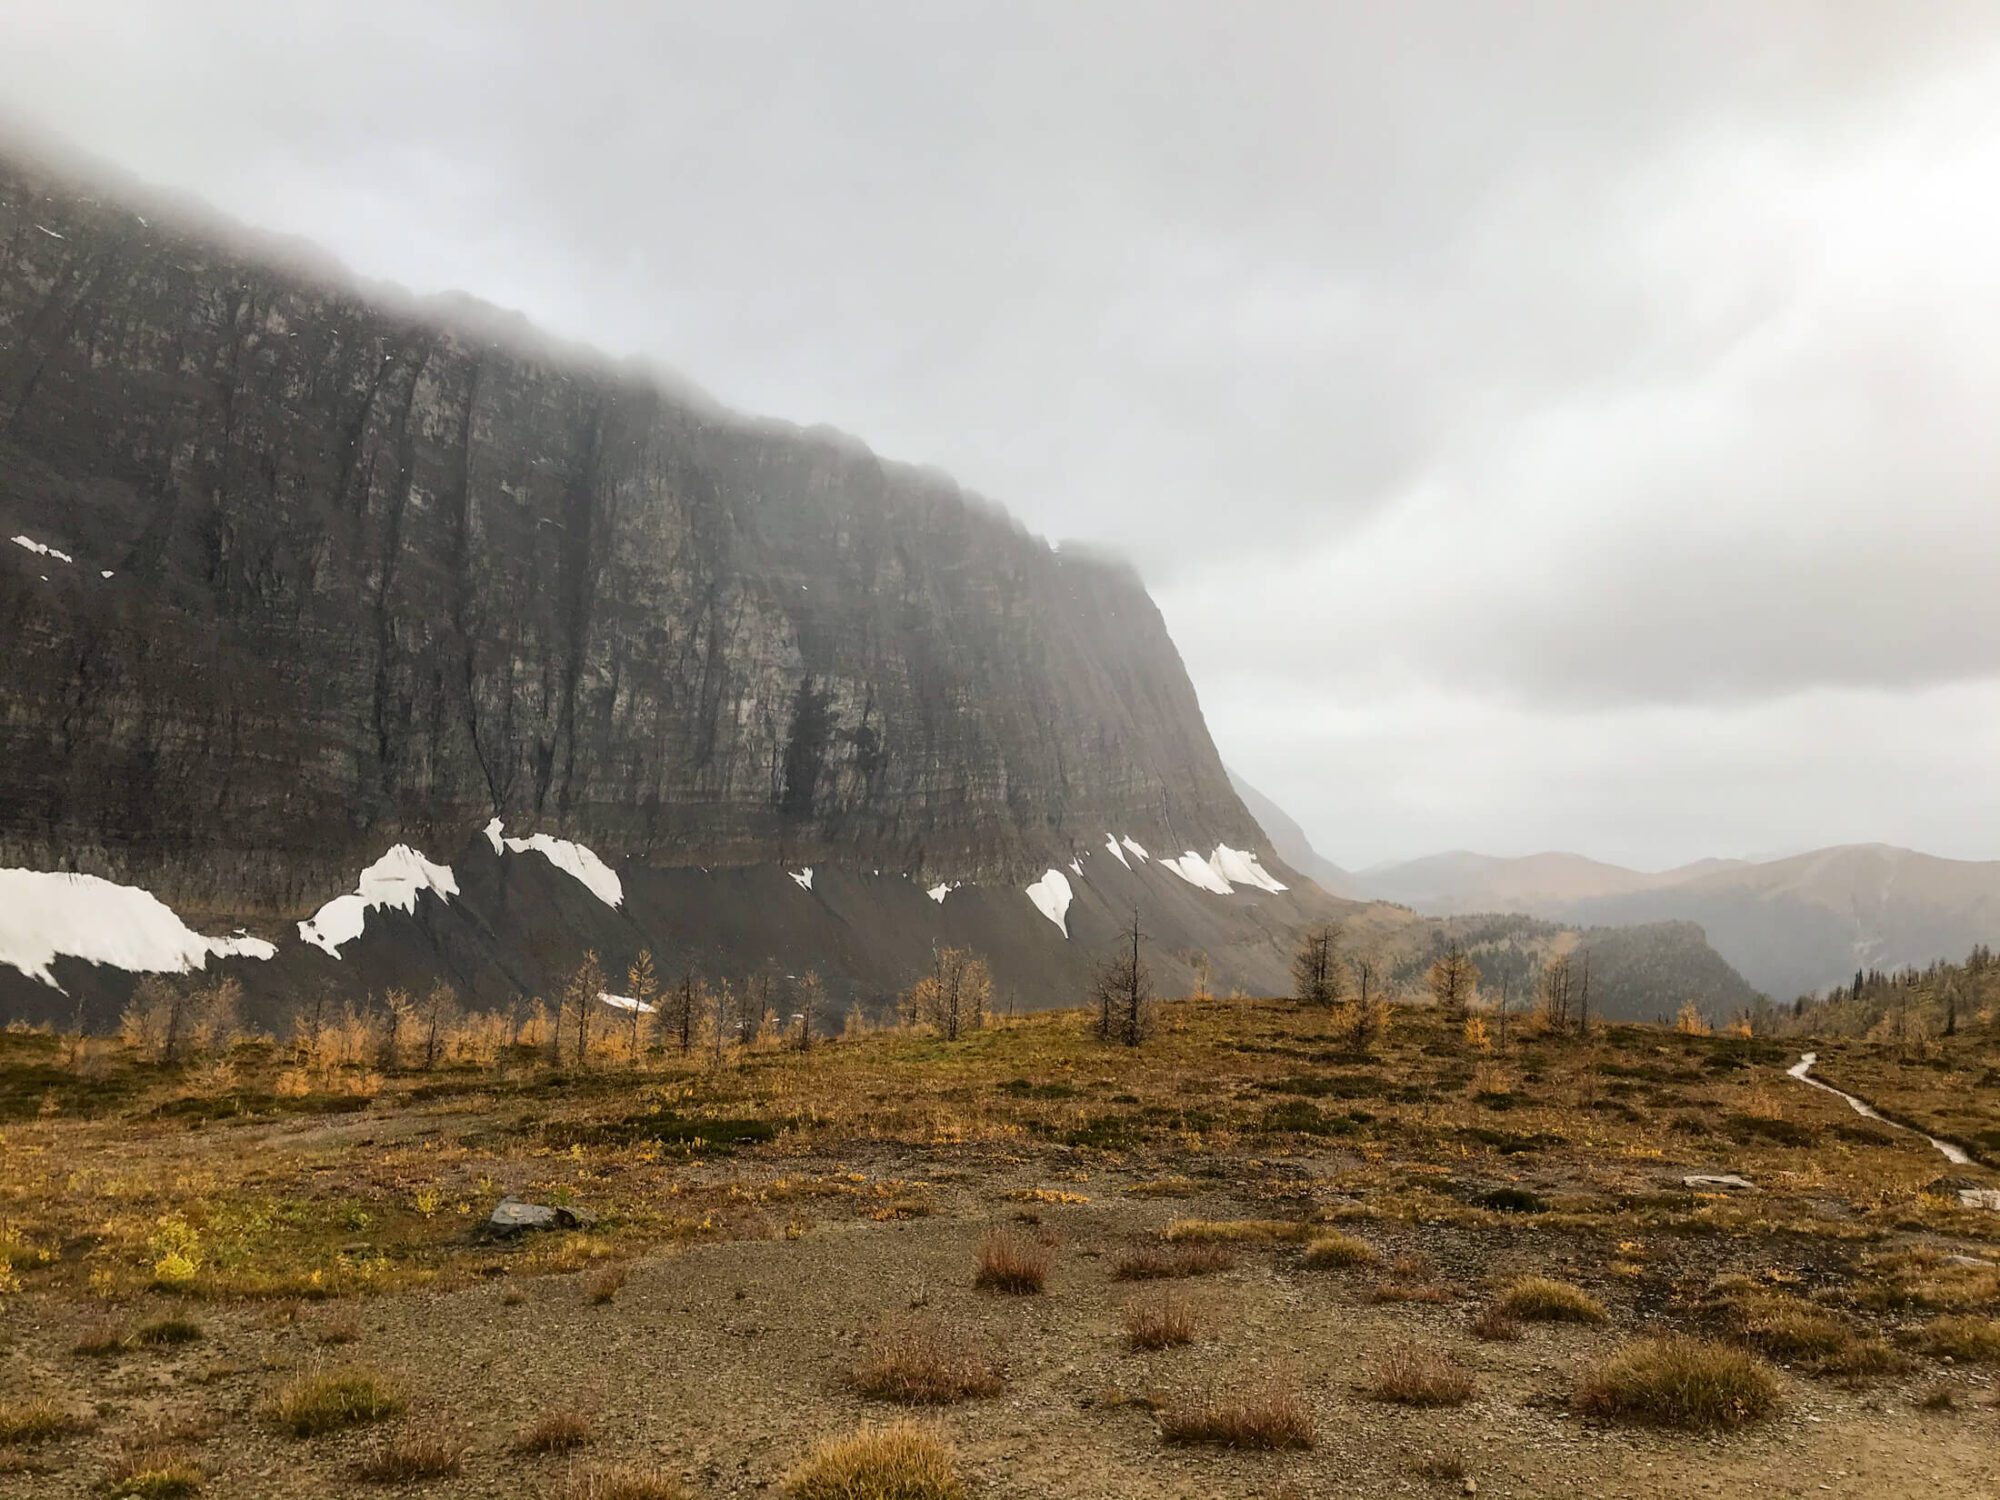
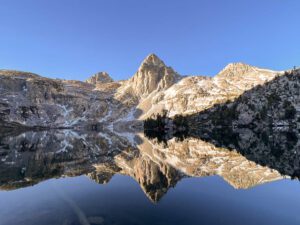
The Rockwall Trail is one of the Canadian Rockies’ premier backpacking trips. For 55km you’ll be treated to a seemingly unending supply of sublime Rocky Mountain scenery. You’ll camp near glacier-clad Floe Lake, hear the torrent of water crashing down from 300m+ high Helmet Falls, and be left awestruck by the Rockwall itself, an incredible expanse of 1000ft cliffs arranged almost unbroken for 30km.
Traversing three high passes in Kootenay National Park, the Rockwall delivers over 2,500 m meters of quad-burning elevation gain and over that amount of knee-crunching descent. Fortunately, five established campsites make daily mileage manageable for backpackers looking to space the hike out over a longer period of time.
Your biggest challenge in backpacking the Rockwall is likely to be obtaining a permit and finding a way to escape the crowds on this popular hike. Fortunately, you’ve come to the right spot! This comprehensive guide was built on my own experience hiking the Rockwall and includes multiple itinerary options for planning your own adventure. I also reveal how I managed to hike the first 40 km without crossing paths with another hiker, while snagging a permit only days before starting my hike.
So without further ado, let’s dive in.
** Some of the links in this post may be affiliate links. If you click one of the links and make a purchase we’ll earn a small commission at no cost to you. We’re very particular about products and we only recommend products, services, or accommodation we trust and use ourselves.**
Need to Know for Hiking the Rockwall Trail
Days Required: 2-5
Difficulty: Moderate
Distance: 54 km (34 miles)
Elevation Gain: 2,500 m ( 8, 000 ft)
Elevation Loss: 2,600 m (8, 500 ft)
Permit Required: Yes, campsites must be booked and book up fast
Designated Campsites: Yes
Navigation: Easy, well marked and maintained trail
Food Storage: Provided bear boxes
Best Campsite: Floe Lake
Worst Campsite: Helmet/Ochre Junction
Things You’ll Love About This Hike
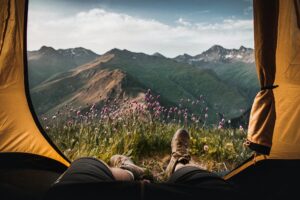
- Sublime Rocky Mountain scenery.
- Established campsites with bear lockers (no need to carry a bear canister), tent pads, outhouses, and tables for cooking/eating.
- Numerous campsites allow for flexibility on trip duration and daily mileage.
- Chance to see Rocky Mountain mega fauna (moose, grizzly bears, and mountain goats).
Things You Won’t Love About This Hike
- Lack of solitude during peak season with large campsites.
- Competitive permit process that requires advance trip planning during peak season.
- 13 km shuttle required between the starting trailhead and ending trailhead.
- Most campsites lack dynamic views from the tent pads.
What to Pack for Backpacking the Rockwall
Here’s a quick summary of what to pack for backpacking the Rockwall Trail. You’ll find a detailed breakdown of each item at the end of the post with rational, alternatives and quick links to check prices.
Don’t Forget
- Travel Insurance with Emergency Medical (if travelling from outside Canada)
- Bear Spray (make sure you know how to use it!)
- Copy of your Backcountry Reservation/Booking
- Park Pass
Essential Items
- Tent
- Backpack
- Sleeping Mat
- Backpacking Pillow
- Sleeping Bag or Quilt
- Water Purification
- Trowel, TP & Hand Sanitizer
- Swiss Army Knife
- Stove & Fuel Canister
- Lighter & Matches
- Compact Backcountry Cookset & Spork
- Water Bottle or Reservoir
- Extra Water Storage Container
- First Aid Kit
- Trekking Poles
- Headlamp with red light mode
- GPS, Compass & Map
- Battery Back-Up & Charging Cable
Clothing and Accessories
- Shell Jacket
- Puff Jacket
- Sun Hoodie
- Rainpants
- Convertible Hiking Pants
- Shorts (1 pair)
- Base Layer Top
- Base Layer Bottom
- Underwear (2-3 pair)
- Hiking Socks ( 3 pair)
- Hat &Toque
- Sunglasses
- Gloves
- Trail Runners or Hiking Boots
- Camp Shoes (optional)
- Low trail running gaiter (optional)
Additional Items
- Microspikes (early season only)
- Sunscreen & SPF lim balm
- Bug Spray
- Tooth Brush & Toothpaste tabs in ziplock
- Duct Tape (for repairs and blisters)
- Food (I love these soups/chilis)
Luxury Items (very optional)
How to Get a Permit for the Rockwall trail
Trekking the Rockwall Trail is such a memorable backpacking trip that your biggest challenge is likely to be securing the right to do it. Reservations for many dates/campsites along the Rockwall book up days after Parks Canada opens the reservation system (usually at the end of January) and no permits are allocated for walk-ups. If you’re planning on doing this trek during peak season, set a reminder and plan ahead to avoid missing out.
To get a permit for the Rockwall Trail you can either call Parks Canada at 1-877-737-3783 or use the online system for Kootenay National Park.
You must start by selecting your starting trailhead, either:
- Paint Pots Trailhead – if heading North to South
- Floe Lake Trailhead- if heading South to North
After picking your starting trailhead you’ll select the campsites you’ll stay at each night. For help with that, refer to the itinerary section below.
When to Hike the Rockwall
The Rockwall Trail is best hiked between early-mid July and mid September. Any earlier and the passes can still be snowbound and sections can be subject to avalanche danger. Later season trips provide a means to beat the crowds and gain booking flexibility. The downside is that the days get shorter, the nights get colder, and there is a significant chance of early season storms disrupting or canceling your hike all together.
My recommendation on when to hike it
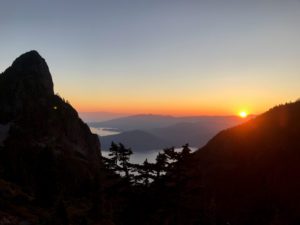
I hiked the Rockwall in early October snow-free, but the nights were chilly (woke up to significant frost) and we used up the majority of daylight hours to complete the Rockwall in 2 nights. If you get lucky with weather and are prepared for the potential of cold-weather/snow, fall can be the perfect time to take this trip and you’ll experience solitude unlike any other time of year. We hiked the first 40 km before encountering another group, camped alone at Tumbling Creek, and shared Floe lake with only 4 other parties. With demand for reservations falling off significantly after the middle of September, it’s possible to reserve a permit the day before starting a trip (especially during the week). If you are prepared for the challenges of late season hiking, this is the way to go, so keep your eyes glued to the forecast and make a last minute decision. You might end up having this incredible hike all to yourself!
How to Get to the Trailheads - Shuttles & Transportation
The Rockwall Trail starts from either Floe Lake Trailhead or Paint Pots Trailhead in Kootenay National Park, approximately 50 km from Banff (Paint Pots) and 175 km from the city of Calgary. The Floe Lake and Paint Pots trailheads are 13 km apart on the Kootenay Parkway Highway 93, making transportation between trailheads a required annoyance. Your options for dealing with this are as follows:
- Take 2 cars and leave one at each trailhead.
- Hitchhike. If you’re electing this option, the best bet is to start your trip with the hitchhike. You get it over with and are more likely to get picked up as you look all fresh and clean! Consider making a small sign on a piece of paper that says “Hiker: only going 13 km” (helps take the edge off by helping drivers realize that even if you’re a weirdo, they won’t be stuck with you for long).
- Bet on your social skills and charm (busy season only). Meet someone on the trail or at the parking lot that will drive you to your car. Bring desirable backpacking bribes (think dessert, candy, pocket cocktails) to help lubricate negotiations.
- Convince a friend, spouse, parent, or lover to drop you off and pick you up! Just make sure you arrange all the details in advance as there is no cell service!
Which Direction Should You Hike the Rockwall Trail?
The Rockwall can be hiked:
- North to South starting at Paint Pots trailhead and ending at Floe Lake trailhead, or
- South to North starting at Paint Pots and ending at Floe Lake trailhead.
Quite frankly, you should be happy if you get a permit going either direction given how hard it is to snag sites. The hike is awesome no matter how you do it! Floe Lake tends to be the most popular campsite and as a result your itinerary may be dictated by the available dates for camping here.
I hiked the Rockwall North to South and if I had to choose I’d do that again. Doing it this way lets you enjoy camping at Floe Lake on your last night. Floe Lake is the pièce de résistance of the Rockwall campsites, and enjoying sunrise here is an epic way to cap your trip.
How Long Does it Take to Hike the Rockwall?
The Rockwall can be backpacked in 2-5 days depending on how much mileage you’d like to cover each day. In my opinion the sweet spot for hiking the Rockwall is 2-3 nights for reasonably conditioned hikers who are mindful of their pack weight. You’ll start early and typically finish in the later afternoon. You’ll have full days of hiking, but leave plenty of time for photos, snack breaks, and lunch. If you’re someone that likes slow mornings or lazing around camp in the afternoon, go for 4 nights – that’ll be perfect.
The shorter you go for, the more important it is to be cognizant of your pack weight and what you’re packing (see the what to pack section). Pack weight makes a huge difference in your enjoyment levels during long days on the trail.
Rockwall Trail Sections
The Rockwall Trail is best thought of as 5 unique sections. Here’s a quick breakdown of each section described for a North to South trip (Paint Pots to Floe Lake Trailhead). If you’re going South to North, use your imagination and remember uphill changes to downhill! 😉
Paint Pots Trailhead to Helmet Falls - 14.2 km
14.2 KM - 500 M elevation gain / 200 M elevation loss
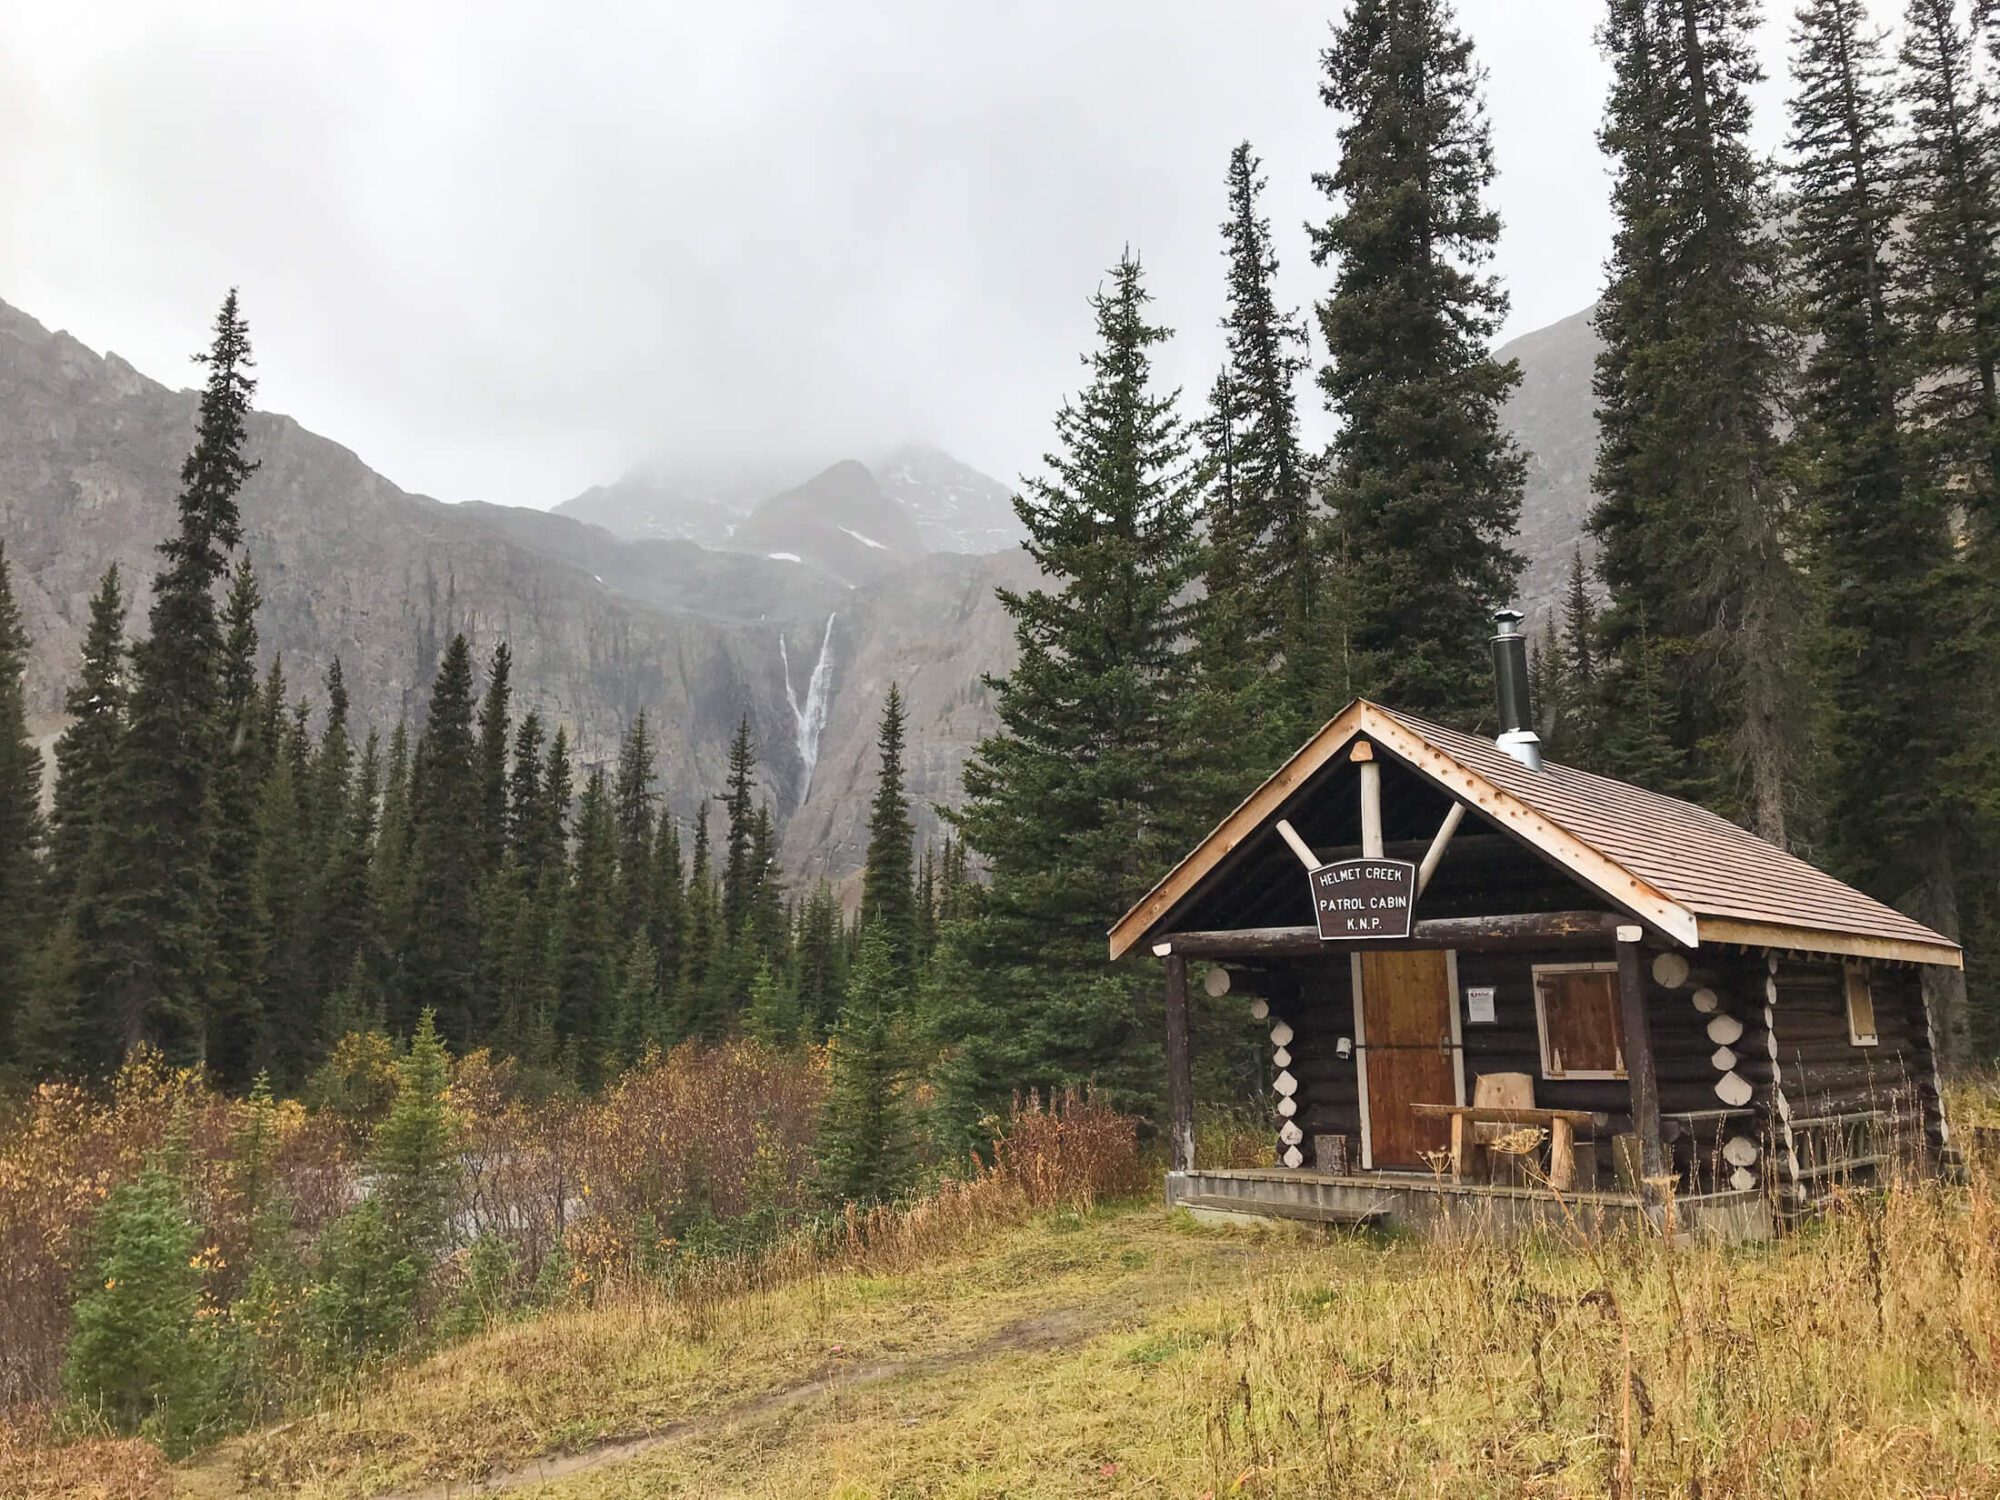
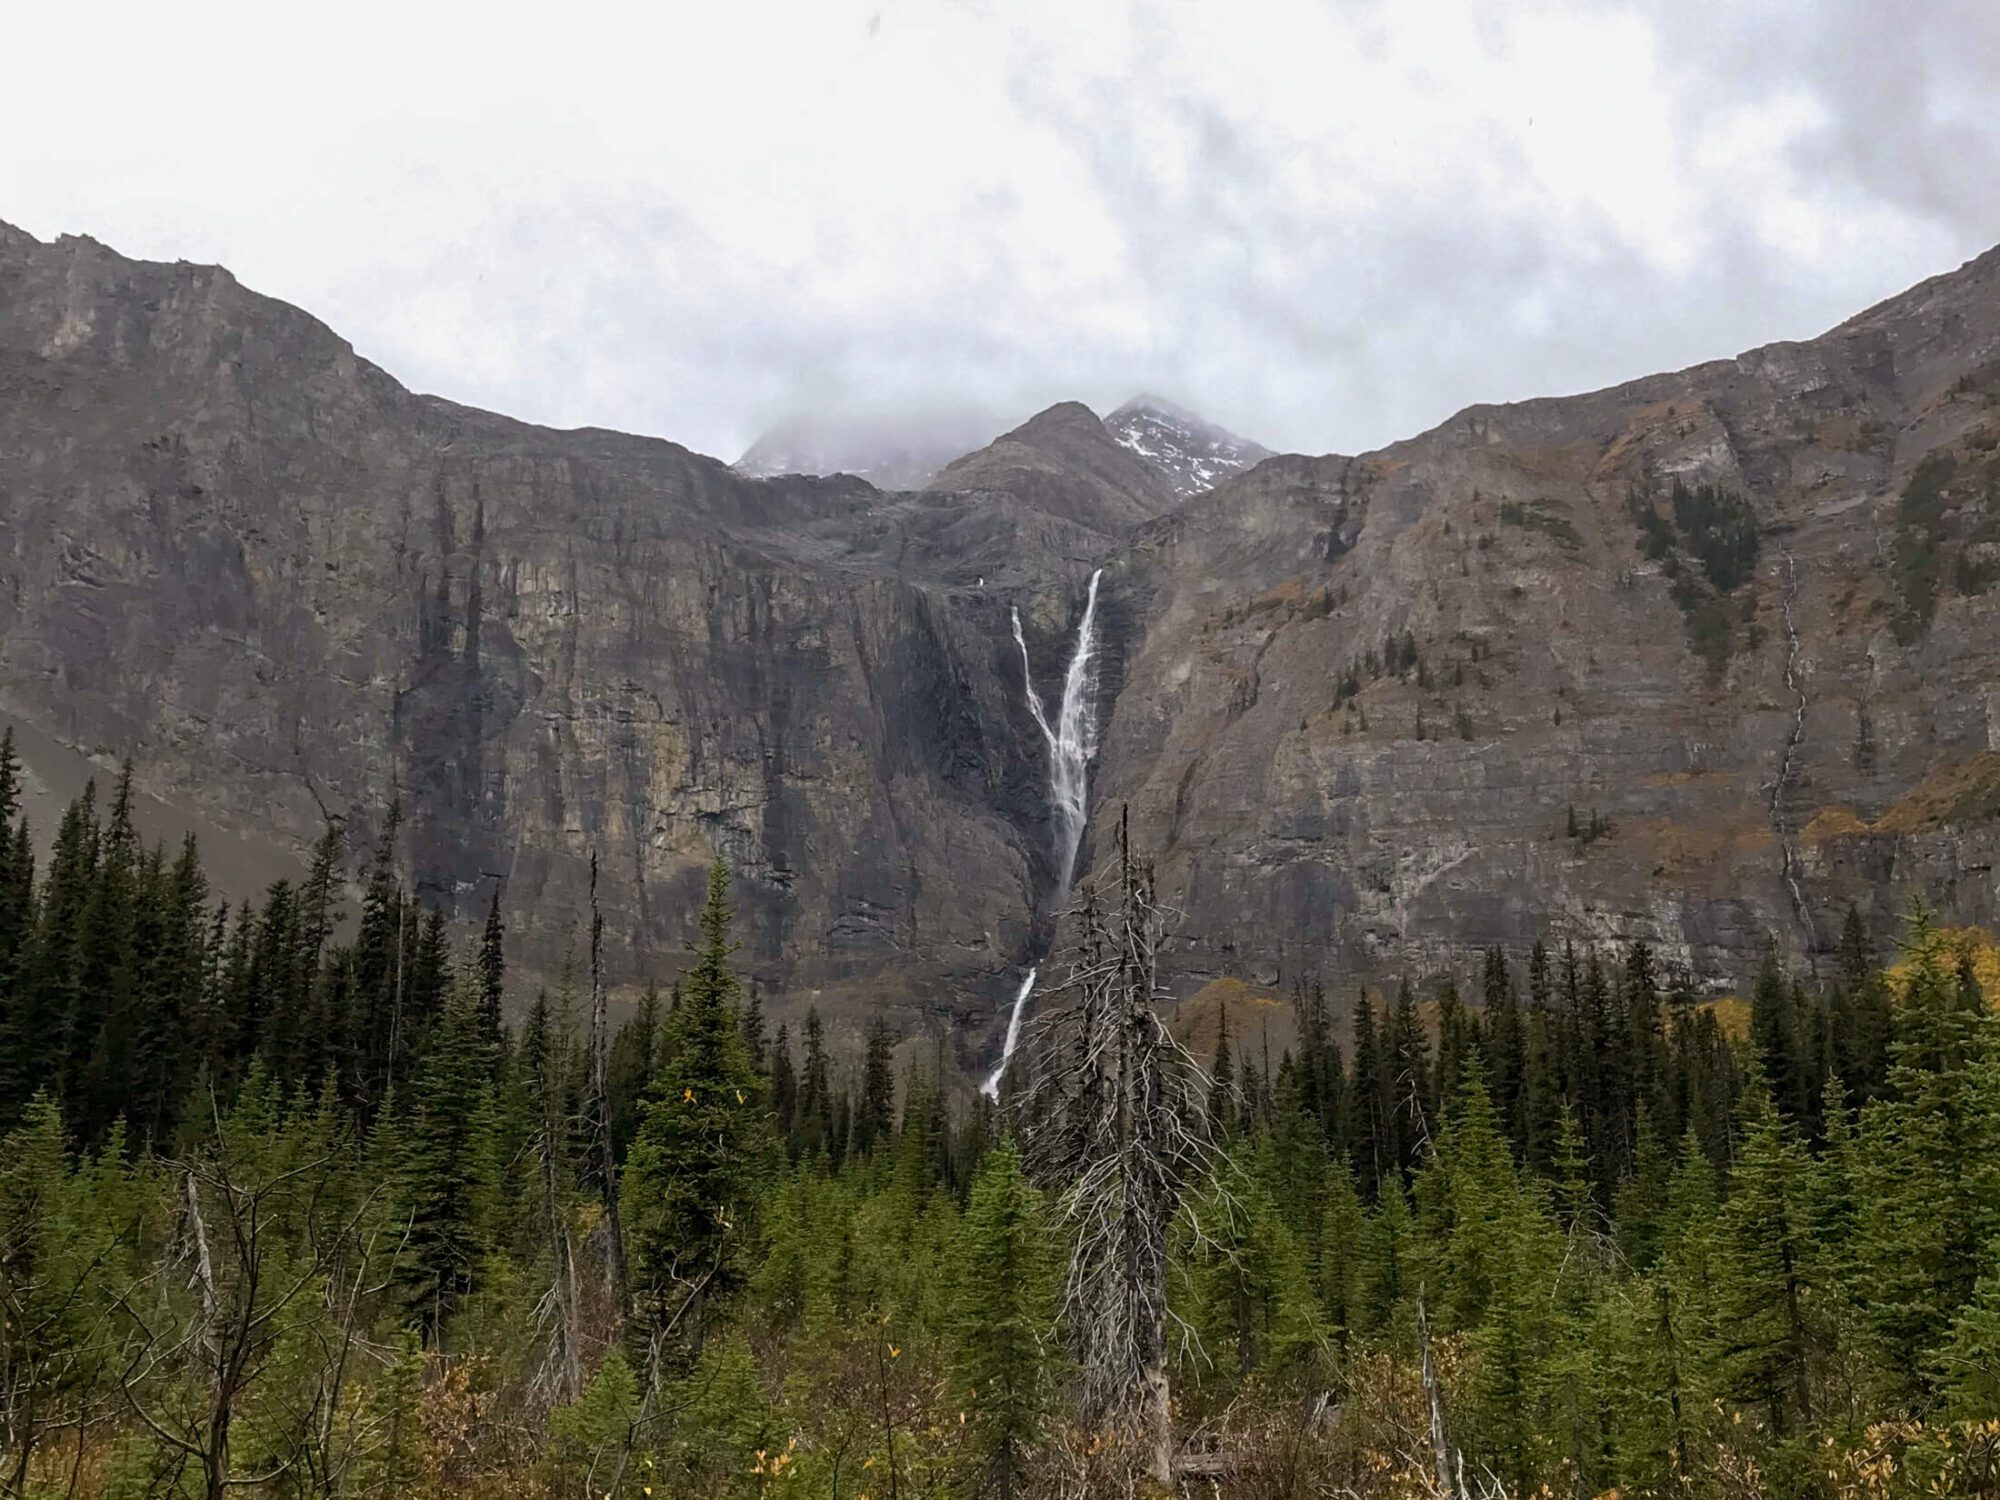
The opening section of the Rockwall takes you through lush forest until you pass the Helmet-Ochre junction campground at 8.2 km. Shortly after Helmet-Ochre Campground the trail swiftly gains elevation for about a kilometer before continuing at a more gradual pace up to the Helmet Falls Campground. By the time you reach this campground, you’re 14 km into your trip and starting to get a real taste of some of the scenery to come! The campground is situated between the tributaries of Helmet Creek and 350m Helmet Falls crashes down in the distance. Take a breath, soak it all in, and taste that mountain air with an essence of waterfall mist! Yum! A short side trip takes you closer to the base of the falls for a closer look. Stay here for the night if it’s on the itinerary, if not, proceed to the next level.
Helmet Falls to Tumbling Creek over Rockwall Pass- 12.3 KM
12.3 KM - 700 M elevation gain / 500 M elevation loss
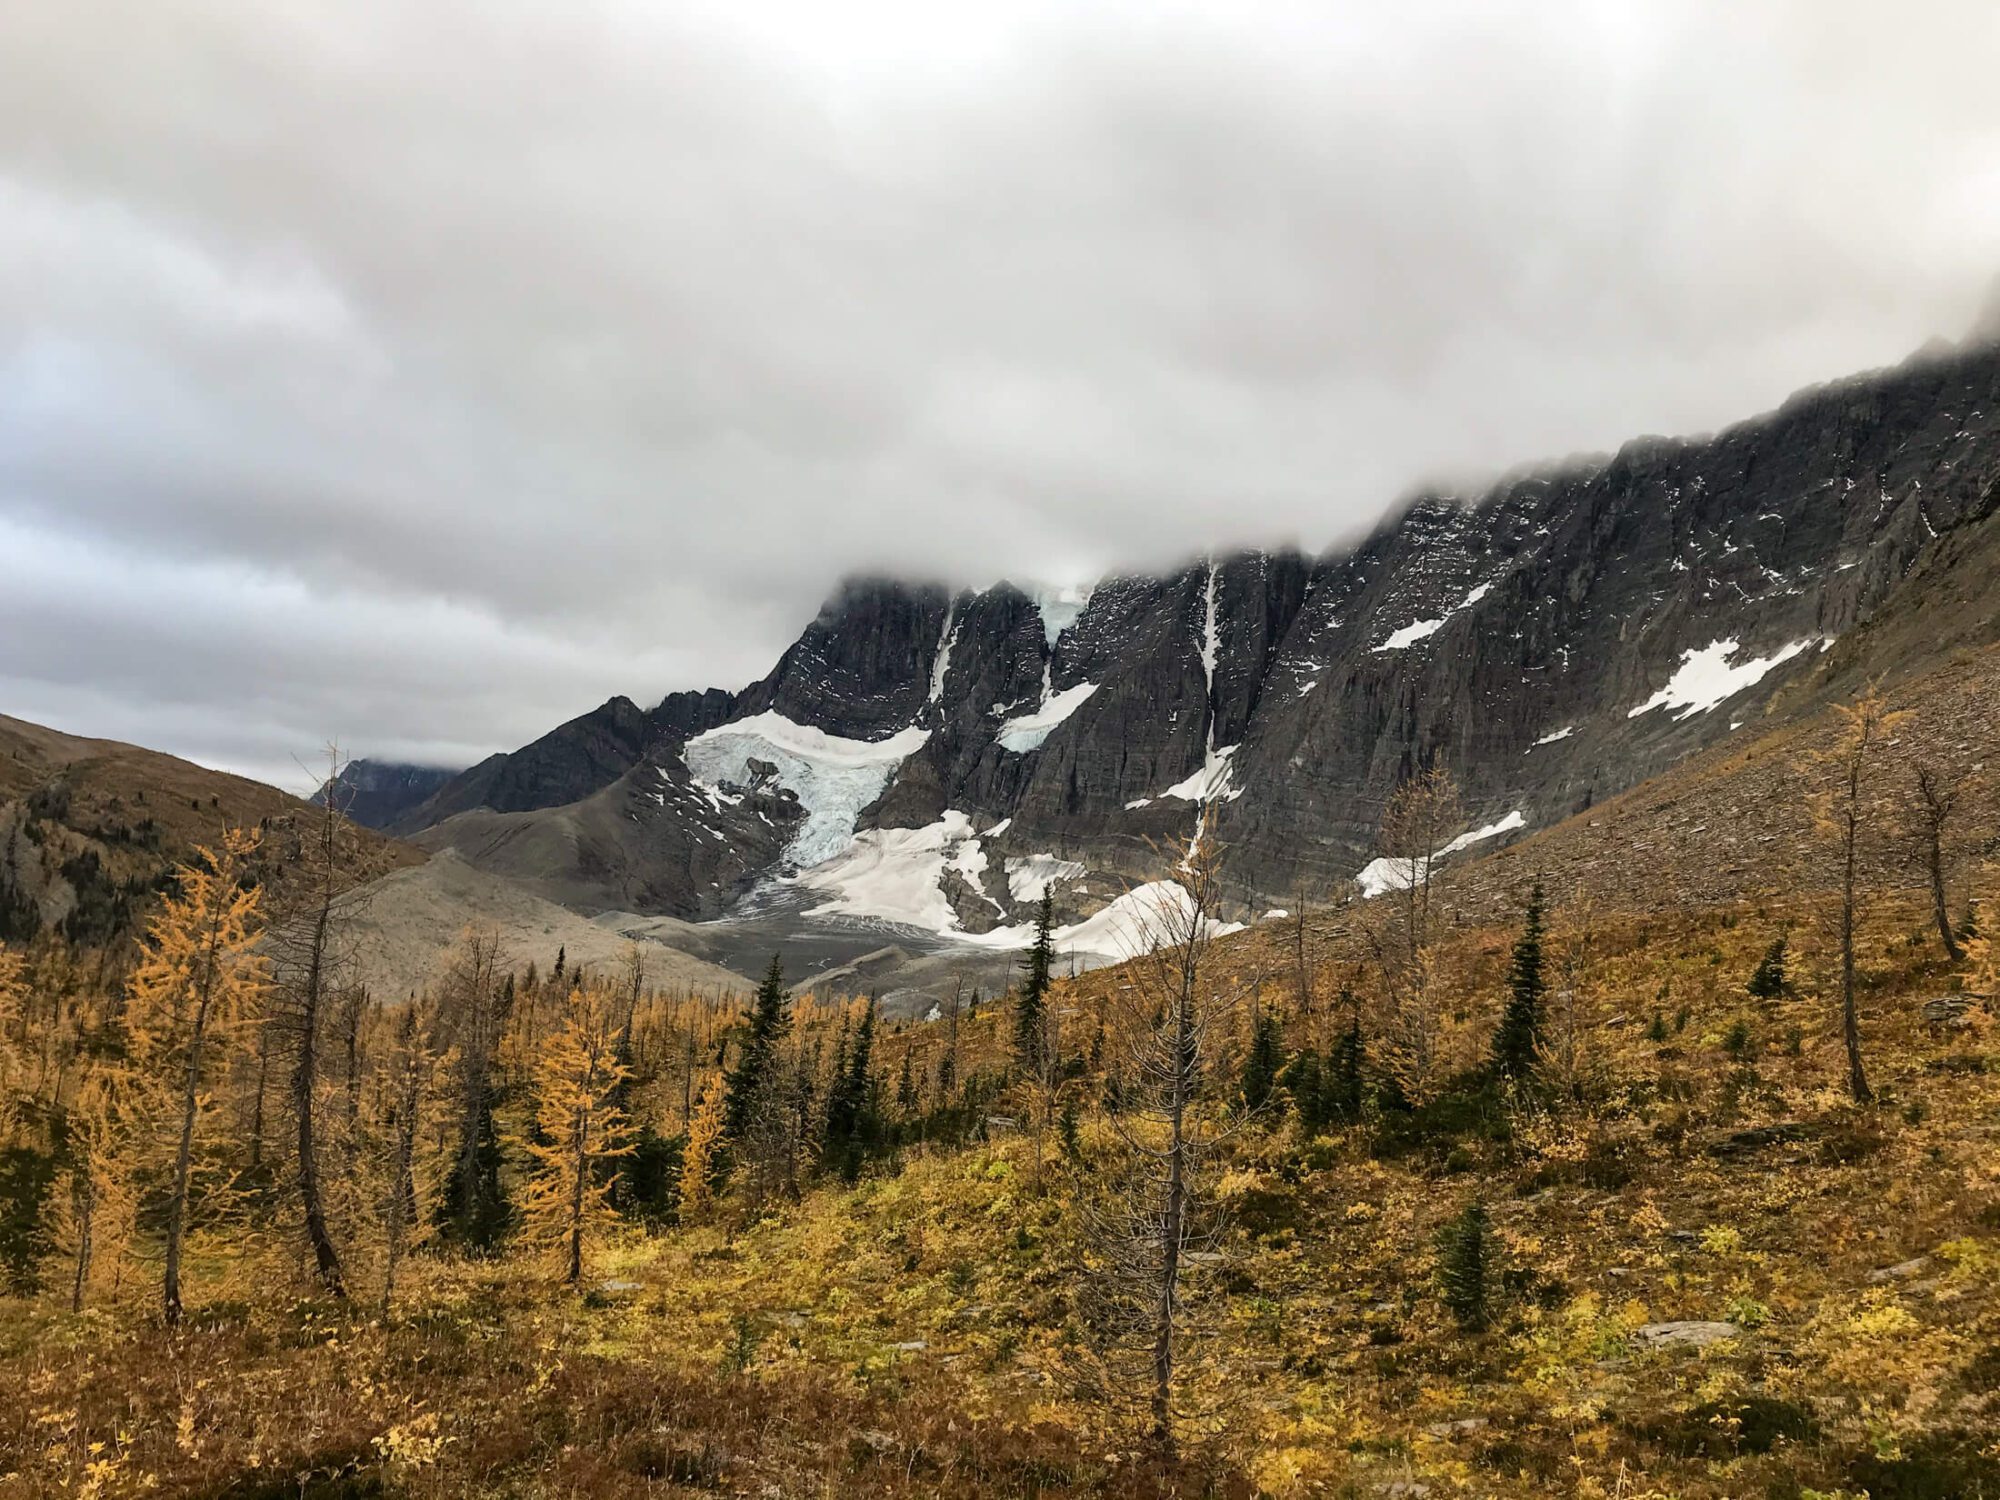
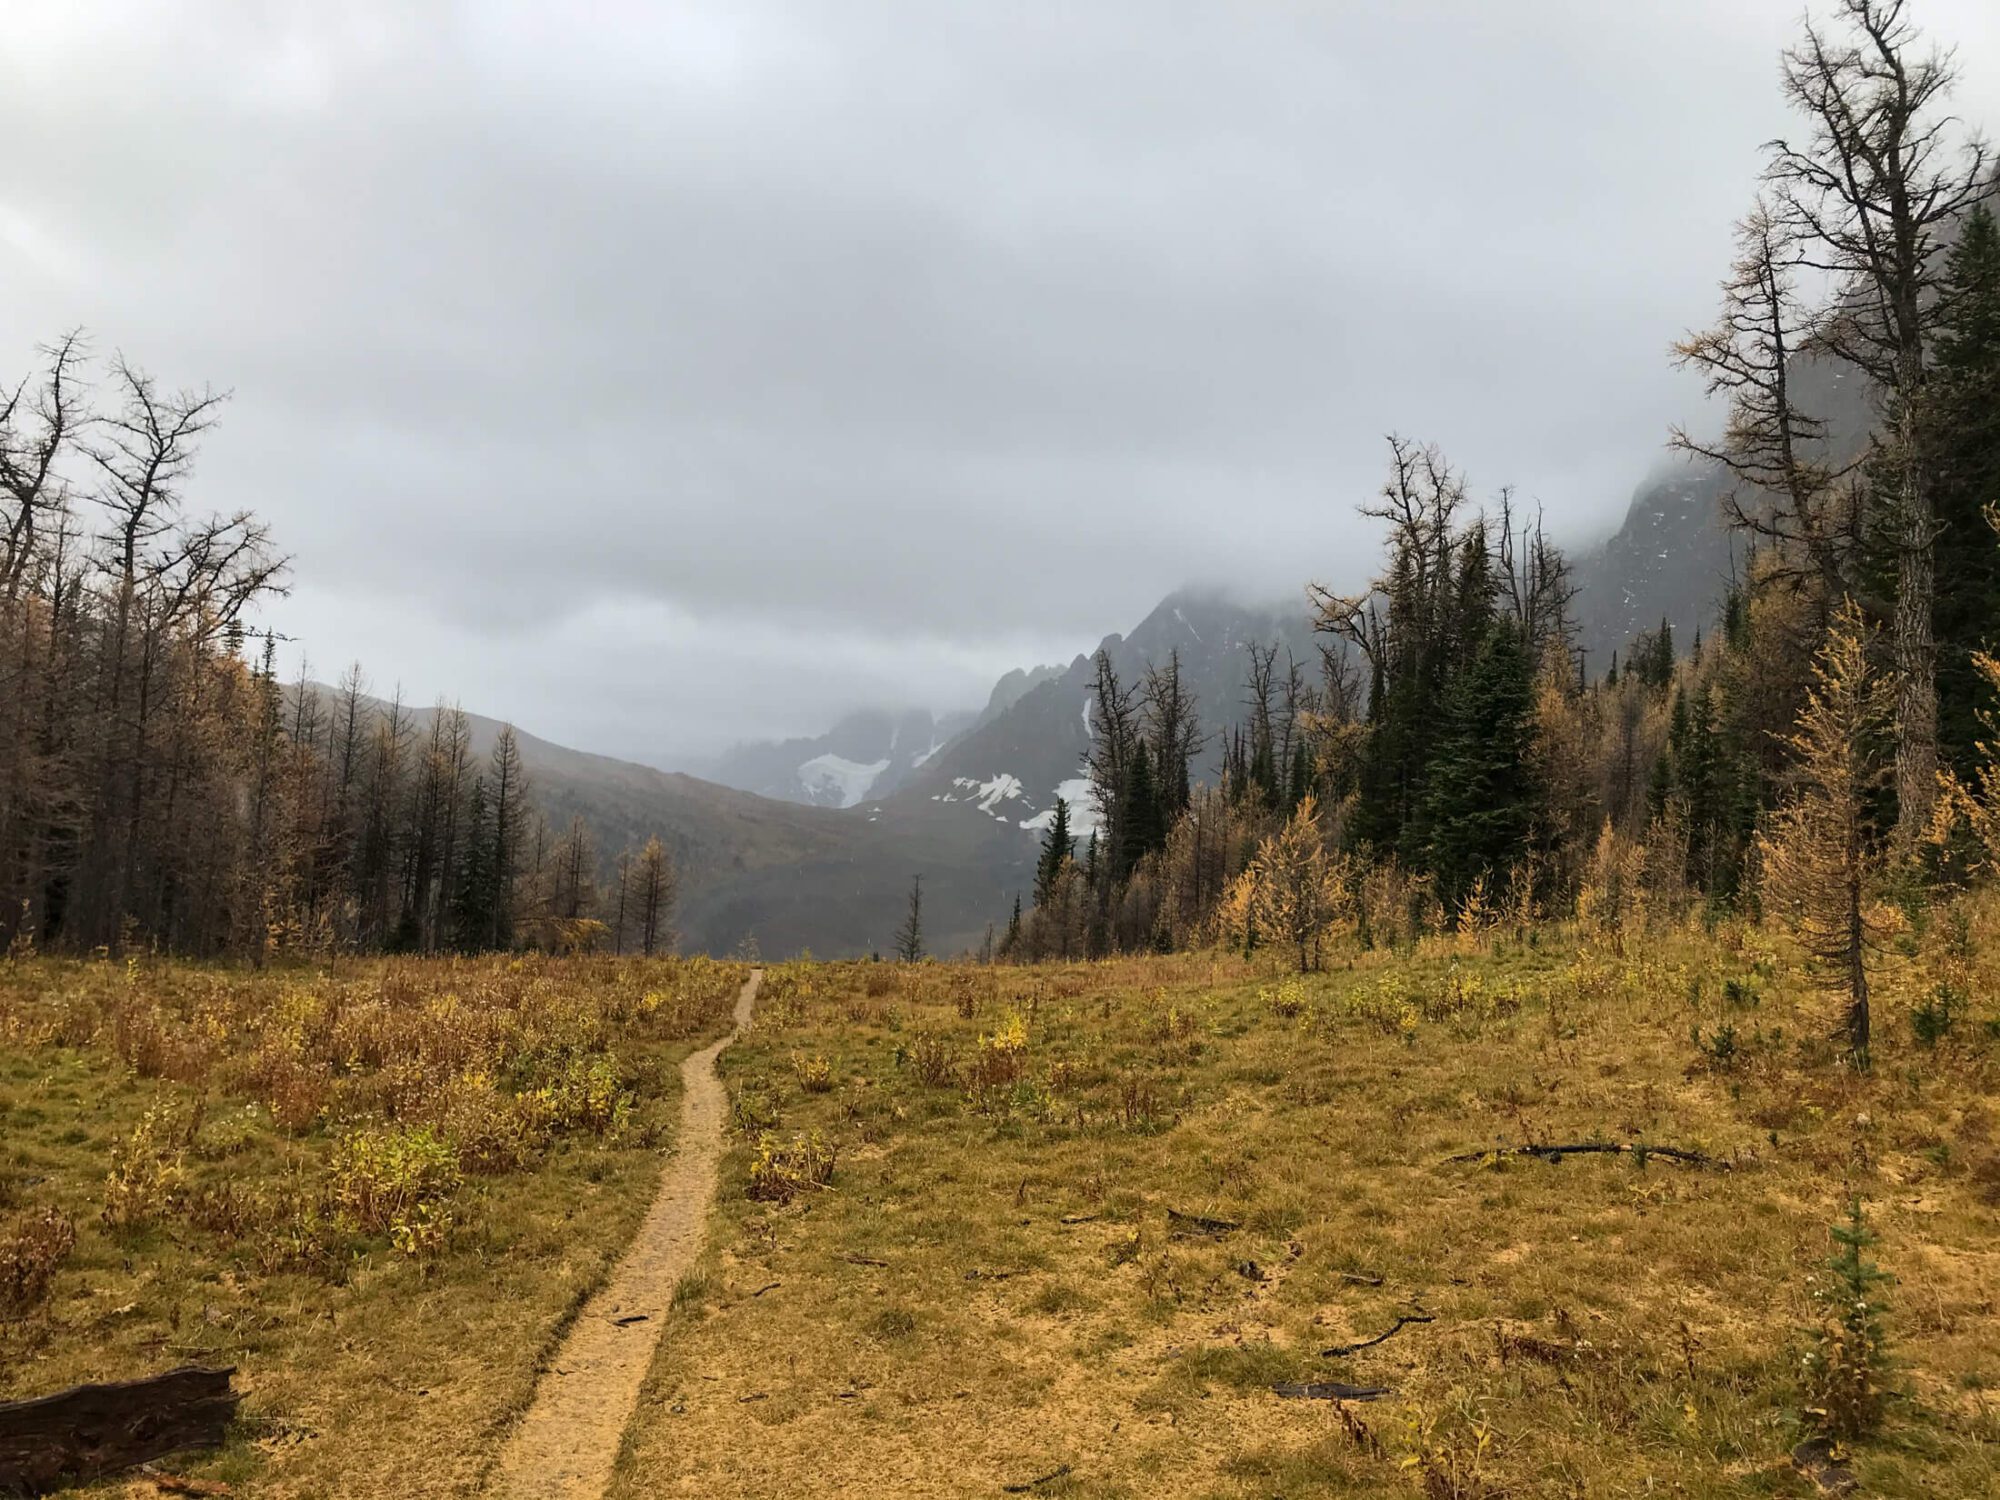
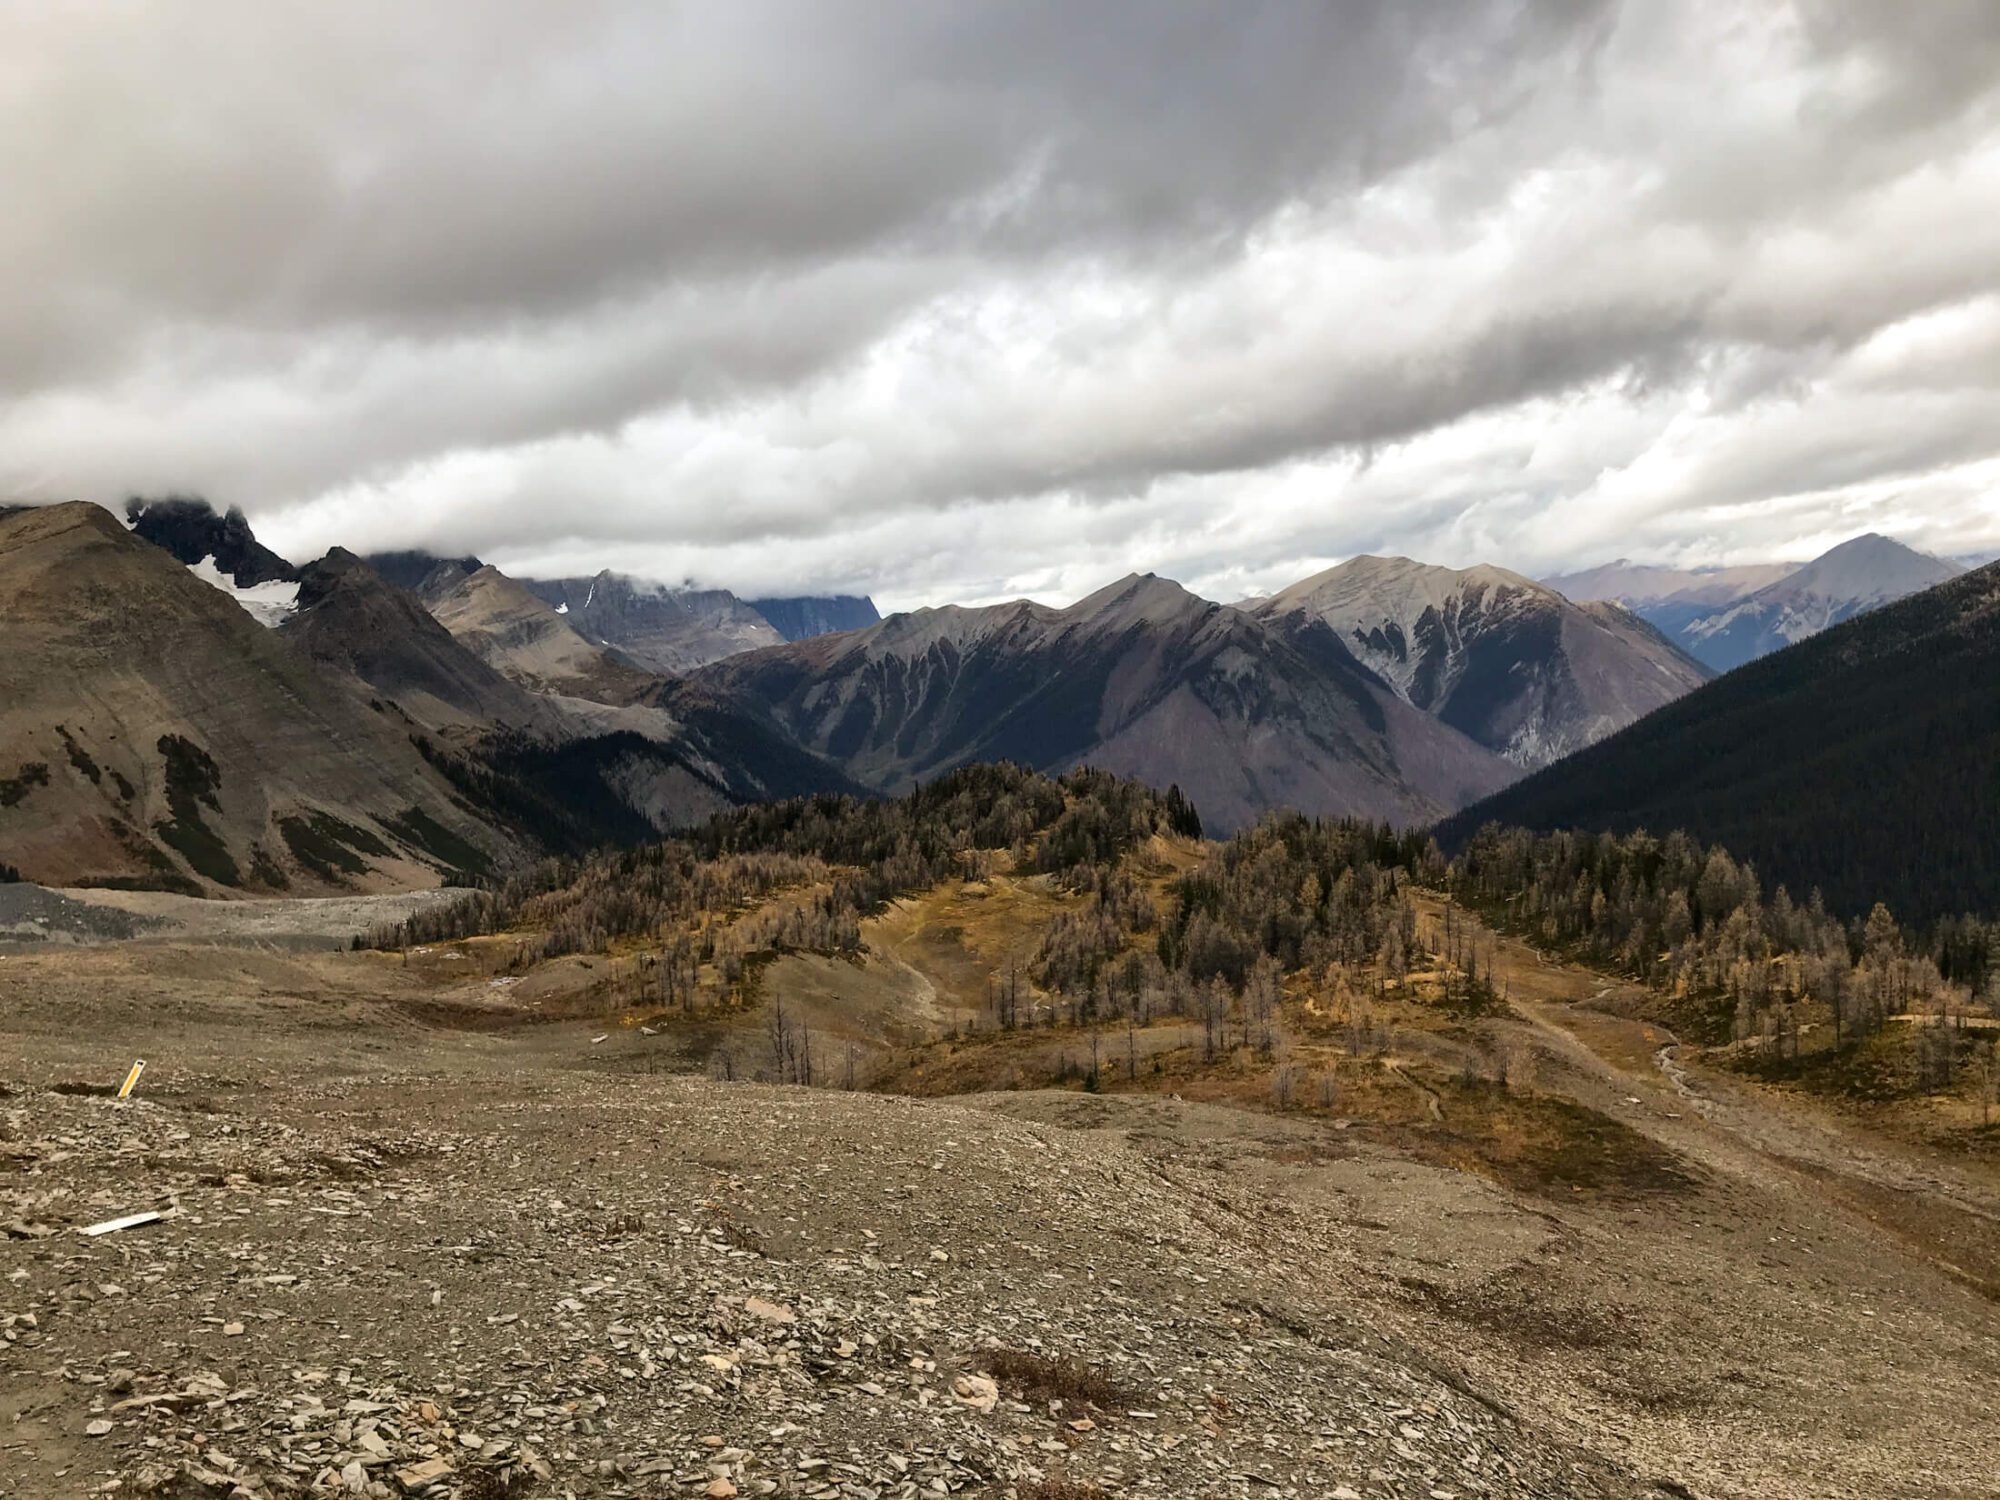
After departing the Helmet Creek Campground the trail begins an ascent, climbing over 400m in just over 3 km to Limestone Summit. This hard work gives you your first close-up of the incredible Rockwall. Take it in and enjoy. Erosive forces have been working relentlessly for millennia to create this view for you and your Instagram followers! Show ‘em some love and savor it! After your climb, you’ll descend towards the south fork of Helmet Creek before climbing again to Rockwall Pass and eventually passing the junction for Wolverine Pass where a short side trip leads to the border of Kootenay National Park. The scenery along this section is absolutely stunning as you view the Rockwall, alpine meadows and glaciers. Shortly after the junction you’ll make a short but steep descent down to Tumbling Creek Campground with views towards Tumbling Glacier and the Rockwall along the way. The campground is in the trees near the creek.
Tumbling Creek to Numa Creek over Tumbling Pass - 7.9 km
7.9 KM - 400 M elevation gain / 700 M elevation loss
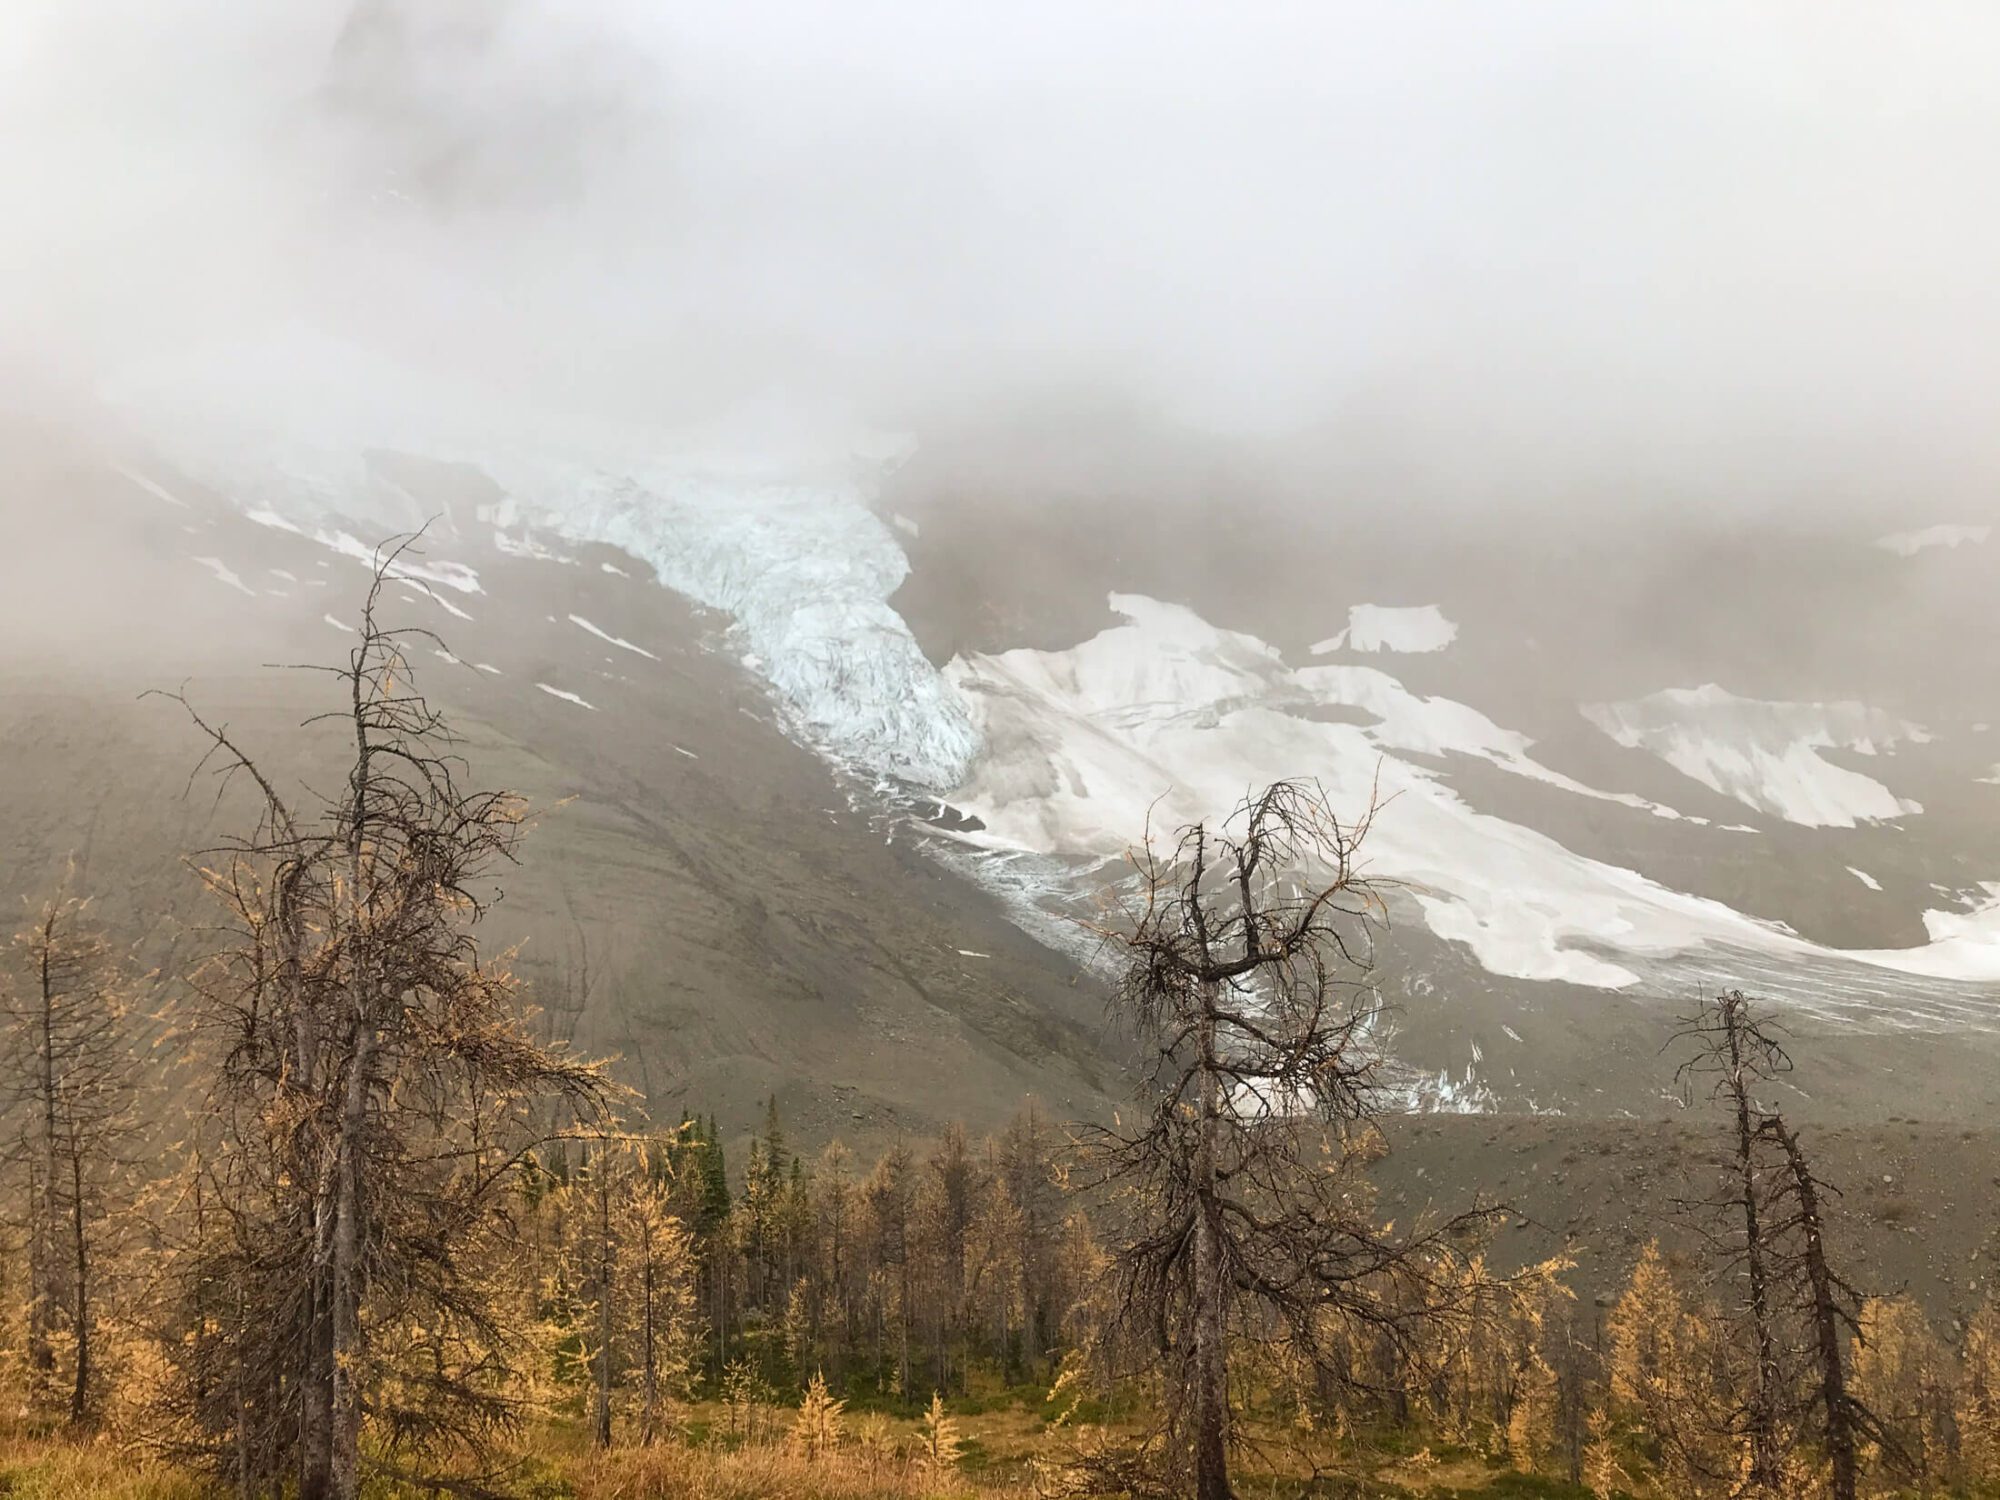
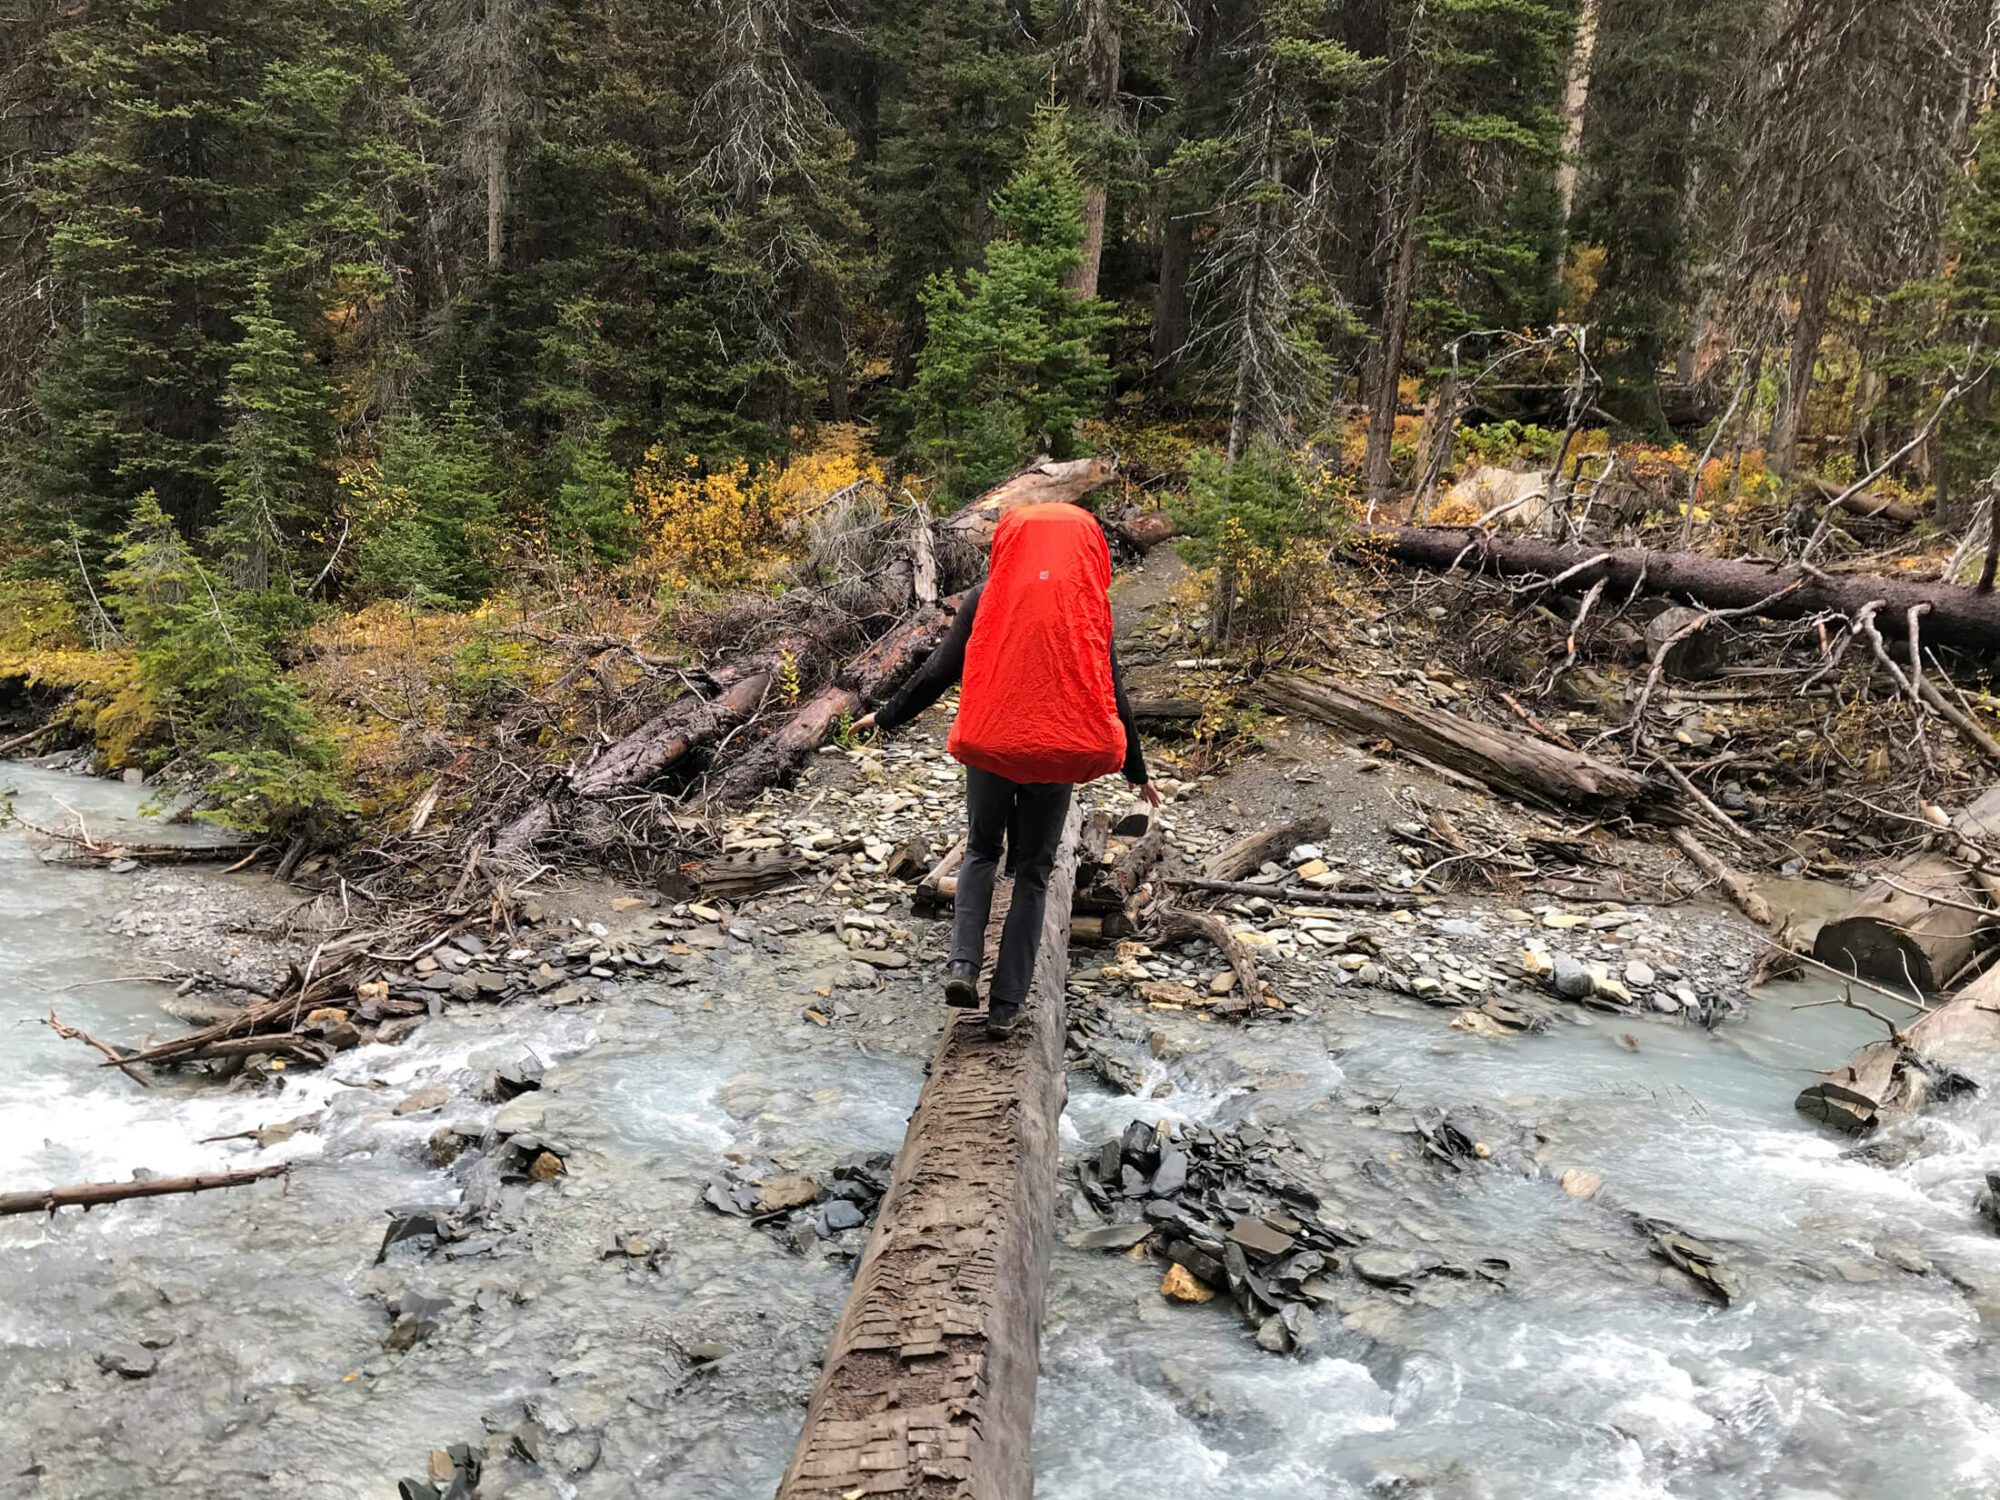
After departing the campground and crossing Tumbling Creek, you’ll fire up the ol’ pegs and begin your ascent up to Tumbling pass gaining 350m in 2.5 km. Go legs go! Walking through subalpine forest, you’ll have views of Tumbling Glacier. After reaching the height of the pass you’ll descend through a boulder meadow before following numerous switchbacks alongside tributaries fed from the glacier above, fording the water on numerous occasions. As you descend and hear the roar of Numa Creek grow louder, shrubbery begins to surround the trail. Make lots of noise here to avoid sneaking up on a bear enjoying the buffet of berries that can be found in this section. After walking through some lush vegetation that makes you feel as if you’re hiking in the Pacific Northwest, you’ll arrive at Numa Creek Campsite.
Numa Creek to Floe Lake over Numa Pass - 9.2 km
9.4 KM - 800 M elevation gain / 300 M elevation loss
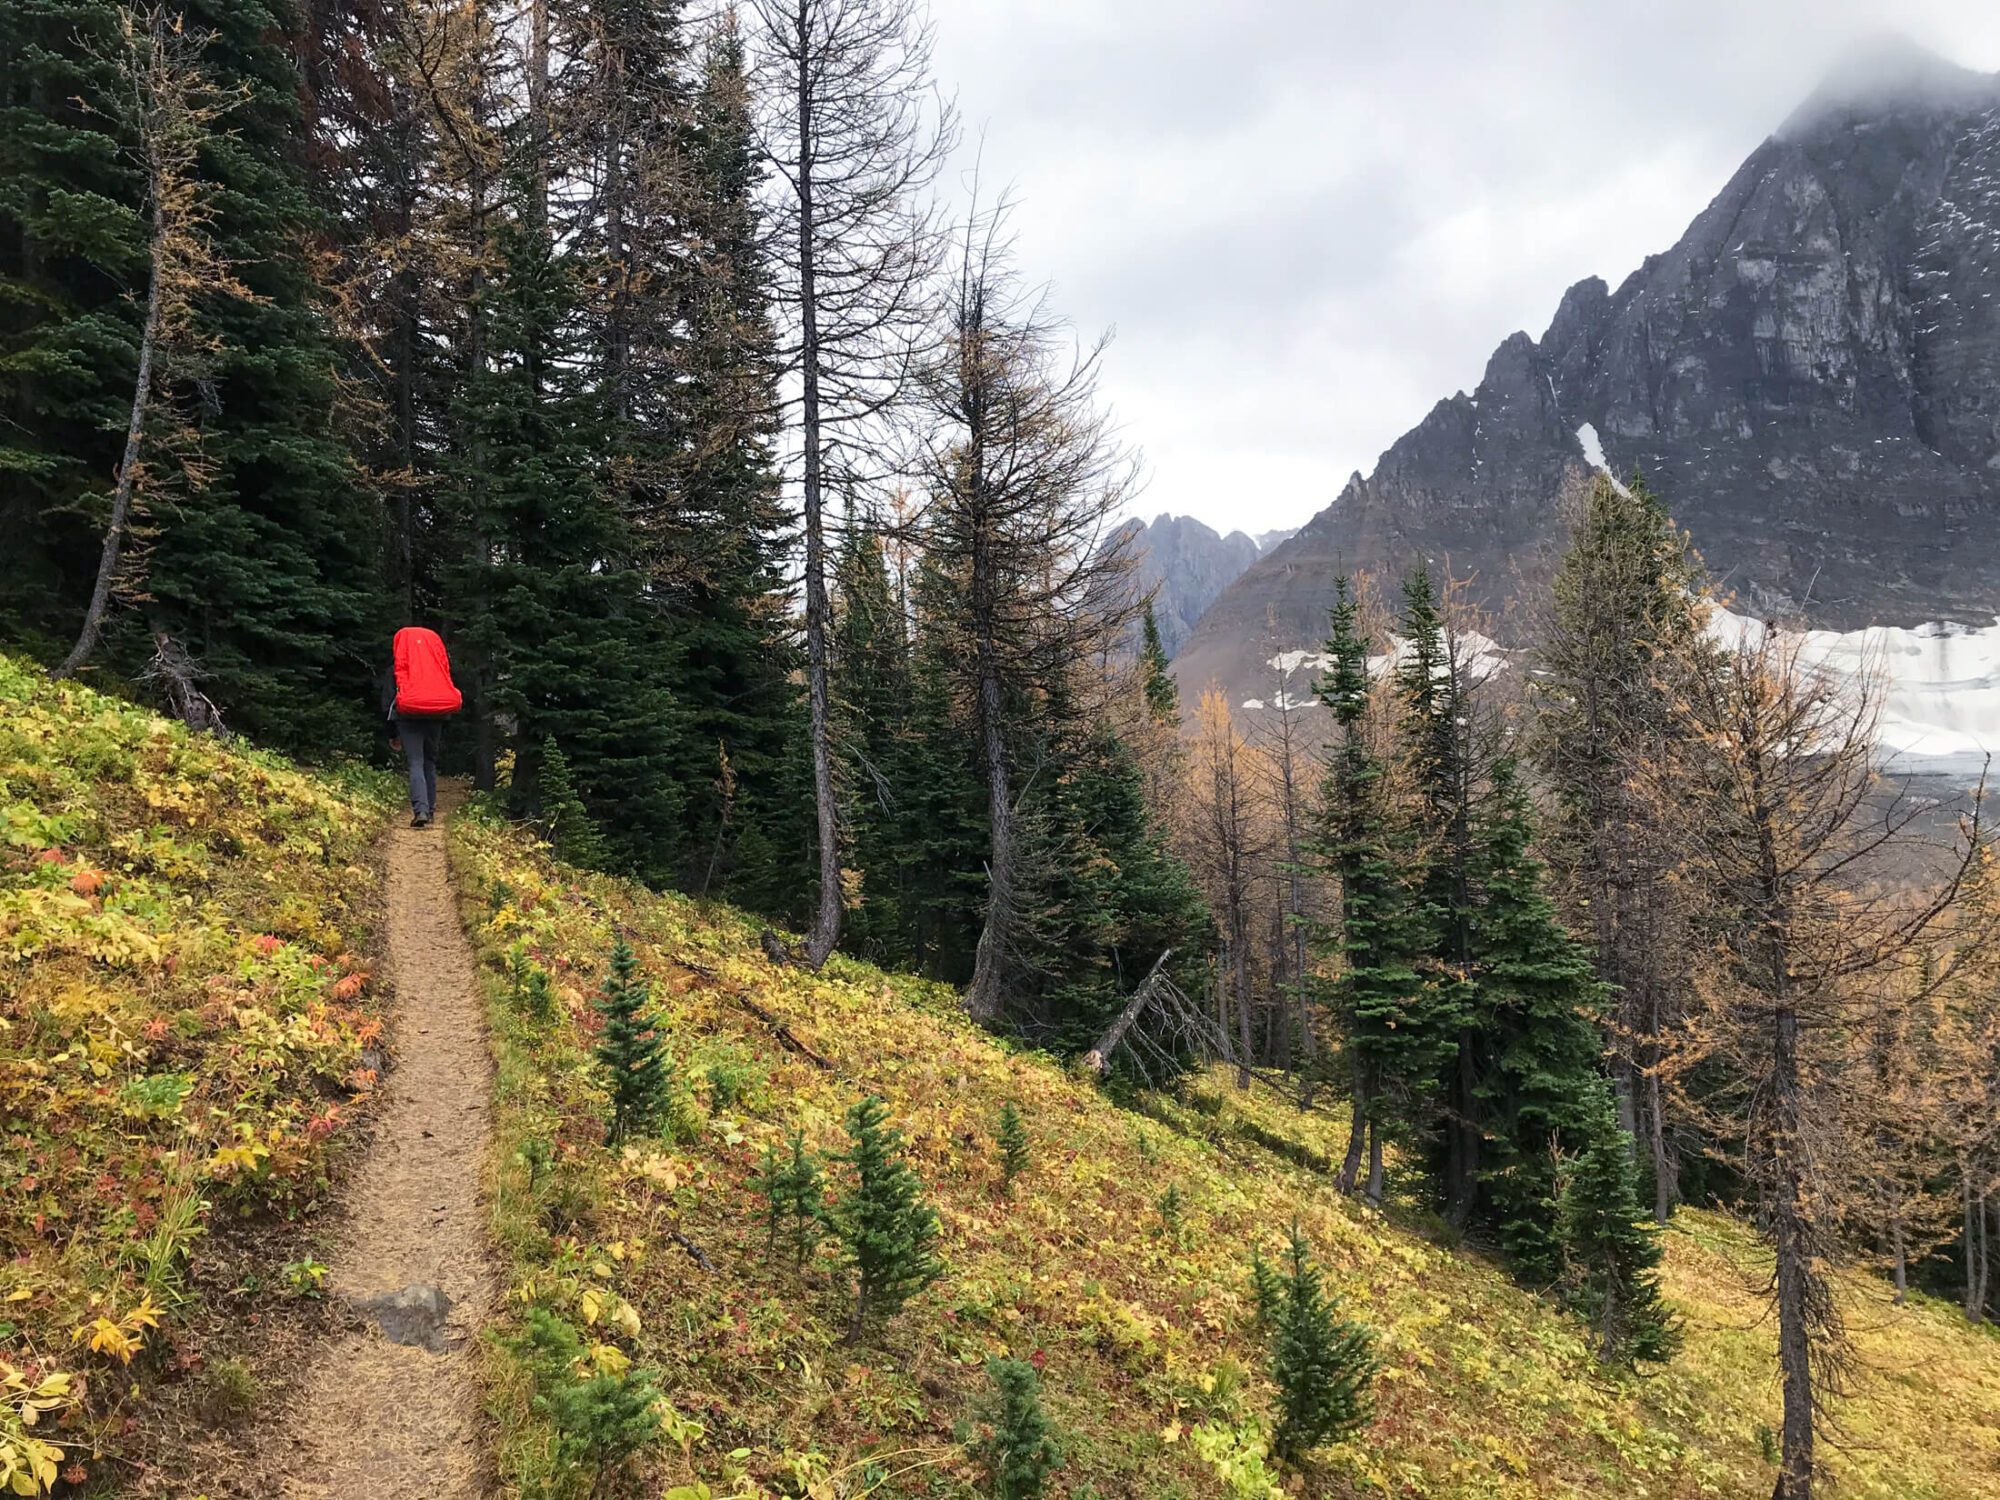
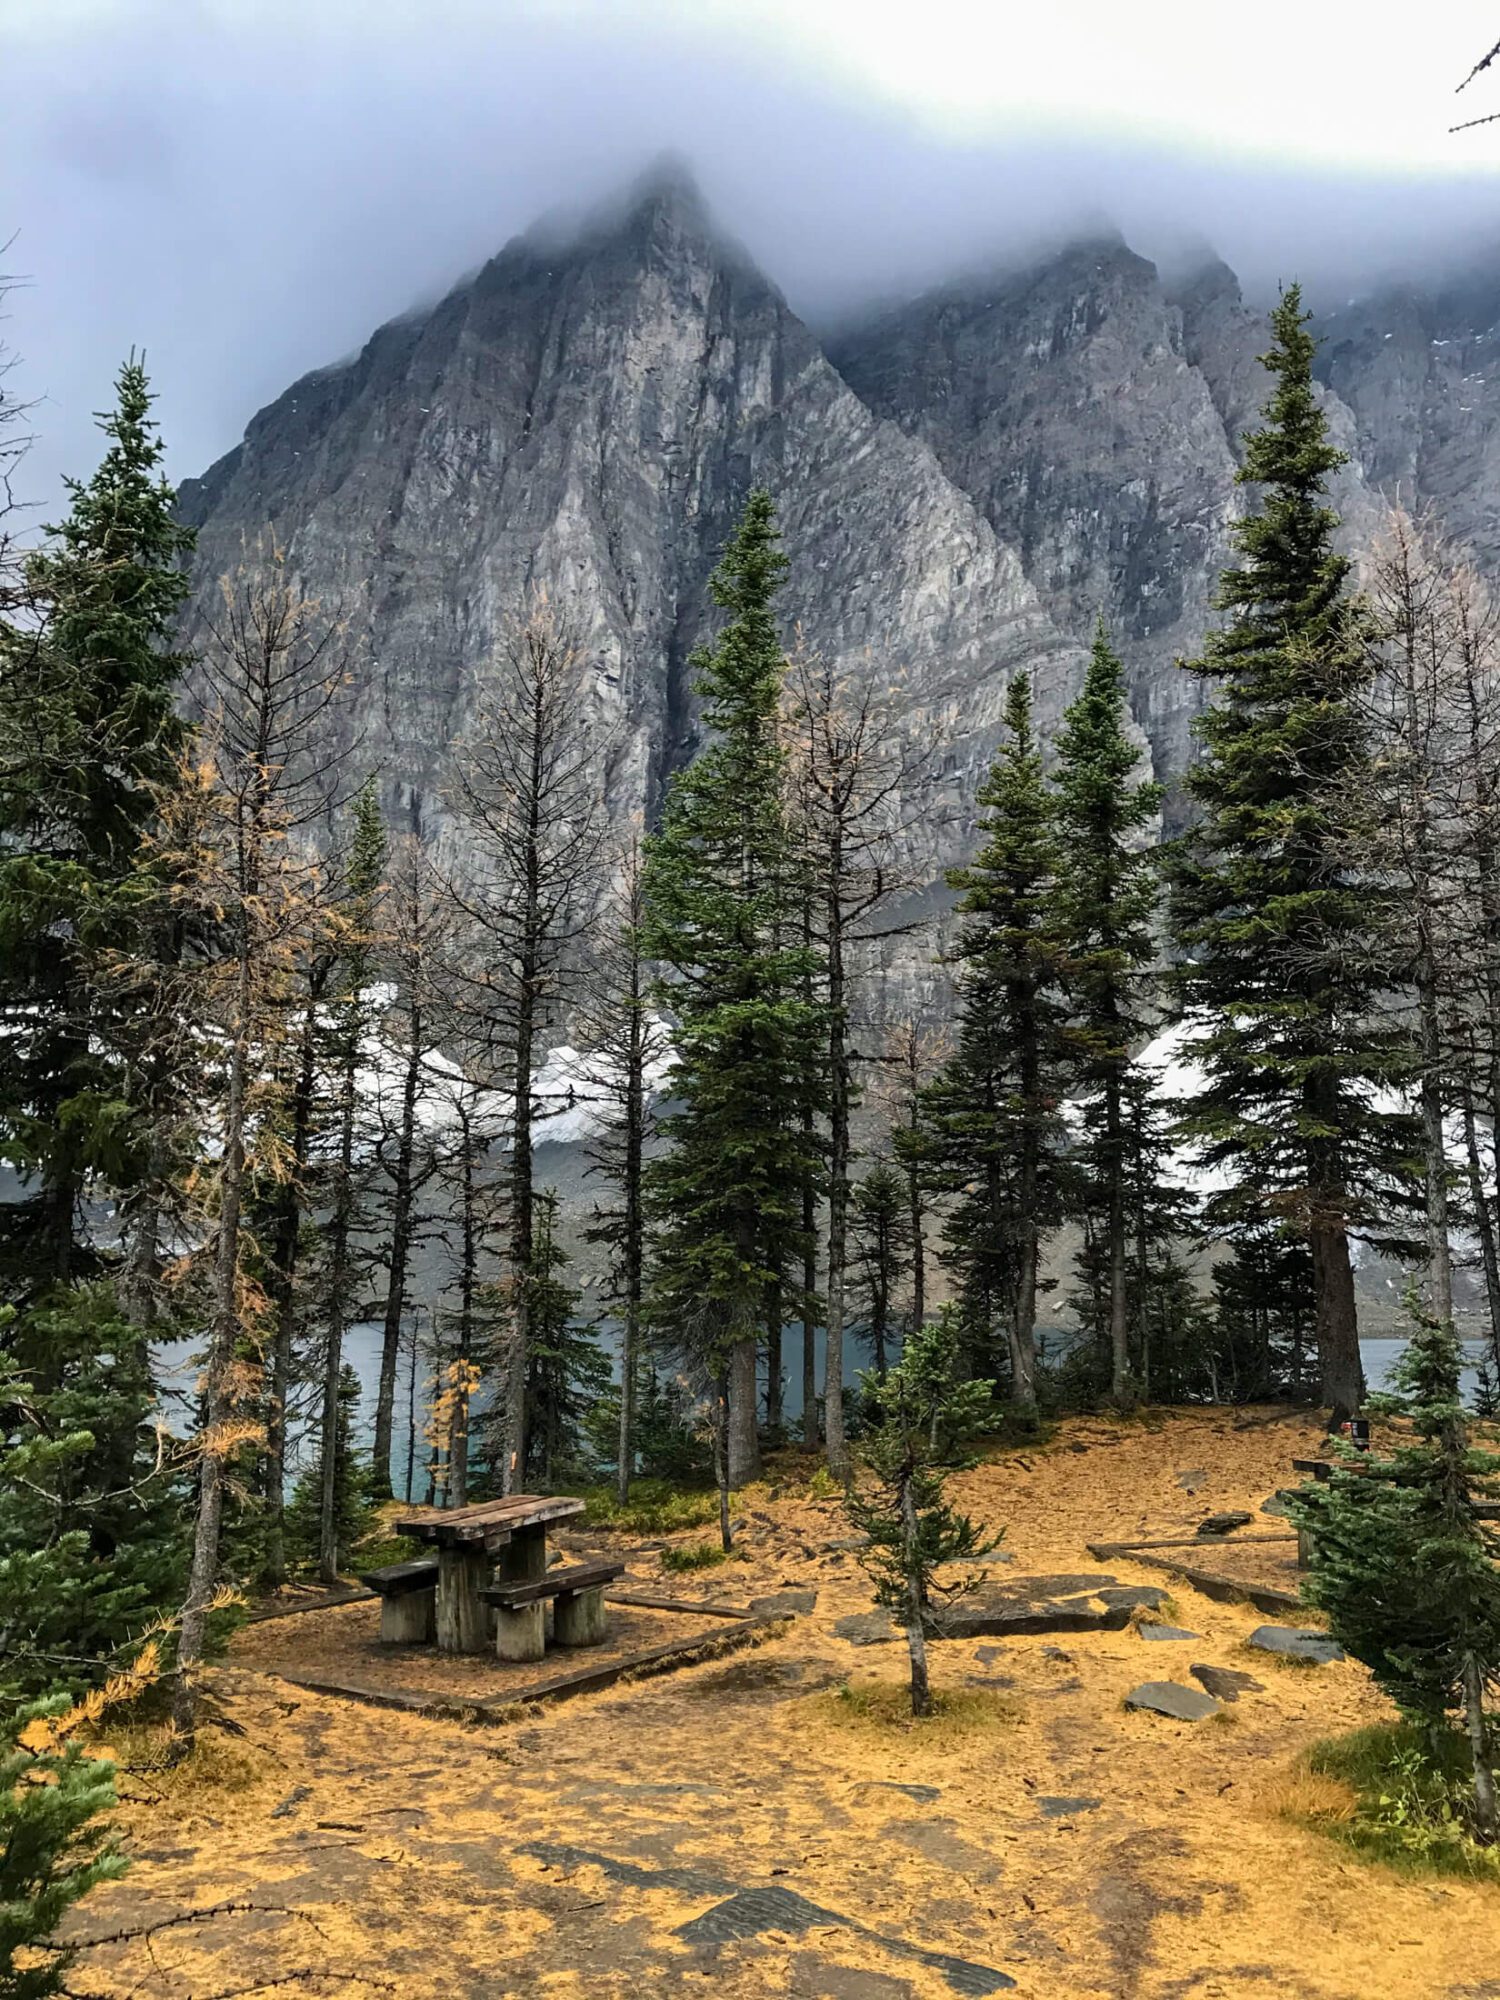
From Numa Creek Campsite, you’ll cross a log bridge over Numa Creek and hike through lush vegetation adjoining multiple avalanche chutes before beginning the climb to Numa Pass, the highest point on the Rockwall Trail. The ascent to Numa Pass is strenuous with 800m of elevation gain in under 7 km. As you near the top the landscape changes from alpine forest to a barren alpine tundra. From Numa Pass incredible vistas greet your weary legs including a glimpse of Mt. Temple to the North. After taking in the view from the pass, continue down through the alpine as you wind through larch glades and seasonal wildflower meadows, noticing as Floe Lake comes closer into view below you. Once you reach Floe Lake there are a couple of frequently occupied tent pads near the water, unfortunately the other sites lack the same view out to the lake. Fortunately, the cooking area is set adjacent to the lake and provides great consolation. Don’t forget to set your alarm, sunrise here is a spectacle to behold!
Floe Lake to Floe Lake Trailhead - 10.5 km
9.4 KM - 150 M elevation gain / 900 M elevation loss
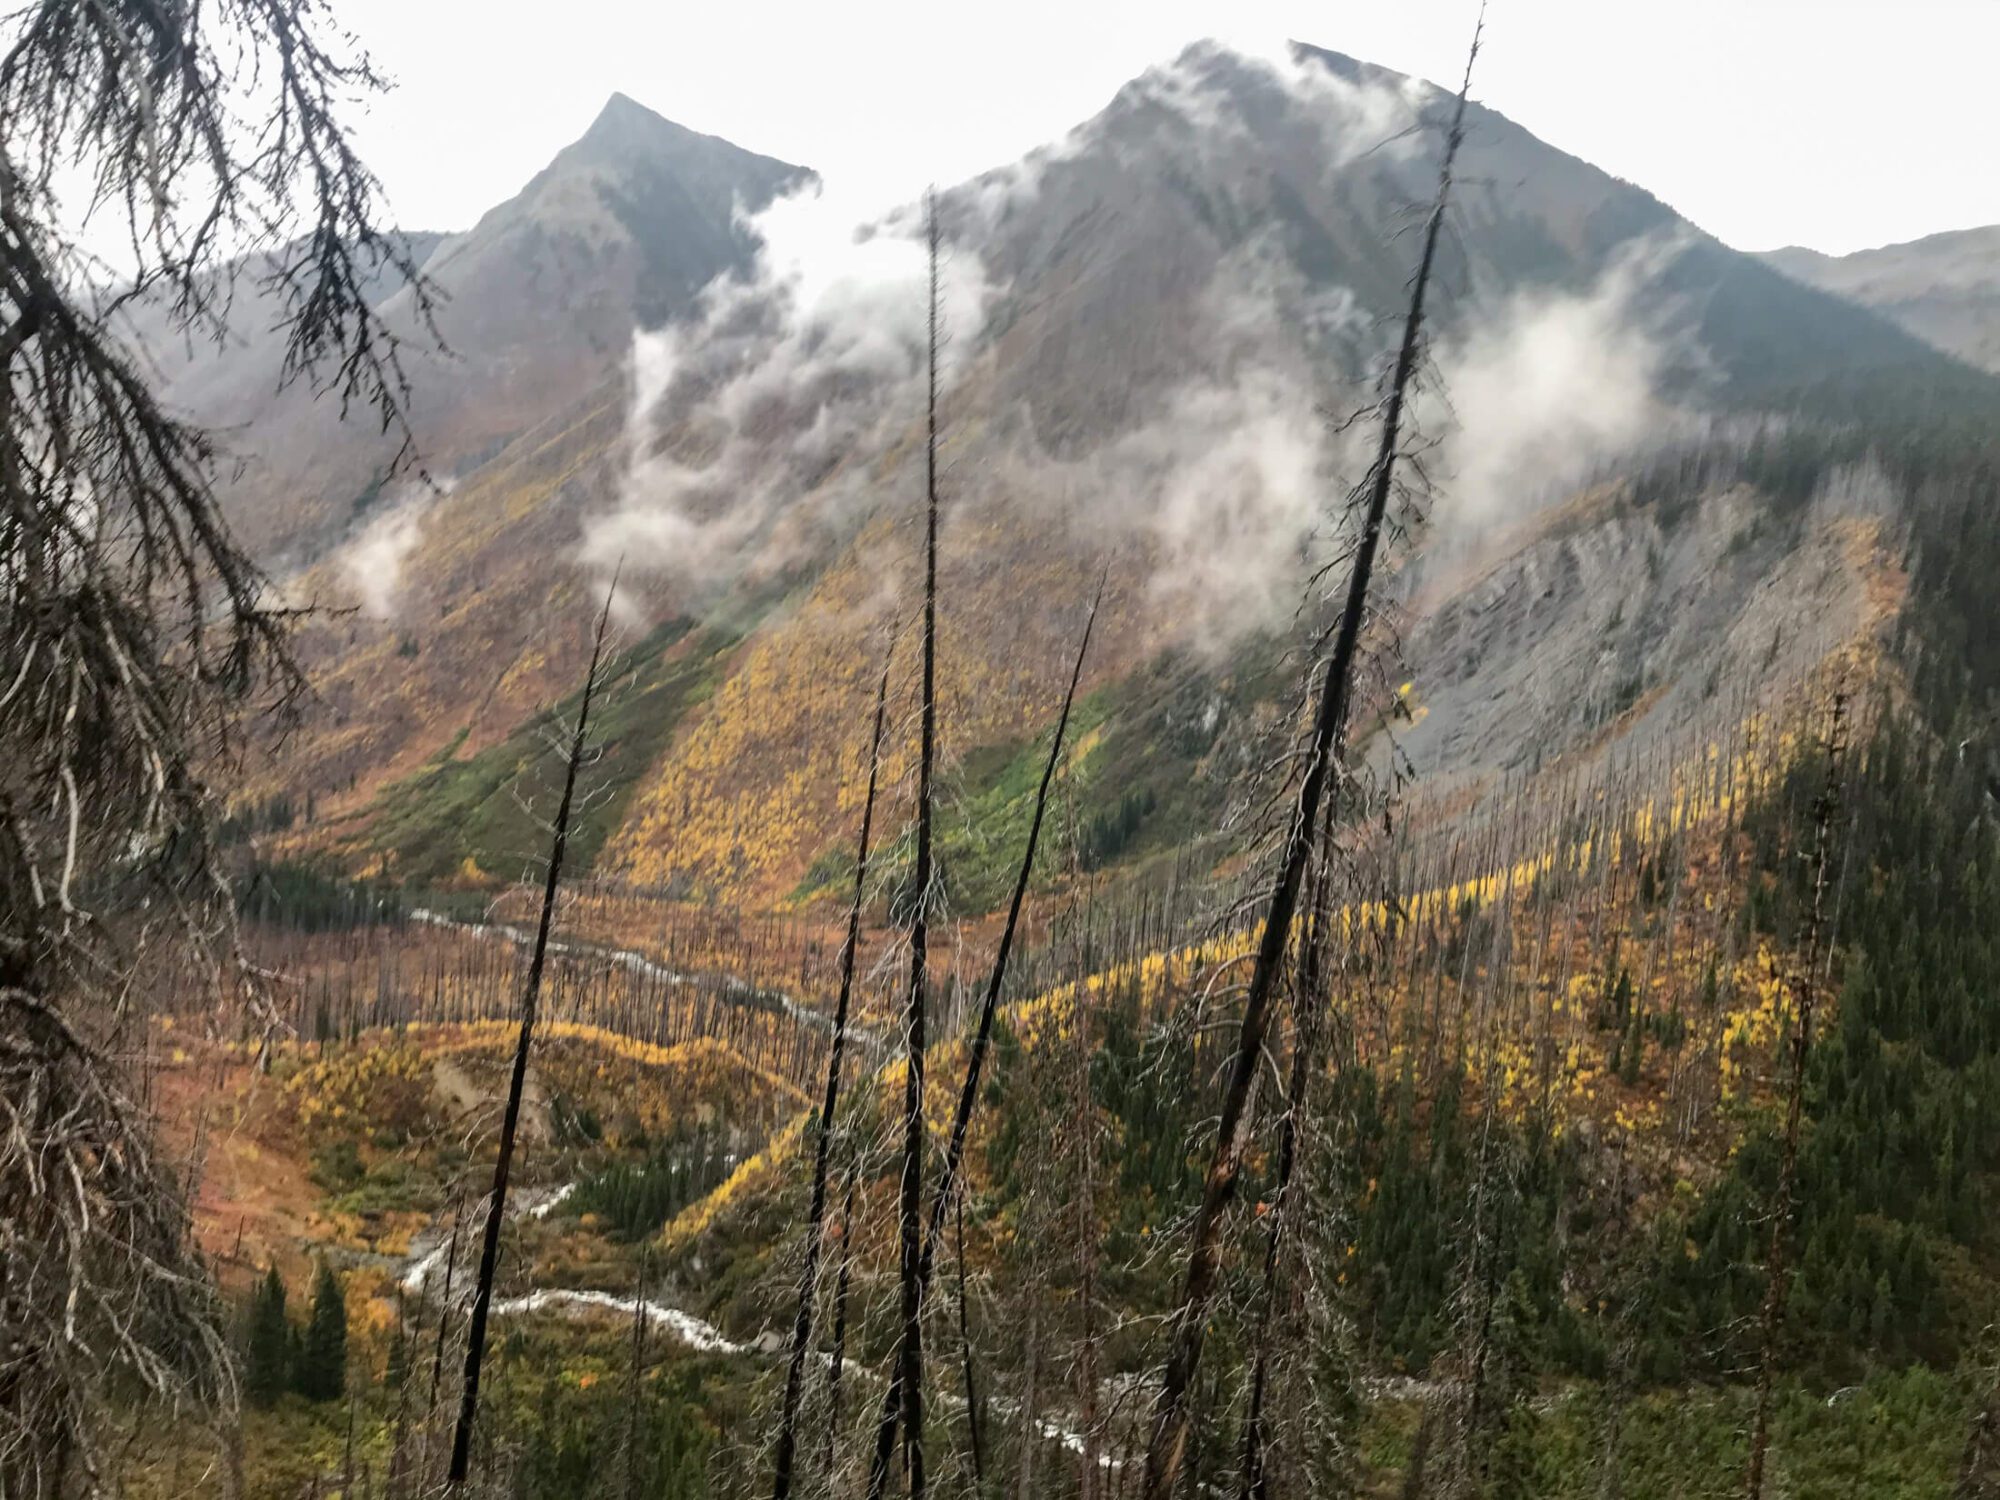
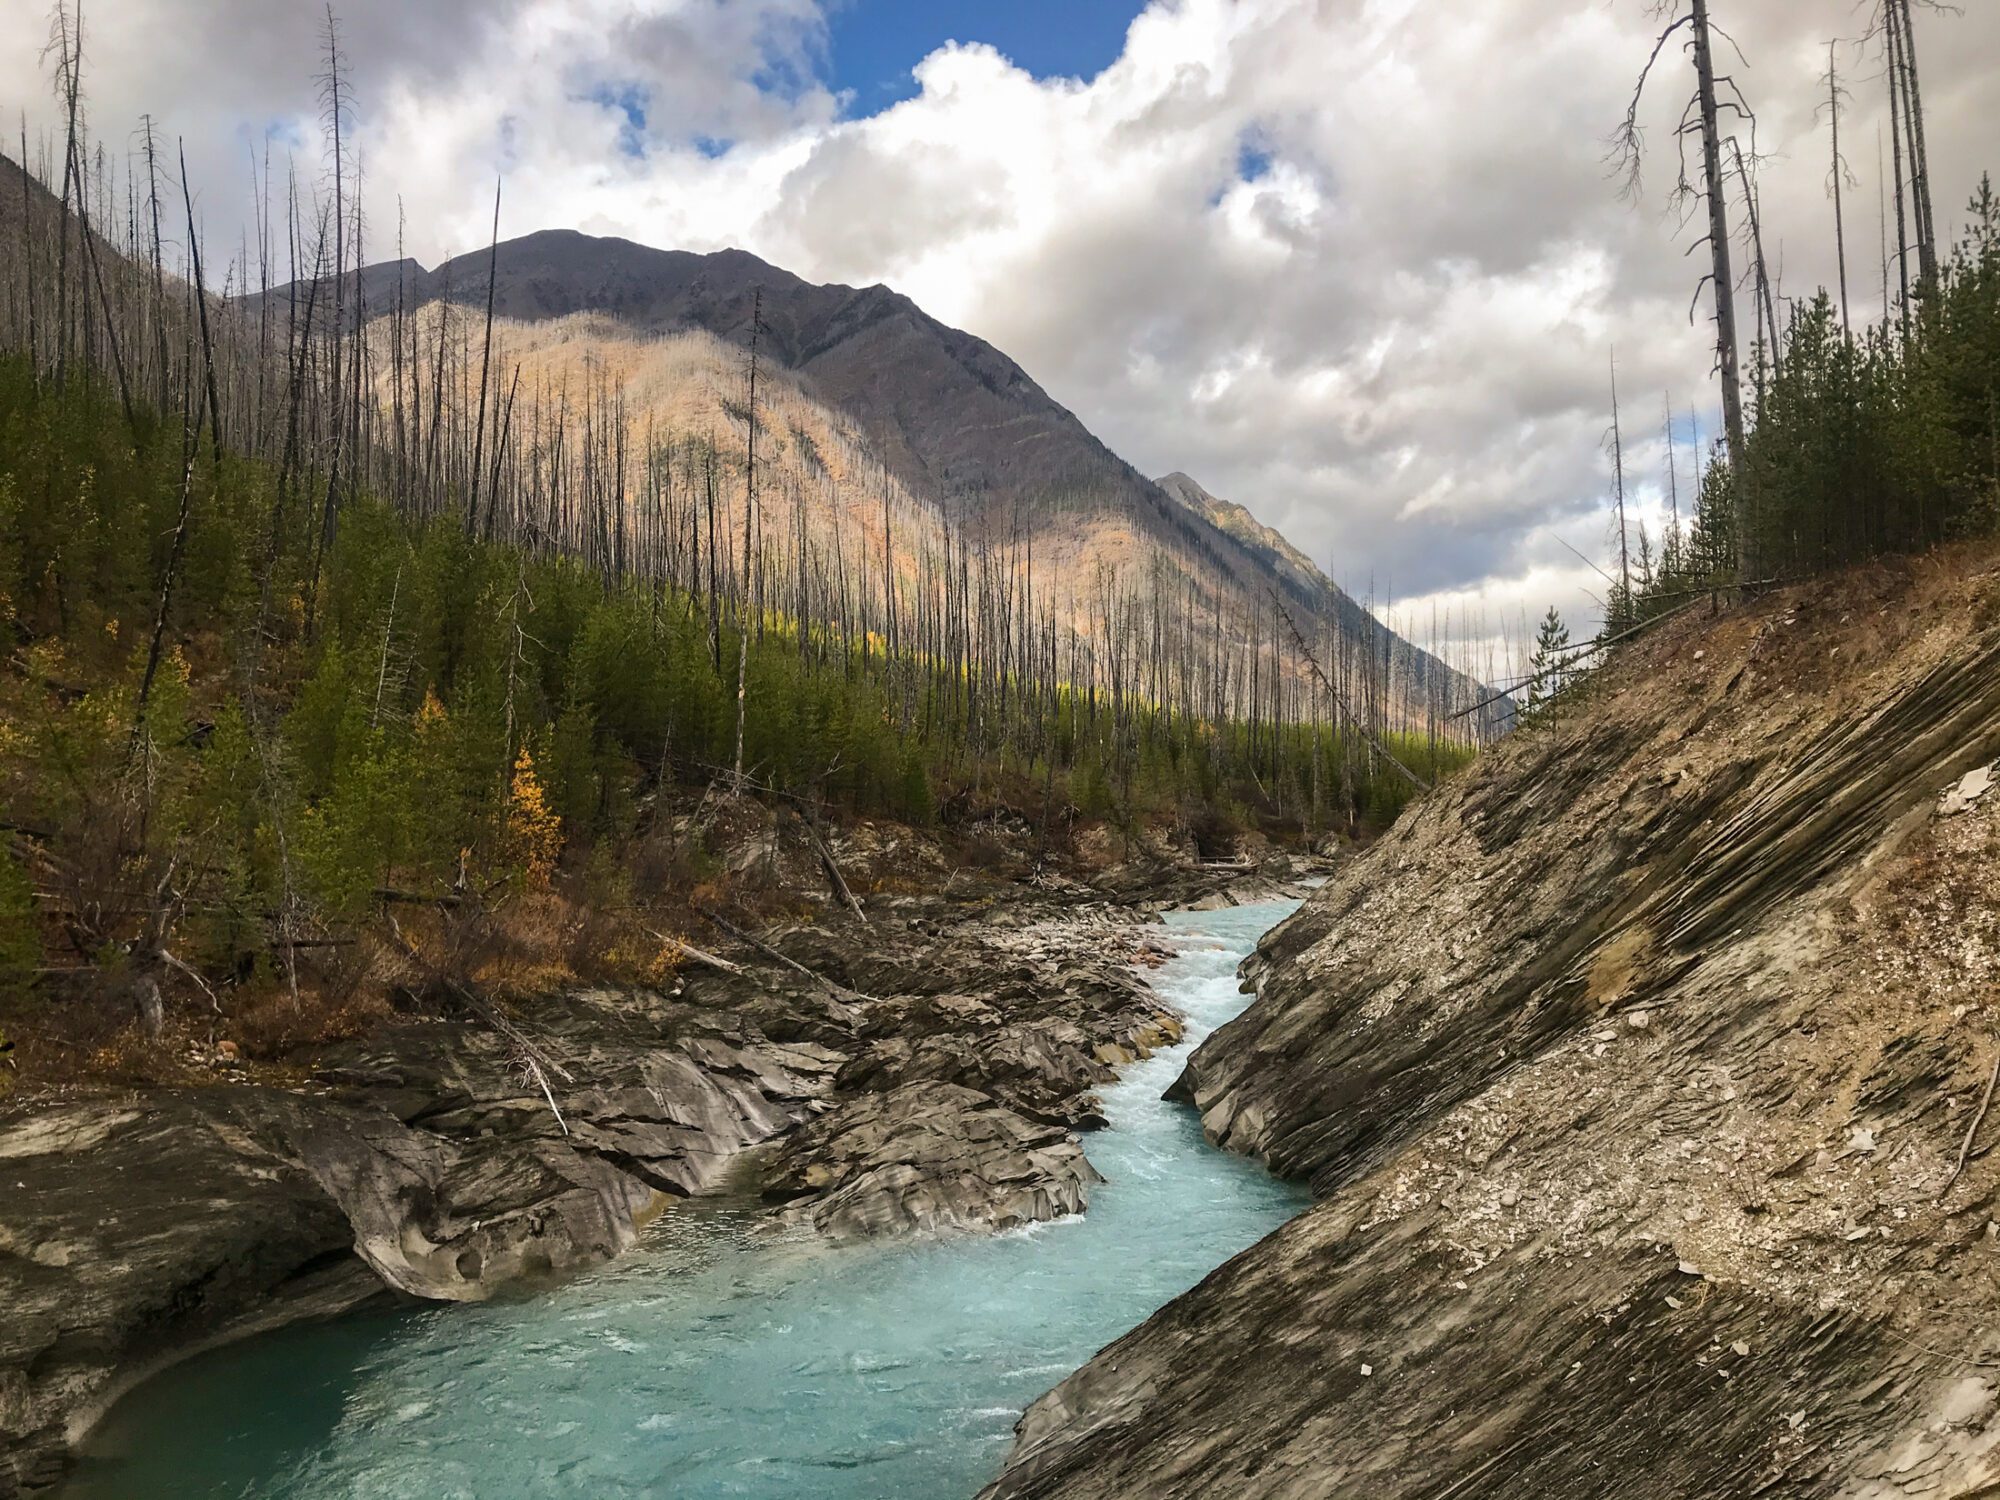
After walking for several hundred meters through the subalpine forest surrounding the magnificent Floe Lake, the trail drops sharply for the next 2.5 km, quickly losing 400m. For the final 8 km you’ll find yourself walking through the remnants of the substantial forest fire that burned through Kootenay National Park in 2003. Heed extra caution on windy days as some of these trees have precarious leans to them. Take note of the incredible regrowth that has already occurred in this burned area and observe the significant logjams that have funneled their way into the valley and Floe Creek below. To wrap the hike you’ll walk alongside a beautiful canyon eroded by the Vermillion River, before crossing to the Floe Lake Trailhead. Give your hiking companions (if applicable) a high five! You did it!!
Rockwall Itinerary Options
Here’s your Rockwall itinerary buffet! No matter your time or desired mileage level there should be an itinerary that suits your palate. I’ve also indicated which day you’re likely to find the most challenging.
Campsites on the Rockwall Trail
To make your reservation for hiking the Rockwall you’ll need to select a campsite for each night. There are 5 campsites along the Rockwall Trail. Listed in order from North to South they are:
- Helmet-Ochre Junction Campground*
- Helmet Falls Campground
- Tumbling Creek Campground
- Numa Creek Campground
- Floe Lake Campground
*None of the below itineraries include the Helment-Ochre Junction Campground. In my opinion, staying at this site provides limited benefit as Helmet Falls to the Paint Pots Trailhead is not a challenge for most hikers looking to complete the Rockwall in its entirety. In a pinch, those looking to spend 4 nights on the trail could use this site as a substitute for Helmet Falls if that was booked.
Rockwall Trail in 1 Night /2 Days
Crazy?? Maybe! But trail runners slay this dragon of hike in a day. So, the Rockwall Trail is doable as a 1 night / 2 day backpacking trip if that’s all your schedule affords. To make this happen, you’ll need to travel light and be comfortable hiking 30 km+ days with significant elevation changes. Your pack weight should be under 20 lbs. I’d also suggest doing this early in the season (July) so that the long daylight hours are on your side and you can hike from dawn to dusk if needed.
Now that the disclaimer is out of the way, time to pick your poison:
Starting at Paint Pots Trailhead
Option 1
- Day 1: Paint Pots Trailhead to Tumbling Creek (26.5 km)
- Day 2: Tumbling Creek to Floe Lake Trailhead (27.6 km) – Hardest Day
Notes: This option splits the mileage evenly between the two days with Day 2 being significantly more challenging as you’ll combine both Tumbling Pass and Numa Pass in one day before making the knee-crunching descent from Floe Lake to the parking lot.
Option 2
- Day 1: Paint Pots Trailhead to Numa Creek (34.4 km) – Hardest Day
- Day 2: Numa Creek to Floe Lake Trailhead (19.7 km)
Notes: A huge Day 1 is a great way to go as you benefit from fresh legs and guaranteed blister-free feet! Plus, by doing it this way, you group the two easier passes together (Rockwall Pass and Tumbling Pass). This itinerary also saves the most physically strenuous pass (Numa Creek Campsite to Numa Pass) for the lower mileage day and provides ample time for a lunch stop at Flow Lake prior to making the big descent down to the trailhead.
Starting at Floe Lake Trailhead
Option 1
- Day 1: Floe Lake Trailhead to Numa Creek (19.7 km)
- Day 2: Numa Creek to Paint Pots (34.4 km) – Hardest Day
Notes: For a 1-night option going South to North, this is the option that I’d pick as the first day is shorter, but includes a significant amount of elevation delta going directly from the Floe Lake Trailhead to the trail’s high point (Numa Pass) then making the big drop down to Numa Creek. The second day will be long, but the most challenging ascent will come first thing as you grind up Tumbling pass from Numa Creek Campground. The final 14 km from Helmet Falls to the trailhead will fly by.
Option 2
- Day 1: Floe Lake Trailhead (27.6 km) to Tumbling Creek – Hardest Day
- Day 2: Tumbling Creek to Paint Pots Trailhead (26.5 km)
Notes: Despite evening out the mileage, Day 1 will be brutal on this trip as you ascend the trail’s two longest climbs back-to-back while squishing the epic descent from Numa Pass to Numa Creek in the middle. The upside? Day 2 should feel like a breeze after making the early morning climb from Tumbling creek to Rockwall pass, so you can throw it into cruise all the way down.
Rockwall Trail in 2 Nights/3 Days
Anytime you can fit a trip like the Rockwall into an extended weekend, you go for it right? If that’s your motto and you’re an in-shape backpacker that knows your limits, this is probably the trip length for you. When I hiked the Rockwall this is how I did it (North-South) and if I had a do over, I wouldn’t change a thing! This trip duration makes for a couple full days, but you have ample time to enjoy the views without feeling rushed and you’re left with an easy half-day conclusion to wrap it up.
Starting at Paint Pots Trailhead
- Day 1: Paint Pots Trailhead to Tumbling Creek (26.5 km) – Hardest Day
- Day 2: Tumbling Creek to Floe Lake (17.1 km)
- Day 3: Floe Lake to Floe Lake Trailhead (10.5 km)
Notes: This is the exact itinerary that I hiked. Day 1 was long, but manageable. Day 2 felt longer than the mileage would suggest given the significant elevation gain over Tumbling Pass and Numa Pass before reaching Floe Lake. The hike out from Floe Lake flew by in the morning of the last day.
Starting at Floe Lake Trailhead
- Day 1: Floe Lake Trailhead to Numa Creek (19.7 km) – Tie Hardest
- Day 2: Numa Creek to Helmet Falls (20.2 km) – Tie Hardest
- Day 3: Helmet Falls to Paint Pots Trailhead (14.2 km)
Notes: This itinerary has been included as an option, but I don’t recommend this itinerary unless you have no other options for the following reasons:
- You have limited time to enjoy the scenery around Floe Lake.
- The section from Helmet Falls to the Paint Pots Trailhead isn’t nearly as enjoyable of a denouement as the descent from Floe Lake.
Rockwall Trail in 3 Nights/4 Days
Completing this hike in 3 nights and 4 days requires one longer day, but allows for plenty of time to relax at campsites and enjoy the Rockwall at a more leisurely pace. Unfortunately, this itinerary is slightly awkward, as you’re still stuck with one longish day that will include two passes.
Starting at Paint Pots Trailhead
- Day 1: Paint Pots Trailhead to Helmet Falls (14.2 km)
- Day 2: Helmet Falls to Numa Creek (20.2 km) – Hardest Day
- Day 3: Numa Creek to Floe Lake (9.3 km)
- Day 4: Floe Lake to Floe Lake Trailhead (10.5 km)
Notes: Day 2 will be the most challenging as you combine Rockwall Pass and Tumbling Pass in one day. Both are manageable ascents taken in this direction. You’re likely to find the long descent from Tumbling Pass to Numa Creek tiring at the end of a long day. Day 3 has light mileage, but the ascent to Numa Pass is long and gruelling.
Starting at Floe Lake Trailhead
- Day 1: Floe Lake Trailhead to Floe Lake (10.5 km)
- Day 2: Floe Lake to Tumbling Creek (17.1 km) – Hardest Day
- Day 3: Tumbling Creek to Helmet Falls (12.3 km)
- Day 4: Helmet Falls to Paint Pots Trailhead (14.2 km)
Notes: Day 2 will be tough. After making the big descent from Numa Pass to Numa Creek, you’ll make the long and thigh-burning ascent to Tumbling Pass. Day 1 is likely to be the next most challenging as the climb to Floe Lake is significant.
Rockwall Trail in 4 Nights/5 Days
The Rockwall Trail’s incredible scenery is worthwhile sticking around for and with 5 established campsites along the trail, why not make use of them? By going with this itinerary you’ll break all major elevation gains into separate days. This seems to be the most popular way for most backpackers trek the Rockwall. The more relaxed schedule allows you to sleep in a bit and relax at camp after arriving early in the afternoon. If this sounds like the type of adventure you’re looking for, here’s how to make it happen:
Starting at Paint Pots Trailhead:
- Day 1: Paint Pots Trail Head to Helmet Falls (14.2 km)
- Day 2: Helmet Falls to Tumbling Creek (12.3 km)
- Day 3: Tumbling Creek to Numa Creek (7.9 km)
- Day 4: Numa Creek to Floe Lake (9.3 km) – Toughest Day
- Day 5: Floe Lake to Floe Lake Trailhead (10.5 km)
Notes: This itinerary is the standard Rockwall itinerary that many backpackers choose. The climb to Numa Pass on Day 4 is likely to be the most challenging.
Starting at Floe Lake Trailhead
- Day 1: Floe Lake Trailhead to Floe Lake (10.5 km) – Toughest Day
- Day 2: Floe Lake to Numa Creek (9.3 km)
- Day 3: Numa Creek to Tumbling Creek (7.9 km)
- Day 4: Tumbling Creek to Helmet Falls (7.9 km)
- Day 5: Helmet Falls to Paint Pots Trailhead (14.2 km)
Notes: This itinerary is the standard Rockwall itinerary that many backpackers choose. The climb to Floe Lake (Day 1) is likely to be the most challenging, with the climb from Numa Creek to Tumbling pass (Day 3) a close second.
What to Pack for the Rockwall Trail
Since I backpacked the Rockwall, I’ve changed and continuously improved my gear setup to lighten my pack weight. Backpacking light makes it easier to cover long distances, large amounts of elevation and be a lot more comfortable doing so!
That said, if you’re new to backpacking, don’t stress out about buying the latest and greatest equipment. Save money and use things you already own or borrow things from a friend. Later, when you’ve gained more experience, modify your kit and change out gear as you get a better understanding of what creature comforts you can and can’t live without. Even then, it’s a consistently evolving process.
With this in mind, here’s a clickable list of what to pack and gear suggestions for hiking the Rockwall Trail. Detailed descriptions and rationale are provided further below.
Don’t Forget
- Travel Insurance with Emergency Medical (if travelling from outside Canada)
- Bear Spray (make sure you know how to use it!)
- Copy of your Backcountry Reservation/Booking
- Park Pass
Essential Items
- Tent
- Backpack
- Sleeping Mat
- Backpacking Pillow
- Sleeping Bag or Quilt
- Water Purification
- Trowel, TP & Hand Sanitizer
- Swiss Army Knife
- Stove & Fuel Canister
- Lighter & Matches
- Compact Backcountry Cookset & Spork
- Water Bottle or Reservoir
- Extra Water Storage Container
- First Aid Kit
- Trekking Poles
- Headlamp with red light mode
- GPS, Compass & Map
- Battery Back-Up & Charging Cable
Clothing and Accessories
- Shell Jacket
- Puff Jacket
- Sun Hoodie
- Rainpants
- Convertible Hiking Pants
- Shorts (1 pair)
- Base Layer Top
- Base Layer Bottom
- Underwear (2-3 pair)
- Hiking Socks ( 3 pair)
- Hat &Toque
- Sunglasses
- Gloves
- Trail Runners or Hiking Boots
- Camp Shoes (optional)
- Low trail running gaiter (optional)
Additional Items
- Microspikes (early season only)
- Sunscreen & SPF lim balm
- Bug Spray
- Tooth Brush & Toothpaste tabs in ziplock
- Duct Tape (for repairs and blisters)
- Food (I love these soups/chilis)
Luxury Items (very optional)
Packing List Breakdown
Park Pass and Site Reservations
Don’t forget to buy a park entrance pass or Discovery Annual Pass and leave it on the dash in your car. To avoid the line at the park gates, or if you’re driving past the ticket windows at the National Park gates before opening, buy your park entrance pass and print it in advance.
Additionally, print and bring along the campsite reservation/backcountry reservation confirmations for your trip.
Best Tent for the Rockwall Trail
I upgraded to Mountain Hardwear Strato UL2 last year. It’s semi-freestanding (needs to be staked), double walled and weighs in at a mere 2.5 lbs. Unlike many 2-person tents, it doesn’t have a tapered floor and can fit 2 extra wide sleeping pads side-by-side with no overlap. A rare feature in this class of tent! It’s cozy, but workable for two and palatial for one! I debated between this tent and the MSR Freelite and ultimately chose the MH as it was in-stock. The MH Strato doesn’t seem to be as readily available in Canada, so you may want to go for the MSR Freelite to avoid the risk of paying duty shipping the MH from a retailer in the US. Ultimately, both are a great lightweight tents with similar features, but feel very fragile given their lightweight components. If you’re looking for more durability/resilience these aren’t the tents for you.
If you’re looking for a completely freestanding tent that offers more durability, check out the Big Agnes Copper Spur UL2. It’s unique blend of functionality, livability, weight, and durability earn high praise and Big Agnes’s customer service is outstanding!
Best Backpack for the Rockwall Trail
If you’re relatively new to backpacking and building out your kit slowly, there is nothing wrong with using a large size travel backpack with a decent suspension system and padded hipbelt or borrowing a pack from a friend. This gives you time to decide what features you need and whether or not backpacking (and the gear) is something you’re going to invest in. When I first started backpacking, I used my Khmer Explorer Travel Set on the West Coast Trail and Sunshine Coast Trail which worked great despite my poor packing skills (don’t recommend backpacking with 55lbs…)!
If you’ve begun dialing in your backpacking kit, check out the Gregory Focal or Women’s specific Facet. At ~2.5lbs these packs provide a great compromise between barebones ultralight packs and the heavier feature laden packs. The Osprey Exos (men’s) & Eja (women’s) backpacks are also great packs comparable in features and weight.
If you’re ready to go to an extreme level of gram counting and have eliminated all creature comforts check out the Hyperlite 3400 southwest. It’s 100% waterproof and constructed from ultra light dyneema fabric. Being ultralight, you’ll sacrifice features, so if you hate getting a swampy back (that’s me) you may prefer the Osprey or Gregory despite the small weight penalty. Backpacking gear is always a zero sum game!
Sleeping Mat
I used to have terrible sleeps in the backcountry until I switched to the Therm-a-Rest NeoAir Xlite. It’s incredibly lightweight, comfortable and packs down to the size of a Nalgene bottle. This is probably one of my favorite backpacking items! Try it out. You won’t regret it. Sleep well!
Backpacking Pillow
Yes, you can sleep with a pillow not made of bunched up clothes in the backcountry. I love the Nemo Fillo Elite, but they’re harder to find in Canada. Fortunately, this one from Sea-to-Summit are a similar concept, weight and size.
Sleeping Bag
I can’t speak highly enough of Patagonia’s Fitz Roy sleeping bags I invested in one several years ago. It’s unbelievably lightweight and packs down small. I found the 30°F / -1°C to be perfect for most outings. Like all Patagonia products, it’s not cheap, but they stand behind their gear and the quality matches the price point. If you spend a lot of time in colder environments they also make a 20°F / -7°C version. These bags are a very worthwhile splurge you won’t be disappointed in.
If you’re looking for an even lighter-weight option, consider going for a sleeping bag quilt. Feathered Friends Flicker UL Quilt Sleeping Bag has won numerous awards and is a stalwart among ultralight backpackers. With a weight starting at 526 g (1 lb 2.5 oz), I can see why!
Water Purification
I love the Steripen. It’s light, portable and only takes minutes to purify a liter of water in a Nalgene. Press the button, place the pen in your bottle, and stir for a couple minutes. It’s like magic! Make sure to bring a few purification tablets as a backup should you run into any technical problems/dead battery with your Steripen.
Trowel, Toilet Paper & Hand Sanitizer
The Rockwall trail feels like luxury with established outhouses at each campsite, that said you need to bring a trowel for digging a cathole in case nature calls at any other time. Follow minimum impact camping principles and be sure to go at least 200m away from any established trails, campsites, or water (creeks, lakes, rivers etc.). Pack out your TP or hang onto it until you reach the next outhouse.
Don’t forget a small bottle (1 oz) of hand sanitizer.
Swiss Army Knife
Fixing gear, cutting food, a swiss army knife is your go to everything too for backpacking.
Stove & Fuel Canisters
Lightweight, convenient, and reliable, the MSR pocket rocket has been my go to backpacking stove for years.
Lighter & Matches
A bring a small baby Bic lighter (in a mini-ziplock to keep it dry) & a few matches as a failsafe.
Backcountry Cookset
I love the GSI Halulite Microdualist II, Two-person cookset. It’s lightweight and I can fit my MSR pocket rocket and a fuel canister inside. If you don’t already have a stove, consider the MSR PocketRocket Stove Kit for an all-inclusive solution.
Water Bottle or Reservoir
Nalgenes are always a backcountry favorite. If you’re cutting weight or looking for a way to save a buck, a simple smart water is the go-to for ultralight backpackers. I’ve recently moved to a hydration reservoir as it allows me to stay hydrated continuously without stopping to grab and open a bottle.
Water Container
The Rockwall Trail has a pretty solid supply of accessible water sources, but sometimes it’s nice to have extra water storage capacity for cooking and camp. The MSR DromLite Bag V2. are a lightweight option to add this convenience and are essential on trips with less reliable water sources.
First Aid Kit
From blisters, to scrapes, and cuts. A first aid kit is an essential item to have. The pre-built kits from Adventure Medical Kits have served me well on many adventurers. At the end of your trip write down any items you used and replace them so they’re ready for your next adventure.
Hiking Poles
For the grueling passes of the Rockwall, poles make a big difference! I resisted getting them for years, but take it from a former skeptic, poles are incredible at reducing the strain of long, gruelling descents and providing extra stability on exposed sections. Do yourself a favor and get a pair of poles. I‘ve had great luck with these Leki’s, but for a reliable entry-level option try these Black Diamond Poles. Black Diamond also makes a carbon fiber version if you’re looking to save extra weight.
Bear Spray
The Rockwall trail passes through prime Grizzly Bear country making Bear Spray an absolute must! Make sure to remove the packaging, check the expiration date before heading out, and know how to use it.
Dry Bag
The Rockwall offers bear storage boxes at every campsite so you can leave your buiky bear can at home! For trips like this, I use a dry bag to store my food, camp cook wear, and toiletries/scented items in, making transportation easy to the bear box and keeping everything nicely organized inside my pack.
Headlamp
The Spot 500-R is the way to go with 9 modes including the night vision saving red light! Red light mode takes a minute to get used to, but once you do it’s a total game changer trust me! The stars never looked so good! The Spot 500-R is rechargable, but with a batter life of over 19 hrs on medium and 7hrs on high it should get you through the trip!
GPS, Compass & Map
The Rockwall Trail is extremely well marked, but download the GAIA app for maps and gps. Additionally, I always bring a traditional compass and map in the case of technical problems or dead batteries.
Power Bank & Charging Cable
Don’t forget a power bank to keep your phone charged for photos and gps. Plus a backup for charging your headlamp if it needs a recharge.
Clothing & Accessories to Pack for the Rockwall
Shell Jacket
A shell jacket is one of the most important items in your backpacking kit and it’s vital to have a great shell for the rapidly changing mountain environment you’ll experience backpacking the Rockwall. The Arc’teryx Beta shell is the best all around shell jacket. This shell performs in all adverse conditions and is the perfect outer layer for rainy days, or cool nights. Arc’teryx gear is expensive, but impeccably designed. I was skeptical for years, until I purchased a few pieces of their trail running gear and got hooked. If you’re looking for the best reviewed hiking shell out there, this is the one.
For another excellent option that is more economical, check out the Patagonia Torrentshell 3L.
Puff Jacket
I’ve had the Patagonia Nano Puff Hoody for years and it works great on it’s own or layered underneath your shell for extra warmth. It’s a perfect multi-functional item for everyday, backpacking, and pretty much anything where you might need a bit of warmth. I’m still looking for an activity it doesn’t work for.
Rainpants
You leave camp on sunny beautiful day breaking sweat over a pass, only to have storm clouds roll in an hour later and dump sleet on you. Rainpants are lifesaver for rapidly changing mountain weather. Many have the functionality for quickly taking them on and off without removing your shoes/boots allowing you to stay comfortable even if you get caught in a sudden downpour. I’ve been happy with the Black Diamond StormLine Rain Pants. The Patagonia Torrentshell pants are also a great option.
Sun Hoodie
When I went backpacking in the Grand Canyon a few years back, I was shocked to see throngs of Arizona Trail thru-hikers wearing hoodies in the 40 C heat. Turns out they weren’t just lost tech bros in the Grand Canyon, they were really onto something! A sun hoodie has been one of the best items I’ve added to my backpacking kit. They keep you burn free, are surprisingly cool, and let you get away with leaving the bottle of sunscreen at home (or bringing way less). The Sahara Sun Hoodie from REI is one of the best items I’ve added to my backpacking wardrobe and you can’t beat the price.
Zip Off / Convertible Hiking Pants
I never thought I’d see the day I embraced the zip-off pant. But hey, they’re the best of both worlds. Check out the Quandary Pant for a great option
A pair of shorts
In addition to hiking pants, it’s nice to have a pair of shorts to change into after a long day on the trail or as a backup option. Trail running shorts are light and comfortable.
Base layer top
In addition to a sun hoodie, I also bring one base layer top to change into at camp or have as an alternate. The Capilene Cool trail t-shirts work great for me on long hikes and trail runs, but pretty much any athletic quick-dry top will work fine.
Base Layer Bottom
A merino wool or synthetic bottom baselayer is perfect for warming up at night or during chilly mornings.
Underwear
I’ve had the best luck with Patagonia underwear for hiking, trail running, mountain biking and skiing and found them to be more durable than the more expensive ones from lululemon. I usually bring a 2-3 pair depending on trip length.
3 Pairs of Hiking Socks
Darn Tough Vermont makes the best hiking socks hands down. They’re guaranteed for life/replaced free of charge and they don’t stink. Really! I typically bring 3 pair. 1 pair for hiking, 1 pair to change into at camp, and a reserve to throw into the rotation as needed.
Gloves
I typically bring a thin weatherproof pair of trail running gloves, like these.
Sun Hat & Winter Hat/Toque
A cap or Tilley hat keeps your face protected from the intense mountain sun. A toque is great for warming up during chilly mornings, evenings or when the weather takes a turn.
Sunglasses
Protect your eyes, don’t forget to bring your Sunglasses!
Trail Runners or Boots - Are Trail Runners or Hiking Boots Better for the Rockwall?
The answer here is it depends! If you have your backpack weight down to less than 20-25lbs and have a decent amount of backpacking experience, trail runners are the way to go during the summer months. If you’re going at a time when snowfall and colder weather are a possibility go with boots. Boots are also a better choice if you have a heavier pack and are newer to backpacking as they provide more stability and sturdiness. You also feel rough sections of the trail alot less on the base of your feet!
In October with the cold weather and snow a real possibility I hiked the Rockwall in my Scarpa Kailash Hiking Boots. During the summer months and with a light load I’d wear my La Sportiva Bushido II.
Camp Shoes
Crocs are back! Well for backpacking camp shoes they never left… They’re lightweight and ugly as ever. Many backpackers find them to be the perfect camp shoe for resting sore feat after a long day in boots/shoes.
Personally, I still hate them. I have an old pair of Tom’s which I occasionally bring. They are light and less bulky than Crocs. If going with a trail runner, I’ll often ditch the camp shoe altogether and just loosen my laces. Your call!
Microspikes (Season Dependent)
Kahtoola Microspikes slip effortlessly over your boots and make walking on snow and ice a breeze. These are absolutely essential for early season travel or later in the year when snow/ice are a possibility.
Low Trail Running Gaiters
Low gaiters are perfect for keeping rocks, sand, and snow out of your trail runners/boots and preventing blisters.
Additional Items to Pack
Toothbrush & Toothpaste
I recently started packing these toothpaste tabs in a tiny plastic bag/ziplock to save more space.
Duct Tape (For Repairs and Blisters)
Food
Everyone has different takes and caloric requirements, so I’m not going to tell you exactly what to bring. I generally avoid the just add water meals you find at REI or MEC. They’re overpriced and often don’t rehydrate as you’d like. Check out these incredible soups and chilis they taste better, are made with better ingredients, and are less expensive. As another option, I head to the grocery store and search for things like lentil rice, ramen, or plant-based mac & cheese. They’re basically just add/boil quickly meals and taste like real food. Always rebag/repack this type of food as there is no reason to carry unnecessary packaging weight on the trail.
Travelling from outside Canada? DO NOT FORGET THIS
If you’re traveling from outside Canada don’t forget to purchase comprehensive travel insurance that includes emergency evacuation!
Check out World Nomads* for a quote. Hopefully you never need to make a claim, but if you do you’ll be beyond happy you were prepared! I broke my collarbone traveling a few years ago, which hurt enough! I can’t imagine how much worse it would have felt if I had to pay the $15,000 in medical bills out-of-pocket.
Luxury Items You Could Pack
These items are extreme luxuries for a backpacking trip, but may be worth it depending on your weight priorities and the distance you plan to cover. I’d only consider these items on a low distance or base camp style hike given their added weight and bulk.
Camp Chair
After a long day on the trail there’s nothing better than finding a nice comfortable spot to rest your weary glutes. Fortunately, the Rockwall Trail offers tables and benches at every eating area. So this item is almost certainly a leave behind on this trip unless you’re looking for a comfortable spot to sit near your tent. Check out the Big Agnes Mica Basin Camp Chair or the Helinox Chair One. Both weigh around 1kg, and are light enough to justify bringing on slower/easier backpacking trips where weight isn’t as big of consideration or for trips where you’re taking day trips from an established base camp.
Hammock
If you’ve never strung up a hammock between two trees deep in the backcountry you’re missing out! Nothing beats getting horizontal with some great reading material in the pre-dinner hours or taking in an amazing sunset from your own outdoor couch. The ENO Double Nest has room for two and at ½ kg it’s hardly even a splurge to pack. P.S don’t forget the straps to hang it.
Final Thoughts on the Rockwall Trail
- The Rockwall Trail is unquestionably one the best hikes for scenery that I’ve experienced in the Canadian Rockies.
- Go late season to avoid the crowds.
- 2.5 days felt like the perfect length. It was 2 full days with early morning starts and late afternoon finishes, but plenty of time for lunch, scenery observation, and snacks. The last day from Floe Lake to Floe Lake Trailhead was an easy half day.
- The section from Tumbling Pass to Numa Creek felt like it would be quite hot in peak summer months.
- What I’d change hiking it again: Nothing! I was happy with the duration and campsites.
- Hike it North to South. Floe Lake is a great place to finish. Sunrise there is spectacular. The final day out is short, yet scenic, and makes for an easy conclusion.
Your Thoughts on the Rockwall Trail?
Have you hiked the Rockwall Trail? I’d love to hear from you.
Questions about the Rockwall? Drop me a line in the comments below and I’ll do my best to help!
Don't miss these adventures
Michael


4 Responses
Been reading up on Rockwall for years…hoping to get the permits for this summer. This is one of the most helpful sites I have com across. Thank you! Comprehensive, yet easy to read.
Thanks Andrea. Good luck getting your permits this summer. Happy trails!
Do you think going from Numa Creek Campground to Flow Lake Parking lot is doable in a day? I couldn’t get a Floe Lake Campground spot.
Hey Joel. Assuming you have decent hiking legs and are comfortable with 20km day (1k elevation gain and loss) this is very manageable. Most of the up will come between Numa Creek Campground and Numa Pass. After Numa Pass it’s essentially all downhill to the TH at Floe Lake. Happy trails!