
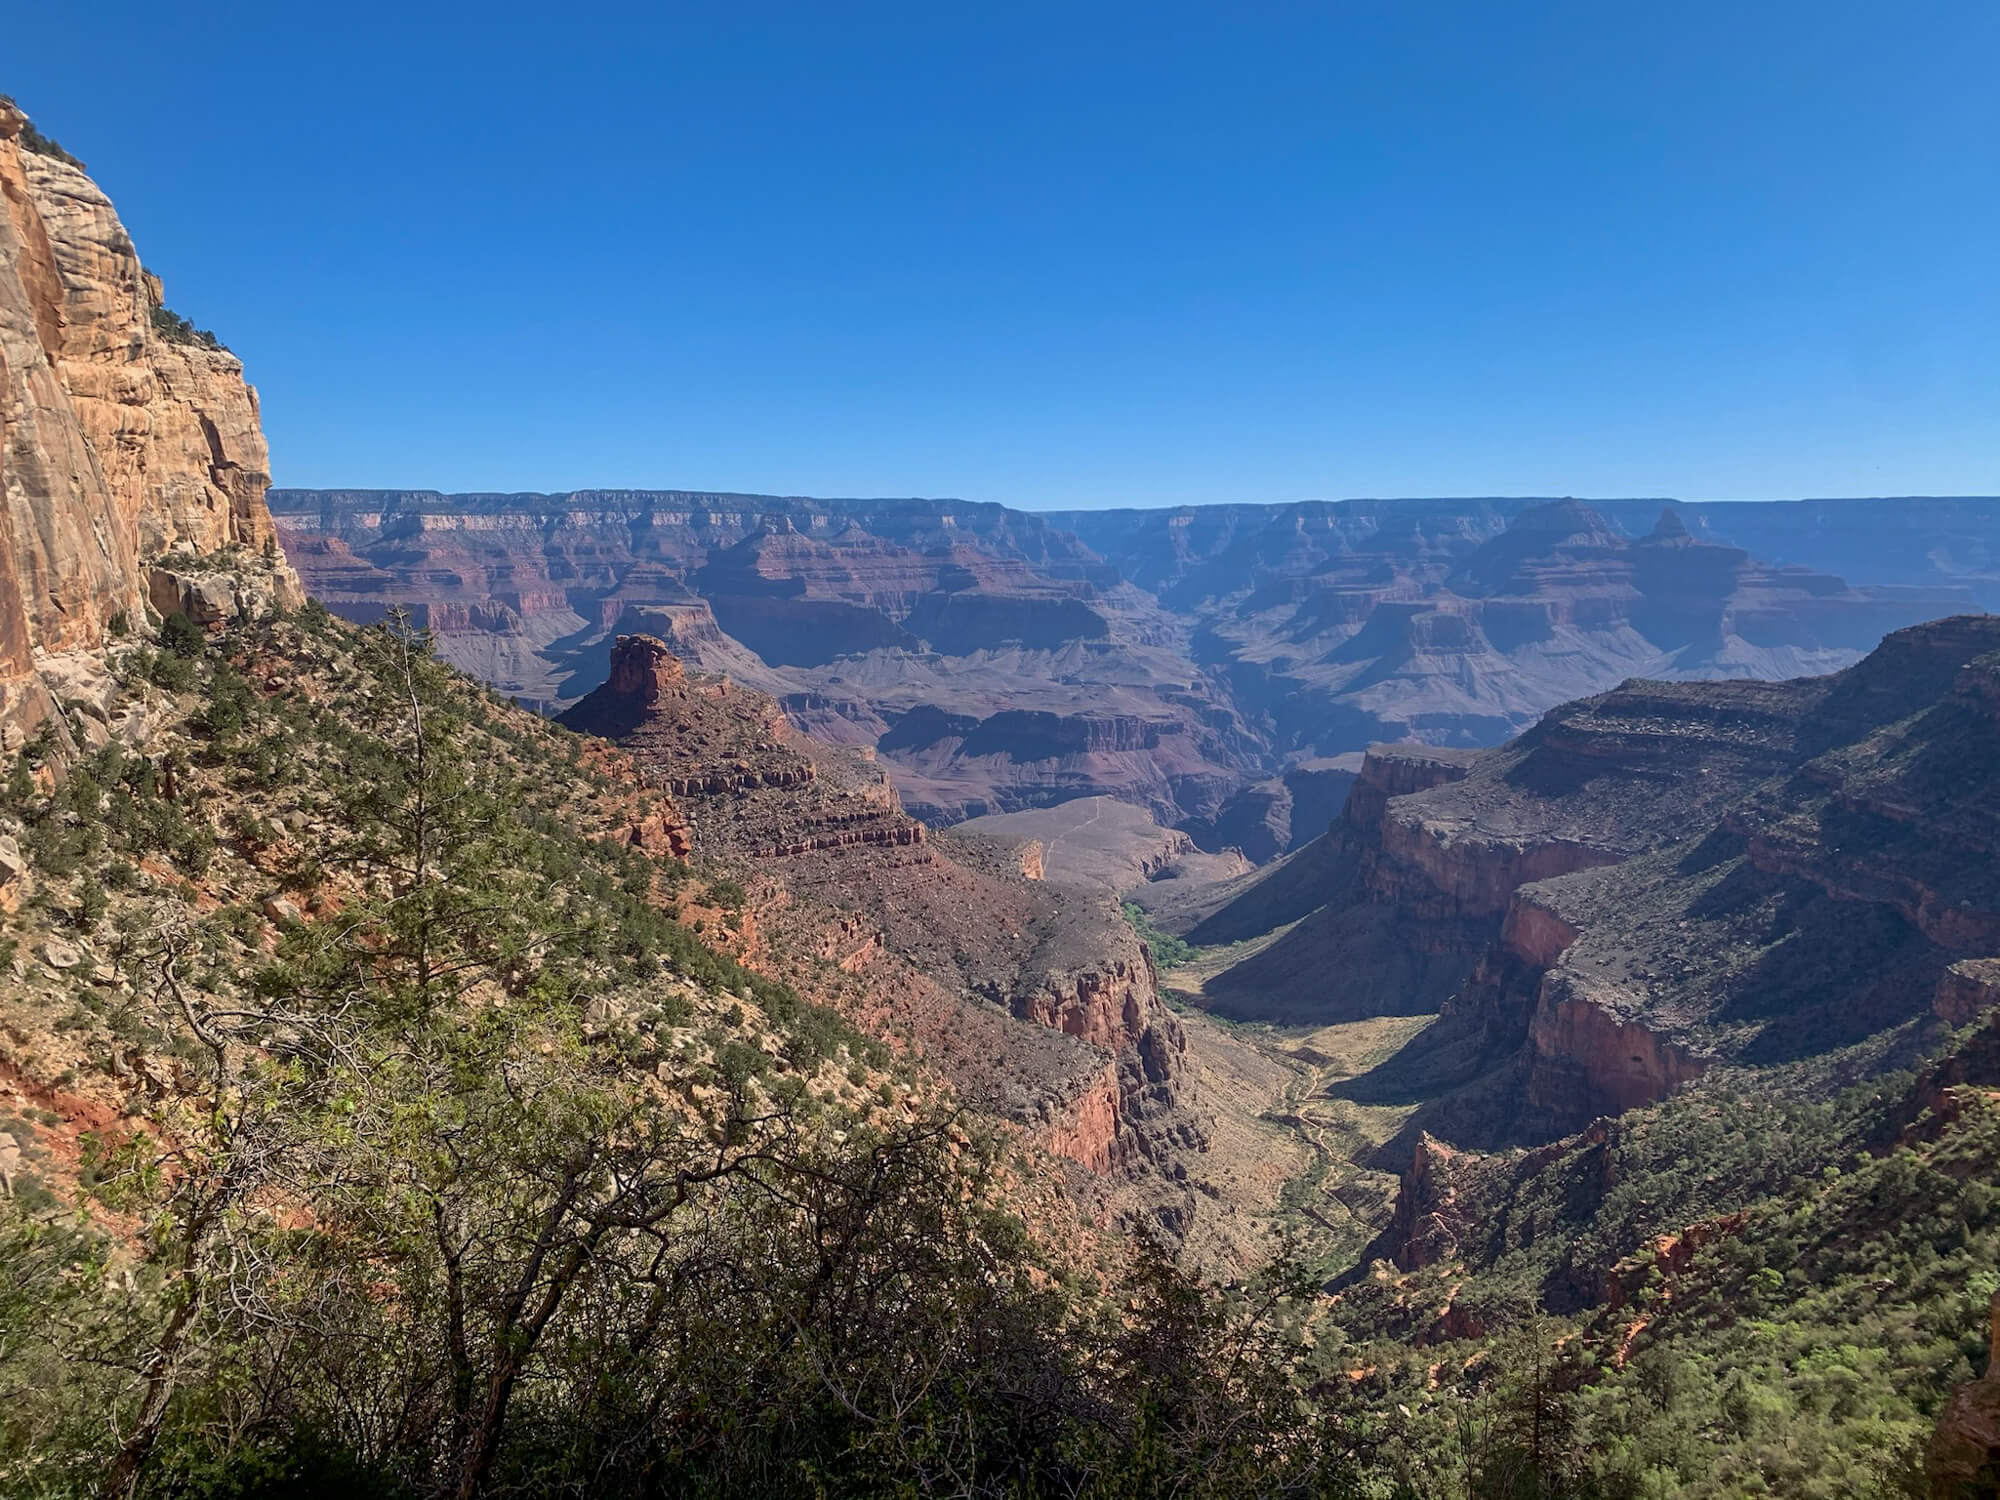
Backpacking the Grand Canyon inevitably ends up on every adventurer’s bucket list. For a backpacker visiting the Grand Canyon for the first time, the 21 mile journey (33.8 km) from the South Rim to the North Rim is the ultimate trip to cut your teeth. You’ll descend the South Kaibab Trail deep into the Grand Canyon to the Colorado River before climbing a punishing 5700ft (1700m) up the North Kaibab trail to the Grand Canyon’s quieter North Rim.
Perhaps, the only better way to backpack the Grand Canyon for the first time is to do it all over again in reverse for an epic backpacking trip known as the rim to rim to rim (R2R2R2). During the late spring, summer and fall when the North Rim is open and shuttles are available, this add-on makes limited sense. However, when the North Rim shuts down backpacking the Grand Canyon this way is an incredible opportunity to find a level of solitude unimaginable at other times of the year. If you’re thinking about this trip, dreaming of this trip, or have secured a permit, this epic guide to backpacking the Grand Canyon rim to rim to rim was written just for you. So, let’s stop with the formalities and dive right into it!
** Some of the links in this post are affiliate links. If you click one of the links and make a purchase we’ll earn a small commission at no cost to you. We’re very particular about products and we only recommend products, services, or accommodation we trust and use ourselves.**
Need to know for backpacking the Grand Canyon rim to rim to rim
Days Required: 2 – 7 days
Difficulty: Moderate, but extreme heat and weather can increase difficulty dramatically.
Distance: 44.5 miles (72 km)
Elevation Gain: 10, 141 ft (3,090 m)
Elevation Loss: 10, 541 ft (3,210 m)
Permit Required: Yes, competitive.
Navigation: Easy, trails are very well marked.
Water Sources: Frequent potable water sources available between May and December. Large portions of the Bright Angel and North Kaibab trails have access to water for purification year during the rest of the year. South Kaibab trail has no water.
Food Storage: Provided at designated campsites.
Best Campsite Walked Past or Stayed At: Cottonwood (below the rim), but read section on the ultimate hack for backpacking the rim to rim to rim for a special campsite tip.
Things you'll love about backpacking the rim to rim to rim
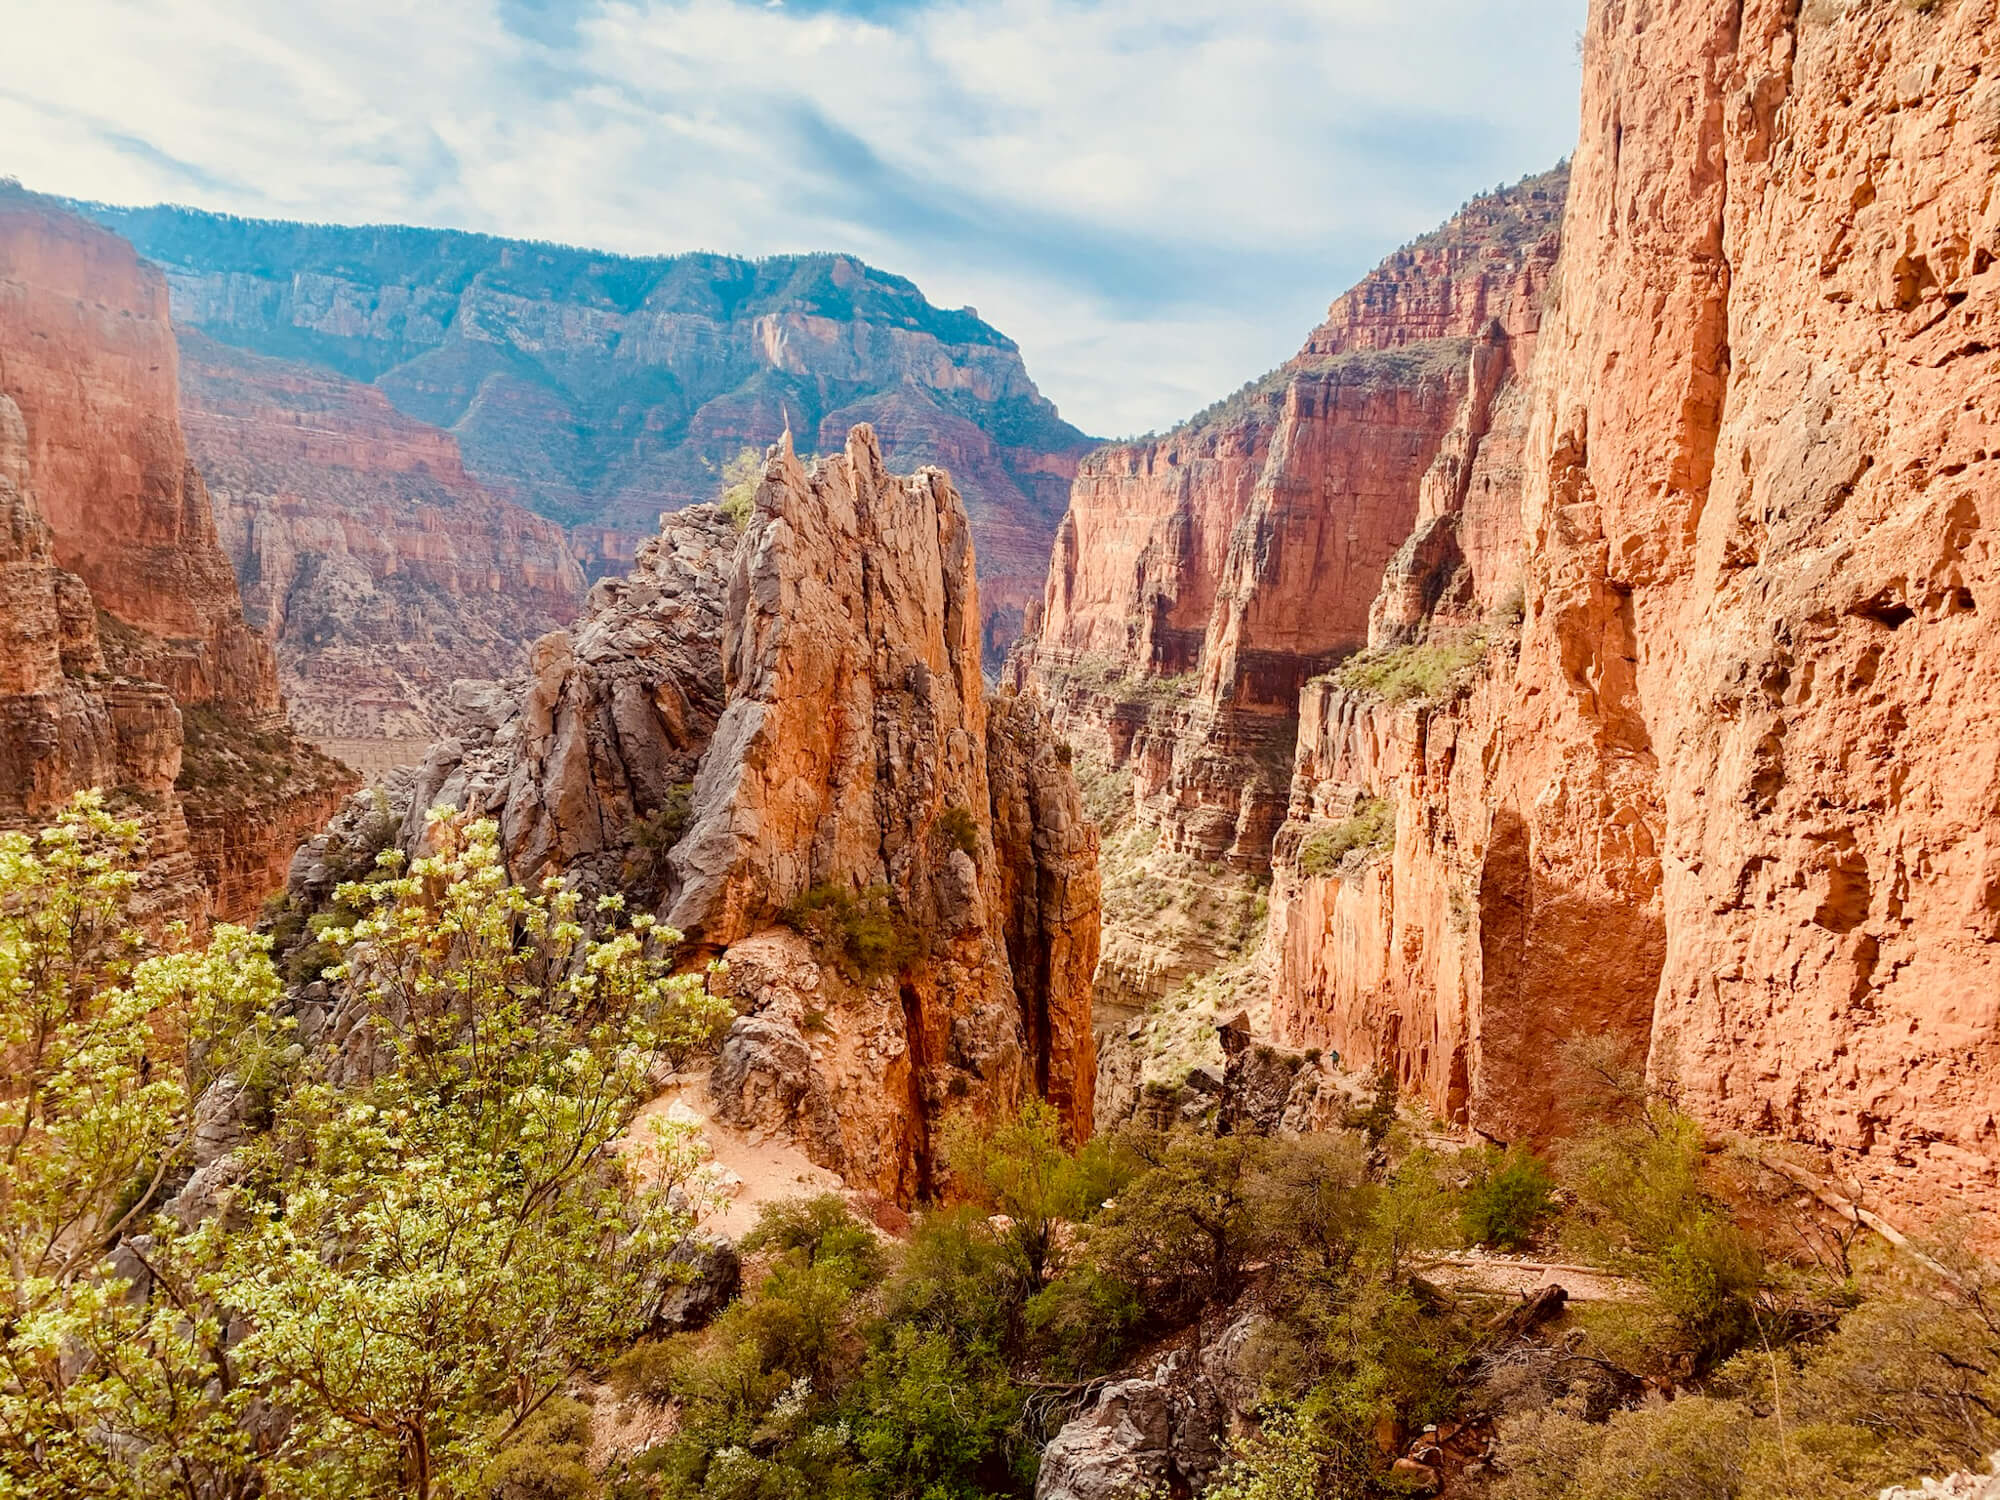
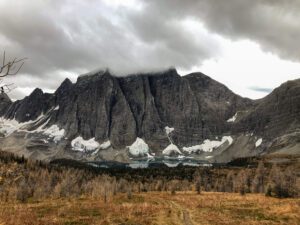
- Remarkable geology and natural scenery that will leave you awestruck at every turn.
- Incredible trail infrastructure.
- Established trail with no navigation required.
- Readily available potable water via taps at numerous points (seasonal and not on the South Kaibab).
- Numerous campsites allow for very manageable daily mileage and different itineraries.
- Opportunity to camp on the seasonally isolated North Rim.
Things you won't love about backpacking the rim to rim to rim
- The squirrels. Take your eye off your bag for a second and they are in it.
- The heat can be the most challenging factor.
- Competitive permit process.
- Navigating the throngs of day hikers at the beginning (and end).
- Keeping a constant ear out for trail runners coming in hot.
- Busy campsites that are close together with limited privacy.
- Did I mention it can get deathly hot?
How many days does it take to backpack the Grand Canyon rim to rim to rim?
A backpacking trip of the Grand Canyon’s rim to rim to rim is typically done in 4-7 days.
That said, you’re likely to encounter many ambitious trail runners and a few speed hikers pushing to complete the 44.5 mile (72 km) rim to rim to rim in one very, very long day.
Fortunately, backpacking allows the benefit of time to enjoy the splendor of the Grand Canyon, not to mention some of the best night skies you’ll see in your life. So, less mileage is often more enjoyment. We spent 6 nights on the trail and that was absolutely perfect. I’m not sure I would’ve wanted to move much faster since we had daily high temperatures approaching 110 Fahrenheit (45 degrees Celsius) on several occasions.
For fit, ultralight backpackers this trip could be done in as little as 2 days, spending 1 night on the North Rim. That said, the heat in the Grand Canyon adds a whole new variable that can force schedule interruptions on even upon the most determined hikers.
How hard is it to backpack the Grand Canyon?
The rim to rim to rim backpacking trip in the Grand Canyon is a deceivingly challenging hike.
On one hand, the corridor trails that make up the R2R2R2 route (South Kaibab, North Kaibab, and Bright Angel) are impeccably maintained, require no navigation skills, campsites feature numerous amenities, and potable water is readily available during many times of the year.
On the other hand, the Canyon coaxes you into a false sense of security with its upside down mountain topography. You start with the ease of descending and gravity on your side, you finish working against it. You’ll descend 4780 ft (1450 m) from the top of the south rim only to climb 5700ft (1700m) up to the North Rim, before doing it all over again in reverse.
The biggest challenge you may face is the elements. The intense sun and searing heat, lack of shade (especially on the South Kaibab), and lack of water and requirement to haul extra (exacerbated during non-peak season when many taps are shut off) are variables unique to those unfamiliar with desert hiking. The heat can be so intense that you’ll find yourself kneeling with gratitude at the smallest amount of shade and setting your alarm earlier each day in a futile attempt to beat the worst of it.
During the winter, fall and spring, cold weather is also a major part of the equation. Snow, ice and below freezing temperatures are commonplace higher on the South Rim and the North Rim.
Ultimately, backpacking the rim to rim to rim can be tough, but with proper planning and respect for the environmental conditions, most backpackers encounter no issues.
How do you get a permit to backpack the Grand Canyon?
Grand Canyon National Park has finally decided to stop using their fax-based reservation system and has moved onto recreation.gov website.
To give yourself the best chance of obtaining a permit, participate in the early access lottery which opens mid-month five months before your intended start date. For example, for permits in May the lottery opens December 16 and closes Jan 1. Typically one day after the lottery closes you’ll be advised if you were successful. If so, you’ll be able to make a reservation during your early access period. It’s advisable to book as early as possible during this early access period to ensure maximum date flexibility.
Full instructions and the lottery itself can be found here.
Do you need a park entrance pass if you have a backcountry permit for the Grand Canyon?
Yes, you require a park entrance pass even if you have a permit for backpacking the Grand Canyon. The lines to pay entrance fees at the gate can be long, so make sure to purchase your entrance pass in advance to save time.
America the Beautiful Annual Pass if the best bet if you plan on visiting multiple parks or multiple times within the year of purchasing it. The Grand Canyon charges $35 per vehicle for a 7 day pass, so it doesn’t take many visits to National Parks or federal public lands to pay back the $80 dollar cost of the America the Beautiful Annual Pass.
You can also pre-purchase your 7-day entrance fee at recreation.gov if this is the only time you’ll be visiting a National Park this year.
Which direction should you hike?
The rim to rim to rim trail is started from the South Rim, taking either Bright Angel Trail or the South Kaibab trail down before ascending the North Kaibab to the North Rim and then doubling back. The primary reason for this is the seasonal closure of the North Rim that typically begins on the 1st of December until May 15.
Should you hike the Grand Canyon rim to rim or rim (R2R2R) to rim to rim (R2R)?
When the North Rim is closed to vehicles you’ll only have the option to hike the rim to rim to rim if you wish to complete this hike in its entirety. This provides a couple of advantages. You can camp on deserted North Rim (more on that below) and you will run into fewer and fewer people the further you get from the South Rim. Purely from a solitude perspective, the R2R2R takes the cake while the North Rim is closed to vehicle access. It will take double the time thought, so this itinerary might not be feasible for everyone.
During the later spring, summer and fall months when the North Rim is open, I’d gravitate towards doing the R2R as you get no real benefit from the extra days and mileage at this time of year aside from getting to look at the views in reverse, spending more time in the grand canyon, and avoiding a 4-hour shuttle ride.
Which trails do you hike for the rim to rim to rim?
The most popular and recommended way to backpack (or hike) the R2R2R is to begin your hike by descending the South Kaibab trailhead. After climbing the North Kaibab and returning to Phantom Ranch you’ll be faced with a choice of climbing the South Kaibab or hiking up the Bright Angel Trail. Despite being 2 miles longer, Bright Angel is the wiser choice, especially if there is any kind of heat whatsoever. The South Kaibab is relentlessly exposed with virtually no shade and no opportunity for water. Descending it at the heat of the day on an unexpectedly hot day in April left us completely bagged, I couldn’t have imagined hiking up in these conditions. The smart choice here is to ascend Bright Angel as it provides numerous opportunities for water and shade making the already challenging experience of climbing out of the Grand Canyon significantly more enjoyable.
When is the best time to hike the Grand Canyon rim to rim to rim?
If you can secure a permit, April is the ideal month to hike the Grand Canyon rim to rim to rim. The heat typically is not yet in full force (It did get to over 110, so extreme heat is still possible), the likelihood of winter conditions (ice, snow) at the higher elevations is reduced, the days are long, and the North Rim is still closed. Hiking the R2R2R while the North Rim is closed affords a couple key advantages. First, it reduces some of the day hiker traffic descending from the North Rim (although according to the park service only around 10% of visitors to the Grand Canyon visit the North Rim) and most importantly it provides an unprecedented way to obtain some solitude on what is a very busy trail by spending a night camping on the North Rim.
The ultimate rim to rim to rim backpacking hack : Book a night on the North Rim and beat the crowds
I was lucky enough to speak to an informative ranger before requesting our permit who was kind enough to advise me that despite the North Rim being closed, the campground remains open to backcountry travelers venturing from the Grand Canyon’s south side. As long as you’re equipped with warm enough gear for the high elevation of the North Rim, (the daily average low is 32F (0C) in April), this can be an incredible experience. With luck, you’ll have an empty campsite and the opportunity to explore the viewpoints of the North Rim in near isolation.
Can you have campfires inside the Grand Canyon?
No, fires are prohibited throughout the backcountry in Grand Canyon National Park.

How do you get to the South Kaibab Trailhead?
After parking your vehicle at the Backcountry Information Lot you’ll hop on the free Hikers’ Express shuttle bus to the South Kaibab trailhead. The hours change depending on the season, but they typically leave as early as possible to ensure hikers beat the heat. Check this page on the Grand Canyon’s site to determine the times the bus departs during your trip dates.
How do you get to the Bright Angel Trailhead?
The Bright Angel Trailhead is only a ¼ mile from the Backcountry Information Lot making a return to your vehicle seamless on completion of your trip.
Food storage while backpacking the Grand Canyon
Metal food storage containers are provided at each campsite along the corridor trails of the Grand Canyon. If you’re planning an itinerary that includes campsites off the main corridor trails bring something to protect your food, like a ratsack.
Squirrels in the Grand Canyon
Along the corridor trails one of the largest annoyances and potential dangers you’re likely to face is the Grand Canyon famous rock squirrels. It’s rumored that they hold the title for most dangerous animal in the Grand Canyon and this becomes immediately obvious after witnessing the behavior of the first squirrel you see. Extra caution is required! Do not leave your bag or clothing unattended and ensure all food is placed inside the metal food storage boxes. Leave your pack open and hanging from the metal bars at each campsite. Apparently, this allows them to climb inside and take a look around before realizing there is nothing good to eat and thereby preventing them from chewing though your pack to investigate. Be extra aware of the squirrels nearest to the South Rim. The high volume of day hiker traffic here seems to have further emboldened this cohort, likely due to many people feeding them. If you sit down and pull out a snack, you may look over to realize there is a squirrel uncomfortably close. You’ve been warned.
How do I have dinner at Phantom Ranch?
In the middle of a long hard day of backpacking it’s only natural to have visions of your favorite dinner pop in and out of your head. Maybe it’s your favorite pizza, steak frites, or marinated tofu delight. Whatever your fancy, you’re usually constrained to dining on some form of dinner that involves adding boiling water to something dry. One benefit that comes with the sometimes diluted wilderness experience around Bright Angel Campground and Phantom Ranch is your ability to treat your hiking buddy (or have them treat you) to a sit down meal at the Phantom Ranch Canteen. You’ll have your choice of steak, stew or vegetarian option at the heart of the Grand Canyon. A great meal and backpack weight savings all at once! Like any good restaurant, reservations are required, so make a booking for dinner well in advance if this is something that tickles your fancy.
Where to stay before hiking or backpacking the Grand Canyon
To ensure an early start and guarantee you catch the Hikers’ Express Shuttle Bus from the Backcountry Information Center it’s most convenient to spend the night before your hike close to the South Rim of the Grand Canyon. The best option is to stay inside the park itself which allows for exploration of the rim area and historic district during the day before your hike. These options book up incredibly fast, so make your booking as soon as you’ve secured your permit.
Best accommodation options inside Grand Canyon National Park
Camp at Mather Campground
The most economical option is to camp at one of the 327 campsites at Mather Campground in Grand Canyon Village. The campsites include all the amenities you’d expect plus flush toilets and potable water throughout the campground. If you’re tenting, Pine Loop is a tent-only area where generators are prohibited. Book a reservation on recreation.gov well in advance to secure a spot.
Stay at one of the Grand Canyon’s historic lodges
Sometimes nothing beats a comfortable bed before (and after) multiple nights in the tent. Fortunately, the Grand Canyon offers numerous historic lodges to get a good night or two of sleep before heading out on your rim to rim to rim adventure. The majority of these are within easy walking distance of the Canyon Rim.
El Tovar Hotel is considered to be the crown jewel of Historic National Park Lodges. Constructed in 1905 of local limestone and Oregon Pine, this historical hotel is located directly on the rim of the Grand Canyon.
Bright Angel Lodge and Cabins – Another historic lodging option at the rim of the Grand Canyon. This lodge was originally constructed as a less expensive option to El Tovar. This National Historic Landmark features 90 rooms ranging from cozy lodge rooms (some with shared, some with private bathrooms) and several historic cabins. For one of a kind accommodation consider a stay at the historic Buckey O’Neill Cabin or Red Horse Cabin. You can find more information on these historic cabins and details on how to book them here.
Kachina Lodge, Thunderbird Lodge, Yavapai Lodge and Maswik Lodge – These lodging options in Grand Canyon Village are slightly more contemporary than the first 2, but do offer more conventional hotel amenities still within easy access of the Canyon Rim.
Hotels outside Grand Canyon National Park
If the options in the park are booked up there are several notable options just outside of the park gates in the small village of Tusayan. Only 7 miles (11 km) south of the south rim is a suitable backup option that leaves a very manageable drive for the morning of your departure.The Grand Hotel at the Grand Canyon is most sought after choice here with several other decent chain hotel options available.
Trail sections and descriptions
The three trails that make up the rim to rim to rim of the Grand Canyon are referred to as the Corridor trails. These include the South Kaibab Trail, North Kaibab Trail, and Bright Angel Trail. The most common route for hiking rim to rim to rim is to descend the South Kaibab Trail to the Colorado River and Phantom Ranch. From there you’ll climb the North Kaibab trail to the North Rim before doubling back to Phantom Ranch and taking Bright Angel Trail back to the South Rim. The trail sections are broken down with descriptions in this order,
South Kaibab Trailhead to Bright Angel Campground
7 miles (11.3 KM)
4780 ft (1450 M) elevation loss
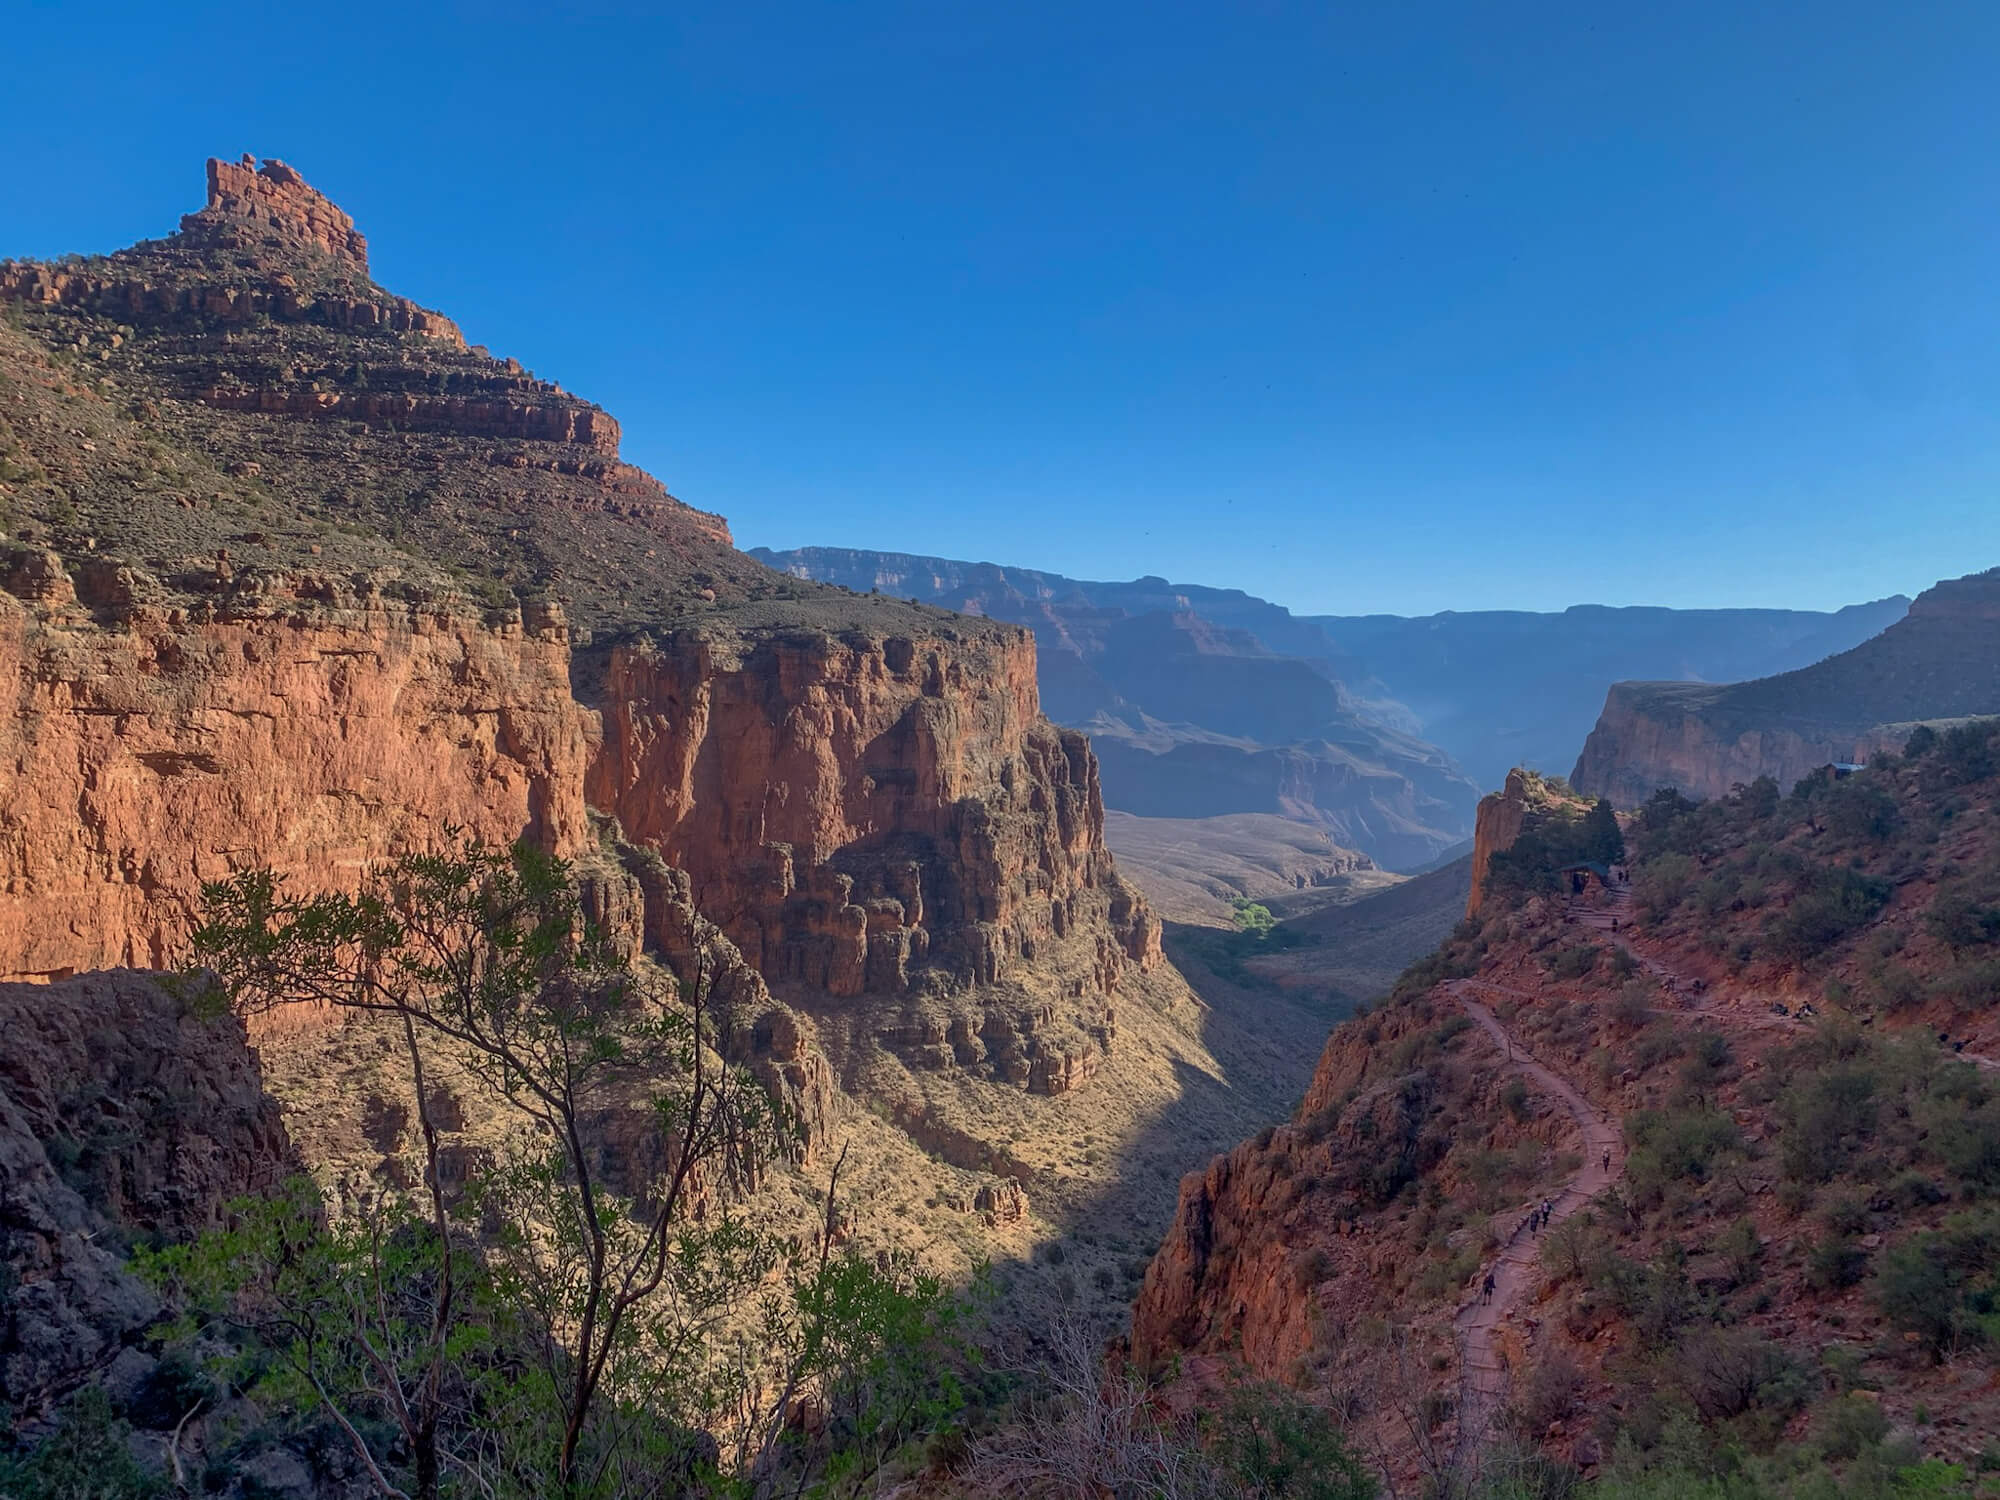
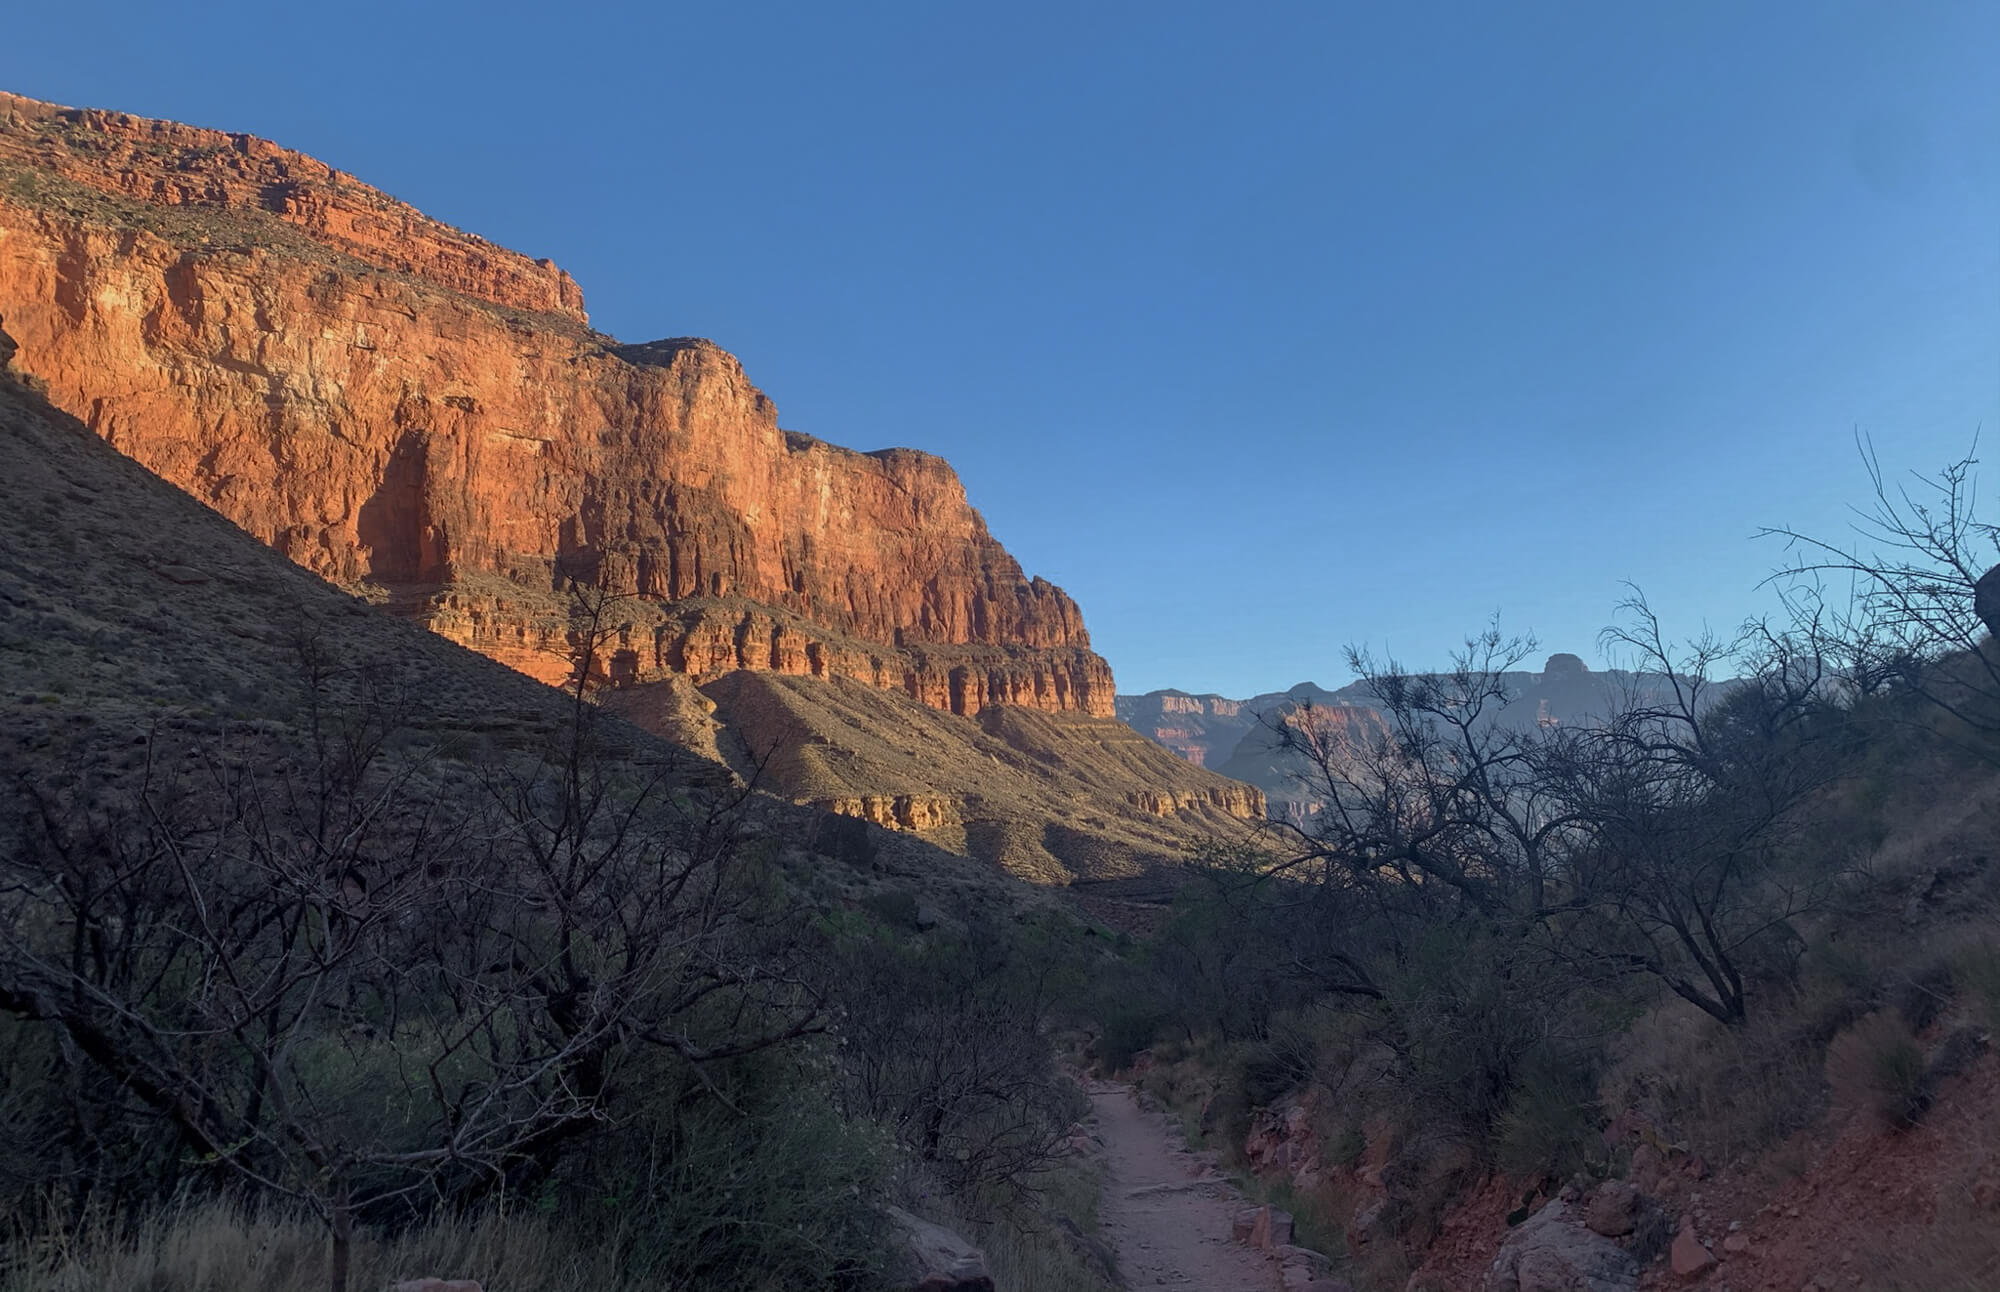
After disembarking from the Hikers’ Express Shuttle bus, take a moment to top up your water supplies (this tap is seasonal and may not be turned on until early May). This is your last chance to do so prior to reaching Phantom Ranch and you have 7 miles of very exposed hiking to get through with almost no shade. After approaching the Canyon rim and dropping, in it doesn’t take long before you come across a series of switchbacks before traversing the slope in a straight shot until coming up on the sublime vista at the aptly named Ooh Ahh Point. You’re already 800ft (250m) of descending in with plenty to go!
After Ooh’ing and Ahh’ing for as long as you feel is required, continue along the trail as it descends the ridgeline to Cedar Ridge where toilets (no water) are available to anyone feeling moved by the views… The South Kaibab continues its descent along the ridgeline before skirting around the west side of O’Neill Butte and descending to Skeleton Point. Depending on the season, you’ll likely be ready to de-layer by this point as you notice the substantial increase in temperature as you descend towards the canyon floor. After Skelton Point the trail drops down dramatically via a series of switchbacks which descend 650ft (200 m) of elevation in just over half a mile (1 km) towards the Tonto plateau. By this section, hiker traffic thins substantially as all but the boldest, fittest or most naive day hikers have turned back. After completing the switchbacks and continuing your descent at a rapid, but slightly more gradual pace you’ll reach the Tonto Plateau and a small rest stop at the Tipoff. The Tipoff has a shaded pavilion and toilers (no water) and is a terrific spot to have a snack, rehydrate, and embrace the shade before tackling the final leg of the South Kaibab.

The section following Tipoff can feel like a race against time, especially for those hiking in late spring, summer or during an unseasonably hot day. In 1.5 miles (2.5 KM) from the Tipoff to the fork with River Trail you rapidly descends nearly 1280ft (390 m). Despite the rapid descent, you’ll do so without the major switchbacks you encountered earlier and almost no shade. We hiked during an unseasonably hot day in April where the temperature got to well over100 and this section felt like the most challenging of our entire hike. The Park Service advises that everyone start hiking well before dawn or in the late afternoon during May to September and advises against being on the trail between 10 am – 3 pm to avoid medical risk and potential need for rescue. So start early! After reaching the fork with River trail continue to the right. head through the tunnel and across the Black bridge.
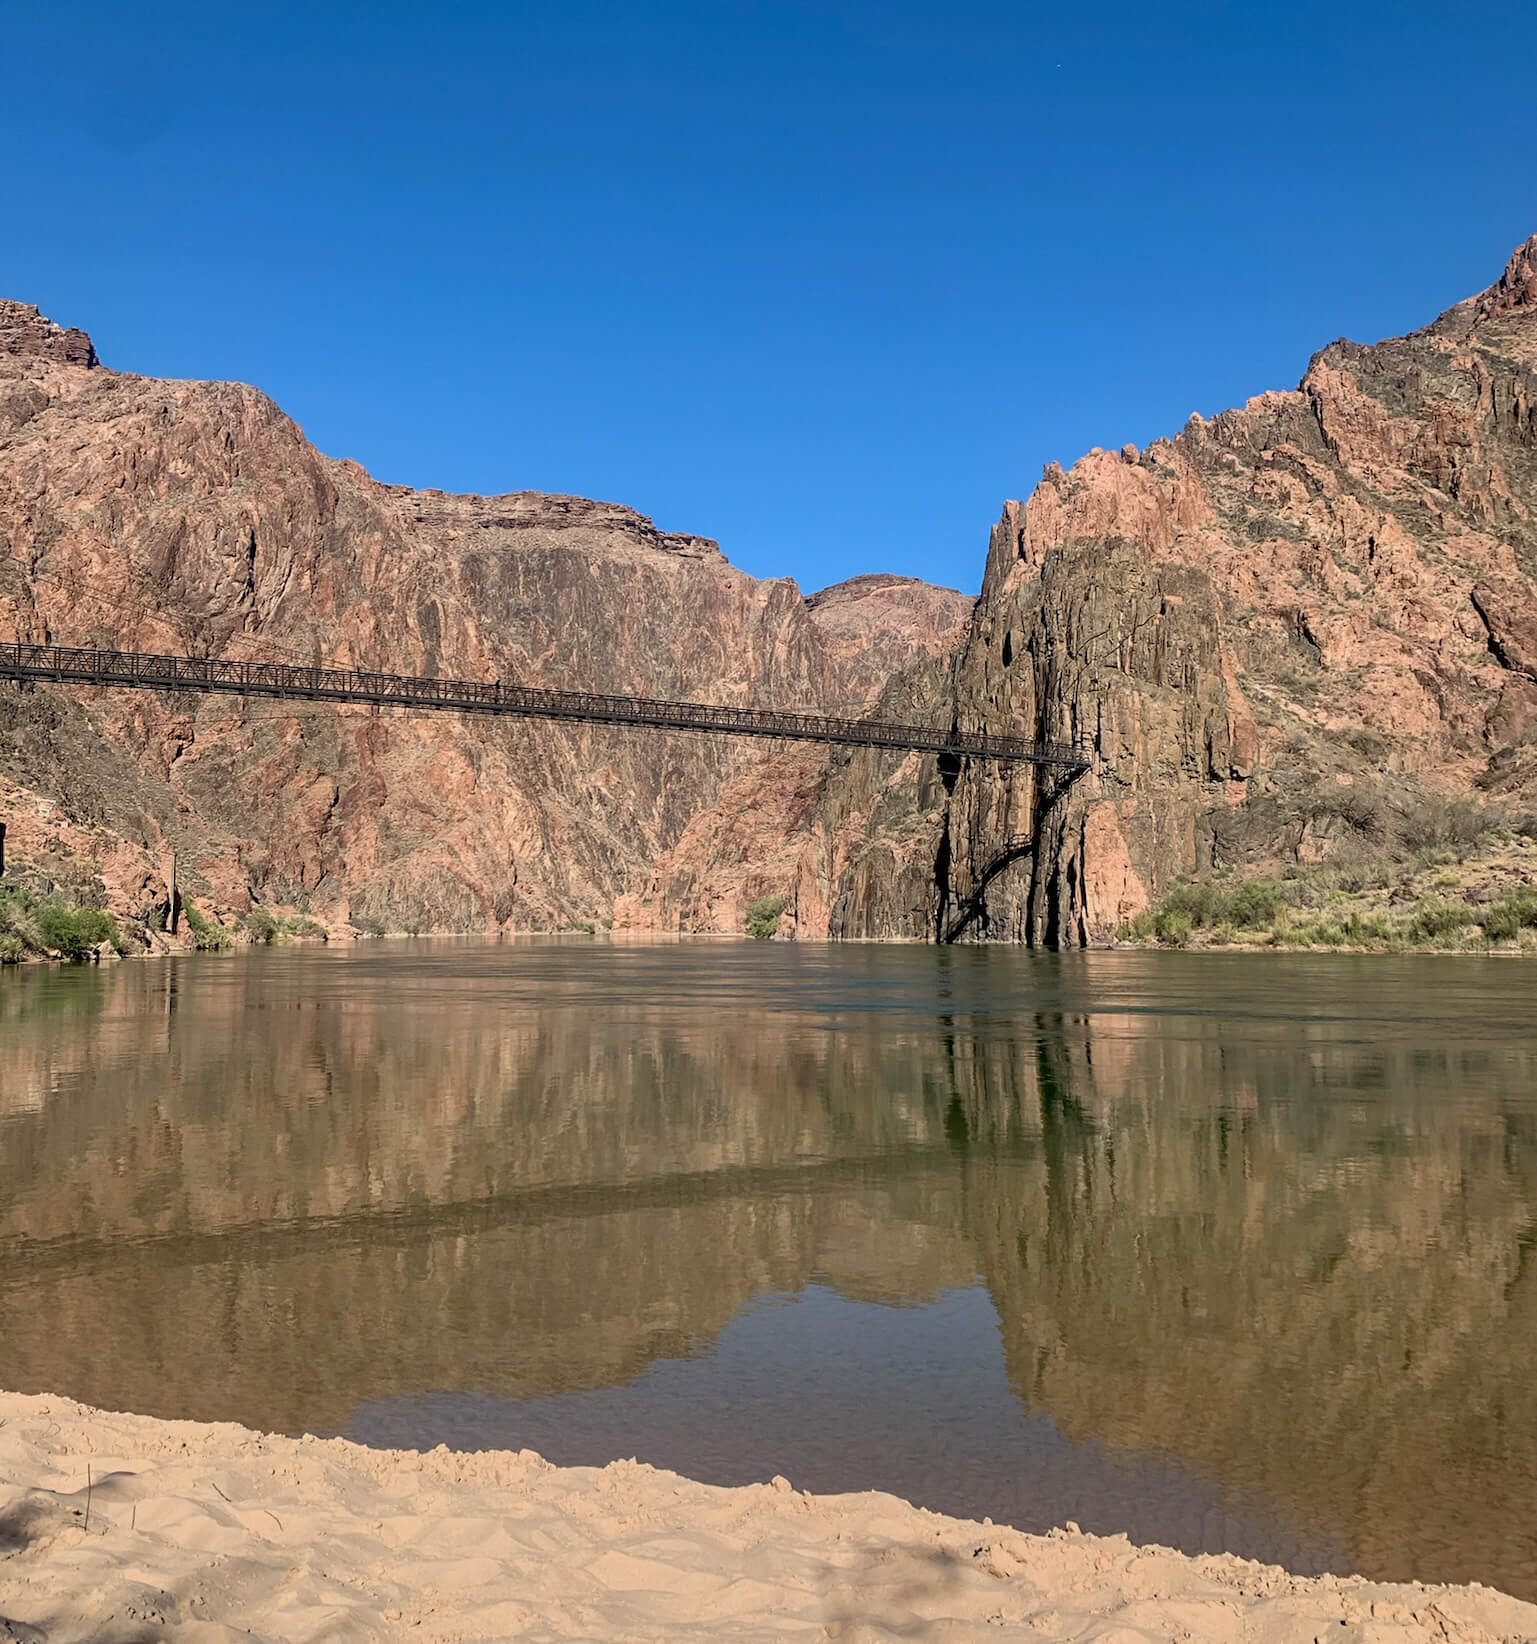
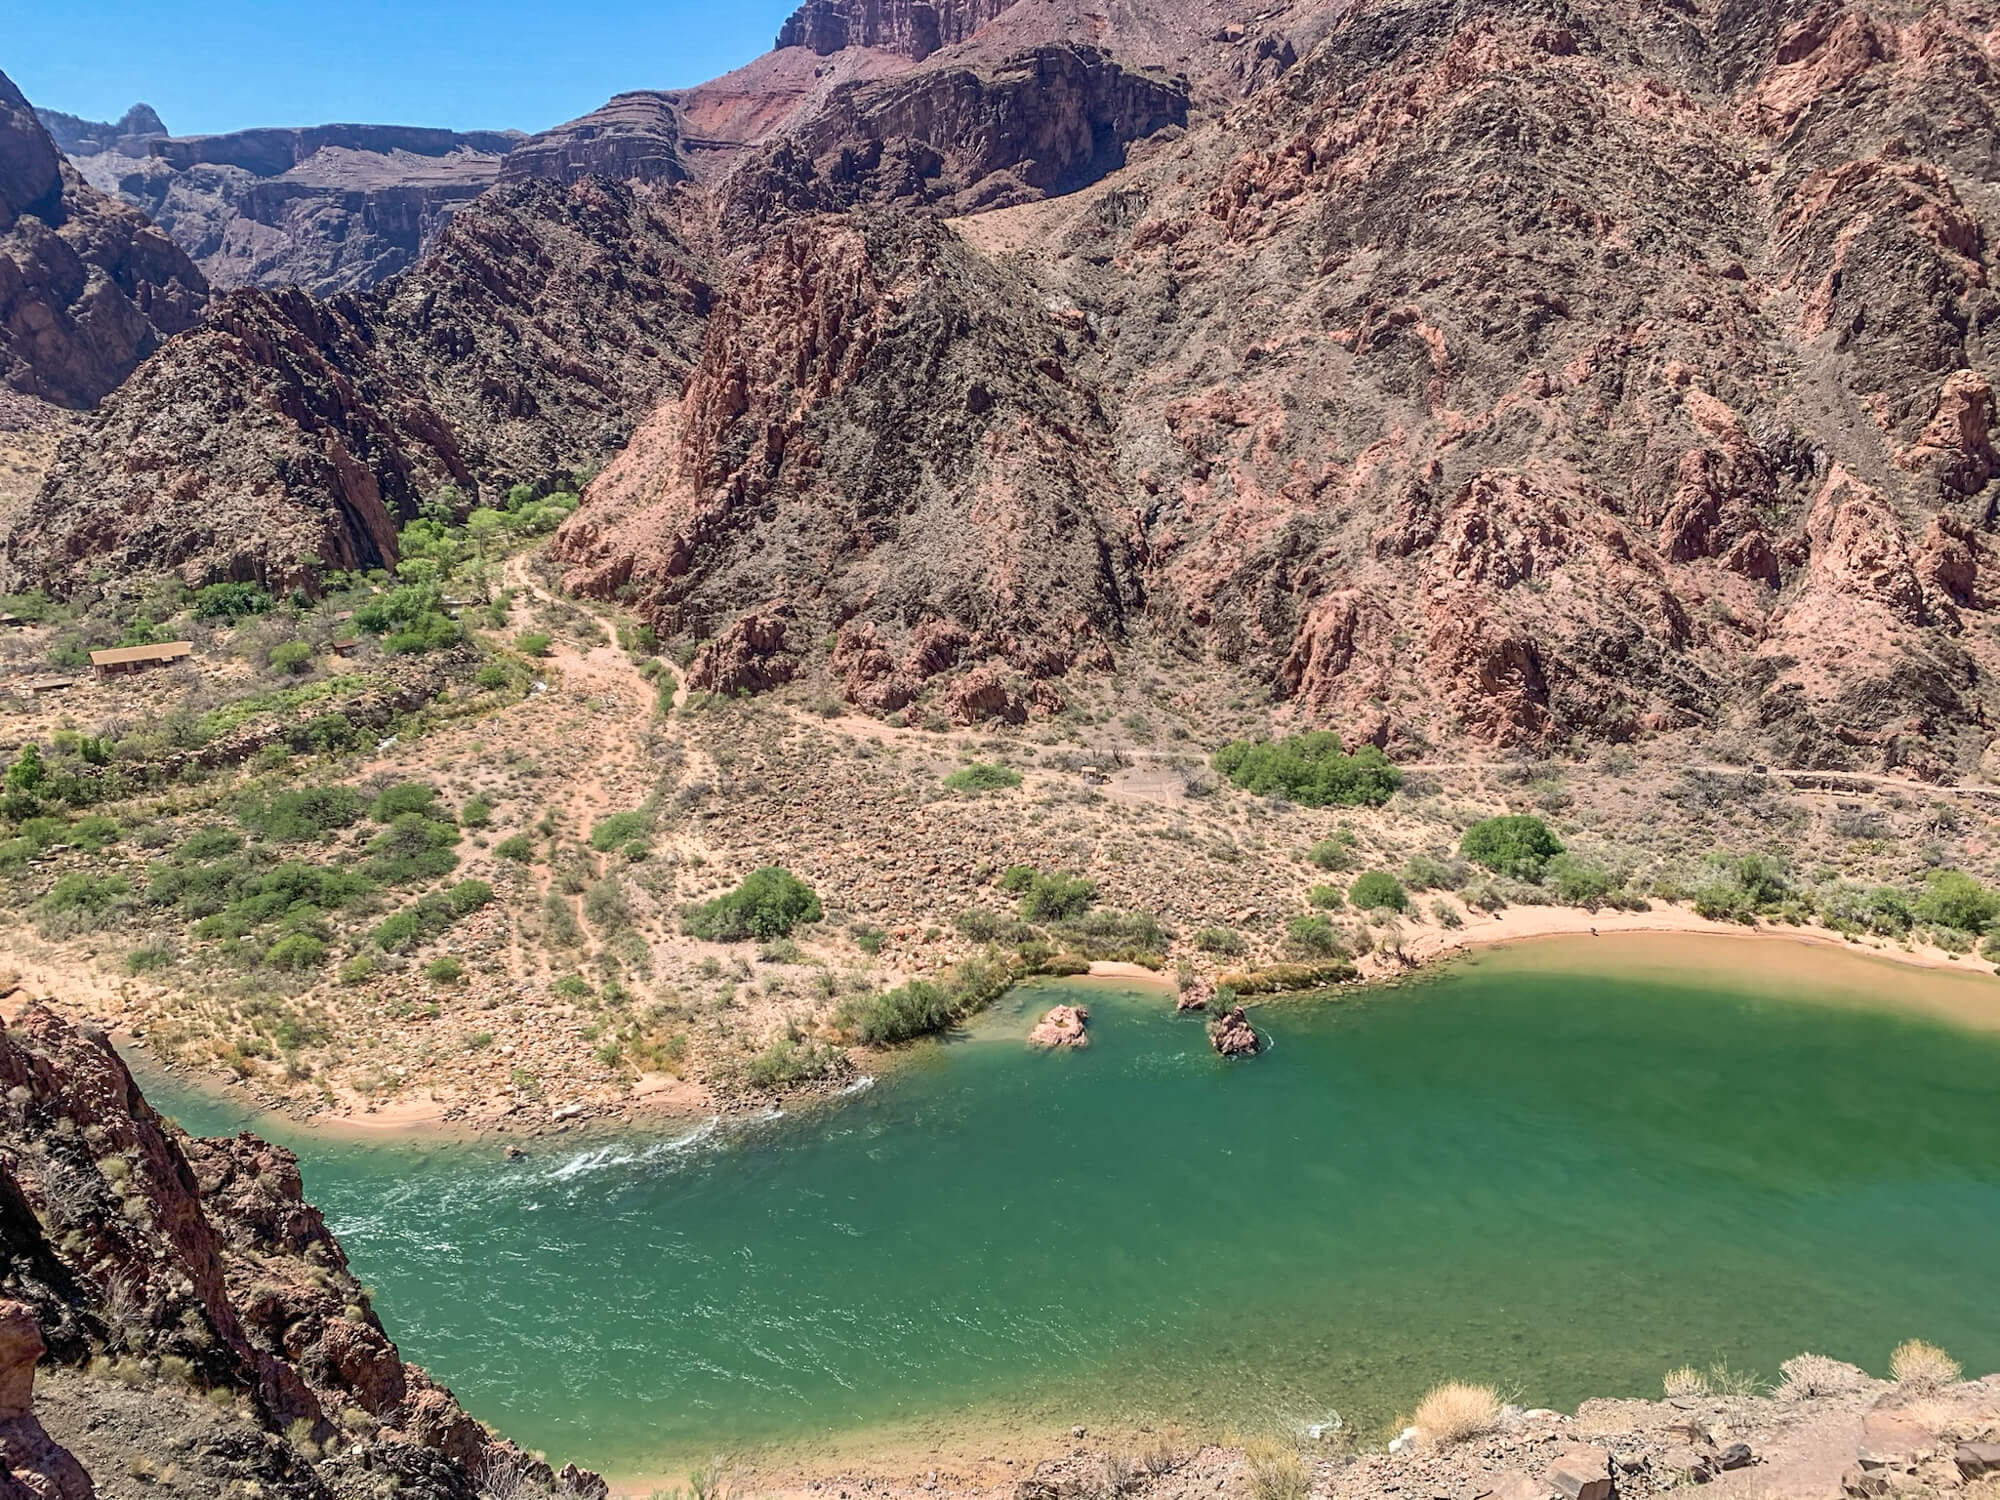
After crossing black bridge you’ll pass by Boat Beach ( a nice spot to check out on the Colorado River) before walking for another ½ mile to reach Bright Angel Campground, shade, and most importantly water.
Bright Angel Campground to North Kaibab Trailhead or North Rim Campground
14 miles (22.5 KM)
5761 FT (1756 m) Elevation Gain
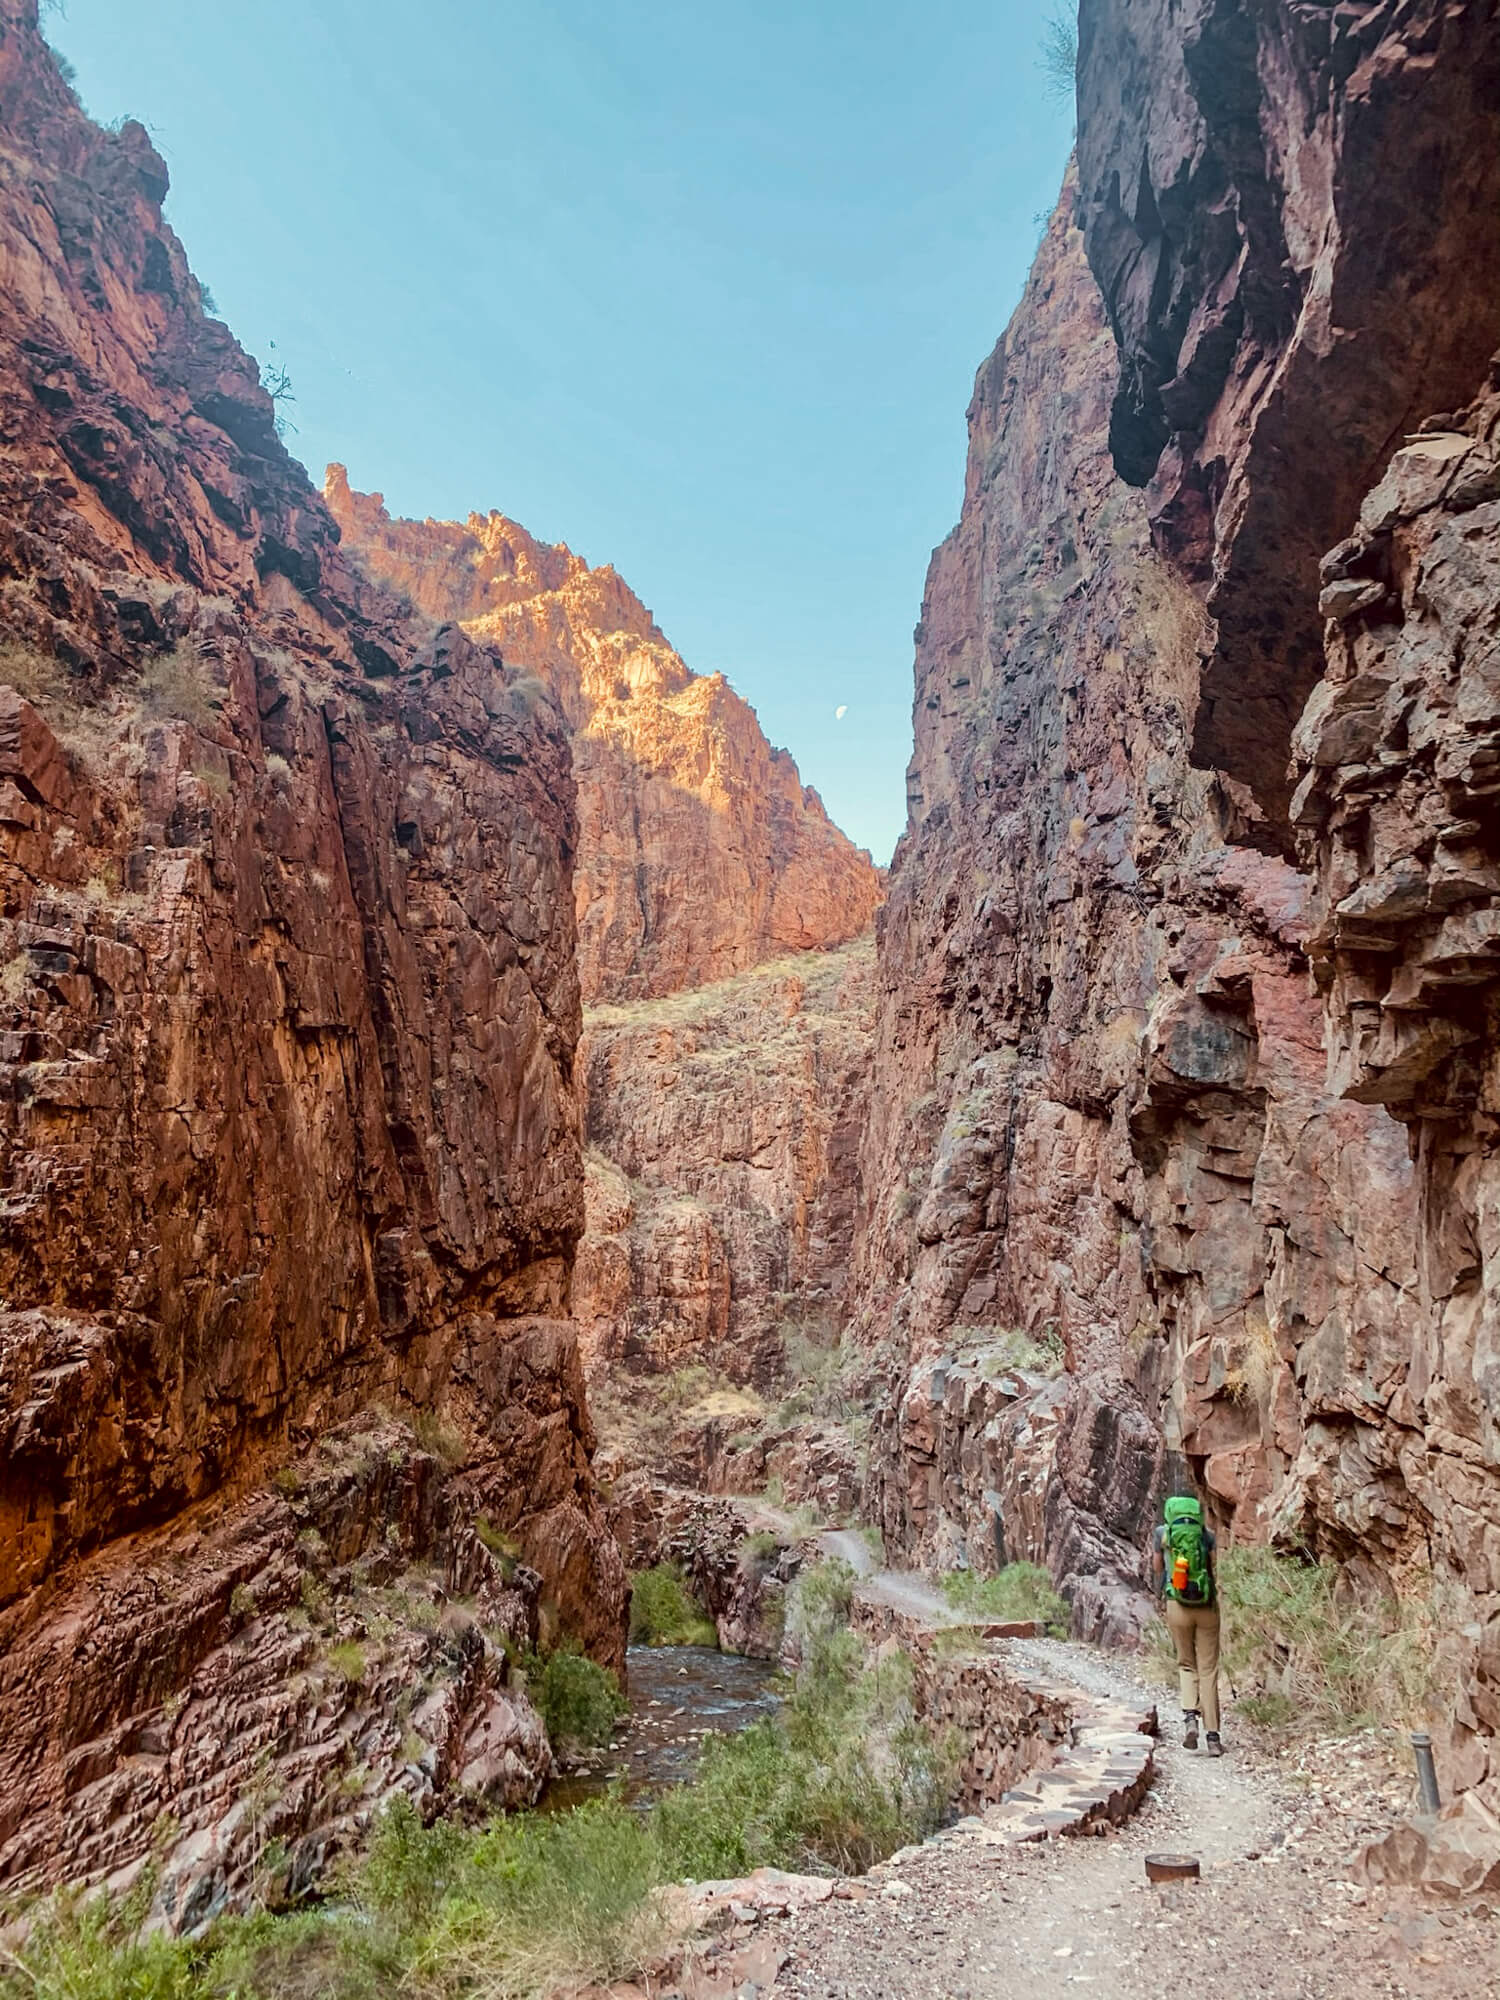
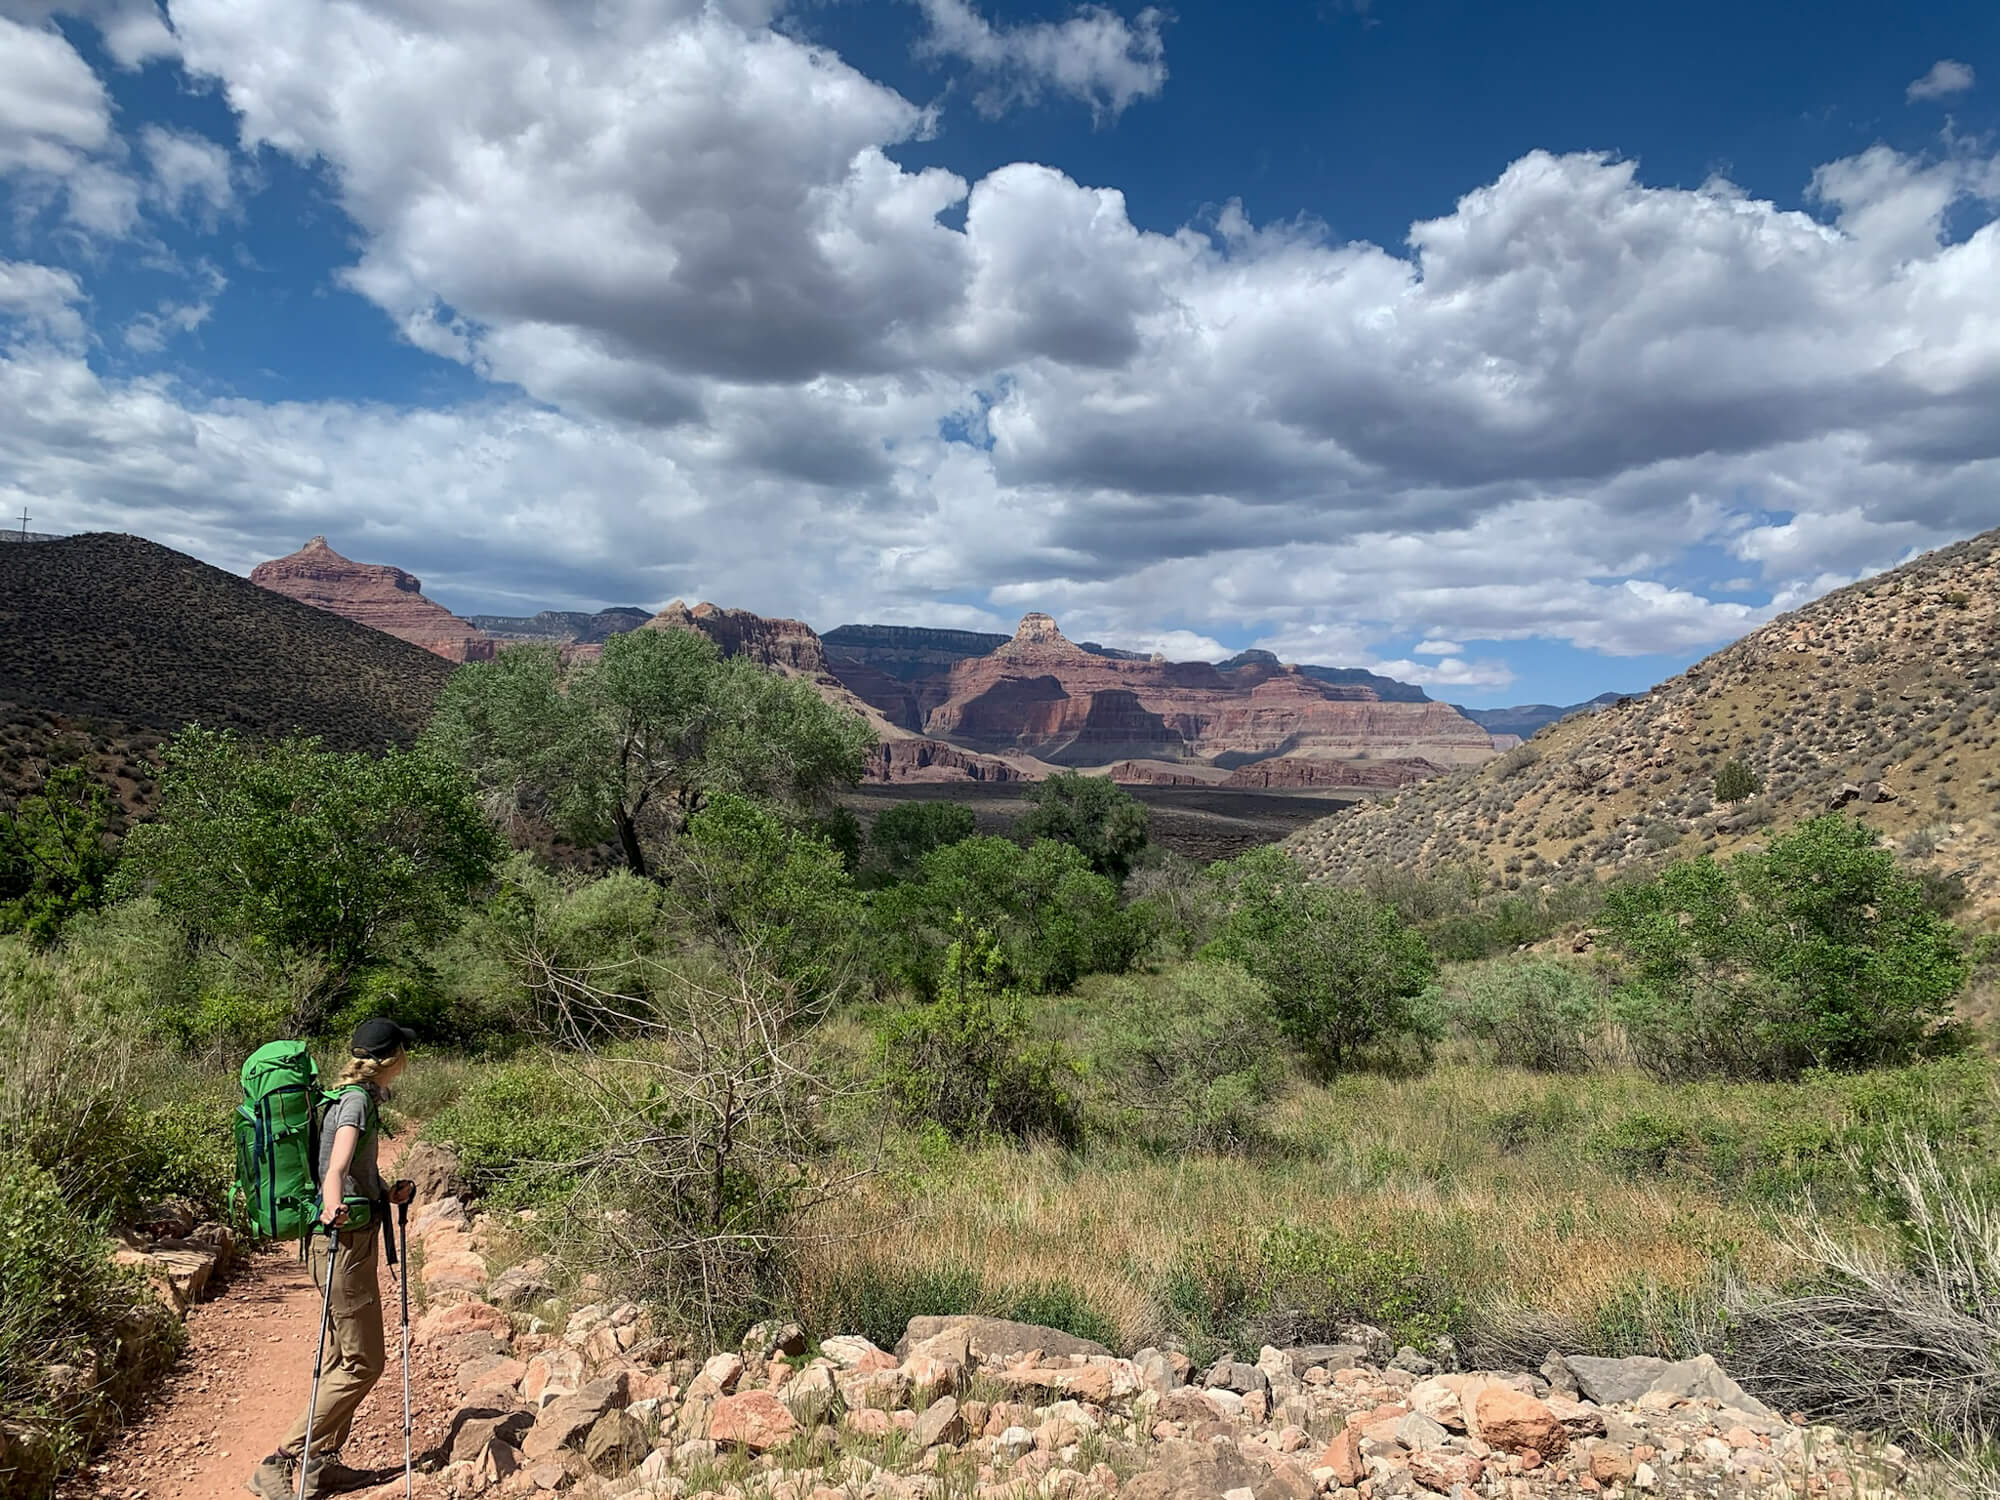
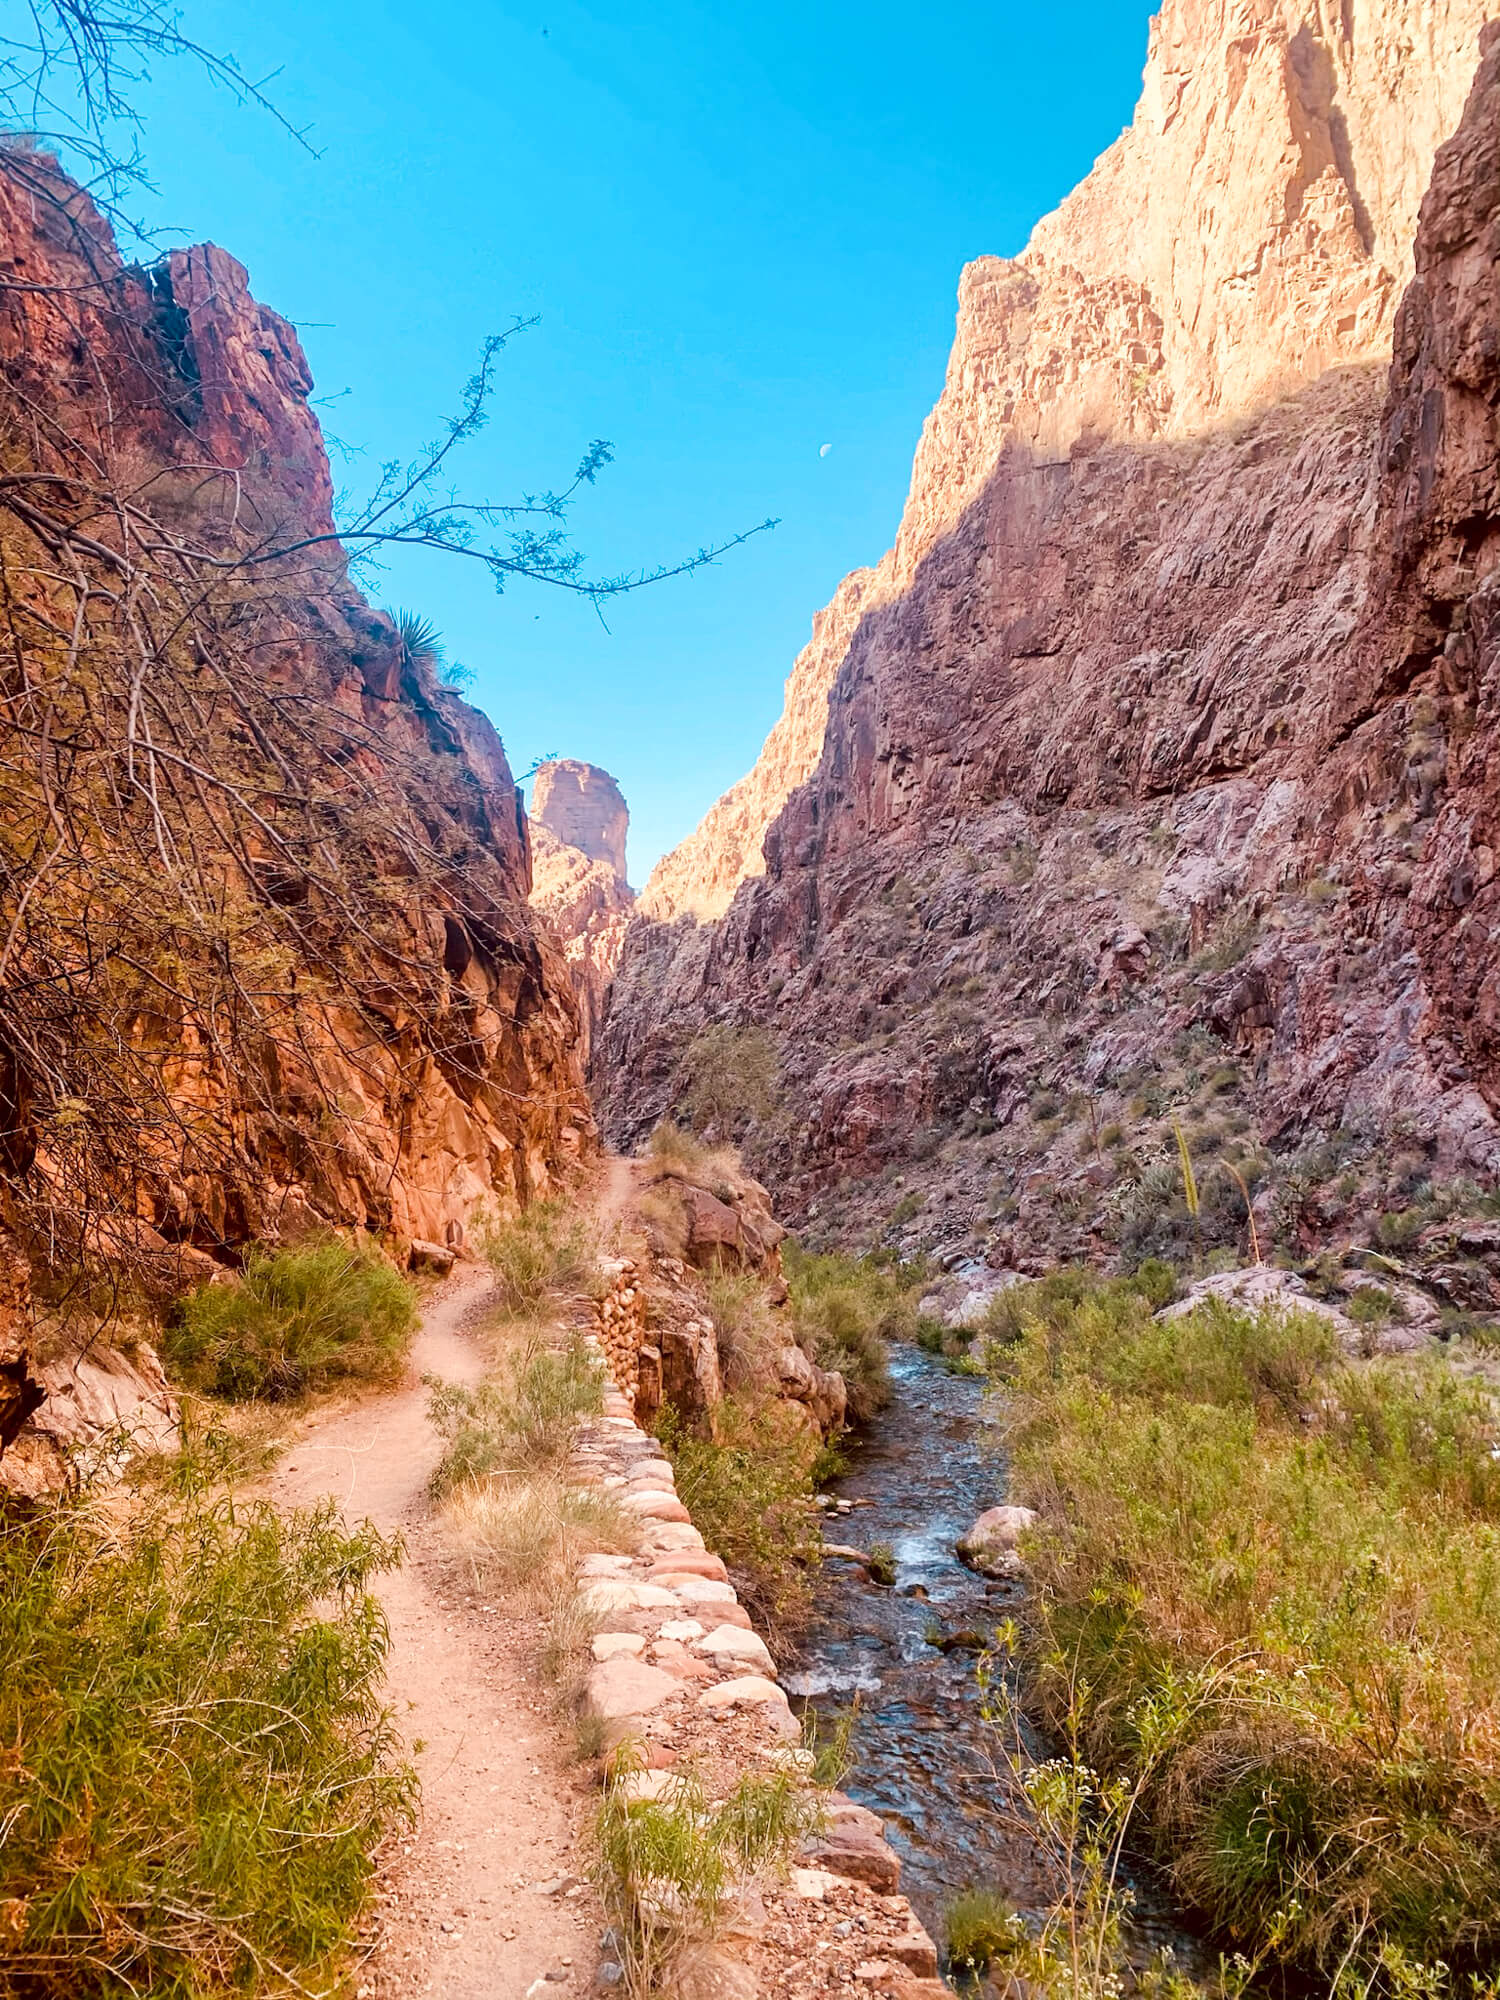
After leaving Bright Angel Campground and passing through Phantom Ranch the trail meanders alongside Bright Angel creek as the Grand Canyon enters one of its narrowest sections, the Inner Gorge or “the Box”. The hiking here is quite flat and easy, but with dark rock walls and low elevation this section can feel like the parking lot at a Phoenix Target in August, so once again, make sure to start early.
After leaving the Box, the trail remains a gradual incline for the entire 7.2 mi (11.6 km) stretch from Bright Angel to Cottonwood Campground. After negotiating a small hill around 5.5 miles from Bright Angel, you’ll have the option of making a wonderful side trip to the cool oasis of Ribbon Falls.
This trip is well worth it and can also easily be made as a quick afternoon trip directly from Cottonwood campground, if you’re overnighting there. Going to Cottonwood first adds a 1.6 miles (2.6 km) each way, but gets off the trail before the heat of the day and helps you secure a better campsite at Cottonwood by getting there early.
To get to Ribbon Falls follow the path until you hit Bright Angel Creek before crossing and following the fork to the left to lower ribbon falls. If you have the energy, a longer trail (0.9 miles or 1.4 km) forks right and climbs 330ft (100m) of elevation to the less visited Upper Ribbon Falls, Note that at time of hiking the bridge to access to this trail was removed and an easy ford of Bright Angel Creek was required to access the trail to both upper and/or lower Ribbon Falls.

After reaching Cottonwood campsite or overnighting there, you’ll hike for 1.4 miles (2.3KM) gaining about 390 ft (120 m) alongside Bright Angel Creek before crossing a final bridge to reach the Manzanita Rest Area. Seasonal water taps are available at the Manzanita Rest area. During the winter and spring months, you’ll a have a final opportunity to fill and treat water by taking the short, ¼ mile side trip to Roaring Springs which lies ⅔ mile (1.1 KM) up from Manzanita Rest Area. Regardless of your water needs, the short side trip to Roaring springs is worthwhile as it brings you closer to the incredible stream of water that gushes out from the cliff above before making its way down to Bright Angel Creek below. Once you’re filled up and ready to get started, backtrack along Roaring Springs Trail back to the North Kaibab and take a breath. The big ascent is about to get started.
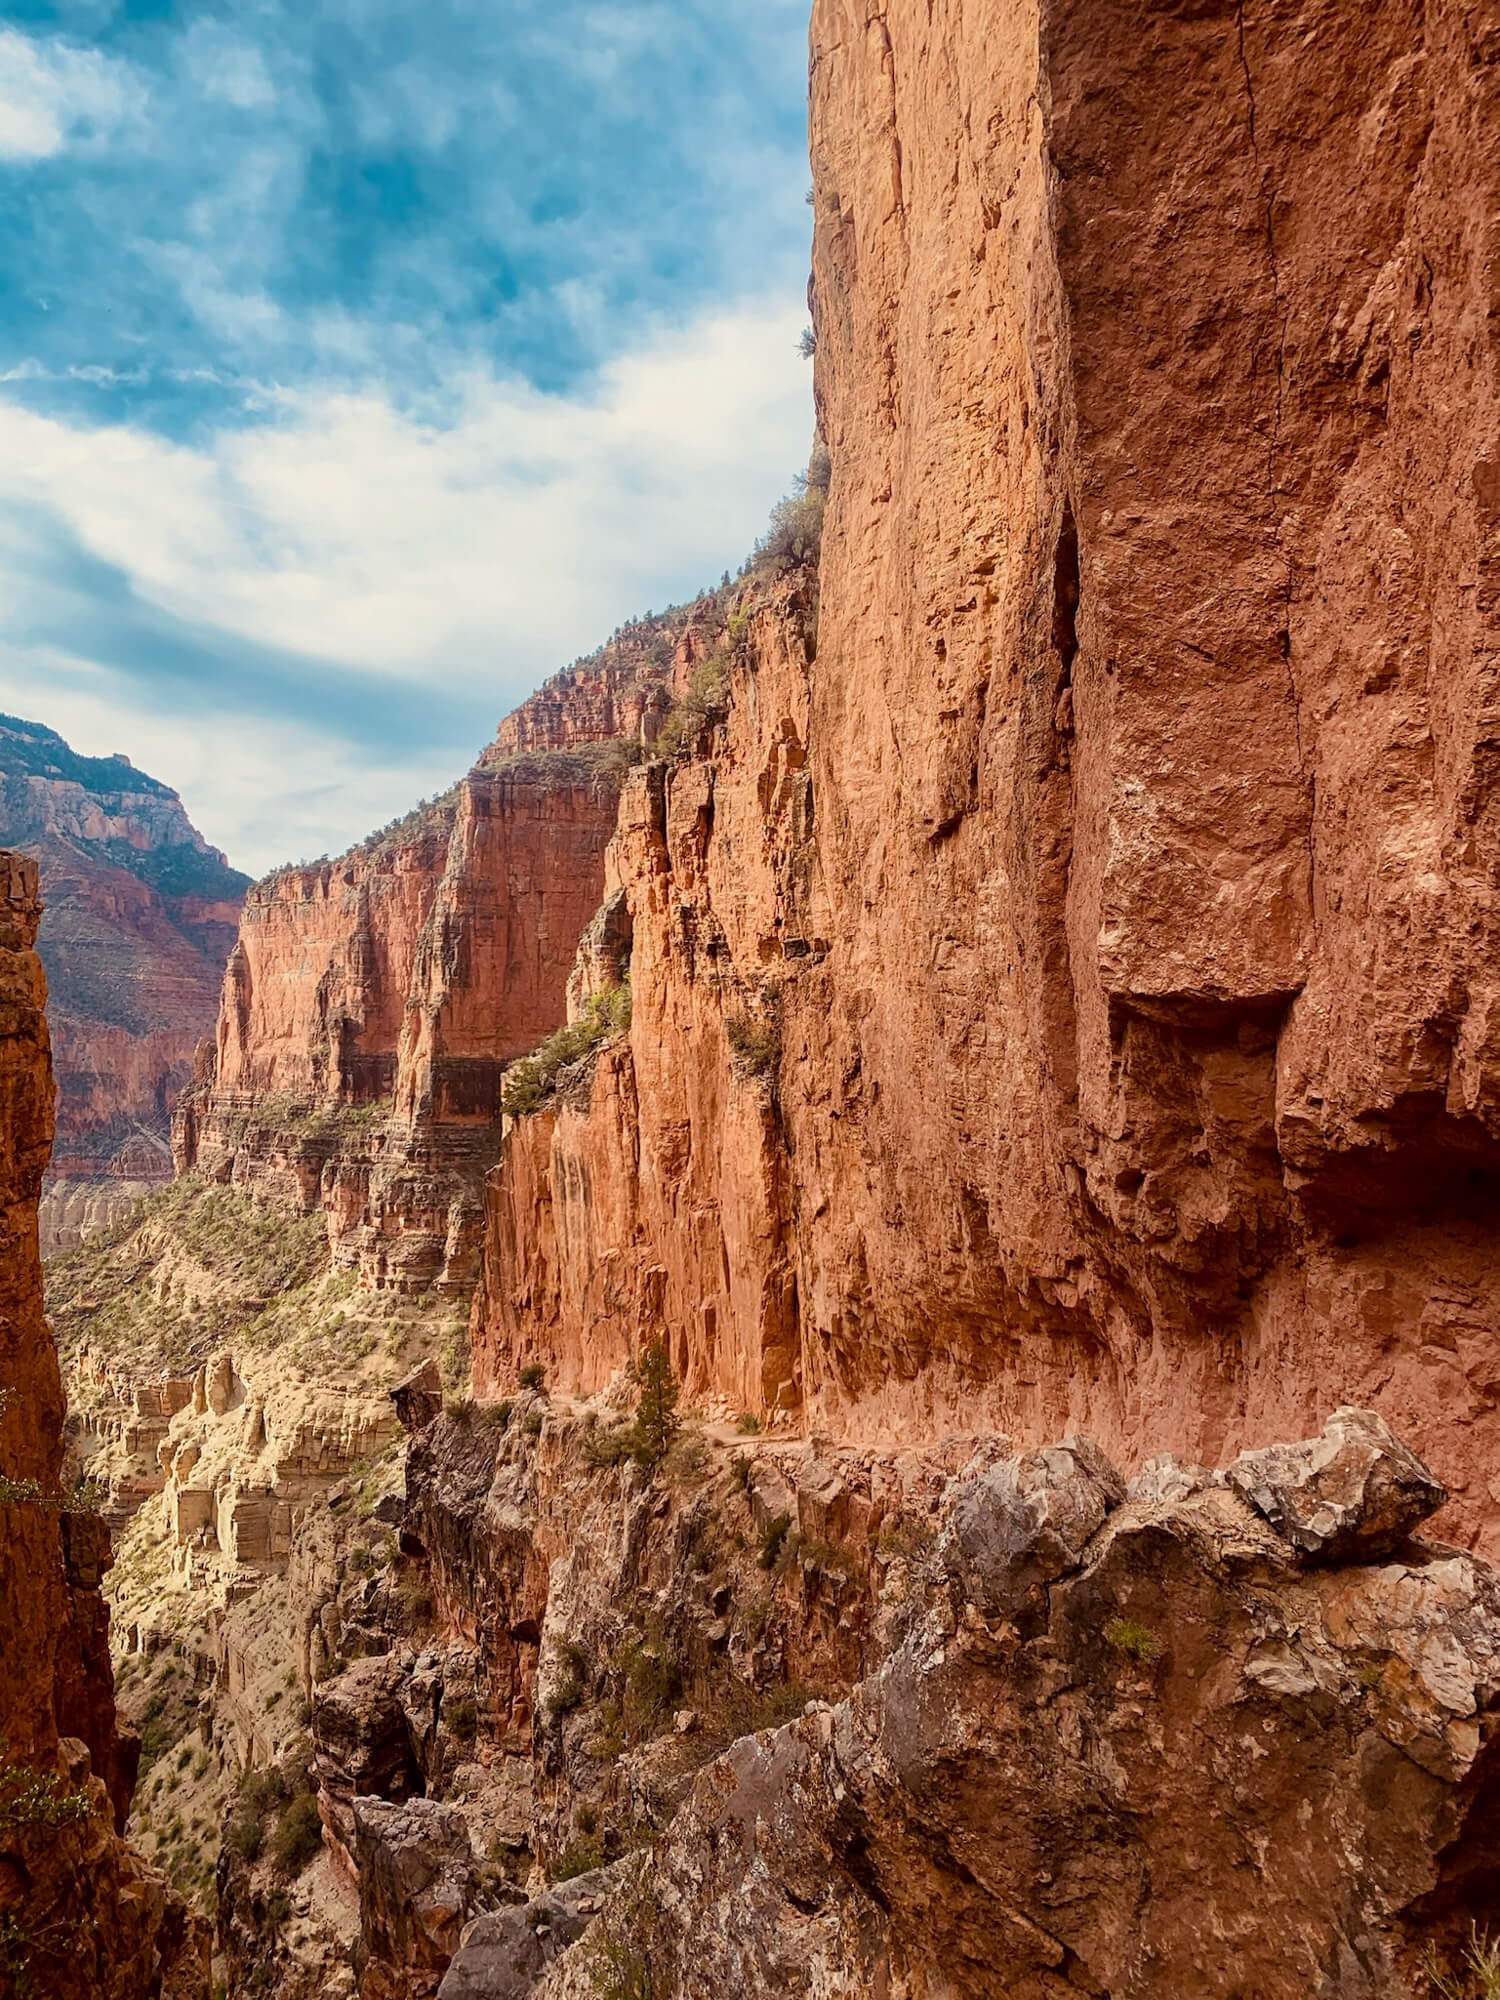
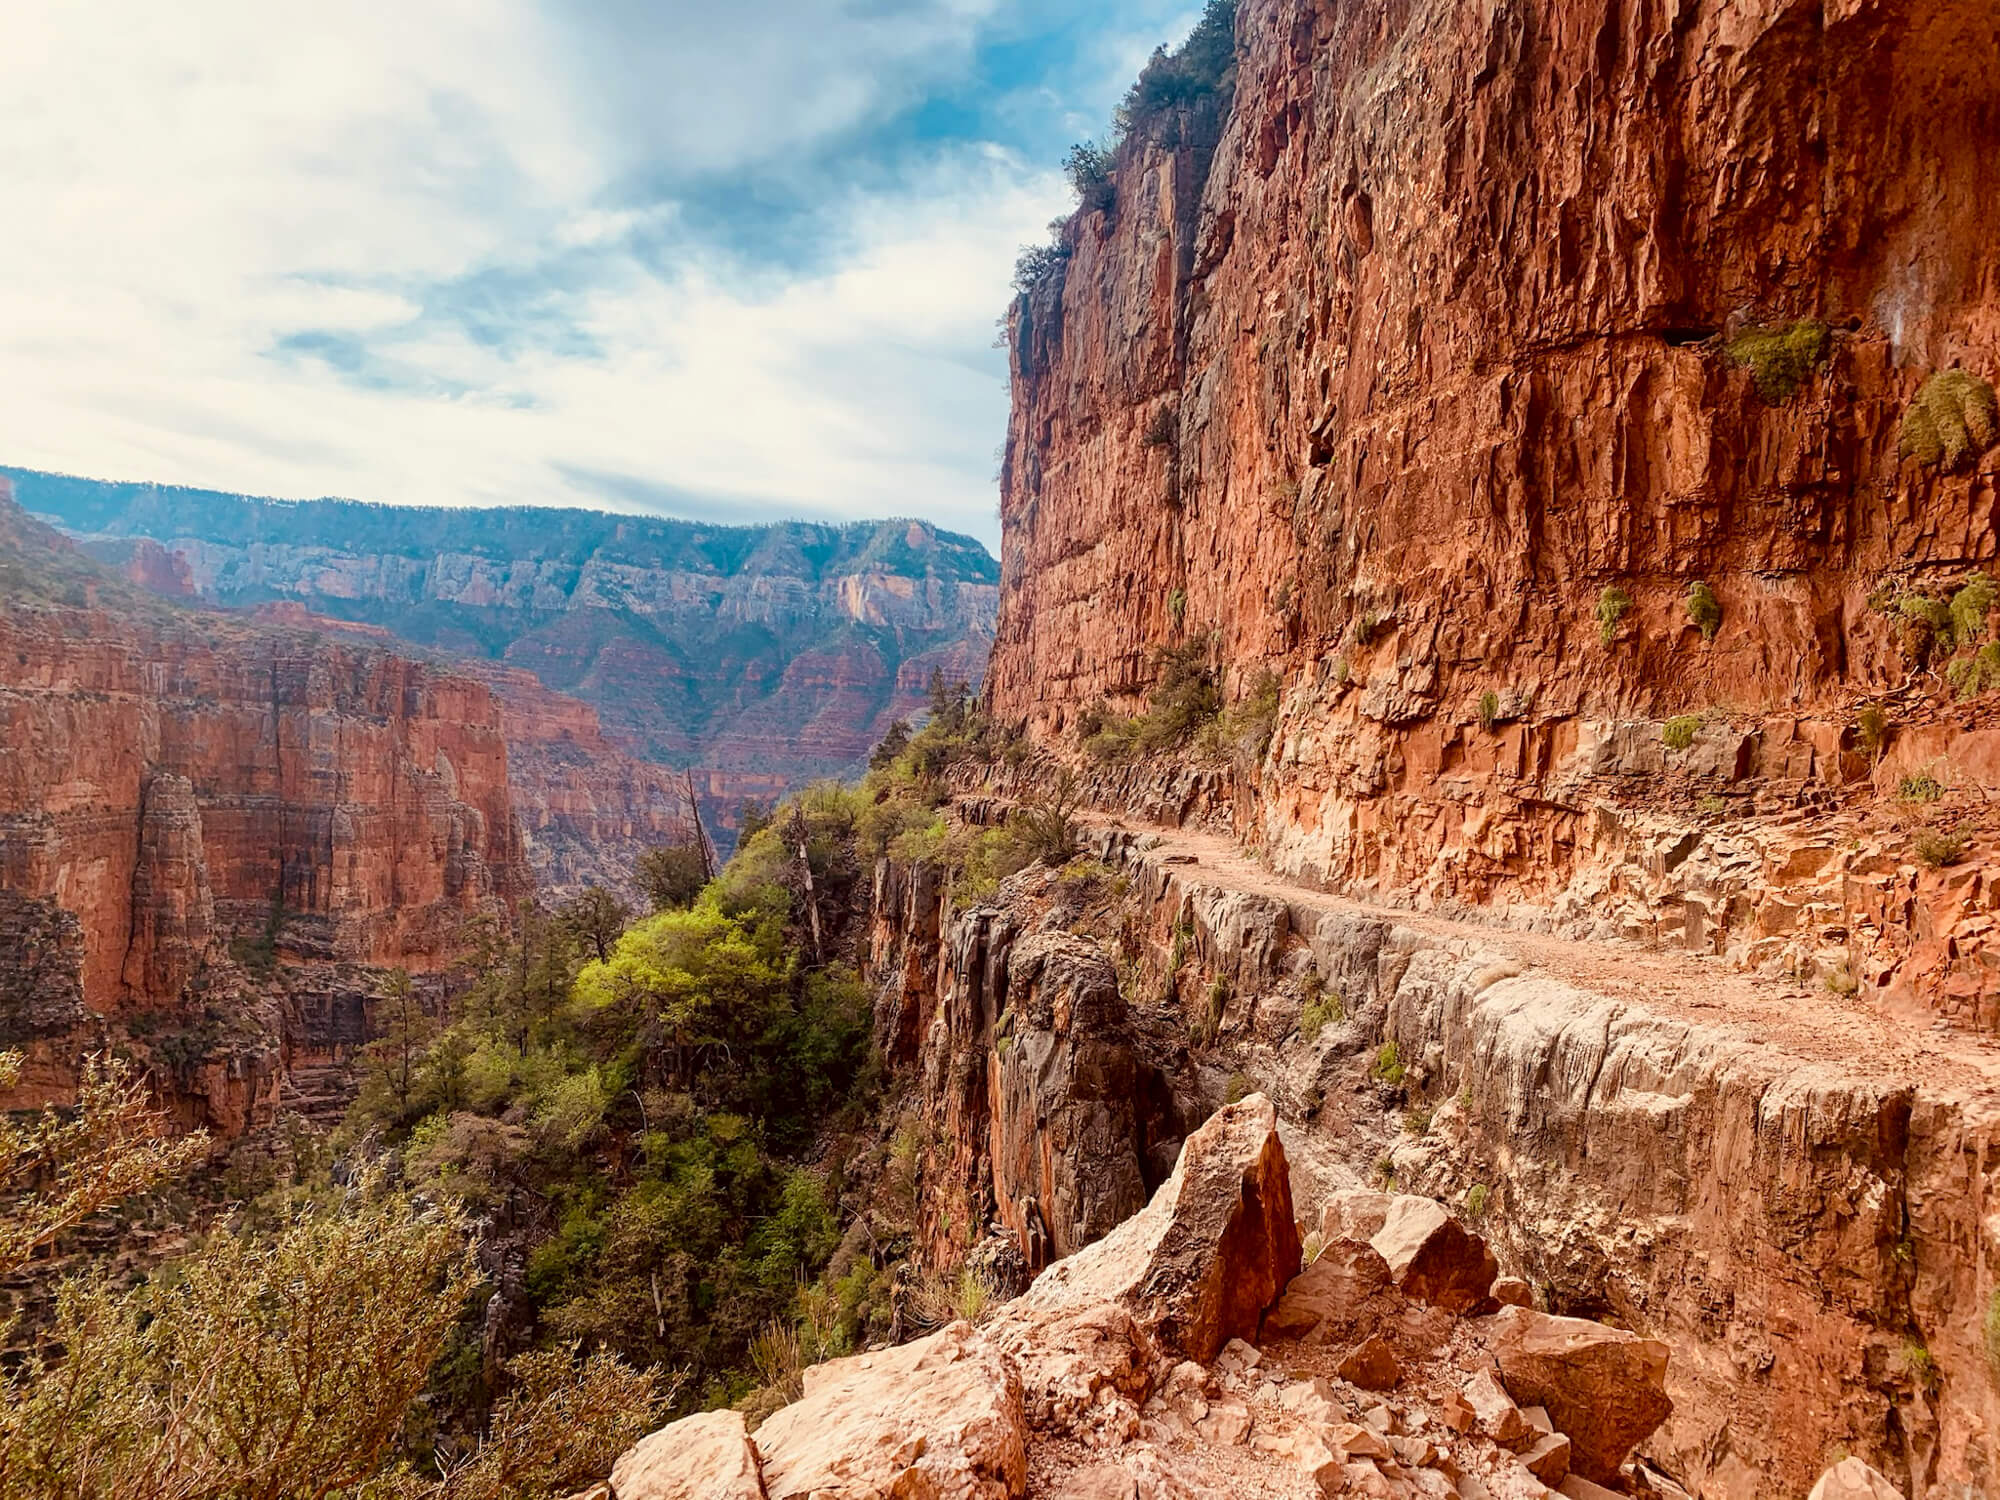
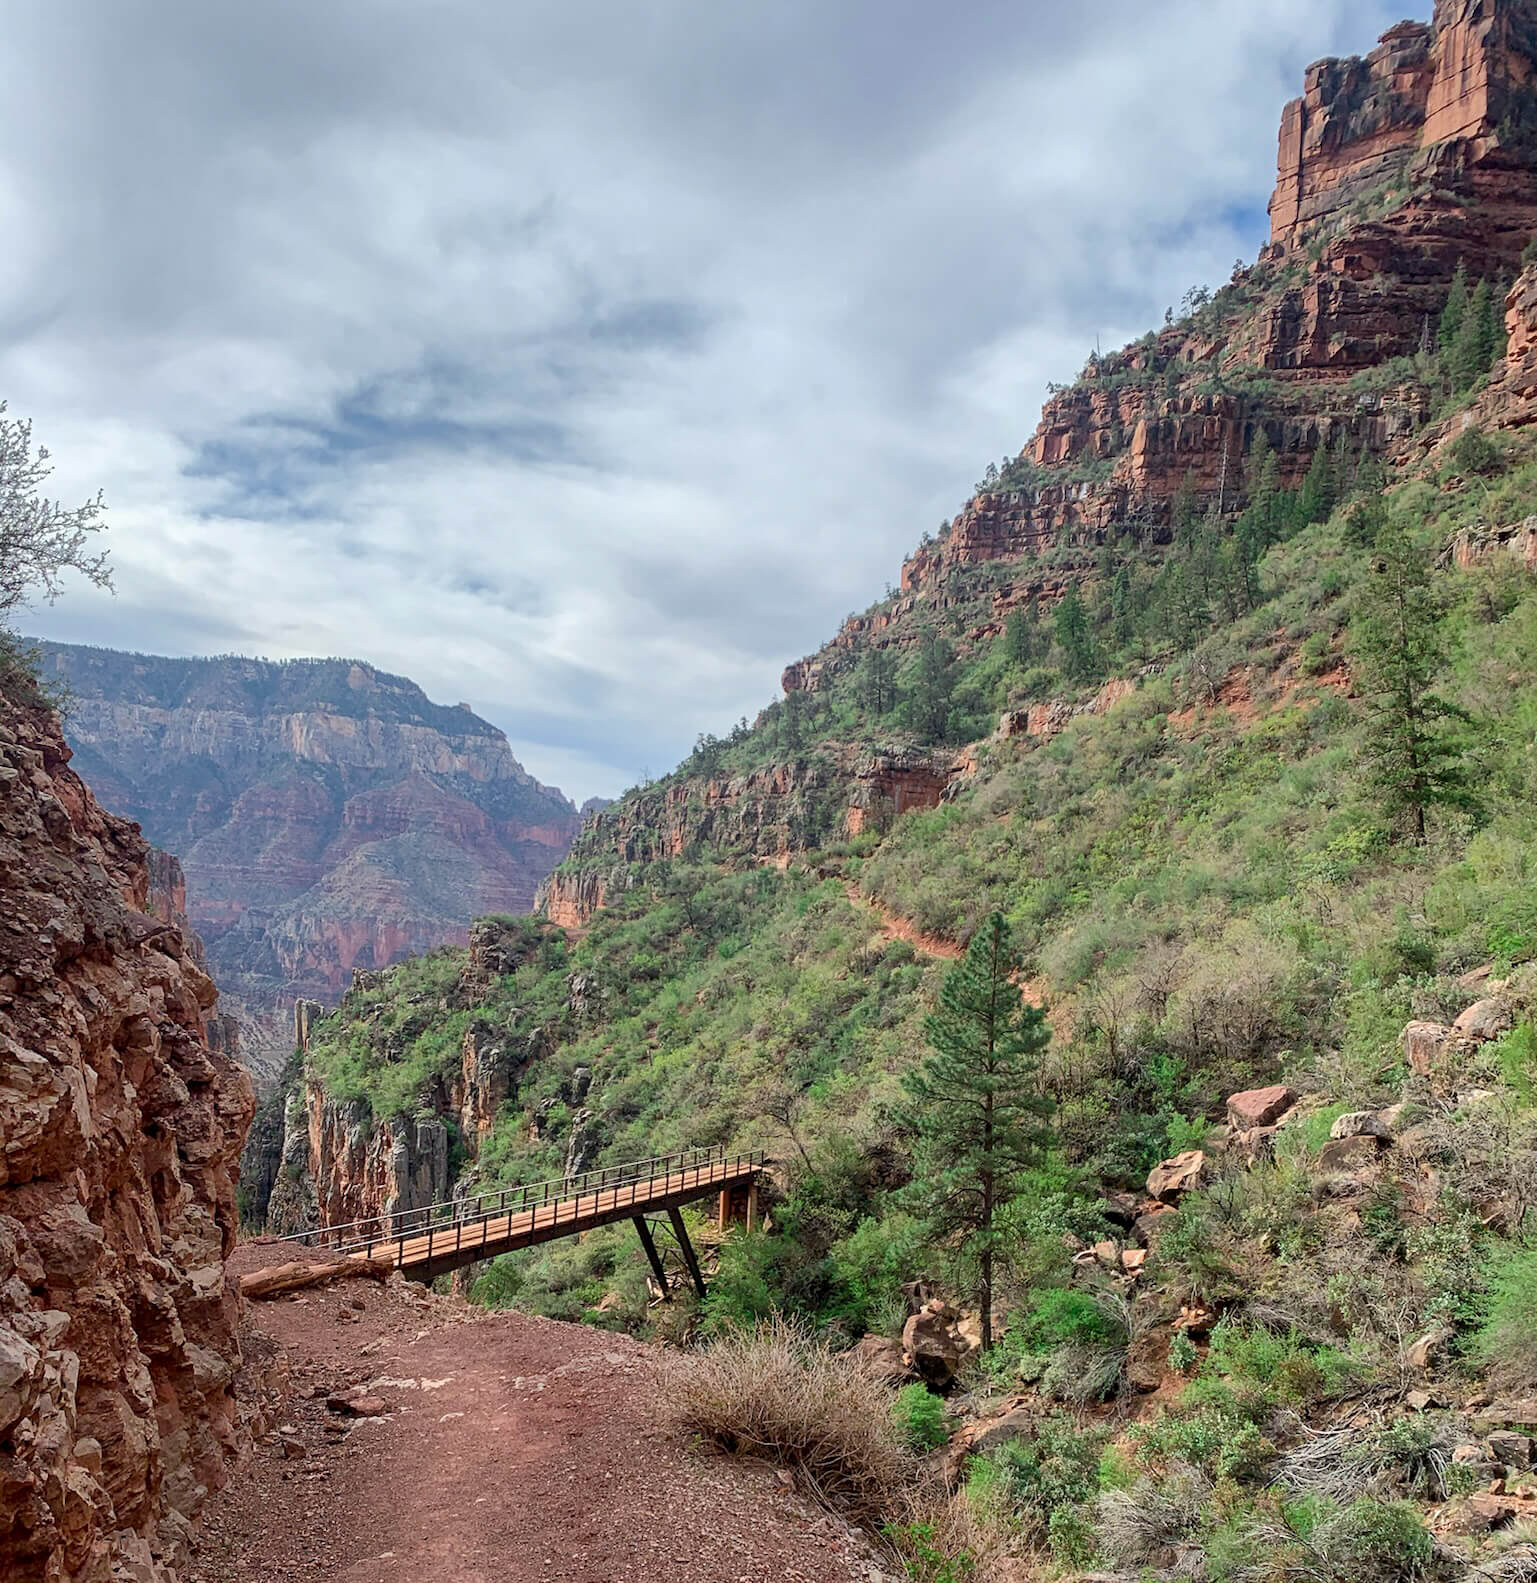
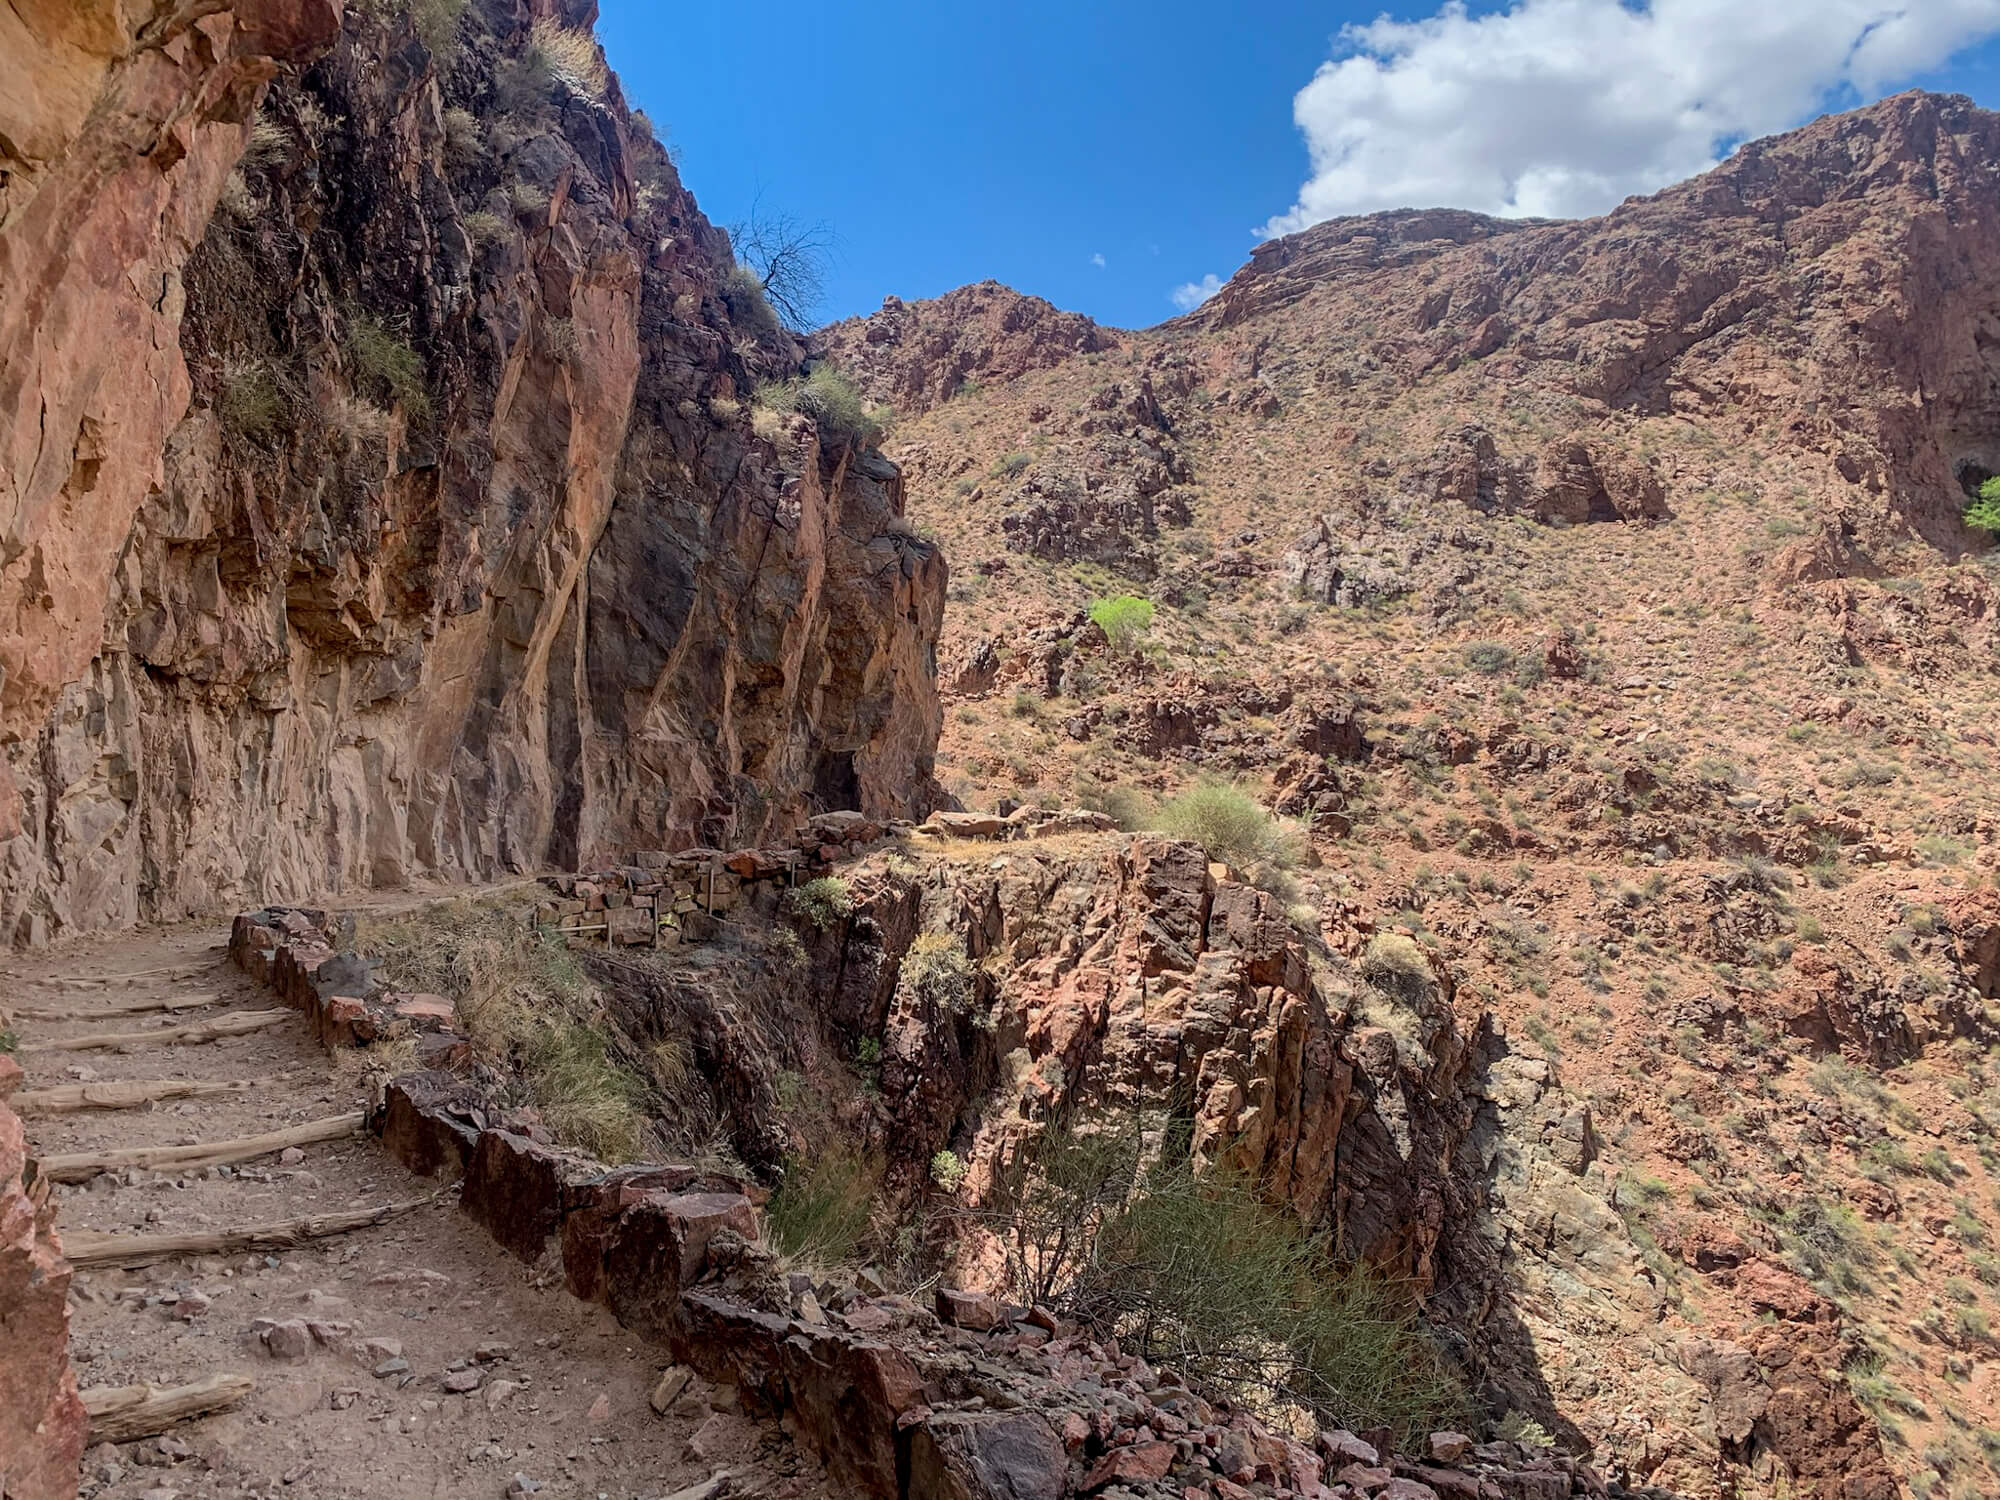
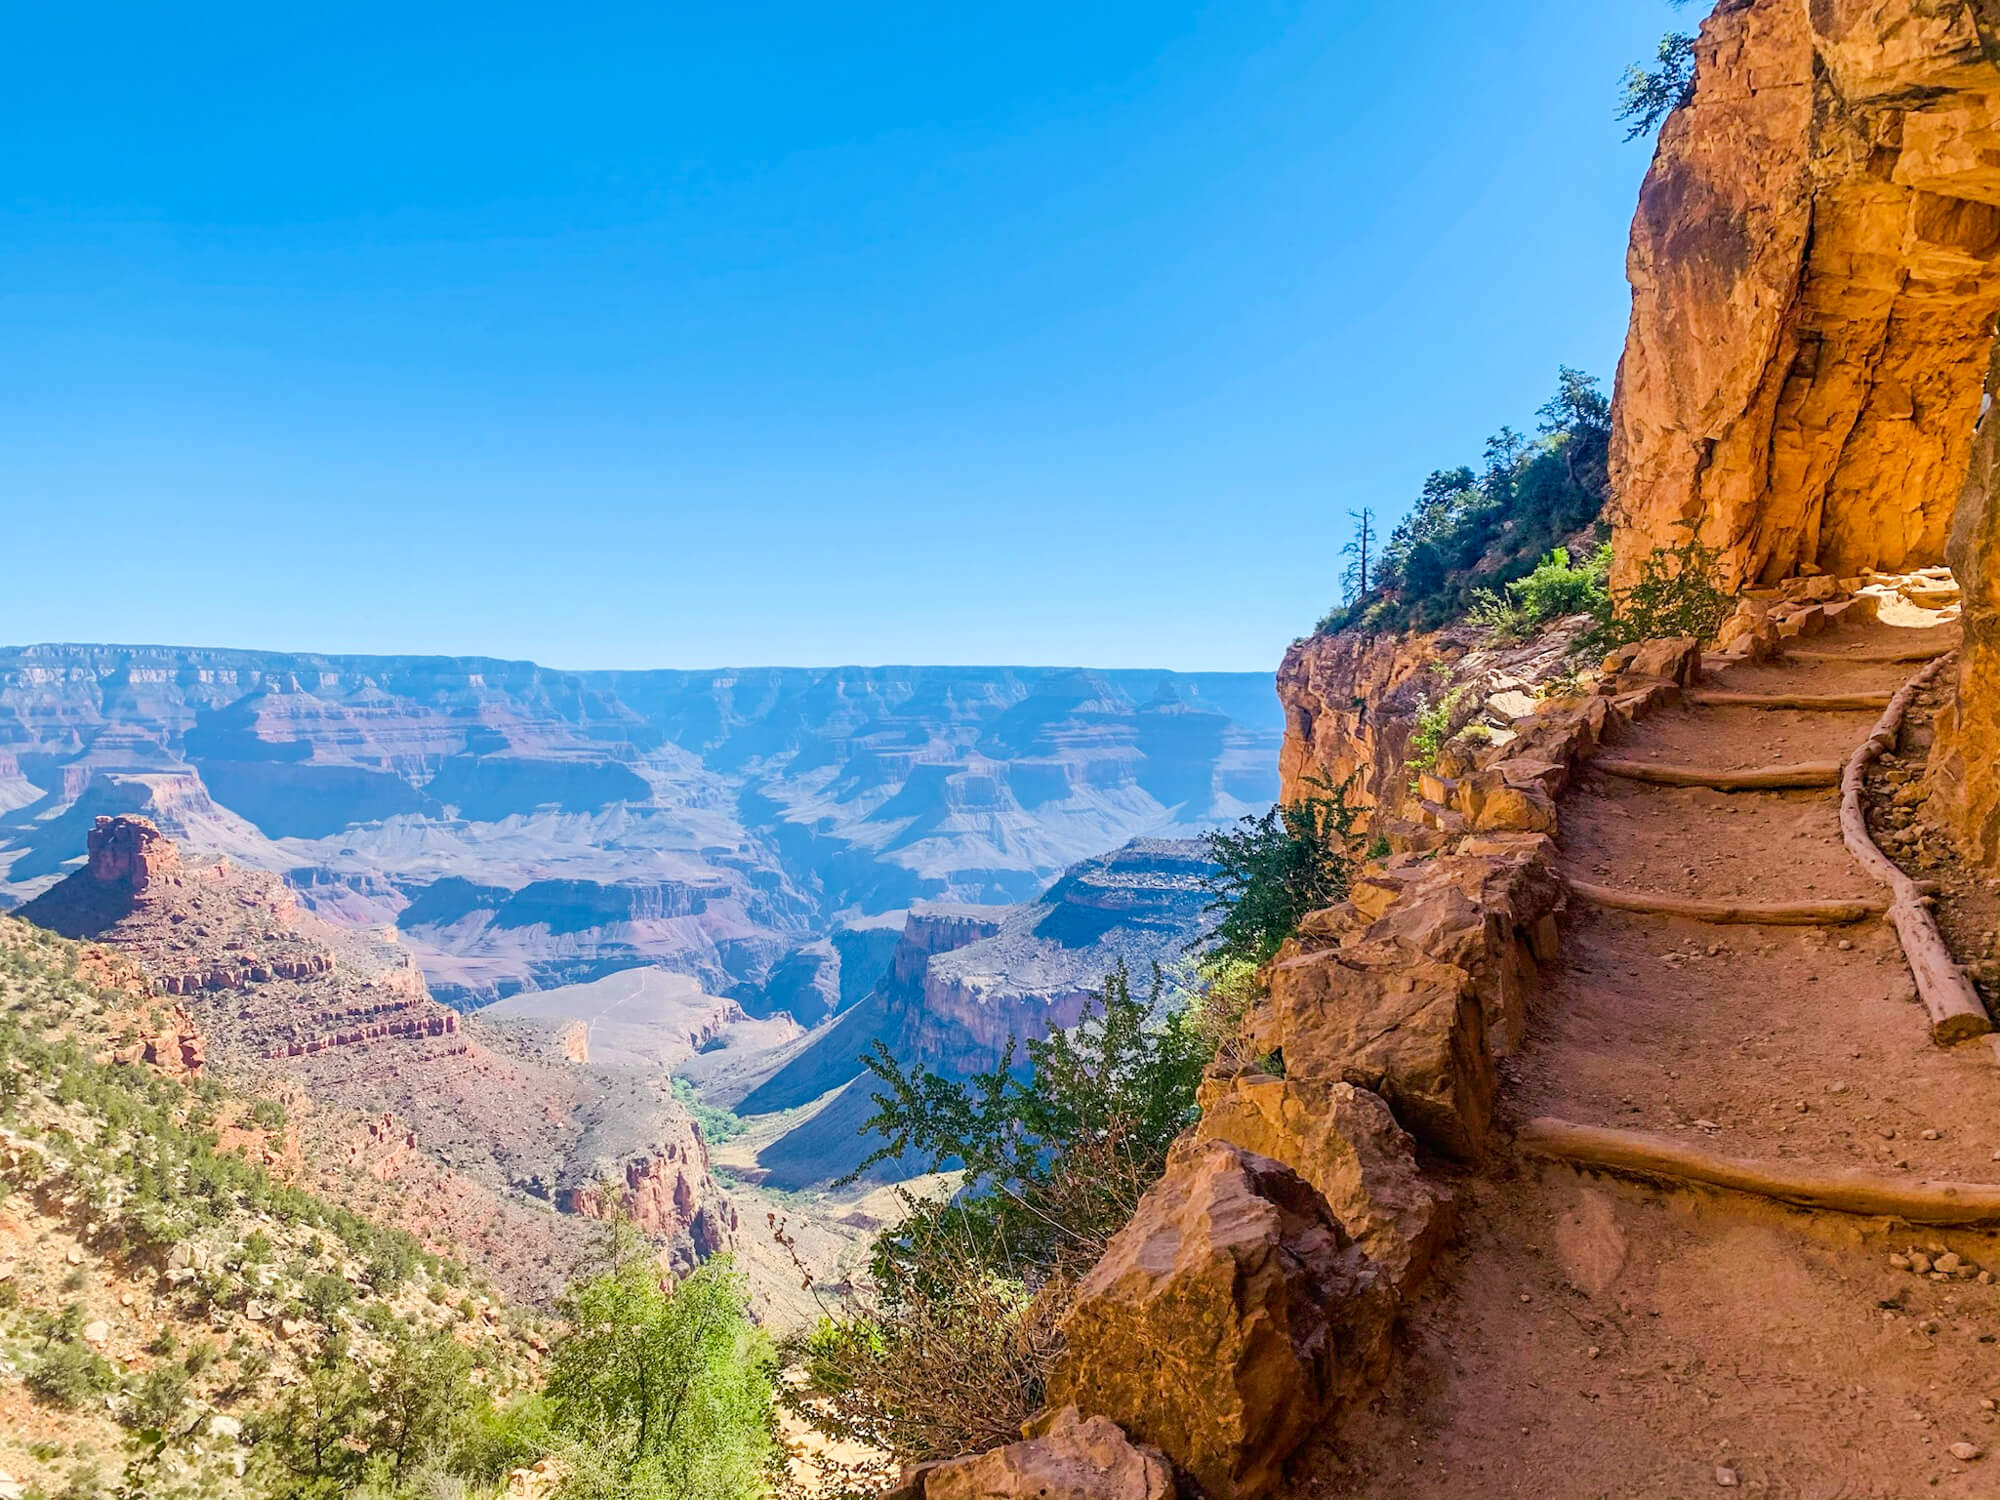
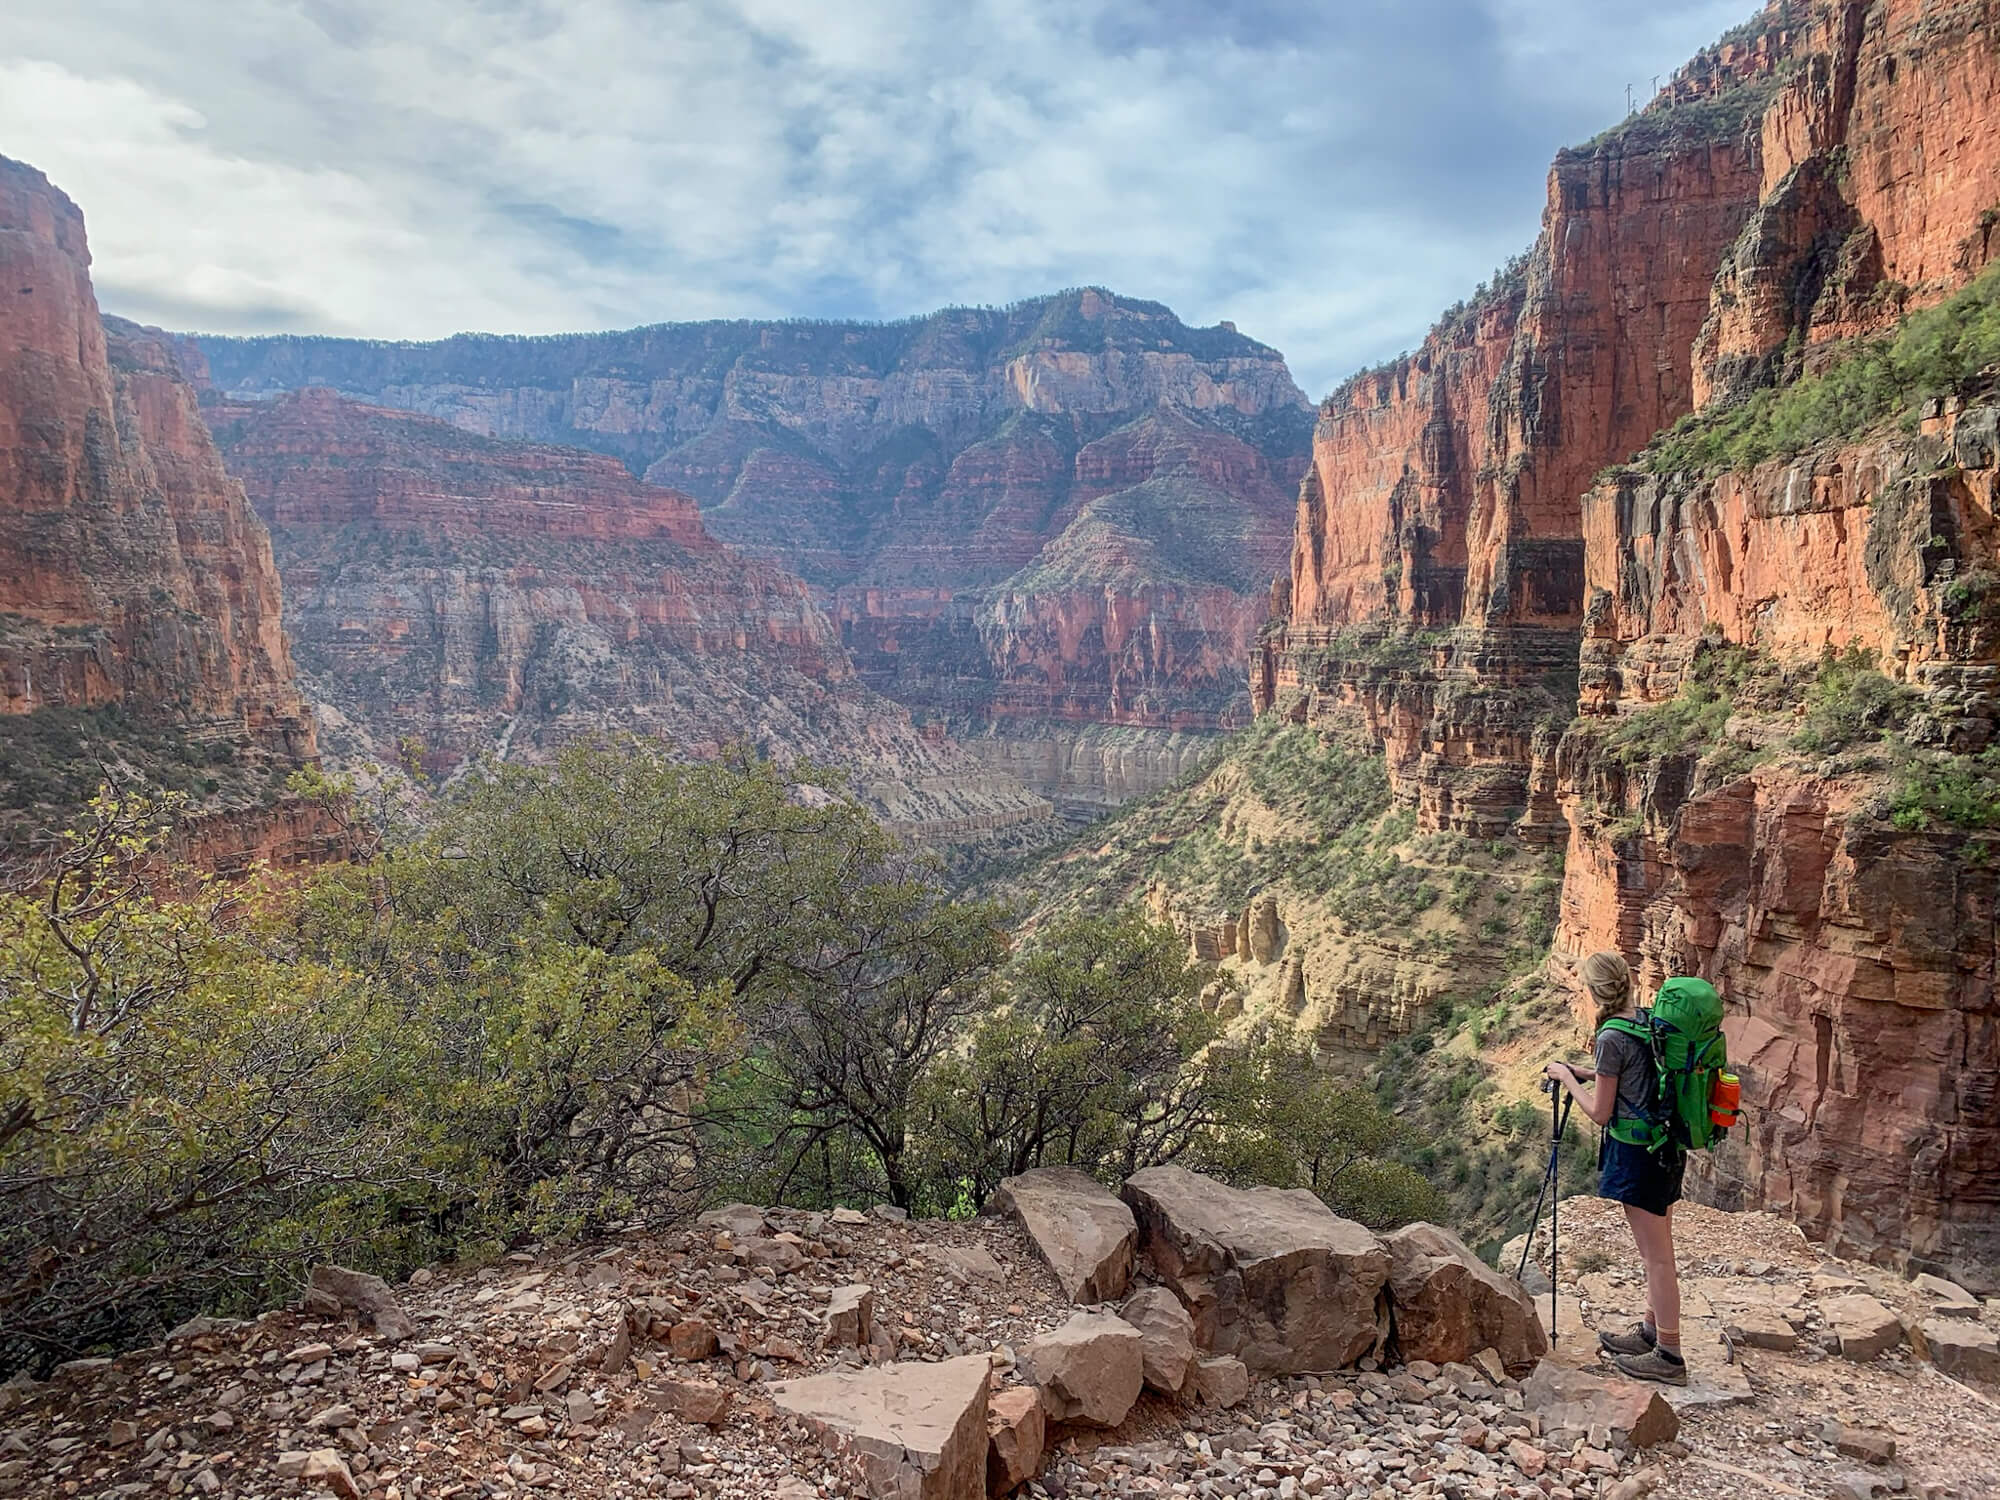
For the next 1.7 miles (2.8 KM) after the junction with Roaring Springs the trail picks up nearly 1000ft (300 m) of elevation before reaching Redwall bridge. During this section you’ll pass along beautiful sections of trail with sheer cliff faces dropping off to the right hand side. For anyone afraid of heights, this section is the likeliest to potentially test your nerves. Fortunately, the wide trail provides ample room to hug the cliff wall so the exposure never feels truly frightening. This section of the North Kaibab trail is stunning example of a time when trail construction involved blasting away giant sections of rock to accommodate a hiking trail.
After descending slightly to Redwall Bridge you’ll begin another big uphill slog gaining close to 850ft (260 m) in 0.9 miles (1.4 KM) before reaching Supai Tunnel. Supai Tunnel offers a restroom and a seasonal water tap. At an elevation of 6800 ft (2073 m) you’ll begin to notice a change in both vegetation and temperature with large coniferous trees becoming more prevalent.
From the Supai tunnel the North Kaibab trail pushes on, snaking its way up another another 850ft (250m) of elevation with a dozen switchbacks over the next mile (1.6km) to the Coconino Overlook. Take a moment to savor the view here, as this is the last panoramic view you’ll get of the Canyon on the North Kaibab Trail.
After enjoying the view, take a deep breath and crush out the final 0.6 mile (1 km) to the top of the North Kaibab Trailhead. Hopefully, you took a moment to enjoy the view from the Coconino Overlook, as the terminus of the North Kaibab is somewhat anticlimactic with no view to speak of. If time permits, consider the 2 mile (3.2 KM) easy trek to Bright Angel Point for a spectacular view back across the Grand Canyon. During the quiet months that North Rim is closed to vehicle traffic this trip is particularly worthwhile. If you’re fortunate enough to be camping on the North Rim, head west for just under a mile (1.4 KM) of easy walking to the BIker/Hiker section of the North Rim Campground on the far west side adjacent to the rim. After getting your site set up, ditch your big pack and take the 1.6 mile (2.6 KM) trail along the rim’s perimeter to Bright Angel Point.
Return to Bright Angel Campground
14 miles (22.5 KM)
5761 FT (1756 m) Elevation Loss
Double back the way that you came on the North Kaibab Trail following the same route until you reach Bright Angel Campground. Hopefully, you were able to enjoy a night on the North Rim.
Bright Angel Campground to Bright Angel Trailhead
9.5 miles (15.3 km)
4380 ft (1337 m) Elevation Gain
From Bright Angel Campground you’ll have the option to hike out on the South Kaibab Trail or take the recommended route out on Bright Angel Trail (see earlier section for the reasons why). From Bright Angel Campground take the Silver Bridge to the west across the Colorado River. After crossing the river you’ll hike along sand dunes alongside the Colorado River for around 1.2 miles (1.9 km) until the trail begins its ascent back to the South Rim at the Pipe Creek drainage. At this point you’ll find the River Resthouse, a toilet and a convenient spot to fill up and treat water if you happened to forget to do so before leaving Bright Angel.
You’ll begin your ascent up the Pipe Creek Drainage after departing the River Resthouse . For the first mile (1.6KM) the trail follows alongside Pipe Creek and picks up about 350ft of elevation (100m). After crossing the creek a final time, you’ll encounter a series of switchbacks called the Devil’ Corkscrew which rapidly gains another 500ft (150 M) of elevation. This section is likely to be one of the most unshaded parts you’ll encounter on Bright Angel Trail, so an early start (or late in the day) is recommended to ensure safe passage here.
The trail links up with Garden creek about a mile after starting the switchbacks of Devil’s Corkscrew. From here, it’s a gradually elevated mile (1.6 KM) along the creek gully to Havasupai Gardens Campground. Just before reaching Havasupai Gardens Campground the trail forks with an option to hike out to Plateau point or gain access to the westbound side of the Tonto Trail. The trip to see the view from Plateau Point (1.4 miles or 2.3 km one-way) is a worthwhile side trip if you have the time.
After staying the night at Havasupai Gardens or stopping to refill and refuel, it’s time to buckle up for the final push back to the South Rim. Following the Garden Creek drainage the trail gains around 500ft (150 m) in the first mile before rapidly gaining another 330ft (100m) in a series of switchbacks to reach 3 Mile Resthouse. Fortunately, the rest stop provides ample opportunity to catch your breath before the next big push. By this point of your hike, you’ll notice an increase in the trail traffic as you start to encounter a higher frequency of day hikers coming down from the South Rim.
When you’re feeling re-energized and ready for more elevation push towards the 1.5 Mile Resthouse 1.5 Miles (2.4 KM) up the trail. Nearly a dozen switchbacks and nearly 1000 ft of elevation gain (300 m) separate you from the final rest stop on your rim to rim to rim journey. As you continue upward, take a look back and see where you’ve come from looking for Havasupai Gardens way down below. After the final rest stop of your adventure summon your legs for the final set of switchbacks that lead you up the last 1.5 miles and 1100 ft (340m) of elevation to the Bright Angel Trailhead.
Congratulations, you’ve just completed the Grand Canyon rim to rim to rim.
Campsites in the Grand Canyon on the rim to rim
Along the corridor trails you’re limited to camping in the established campsites which serve as a sufficient place to bunk down with some incredible dark sky views over the canyon walls. The night skies and sublime mesas and canyon walls that adorn every section of the Grand Canyon more than make up for the somewhat lackluster campsites themselves. Many of the sites are close together, with limited privacy. The vast majority of backpackers are respectful of lights out times and quiet time, but bring ear plugs for the one night you inevitably come across a snorer or someone that fails to observe the rules.
Bright Angel Campground
Located near historic Phantom Ranch and near the confluence of Bright Angel Creek and the Colorado River, this is the busiest campground along the Corridor trails. It is also my least favorite. The 30 small campsites are close together with limited privacy, the squirrels are relentless (unquestionably due to the constant prevalence of easy meals) and the cantina, restaurant, and lodging at Phantom Ranch take away slightly from the backpacking/backcountry experience. Not to mention the flush toilets and running water. The entire experience at Bright Angel Campground feels more analogous to car camping than backpacking. All this said, it still has many things to love especially for a one night stay. Bright Angel Creek runs right through it and the cold water is balm to any weary joints and muscles. The site also provides easy access to an incredible beach along the Colorado River that more than makes up for the sleep you’re likely to lose from your neighboring backpacker’s snoring.
Havasupai Gardens Campground (f.k.a. Indian Gardens)
This is an excellent final night option if you plan on exciting your trip via the Bright Angel Trailhead. The 15 small group sites lie 4.8 miles from the South Rim and about halfway up the Bright Angel Trail making for a relaxed half day hike to exit. The campsites are quite close together with some offering more privacy than others. It’s situated in a beautiful cottonwood grove and adjacent to a small creek. Staying here also provides easy access to add on trips along the Tonto Trail or Plateau point.
Cottonwood Camground
Camping at Cottonwood is a delight. It’s a smallish campground with 15 sites located 7.2 miles (11.6 km) from Bright Angel Campground on the North Kaibab Trail. This site feels a little more spacious and private than both Indian Garden and Bright Angel and this was definitely my favorite site below the rim. Bright Angel creek bubbles joyfully alongside providing several incredible spots to cool down or soak and relax. Sleeping here was a delight with mesas rising from all around the campground to provide an enchanting silhouettes in contrast to some of the most incredible stars you’ll ever see. Earplugs may still be required, but this site is not even on the same level as Bright Angel. Look for a couple sites on the left as you head toward the North Rim after passing the toilets. Potable water is seasonal here, so ensure you have a treatment method if traveling between the middle of October and the middle of May.
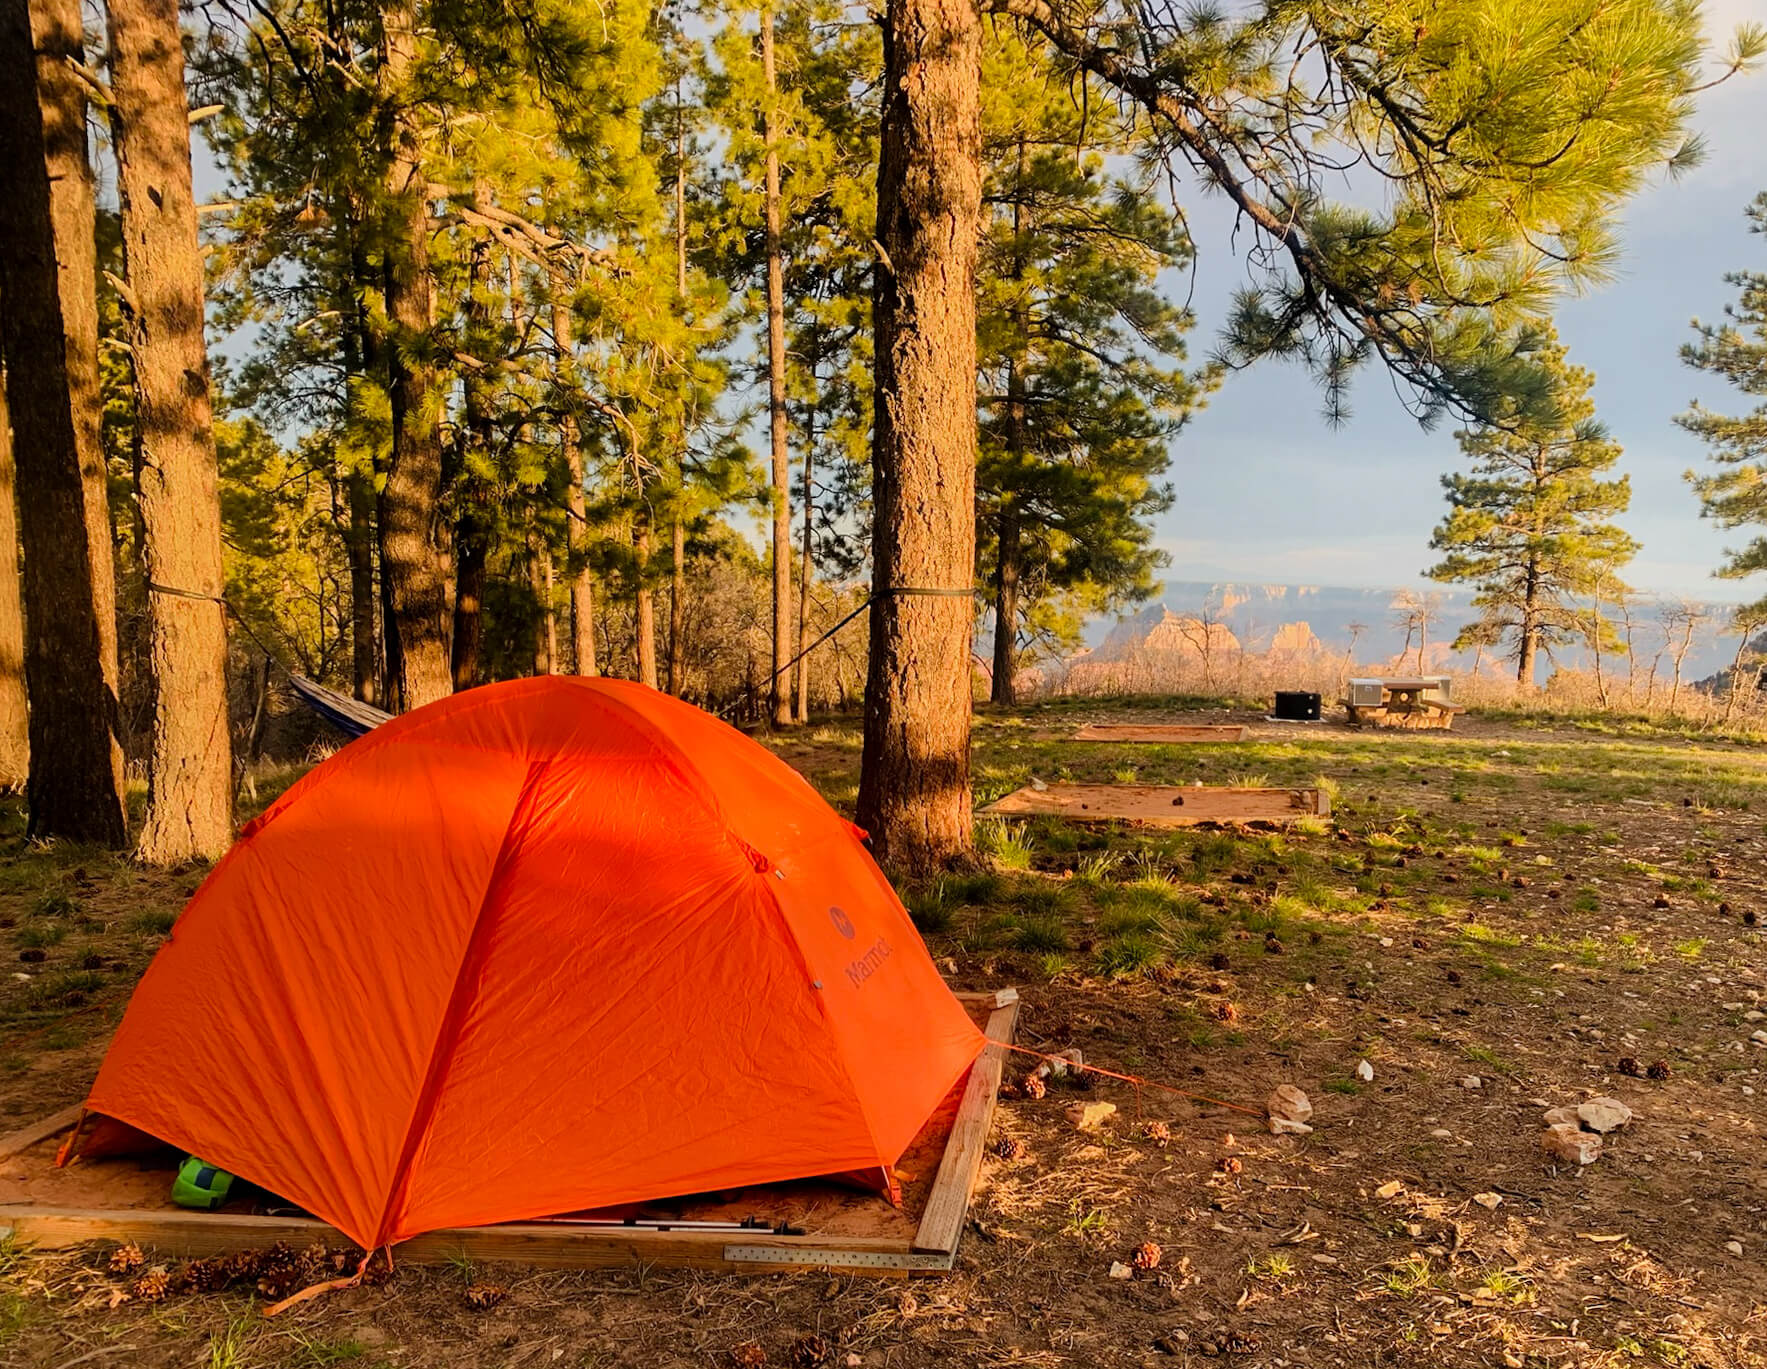
North Rim Campground - Winter Camping
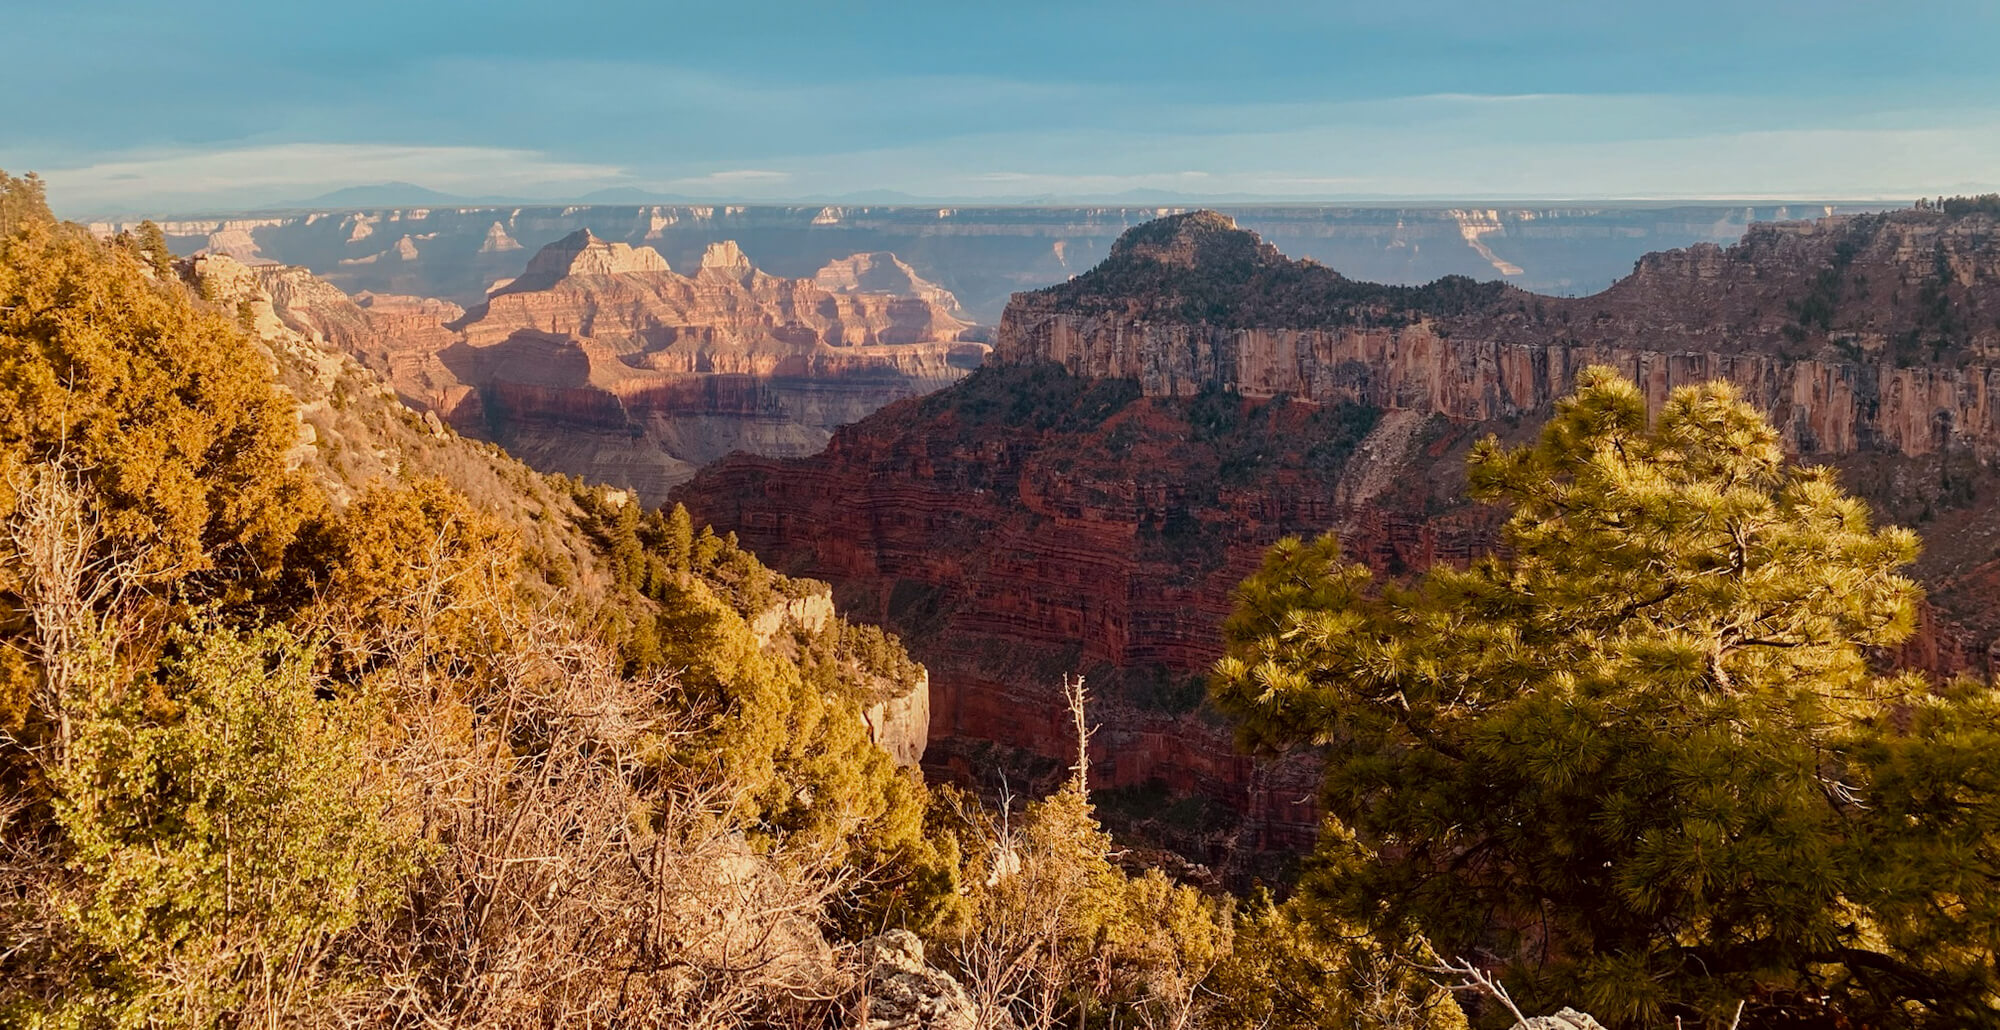
As I mentioned before, I believe staying a night on the North Rim is the ultimate hack for hiking the Grand Canyon rim to rim to rim. It can be very cold at night with the possibility of waking up to snow. That said, the solitude provided here is unmatched by any of the other campsites on the R2R2R2. You need to be prepared with proper layers and sleeping gear. We camped here and had the entire place to ourselves which was quite the change from the chaos of Bright Angel Campground. You’ll set up camp in the section near the canyon rim at the west end of the campground about a 1 mile walk from the North Kaibab Trailhead. The view here is breathtaking! Additionally, you can explore the lookout at Bright Angel Point without another person anywhere in sight. The entire experience of staying here in winter feels almost post-apocalyptic .Ultimately, I believe staying here also makes for a much more enjoyable experience hiking the North Kaibab Trail as it provides an epic conclusion to the day. Otherwise, you’ll reach the trailhead (which has no view) after the big push up and turn around.
Itinerary options for backpacking the Grand Canyon rim to rim to rim
There are numerous ways to structure an itinerary for backpacking the Grand Canyon rim rim to rim depending on your desired mileage, your fitness level, and the weather conditions/season. When planning your itinerary, note that both Havasupai Gardens Campground and Bright Angel Campground offer several great options for day hiking off the main corridor trails which may make them worthy of an extra night’s stay! Simply add another night or 2 to these campsites on your permit request. These base camp stops get you day hiking off the highly trafficked corridor trails, not to mention the reprieve of lightening your load for a day of exploration.
Remember when planning your itinerary, it’s critical to recognize that the Grand Canyon is a place of extremes where both heat and snow/ice can impact trip feasibility. On our trek through the Grand Canyon at the end of April we watched our daily wakeup time increase to a nadir of 3:00 am in a futile effort to bike before the heat during an unseasonably warm spell. Best be prepared for the unexpected.
With this in mind, let’s take a look at a few options:
Grand Canyon rim to rim to rim in 2 days 1 night
- Day 1 : South Rim to North Rim Campground via South Kaibab and North Kaibab Trails
- 21 miles (33.8 KM) (+ 0.9 miles (1.4 km) to Campground)
- Approximate Elevation Gain 5761 ft (1750 m)
- Approximate Elevation Loss 4780 ft (1457 m)
- Day 2: North Rim Campground to South Rim via North Kaibab and Bright Angel Trails
- 23.5 miles (37.8 km) (+ 0.9 miles (1.4 km) from North Rim Campground to Trailhead)
- Approximate Elevation Gain 4380 ft (1337 m)
- Approximate Elevation Loss 5761 ft (1750 m)
Itinerary notes
This is an extreme itinerary that is not to be taken lightly and is only recommended for experienced backpackers and thru hikers that have experience with pushing 25+ mile days. This length of mileage is challenging backpacking anywhere, but the climate and environment of the Grand Canyon may at times make these distances impossible, completely unenjoyable, and often dangerous. In the late fall, winter and early spring, snow and ice cannot be ruled out and may dramatically slow down your pace. In the spring or fall, unseasonal temperatures have the potential to make the Grand Canyon dangerously hot, making hiking during mid-day hours nearly impossible. If you’re thinking about taking this on, recognize that you may be forced to spend a significant part of your trek hiking in the dark and know your limits. Less is often more in the Grand Canyon, but if you’re limited on time and have the experience and conditioning, this might be the itinerary for you.
Grand Canyon rim to rim to rim in 3 days 2 night
- Day 1 : South Rim to Cottonwood Campground via South Kaibab and North Kaibab Trail
- 14.2 miles (22.9KM)
- Approximate Elevation Gain 1600ft (480 m)
- Approximate Elevation Loss 4780 ft (1457 m)
- Day 2 Cottonwood Campground to North Rim Trailhead and then Back to Bright Angel Campground
- 20.8 miles (33.4 km)
- Approximate Elevation Gain 4160 ft (1268 m)
- Approximate Elevation Loss 5760 ft (1756m)
- Day 3 Bright Angel Campground to South Rim via Bright Angel
- 9.5 mi (15.3 km)
- Approximate Elevation Gain 4380 ft (1337 m)
- Approximate Elevation Loss negligible
Itinerary notes
Completing a R2R2R backpacking trip in 3 days is no small feat with several tough days and one seriously long day. Similar to the sprint of doing it in 1 night, this trip is only recommended for individuals very comfortable with their backpacking abilities and some knowledge of the conditions/extremes one is likely to encounter here. The first day provides for an early morning descent down the South Kaibab and the opportunity to take some time to cool down and wait out the heat (as applicable) in the Phantom Ranch Area. In the later afternoon or on cooler days, the section between Phantom Ranch and Cottonwood is smooth sailing. Day 2 is the most challenging, requiring an early departure from Cottonwood on days where heat may be a factor. The final day features shorter mileage with significant elevation gain made manageable by the availability of water and shade along the Bright Angel Trail. The downside of this itinerary is the lack of time it affords to experience or camp at the North Rim. Additionally, I found Havasupai Gardens Campground to be nicer than Bright Angel, but this itinerary makes camping here for the last night logistically awkward. Or maybe it’s just a good excuse to get a dinner reservation at Phantom Ranch for your last night in the Grand Canyon.
Grand Canyon rim to rim to rim in 4 days 3 nights
- Day 1: South Rim to Cottonwood Campground via South Kaibab and North Kaibab Trail
- 14.2 miles (22.9KM)
- Approximate Elevation Gain 1600ft (480 m)
- Approximate Elevation Loss 4780 ft (1457 m)
- Day 2 Cottonwood Campground to North Rim Campground
- 6.8 miles (10.9 KM) (+ 0.9 miles (1.4 km) to North Rim Campground)
- Approximate Elevation Gain 4161 ft (1268 m)
- Approximate Elevation Loss Negligible
- Day 3 North Rim Campground to Bright Angel Campground
- 14 mi (22.5 km) (+ 0.9 miles (1.4 km) from North Rim Campground to Trailhead)
- Approximate Elevation Gain Negligible
- Approximate Elevation Loss 5761 ft (1756 m)
- Day 4 Bright Angel Campground to South Rim via Bright Angel
- 9.5 mi (15.3 km)
- Approximate Elevation Gain 4380 ft (1337 m)
- Approximate Elevation Loss negligible
Itinerary notes
Completing the rim to rim to rim in 4 days and 3 nights is likely the choice for you if you seriously considered doing it in 2 days, but really wanted the opportunity to stay a night on the North Rim. This itinerary groups heavy mileage with heavy descending and low mileage with ascending. The only downside here is the requirement to stay at Bright Angel on the last night vs the nice Havasupai Gardens Campground. That said, get a dinner reservation at Phantom Ranch and it might be the perfect way to spend your last evening in the Grand Canyon.
Grand Canyon rim to rim to rim in 5 days 4 nights
- Day 1: South Rim to Cottonwood Campground via South Kaibab and North Kaibab Trail
- 14.2 miles (22.9KM)
- Approximate Elevation Gain 1600ft (480 m)
- Approximate Elevation Loss 4780 ft (1457 m)
- Day 2 Cottonwood Campground to North Rim Campground
- 6.8 miles (10.9 KM) to North Kaibab Trailhead (+ 0.9 miles (1.4 km) to Campground)
- Approximate Elevation Gain 4161 ft (1268 m)
- Approximate Elevation Loss Negligible
- Day 3 North Rim Campground to Cottonwood Campground
- 6.8 miles (10.9 KM) (+ 0.9 miles (1.4 km) from North Rim Campground to Trailhead)
- Approximate Elevation Gain Negligible
- Approximate Elevation Loss 5761 ft (1756 m)
- Day 4 Cottonwood Campground to Havasupai Garden Campground (North Kaibab Trail & Bright Angel
- 7.2 mi (11.6 km) + 4.7 mi (7.6 km) = 11.9 mi (19.2 km)
- Approximate Elevation Gain 1320 ft (400 m)
- Approximate Elevation Loss 1600 ft (480 m)
- Day 5 Havasupai Garden to South Rim via Bright Angel Trail
- 4.8 mi (7.7 km)
- Approximate Elevation Gain 3060 ft (930 m)
- Approximate Elevation Loss negligible
Itinerary notes
This might just be the perfect itinerary for hiking the Grand Canyon Rim to Rim to Rim. The daily mileage is manageable with one long day that is primarily descending. Additionally, you’ll avoid staying at my least favorite campground (Bright Angel), and have plenty of time to take in the splendor of the Grand Canyon. ’d likely choose this route, if I were to do this trip over again. The biggest consideration you’ll here is ensuring you get a very early start on day 1. If you don’t start early enough and the heat becomes unbearable, you may be forced to pitstop for a couple hours at Phantom Ranch between 10 am – 3 pm. The same goes for Day 4 when you’ll hike from Cottonwood to Havasupai Garden.
Grand Canyon rim to rim to rim in 6 days 5 nights
- Day 1: South Rim to Bright Angel Campground via South Kaibab Trail
- 7.0 mi (11.3 km)
- Approximate Elevation Gain Negligible
- Approximate Elevation Loss 4780ft (1457 m)
- Day 2 Bright Angel Campground to Cottonwood Campground
- 7.2 mi (11.6 km)
- Approximate Elevation Gain 1600 ft (480 m)
- Approximate Elevation Loss Negligible
- Day 3 Cottonwood Campground to North Rim Campground
- 6.8 miles (10.9 KM) to North Kaibab Trailhead (+ 0.9 miles (1.4 km) to Campground)
- Approximate Elevation Gain 4161 ft (1268 m)
- Approximate Elevation Loss Negligible
- Day 4 North Rim Campground to Cottonwood Campground
- 6.8 miles (10.9 KM) (+ 0.9 miles (1.4 km) from North Rim Campground to Trailhead)
- Approximate Elevation Gain Negligible
- Approximate Elevation Loss 5761 ft (1756 m)
- Day 5 Cottonwood Campground to Havasupai Garden Campground (North Kaibab Trail & Bright Angel)
- 11.9 mi (19.2 km)
- Approximate Elevation Gain 1320 ft (400 m)
- Approximate Elevation Loss 1600 ft (480 m)
- Day 6 Havasupai Garden to South Rim via Bright Angel Trail
- 4.8 mi (7.7 km)
- Approximate Elevation Gain 3060 ft (930 m)
- Approximate Elevation Loss negligible
Itinerary notes
Daily mileage is very manageable and affords the ability to avoid hiking during hot temperatures if you encounter them. This was the itinerary that we hiked on our rim to rim to rim trek. In ideal hiking conditions it may have felt a little relaxed, but with unseasonal temperatures well over 100F, we were happy to have the time. We’d start hiking shortly before sunrise and finish many days before 11am. Day 2 will be short with limited elevation gain, but this provides the option of setting up camp and then using the afternoon to hike to and relax at nearby Ribbon Falls.
Grand Canyon rim to rim to rim in 7 days 6 nights
- Day 1: South Rim to Bright Angel Campground via South Kaibab Trail
- 7.0 mi (11.3 km)
- Approximate Elevation Gain Negligible
- Approximate Elevation Loss 4780ft (1457 m)
- Day 2 Bright Angel Campground to Cottonwood Campground
- 7.2 mi (11.6 km)
- Approximate Elevation Gain 1600 ft (480 m)
- Approximate Elevation Loss Negligible
- Day 3 Cottonwood Campground to North Rim Campground
- 6.8 miles (10.9 KM) to North Kaibab Trailhead (+ 0.9 miles (1.4 km) to Campground)
- Approximate Elevation Gain 4161 ft (1268 m)
- Approximate Elevation Loss Negligible
- Day 4 North Rim Campground to Cottonwood Campground
- 6.8 miles (10.9 KM) (+ 0.9 miles (1.4 km) from North Rim Campground to Trailhead)
- Approximate Elevation Gain Negligible
- Approximate Elevation Loss 5761 ft (1756 m)
- Day 5 Cottonwood Campground to Bright Angel Campground
- 7.2 mi (11.6 km)
- Approximate Elevation Gain negligible
- Approximate Elevation Loss 1600 ft (480 m)
- Day 6 Bright Angel Campground to Havasupai Garden Campground
- 4.7 mi (7.6 km)
- Approximate Elevation Gain 1320 ft (400 m)
- Approximate Elevation Loss negligible
- Day 6 Havasupai Garden to South Rim via Bright Angel Trail
- 4.8 mi (7.7 km)
- Approximate Elevation Gain 3060 ft (930 m)
- Approximate Elevation Loss negligible
Itinerary notes
This option is like the 6 day option, but splits the trek up between Cottonwood and Havasupai Gardens. Doing it this way allows you to conquer the hottest part of your ascent up the South Rim first thing in the morning and takes significant mileage and elevation off your final day’s trek out.
What to pack for backpacking the Grand Canyon
The lighter your pack, the more enjoyable your backpacking trip in the Grand Canyon is going to be. A lighter backpack helps you cover more mileage and more elevation with way less effort making big days more realistic, not to mention more comfortable!
If you’re new to backpacking, don’t stress out about buying the latest and greatest equipment. Save money and use things you already own that can be repurposed for backpacking, rent gear or borrow stuff from a gear-head buddy. Later, when you’ve gained more experience, modify your kit and change out gear as you get a better understanding of what creature comforts you can and can’t live without.
Here’s a complete list of gear to pack for backpacking the Grand Canyon. Click any item below to jump ahead in the post for a detailed recommendation.
Essential Items
- Tent
- Backpack
- Sleeping mat
- Backpacking pillow
- Sleeping bag or quilt
- Water purification
- Trowel & TP
- Swiss army knife
- Stove & fuel canister
- Lighter/matches
- Backcountry cookset
- Water bottle or reservoir
- Water storage container
- First aid kit
- Trekking poles
- Headlamp with red light mode
- GPS, compass & map
- Battery back-up & charging cable
- Permit
Luxury Items
What to wear
- Sun hoodie
- Convertible hiking pants
- A pair of shorts
- Shell Jacket
- Puff Jacket (seasonal)
- Base Layer Top
- Base Layer Bottom
- Underwear
- Hiking Socks
- Hat & Warm Hat (seasonal)
- Buff
- Sunglasses
- Gloves (seasonal)
- Trail Runners or Hiking Boots
- Camp Shoes (optional)
Additional Items
- Microspikes (season dependent)
- Low trail running gaiter (optional)
- Sunscreen & SPF lim balm
- Bug Spray
- Tooth Brush & Toothpaste
- Food
- Emergency Medical Insurance (if traveling from outside the US)
Best tent for backpacking the Grand Canyon
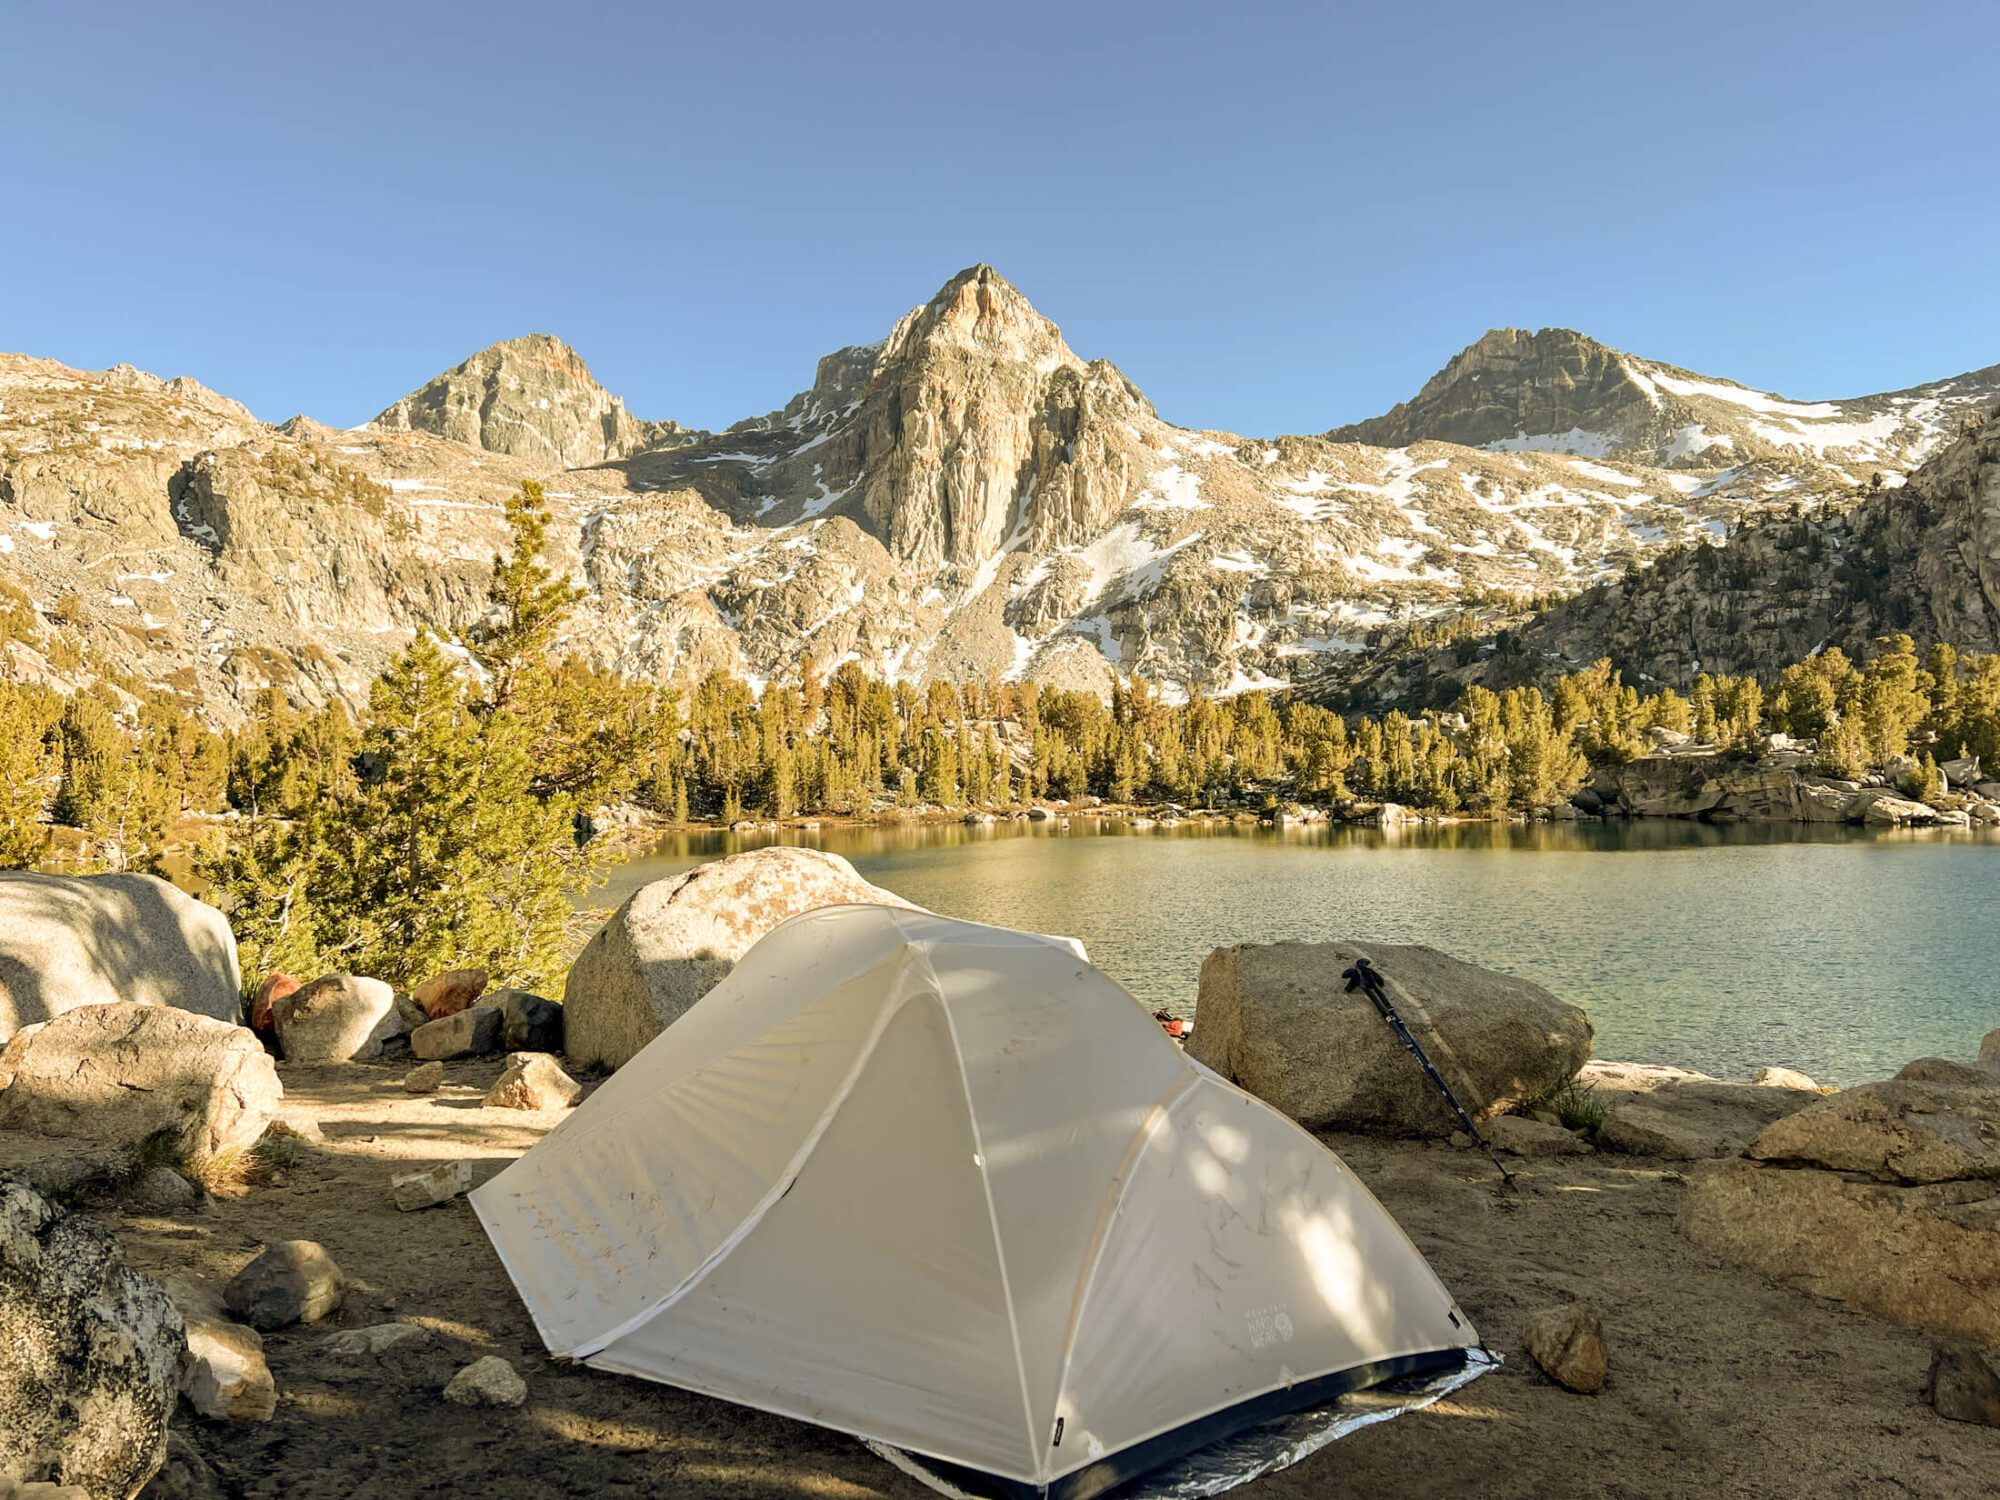
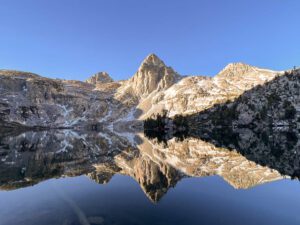
I upgraded to Mountain Hardwear Strato UL2 since backpacking the R2R2R2 and it’s been great, that’s it above at Rae Lakes in Sequoia National Park. It’s the perfect tent for backpacking the Grand Canyon as it’s semi-freestanding, double walled and weighs in at a mere 2.5 lbs. Unlike many 2-person tents, it doesn’t have a tapered floor and is able to fit 2 extra wide sleeping pads side-by-side with no overlap, a rarity in this class of tent! It’s cozy for two, but palatial for one!
If you’re looking for a completely freestanding tent that doesn’t need to be staked out to stand, check out the Big Agnes Copper Spur UL2. It’s unique blend of functionality, livability, weight, and durability earn high praise and Big Agnes’s customer service is outstanding!
For an incredible ultralight option, check out the single wall Durston X-Mid Pro which weighs in at a mere 20 oz (565g). There’s a reason this tent has developed a serious cult following among ultralighters.
Best backpack for backpacking the Grand Canyon
If you’re just getting into backpacking, there is nothing wrong with using a large-size backpack with a decent suspension system (and good hipbelt) or borrowing one from a friend. Going this route gives you time to decide what features you need and whether or not backpacking (and the gear) is something you want to invest in. Whatever backpack you use, make sure you have a good fit before by following this guide to backpack sizing. When I first started backpacking, I used a 60L travel backpack, our Khmer Explorer Travel Set on Canada’s West Coast Trail. While not designed for hiking, it worked great despite my ridiculous overpacking!
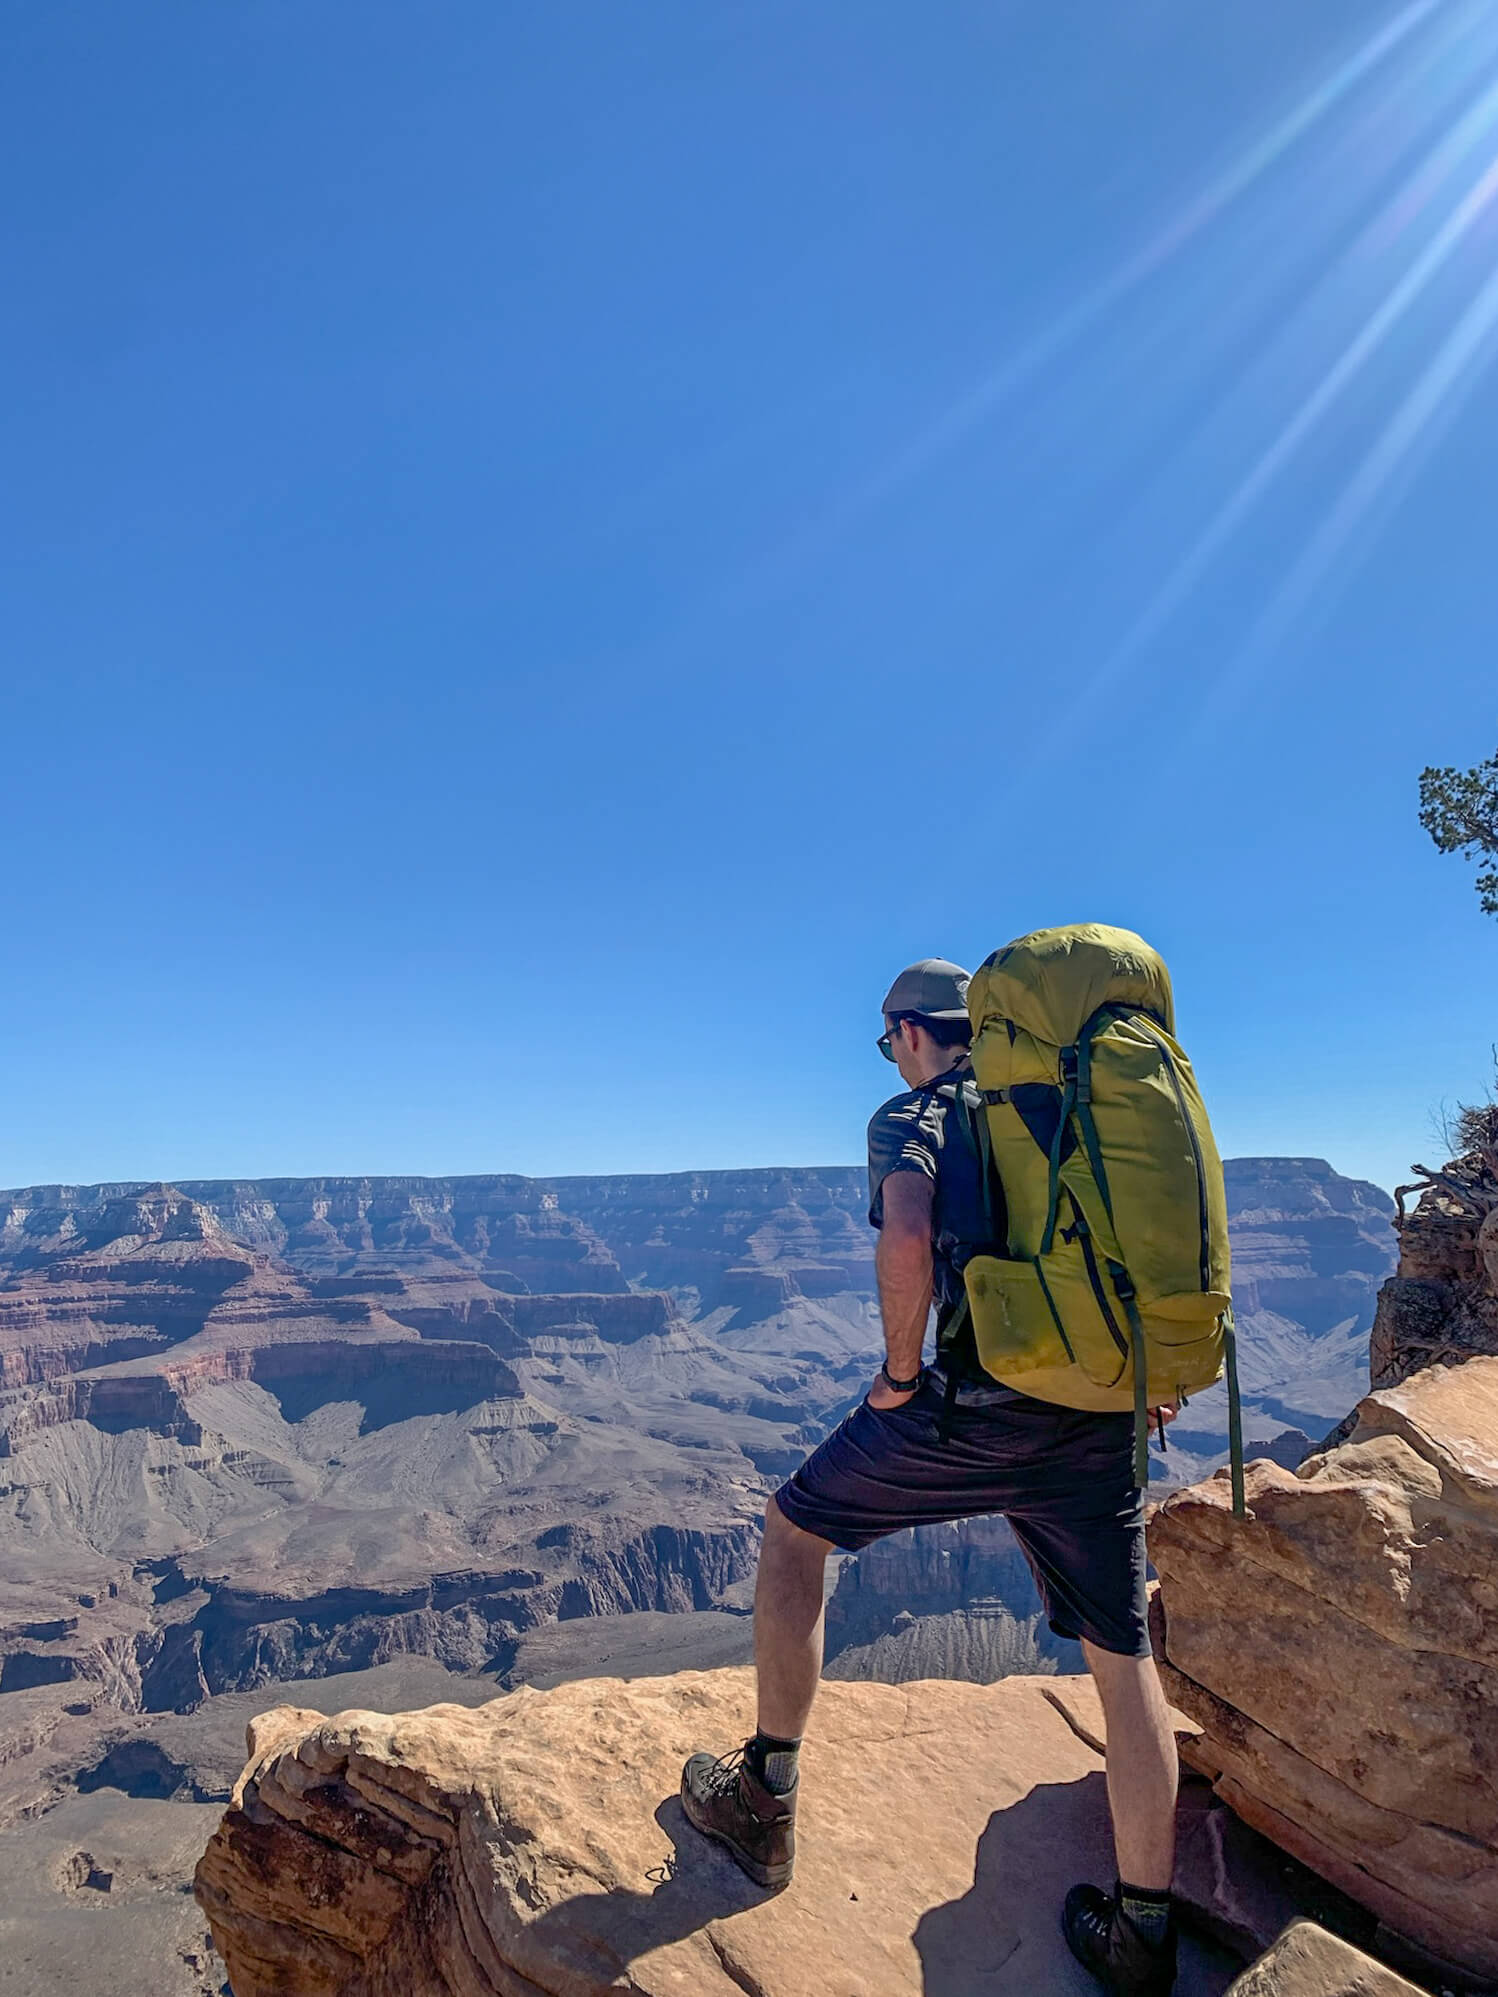
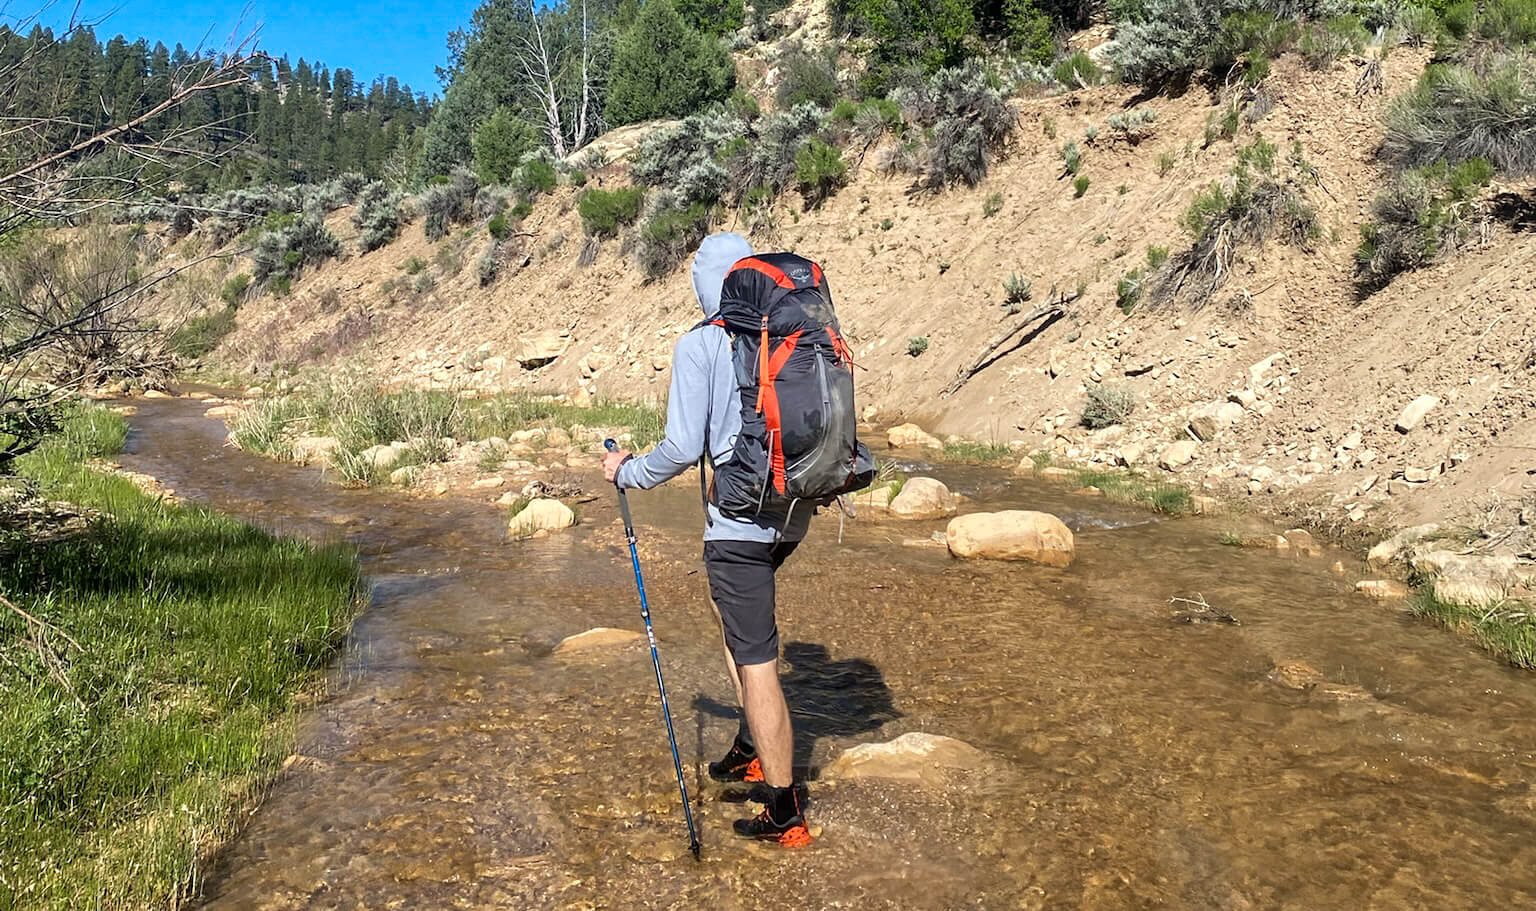
If you’ve begun dialing in your backpacking kit and moving towards a lightweight set-up, check out either the Osprey Exos or Woman’s Eja. At under 3 lbs these packs provides a great compromise between barebones ultralight packs and the heavier feature-laden packs. Their excellent suspension systems prevent the dreaded swampy/sweaty back on hot days. That’s my Exos hiking the Narrows in Zion in the photo above.
Learn more about the Exos and Eja:
For a similar option that checks in even a little bit lighter in weight, check out the Gregory Focal and Facet (women’s) lineup:
If you’re an extreme gram counter, you might like the Hyperlite 3400 southwest. It’s 100% waterproof and constructed from ultralight dyneema fabric. Being ultralight you’ll sacrifice features, so if you hate getting a swampy back (that’s me) you may prefer the Osprey or Gregory despite the weight penalty. Backpacking gear is always a zero sum game!
Check the price of the Hyperlite 3400 southwest:
Sleeping mat
I used to have terrible sleeps in the backcountry until I switched to the Therm-a-Rest NeoAir X-lite. It’s incredibly lightweight, comfortable, and packs down to the size of a Nalgene bottle. This is probably one of my favorite backpacking items! Get one. You won’t regret it. Sleep well!
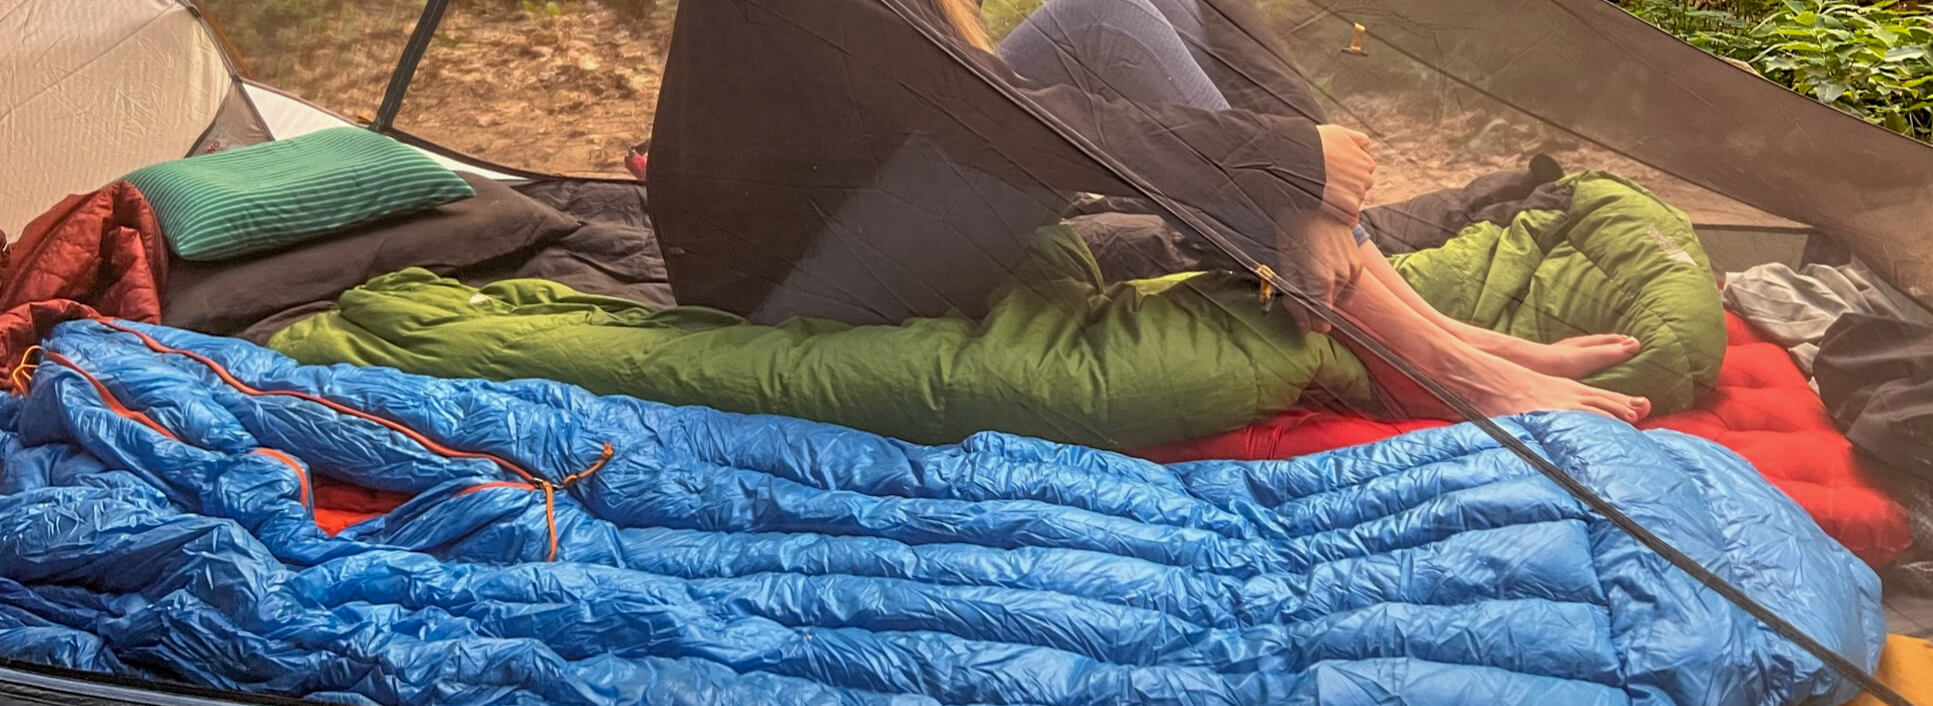
Sleeping bag or quilt
My Patagonia Sleeping Bag kept me nice and toasty on the North Rim. Plus at only 822 g (29 oz) it’s lightweight and packs down small! I found the 30°F / -1°C to be perfect for most outings – if it gets colder you can always layer up! Like all Patagonia products, it’s not cheap, but they stand behind their gear and the quality matches the price point. If you spend a lot of time in colder environments they also make a 20°F / -7°C version . These bags are a worthwhile splurge!
If you’re looking for an even lighter-weight option, consider going for a sleeping bag quilt. Feathered Friends Flicker UL Quilt Sleeping Bag has won numerous awards and is a stalwart among ultralight backpackers. With a weight starting at 526g (1 lb 2.5 oz), I can see why!
Backpacking pillow
Yes, you can sleep with a pillow not made of bunched up clothes in the backcountry. Check out the Nemo Fillo Elite. It packs down ultra small and provides a new level of comfort after long days on the trail. Once you try one you won’t imagine how you lived without!
Water purification
Outside of the summer months you’ll need to bring something to purify your drinking water. I love the Steripen. It’s light, portable and only takes minutes to purify a liter of water using only UV light. Press the button, place the pen in your bottle, and stir for a couple minutes it’s that easy!
Make sure to bring tablets as a backup though should you run into any technical problems/dead battery with your Steripen.
Trowel & toilet Paper
The rim to rim to rim offers a number of toilet facilities along the way and you should do everything you can to make use of them and avoid the alternative! That said, it’s always a good idea to pack a trowel just incase nature urgently calls at an unexpected time. Follow minimum impact camping principles and be sure to go at least (650 ft) 200m away from any established trails, campsites, or water (creeks, lakes, rivers etc.), dig your cathole at least 6 inches deep, and pack tp out.
Swiss army knife
For fixing gear or cutting food, make sure to bring swiss army knife.
Stove & fuel canister
Lightweight, convenient, and reliable, the MSR pocket rocket has been my go-to backpacking stove for years.
Lighter and matches
A little baby bic lighter is all you need. I often bring a small pack of matches wrapped in ziplock bag as well for backup or you could bring a small pack of waterproof ones.
Backcountry cookset
I love the GSI Halulite Microdualist II , two-person cookset. It’s lightweight and I can fit my MSR pocket rocket and a fuel canister inside.
If you’re looking to buy a minimalist stove and cookset check out the MSR PocketRocket Stove Kit for an all-inclusive solution.
Water bottle or reservoir
Nalgene are always a backcountry favorite. Check prices at Backcountry /REI. If you’re cutting weight or looking for a way to save a buck, a simple smart water is the go-to for ultralight backpackers.
Alternatively, a hydration reservoir allows you to stay hydrated continuously without stopping to grab and open a bottle.
Water storage container
Extra water capacity is important for safety on your hike of the rim to rim to rim. So make sure to bring a MSR DromLite Bag or Dromedary for additional water storage. They are also convenient to have around camp for cooking and cleaning up.
First aid kit
From blisters, to scrapes, and cuts, a first aid kit is an essential item to have. The pre-built kits from Adventure Medical Kits offer varying sizes for party size and trip length. At the end of your trip write down any items you used and replace them right away so your kit is ready for your next adventure.
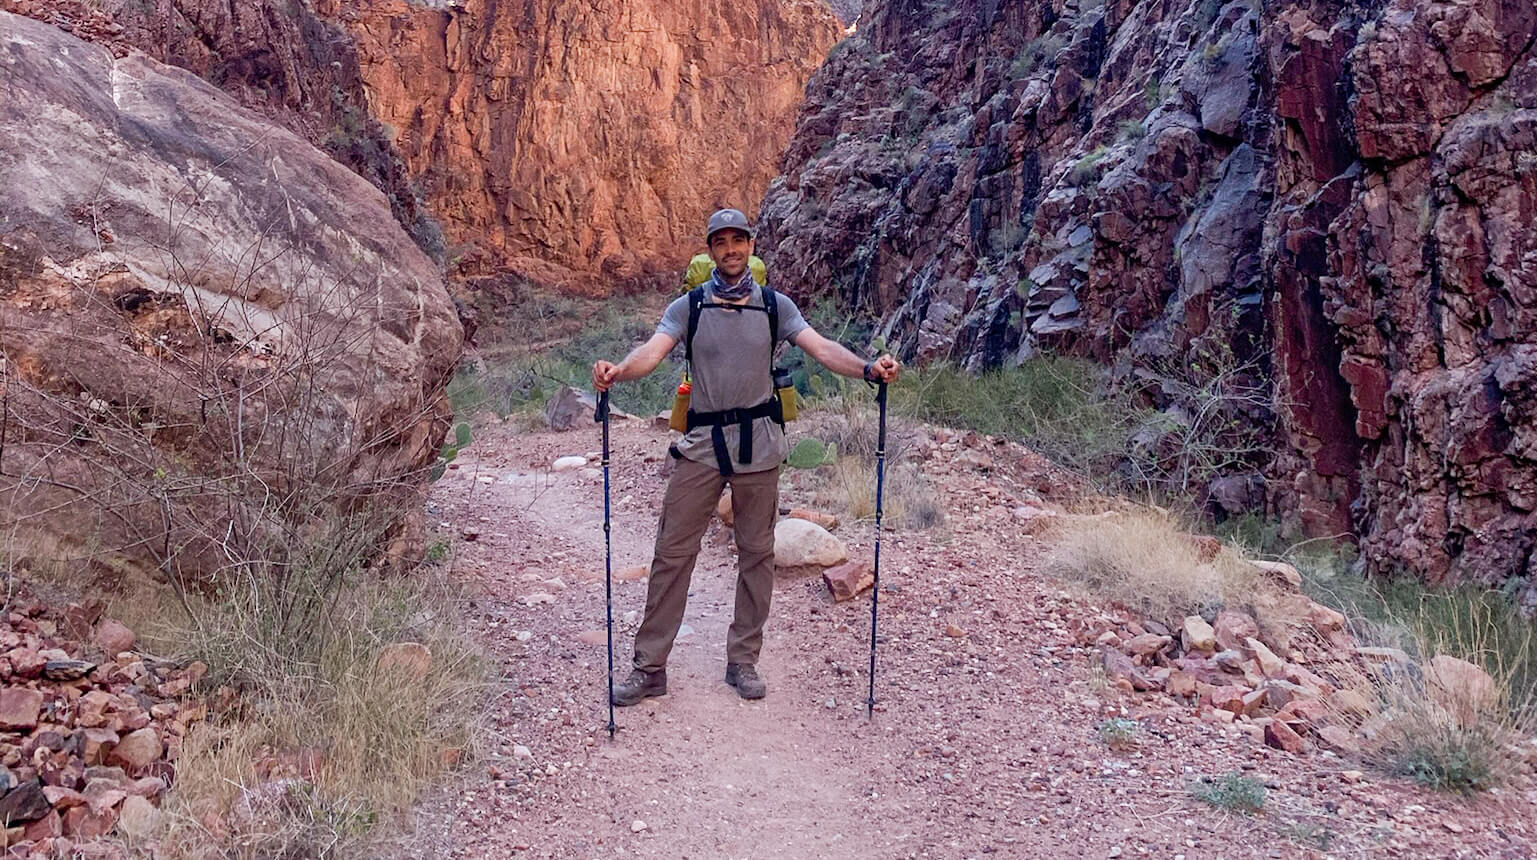
Trekking poles
The huge elevation gains and losses in the Grand Canyon make trekking poles an essential item in your kit! I resisted getting them for years, but take it from a former skeptic, poles are incredible at reducing the strain of long, grueling descents and providing extra stability on exposed sections. Leki makes some the best trekking poles on the market, I bought the Leki Micro Vario before doing the R2R2R and just look at how much fun I’m having with them in the photo above. If you’re looking for a premium hiking pole check out the new version, the MCT Vario.
Headlamp with red light mode
The Grand Canyon is an International Dark Sky Park (IDSP) and you’re likely to encounter some of the most beautiful night skies you’ve ever seen. You’re also going to see numerous signs asking you to use the red light mode on your headlamp to preserve yours and others night vision.
The Black Diamond Spot 350 is the way to go with 6 modes including the night vision saving red light! Red light mode takes a minute to get used to, but once you do it’s a total game changer trust me! Hello stars!!
GPS, compass and map
The rim to rim to rim trail is extremely well marked and easy to navigate, but make sure to download the GAIA app for maps and gps. Additionally, I always bring a traditional compass and map for use in the case of technical problems or dead batteries.
Battery back-up and charging cable
Keep your phone charged for photos and gps. View options at REI.
Luxury items to pack for backpacking the grand canyon
Should you pack a camp chair?
No need to bring a backpacking chair on the corridor trails as picnic tables are provided at every established campsite. Hello luxury!
If you’re heading to a more remote site and this item makes your weight cut, check out the Helinox Chair Zero. At just over 1lb and is light enough to justify bringing on slower/easier backpacking trips where weight isn’t as big of consideration.
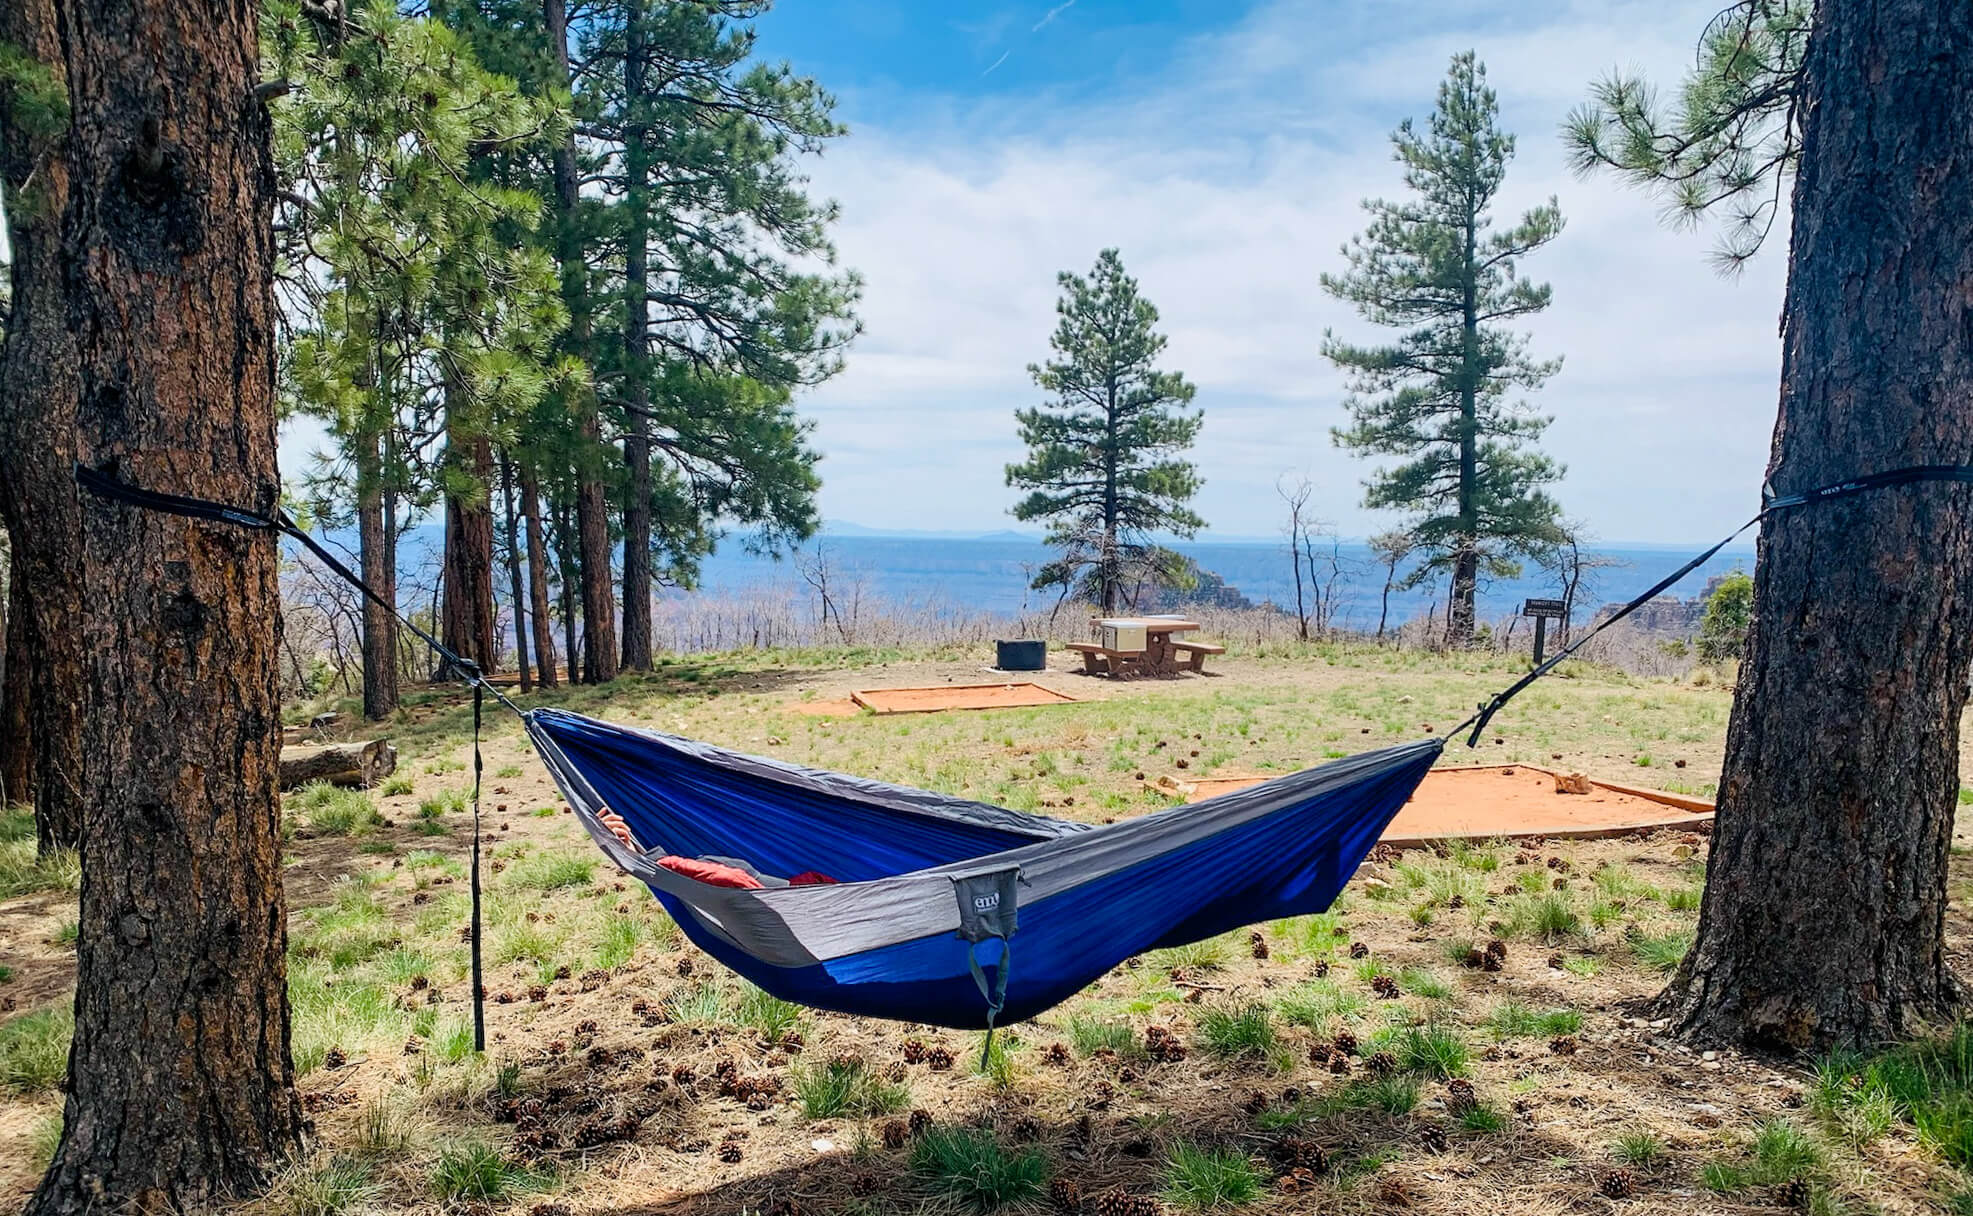
A hammock
A hammock can be the ultimate luxury item or even a replacement to sleeping in a tent. Unfortunately, the Grand Canyon is hit and miss with spots to string one up. Havasupai Gardens has a couple man-made options for hanging a hammock and it’s possible and allowed on the North RIm. However, you are not allowed to use trees at Bright Angel or any of the other sites below the rim.
If it’s worth it to get horizontal with some great reading material in the pre-dinner hours or take in an amazing sunset from your own outdoor couch, the ENO Double Nest has room for two and at ½ kg it’s hardly even a splurge in weight to pack.
P.S. don’t forget the straps are sold separately (view them at Backcountry / REI).
What to wear in the Grand Canyon
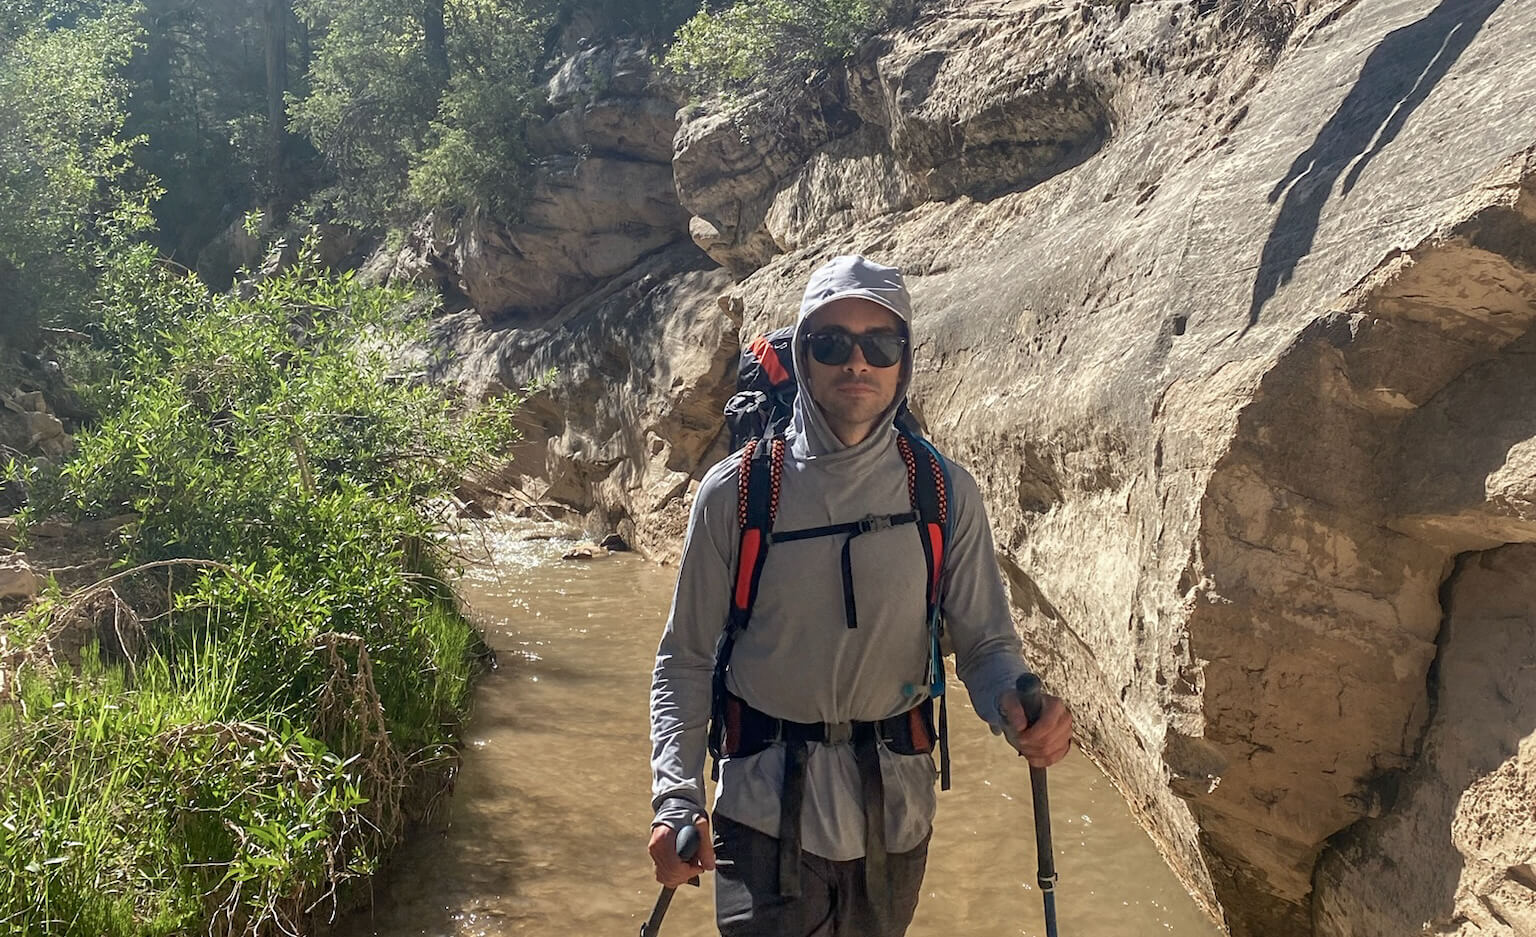
Sun hoodie - the best clothing item to pack for the Grand Canyon
When I did this hike a few years ago, I was shocked to see throngs of Arizona Trail thru-hikers wearing hoodies in the 100 degree (40 C) heat. Turns out they were onto something! A sun hoodie has been one of the best items I’ve added to my backpacking kit. They keep you burn free, are surprisingly cool, and let you get away with leaving the bottle of sunscreen at home (or bringing way less). The Sahara Sun Hoodie from REI is one of the best items I’ve added to my backpacking wardrobe and you can’t beat the price.
Convertible hiking pants
I never thought I’d see the day I embraced the zip-off. But they really are the best of both worlds and can’t be beat for quickly changing Grand Canyon conditions and keeping warm in the evening during the non-summer months when the temperature drops. Check out the Patagonia Quandary Pant.
They are also available in a women’s version.
Should you hike in shorts or pants?
Should you wear shorts or leggings in the Grand Canyon?
Regardless of the season you’ll almost certainly get hotter as you descend. During many months of the year, that may mean going from near freezing temperatures to heat stroke temperatures all in the matter of hours. As we descended the South Kaibab Trail, a ranger took one look at my wife’s black leggings and said “You’re going to regret those”. Sure enough, an hour later she was making a trail side outfit change. To avoid this situation, just remember layers are key. If you have convertible hiking pants, wear those. If not, wear a pair of shorts underneath a pair of hiking pants. Layering makes it easy to adjust your temperature depending on the environment and how much you’re exerting yourself.
A pair of shorts
In addition to hiking pants, it’s nice to have a pair of shorts to change into after a long day on the trail or as a backup option. Trail running shorts are light and comfortable.
Shell jacket
An essential piece for wind, rain, and snow. The Arc’teryx Beta shell is the best all around shell jacket. While you’re unlikely to encounter much rain here this shell performs in all adverse conditions and is the perfect outer layer for the North Rim. Arc’teryx gear is expensive, but impeccably designed. I was skeptical for years, until I purchased a few pieces of their trail running gear and got hooked. If you’re looking for the best reviewed hiking shell out there this is the one.
For another excellent option that is more economical, check out the Patagonia Torrentshell 3L.

Puff jacket
I’ve had the Patagonia Nano Puff Hoody for years and it works great on it’s own or underneath a shell for extra warmth. It’s a perfect multi-functional item for everyday, backpacking, and pretty much anything where you might need a bit of warmth. I’m still looking for an activity it doesn’t work for. This item likely won’t be needed in the summer months, but is ideal for cold nights on the North RIm.
Base layer top
In addition to a sun hoodie, I also bring one base layer top to change into after hiking or have as an alternate. The Capilene Cool trail t-shirts work great for me on long hikes and trail runs, but pretty much any athletic quick-dry top will work fine.
Base layer bottom
A merino bottom baselayer is perfect for warming up at night or during chilly mornings especially during the non-summer months.
Underwear
I’ve had the best luck with these Patagonia underwear for hiking, trail running, mountain biking and skiing and found them to be more durable than the more expensive ones from lululemon. I usually bring a 2-3 pair depending on trip length.
They also make women’s underwear, but I am unable to advise on fit, form, function, or durability on this front. Check them out for yourself at Backcountry/Patagonia.
Hiking socks 3 pairs
I typically bring 3 pairs of socks. 1 pair for hiking, 1 pair to change into at camp, and a reserve to throw into the rotation as needed. Darn Tough Vermont makes the best hiking socks hands down. They’re guaranteed for life/replaced free of charge and they don’t stink. So go ahead and try to get holes in your socks. Really!
Sun hat & warm hat (seasonal)
A ball cap or tilley hat keeps your face protected from the sun. Check out these options at REI / Patagonia/Backcountry.
For colder months, bring a winter hat or beanie to warm up during chilly mornings or evenings.
Buff
This little item was super helpful on the rim to rim to rim. It helped block sun exposure on my head and neck and worked great to cool down with by soaking it at every creek or water stop.
Sunglasses
Don’t forget to pack your favorite pair!
Gloves
I bring a thin weatherproof pair if you’re camping on the North Rim.
Trail runners or hiking boots
Unless you’re hiking in the winter with the potential for snow and cold or you’re carrying the gear for your whole family, I’d choose trail runners for this hike. I’ve had great luck with the La Sportiva Bushido II.
The Altra Lone Peak are also a thru-hiker favorite and award winning trail shoe!
I do have a larger more traditional hiking boot, the Scarpa Kailash that I occasionally use when I’m carrying more gear/weight or heading somewhere with lots of snow. I actually wore these on this hike as I didn’t have my pack weight nearly as dialed as do now. I prefer trail runners now, but these are still a great boot.
Camp shoes
Crocs are back! Well for backpacking camp shoes they never left… They’re lightweight and ugly as ever. Many backpackers find them to be the perfect camp shoe for resting sore feat after a long day in boots/shoes.
Personally, I still hate them. I have an old pair of Tom’s which I occasionally bring. They are light and less bulky than Crocs. If I’m wearing a trail runner, I’ll often ditch the camp shoe altogether and just loosen my laces. Your call!
Additional items to pack for backpacking the Grand Canyon
Microspikes (season dependent)
Kahtoola Microspikes slip effortlessly over your boots and make walking on snow and ice a breeze. If you’re tackling this hike when snow and ice are possible, bring these!
Low trail running gaiter (optional)
Low gaiters can be helpful for keeping rocks, sand, and snow out of your trail runners and saving you from blisters.
Duct tape (repairs and blisters)
Tooth brush & toothpaste
Food for backpacking the Grand Canyon
Everyone has different takes and caloric requirements, diets, and preferences so I won’t tell you exactly what to bring. I generally try to avoid/limit the just-add-water meals you find at REI . They’re overpriced and often don’t rehydrate as well as you’d like. I usually head to the grocery store and search for things like lentil rice, ramen, or plant-based mac & cheese. They’re basically just add water/boil quickly meals and way cheaper. Always re-bag/re-pack this type of food, as there is no reason to carry unnecessary packaging on the trail. If you’re looking for convenience consider Patagonia Provisions soups and chilis. I’ve found them to be a better bet than the other just add water options.
If you're coming from outside the US, don't forget this!
If you’re traveling from outside the US don’t forget to purchase comprehensive travel insurance that includes emergency evacuation. Check out World Nomads* for a quote. Hopefully, you never need to make a claim, but if you do you’ll be beyond happy you were prepared! I broke my collarbone traveling a few years ago, which hurt enough! I can’t imagine how much worse it would have hurt if I had to pay the $15,000 in medical bills out-of-pocket…
Final thoughts on backpacking the Grand Canyon
- Terrific first backpacking trip to the Grand Canyon that provides a great introduction to the nuances of backpacking here, not to mention the incredible scenery.
- First and last sections felt busy with day hikers from the South Rim.
- The heat was unbearable at times and felt like the biggest obstacle to overcome, much more so than elevation gain.
- Would avoid staying at Bright Angel Campground if possible due to congestion.
- Would take the earliest possible Hikers Express on day 1. South Kaibab trail is much more enjoyable this way.
- Would love to camp at the North Rim again while it’s closed to vehicle traffic.
Your Thoughts on backpacking the Grand Canyon
Have you backpacked the Grand Canyon rim to rim to rim? I’d love to hear from you. Questions about backpacking the rim to rim to rim? Drop me a line in the comments below and I’ll do my best to help!
More adventures you might enjoy
Michael