Kananaskis Backcountry Camping | Best Spots for Backpacking

Kananaskis backcountry camping

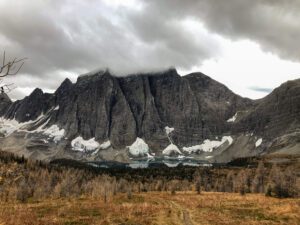
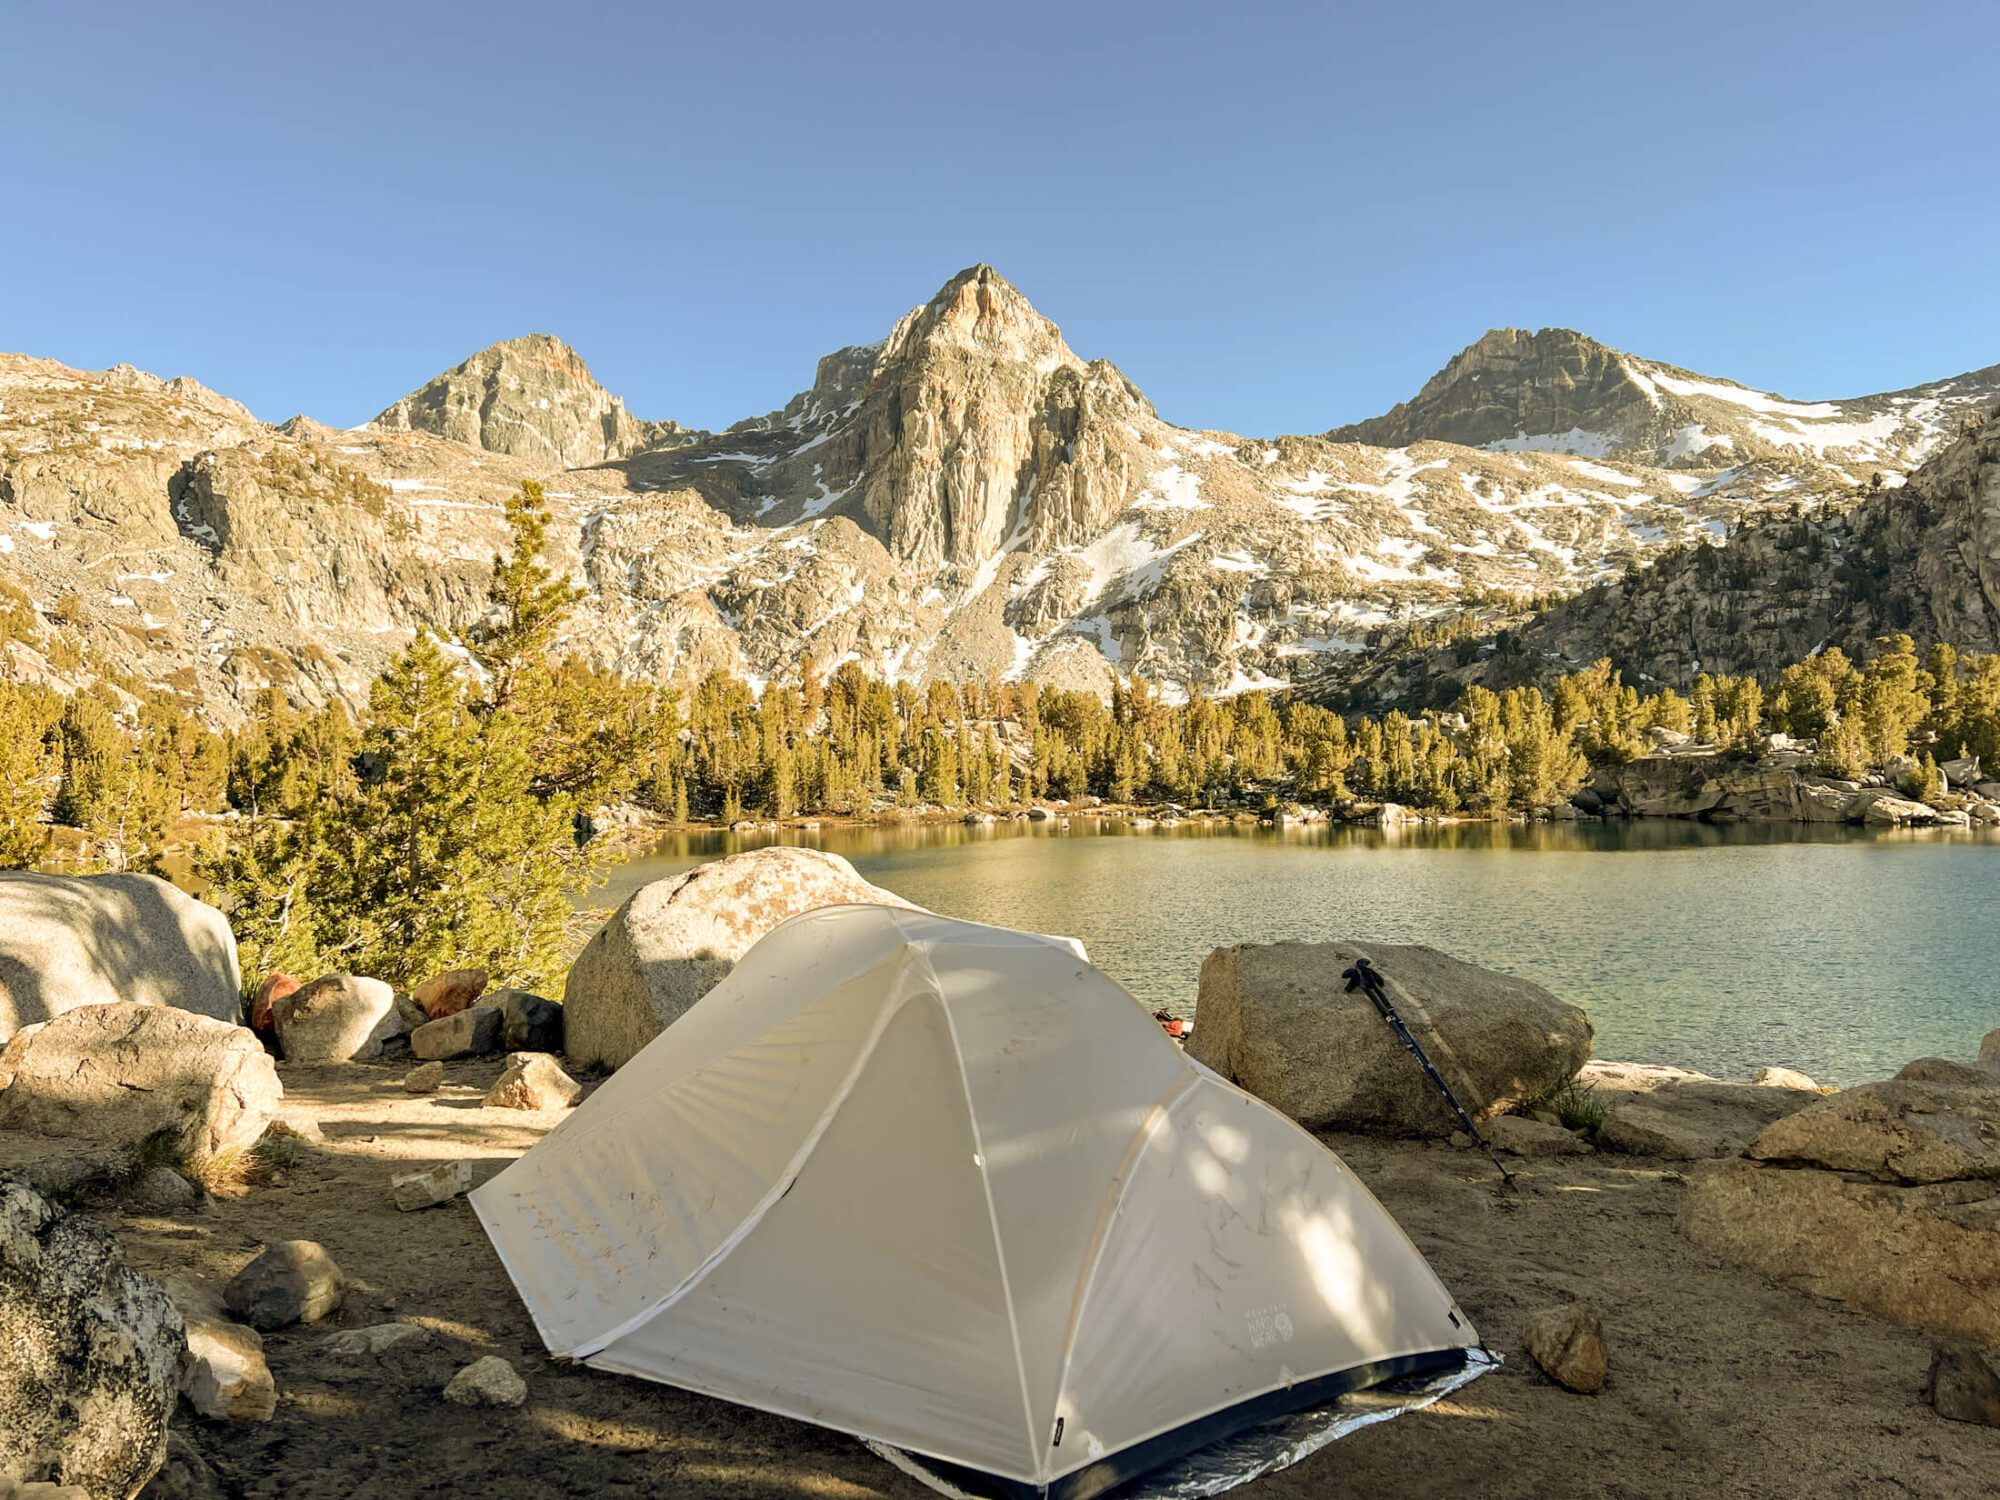
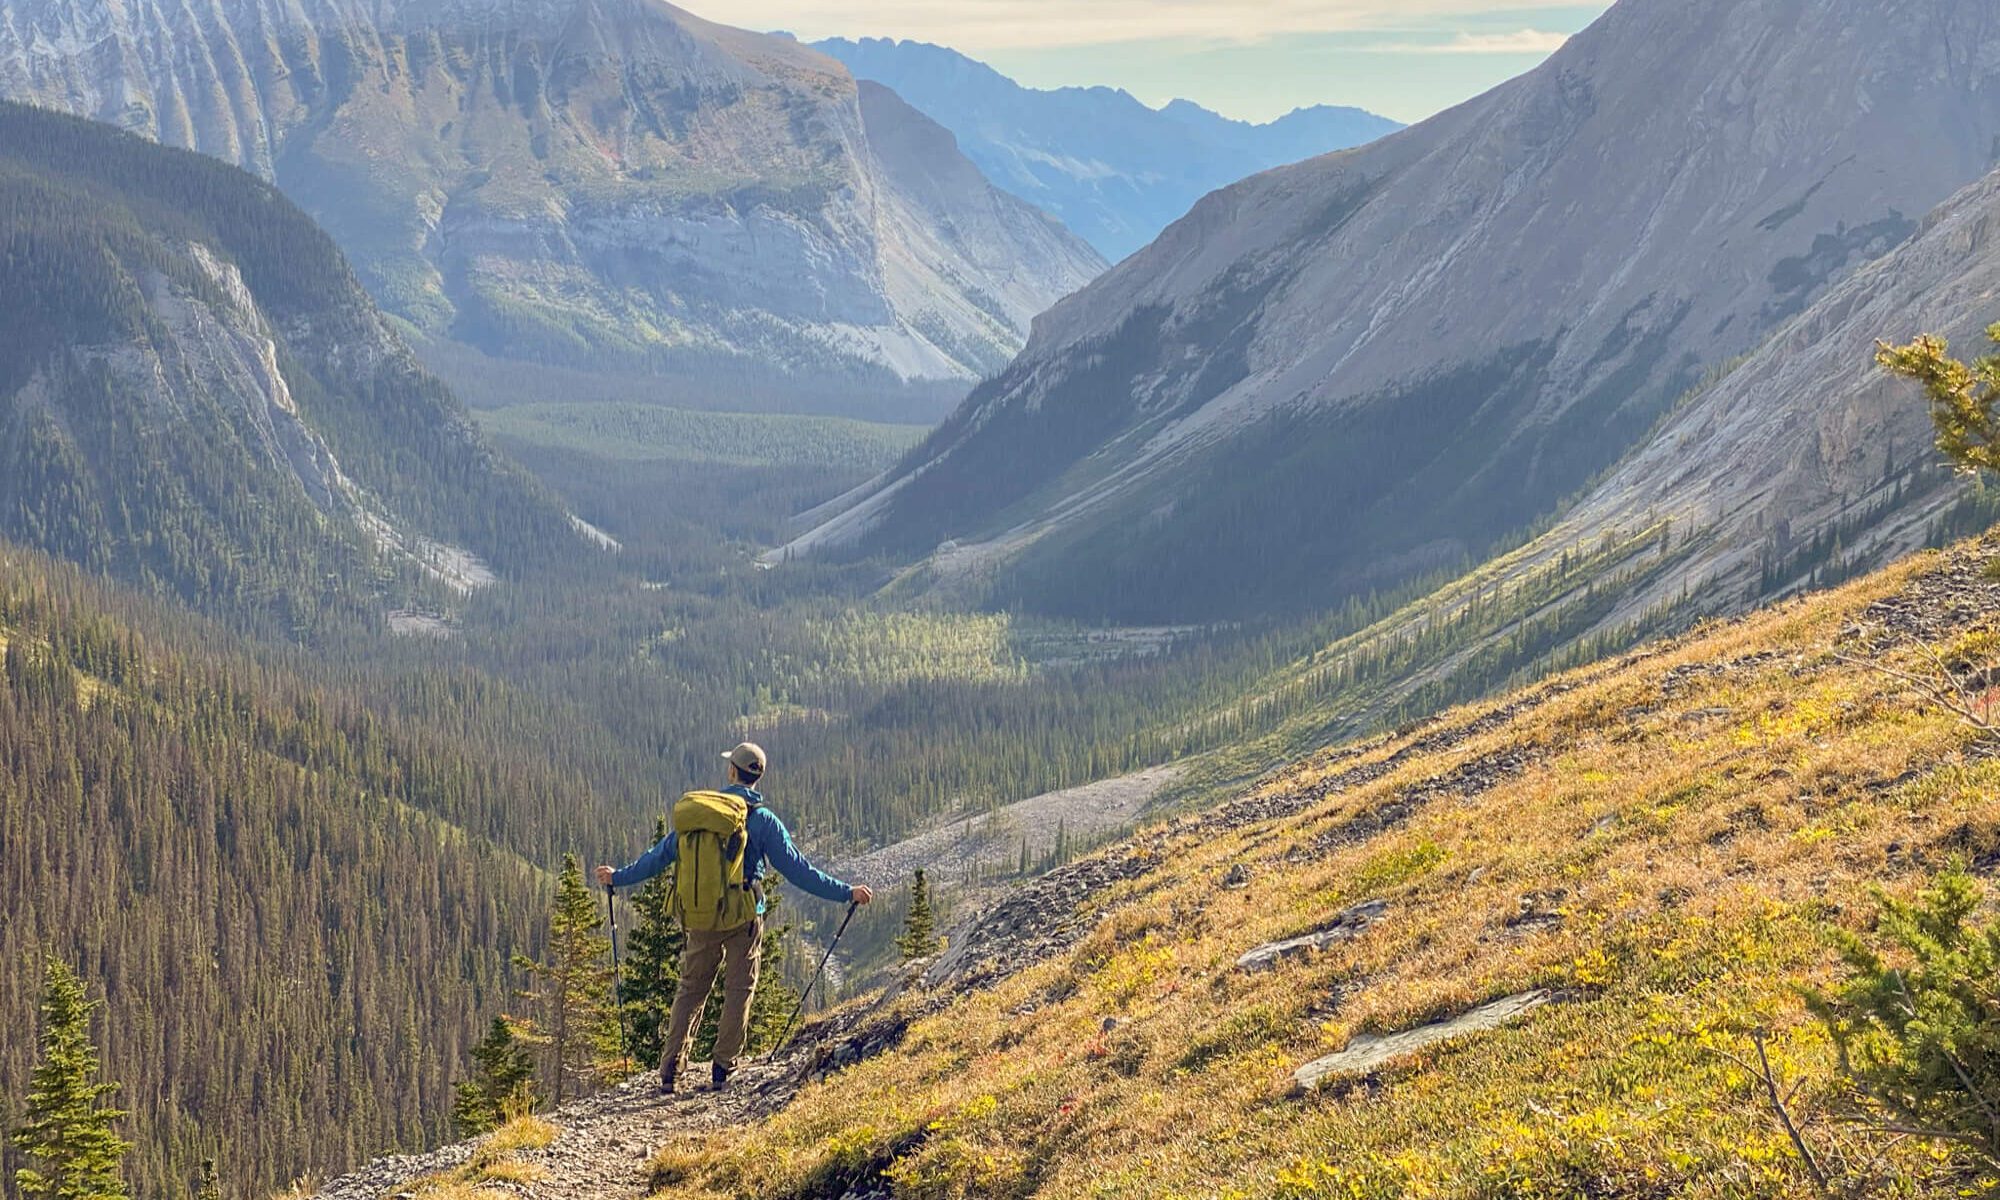
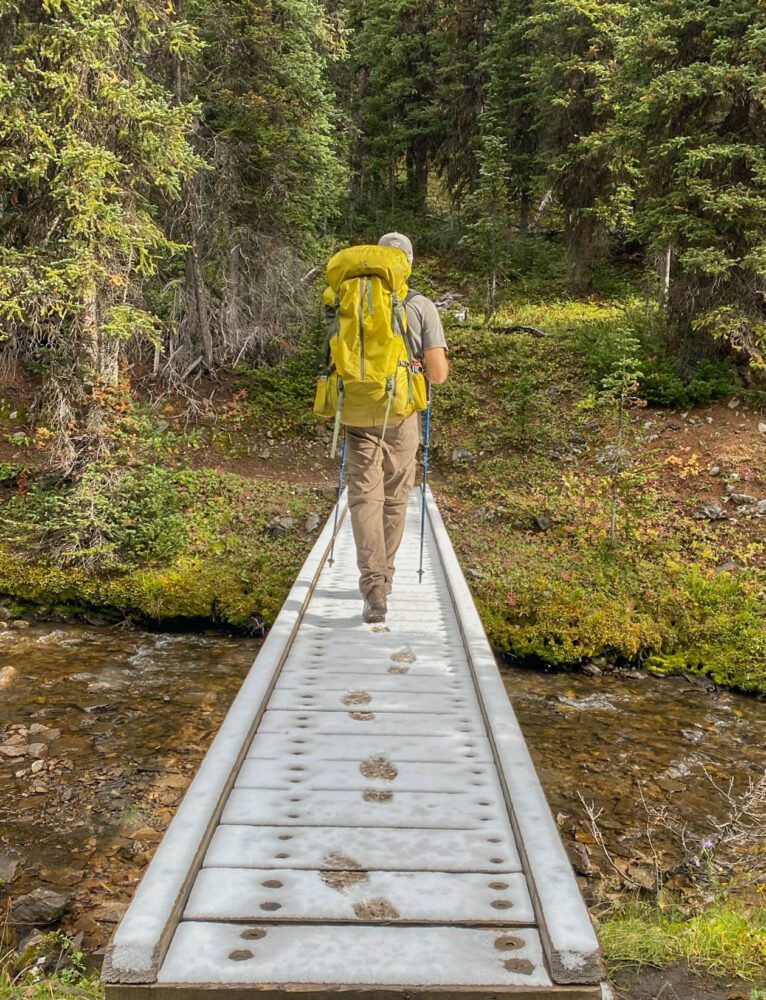
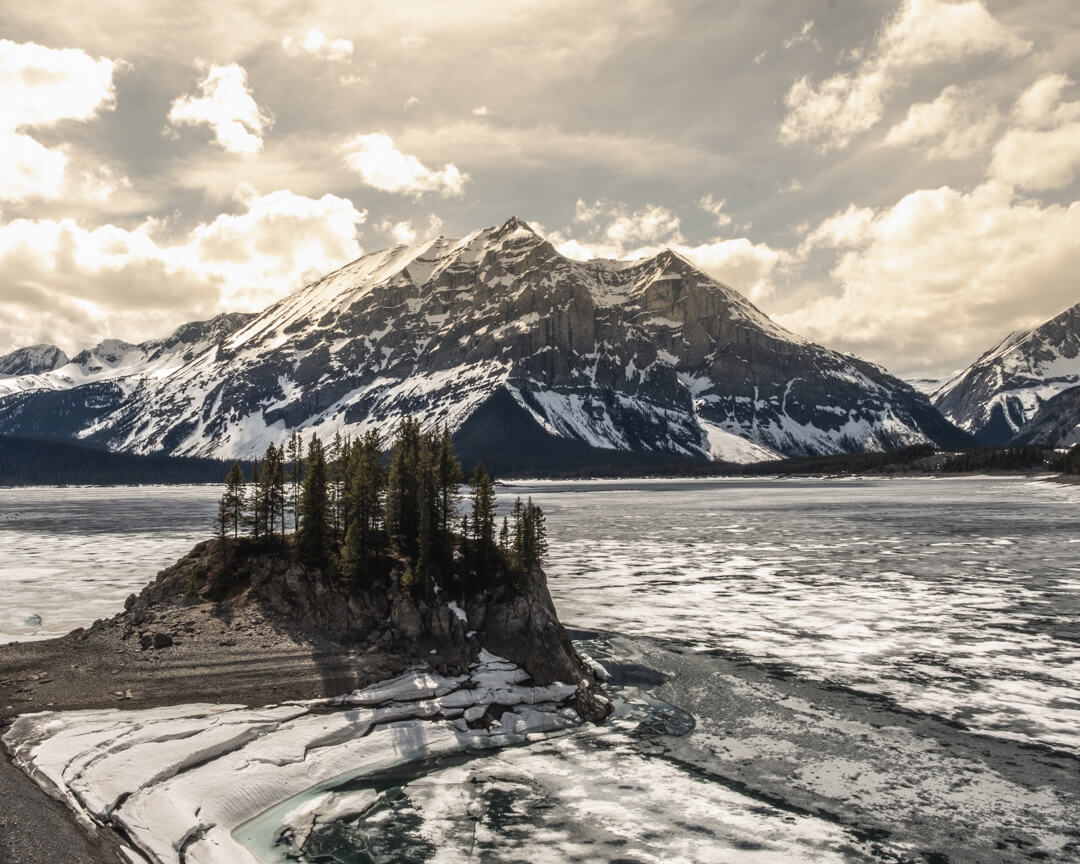
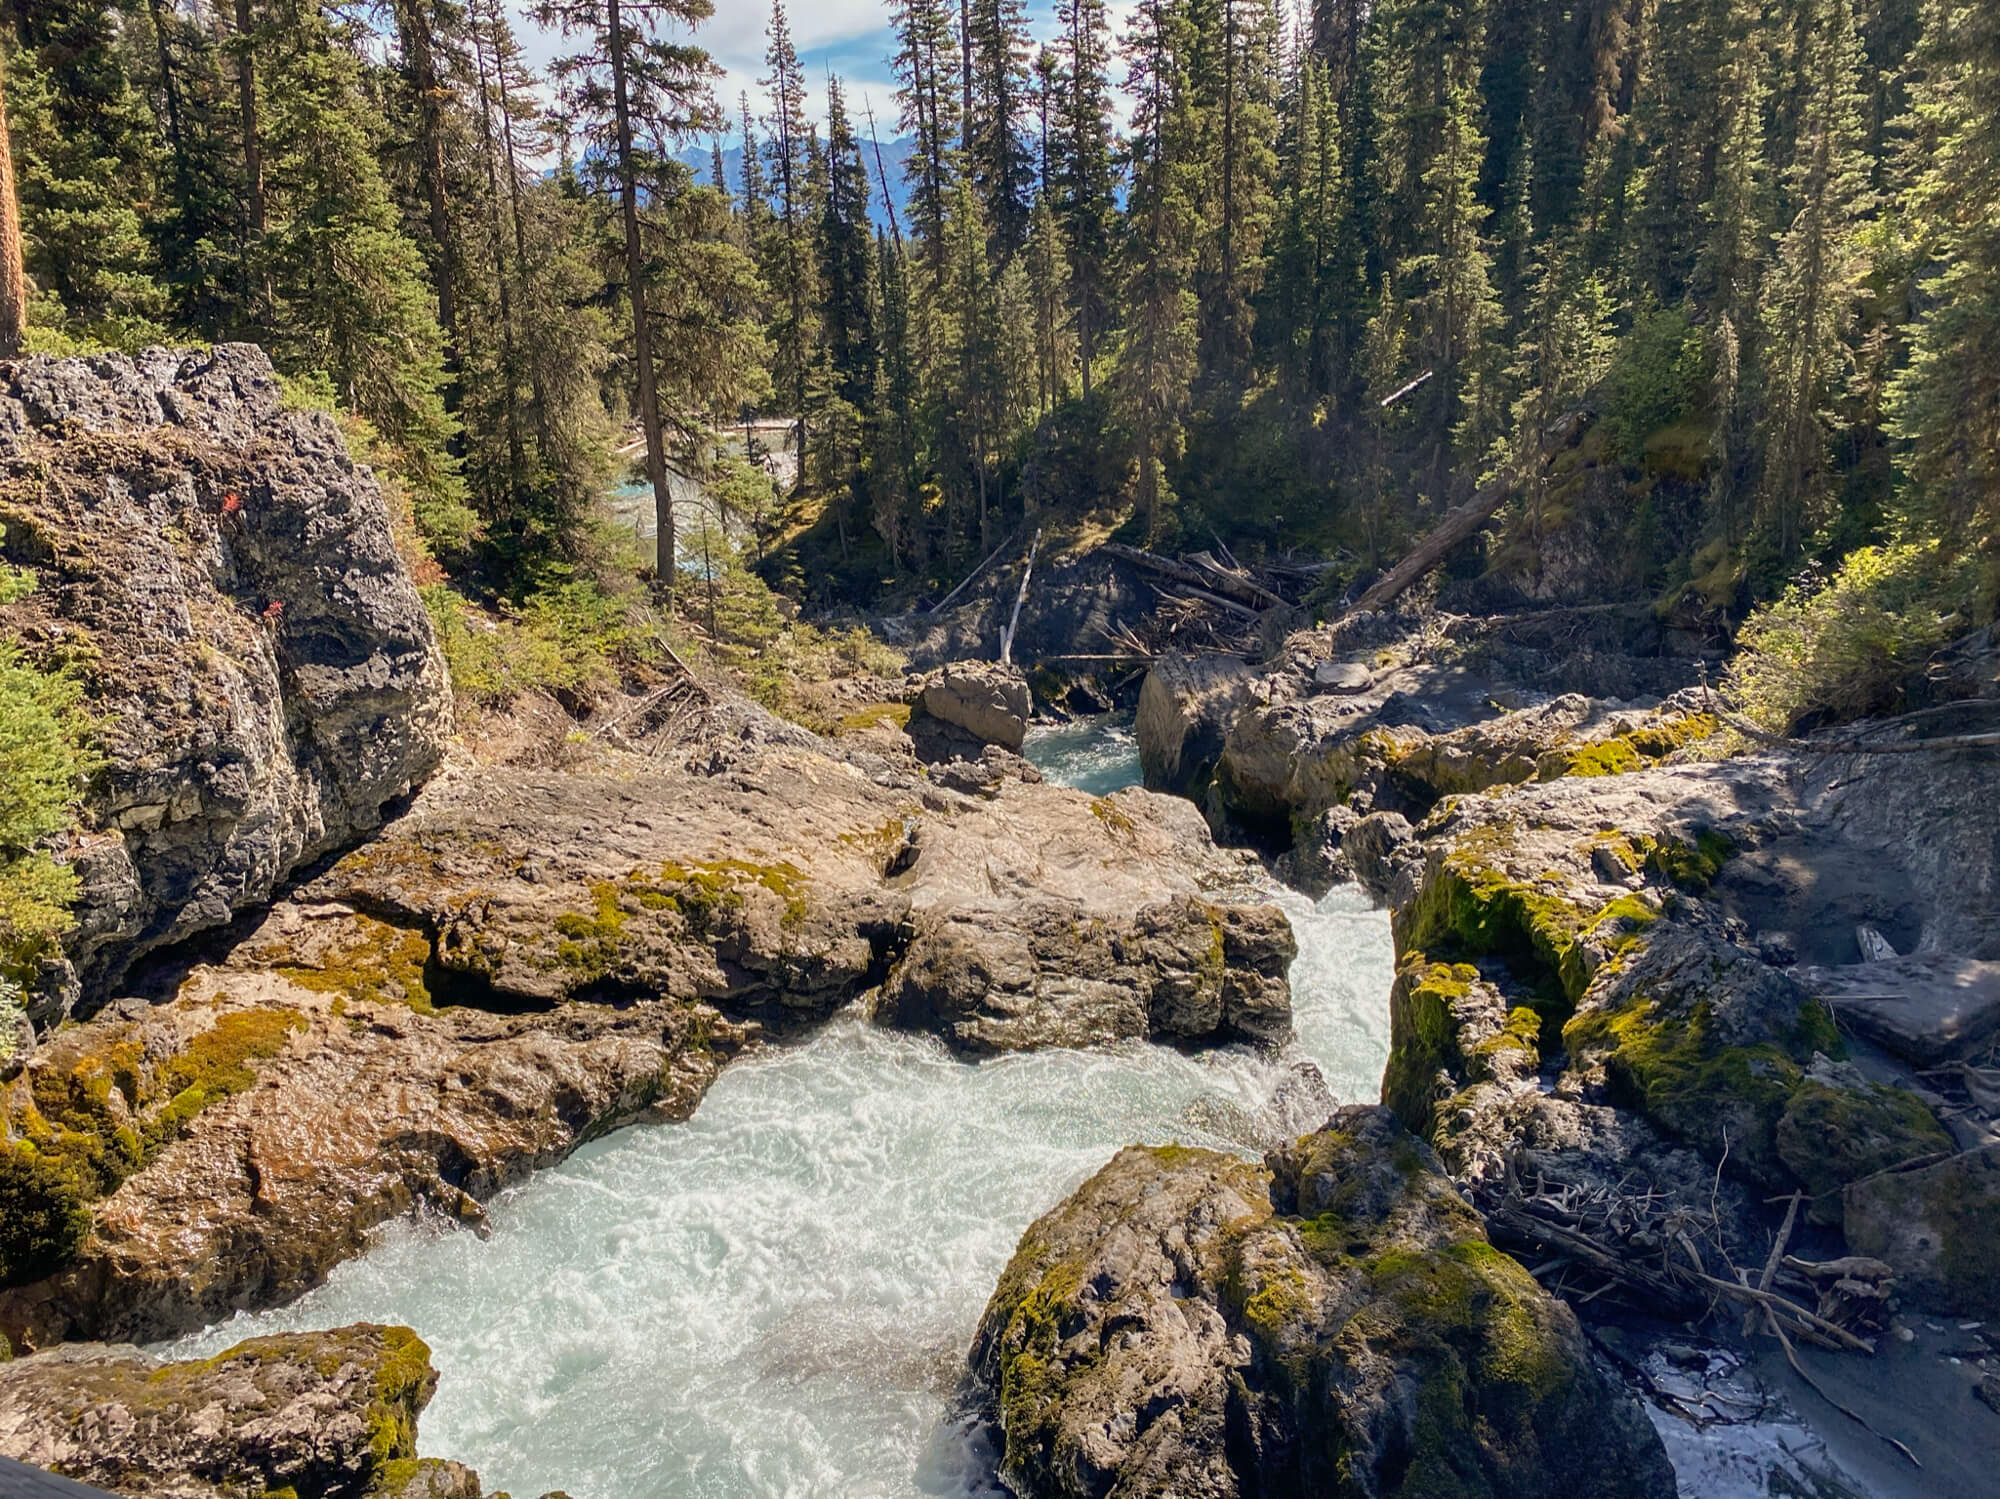
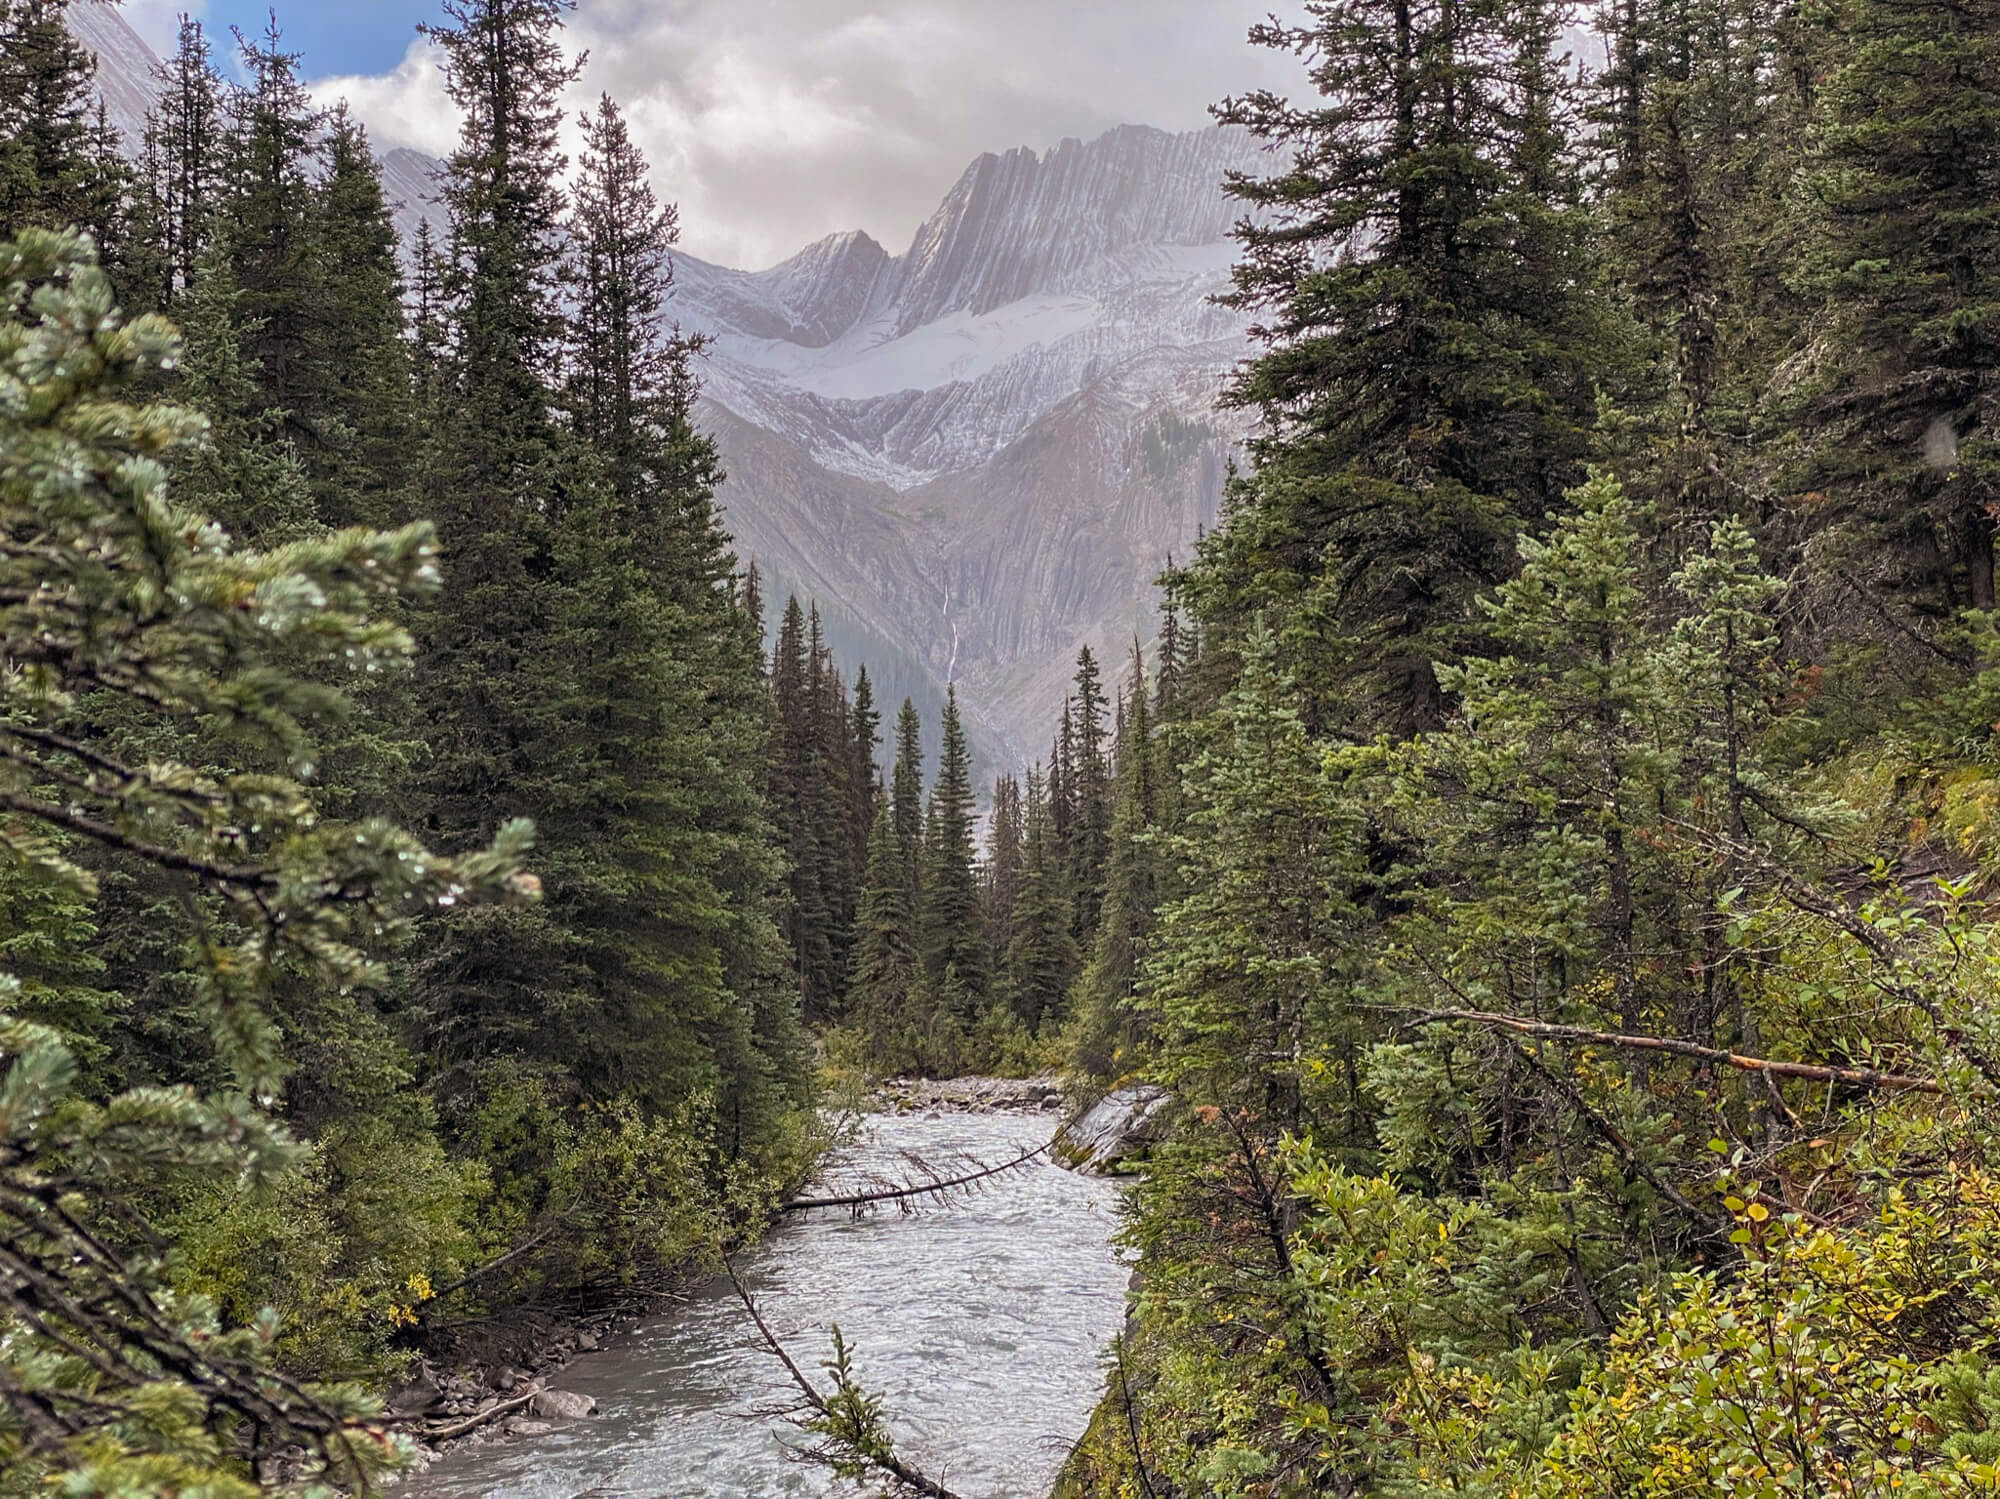
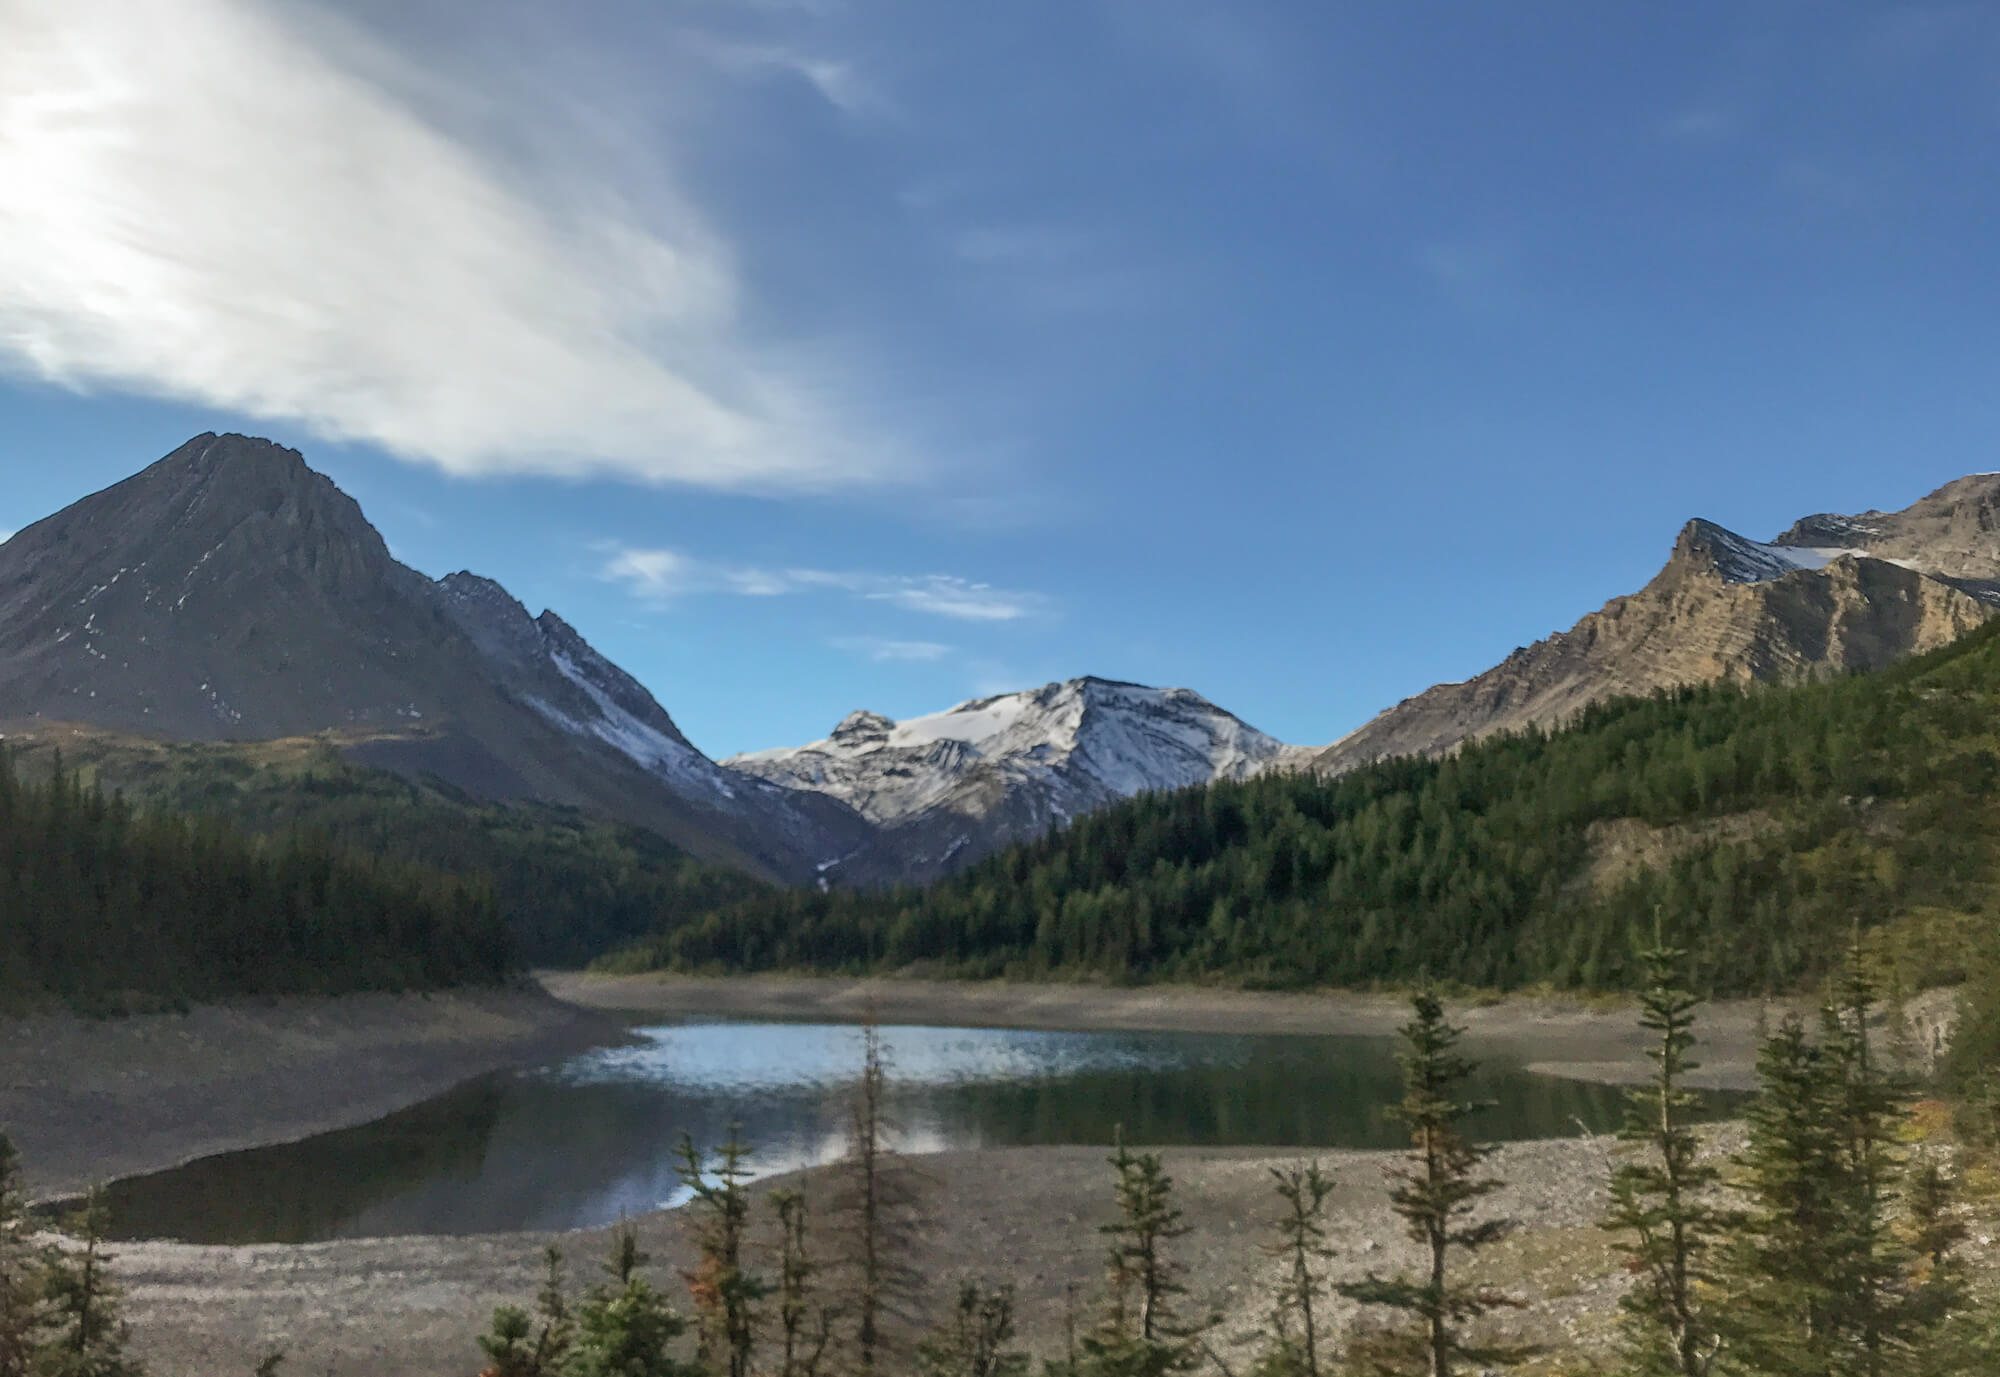
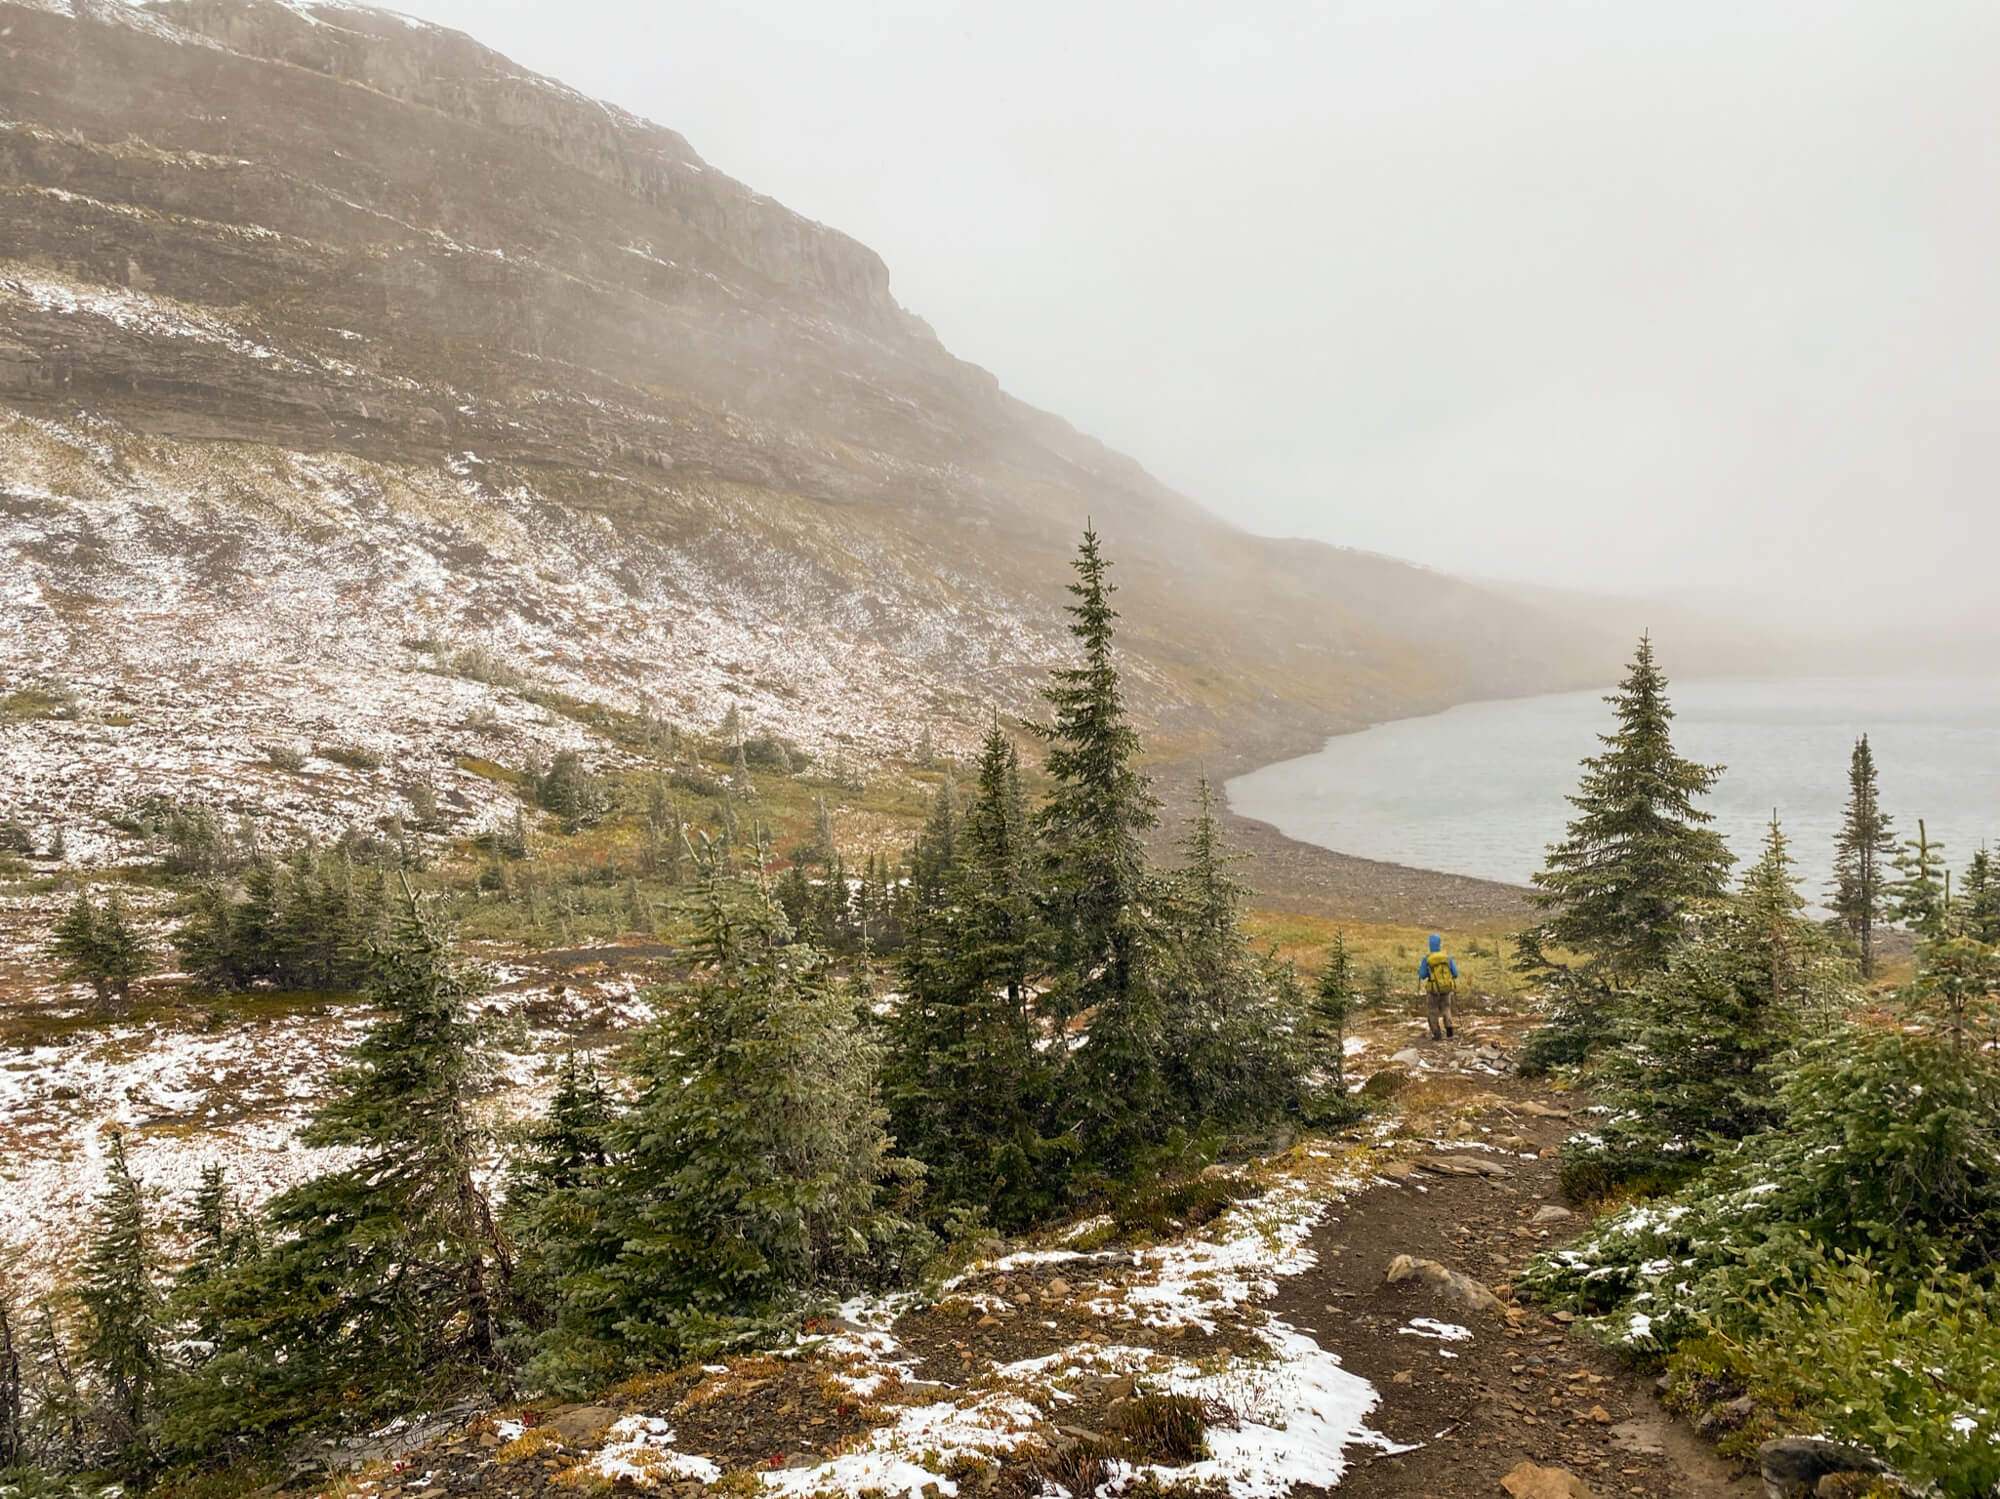
Kananaskis Country is a sublime section of Rocky Mountain wIlderness that provides some incredible opportunities for backcountry camping and overnight hiking.  Situated just south of Banff National Park, Kananaskis receives far fewer visitors than its world famous neighbor, but offers up an incredible array of jaw dropping peaks, lakes, and glaciers. For the intrepid backpacker, Kananaskis Country offers a myriad of established backcountry campsites that are accessible by trails appropriate for beginners and experts alike. The backcountry campsites in Kananaskis are well maintained and come equipped with pit toilets, tables for cooking/eating, defined tent pads, and bear caches making it easy for beginners to cut their teeth on overnight backpacking without the added stress of storing food, finding a level tent site, or digging a hole to poo đź’© . If you’re ready to adventure into some of the Canadian Rockies’ most spectacular scenery, let’s take a look at a few of the incredible backcountry camping spots in Kananaskis. 

First, let’s go over a few of the basics.

** Some of the links in this post may be affiliate links. If you click one of the links and make a purchase we’ll earn a small commission at no cost to you. We’re very particular about products and we only recommend products, services, or accommodation we trust and use ourselves.**

Do you need a permit for backcountry camping in Kananaskis?

Yes permits are required for backcountry camping in Kananaskis and you must make a reservation on the Alberta Parks Reservation website up to 90 days in advance of your visit. All permits must be obtained in advance as there are no walk-up permits offered. 

Once you have a permit all sites/tent pants are first-come-first serve. You do not reserve the sites themselves.

Do you need a park pass for backcountry camping in Kananaskis?

You will need to purchase a Kananaskis Conservation Pass, if you park a vehicle during your backcountry camping adventure. The cost of this pass is as follows (2024):

    • Day pass – $15 (registers one vehicle)
    • Yearly pass – $90 (registers up to 2 vehicles)

How much does it cost to camp in the backcountry in Kananaskis?

Backcountry permits cost $12 per person, per night plus a non-refundable reservation fee of $12 per booking transaction. Up four permits can be reserved per transaction.

Can you have fires while backcountry camping in Kananaskis?

The majority of Kananaskis backcountry campsites allow fires, when local conditions permit (i.e. no fire bans). When you book your permit online, double check the individual site rules for guidance and make sure to check for any local restrictions before heading out. 

Can you random camp in Kananaskis?

Random camping is not permitted in any provincial parks and provincial recreation areas in Alberta. That means that you are not allowed to pick campsites at will in large swathes of Kananaskis country including Peter Lougheed Provincial Park. That said, there are several locations in Kananaskis where random camping is allowable. Consult this page for more details if you’re looking to camp off the beaten track. 

crossing a bridge near Turbine Canyon in Kananaskis Country

What gear should you pack for backpacking in Kananaskis?

Backpacking gear is a subjective subject and everyone has a different opinion on what works best for them. If you’re new to backpacking, try to borrow gear from a friend or rent to decide what works for you before making any major investments. You might gravitate towards minimalist ultralight gear or decide that certain creature comforts are literally worth their weight. With this in mind here are few of my recommendations:

Don’t Forget

Essential Items

  •  

Clothing and Accessories 

Additional Items

Luxury Items (very optional)

Upper Kananaskis Lake

Kananaskis Backcountry Camping Sites

To help you decide on where to go, I’ve sorted the Kananaskis Backcountry campsite sites by difficulty level. Hiking difficulty level is subjective and highly influenced by your fitness level, experience, and pack weight, so use your own judgment to decide which trips/sites may be best for you. If you’re new to backpacking or backcountry camping, start slow. You’re likely to overpack and you may forget a thing or two, fortunately the consequences of your mistakes are much lower when you have the option of hiking out easily if you’re in a bind. 

Beginner Friendly Kananaskis Backcountry Camping Spots

These sites are accessible via short trails with limited elevation gain and are the perfect introduction to overnight hiking.

Elbow Lake

Situated only 1.3 km (130 m elevation gain) from the trailhead on highway 40, Elbow lake is an excellent base camp site for backcountry exploration in Kananaskis. Set up camp for a few nights at one of the tent pads around this stunning emerald green lake, and set out on one of the many day hikes in this area including Rae Lake, Tombstone Mountain or Piper Pass. For hikers looking for longer adventures, it is possible to hike to Tombstone or access the Little Elbow – Big Elbow loop. . 

    • Number of sites: 15
    • Amenities: Pit Toilet and Bear Lockers 
    • Fires Permitted: Yes, but check for restrictions.
    • Nearest trailhead distance: 1.3 KM from trailhead on Highway 40 (Kananaskis Trail)

Jewell Bay

Jewell Bay campground is a popular backcountry camping spot situated on a small bay within the Barrier Lake reservoir. This site is one of the most accessible backcountry sites in Kananaskis lying just inside park boundaries. Although Jewell Bay lacks the remote backcountry feel of some of the other sites on this list, it makes up for it by being accessible by foot, kayak or canoe. If you’re looking to hike in, it’s just over 4 km of flat walking from the Barrier Dam Day use area. Note: This site is presently closed for construction. 

    • Number of sites: 11
    • Amenities: Pit Toilet and Bear Lockers 
    • Fires Permitted: Yes, but check for restrictions.
    • Nearest trailhead distance: 4 KM from Barrier Dam Day Use Area

Point Campground

The Point campground sits on the shores of Upper Kananaskis Lake with epic lakefront and mountain views. Situated a mere 3.5 KM from the interlakes parking lot with negligible elevation gain, this is one of the best spots for first time backpackers to try their hand at backcountry camping in Kananaskis. For those looking to try their hand at winter camping, this site is one of the few that is open year round. 

    • Number of sites: 20
    • Amenities: Pit Toilet and Bear Lockers 
    • Fires Permitted: Yes, but check for restrictions.
    • Nearest trailhead distance: 3.5 KM North Interlakes 

Quaite Valley

This site often receives lackluster reviews for limited views and road noise, given its proximity to Highway 1. The most common route to access Quaite Valley is via a 4.5 km hike starting from the Heart Creek Parking Area (180 m elevation gain). You’ll spend the first 2.5 km parallelling Highway 1 before cutting up the Quaite Valley to this backcountry campground. The site can also be accessed via a longer hike from Barrier Lake. While the backcountry site is acceptable, the approach hike is one of the worst on this list. There are better options on this list, even if you’re just getting started with backpacking. 

    • Number of sites: 20
    • Amenities: Pit Toilet and Bear Lockers 
    • Fires Permitted: Yes, but check for restrictions.
    • Nearest trailhead distance: 4.5 KM from Heart Creek Parking Area.


Intermediate Kananaskis Backcountry Camping Spots

Campsites in this section are accessed via  slightly longer hikes in and my be more appropriate for those that have a trip or two under their belt. 

Big Elbow

Nestled alongside the Elbow river, Big Elbow backcountry campground is an easy 8.5 KM hike (140m elevation gain) from the LIttle Elbow Campground at the end of Highway 66. The sites are well equipped with picnic tables and firepits (firewood provided). Big Elbow campground (along with Romulus and Tombstone)is a great option for those looking to make an extended backcountry trip out of the Big Elbow – Little Elbow Loop. An out and back trip to Big Elbow is a great choice for an introductory backpacking trip.

    • Number of sites: 10
    • Amenities: Pit Toilet and Bear Lockers 
    • Fires Permitted: Yes, but check for restrictions.
    • Nearest trailhead distance: 8.5 KM from Little Elbow Campground
River near Forks Kananaskis Backcountry Camping

Forks

Forks campground is nestled alongside the Upper Kananaskis River and just before the junction where Three Isle Lake Trail and Maude Lawson (Great Divide Trail) meet. This gorgeous little campground provides a wonderful taste of Kananaskis backcountry camping with a low work-to-reward ratio. Lying only 7.7 relatively flat kilometers (only 160m elevation gain) from interlakes parking lot, Forks is an excellent alternative to the more frontcountry feel of the Point campground. An out-and-back trip here is a great option for anyone new to backpacking. 

    • Number of sites: 20
    • Amenities: Pit Toilet and Bear Lockers 
    • Fires Permitted: Yes, but check for restrictions.
    • Nearest trailhead distance: 7.7 KM from North Interlakes. 

Lillian Lake

Typically accessed via the 6.1km Galatea Creek Trail, Lillian Lake is a beautiful mountain lake with 17 campsites. While the distance from highway 40 is very manageable the trail does gain nearly 500m of elevation making it better suited to individuals with some backpacking experience.  This site is a great option as a base camp to explore the nearby Galatea Lakes, hike to Lost Like or summit Mount Kidd South. 

    • Number of sites: 17
    • Amenities: Pit Toilet and Bear Lockers 
    • Fires Permitted: Yes, but check for restrictions.
    • Nearest trailhead distance: 6.1 KM from Galatea Creek Trailhead on Highway 40.  

Mount Romulus

Situated on the banks of the Little Elbow River, Mount Romulus is the first backcountry campsite for those making a counter-clockwise circuit of the Little Elbow – Big Elbow loop.  It’s an easy 10.2km of walking along a double track/service road that follows alongside the little elbow river with limited (190 m) elevation gain. For those looking to make a multi-day trip, a stay at Mount Romulus can be combined with stops at either Tombstone or Big Elbow to close out the loop. 

    • Number of sites: 10
    • Amenities: Pit Toilet and Bear Lockers 
    • Fires Permitted: Yes, but check for restrictions.
    • Nearest trailhead distance: 10.2 KM from Little Elbow Campground along Little Elbow Trail.  

Ribbon Falls

If you imagine falling asleep to the sound of roaring water, Ribbon Falls campground has your name written all over it. Many of the 10 sites here are within earshot of the incredible Ribbon Falls. To get here it’s an 8.8KM hike into the Ribbon Fall Campground that gains around 370m of elevation as it follows the Ribbon Creek drainage. 

    • Number of sites: 10
    • Amenities: Pit Toilet and Bear Lockers 
    • Fires Permitted: Yes, but check for restrictions.
    • Nearest trailhead distance: 8.8 KM from Ribbon Creek Parking Area

Tombstone

Tombstone campground provides a convenient spot to camp for exploring the Tombstone lakes (2.5 KM one-way) or as a stopover when completing the Elbow loop. Typically accessed via the Elbow Lake Trailhead it’s a casual 7.5 km hike in with 170m of elevation gain to the campsite. The site provides an incredible work reward ratio with fantastic wide open views and the opportunity for a detour to Edworthy falls. For those with more time, it’s also possible to basecamp from Tombstone and make worthwhile day trips to Piper Pass or Rae Lakes. 

    • Number of sites: 11
    • Amenities: Pit Toilet and Bear Lockers  
    • Fires Permitted: No
    • Nearest trailhead distance: 7.5 km from Elbow Lake Trailhead
Kananaskis backcountry camping

Kananaskis Backcountry Camping Spots for Experienced Backpackers

These backcountry sites are accessed via lengthy hikes often with significant elevation gain and are recommended for backpackers with higher levels of experience. 

Aster Lake

Arguably one of the more challenging backcountry campsites to access in Kananaskis country, Aster lake is commonly used as basecamp site for multiple summit routes that start within striking distance of this subalpine camp.  Although the trail beta itself is not overwhelming (11 km with 700 m elevation gain), this hike is best suited to experienced backpackers as it traverses an unmaintained trail along several steep scree sections. 

    • Number of sites: 6
    • Amenities: Pit Toilet and Bear Lockers 
    • Fires Permitted: No
    • Nearest trailhead distance: 11 KM North Interlakes

Ribbon Lake

Ribbon Lake Campground lies less than 2 KM from Ribbon Falls, but requires a significant ascent of over 250 m that negotiates the Ribbon headwall with a series of chains and steel rungs. The Ribbon Lake campground is also accessible via a 10.8 km (870 m elevation gain) hike from the Galatea Day Use Area or via a 10.1 km hike from the Buller Mountain Day Use Area (670 m of elevation gain).

    • Number of sites: 20
    • Amenities: Pit Toilet and Bear Lockers 
    • Fires Permitted: Yes, but check for restrictions.
    • Nearest trailhead distance: 10.7 KM from Ribbon Creek Parking Area
Kananaskis Backcountry Camping at Three Isle Lake

Three Isle Lake

Three Isle Lake campground is a lakeside backcountry camp situated at over 2200m and approximately 2 KM from South Kananaskis Pass. This site is broken up into 2 distinct areas with 8 sites per section. The sites located to the south of Three Isle Creek offer lakeside camping options and the northern area is situated in the forest above Three Isle Lake. This is a popular campsite for backpackers looking to complete the Three Isle Lake to Turbine Canyon loop through Height of the Rockies Provincial Park, a great multi-day alternative to the Rockwall Trail. Three Isle Lake is 11km from the Interlakes Parking with 600m of elevation, of which over 350 meters of elevation is gained in the final 2km. Brace yourself for a bun burner… 

    • Number of sites: 16
    • Amenities: Pit Toilet and Bear Lockers 
    • Fires Permitted: No
    • Nearest trailhead distance: 11km Interlakes Parking Lot

Turbine Canyon

Situated in the forest to the North of Maude Brooke, Turbine Canyon is another popular site for backpackers looking to complete a loop over North and South Kananaskis pass.A journey to this backcountry campsite takes you up along the Great Divide Trail through alpine meadows and past lawson lake with views of the Haig Glacier to the North. Like it’s cousin Three Isle Lake to the South, the journey up to the campsite is no joke as it gains over 700m of elevation over the 15.4 km from the Interlakes Parking Lot. Turbine Canyon underwent an extensive renovation in 2022, basically ensuring you find a nice level tent pad. 

    • Number of sites: 15
    • Amenities: Pit Toilet and Bear Lockers 
    • Fires Permitted: No
    • Nearest trailhead distance: 15.4 km Interlakes Parking Lot 

Final Thoughts

Kananaskis country offers an incredible setting for all types of backcountry camping adventures with incredible variety for beginners and seasoned backpackers. As always feel free to drop me a line in the comments below if you have any questions or on this post. Happy trails friends! 

More posts like this

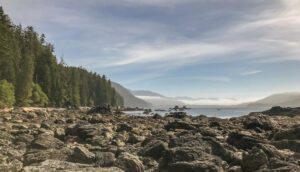
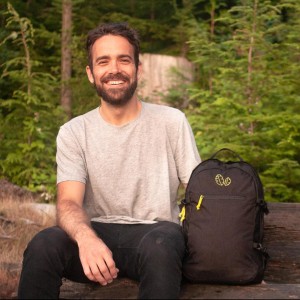
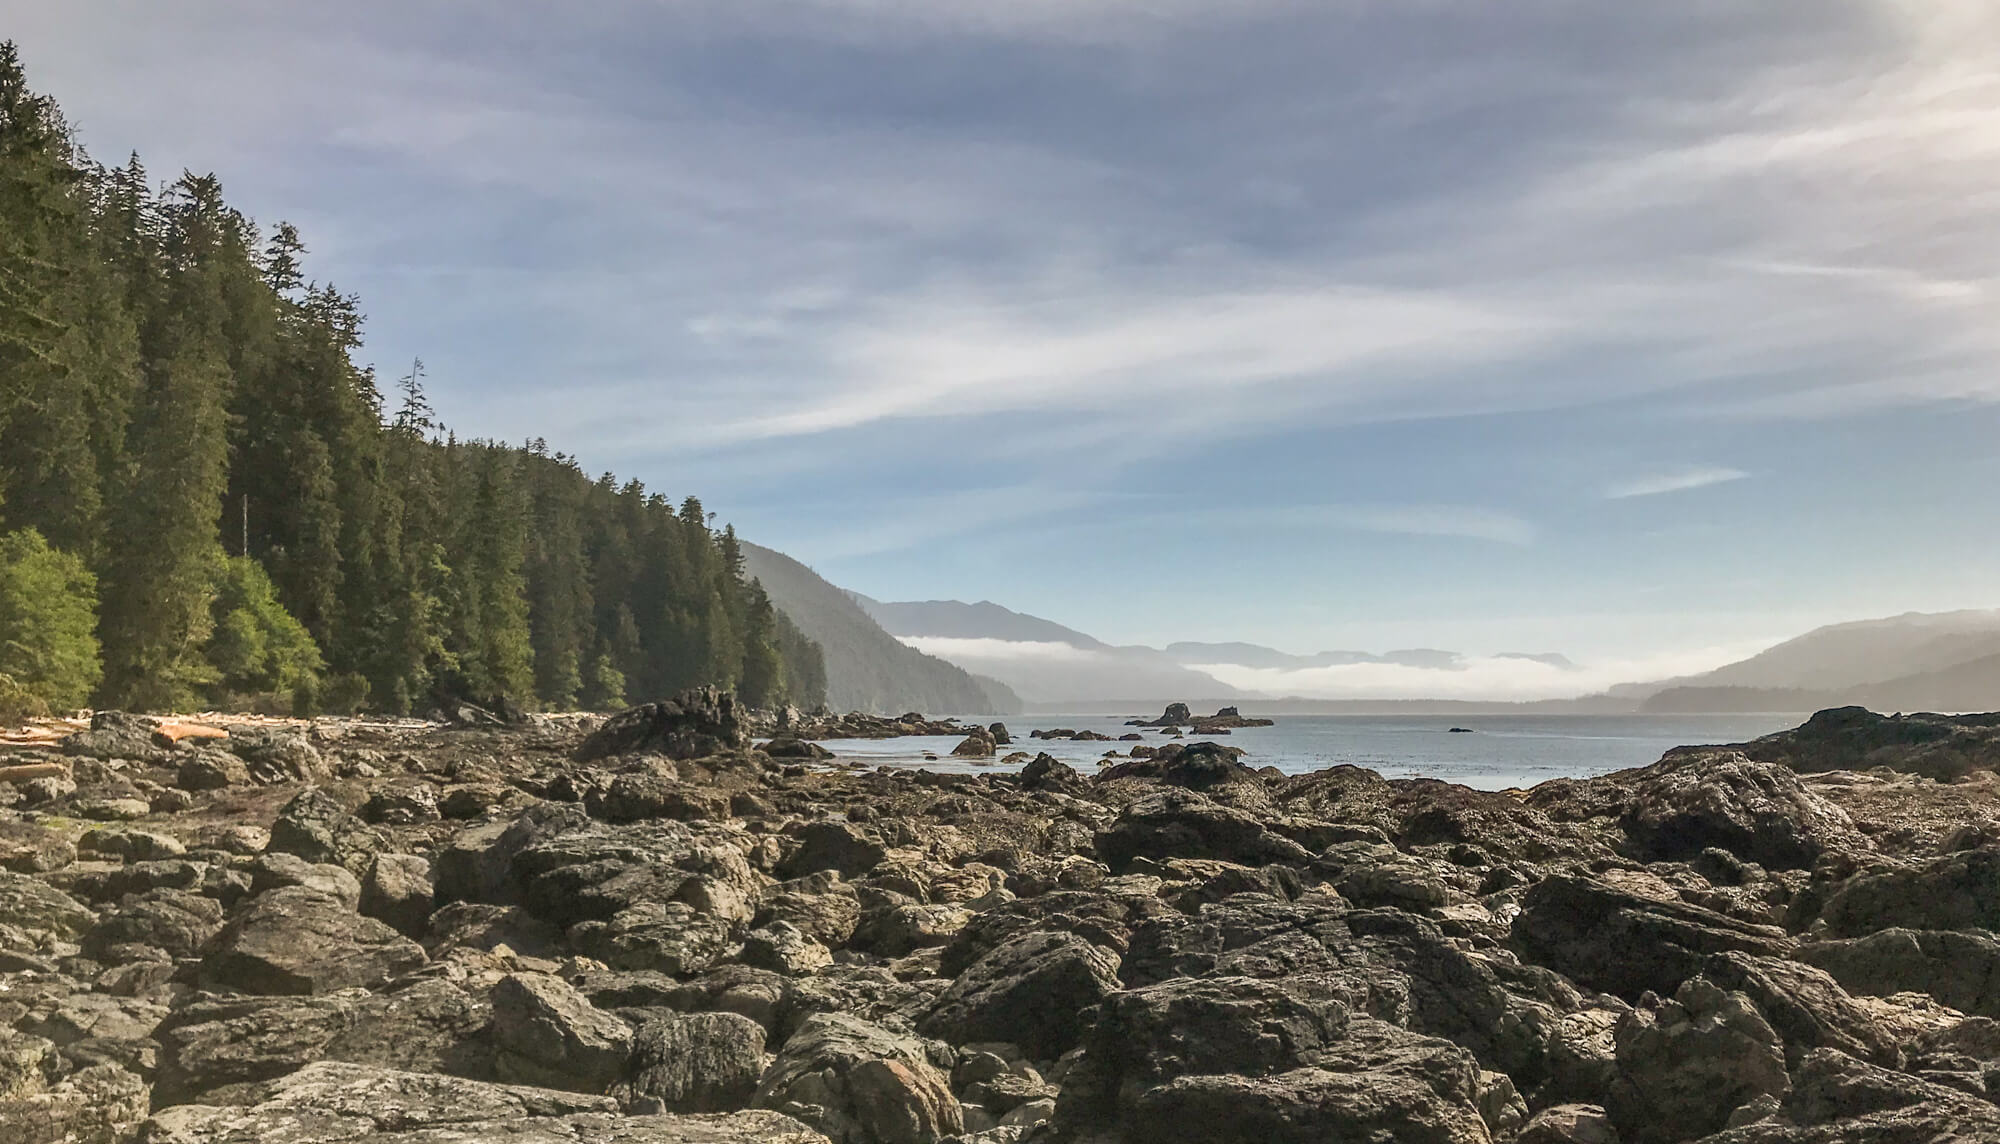
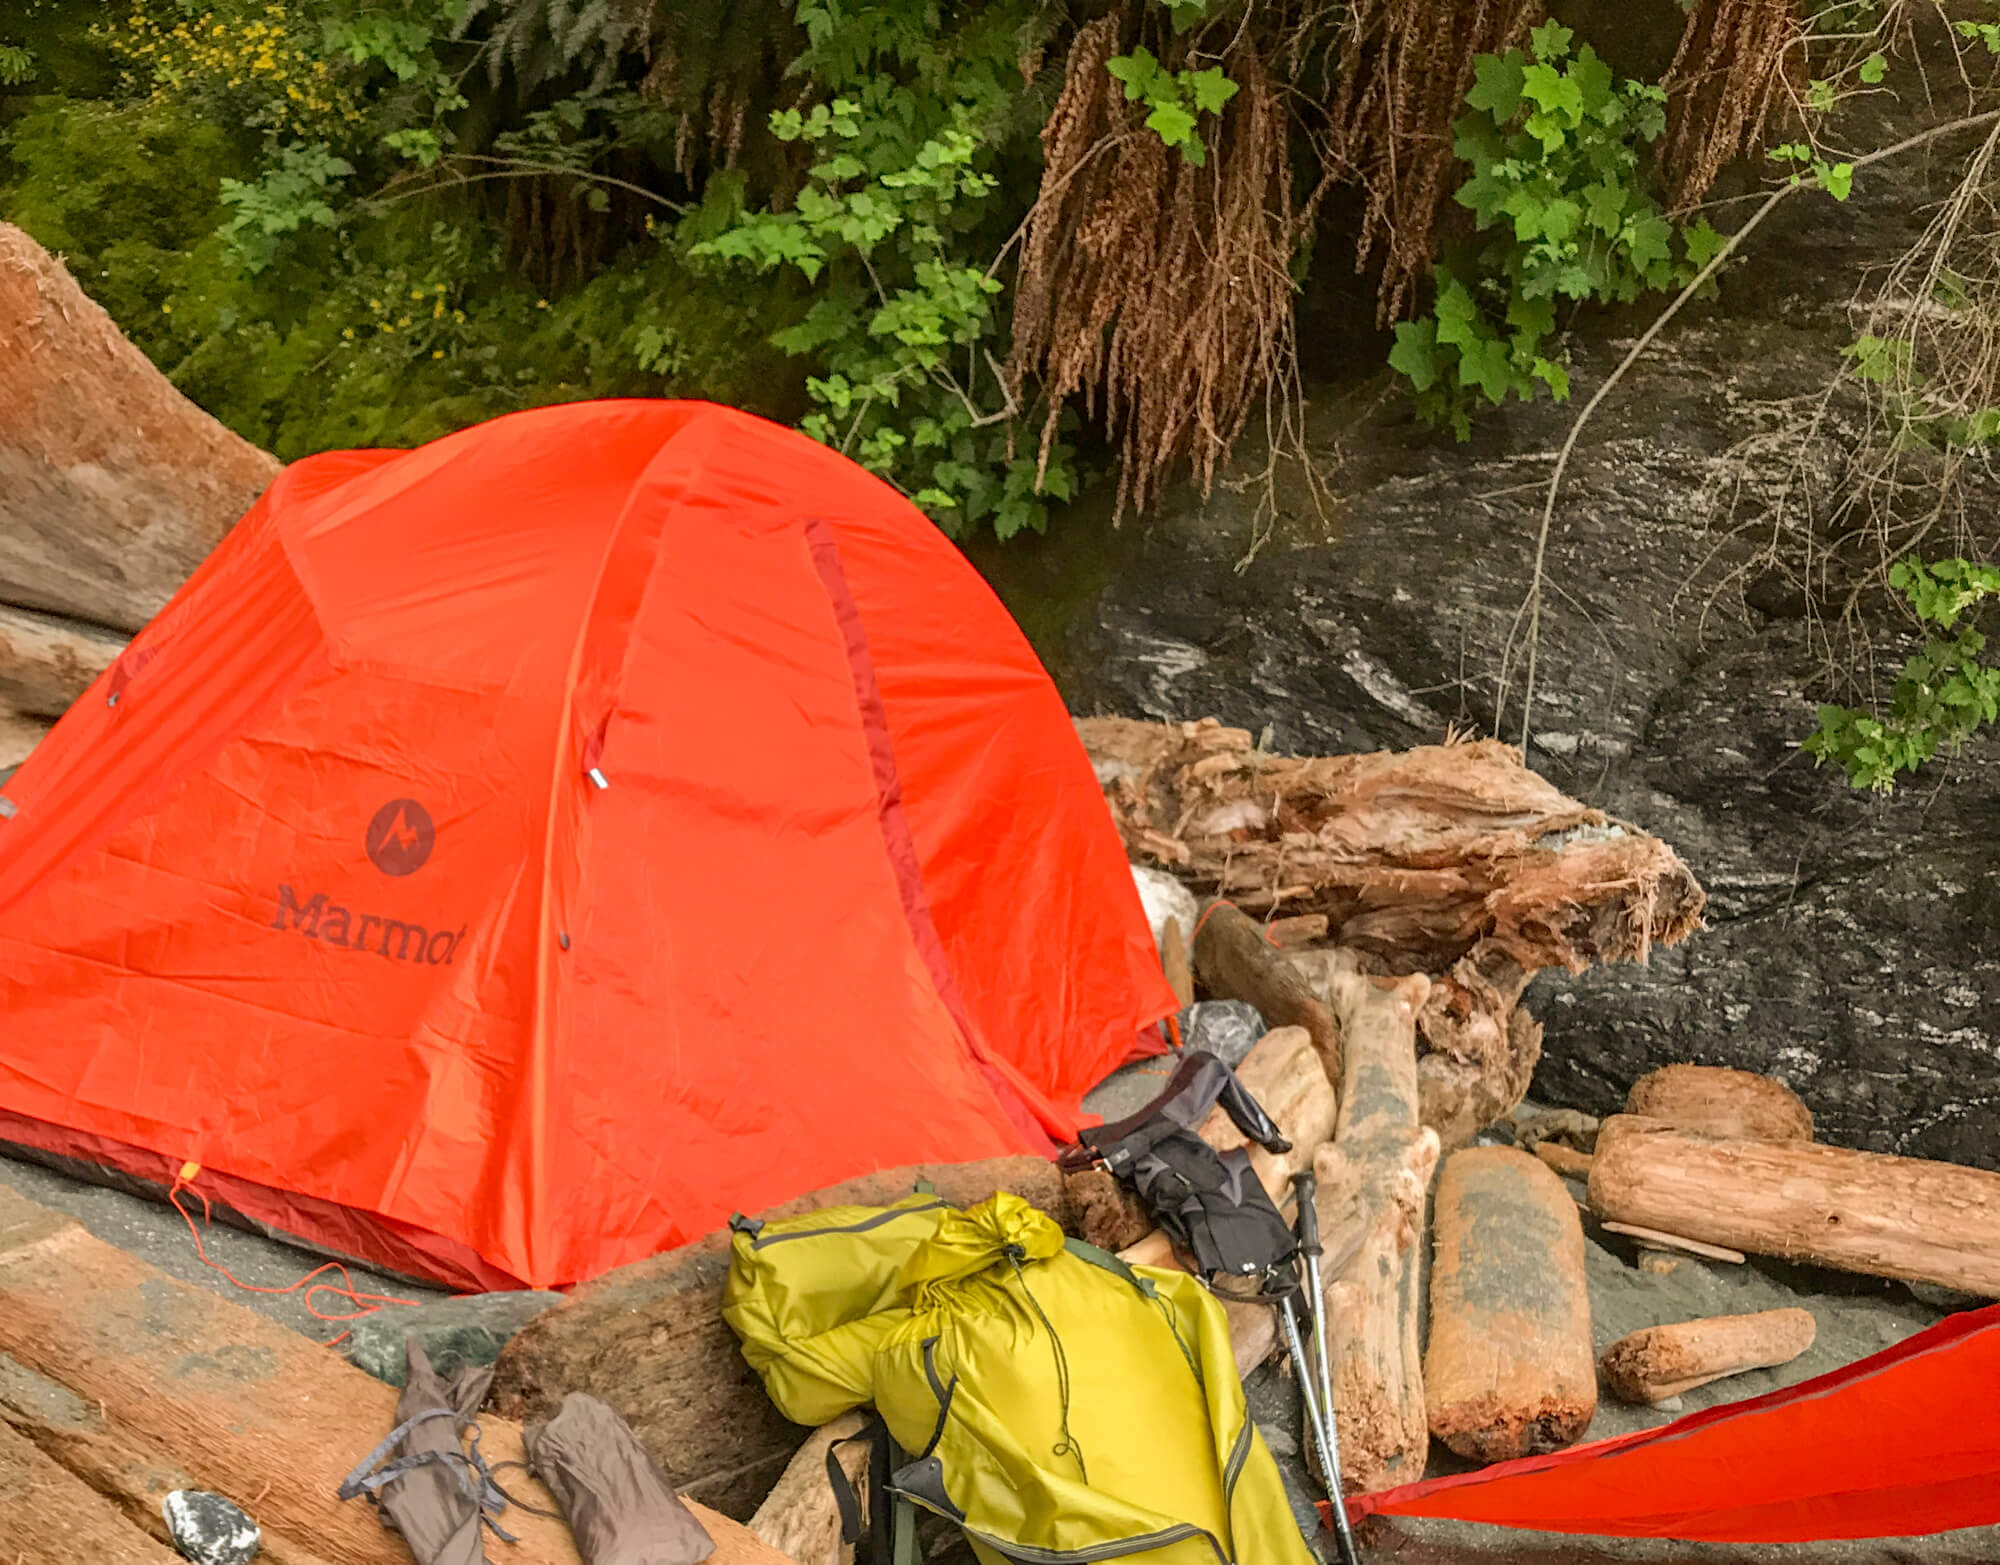
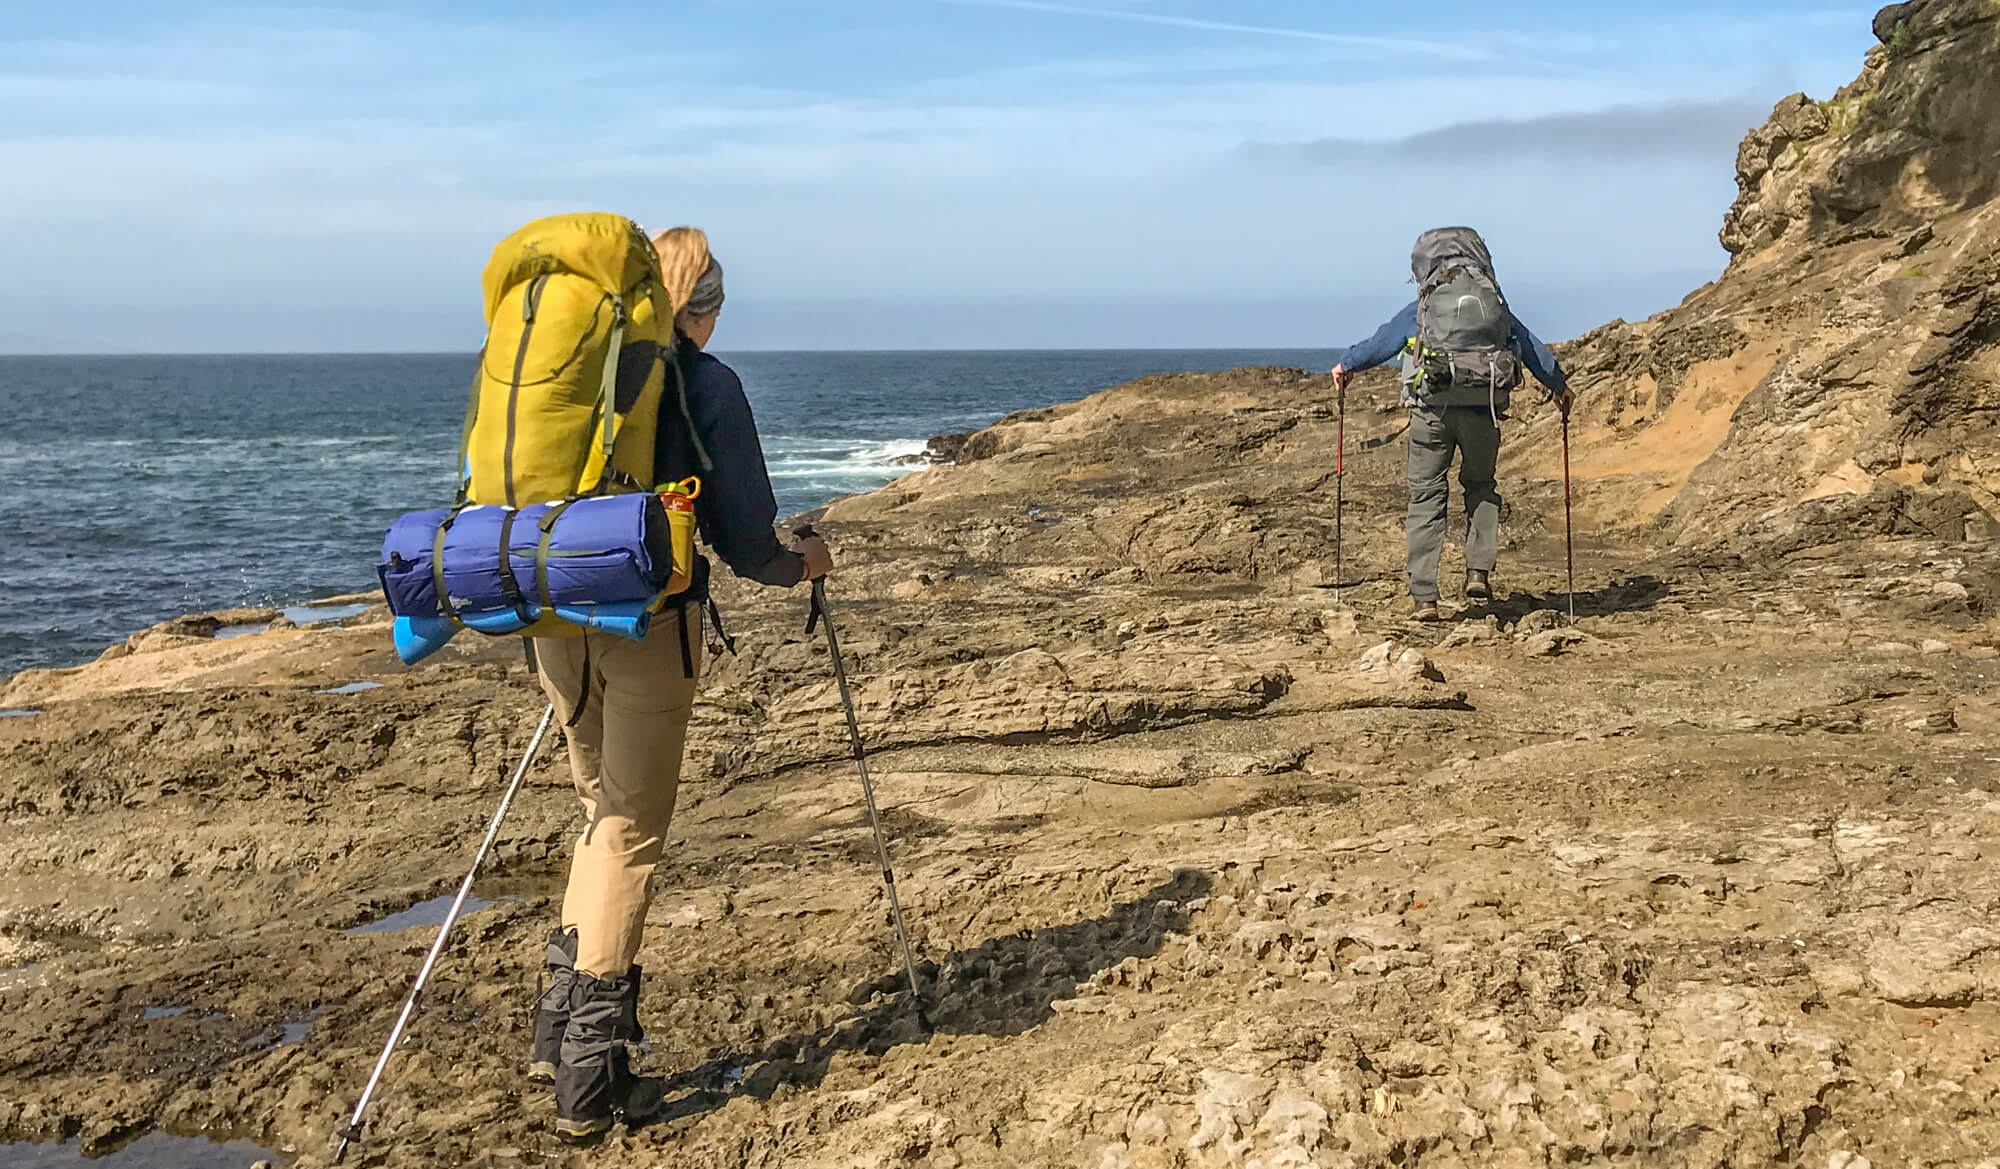
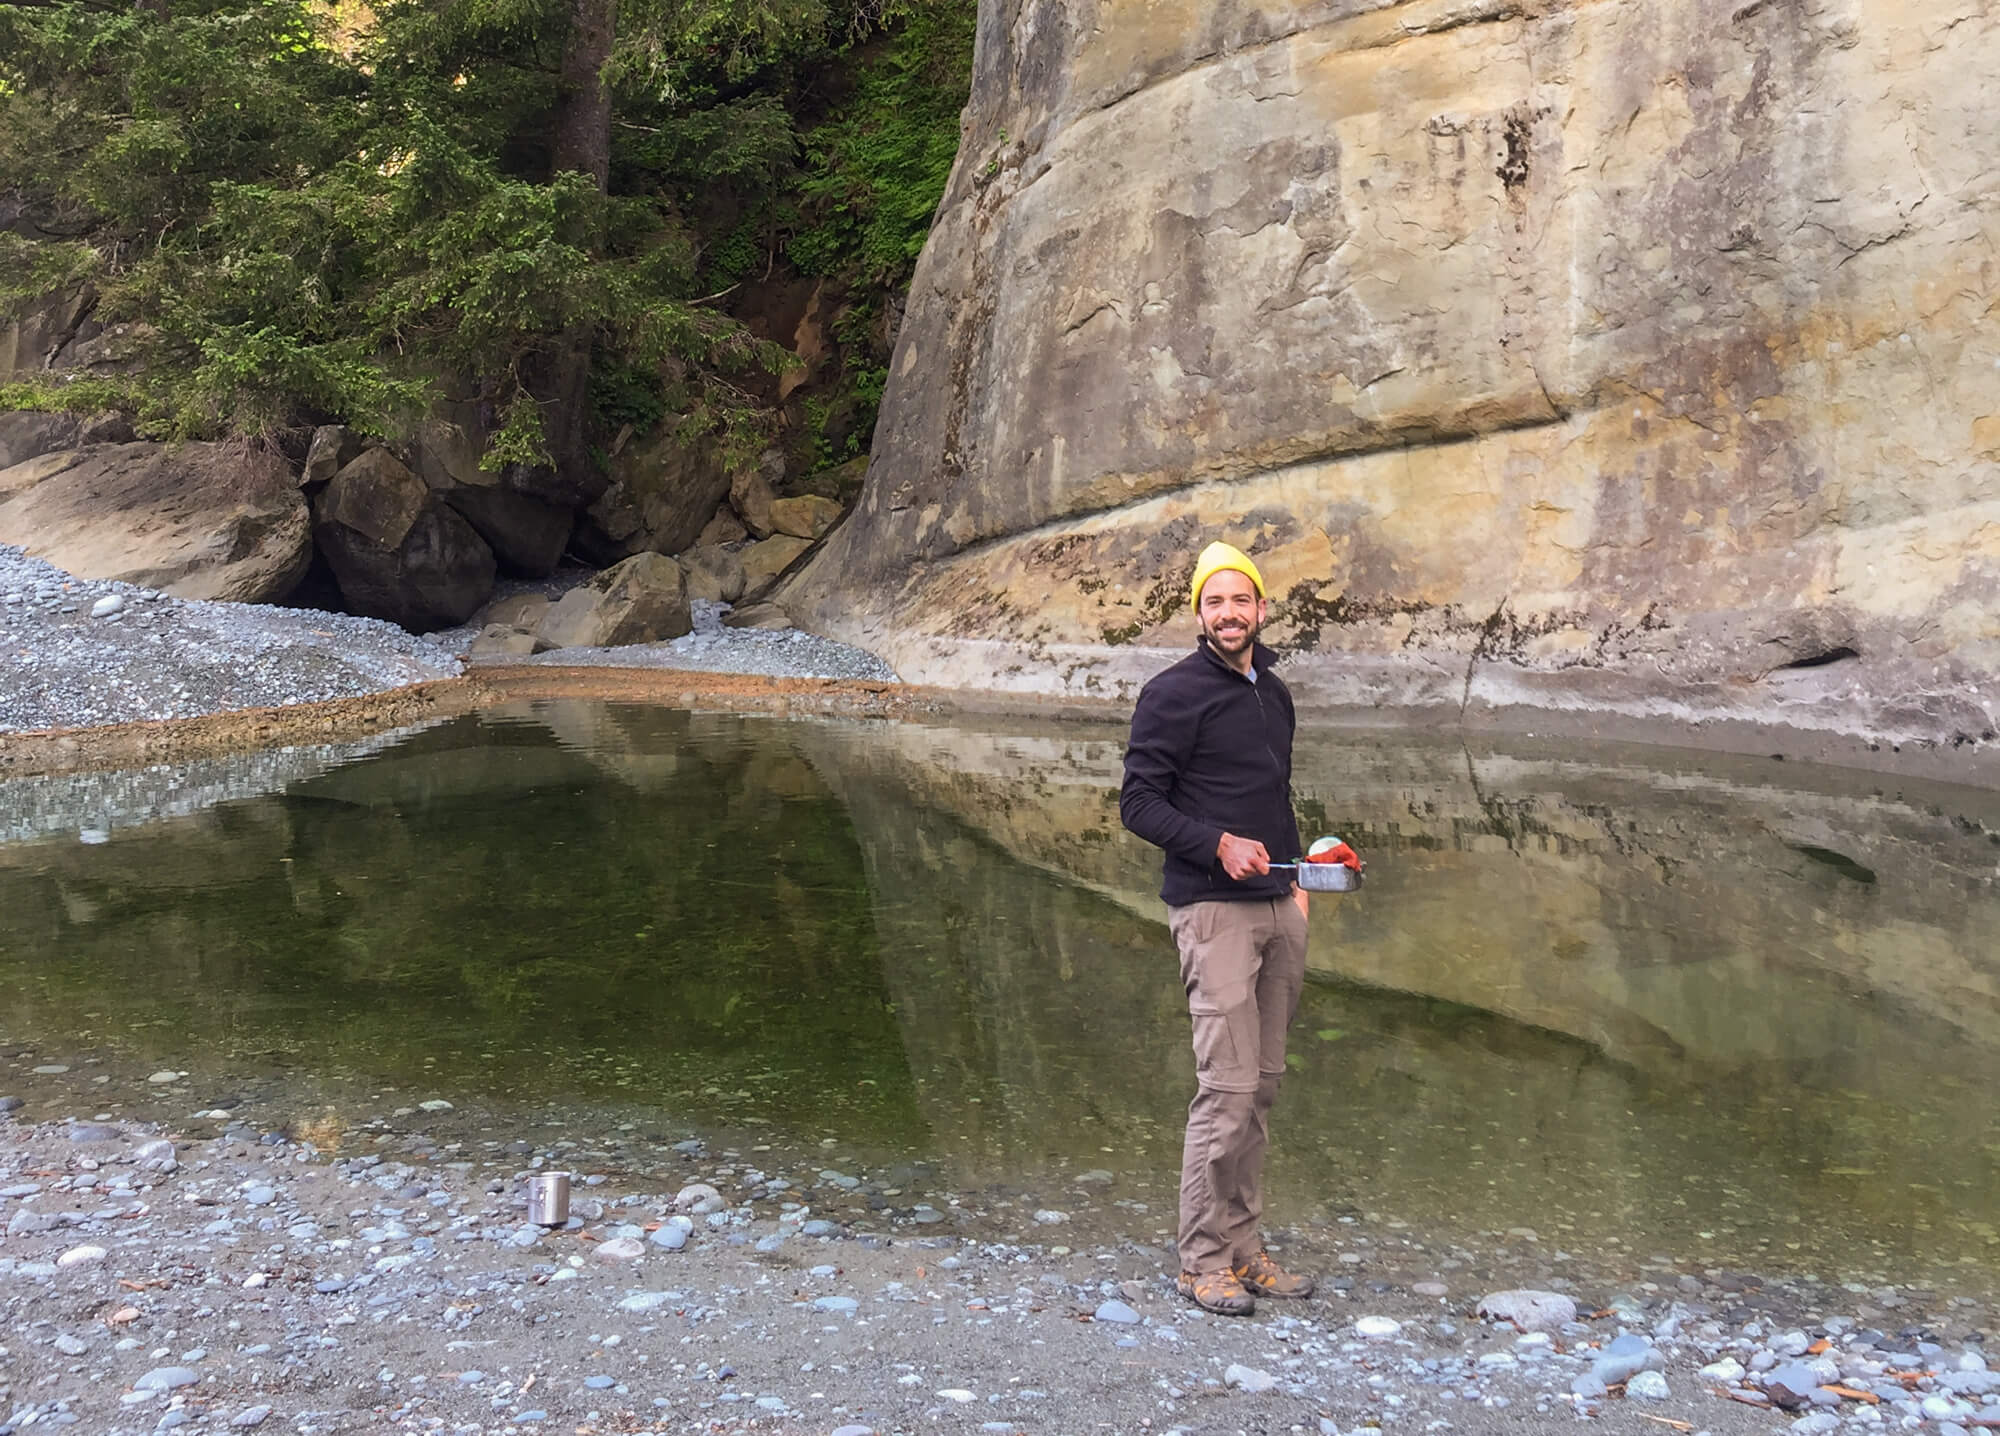
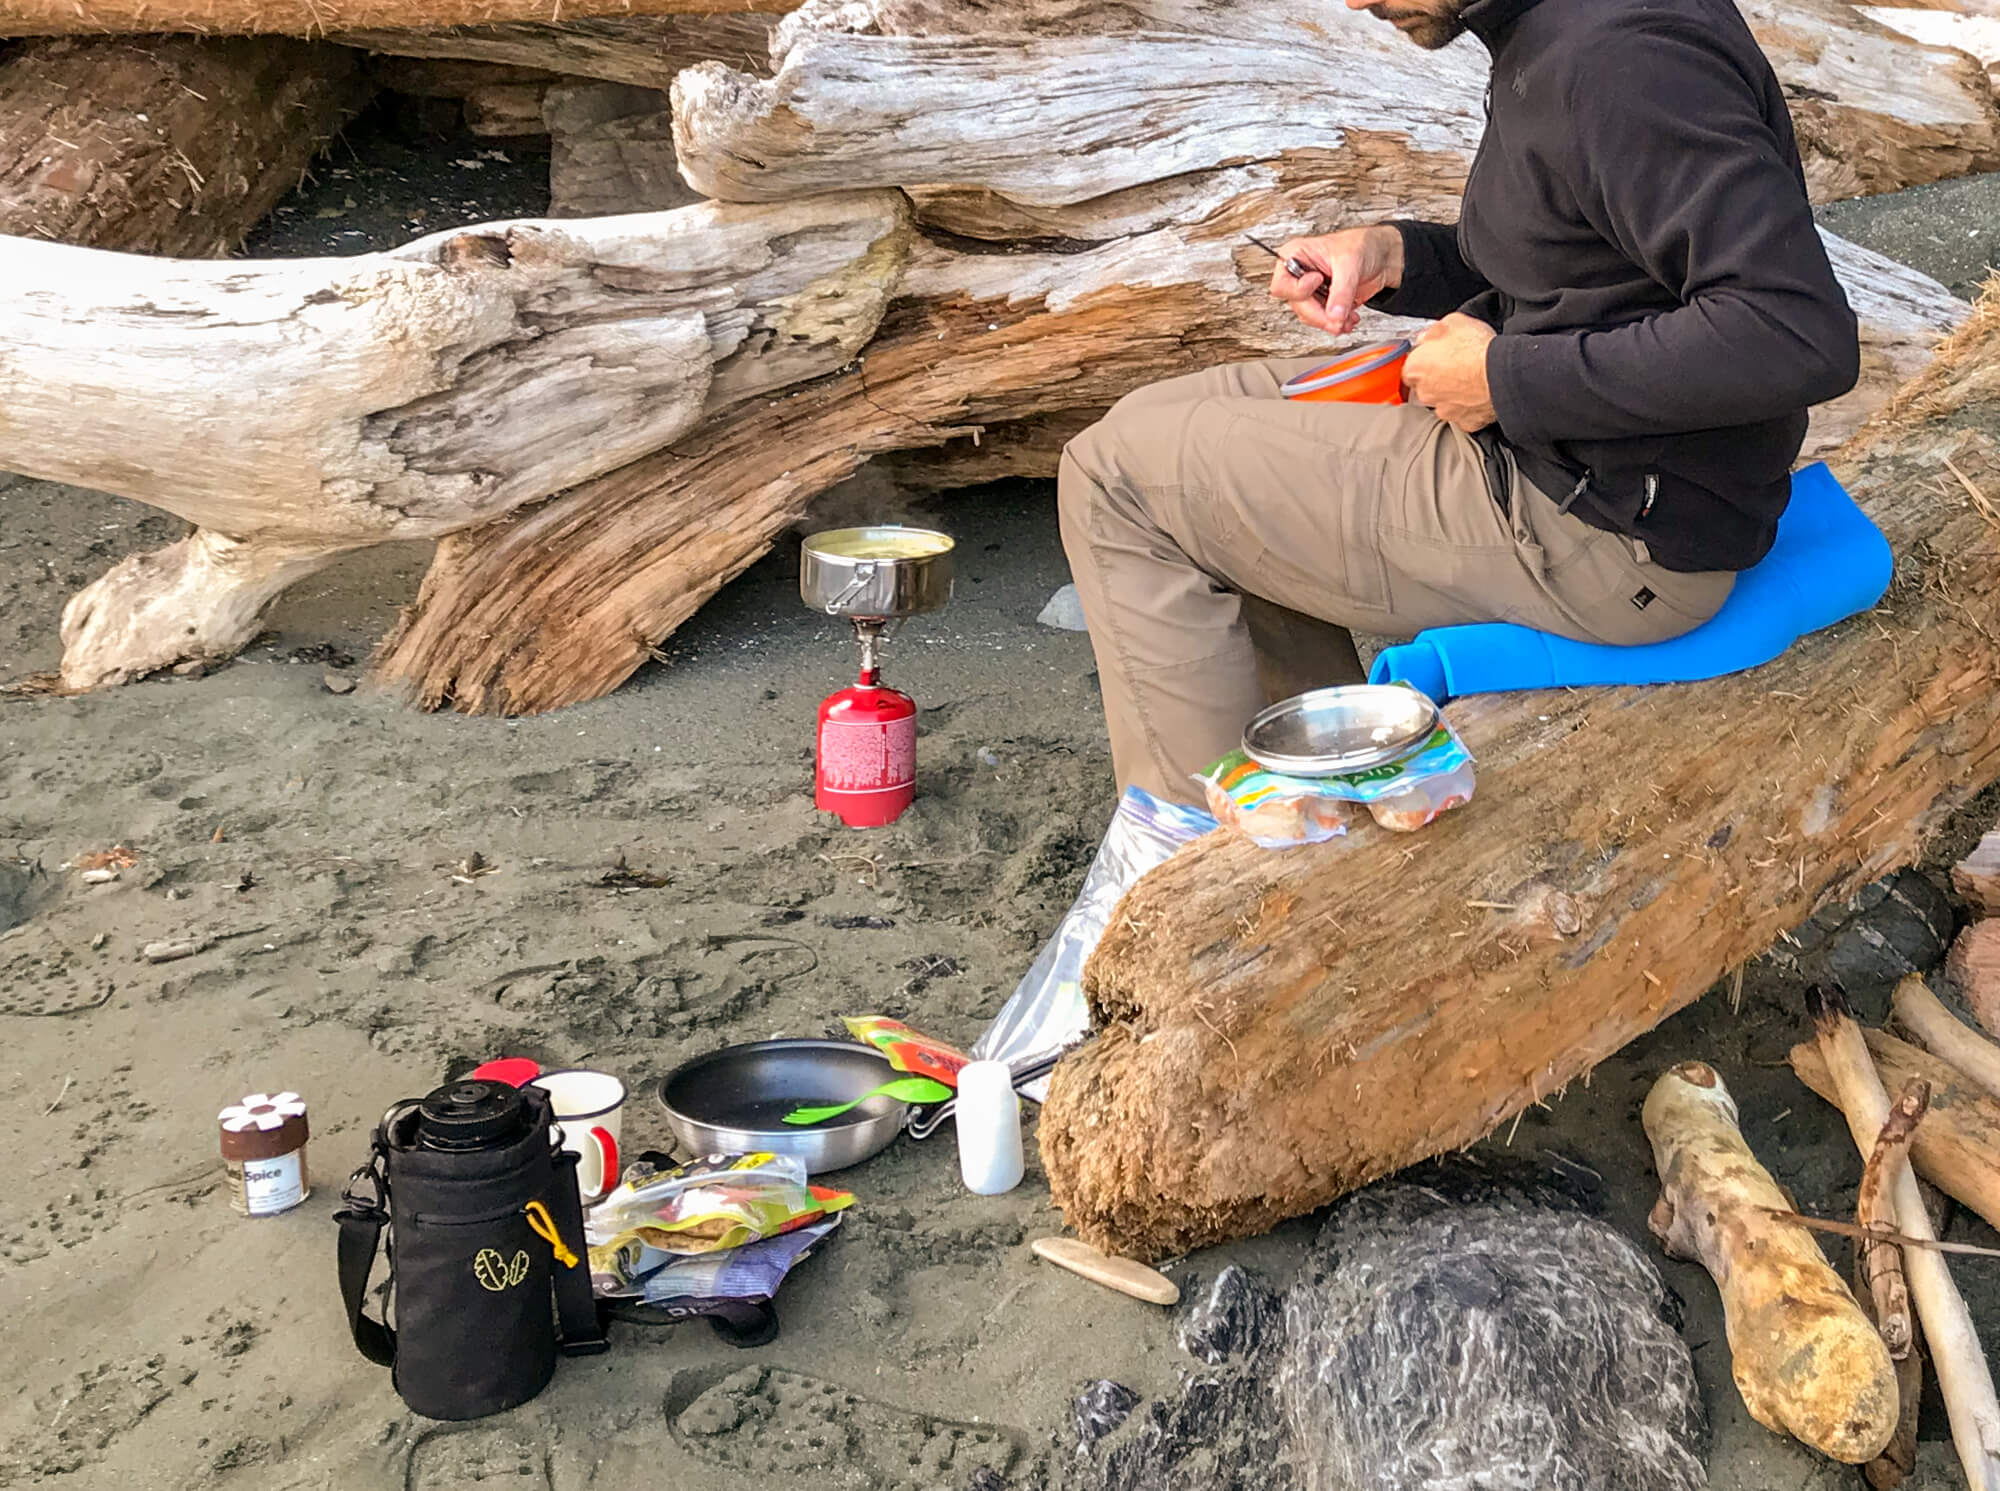
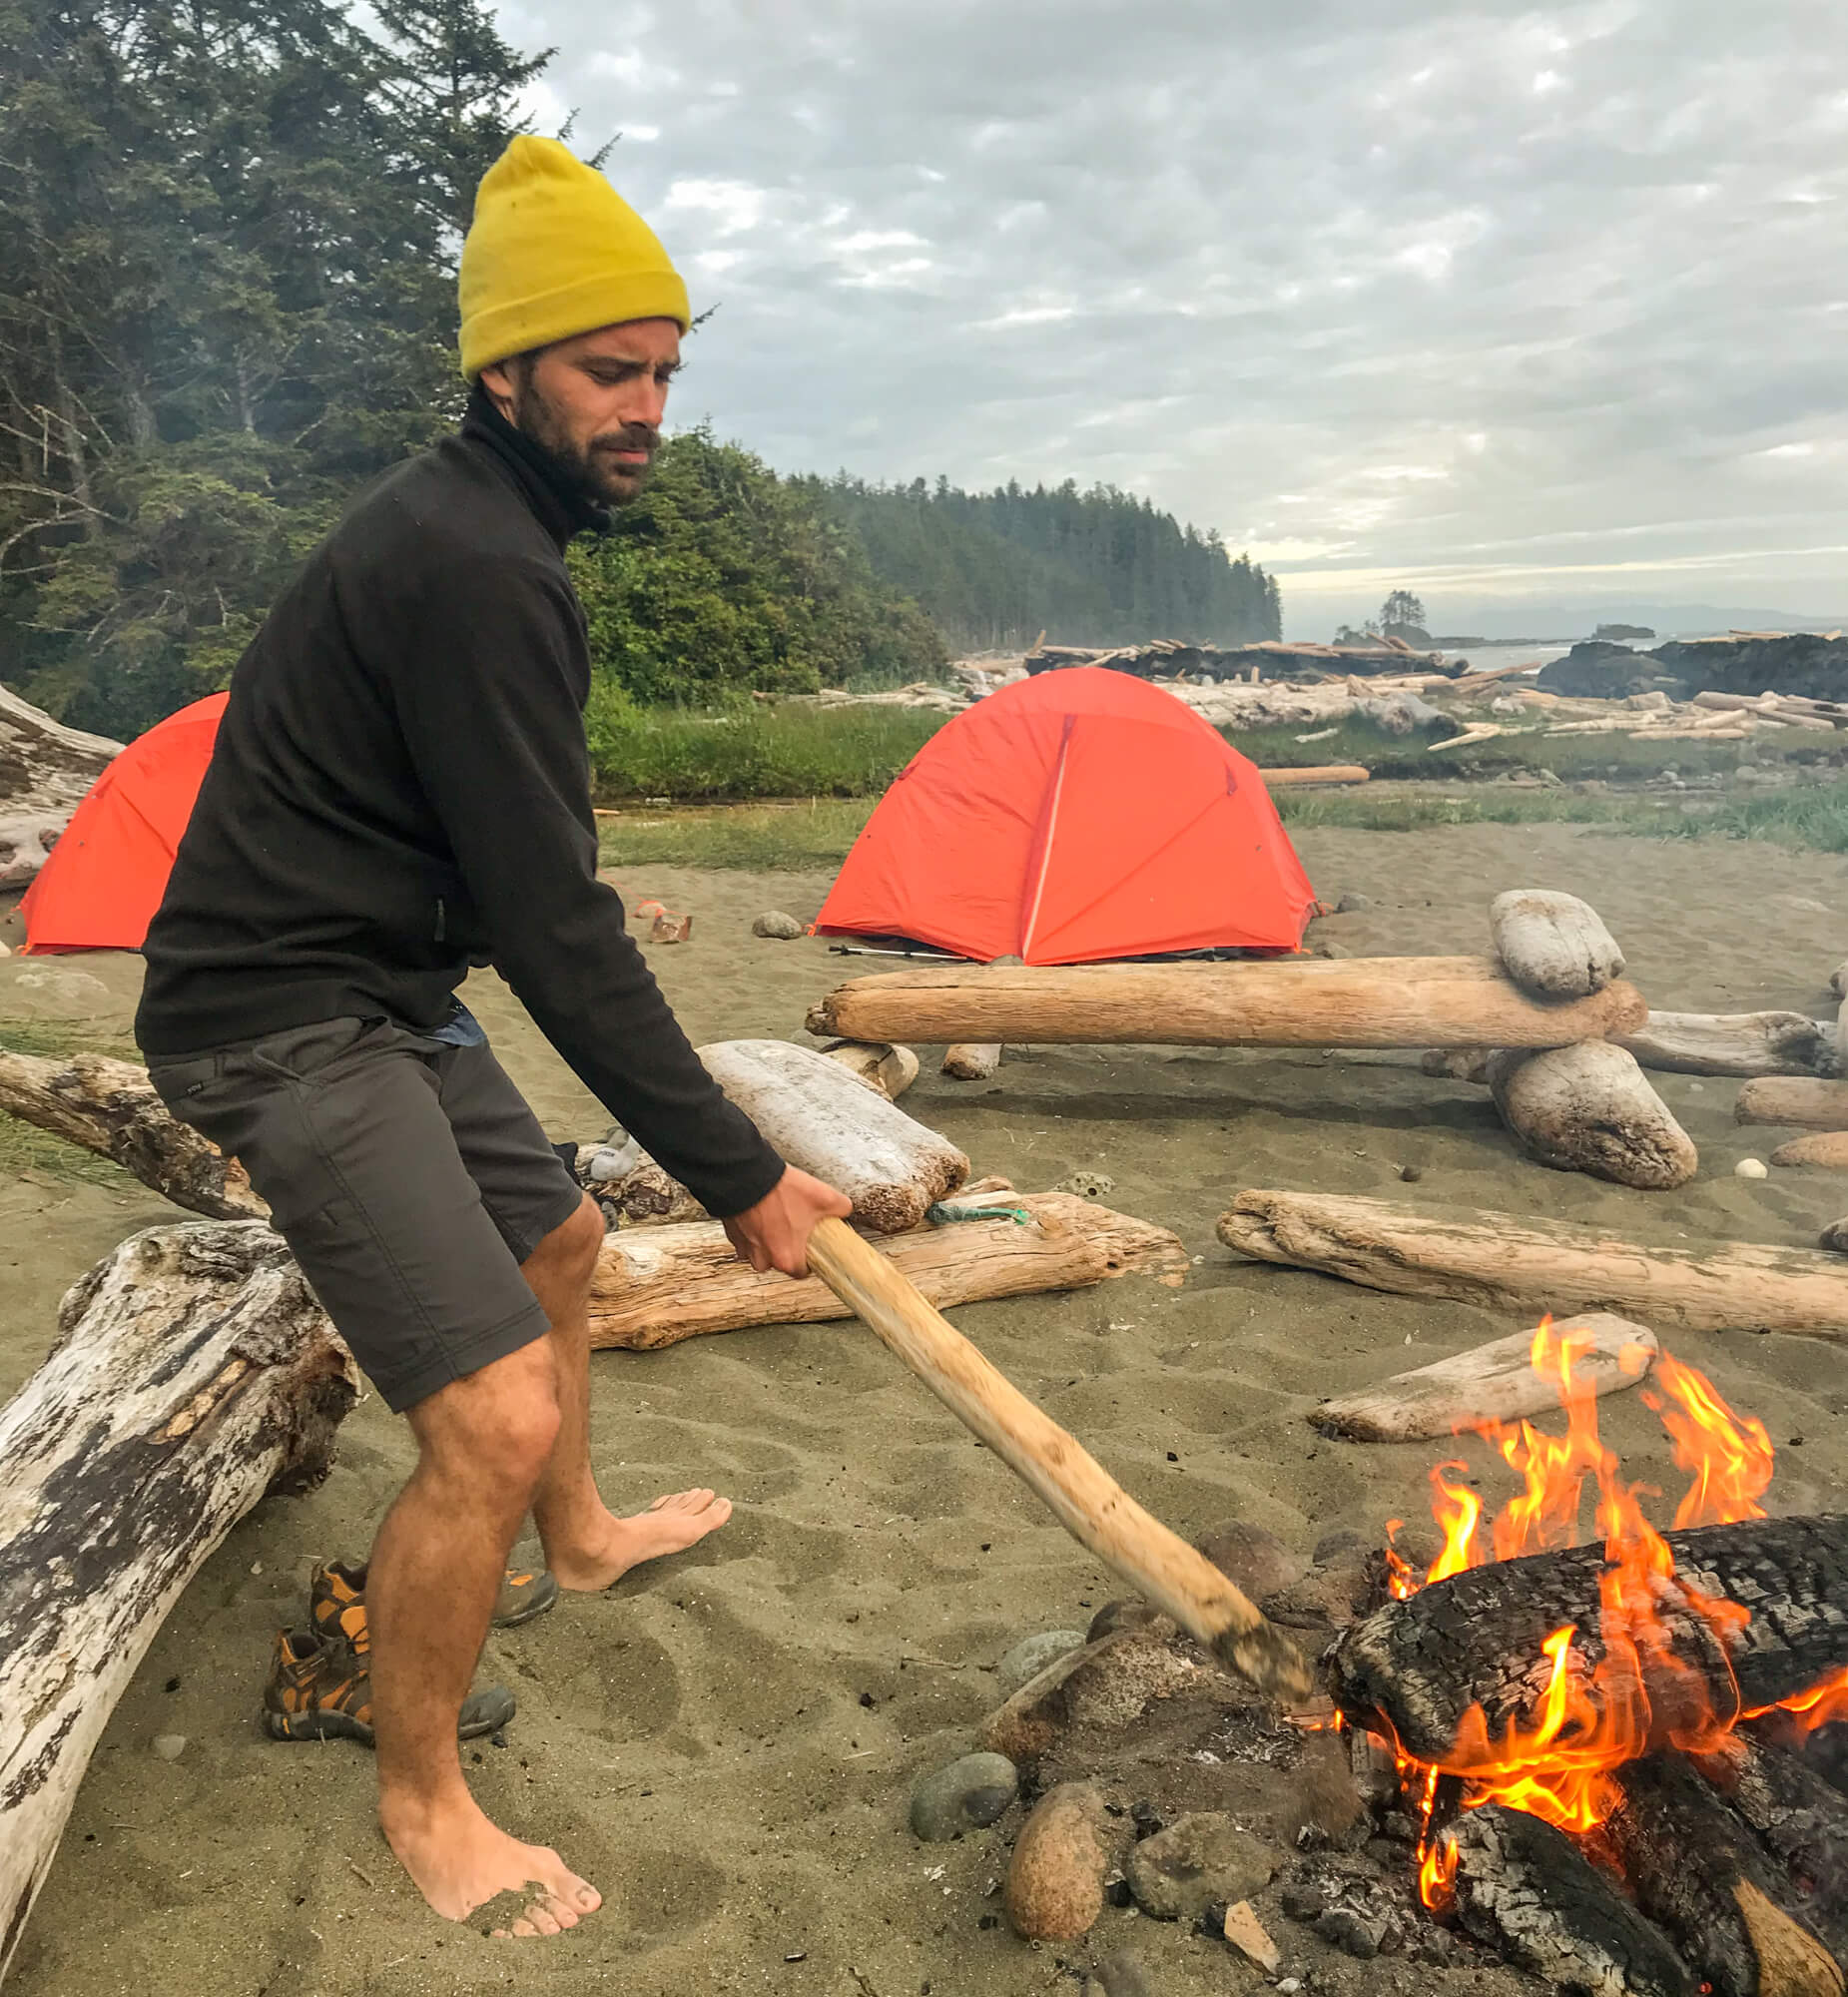
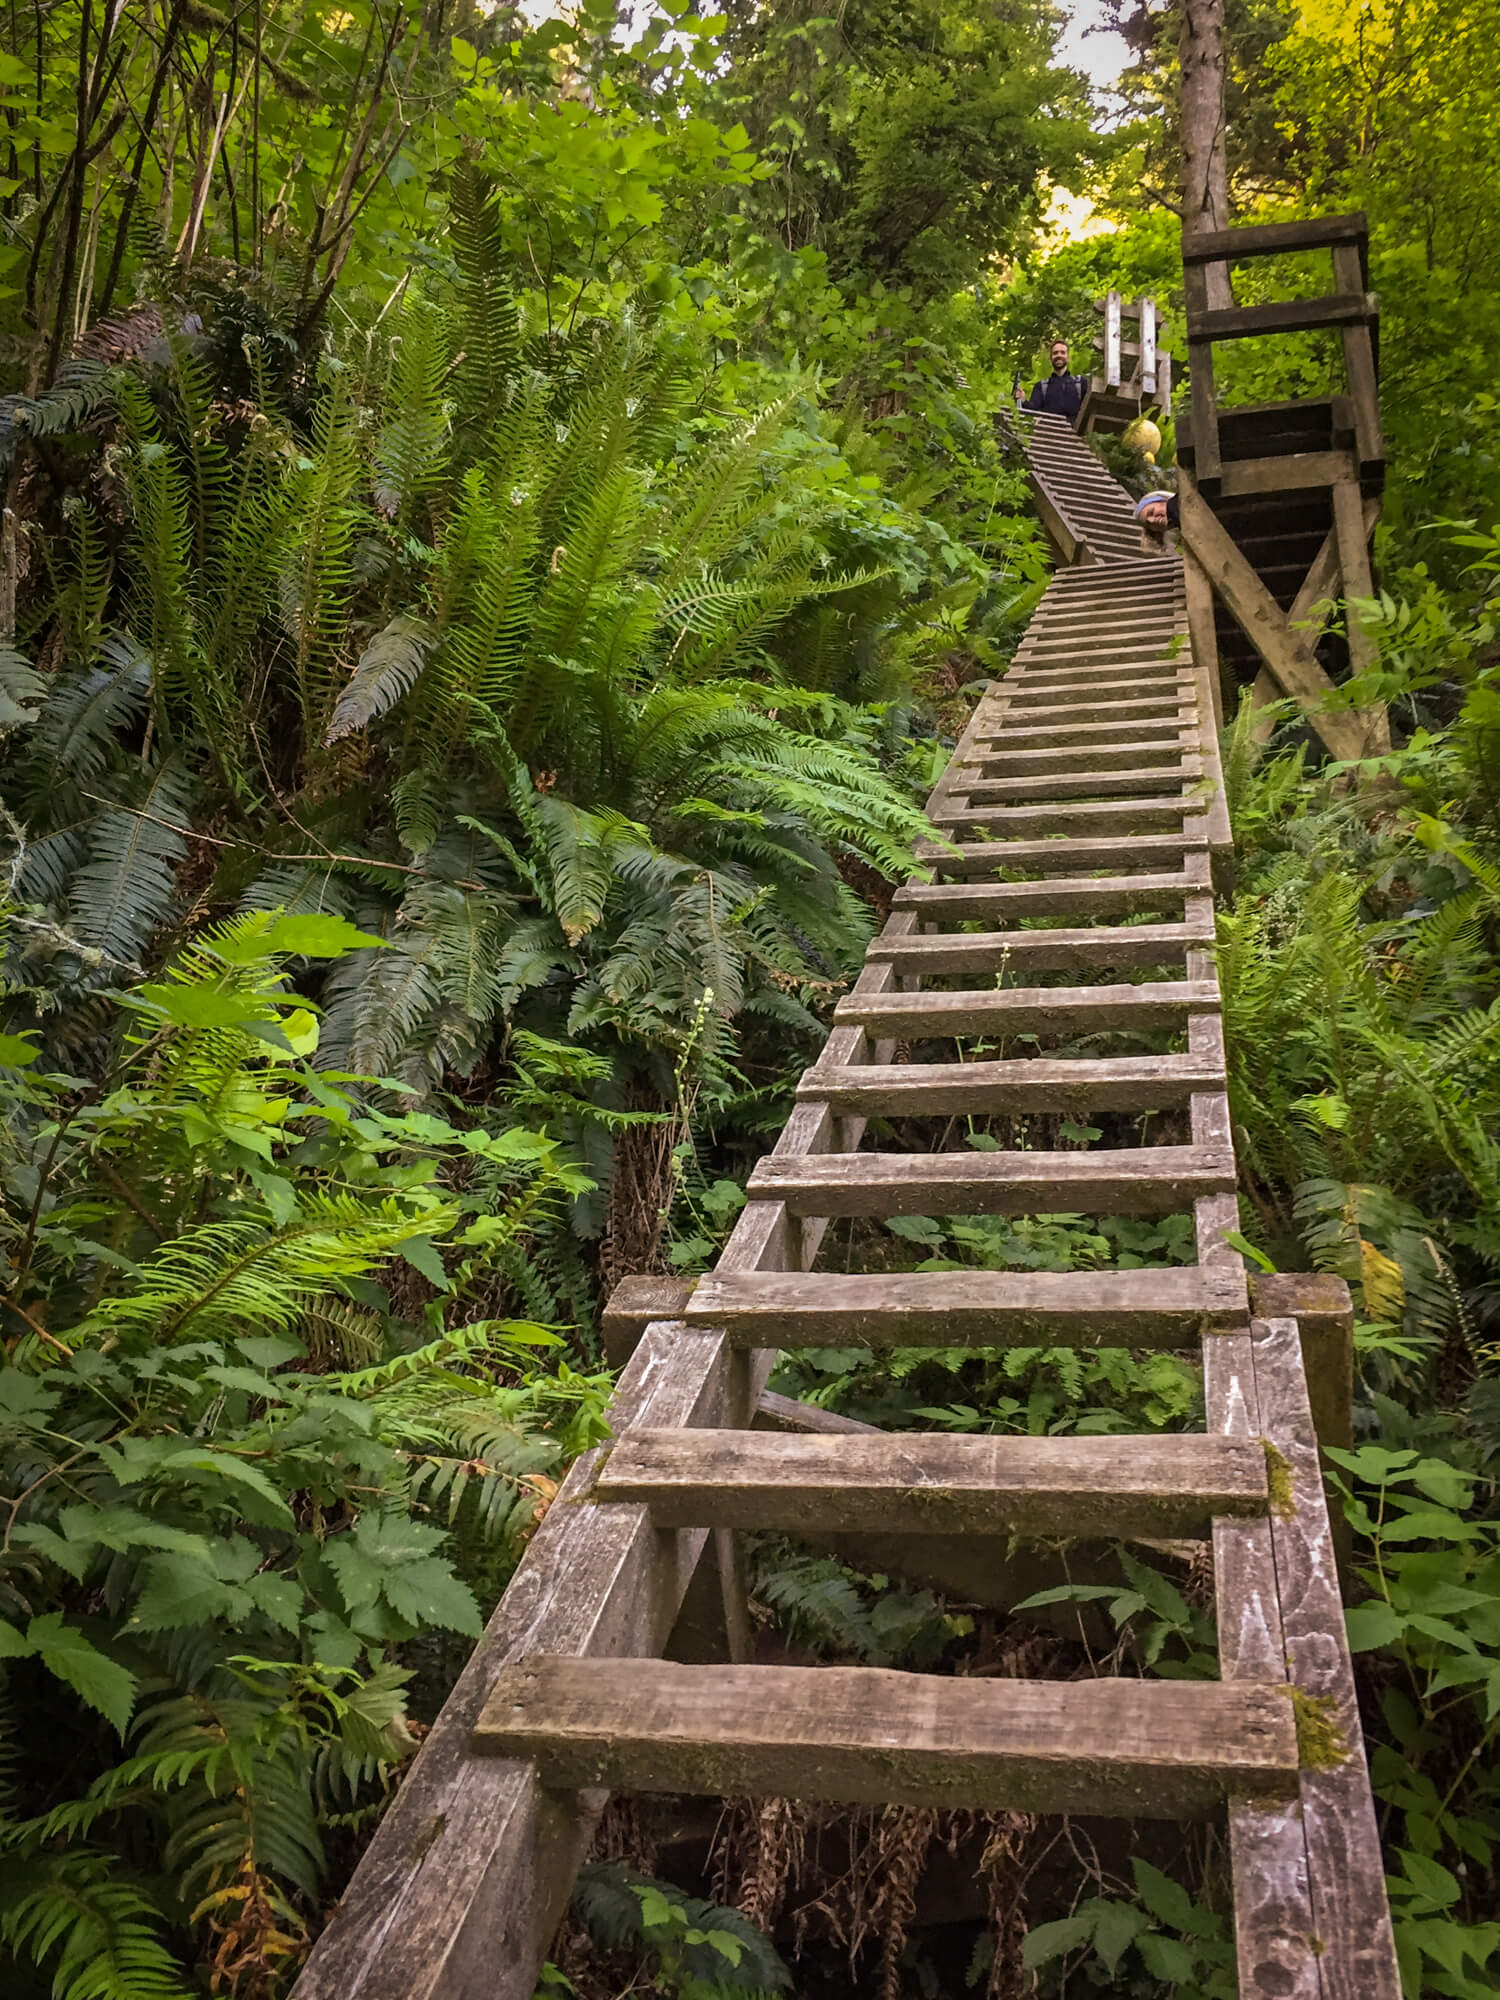
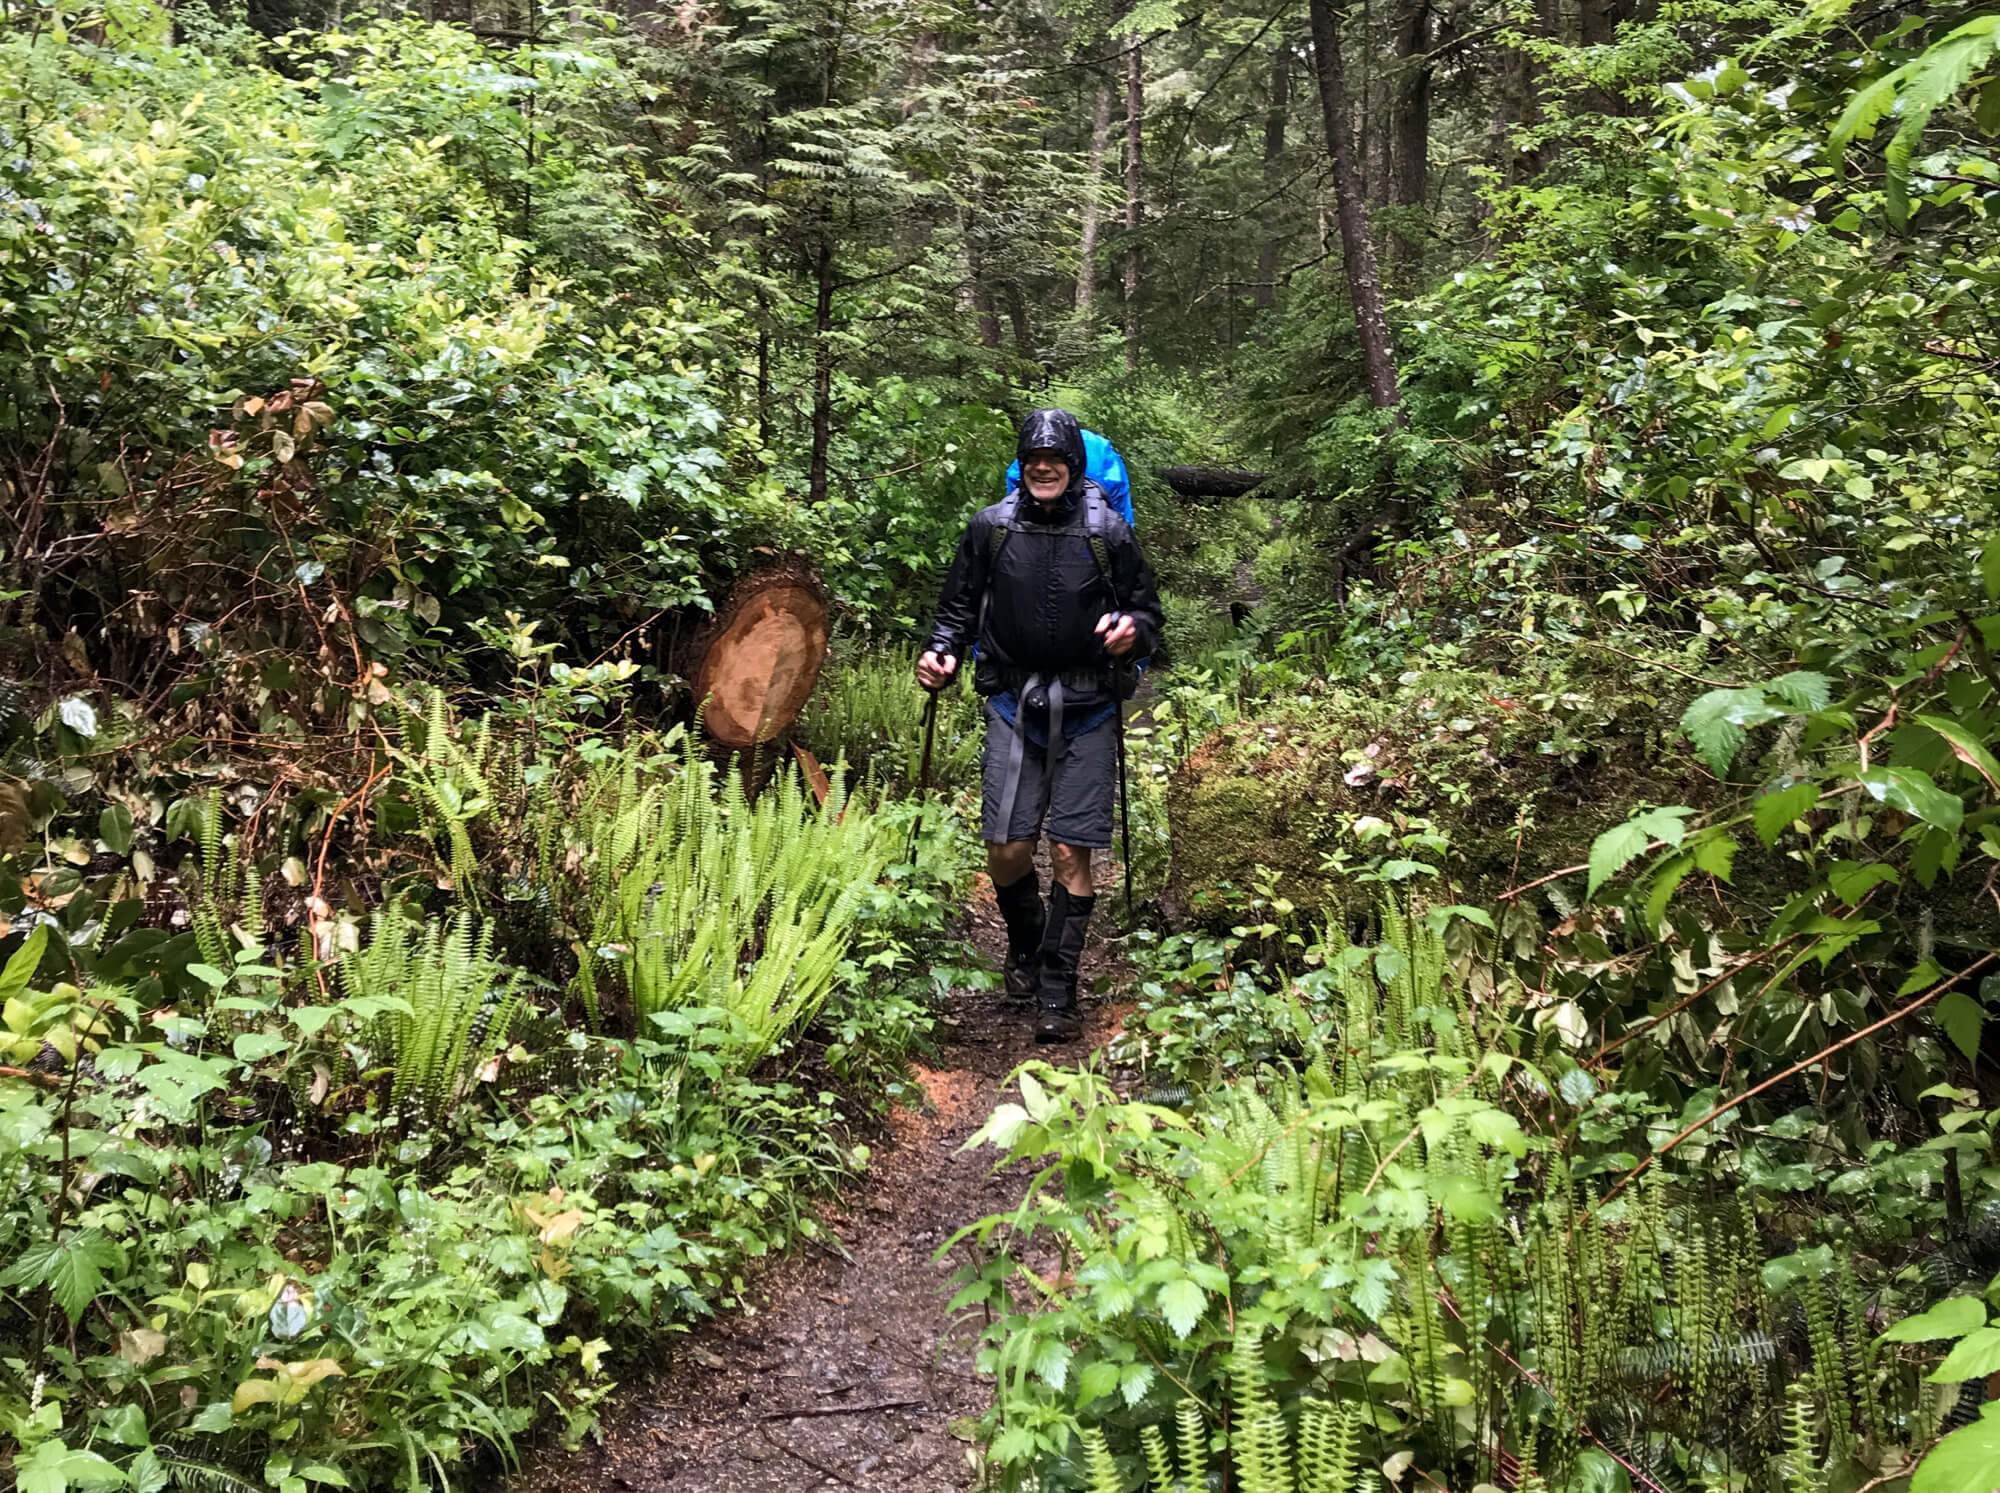
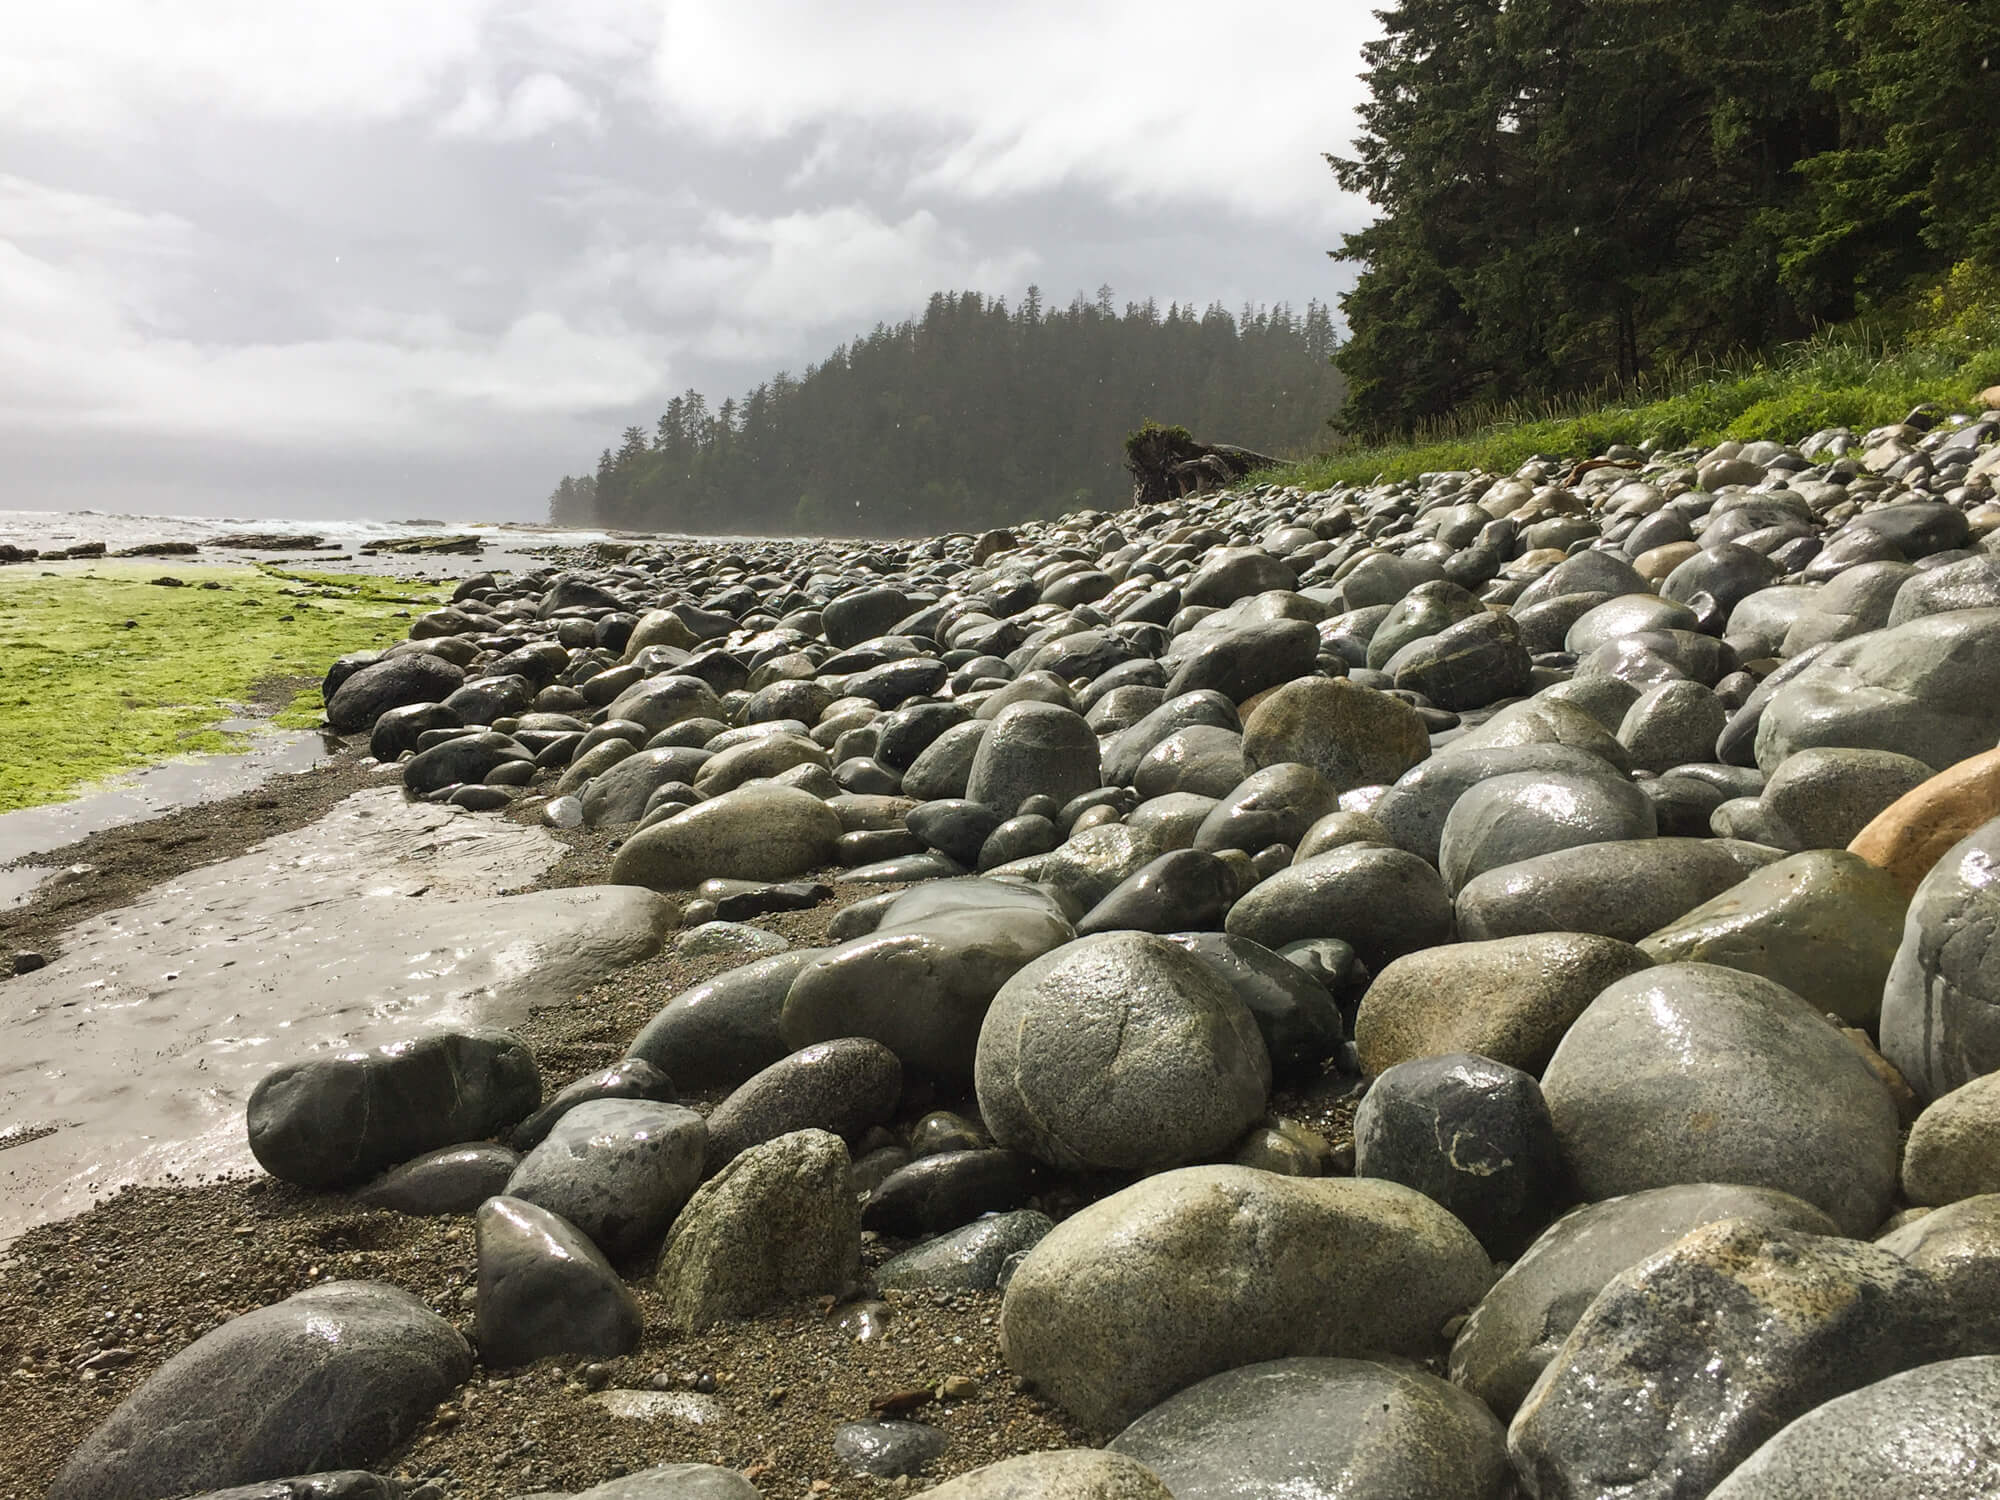
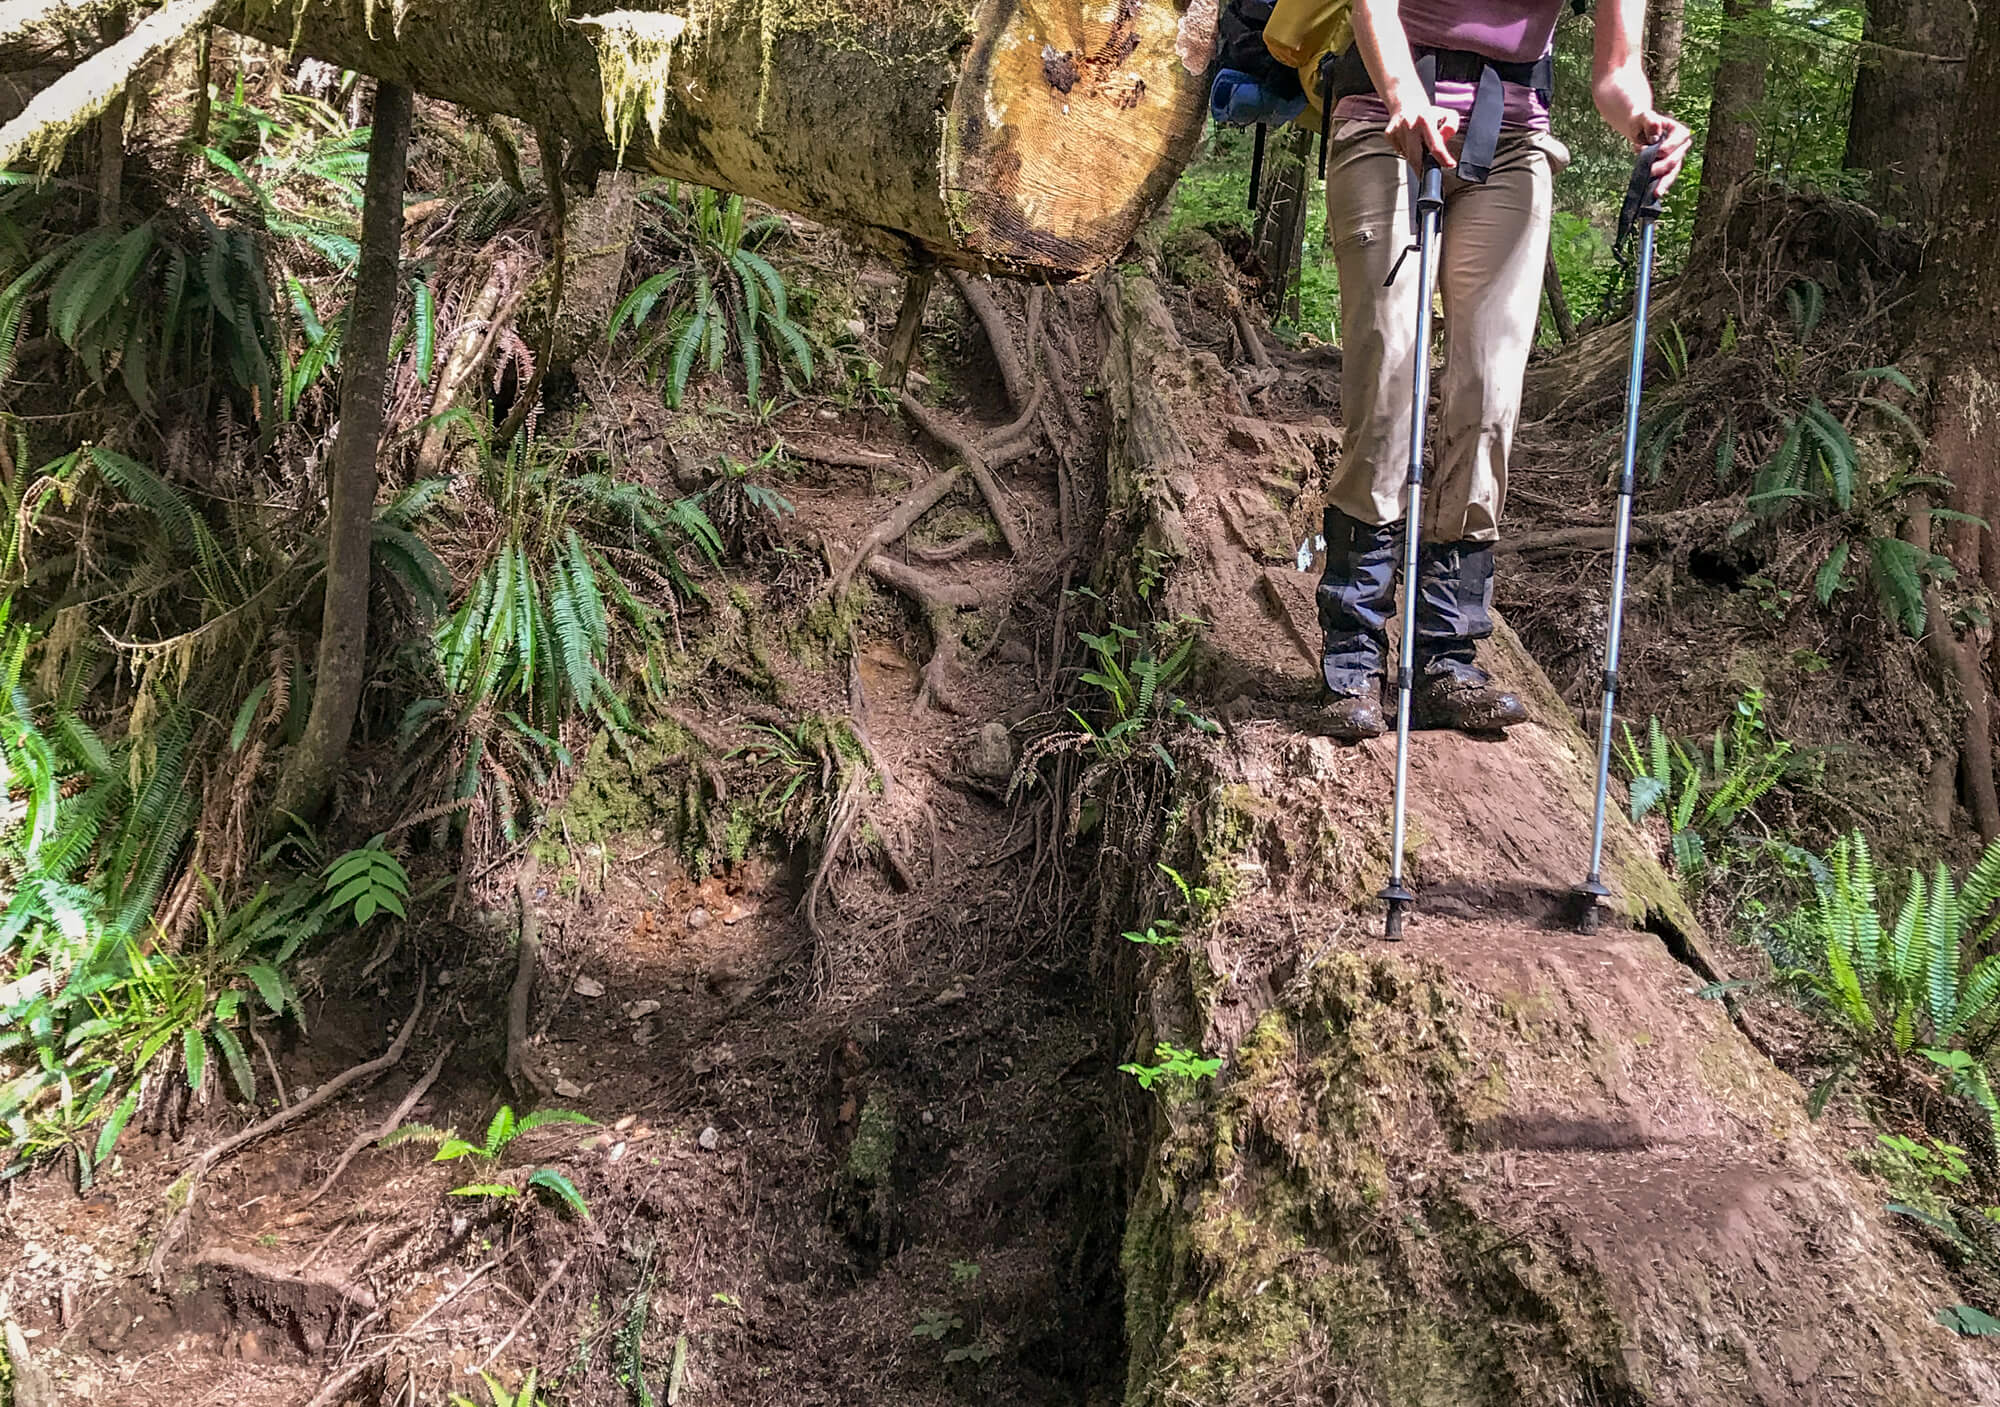
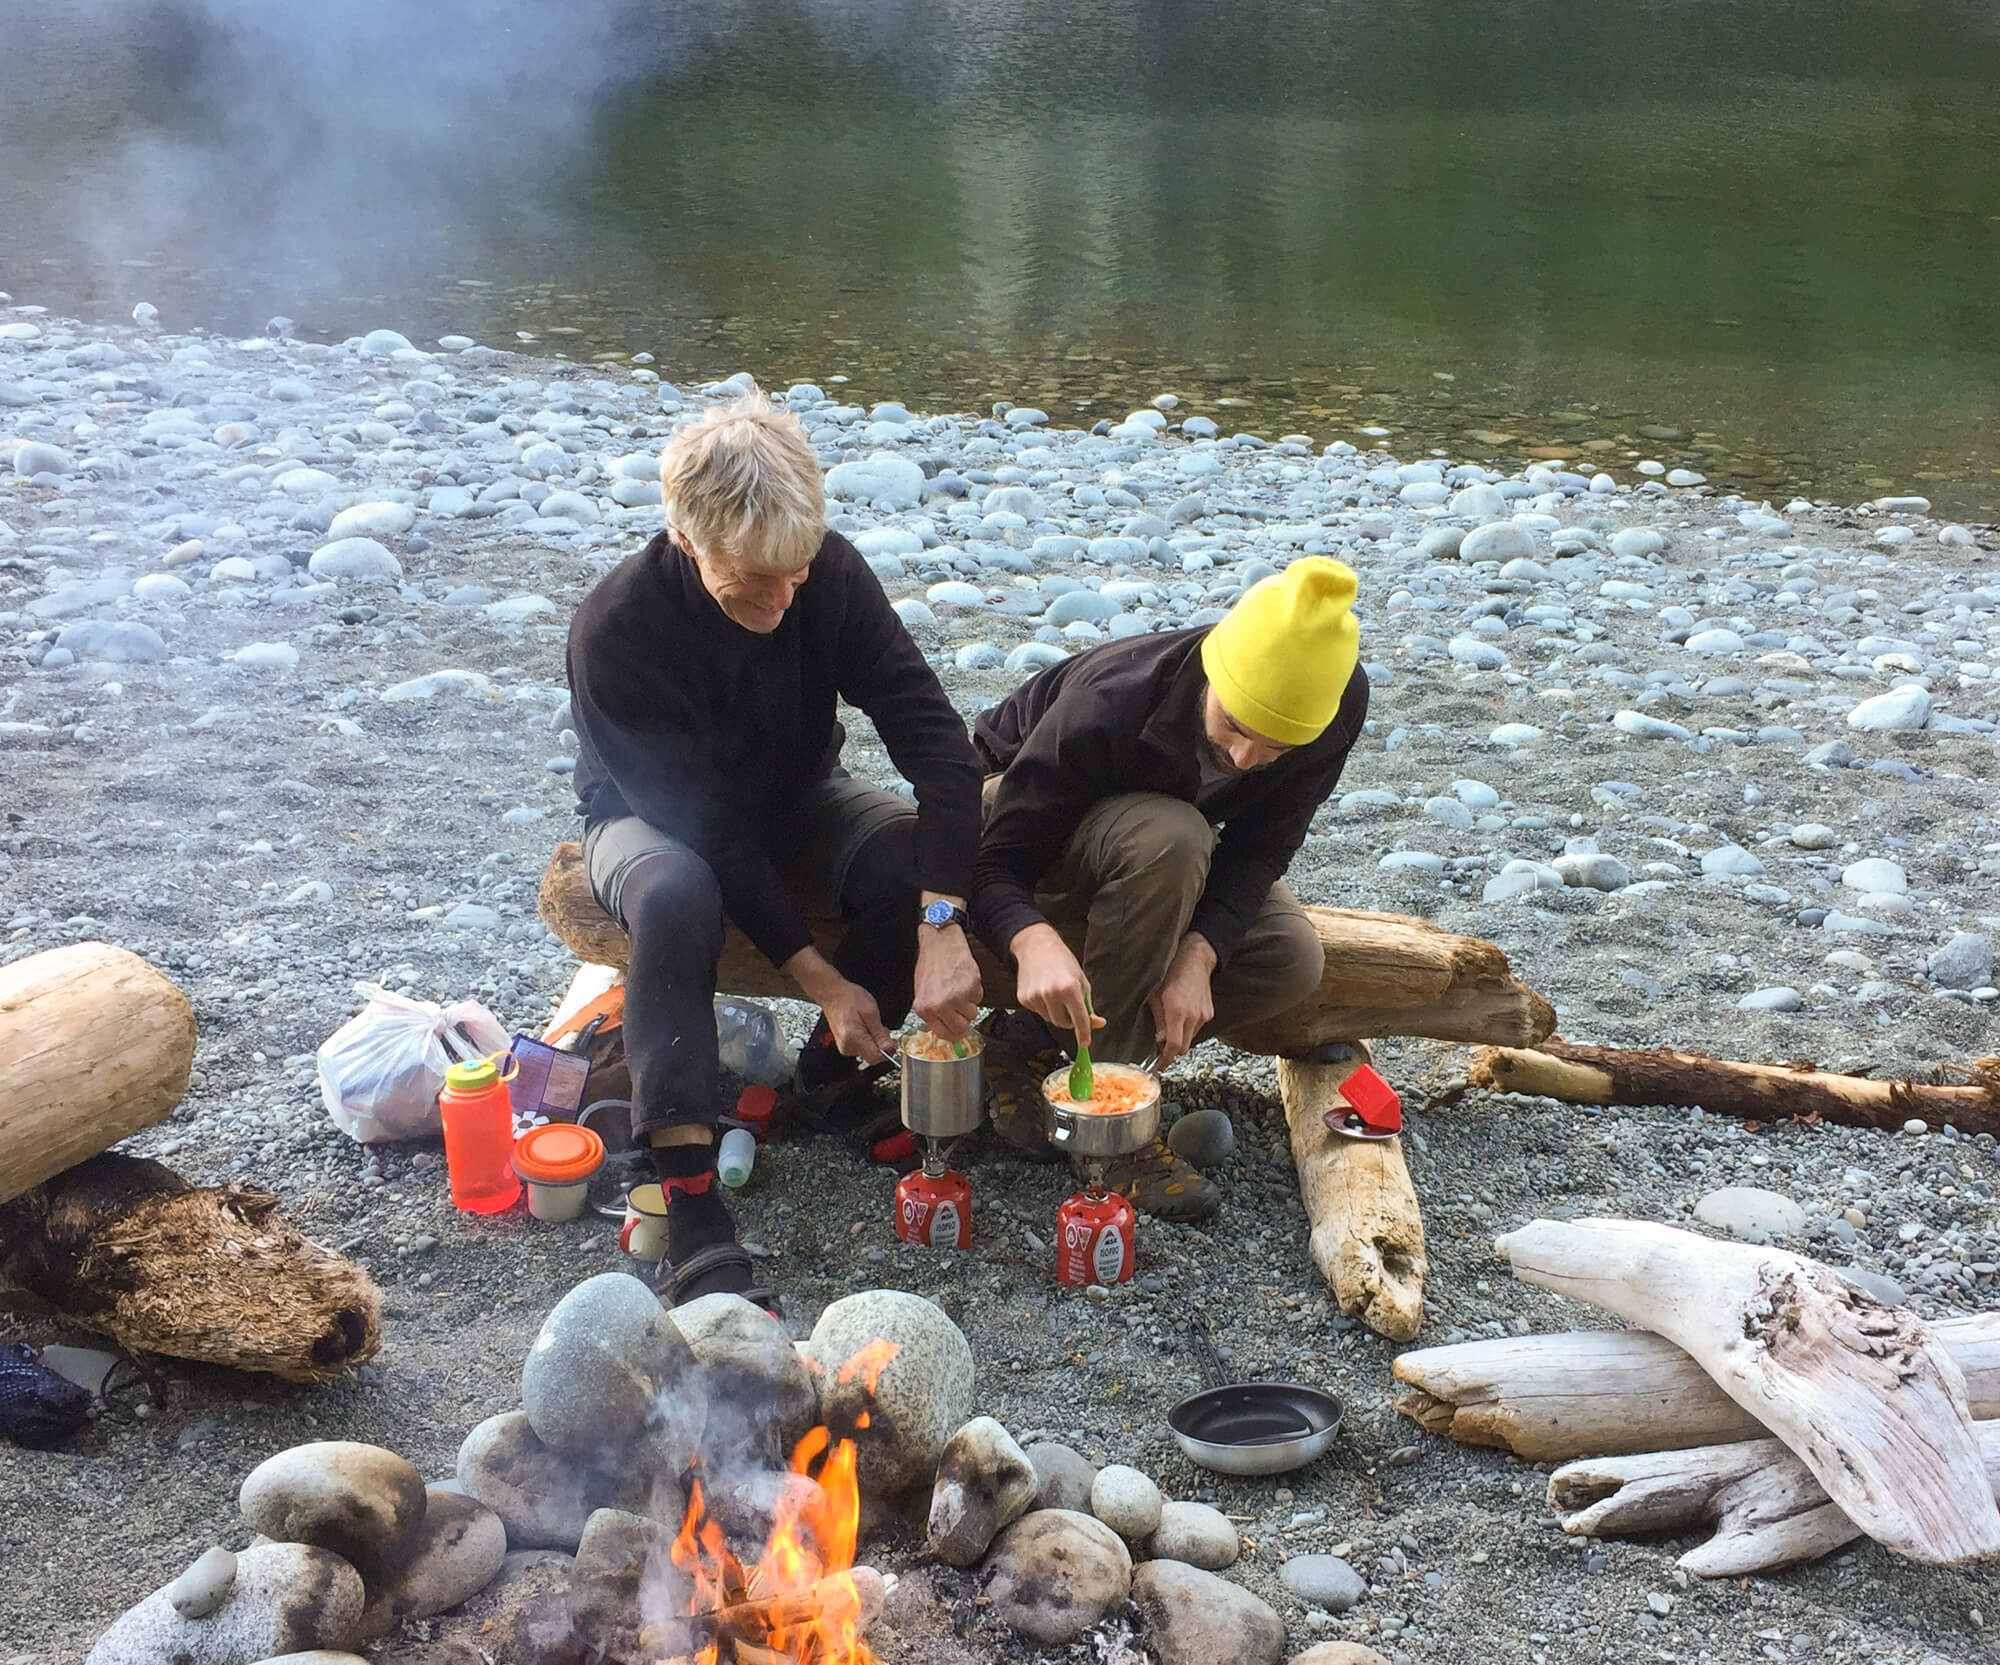
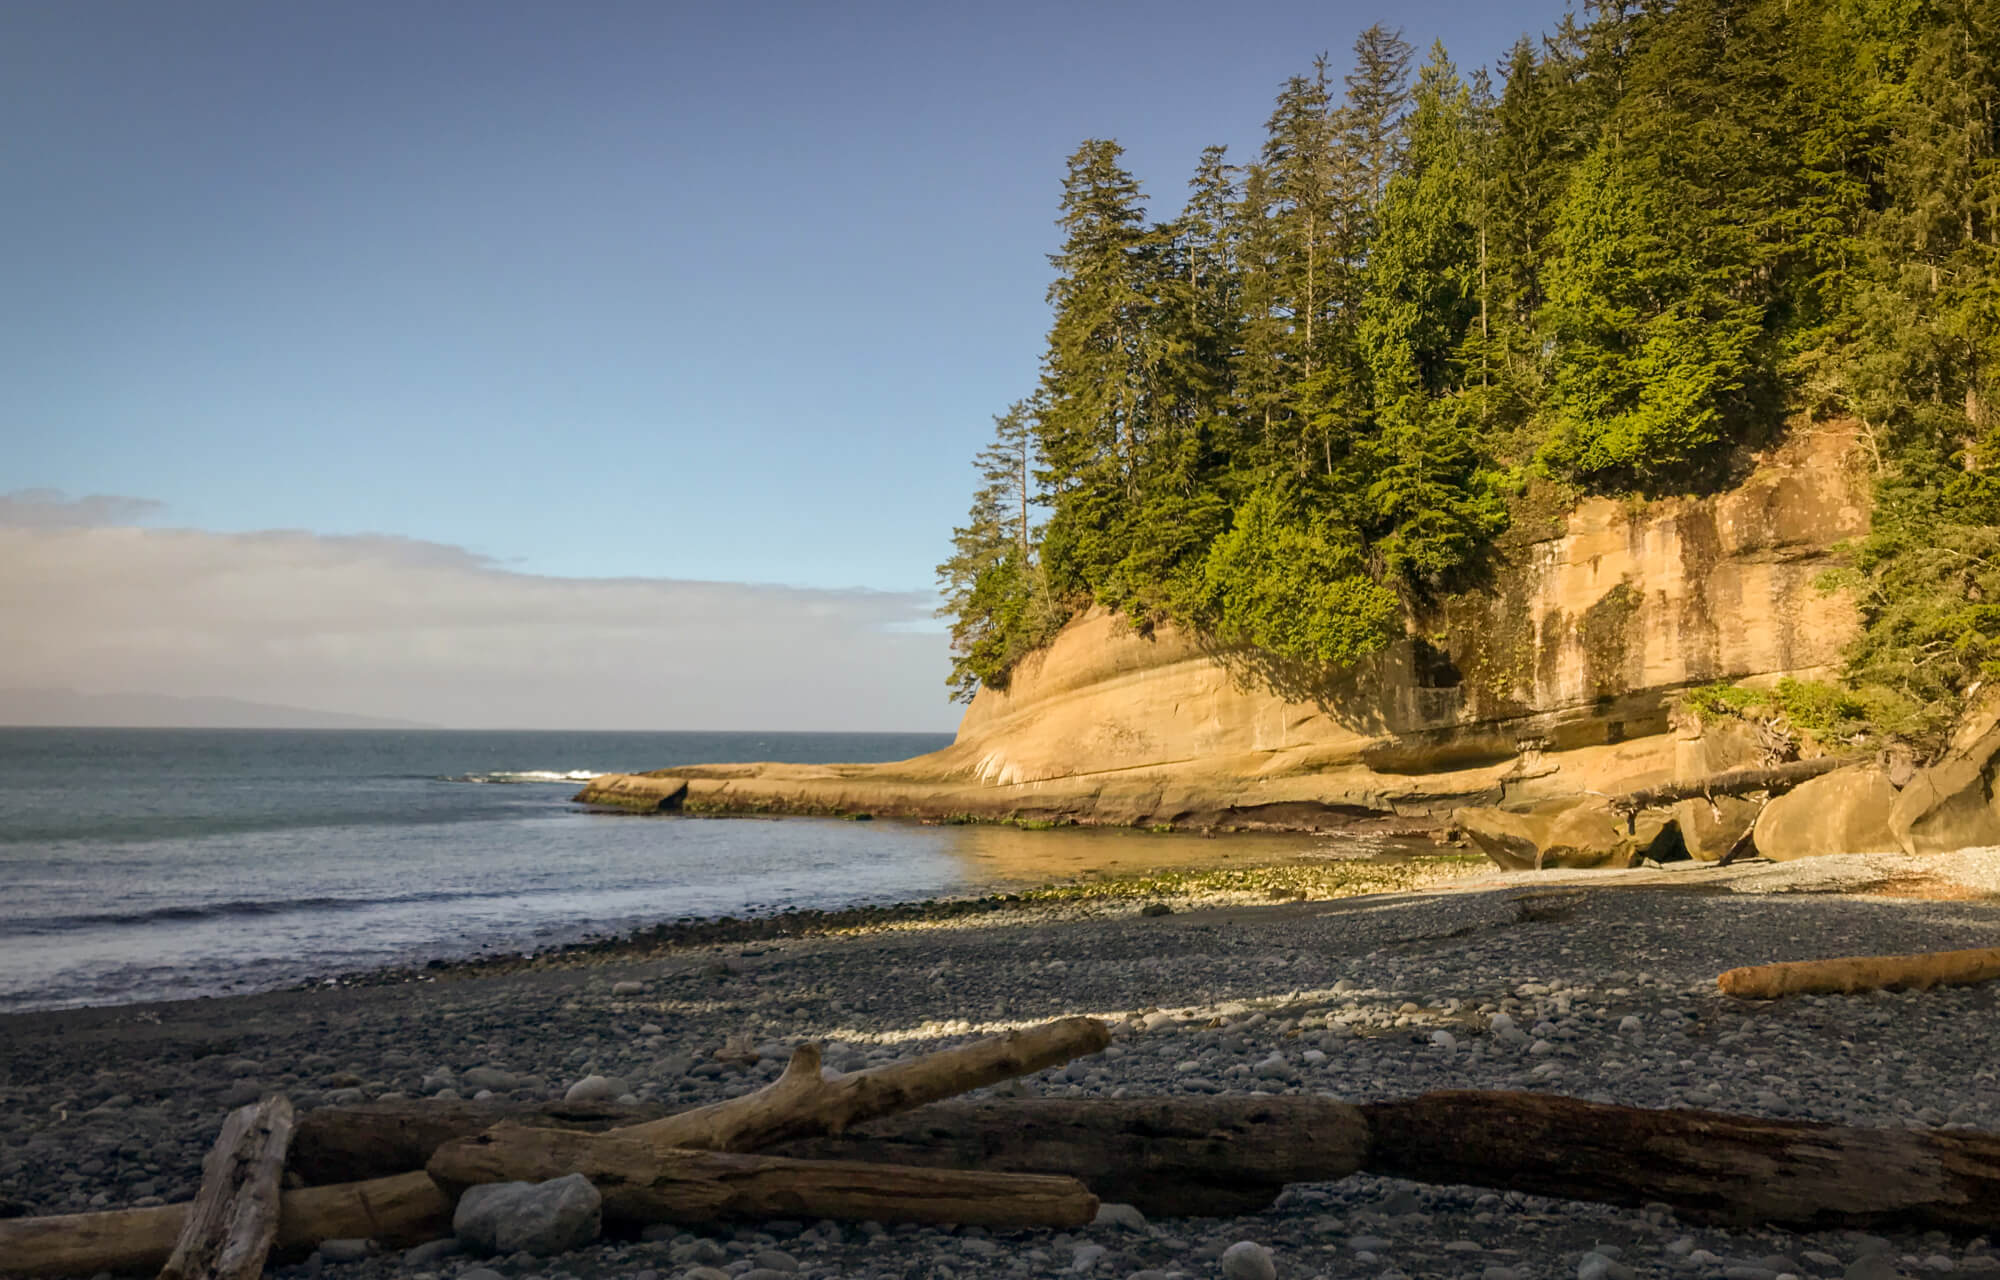
The West Coast Trail Packing List You MUST Read Before Hiking

Canada's West Coast Trail

Canada’s West Coast Trail is a rugged 75 km backpacking trip that traverses a portion of the west coast of Vancouver Island in Pacific Rim National Park. Throughout the duration you’ll navigate through old growth forests, surge channels, ladders, mud bogs and miles of pristine beaches in the ultimate indoctrination to coastal hiking.

How do you pack for the West Coast Trail?  How many pairs of underwear should you bring? How much should your backpack weigh? If these questions have been racing through your mind, you’ve come to the right place!  In this epic West Coast Trail packing guide I’m going to deep dive into the gear that will help make this adventure a successful one whether you have 7 days of sunshine or 7 days of pouring rain. Best yet, I’m going to go about it way differently than the other packing lists out there!

Why trust this West Coast Trail Packing List?

By this point you’ve probably scoured the internet and read a blog post or 10 about the West Coast Trail. Why bother reading this one?

Well, if I’m being honest I really didn’t know jack s*** about packing for backpacking prior to catching the backpacking bug and signing up to hike the West Coast Trail as my first big overnight hiking trip. This ignorance led me to pack 60 lbs of gear and struggle my way up hundreds of ladder planks and across numerous ankle busting baby head boulders. Fortunately for you, I’m wiser now with years of backpacking experience under my belt! My packing list is dialed in, my backpacking setup is light and I’ve learnt the hard way with a lot of gear, so you don’t have to!  So, whether you’re a naive newbie backpacker with the courage of a lion or a seasoned backpacking vet, there is something you in this ultimate guide to packing for the West Coast Trail! 

For many items in this post, I’ll talk about what I used and then talk about what I use now or would pack differently if I were hiking the West Coast Trail again. From there you can make your own decision on whether to buy something new or use something you already have! This contrast should also provide a few laughs at my own expense and you can feel proud knowing that whatever unnecessary item you packed, it likely wasn’t a 4 lb bag of uncooked lentils…

Now let’s jump into the ultimate West Coast Trail packing list!   


** Some of the links in this post are affiliate links. If you click one of the links and make a purchase we may earn a small commission at no cost to you. We’re very particular about products and we only recommend products, services, or accommodation we trust and use ourselves.**

Canada's West Coast Trail

Gear checklist for the West Coast Trail

If you’re here for the quick hits of what to pack, here is a quick summary with clickable links to everything I’m presently backpacking with/recommending for the West Coast Trail:

Don’t Forget

Essential Items

  •  

Clothing and Accessories 

Additional Items

Luxury Items (optional)

We receive a fee when you get a quote from World Nomads using this link. We do not represent World Nomads. This is not a recommendation to buy travel insurance.

What's the best backpack for the West Coast Trail

The fact that you are “backpacking” the West Coast Trail alludes to the fact that a backpack is is a pretty critical item on your packing list.  Do you want the Cadillac of backpacks, the Osprey Atmost AG65? Maybe the Porsche of backpacks – the Hyperlite Southwest? Or perhaps the crossover/hatchback/Subaru – the Osprey Exos/Eja or Gregory Focal/Facet?

A backpack on a beach on the West Coast Trail

Which backpack did I use?

To save a buck and do some epic field testing, I used our 60L travel backpack, the Khmer Explorer on the West Coast Trail. I’m a big fan of repurposing items and if you’re only getting into backpacking a large travel backpack can definitely fit the bill! As great as our pack is for organization of travel gear and hiking from hostel to hostel, it weighs more (6 lbs) than purpose built backpacking packs and is better suited to organizing clothes than backpacking gear.  Ultimately, this pack is my go to for travel, but for backpacking/hiking I now use something more purpose built for weight purposes.

What backpack should you use?

You’re going to see a lot of big and heavy packs on the West Coast trail, Cadillac style backpacks like the Osprey Atmos. You probably don’t want one of these. Weighing in at 5lbs, they’re just too heavy for a dedicated backpacking pack! A heavy pack means more effort exerted, more joint pain and more fatigue.  All things you don’t want more of! So, we’re leaving the Cadillac dealership and moving on. 

Usually, I’m in the lightweight, but not the count every gram ultralight camp. That means a pack like the Osprey Exos (women’s Eja) or Gregory Focal (women’s Facet) work well for my needs. They lack the same amount of organization and features as the heavier packs, but still provide incredible back ventilation which helps you avoid the dreaded swampy back. I own an Exos which I use on all my fast and light backpacking trips nowadays. 

If I were choosing a pack specifically for the West Coast Trail though, I would go with the Ferrari, the Hyperlite Southwest. 

I would choose the Southwest on this trip for 2 reasons.

    • It’s made with ultralight and waterproof dyneema fabric. This saves you the hassle of using dry bags, trash compactor bags, or rain covers to keep your gear dry. This is a major plus on a trail that you’re likely to see a lot of rain on.
    • Secondly, my major gripe with the Southwest is that in hot conditions, like the Grand Canyon, Sierra Nevada etc. the back doesn’t vent that well and you’ll get swampy. The  typically mild temperature on the West Coast Trail mitigates this concern.  

So there we have it, the best backpack for the West Coast Trail is the Hyperlite Southwest. Now, let’s look at the other stuff that goes inside and keep those as light as possible too!

Do you need a raincover for your pack?

Many backpacks offer a level of water resistance, but under a steady downpour they hit their limit of weatherproofing. Unless you’re using the Hyperlite Southwest (which is waterproof) you’ll need to use a rain cover or line your pack with a trash compactor bag to make sure nothing gets wet. I prefer using the trash compactor bag method as it’s lightweight, less bulky and completely covers everything I put inside it. Buy a compactor bag and line the inside of your pack with it for a quick, cheap and reliable waterproofing solution no need to buy a rain cover.

a freestanding tent on the west coast trail
Small campsites that are frequently on the beach make a freestanding tent the best choice for the West Coast Trail.

Best tent for the West Coast Trail

The next most important item on the list of the things to pack for the West Coast Trail is your shelter, here we’re going with a tent. Like all backpacking equipment it’s critical to balance weight and functionality. If you’re backpacking with another person or a group you can split the components of the tent up among your hiking companions that are bunking together to share the load. 

What tent did I use?

My first backpacking tent, the Marmot Catalyst 3P! It’s palatial in size for 2 people and was a great, affordable first backpacking tent that kept us dry and comfortable on the West Coast Trail.  I love this tent so much I still use it for car camping! Unfortunately, at 6 lbs 5 oz it is bulky and far too heavy for backpacking the West Coast Trail.

What tent should you use?

Big Agnes Copper Spur HV UL2 - 1420 g

For the West Coast Trail, I would recommend a tent that is freestanding with superb weatherproofing. Typically gravitate towards a tent that must be staked out to save weight, but this can be an issue on the West Coast Trail given the frequency of beach camping that you’ll be doing. Stakes don’t work so well in sand, so for a tent that requires robust staking  to pitch it is likely going to be get annoying to constantly seek out rocks and logs to help bolster your stakes. Additionally, as you can see from the photo of my rain fly above, getting a taunt pitch may be a challenge at some sites given the sand and campsite space available. On the West Coast Trail, the extra weight of a completely freestanding tent is worth the weight penalty. Additionally, go for a double walled tent to help to manage condensation, something that is especially important on trail where every dry moment is to be relished. The best tents for the West Coast Trail are: 

You can’t go wrong with any of these options for the West Coast Trail and backpacking in general. They’re rugged, durable, double-walled, freestanding tents that are lightweight and reasonably durable (at least for their weight). From the list, I’d gravitate towards the Big Agnes Copper Spur. Big Agnes offers an incredible warranty, product support, and customer service, ensuring that you’re happy with your investment for years!

Additional thoughts on tent selection

 2-person tents are very, very cozy for 2 people, so keep that in mind and consider leveling up to a 3 person if you place a premium on comfort over the weight savings. All the above tents are also available in 3 person models. 

Whichever tent you go with, make sure you set it up in advance at least once. Ideally for a night at at campsite, but in the worst case In your backyard, a park, or even your living room. The last thing you want is to get to your first campsite and realize you forgot a poles, stakes, or rainfly.  Plus by setting a new tent up in advance you save yourself a bit of the embarrassment of broadcasting that it’s your first time using a new tent!

Best sleeping bag for the West Coast Trail

The West Coast trail has a consistently temperate climate with a large amount of humidity and rain.  The biggest question you face in choosing a sleeping bag is the age-old one: Should you get a sleeping bag with synthetic or down fill? In most cases, I find myself on team down, but in really wet climates like the West Coast of Vancouver Island there is a strong case to be made for using synthetic bags. When down gets wet it loses its insulating properties and you get cold fast! Given that it can be nearly impossible to dry anything out on the West Coast Trail, once your bag gets wet you’ll be stuck with a cold, wet bag for the entire trip. That said while a litte bit warmer, a synthetic bag is still not comfortable wet. Plus, if you’re following this packing list you’ll have invested in a well ventilated double walled tent and be using a waterproof or trash compactor lined pack, which should minimize the chance of your bag getting wet regardless of the fill! I used my current down bag on a 10-day Kayaking Trip in Haida Gwaii (equally rainy place) and had zero issue keeping it dry!

What sleeping bag did I use?​

If you’re old enough to remember a time when Macdonald’s used a cartoon character named Grimace to help convince children to get their parents to bring them in to eat their garbage food, that’s pretty much what my sleeping bag looked like. This was my childhood bag with extremely patchy remaining synthetic insulation. However, it did the trick and I didn’t freeze! It wasn’t even the most uncomfortable part about sleeping (more on that later)!  The moral of the story here is, don’t freak out or blow the bank for this item for the West Coast Trail. The temperature is mild with a narrow range. Bring an old bag, rent one, or borrow one from a friend as long as it isn’t too heavy.  You can always use a sleeping bag liner for hygienic reasons in a rental or layer up for extra warmth.

What sleeping bag should you use?

Now I get to gush! A couple years ago I upgraded to a Patagonia Fitz Roy Sleeping Bag and this thing has been nothing short of amazing. It weighs a mere 850 g, features a DWR finish to keep moisture out and has an Internal chest pocket to keep your phone warm and prevent the cold from draining the battery. If you’re looking for a new bag, you won’t regret this one! It’s available in  30°F / -1°C or 20°F / -7°C version.  The -1 C has been perfect for most 3 season adventures, plus you always have the option to layer up further if cold weather strikes. 

Another option I’d strongly consider is a sleeping bag quilt. Quilts were designed under the theory that your sleeping mat provides a large amount of insulation on its own and the bottom part of your sleeping bag looses a lot of its’ insulating quality when it’s compressed (as you lay on). These two facts mean that there is a lot of material and grams that an ultalighter can lose to bring down pack weight. The Flicker UL Quilt by Feathered Friends receives top marks for its’ innovative design that fuses sleeping bag and quilt. On warm nights it can function as a quilt, as it gets cooler, the footbox can be partially zipped, and lastly it can function as full zip (without the hood) sleeping bag in the coldest weather. This award winning setup weighs in as little as 550g and with temp ratings as cold as 20ÂşF / -6.67ÂşC the only thing you’re loosing here is weight in your pack. 

Notice how bulky the sleeping pad is in the photo above. Don't pack one like this on your hike!

Best sleeping pad for the West Coast Trail

The snores of all the other campers weren’t to fault for the bad sleeps I had on the West Coast Trail, neither was my sleeping bag. The sleeping pad you choose makes a huge difference in the quality of rest you get, so don’t skimp on this item like I did!    

What sleeping pad did I use?​

I used a MEC sleeping pad almost identical to this one (like the photo above). Huge mistake! It was bulky, hard to pack, heavy and uncomfortable. When I finally upgraded I couldn’t believe the difference it made in my sleep quality. 

What sleeping pad should you use?

There is no better sleeping pad than the Therm-a-Rest NeoAir Xlite. It weight just over 1lb and packs down to the size of a Nalgene water bottle. It’s also unbelievably comfortable and will change the way you sleep in the backcountry. The only downside is it does tend to make a bit of crinkling noise, like crumpling up a bag of chips. If you’re sensitive to this type of thing consider ear plugs. Get one. You’ll be better rested and ready to take on another day of ladders and mud on the West Coast Trail! 

Best backpacking pillow for the West Coast Trail

It’s possible to find a pillow backpacking that is not just a folded up puffy jacket. 

What backpacking pillow did I use?

Here’s another area that I erred gravely. Despite my deep love for my Therm-a-rest sleeping pad, I cannot say the same about their Compressible Cinch Pillow. This pillow may work fine as car, bus, plane pillow, but it’s probably the worst pillow I’ve ever used backpacking. The weight is not atrocious coming in anywhere between 200 and 400g depending on the size. Unfortunately, it fails miserably in size and packability. You’d be lucky if you can get it down to the size of a 1.5 x a Nalgene water bottle, the baseline comparison item used in all backpacking product photography. Beyond its grotesque size, it’s not comfortable. My new setup (Nemo Fillo Elite) weighs a mere 85g or half a Nalgene as per the photograph on the product website.  So, please do not use a compressible foam pillow. You’re better off with a stuff sack filled with clothes or your puffy jacket.  Can you tell me how many Nalgene bottles that is equivalent too?

What backpacking pillow should you use?

As I mentioned above, the Nemo Fillo Elite is the backpacking pillow you need to use. It weighs a mere 85g and only takes up half a bottle when it’s not blown up. You wouldn’t think a blow up pillow this light and small would be this comfortable, but it is. Buy it you won’t regret it, but if for some reason you don’t just make sure you follow the sage wisdom that under no circumstances should ones pillow equate to a larger number of Nalgene bottles than ones sleeping pad. 

What is the best way to purify water on the West Coast Trail?

Yes, you’ll need to treat your water on the West Coast trail. Sometimes I’m a stream cowboy and love to fill up and drink it straight. Rocky mountain tang straight off an ice sheet is a personal favorite.  Unfortunately, when you’re hiking the West Coast Trail not nearly enough of the watersheds here are protected or untouched, so we must filter/treat. 

A couple notes on treating water on the WCT

    • Make sure you go up a ways at any stream you’re filling from to make sure you’re not getting brackish water from where the tide mixes the seawater and freshwater. 
    • For backpacking newbies, you don’t have to treat the water that you’re using to cook, make coffee or tea. Bring it to a solid rolling boil and that is typically sufficient to make it safe. 

What water treatment method did I use?

When I hiked the West Coast Trail, I used a combination of an MSR TrailShot Pocket-Sized Water Filter and tablets.  This filter was a solid 5/10.  Acceptable for 1 person as an emergency backup on a day hike. For backpacking it was awful and felt like the effort required to manually milk a cow (from what I’ve heard, it’s hard).  My backpacking companions and I would conduct daily bets to decide who had to “milk the utter” that day. Don’t buy this filter. 

As for the chemicals or tablets, they are an easy, cheap and reliable option. I really hate drinking water that tastes like a pool though…

What water treatment method should you use?

Nowadays, I use a Steripen to treat my water. This little thing weighs almost nothing and uses UV light (the same method used in commercial water treatment) to purify your drinking water. Fill your bottle, hit the button, stir for a couple minutes and you’re enjoying potable water in a flash. The only downside to the Steripen is you don’t get the same volume in one go as some of the larger gravity style filter systems, it’s also a bit fragile with a glass lamp that requires a bit of vigilance and you need to pre-filter if you have silty water. Most disadvantageous  is the fact that it is an electronic device with batteries making it more prone to failure or more commonly, a dead battery. Overall it works great, but always bring purification tablets as a failsafe.

Where do you poop on the West Coast Trail? Do you need a trowel to dig a cathole?

The West Coast trail is such a busy hike, it’s wonderful that Parks Canada equipped it with fantastic composting toilets at every campsite. I can’t imagine the land mines that would be lurking if only the tidal flush method (where you poop below the hide tide line) was employed…

The restrooms are very accessible and you should do everything in your power to use them. If an emergency bowel movement situation occurs I would recommend the following course of action:

    • If beach hiking use the intertidal flush for a spin. Don’t leave the TP, behind though bring a small ziplock, and drop your used TP at the next toilet you encounter. 
    • If you’re inland, it’s trowel time so make sure you bring a trowel and TP along. Once again, don’t leave the TP, bring a small ziplock, and drop your used TP at the next toilet you encounter. 

What did I use?

Fortunately, nature never called at any unexpected times. The composting toilets were successfully employed and I must say they were far more pleasant than a typical outhouse. I did pack my trowel though, but it remained dirt free!

What should you use?

Do the same! As convenient and surprisingly nice as the toilets are, as a responsible backpacker you need to bring the trowel just in case.

Don’t forget to pack TP, a dedicated ziplock for packing any out in (should you not make the outhouse) and hand sanitizer.

Swiss army knife

This little item hasn’t changed for me since I started backpacking. It’s convenient, small and does everything a knife should. What more could you ask for? One like this is perfect. 

I spy with my little eye redundant and heavy items....

Best stove & fuel cannisters for the West Coast Trail

So far you’ve seen a lot of packing mistakes that I made when I hiked the West Coast Trail. Fortunately, I’m still using the same MSR Pocket Rocket stove and canister setup! Well, almost the same less one egregious error…

What did I use?

Terrified of running out of cooking fuel I packed a staggering two 16 oz canisters of fuel! This amount is nearly 4 times the volume that I’d use now on a trip like this for 2 people, and that’s still a liberal amount of fuel. The pocket rocket stove was great,  I just way over budgeted on the fuel front! 

What stove should you use? How much fuel should you bring?

I love the MSR Pocket Rocket and am still using my original one! Its ultra compact and ultra-light.

As for fuel, take a read through this article by REI on how to estimate your fuel amount. I’m usually lazy and don’t go through this whole drill.  I’ll be liberal with the amount I take, but that usually means a 4oz (110g) canister for a 2 night trip (for 2 people) and a larger 8 oz (220g) canister for a 4-6 night trip.  Even if you err on the side of caution and pack extra, you’re still going to be way lighter than the 32 oz (900g) I lugged along…

Lighter and Matches

Mini Bic Lighter - 12g

A basic mini bic lighter is usually my go to for backpacking, but I’ll also bring a few waterproof matches as well as a backup as there is nothing more frustrating than when your hands are cold and the lighter got wet and just won’t work. 

Beach fires are a highlight of the West Coast Trail!

Firestarters

A few strikeable fire starters taken out of main packaging - 30g

One of the best memories I have from backpacking the West Coast Trail was sitting on the beach next to a roaring driftwood fire after a long and grueling day on the trail . A couple natural firestarters, like these ones are great to have to help get your fire started.  

Don’t forget, keep your fires below the tideline and only burn driftwood, don’t go foraging for kindling or wood anywhere else. 

Best cookset for the West Coast Trail

The pot, eating utensils, and cup you use are extremely important to the weight of your backpack and its packability. Since I’ve been heaping  so much praise on myself for my great packing skills over the last few items, let’s change it up!

What cookset did I use?

I’d brought along quite the setup on this hike… An enamel mug, an ok backpacking pot, a spork, a collapsible bowl, and a backpacking frying pan. Yikes! Let me be clear. There is no reason an enamel mug should ever venture into your backpacking pack. Same goes for the frying pan!

The rest of my setup was ok, but it was all purchased ad hoc and this made me creative with my daily packing to see where each piece of the jigsaw puzzle went.  All you really need is a pot, spork, and cup (or use your Nalgene)!

What should you use?

GSI Microdualist - 475g

Packability and weight are key to a great backcountry cook set. That’s why I love the GSI Microdualist. Everything packs up inside the pot. I leave the case behind. Don’t need it. The forks suck, so I bring a spork, but everything else works like a charm and it’s perfect for 2 people. It comes with a pot, 2 cups and 2 bowls. All extra light and ultra packable inside the pot itself.  My MSR Pocket Rocket even fits inside along with a small (4 oz) fuel canister.  Everything that I eat and cook with goes inside the one tiny pot (except my spork). It even closes up nicely with a lid that doubles as a pasta strainer! 

If you’re also considering buying the MSR pocket rocket stove, consider the MSR Pocket Rocket  stove kit which comes with a pot and bowl and is a great choice for soloists.

Water Bottle or Water Reservoir

Nalgene - 175g

You need something to drink from and as a vessel to use for treating water if you’re using a Steripen. I used a Nalgene bottle for this trip on the West Coast Trail.  Sure they’re a bit heavier than using a simple smart water like many ultralighters do, but you can’t fit a Steripen inside a smart water. It can also double as your coffee cup or even soup bowl as needed!

A hydration reservoir is another great option. It’s ultra convenient and provides constant access to water throughout the day, preventing you from having to stop, remove your bottle and replace it. This may sound like a small thing, but those stops can feel like momentum killers. At other times the water stops feel like lifesavers, so maybe you wan’t to keep the bottle system… 

Ultimately, both options are fine choices for the West Coast Trail. 

Additional water storage

Even on a hike with an abundance of water like the West Coast Trail, it can be nice to have a water storage container for cooking meals, doing dishes, or for filling up your bottle without having to wander to find the creek. 

What did I use?

None and it was a drag to consistently have to go back and forth to the nearest creek with my cooking pot and precariously avoid tripping and spilling it on the way back!

What should you use?

The MSR DromLite Bag is perfect for this type of trip. The 4L MSR Dromlite bag is an easy and convenient way of storing or carrying extra water.

What first aid kit should you bring for the West Coast Trail

Blisters, cuts, and scrapes are all part of the game on this adventure so you need to bring something to look after these minor annoyances and prevent them from becoming major annoyances. You can certainly build your own first aid kit, but there are likely better things to spend your time on leading up to the West Coast Trail. The best bet it to purchase a pre-built first aid kit, like the ones from Adventure Medical as they include you standard items such as blister bandaging, antiseptic wipes etc. Then the only thing you need to remember to add is some Ibuprofen / other pain-relief medication, Insect sting / anti-itch treatment and antihistamine to treat allergic reactions. There you go, that wasn’t hard at all! 

A backpacker used poles on the West Coast Trail

Do you need Trekking Poles for the West Coast Trail?

Trekking poles are a piece of backpacking equipment that many new backpackers (especially the most youthful) are initially hesitant to use. I know I certainly was! That all changed for me after hiking the Howe Sound Crest Trail and struggling to walk or run from knee pain for weeks after. Poles make a huge difference in reducing the load on your legs and knees, helping you cover more ground with less effort. There an non-negotiable part of my backpacking kit now! That said, the West Coast Trail is one hike where are reasonable argument against poles could be made. During the heavily laddered sections or the difficult large slippery rock section (near Owen Point), poles can be useless. You’ll be forced to stow them on your pack or awkwardly carry them with one hand. Ultimately, I believe that these sections are too short to warrant not bringing poles, as you’re still going to make great use of them for the vast majority of your hike!

What trekking poles did I use on the West Coast Trail?

On the West Coast trail, I was still in my phase of believing that trekking poles were just for retirees hiking in Switzerland.  My knees are likely to regret this one day, especially with that 60lb pack I carried. 

Which trekking poles should you use?

The Leki Vario trekking poles I purchased as my first pair have been terrific, but they don’t make this model anymore. Any Leki Trekking poles or Black Diamond poles are a great choice!  You pay more for lightweight materials such as carbon fiber. 

Best headlamp for the West Coast Trail

When I backpacked in the Grand Canyon a few years ago there were signs everywhere asking people to use the red light mode on their headlamps. At night time only faint red lights poked in around the campsites. It was like there was a big secret that I hadn’t been let in on and I had to spend the entire trip shamefully holding my headlamp in my sleeve to dim its light and cover up my ignorance. After learning more about Grand Canyon status as a dark sky park and red lights night vision saving abilities, it all made sense and I’m now a disciple of the red light movement. So let’s work together for more red lights! The West Coast trail can be crowded and there is nothing worse than constantly being blinded by every other backpacker when darkness sets in. Get a headlamp with red light mode, throw it on when you go to the washroom or walk through camp late at night. You won’t believe the difference it makes it your ability to see the unadulterated night sky. Together we can preserve night vision on the West Coast Trail!

What did I use?

Can’t remember, but it did not have red light mode.

What should you use?

The Black Diamond Spot 400R is a great headlamp with  6 modes including the night vision saving red light. This headlamps is reasonably priced and consistently receives the best in class awards, by the people that give away best in class awards to headlamps. It’s rechargeable and features ample life for your trip with the option to run it on AAA in a pinch. 

GPS for the West Coast Trail

The West Coast trail is well marked and easy to follow. However, a GPS app is helpful to monitor progress and see where you’re at relative to your itinerary.  GAIA is the best option with the premium version you can download maps and use the GPS without a connection. While you’re unlikely to get lost on this trail, some of the buoys used to mark beach exits can be camouflaged and this app helps you be 100%. Plus, you can actually verify that you truly have gone only 1km in the last 45 minutes!

What did I use?

Nothing and this was a mistake. We repeatedly asked hikers coming the other direction about distance and timing only to get answers that were completely detached from reality! This little problem could have easily been avoided by using GAIA to determine our progress, estimated remaining distance and the elevation profiles. 

What GPS should you use?

GAIA features downloadable map layers and is the best companion for any intrepid adventurer. The premium plan allows use you to download maps and layers for use offline (required for the West Coast Trail). Don’t waste your money on All Trails. Avoid using the record function to save battery as it will drain your phone much more rapidly.

Battery backup / power bank + charging cable

After recommending a GPS smartphone app and a rechargeable headlamp it’s a good idea to pack a power bank to give your phone or headlamp a boost as needed. Additionally, don’t forget to keep your phone in your sleeping bag at night to help prevent killing the battery! 

ladders on the West Coast Trail
After a whole day of ladders, luxury items can provide some much need reprieve

Luxury items to pack for the West Coast Trail

We arrived exhausted after at the incredible campsite at Cullite Cove (side note: stay here) to find a couple already camped out and taking in the breathtaking view of the Pacific Ocean. Not only were they enjoying the view, but they were doing so while cuddling in a hammock! Exhausted from our day, we quickly set up our tents, made dinner and went to bed, as they enjoyed a glorious sunset from the comfort of a hammock. For them, the enjoyment they got from that hammock certainly outweighed the weight penalty, but that might not be the case for you! That’s why we call this section of the West Coast Trail packing list, luxury items! 

Should you bring a backpacking chair on the West Coast Trail?

There are numerous great logs and rocks you can sit on so there is no real need for a backpacking chair. That said, getting off the ground or having a truly comfortable spot to sit might be worth the weight penalty for some backpackers. If you can’t imagine being comfortable sitting on a log or rock, check out either the Big Anges Skyline UL stool (539 g) or the Helinox Speed Stool (450 g).. Both weigh in at around 1 lb and can make the weight cut in some backpackers kits. 

What did I use?

A small sit pad of cut out foam! It helped take the edge off a little, but I probably wouldn’t pack it again due to its bulk. There are plenty of comfy logs to sit on.  

What should you use?

Totally your call. If its worth a 1lb and the bulk to have a comfortable spot to sit who am I to tell you otherwise. Make sure it’s as light as possible though. At a 1lb even the ultralight chairs are 10% of many ultralighters total base weight (base weight = items excluding food/water). 

So, what about that hammock?

After introducing the concept of a backpacking Hammock above I undoubtedly left many of you thinking about packing one. Is it worth it for snuggle time or the insta worthy pics? Personally, I don’t think so. A hammock can be great for less weight/space conscious adventures like sea kayaking or car camping, but similar to a backpacking chair it doesn’t fit into my personal backpacking calculus. I love my ENO doublenest hammock, but it weighs in at almost a pound and a half. This is a significant amount of extra weight and bulk for something you don’t really need. If you’re hammock camping as an alternative to a tent this is fine, but just to have it as a luxury is excessive weight for limited purpose. 

Should you bring a tarp on the West Coast Trail?

The West Coast Trail is a unique hike in the sense that you form a large amount of camaraderie with other backpackers you continually run across along your journey. A fast way of making friends is to be the person that packed a tarp for cover at camp!  A tarp can be a great way of staying dry(er) and sheltered while cooking, eating or hanging out during a downpour, but like all luxury items comes with a weight penalty typically around 1lb. Additionally, if you’re not looking to make fast friends during every downpour, leave the tarp at home. 

What did I use?

Nothing, I did not pack a tarp for the WCT. While I can certainly see why people would, I believe this is a luxury item. A good shell and rain pants will keep you about as dry as possible. Besides, once you’re wet a tarp will do little to warm you up or dry you off. If you truly need to warm up your best bet is to get out of your wet clothes and into your tent. 

What tarp should you use?

If I looked at the forecast in advance and it indicated torrential rain everyday, I might consider packing a tarp like the MEC Silicone Scout Tarp, but I’ve never taken a backpacking trip where I wished that I had a tarp in addition to another shelfter solely for the purpose of cooking, eating and hanging out. 

backpacker in a shel jacket on the West Coast Trail
My dad staying dry and warm in his shell jacket on a rainy day.

What clothing should you pack for the West Coast Trail? What should you wear?

Packing clothes for the coastal environment of the West Coast Trail can feel intimidating. What materials are best? Will you stay dry and warm? Like any challenging environment it’s best to stick to layers and avoid cotton (even at the underwear level). 

Best shell jacket for the West Coast Trail

When your core is warm, your body will be warm this is why your shell jacket is such critical piece for hiking the West Coast Trail. It must have a good degree of waterproofing/water resistance via either a Durable Water Repellent (DWR) finish or a Gore-tex finish. This will ensure your upper body stays as dry and as comfortable as possible, even if you encounter days of torrential downpour. Purpose built waterproof shells for hiking and backpacking resist rain on the outside while simultaneously allowing breathability, which prevents your own perspiration from getting you wet and making you cold. Equally important, when you’re exerting yourself! If you want to get into the nitty gritty of it, check out this article on How Rain Gear works. Ultimately, you need a great shell!

What shell did I use?

I used a MEC shell jacket that I bought in 2016 before going hiking in Peru. It’s been a great piece of gear that continues to perform well with an occasional bit of maintenance to refresh it’s weatherproofing! I used this Jacket during several days of pouring rain on the West Coast Trail and with the hood up I stayed nice and cozy all day long despite heavy exertion inside my jacket and pouring rain outside!

What shell should you use?

If I had to buy a new shell today I’d buy the Arc’teryx Beta shell which is the best all around shell jacket.. Arc’teryx gear is expensive, but impeccably designed. I was skeptical for years, until I purchased a few pieces of their trail running gear and got hooked. This shell has one numerous awards as the best of the best for hiking and backpacking and will be my choice when my existing shell eventually requires replacement. If you’re looking for something more reasonably priced go for the Patagonia Torrentshell.3L

Best puff jacket for the West Coast Trail

A puff jacket is great for warming up at night or during cool mornings. They’re also terrific for layering underneath your shell jacket for extra insulation on chilly days. As a bonus, this is a rare backpacking item that is also great for your day-to-day life and may even be classified as runway chic in some cases! How fun is that?  Looks are only skin deep though, and your biggest decision is once again synthetic or down? Unlike the sleeping bag, it’s more important to choose synthetic insulation here.  Afterall, it’s a lot harder to keep a jacket dry than a sleeping bag! If you already have a great ultra lightweight and compact puffy down jacket, you’ll likely be ok, just make sure to use it solely as a mid-layer on rainy/misty days and don’t skimp on the quality of your shell! 

What puffy did I use?

I used my Patagonia Nano Puff Hoody which is still my go to life, travel and backpacking jacket. It’s kept me warm on numerous backpacking trips and adventures around the world! This is a rare spot of brilliant packing on my first trip if I say so myself!

What puffy should you use?

The Patagonia Nano Puff Hoody! If you’re looking for a new versatile puffy, do yourself a favour and get this one!  I love this Jacket and I will have it forever even when it has patches all over it! You will too!

Sunny days on the West Coast Trail do happen. Bring a sun hoodie.

What shirts should you pack for the West Coast Trail?

For this trip 2-3 shirts is sufficient. Pack 1 sun hoodie and 1-2 quick dry athletic style shirts. You have one shirt that you wear during the day/backpacking and a second shirt to change into at camp or sleep in. You can throw in one more  to add a margin for error and allow for a bit more alternation. Anything more than 3 shirts is overkill and you’re packing too much, I think I packed 4-5 when I hiked the West Coast Trail. Yikes!  

Shirt 1: sun hoodie

A few years ago, I went hiking in 40 degree heat through the Grand Canyon, I was shocked to see hoardes of thru hikers wearing hoodies! Did I miss a tech convention at the South Rim? Was this some weird prank? In fact, they were sun-hoodies and they are nothing short of the best backpacking item you’ll add to your kit! Typically rated at SPF 50 these babies cover all the easy to burn spots including your neck, ears, and top-of-hands! They’re also ultralight, comfortable and breathable. I gave my mom one for gardening, but she finds it so comfortable she wears it around the house constantly! Beyond the comfort and breathability, they all but eliminate the need for sunscreen anywhere, but your face! Sure, it rains a lot on the West Coast Trail, but sunny days or weeks do happen! Even if it is raining your sun hoodie is likely to be just as comfortable as any other quick dry base layer item you’d be packing anyway, so best make it multipurpose! I didn’t have one of these when I first hiked the West Coast Trail, but I’d definitely bring it, if I did it again. I don’t leave for a backpacking trip without my Sahara Sun Hoodie! 

Shirt 2: quick dry hiking tee / athletic shirt

I’m a big fan of the Patagonia Capilene cool shirts which are available in mens and womens and short and long sleeve versions. However, any quick dry athletic shirt will work fine  for this hike as long as it is made from synthetic material or merino wool. Absolutely nothing made from cotton should be entering your bag!

Should you bring rain pants on the West Coast Trail?

The West Coast Trail is a hiking trip where rain pants are an item that you should pack! I don’t always view them as required packing as I find that as long as my core is dry and warm, wet pants aren’t that bad. Unfortunately, on the West Coast Trail, there is a chance that you could experience an entire week of torrential rain which compounds the discomfort.  Rain pants are lightweight, and many can be put on and removed without taking off your shoes/boots making for easy layering or delayering.

What rain pants did I use?

None. Despite my gross overpacking, these were not items that I felt necessary to purchase. Fortunately, I did bring multiple pairs of pants so I managed my discomfort by rotating between the least wet pair. It would have saved me a lot of weight if I just had a pair of rain pants as opposed to carrying along a couple waterlogged pairs of pants!

What should you use?

I’ve been happy with the Black Diamond StormLine Rain Pants. They utilize a stretchy material that makes them move comfortable and less restrictive feeling than many of the competing pants.  The Patagonia Granite Crest Rainpants are another great option. 

Zipoff pants and Gaiters. #trailstyle

What pants should you wear on the West Coast Trail?

Hiking pants are largely a matter of personal preference. Some hikers are comfortable being in shorts in everything but intense bushwacking or sub zero temperatures, other’s gravitate towards the flexibility of zip-off pants. Ultimately, there is no right or wrong decision!  I typically bring a pair of zip offs and a pair of shorts and find this provides a good amount of flexibility for most backpacking trips. 

Zip-off hiking pants

I never thought I’d see the day I embraced the zip-off, but they really are the best of both worlds! On cold mornings I’ll start off with long pants and then easily convert them to shorts trail-side! The only downside with the zip offs is that they can sometimes be tricky to get your boot or shoe through the pant leg, mandating a lengthy shoe-off-stop to make the switch! It’s still easier than having to dig through your pack for a pair of shorts and strip down to your underwear on the trail! I’ve had one pair that I’ve used for years, including on the West Coast Trail.  There’s a limited difference between brands, the Quandary convertible pants are pretty good or see if you can snag another brand on sale before your trip. 

Shorts

I bring a pair of shorts for hotter days or as something dry if my pants are soaked. You can go for a hiking short or trail running short. The later will save you weight and tend to be more breathable! I like the Arc’teryx Norvan Short. 

Long underwear

A pair of merino wool or synthetic long underwear are great to have. You can wear them in your sleeping bag for an extra layer of warmth at night or as a last resort camp pant if your shorts & pants are totally soaked and gross! On colder hikes or if you run really cold you’ll want to layer them underneath rain pants or your hiking pants for extra warmth.  I’ve had a pair of MEC brand ones that have worked well for me for the last decade. I’ll probably replace them with the Patagonia Capilene bottoms when they eventually wear out.

What underwear should you pack for the West Coast Trail?

Many packing lists for the West Coast trail leave underwear as an afterthought. They tell you to bring a few pair and call it a day. So, you pack your favourite cotton underwear and start hiking the West Coast Trail decked out in all the other fancy new gear you bought. You’re hiking for a while, everything is going great, you’re sweating a bit, but everything is under control. Then you stop for 10 minutes, grab a snack only to realize that you’re feeling kinda cold, wet and clammy down below. Thanks Calvin Klein or Victoria Secret for making these amazing water absorbing undergarments!! The moral of the story here is pack athletic underwear that are designed for high output activities. I’ve had the best luck with Patagonia Sender underwear they don’t seem to wear out as fast a lululemon. They make womens too! Bring 2 pairs of underwear if you’re really brave, 3 if you’re kinda brave or 4 if the thought of only 2-3 grosses you out too much…

What socks should you pack? How many pairs?

A great pair of hiking socks keep your feet warm even when they’re soaked and wet on the trail and help prevent blisters. Darn Tough are the only way to go for hiking socks. They’re guaranteed for life/replaced free of charge and they don’t stink. So go ahead and try to get holes in your socks. I find 3 pair works well. You rotate between a pair for hiking and a pair for camp and then reserve 1 sacred pair for sleeping (as needed), wearing in the tent or a last resort. 

What hat, toque, or headwear should you pack?

Pack a ballcap/trucker hat for hiking if you’re going the sun hoodie route. If not, consider a brimmed hat or tilley hat to prevent sunburn on your ears and the back of your neck. They look a bit funny, but are effective. Bring a toque (winter hat) as well, as keeping your head warm is one of the easiest ways to warm up on cold mornings or evenings. Buff neckwear are popular as they can be worn as a bandana or a neck tube to provide sun protection or warmth as needed. 

Originally, I packed only 1 of 3. A toque, which I wore almost every morning and evening. I would have been cold/uncomfortable without it.  If I were hiking it again, I’d definitely bring a ballcap/truckerhat as I never hike without one anymore. I have to do everything I can to fight forehead wrinkles these days! 

Sunglasses

Because you’ve been taking the time to read this list in such detail you’re going to have one of the finest packed backpacks the West Coast Trail has ever seen and other backpackers are going to be envious. Throw on your favourite pair of shades and block out the haters. Most importantly though, it does get sunny from time to time out here despite what you might think. So bring ’em and plan a celebration for the moment you get to pull them out of your pack!  

I don’t think you really need a specific or special pair of sunglasses as long as you weren’t planning on bringing designer shades that cover half your face you should be fine. 

Gloves

On most hikes I don’t find I wear my gloves that much while hiking. I wear them alot in the morning while I’m preparing breakfast, packing up, or not moving enough to warm my extremities up. The West Coast Trail was different as all those pesky ladders are wet and cold and require your hands to climb up. 

What gloves did I use?

My dad bought us all a matching pair of orange gloves from Canadian Tire with hearty grips to them. Adorable right? They actually worked pretty well, but were bulky to carry around.  I will say that the grip and warmth that they provided on the ladders and for use on the cable cars was excellent. 

What gloves should you use?

A thin, weatherproof glove. I use the Black Diamond Mont Blanc Gloves for hiking now and they’d work well on the West Coast Trail. They have a grippy silicon palm that would be great for the ladders, plus at 58 g (2 oz)  you won’t even notice them in your pack!

boulders on the West Coast Trail
Are trail runners or boots better for negotiating these baby heads?

Should you wear trail runners or hiking boots on the West Coast Trail?

The benefit of carrying a lighter pack is you can wear a lighter shoe! Trail runners are lightweight, comfortable, and don’t have the same break-in period as backpacking boots. Almost every backpacking trip I take now is in trail runners, but are they the right choice for the West Coast Trail? Let’s unpack this one further. 

What did I use?

I had a light pair of Keen high top hiking shoes. They weren’t as hefty as a typical backpacking boot, but were substantially meatier than the trail runners I wear now. The ankle support saved me from a couple twisted ankles and the height was helpful for the muddy sections of the trail and for keeping sand out. When I hiked the West Coast Trail, I was new to backpacking and I definitely benefited from the stability that comes with the larger surface area of a boot. Additionally, with a 60lb pack they helped to buffer the impact of rocks and roots on the soles of my feet.   Unfortunately, I seem to have overburdened them with the West Coast Trail and they disintegrated shortly after! 

What should you use?

After backpack a lot in trail runners, I’d have a hard time going back to boots. If you have a lot of experience backpacking with trail runners and have a lightweight setup you should be fine here with a trail runner. Don’t forget to bring gaiters to help keep the mud and sand out!  If you’re greener to backpacking, go for boots. Boots provide more stability with their larger surface area which is important as your body adapts to carrying a large backpack over rough terrain. If your pack is heavier and you wear a trail runner, you’ll feel every root and rock on the sole of your feet and you can even injure yourself this way. Lastly, boots are warmer and do a better job of keeping large volumes of mud and water out which can be beneficial on this backpacking trip. If you’re going for boots make sure to put some miles on to break them in well advance of your hike. Trail runners are more forgiving on this front. 

For cold weather or if I need to carry more weight I’ll use my Scarpa Kailash hiking boots which have been terrific.

For trail runners I’ve been happy with the  La Sportiva Bushido II trail runners, but I’m planning on trying the thru hiker favourite Altra Lone Peaks out of curiosity this year. 

Using gaiters on the West Coast Trail

Do you need gaiters for the West Coast Trail?

Prior to hiking I did a limited amount of research on what to bring. Fortunately, somewhere in the 5 minutes of packing pre-reading I did I was advised to bring gaiters as they do a great job of keeping the sand out of your boots.  Beyond the sand, they also do a great job of preventing your hiking pants from getting soaked with mud on your first foray into a mud pit. All around they were a great item to bring on the West Coast Trail, something that was made clear by the envious comments we received from other hikers! 

What did I use?

I used MEC’s generic nylon gaiters for this hike. They served the purpose, but they’re bulky and heavy (360g).  Plus at nearly knee-height they’re a bit overkill for this hike and made beach walking on the warm days quite hot. I guess there’s a reason they’re labelled as ideal for “Alpine climbing and mountaineering, Winter and expedition camping, and Snowshoeing” with hiking or backpacking not making this list! 

What should you use?

I’d go with a lightweight mid-height gaiter for this backpacking trip. A gaiter like the Kahtoola Mid Gaiters would be the perfect choice. You shave off a lot weight and considerable bulk off the MEC nylon gaiters, but keep the functionality, and hopefully sand and blister free feet! 

Camp shoes

There’s no better feeling than getting your campsite set up and getting out of your wet and muddy boots (or trail runners) at the end of a long day! This is what camp shoes are for! Sure, they’re not always necessary especially for those using trail runners, but warm feet and comfy shoes are unquestionably one of camp’s biggest luxuries! Plus, they can help give your shoes/boots some extra time to dry out.

What did I use?

Another item, another egregious packing error. I basically packed a 2nd pair of hiking shoes as my camp shoes, a pair of vibram soled, merril water shoes. I told myself to pack them for river crossings, but realistically I was looking for an excuse to use a purchase I’d felt copious amounts of buyers remorse over.  As camp shoes they were alright, but allowed far too much sand in without making it easy enough to get it out. The biggest downside was that they weighed in at least as much as a pair of trail runners!  If you’re going to bring camp shoes, make sure they’re comfortable and as lightweight as possible.

What should you use?

There is no feeling like setting up your tent and slipping into a nice comfortable pair of Crocs. Wait. What? Yes. Crocs! The mid-aughts and pandemic favorite footwear have stayed cool with backpackers all along. They’re lightweight, comfortable and as ugly as ever. This is the camp shoe of choice for many backpackers. Just make sure to remove your decorative croc charms, if you’re counting grams in your backpack! 

Do you need to bring bear spray on the West Coast Trail?

The West Coast Trail is black bear country and if you’re lucky you might have the opportunity to see one of these incredible creatures in the wild. Parks Canada advises all backpackers to carry bear spray and know how to use it, so it’s probably best to follow their guidance here. If you’re travelling via plane you won’t be able to bring this along with you, so you’ll have to track it down before starting your hike. If you can’t, I personally wouldn’t get bent out of shape about it as there are no Grizzly’s on Vancouver Island and you’re typically hiking in a large group on a very populated trail. Additionally, there are numerous National Parks with very active black bear populations that actually ban anyone from carrying bear spray (Yosemite, Sequoia), so I’m not exactly sure of Park’s Canada’s rational here. That said, I lack the domain expertise to explicitly challenge their guidance, so best to bring it if you can. Most importantly, always make sure to store your food properly and keep any scented items out of your tent.    

Tootbrush and mini toothpaste (or tabs)

I count out a few toothpaste tabs for the number of days I need and put them in a mini-ziplock saves the annoyance of bringing a tube.

Sunscreen

If you followed my advice on the sun hoodie, you shouldn’t need a lot of sunscreen, just enough for your face basically. Leave the Costco size at home here… 

Lip Balm

Keep you lips protected on the sunny days.

Bug spray

This wasn’t the buggiest hike that I’ve done, but there are times you’ll notice them. Bring bug spray. I’ve been pleasantly surprised with the Natrapell lemon eucalyptus, it doesn’t leave me feeling nearly as sticky/gross afterwards as the ones containing deet do

Duct tape

Bring some duct tape if you need to fix a tent pole or bandage a blister. 

cooking on the west coast trail
The moment that I learned that dried, uncooked lentils are an awful food to bring backpacking...

What food should you pack for the West Coast Trail?

A long, tough day of backpacking can burn over 5000 calories. You’re going to be hungry and need to pack the right kind of food to minimize any additional weight in your pack. Before we dive in here are a couple basic tips to follow in your food selection and food packing for the West Coast Trail:

    • Remove any bulky packaging.  Ex. If you buy noodles in box take them out and put them in a ziplock bag. 
    • Remove excess air from packaging. Open packaging that has excess air and use a small ziplock or simply reseal it after pushing the air out. 
    • Line up all meals and snacks in advance and group together breakfast, lunch, dinner and snacks for each day. This guarantees that you’ll pack properly and know what rations look like for each day on the trail. 
    • Aim for items with limited cook time. Ideally things that require only the addition of boiling water. You can find many great things at the grocery store that often costs less and tastes better than the freeze dried meals you’ll find at REI and MEC. 

Sample West Coast Trail Backpacking Menu

I made a ton of errors when I backpacked the West Coast Trail. I packed dried lentils, which take an impossibly long time to cook and I brought pre-packaged curries that contained excess water weight. Sure, we had plenty to eat, but it weighed too much and took up way too much space in my pack.

Here’s a sample menu for backpacking the West Coast Trail to get you started on your meal prep.

Breakfast

Oats with nuts, dried fruit, cinnamon and sprinkle of sugar.

Purchase a big bag of quick cook oats. I like these. Then divide up a small ziplock bag for each breakfast. Add walnuts, your choice of a dried fruit, and cinnamon to each bag. Every morning you’ll boil water, take out what you need for coffee then add a bag of your homemade oat mixture to the remaining water for a quick and easy hot breakfast! 

Coffee

Just because you’re traveling lightweight doesn’t mean you need to go without a half decent cup of joe! Canadian Heritage Coffee Roasters makes this incredible backpacking coffee. It’s micro ground which means it tastes similar to french press and miles ahead of the instant coffees of old. If you’re a coffee snob in real life, this is your backpacking coffee! 

Trail snack 1

Some kind of snackbar

Larabar, GoMacro, Cliffbar. Pick your favourite. 

A hundful of nuts, dried fruit, or jerky

A nice accoutrement to your snackbar. You might not need this extra item at every snack stop, but there will be times! 

Lunch

Option 1: Tortilla with nut butter or plant-based tuna

Pack some of these almond butter pouches and then spread them on a Tortilla for a caloric filled lunch! I also like to bring a few of these plant-based tuna pouches and put them on my favourite backcountry bread, a tortilla.

Option 2: Cold Soak Salad

A cold soak salad is the closest thing you’ll get to a gourmet lunch on the trail. This is an area where pre-buying a backpacking specific food is worthwhile, unless you have the energy to make and dehydrate your own. Check out Outdoor Herbivore for a few great options.

Snack 2

Some kind of snackbar

Time for your second bar of the day. Once again something like a Larabar, GoMacro, Cliffbar. Pick your favourite. 

Dinner

The highlight of your daily meals!  It’s ok if you start dreaming about it anytime after about 9am. Get creative here! To rehash what I said earlier, there is no need to buy the expensive freeze dried meals, look for items at the grocery store that are already dry, have a limited cook time, and require only water!  Here’s a few options:

Option 1: Right Rice

Right Rice is “rice” made from lentils and chickpeas. You boil water, add the contents and wait for ten minutes. It’s high in fibre and protein and all the flavours are delicious! This is a perfect dinner for backpacking! For extra flavour, calories and protein, I’ll mix in a pack of this plant-based tuna replacement. 

Option 2: Mac & Cheese with Chickpea Pasta

This isn’t the kraft dinner you grew up with, but this incredible mac and cheese with chickpea pasta may be one of my favourite backpacking meals!

Chickpea pasta offers way more nutritional value than your standard mac noodle. It’s high in protein and fibre and will keep you going on this tough hike. By using a plant-based mac we don’t have to worry about milk/dairy spoilage. Simply cook the noodles, then drain most of the water leaving about a 1/2 cup behind with the noodles. 

Pack a couple tbsp of cashew butter in some plastic wrap and add this the water with the packet of seasoning! Delicious! 

Option 3: Brown Rice Ramen

This organic. brown rice ramen is ready in minutes and rich with flavour. This is the perfect meal to warm up with after a rainy day. For a standalone dinner, I’ll often down a couple packs. 

Option 4: Red Bean Chilil

Spicy chili done to perfection. This incredible red bean chili needs a little bit more fuel, as it needs to simmer for a few minutes after boiling, but it’s oh so worth it!

Option 5: Black Bean Soup

Made with completely organic ingredients and packed with 34g of protein this Black Bean Soup is one of the easiest and most delicious backpacking meals I’ve had. 

How to make your own meals for the West Coast Trail

If you have the time,  energy, and willingness, making your own dehydrated food well in advance is the best ways to eat in the backcountry! Pick up a food dehydrator with this awesome cookbook and you’re guaranteed to be eating the best meals on the West Coast Trail.  The author of this cookbook founded Food for the Sole, one of my favourite backpacking meal companies that sadly shut down this year.  Fortunately, their incredible food lives on in this cookbook, you just have to make it yourself! Going this route is time intensive and not for everyone, but for those of you that enjoy this type of thing the reward is worth the effort!

How do you store your food on the West Coast Trail?

The West Coast Trail might not feel luxurious in many ways, but by food storage standards it certainly is. Your parks Canada fees and tax payer dollars provide high quality bear caches at every site, so there is no need to bring a bulky bear can or Ursack. Everything scented needs to go in the caches. That means your sunscreen, toothpaste, bug spray and anything that smells. Never eat in your tent, bring or use smelly items in your tent.  A dry bag (120 g) is great for storing your food and scented items in your pack, carrying your food to the cache and keeping everything together inside. The bear caches can get pretty full and a lot of people get the same bags, so write your name on your dry bag with a sharpie or add some distinguishing feature so you know which one is yours! 

Final thoughts on packing for the West Coast Trail

I packed way too much, was disorganized and carried excess weight in many of the wrong areas when I hiked the West Coast Trail.  Ultimately backpacking is an epic struggle between comfort at camp and comfort on the trail. If you’re planning on having full days on the trail and covering the West Coast Trail in a shorter amount of time you’ll be happier sacrificing creature comforts for a lighter pack. Likewise, if you’re planning on spacing the trip out over a longer duration with shorter hiking days, items that make camp more enjoyable are likely a higher priority.  Hopefully, this post has provided with some insight on what to pack and what not to, not matter which route you’re going!

Question about packing for the West Coast Trail? Drop me a line in the comments below and I’ll do my best to help you out. Happy adventuring! 

More adventures you might enjoy

View along the Rockwall Trail towards Floe Lake.

Rockwall Trail | The Ultimate Guide to Hiking the Rockwall

The Rockwall Trail is one of the Canadian Rockies’ premier backpacking trips. For 55km you’ll be treated to a seemingly unending supply of sublime Rocky Mountain scenery. Here’s how to make it happen with must-read tips for getting a permit and beating the crowds.

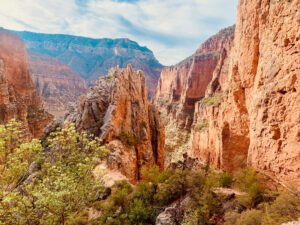
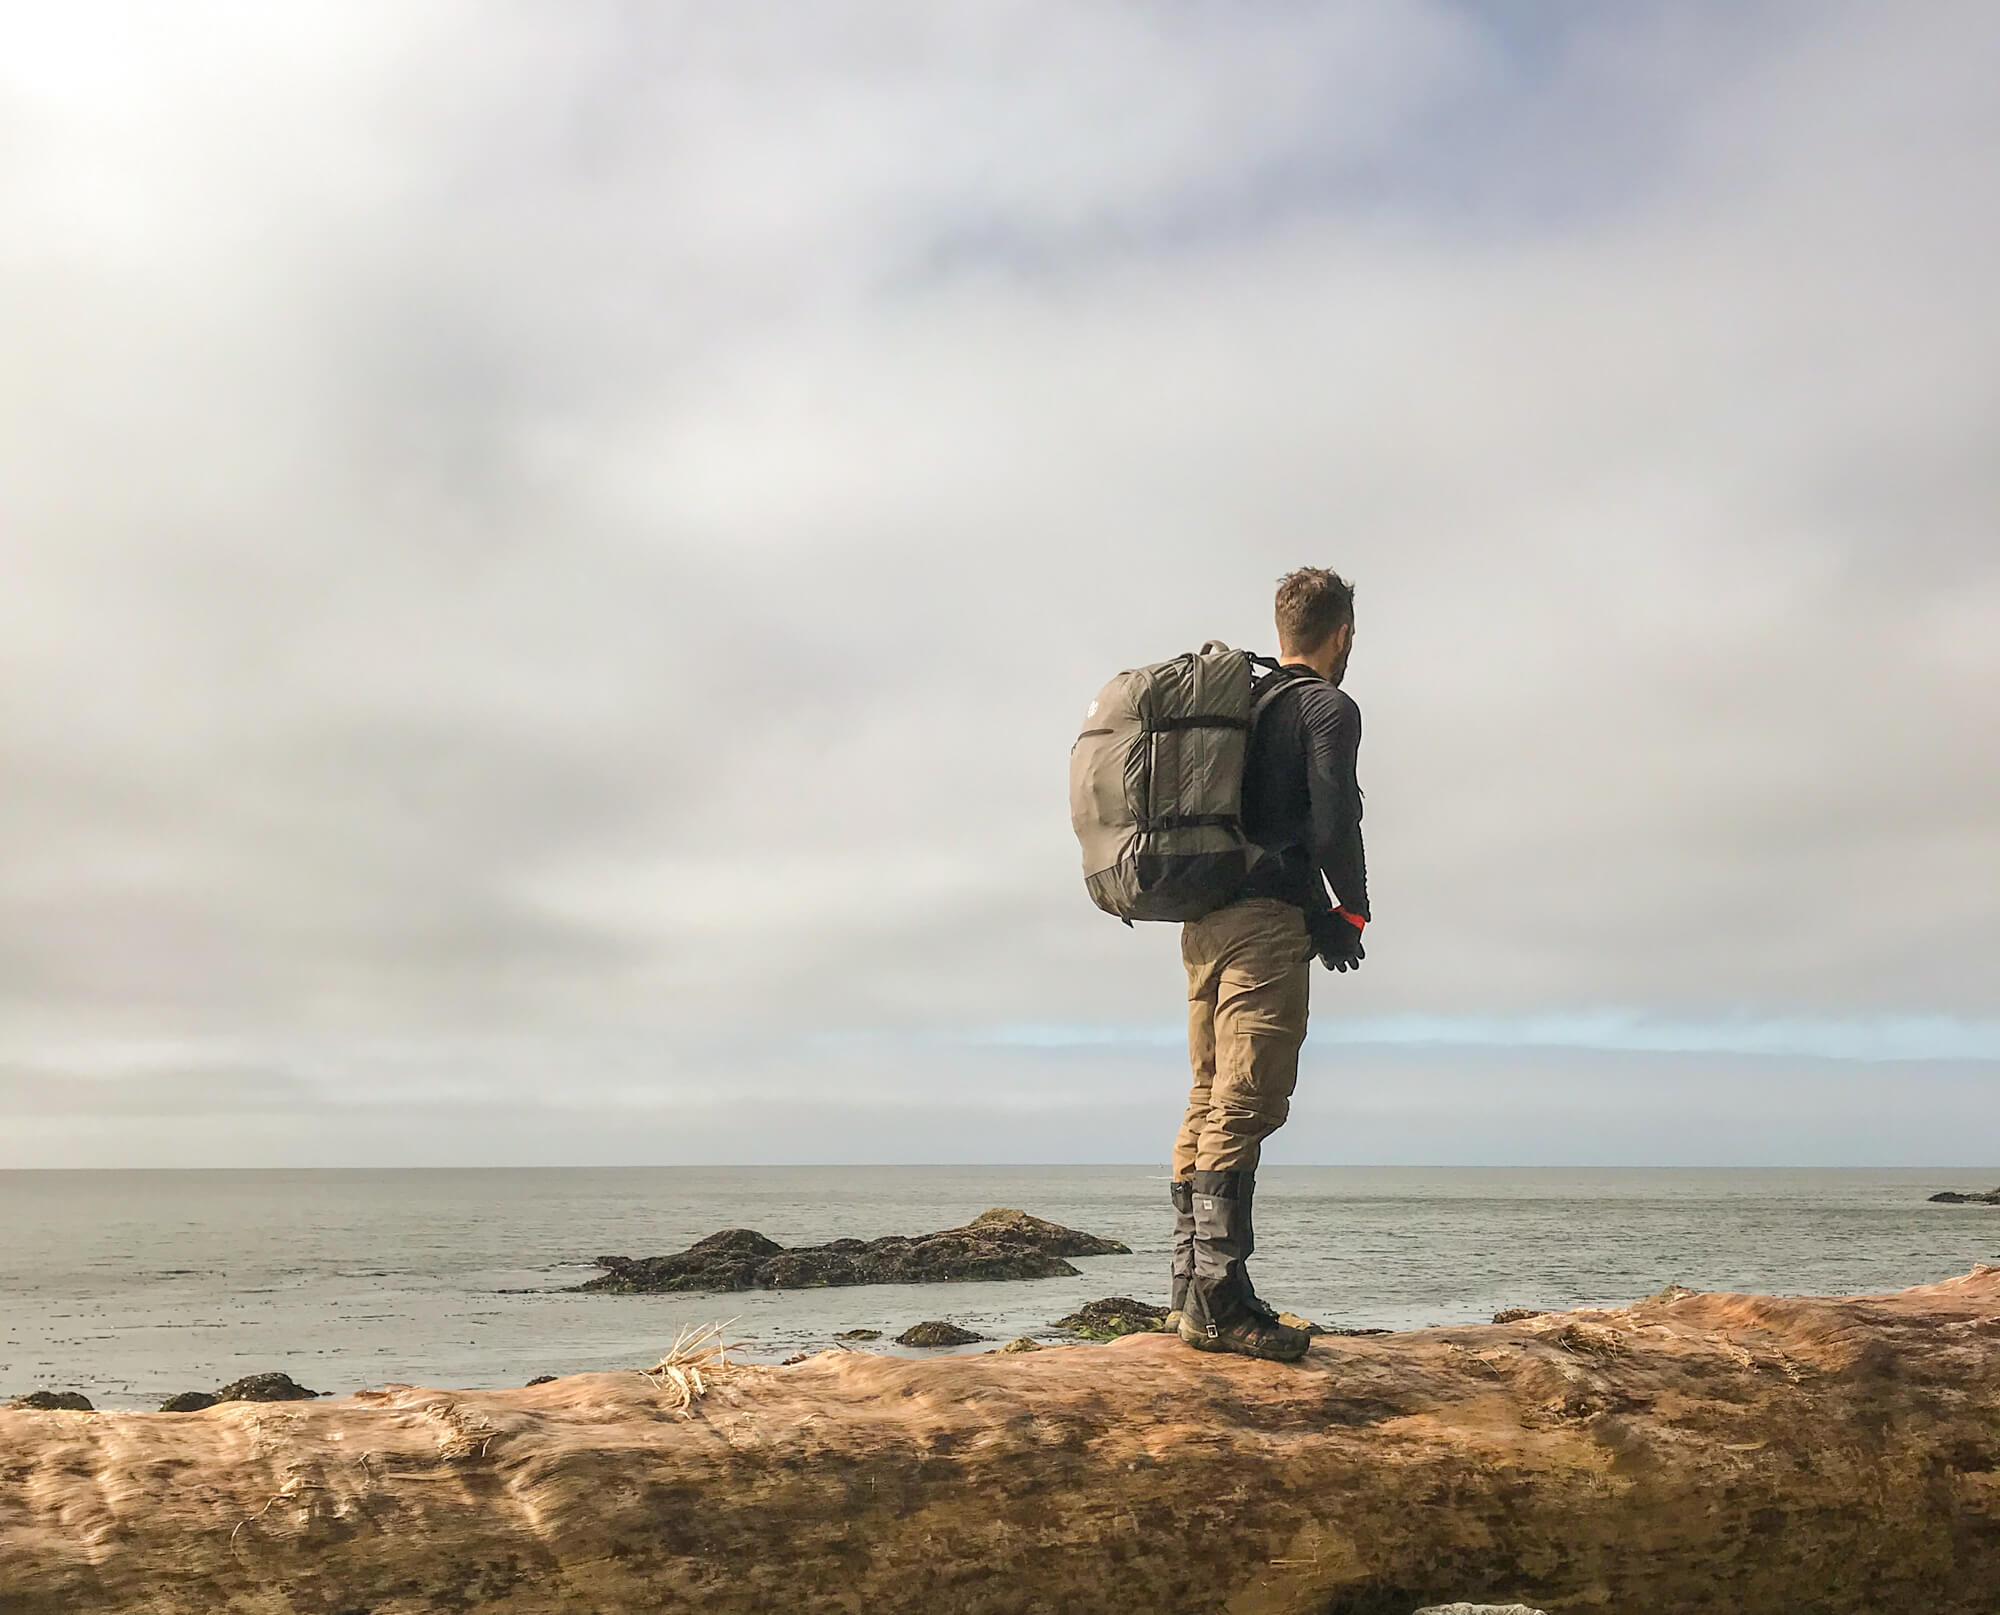
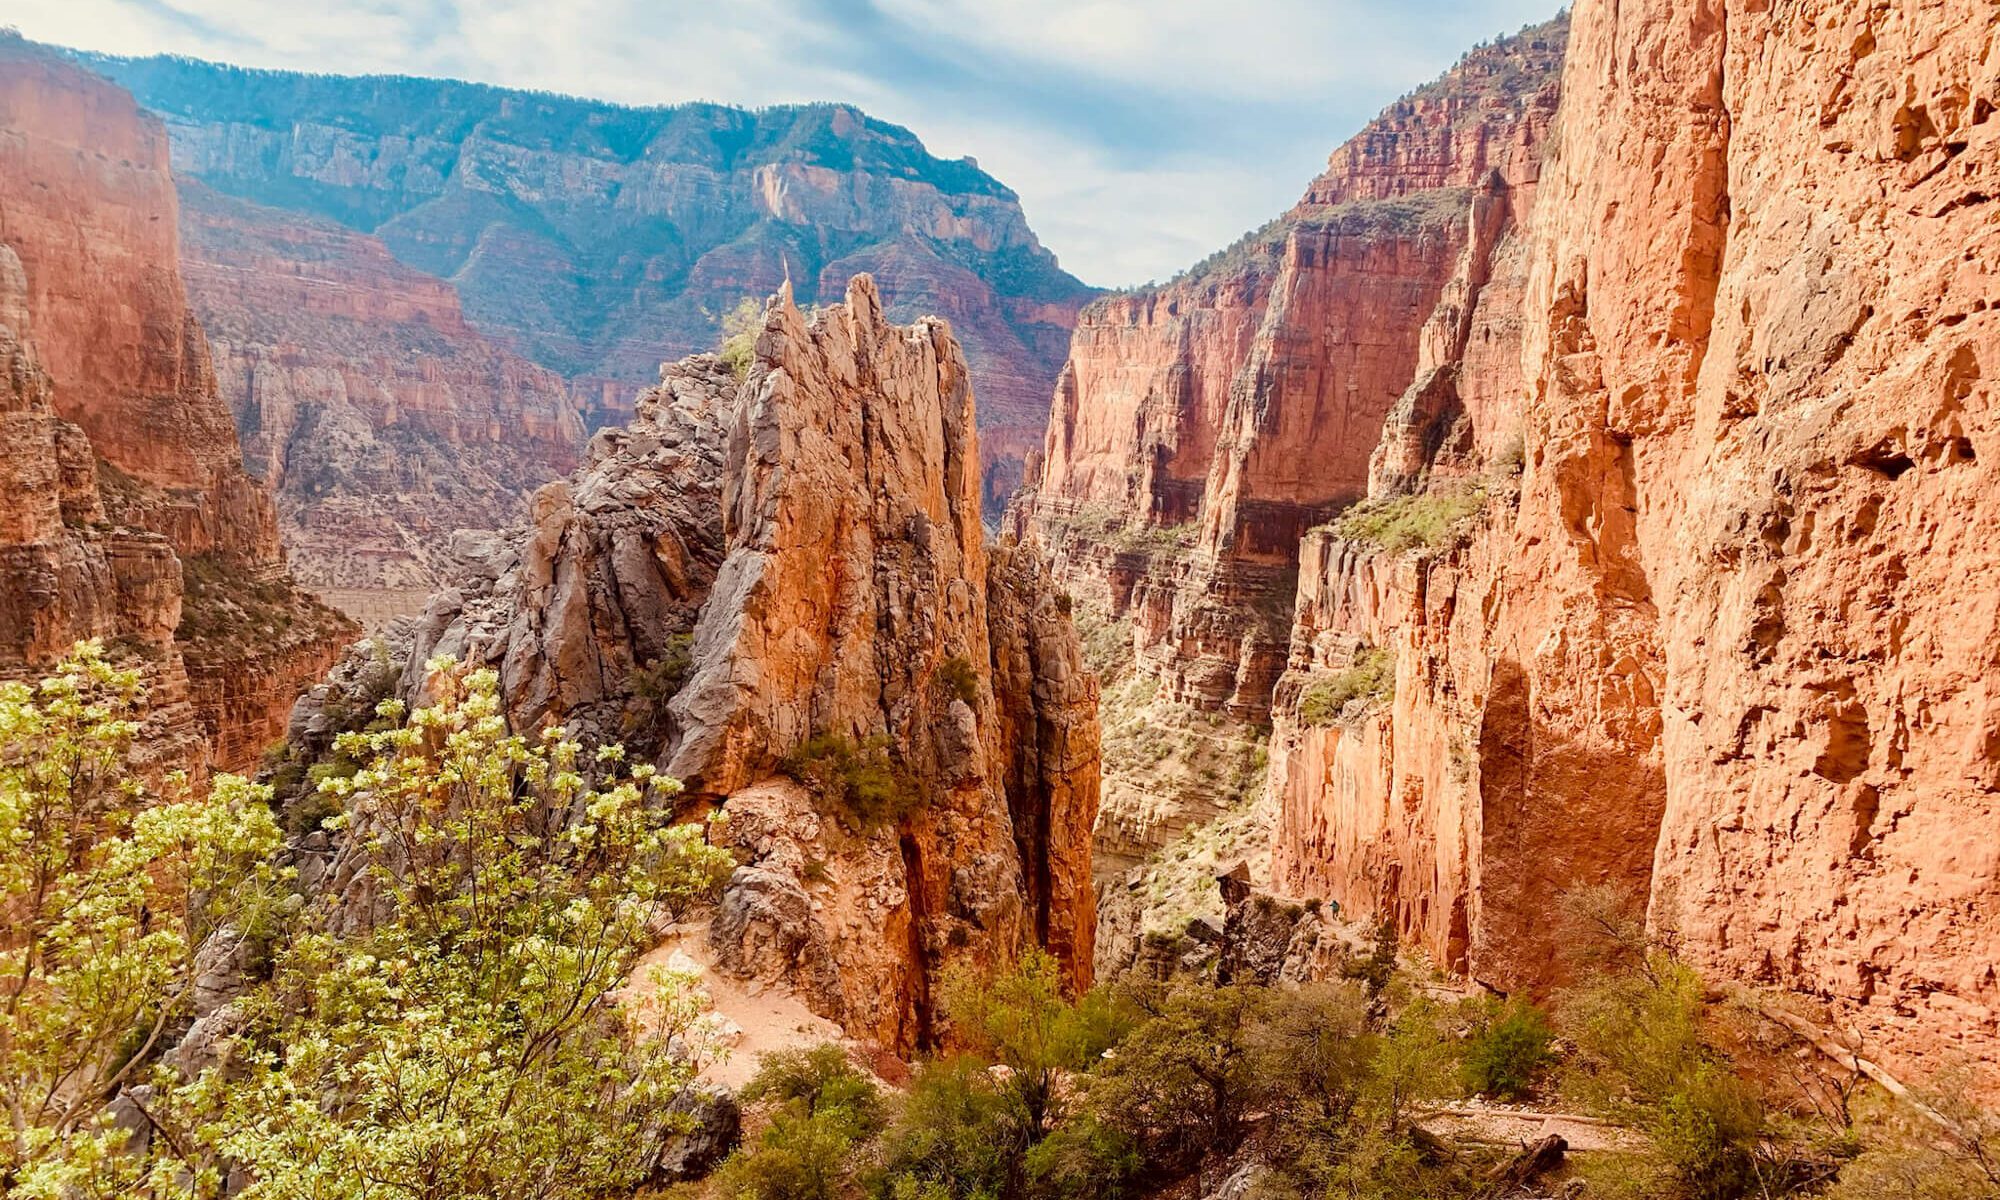
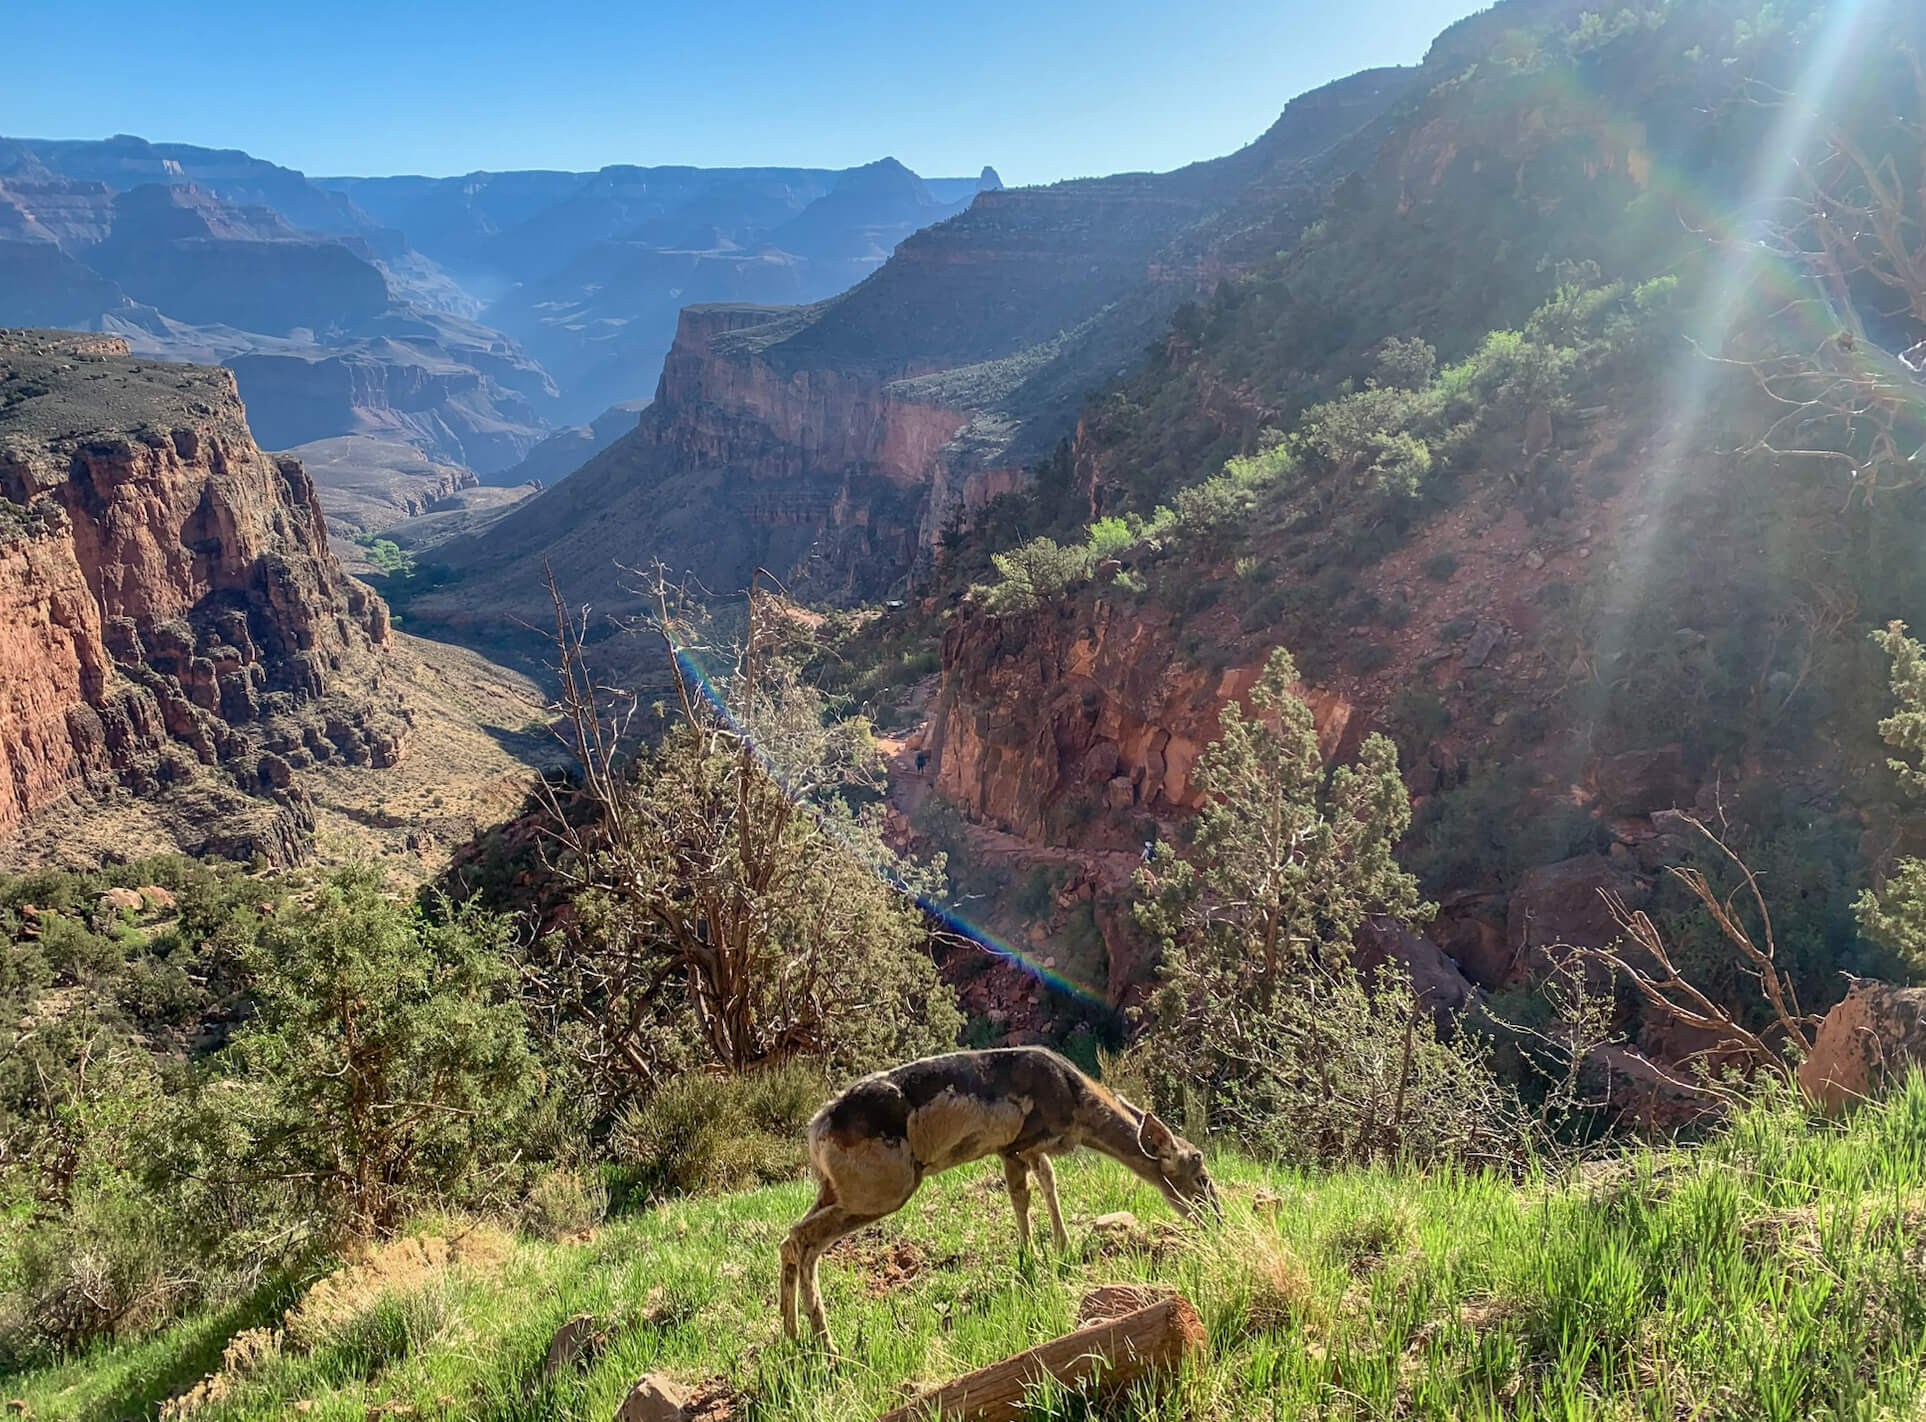
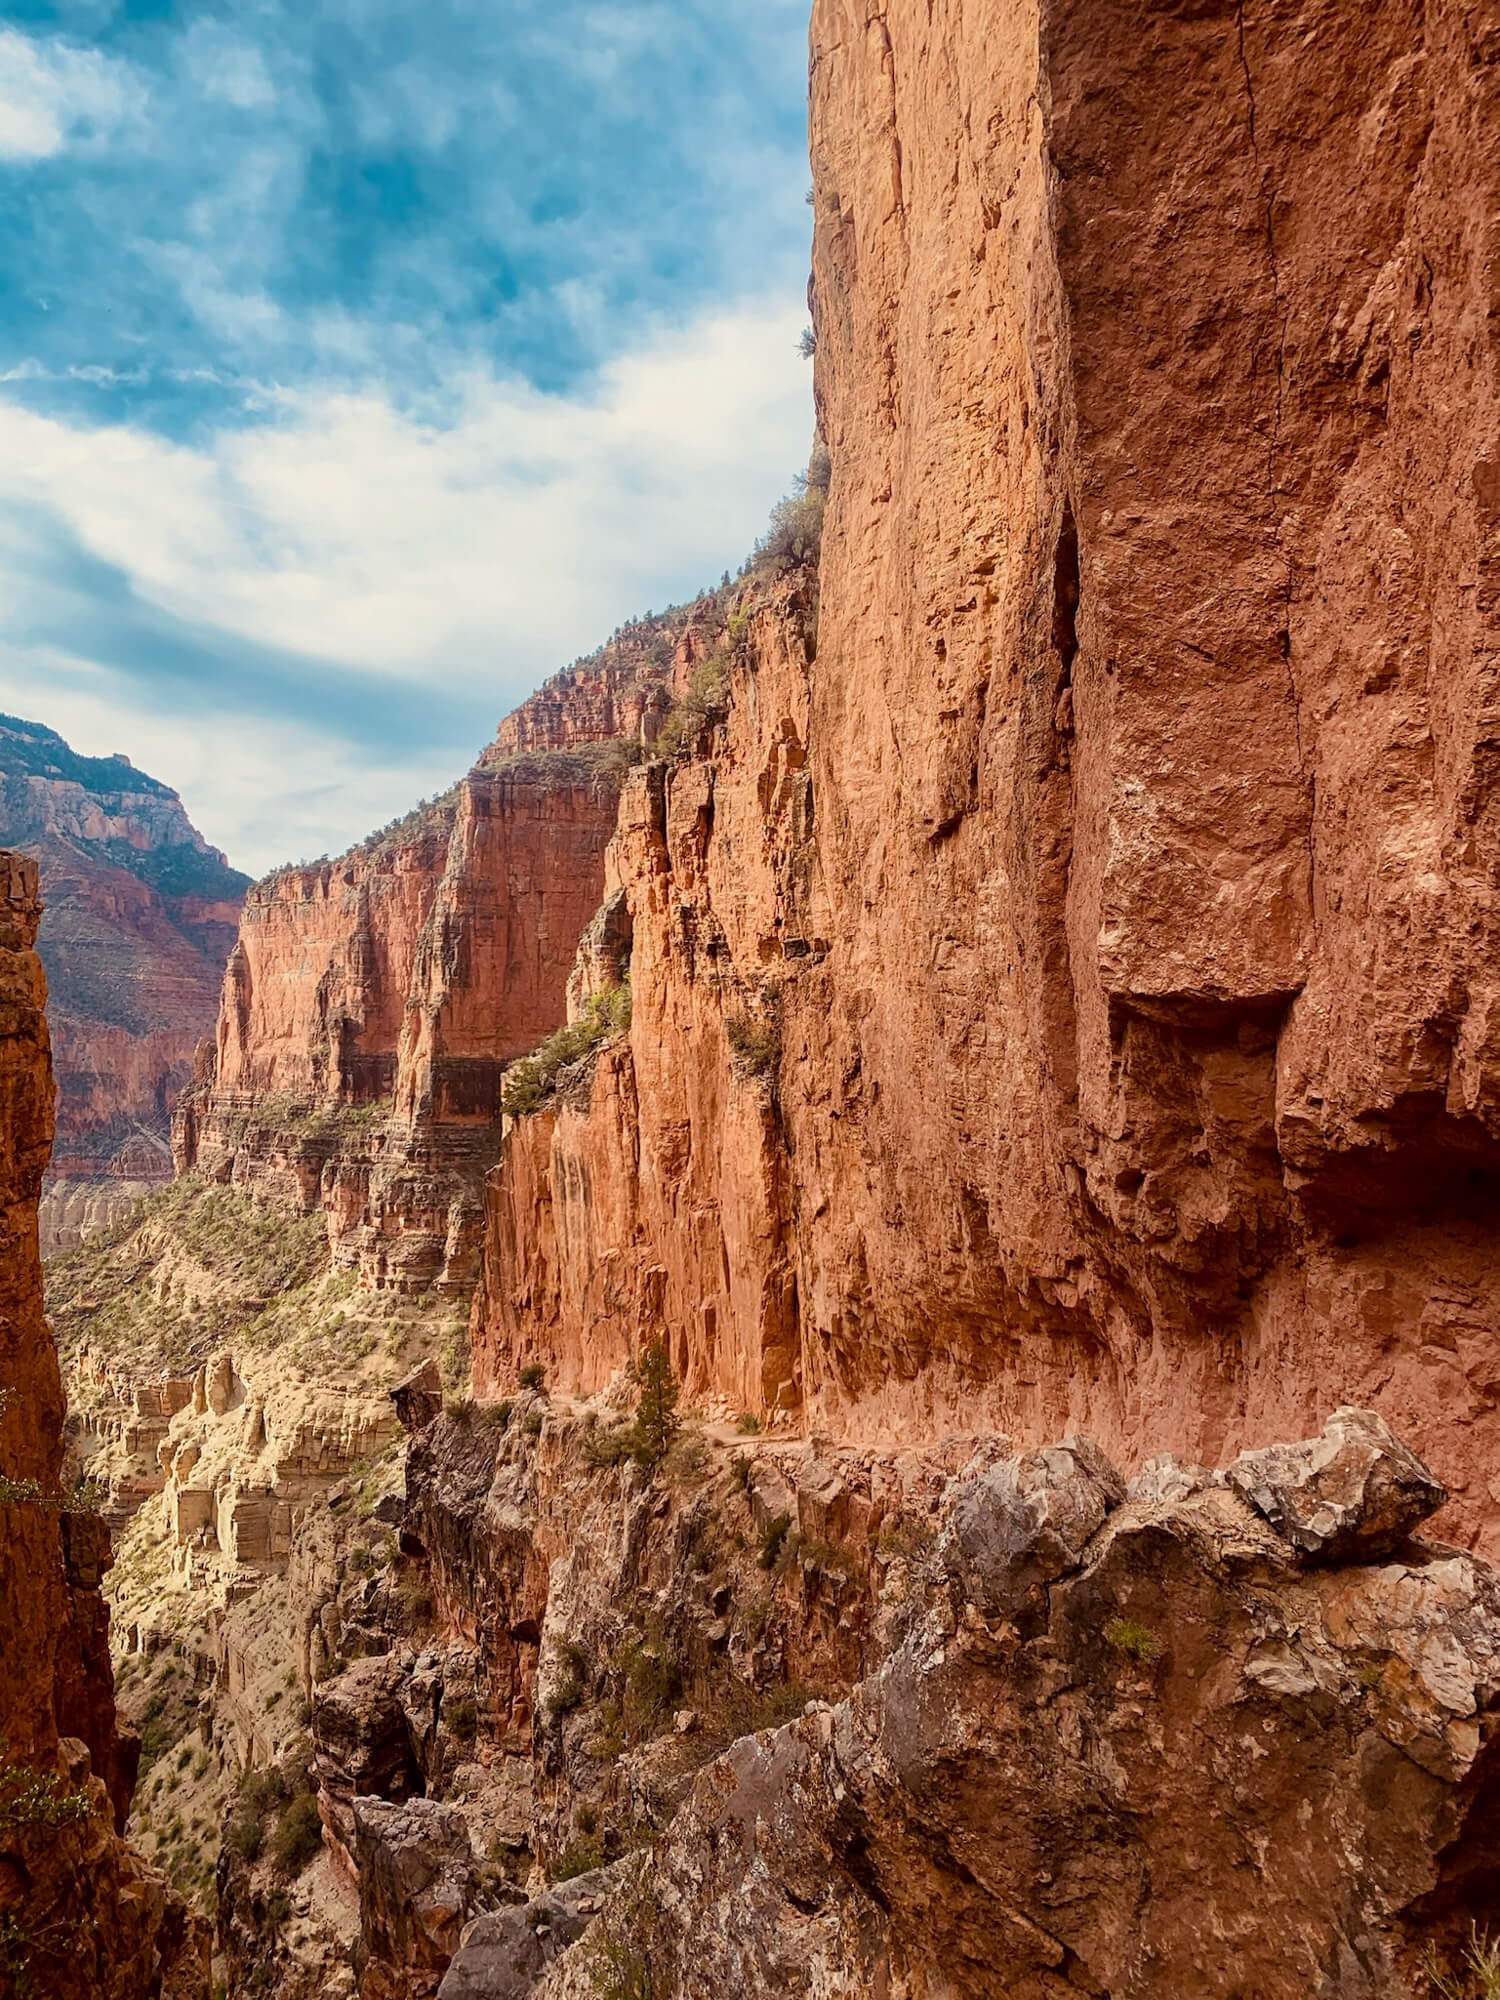
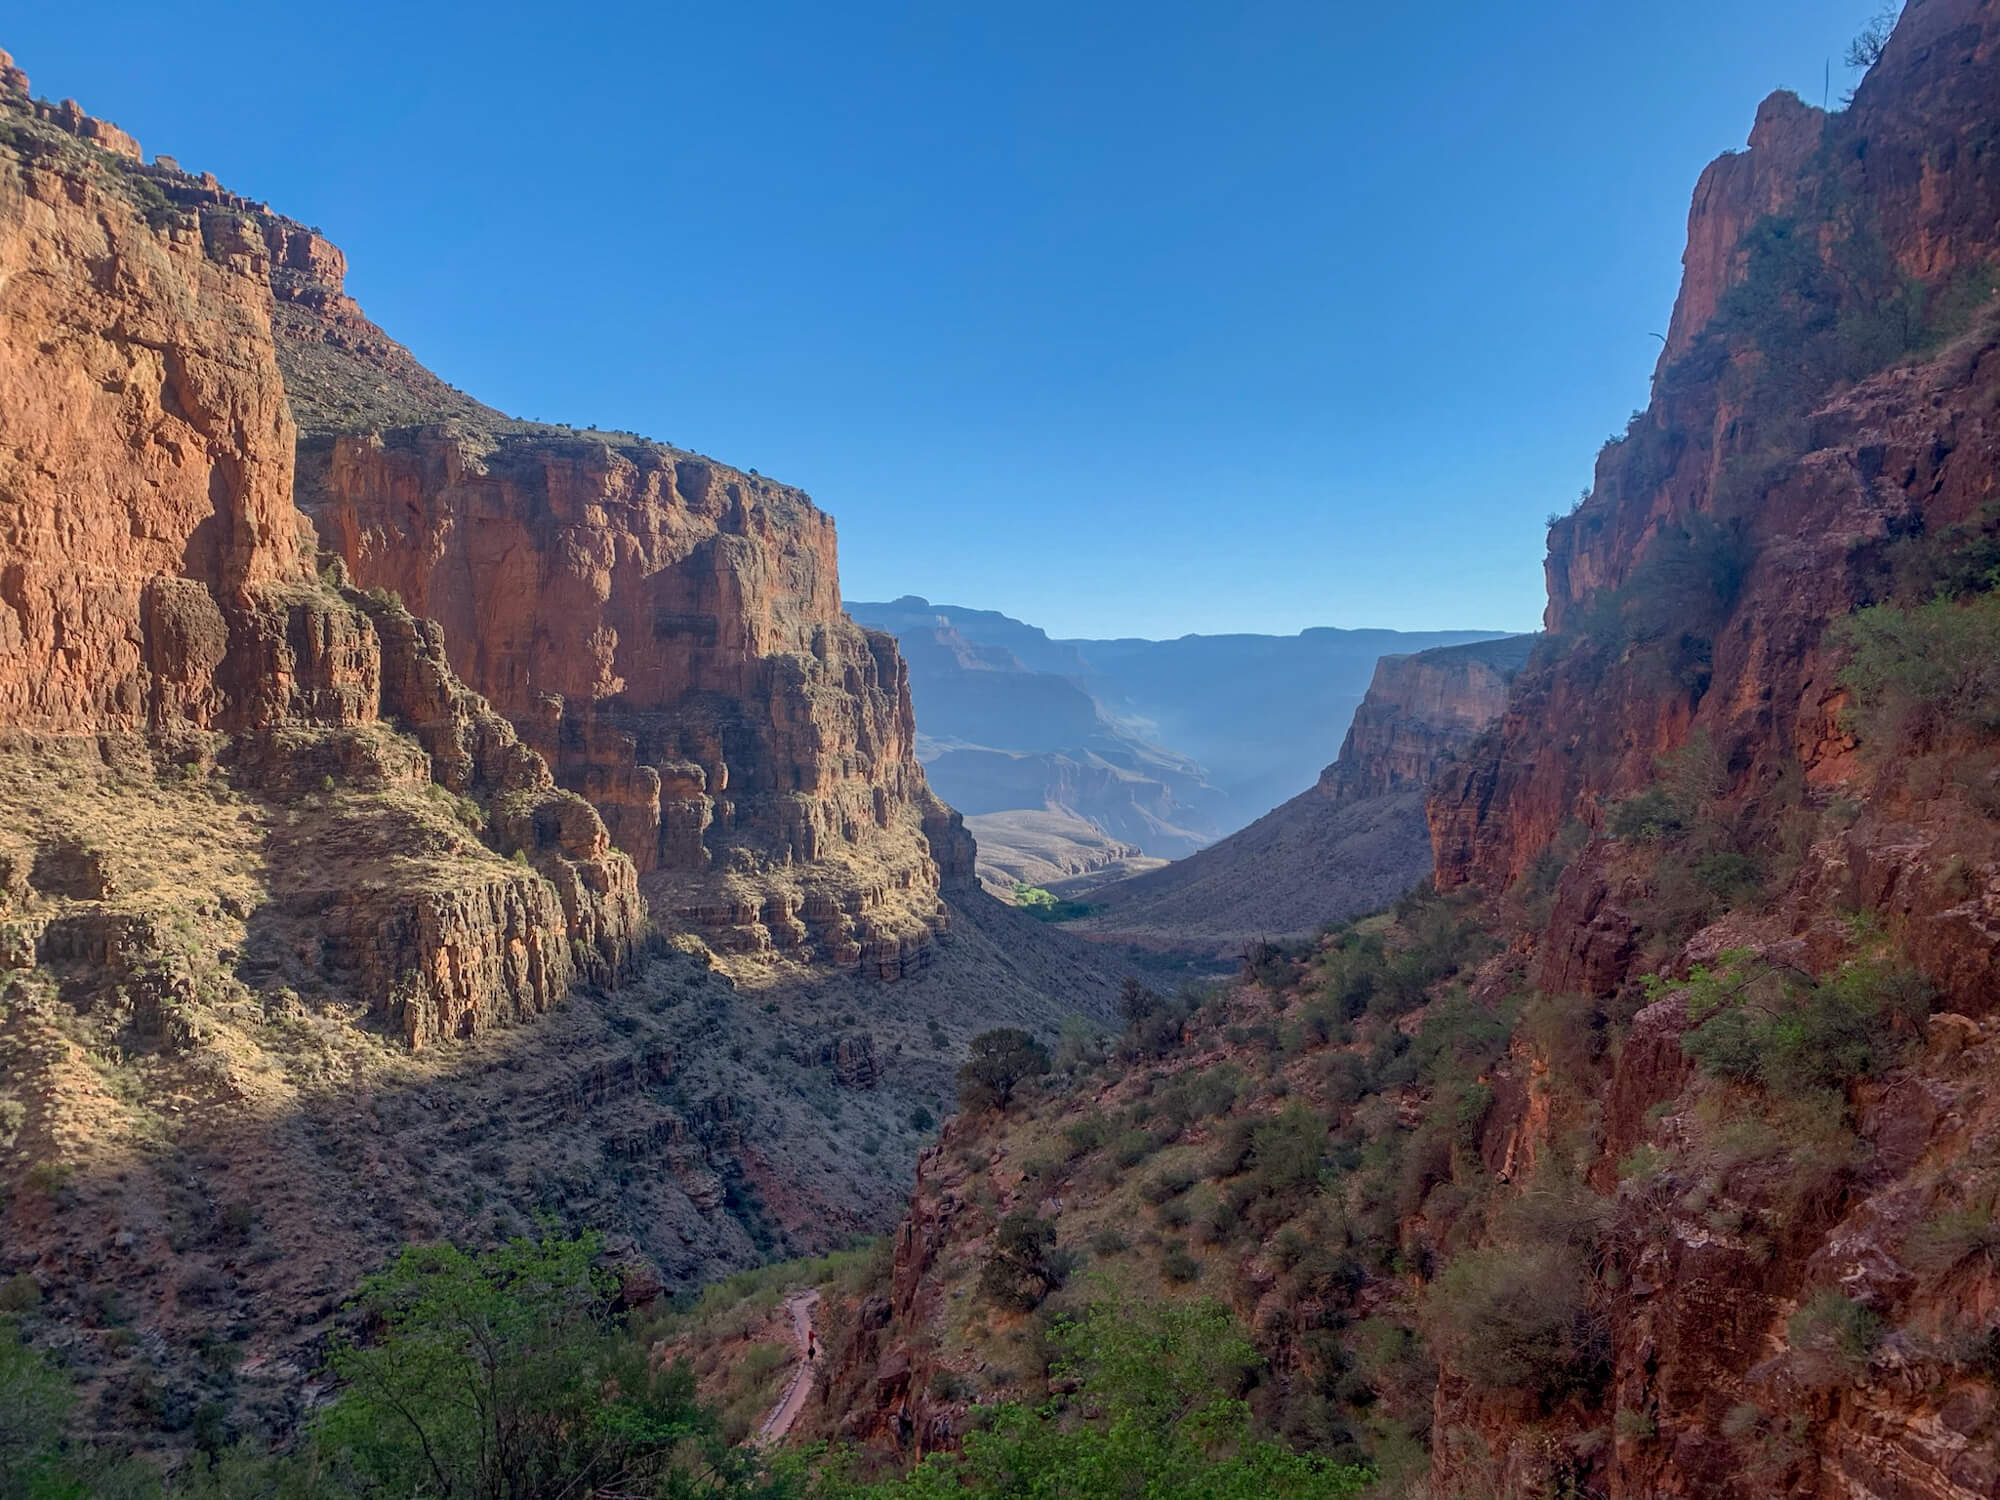
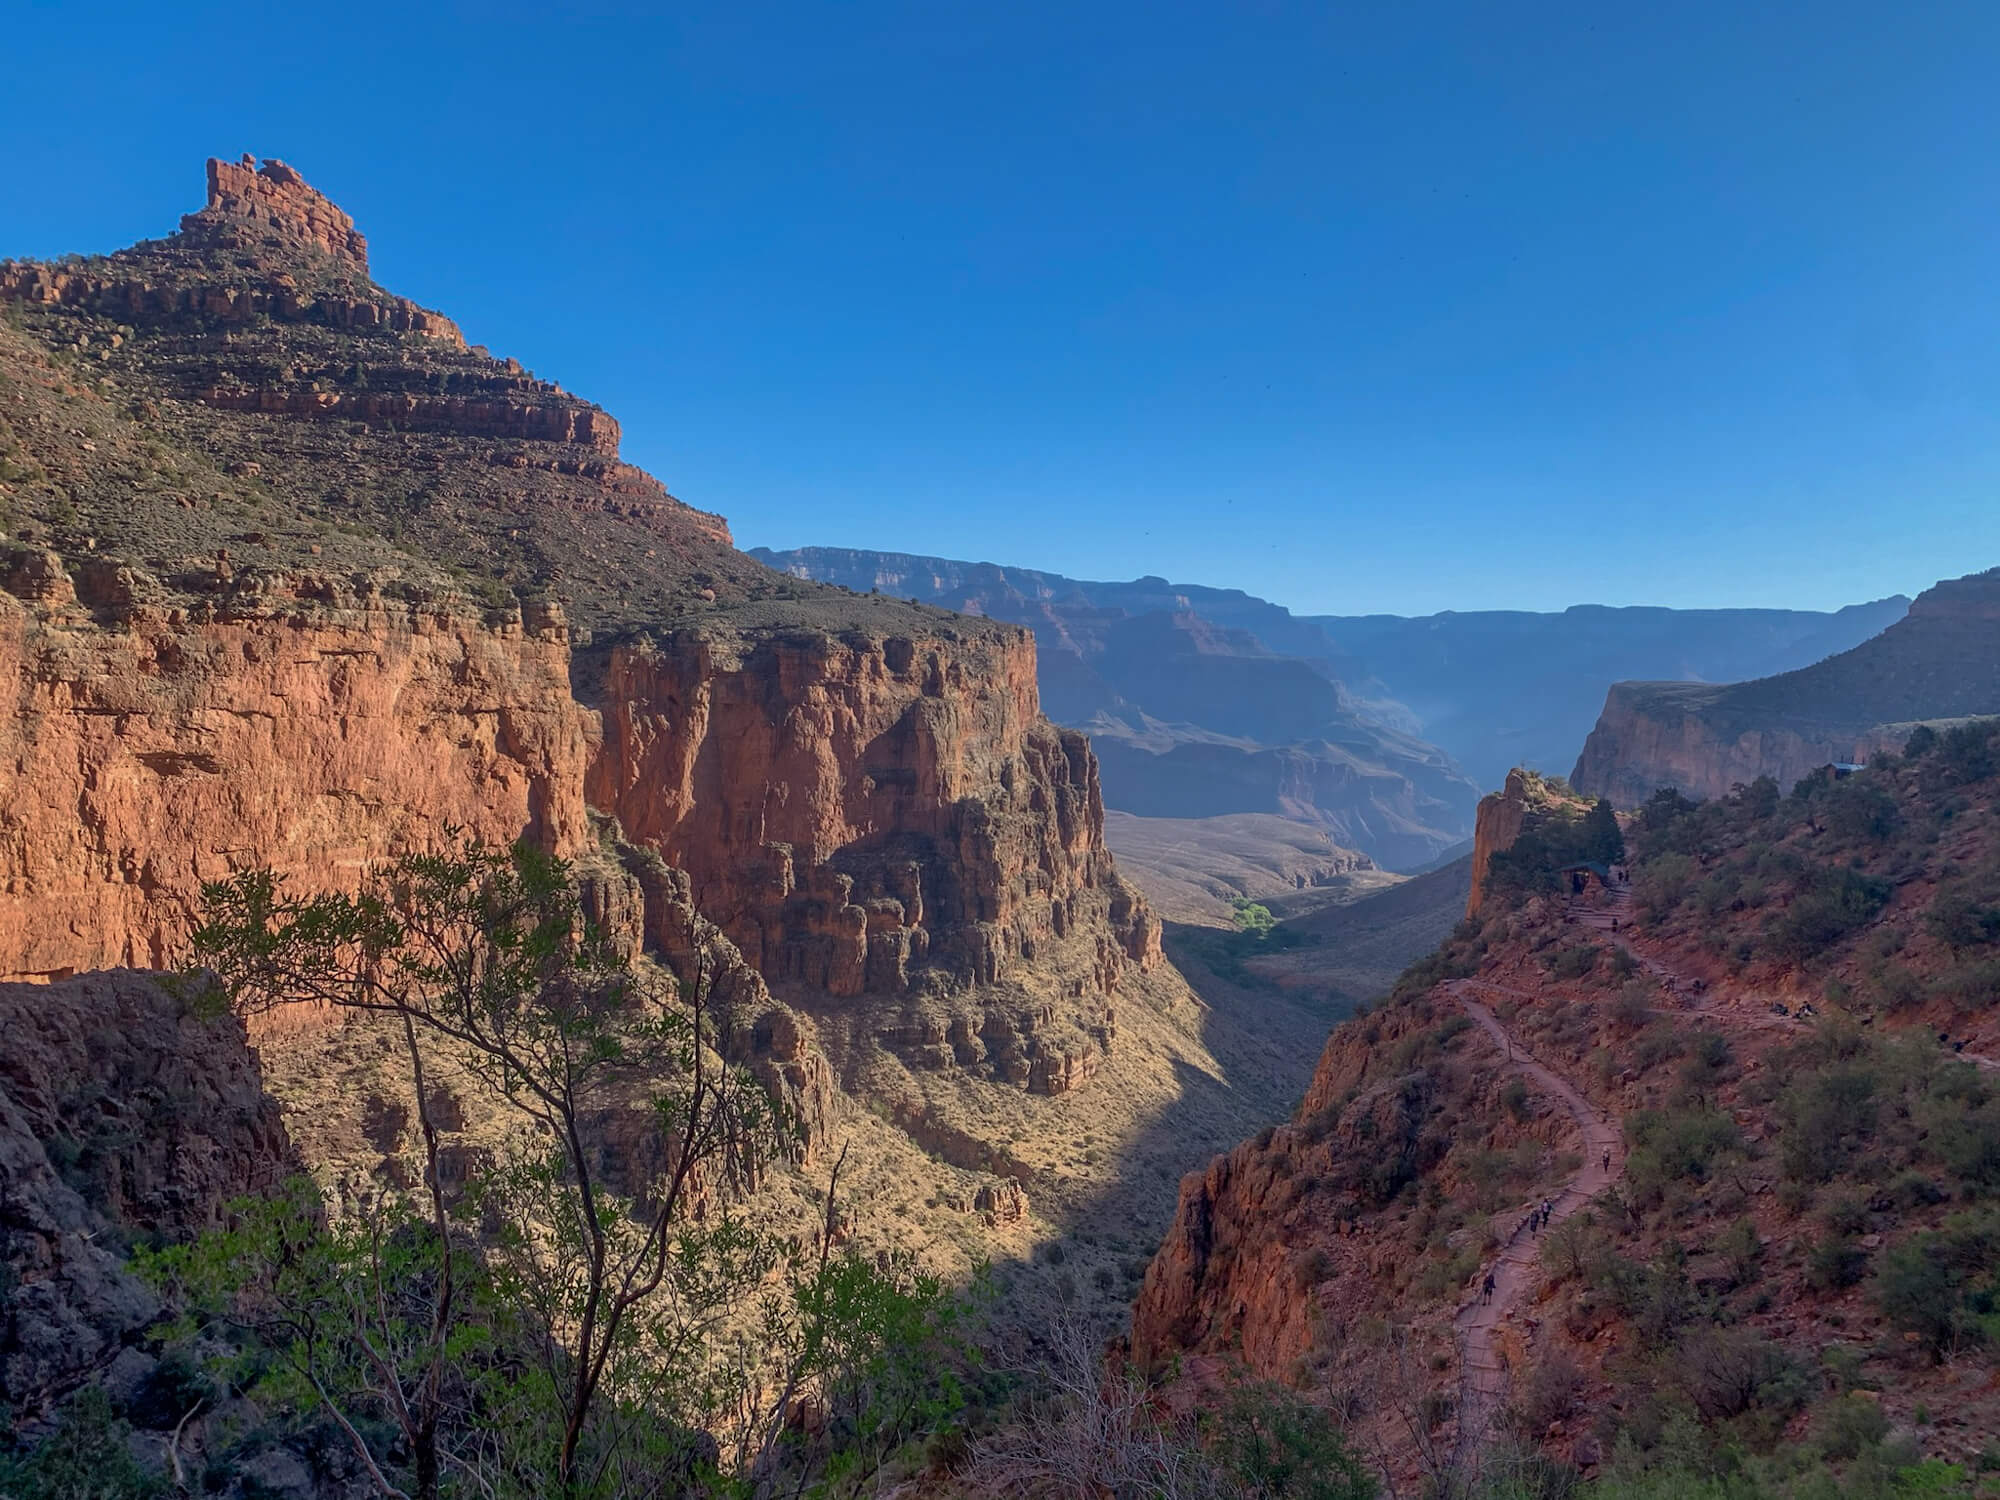
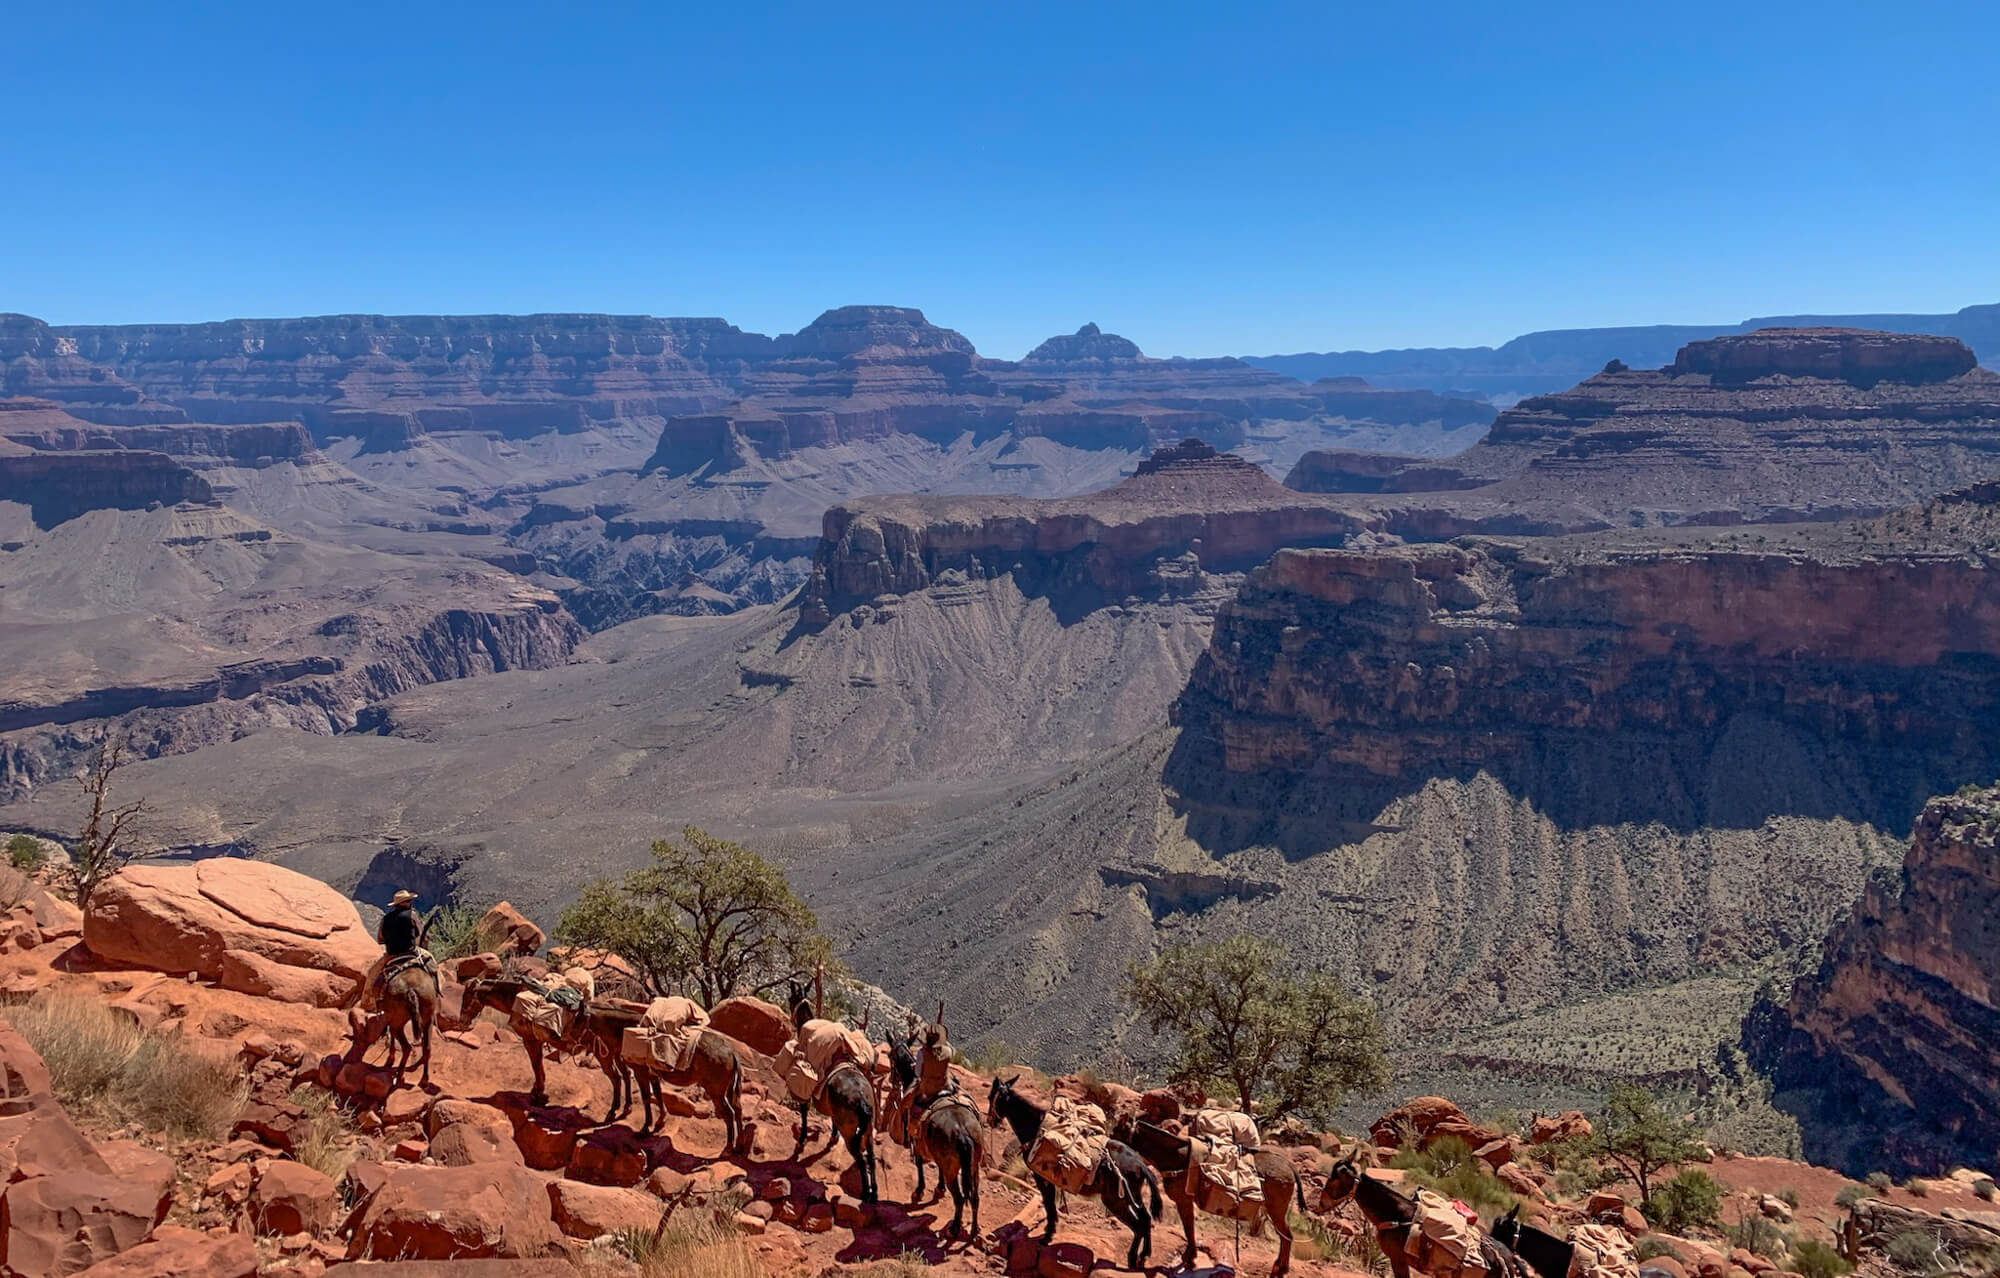
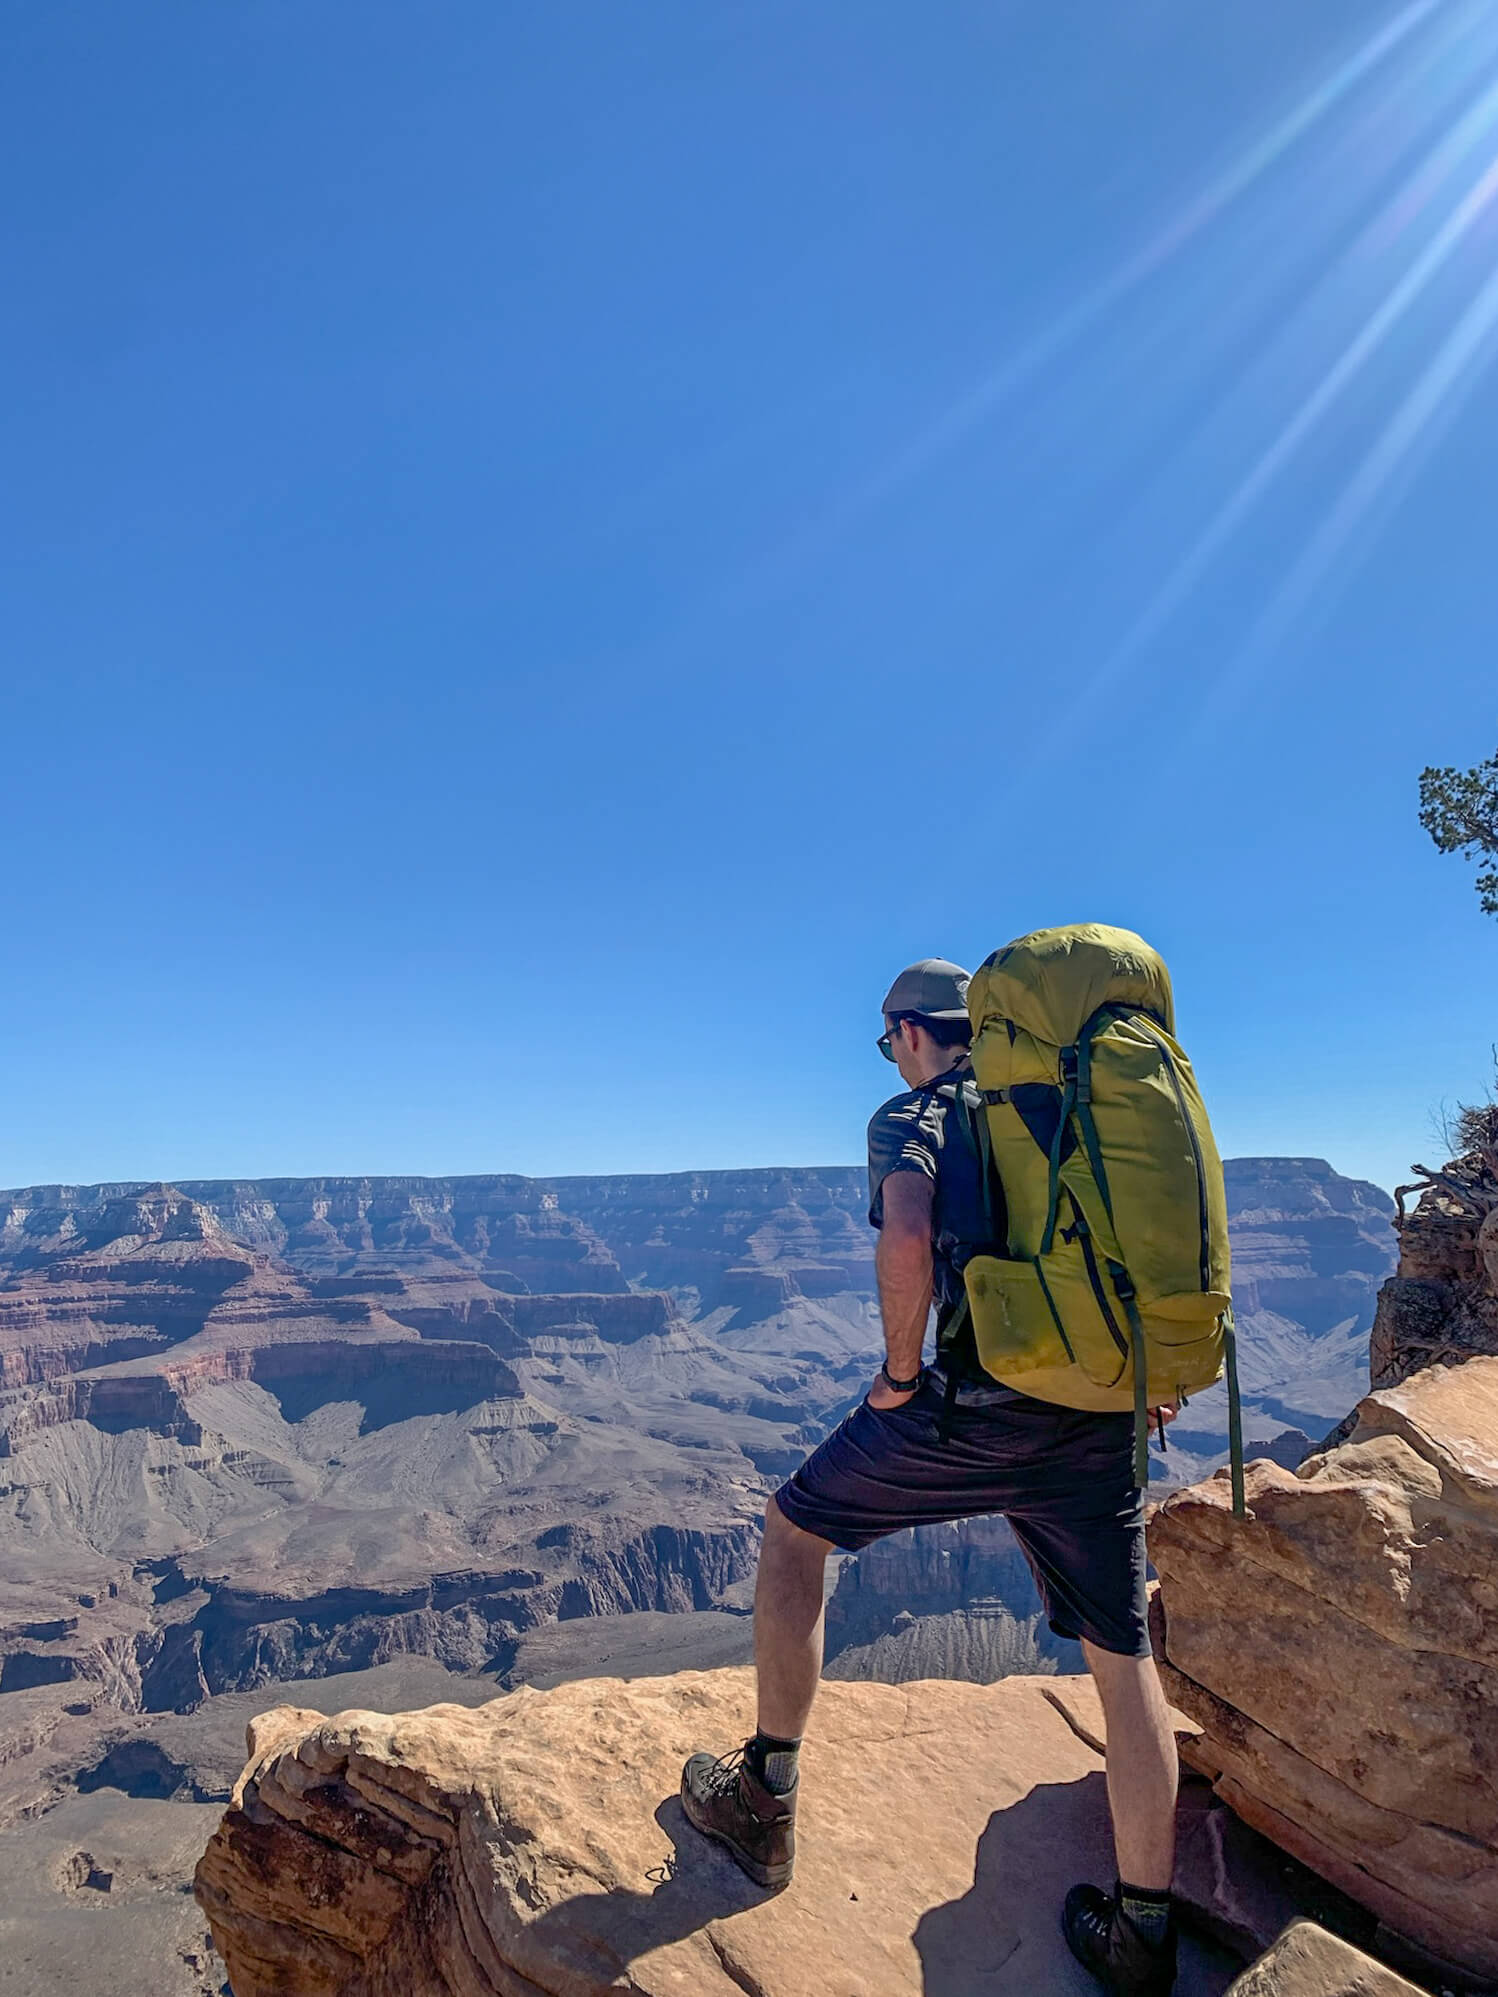
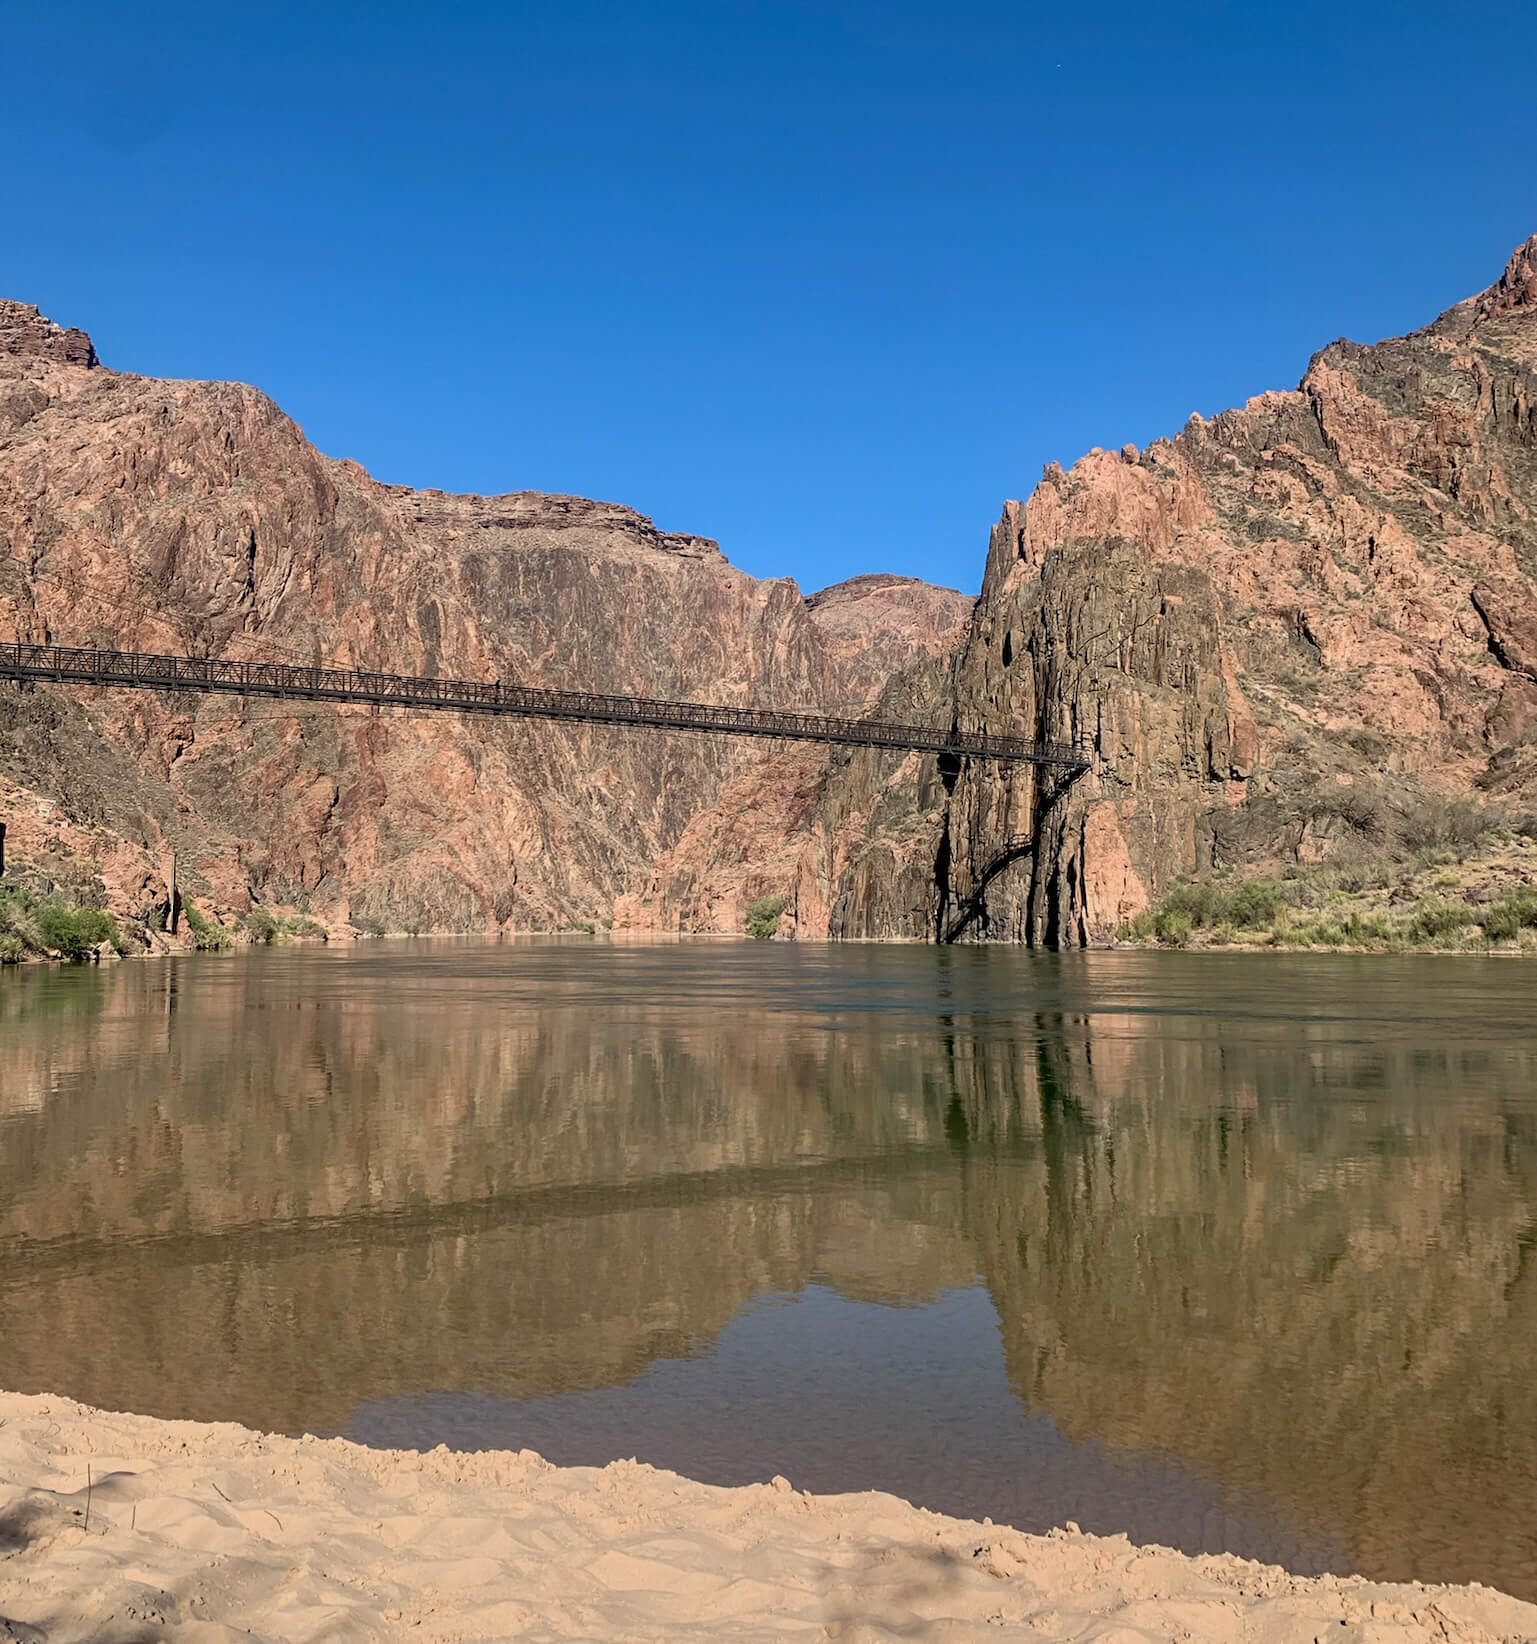
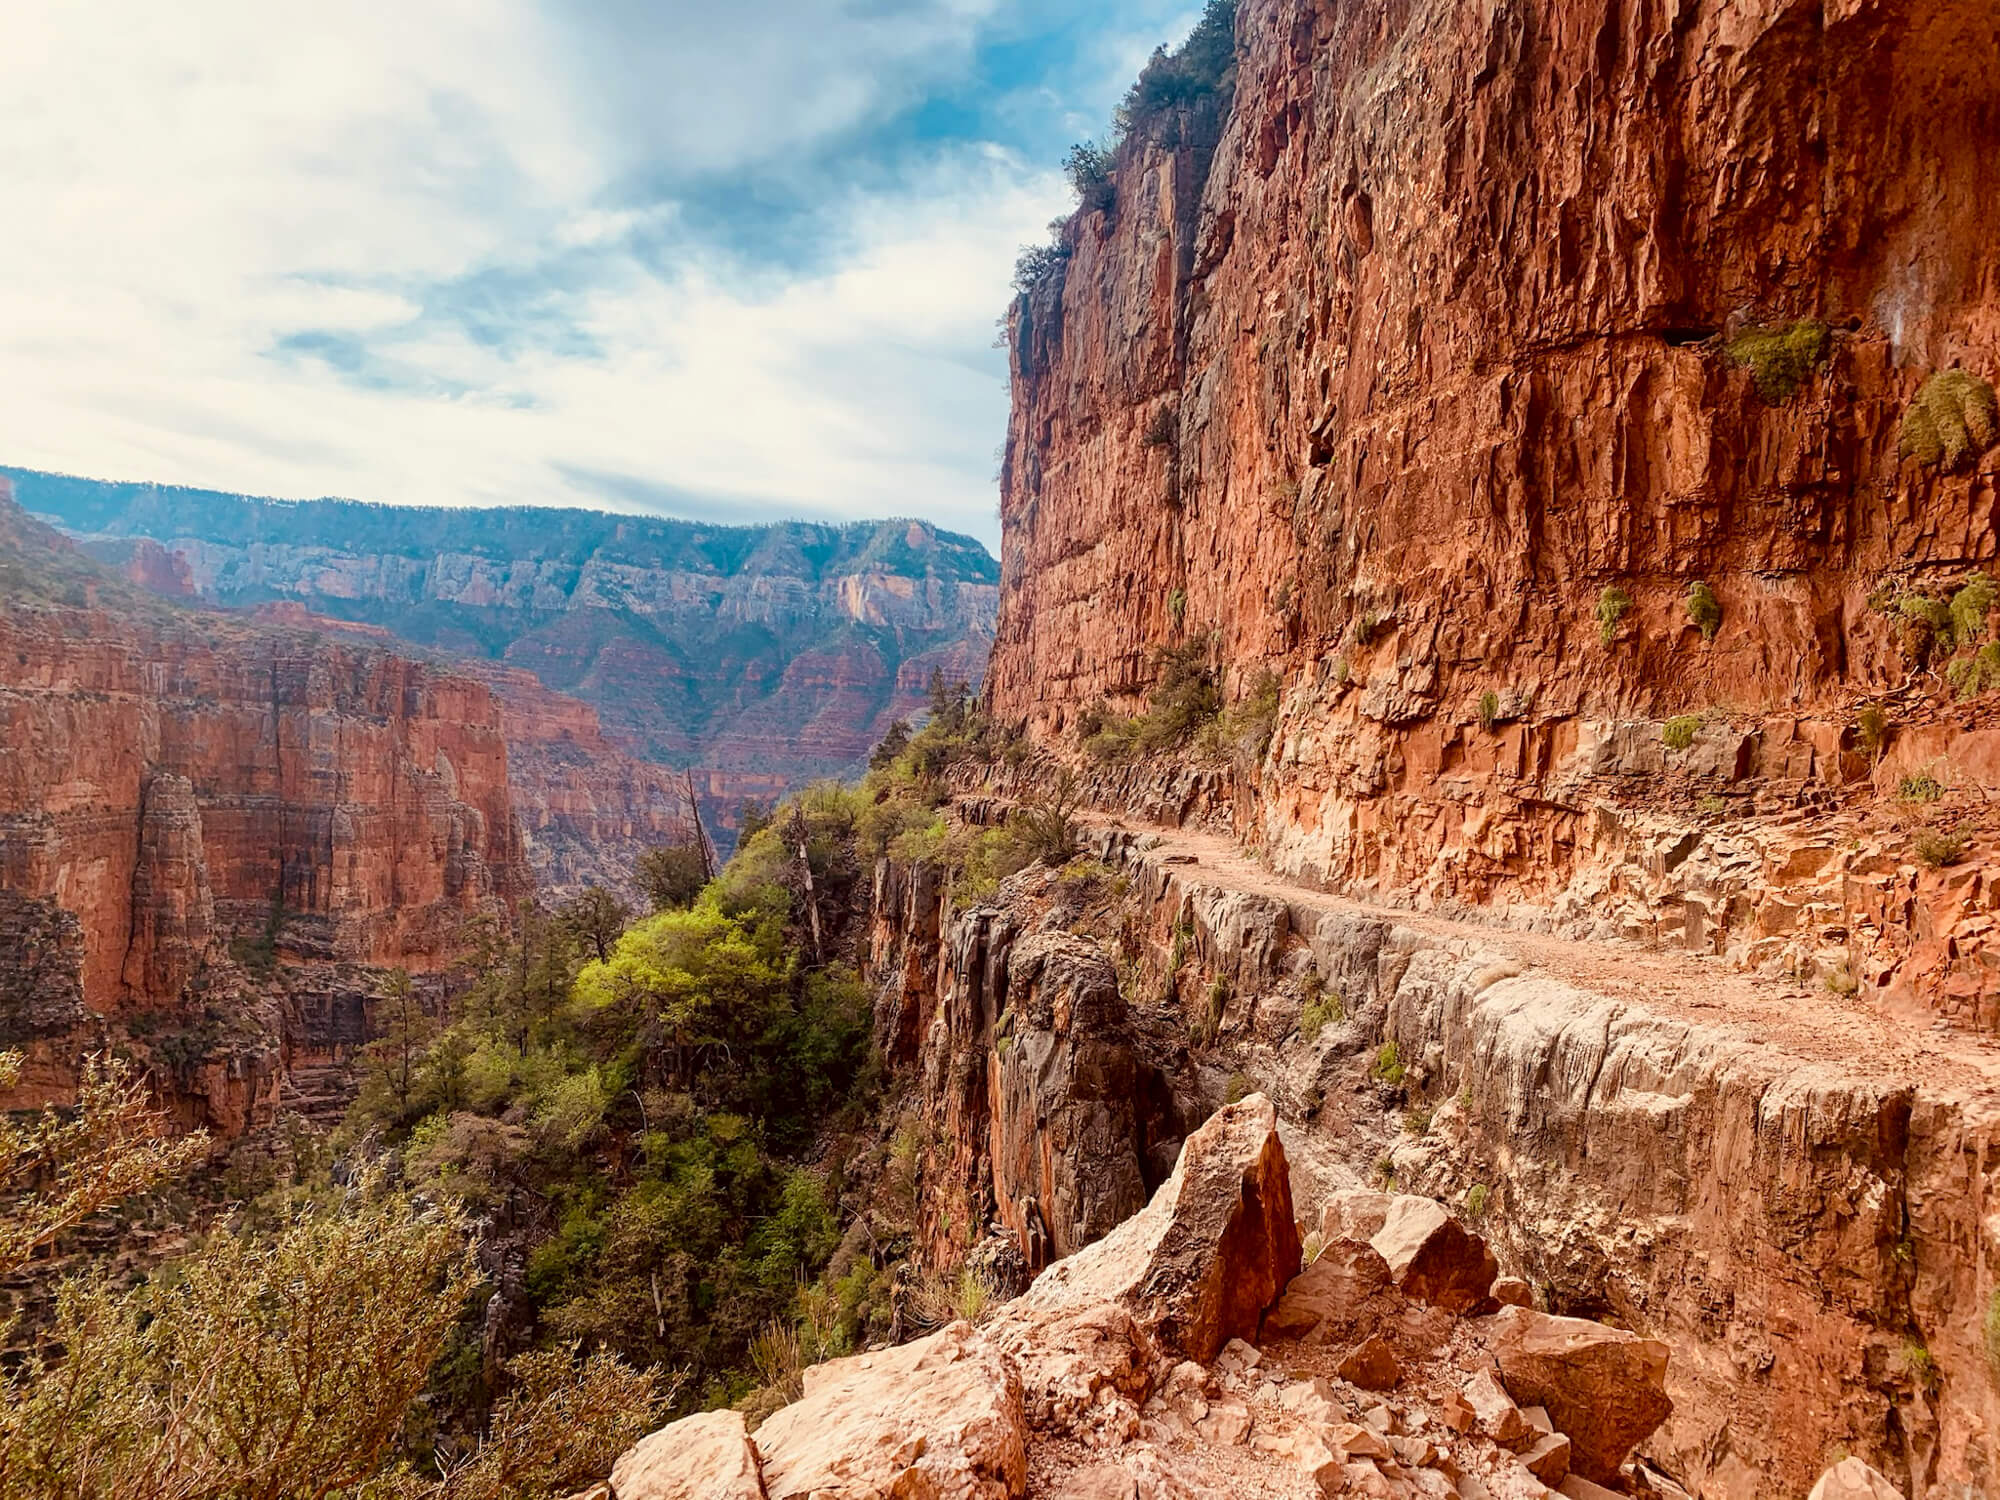
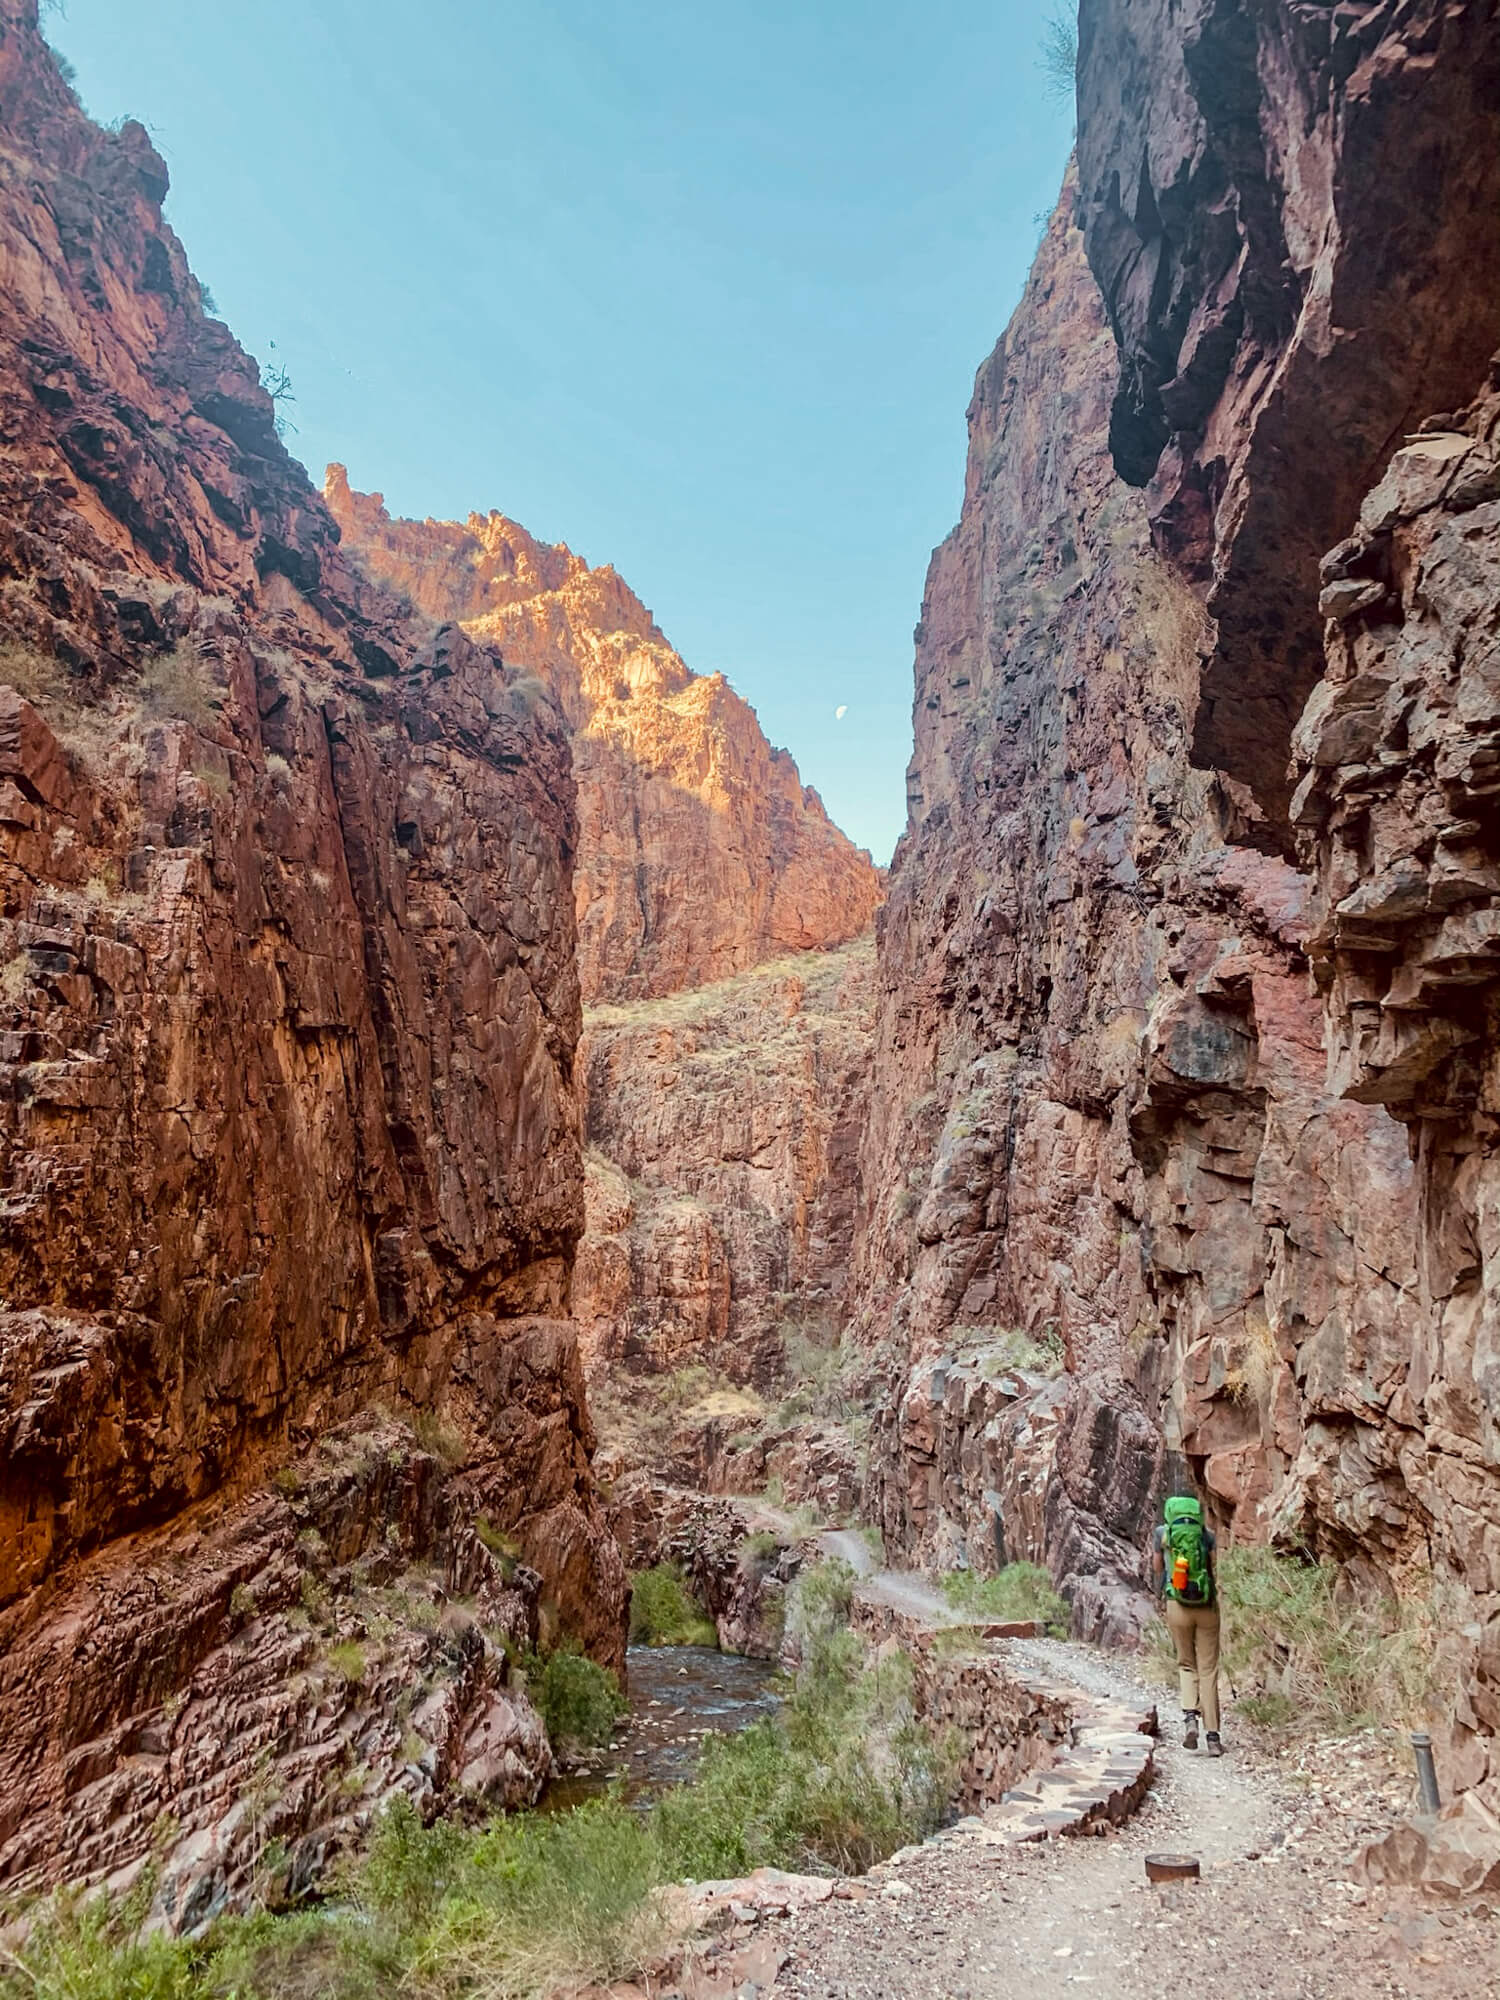
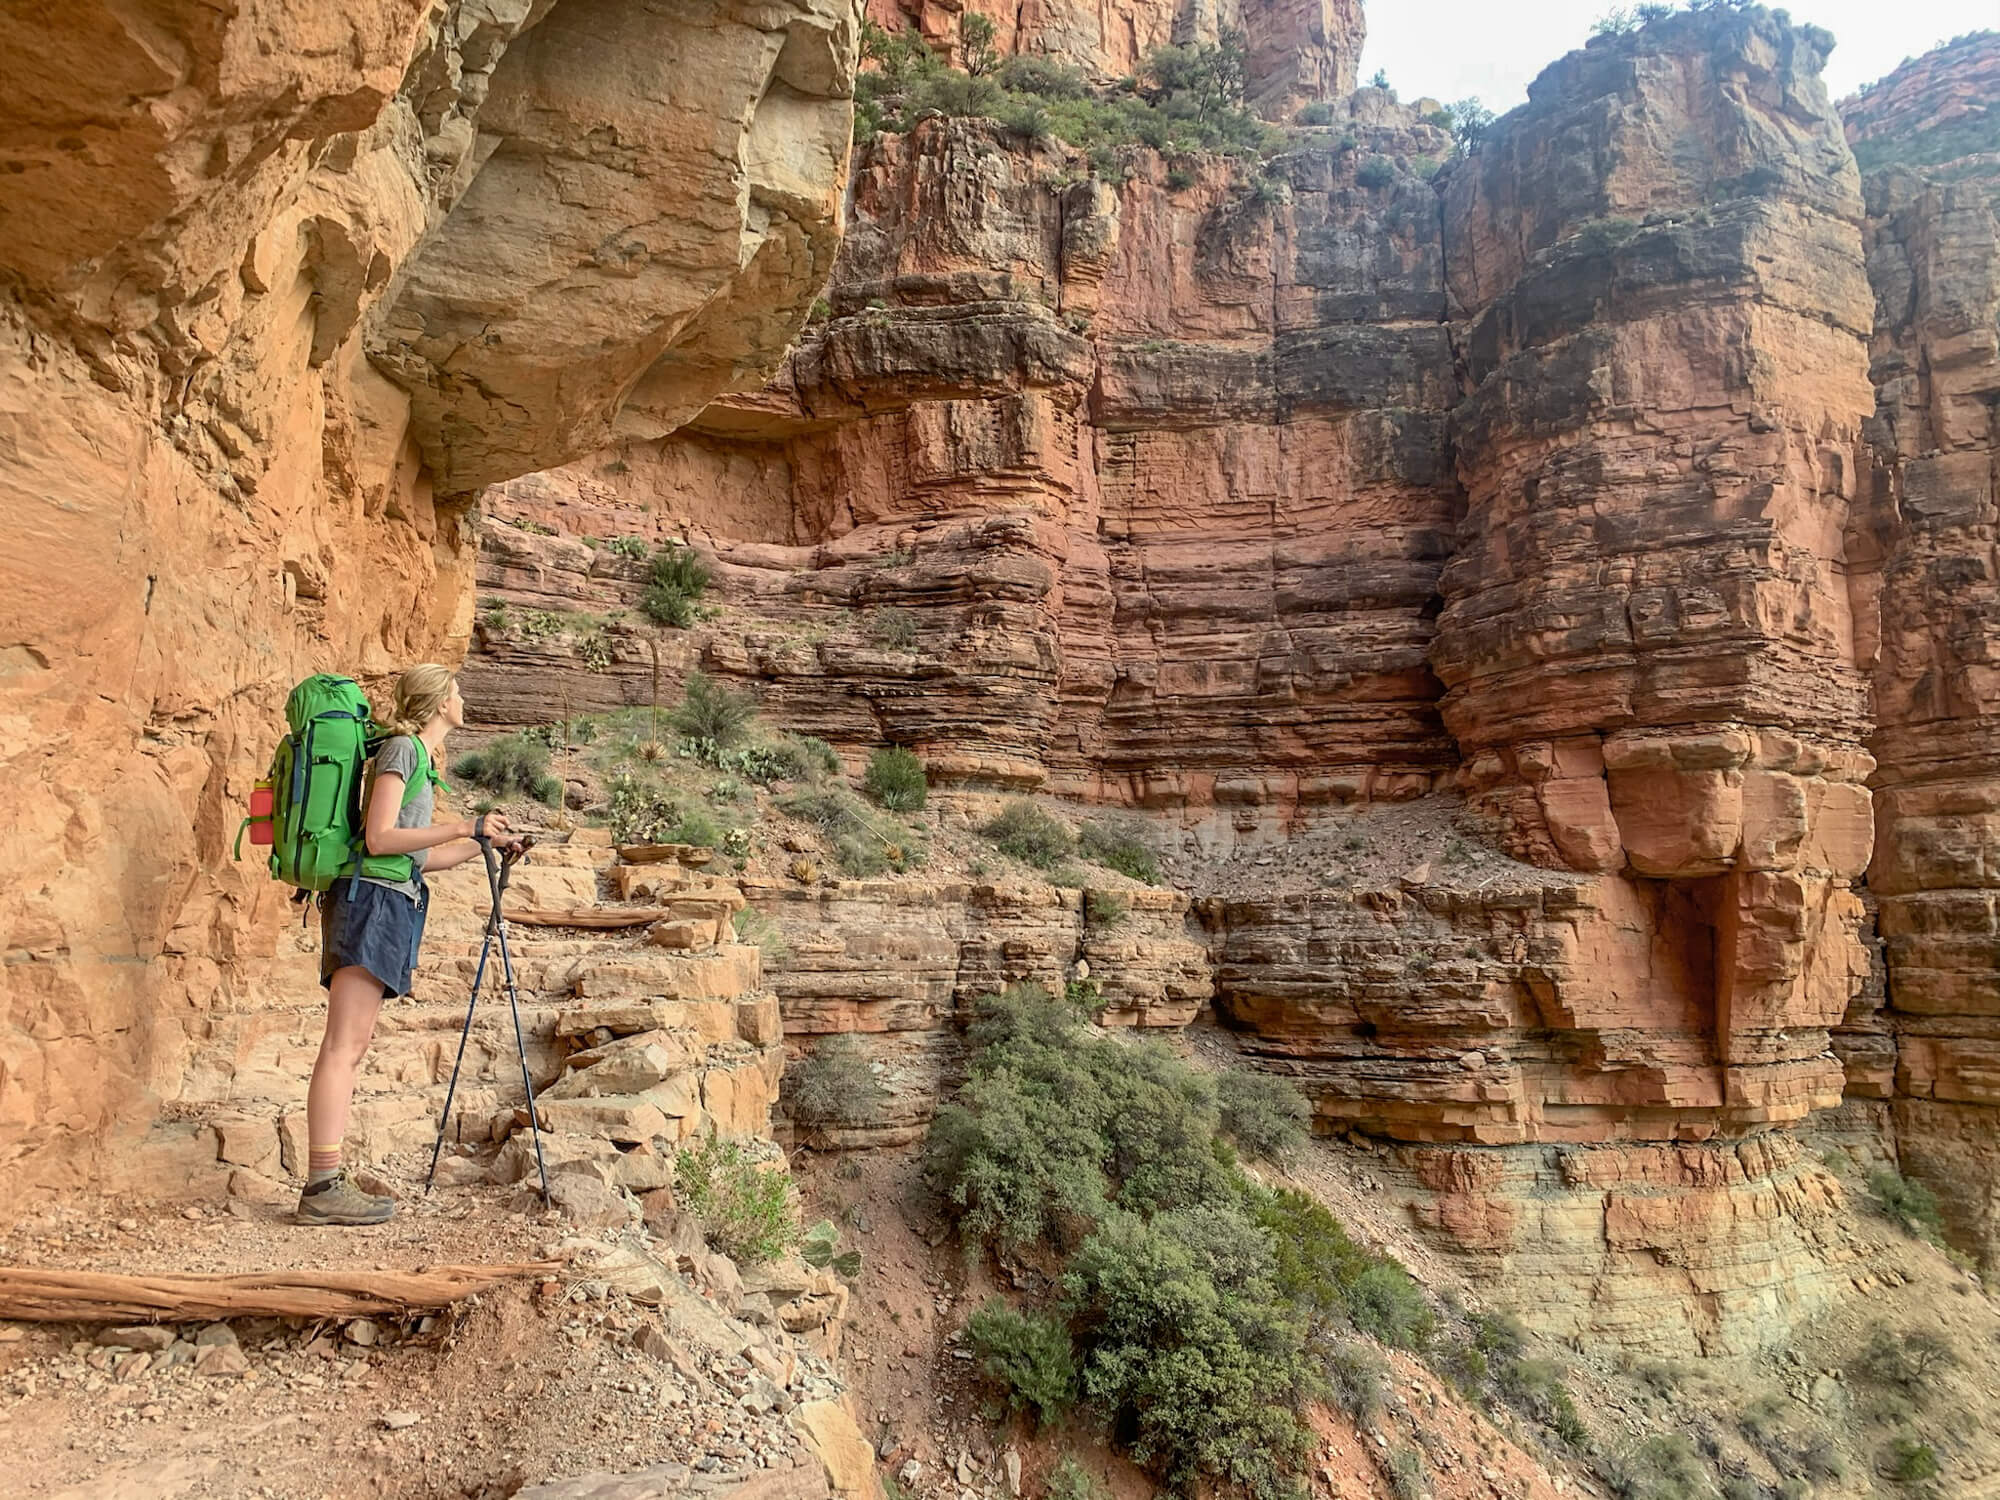
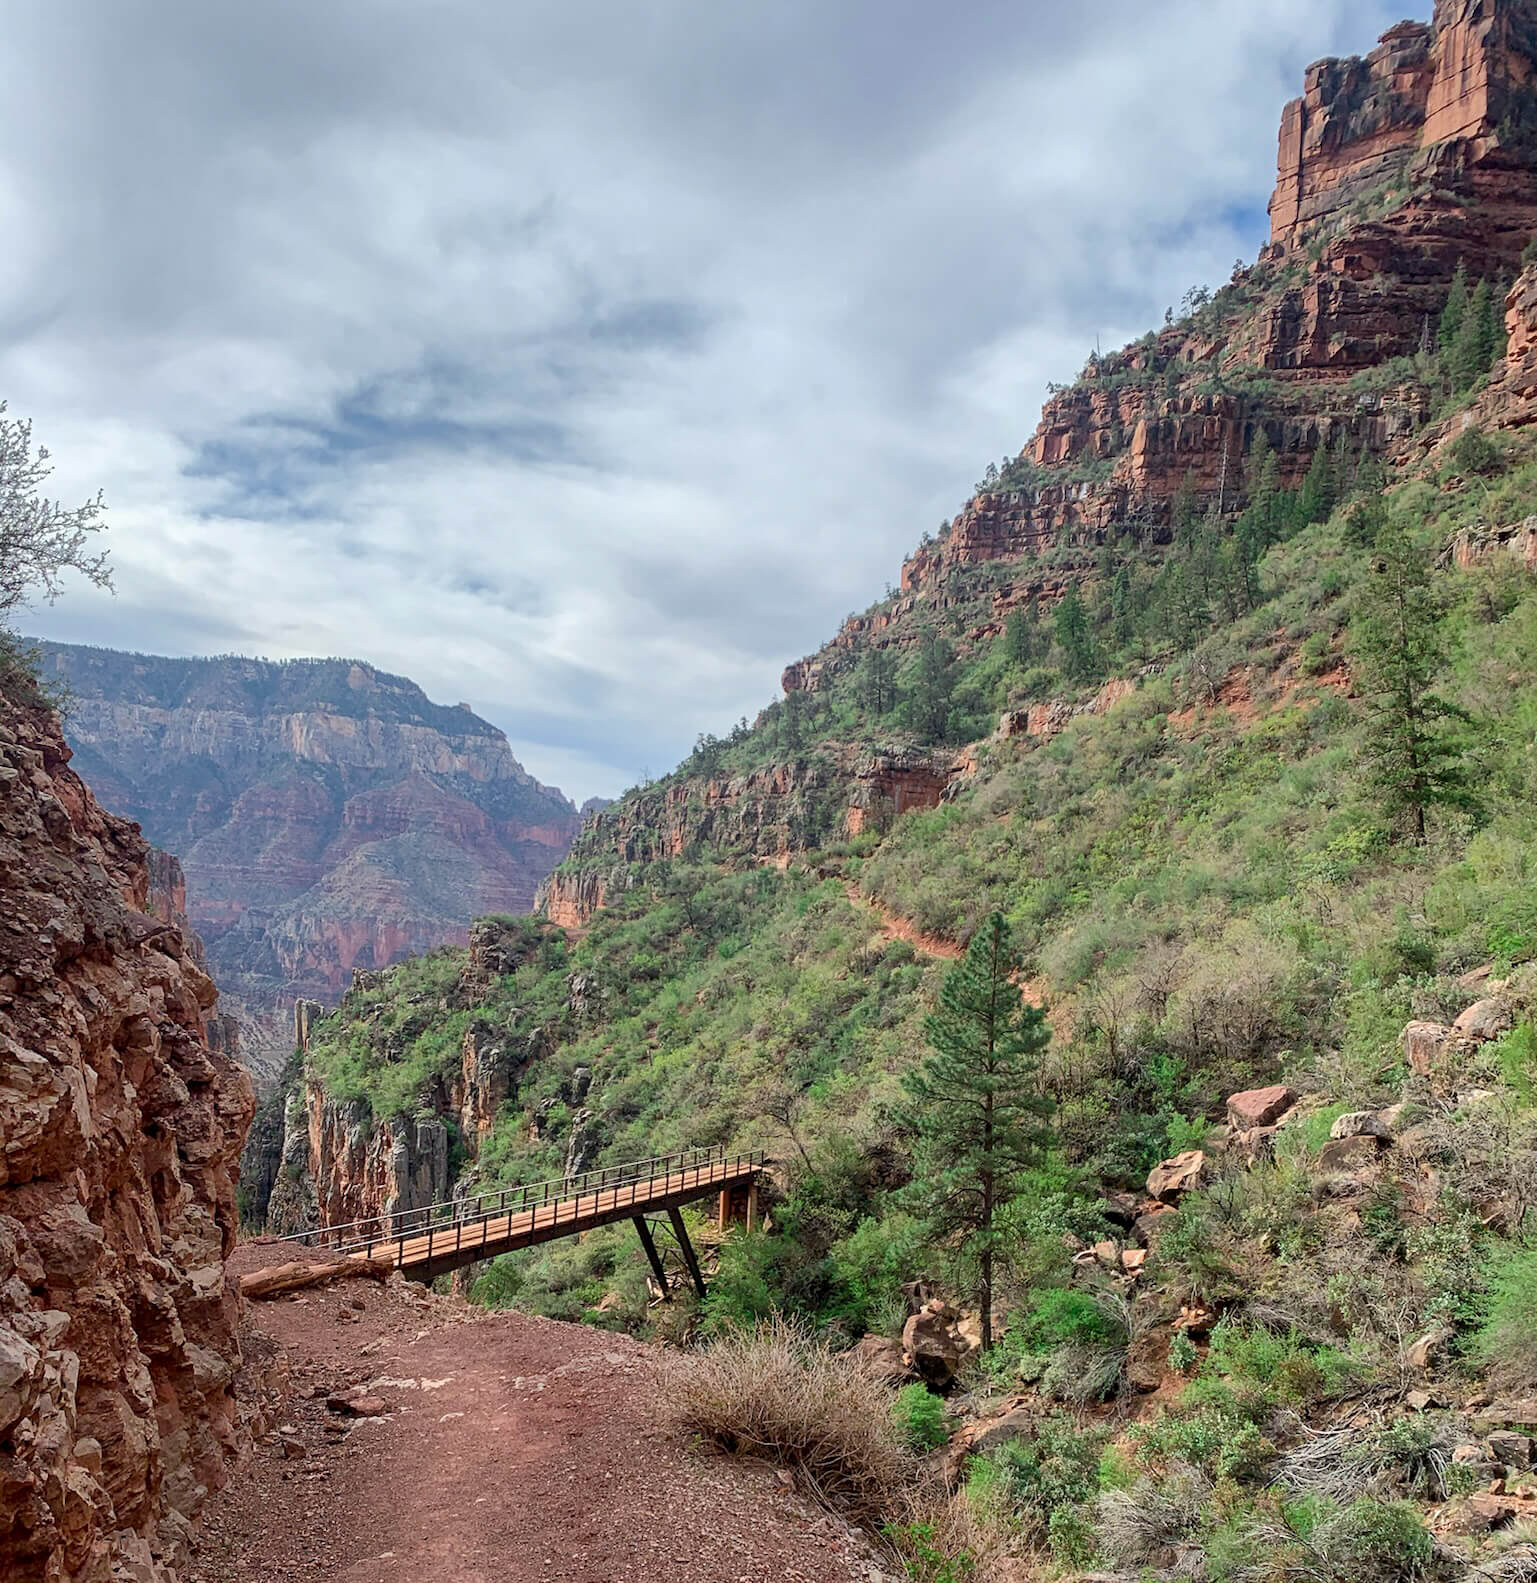
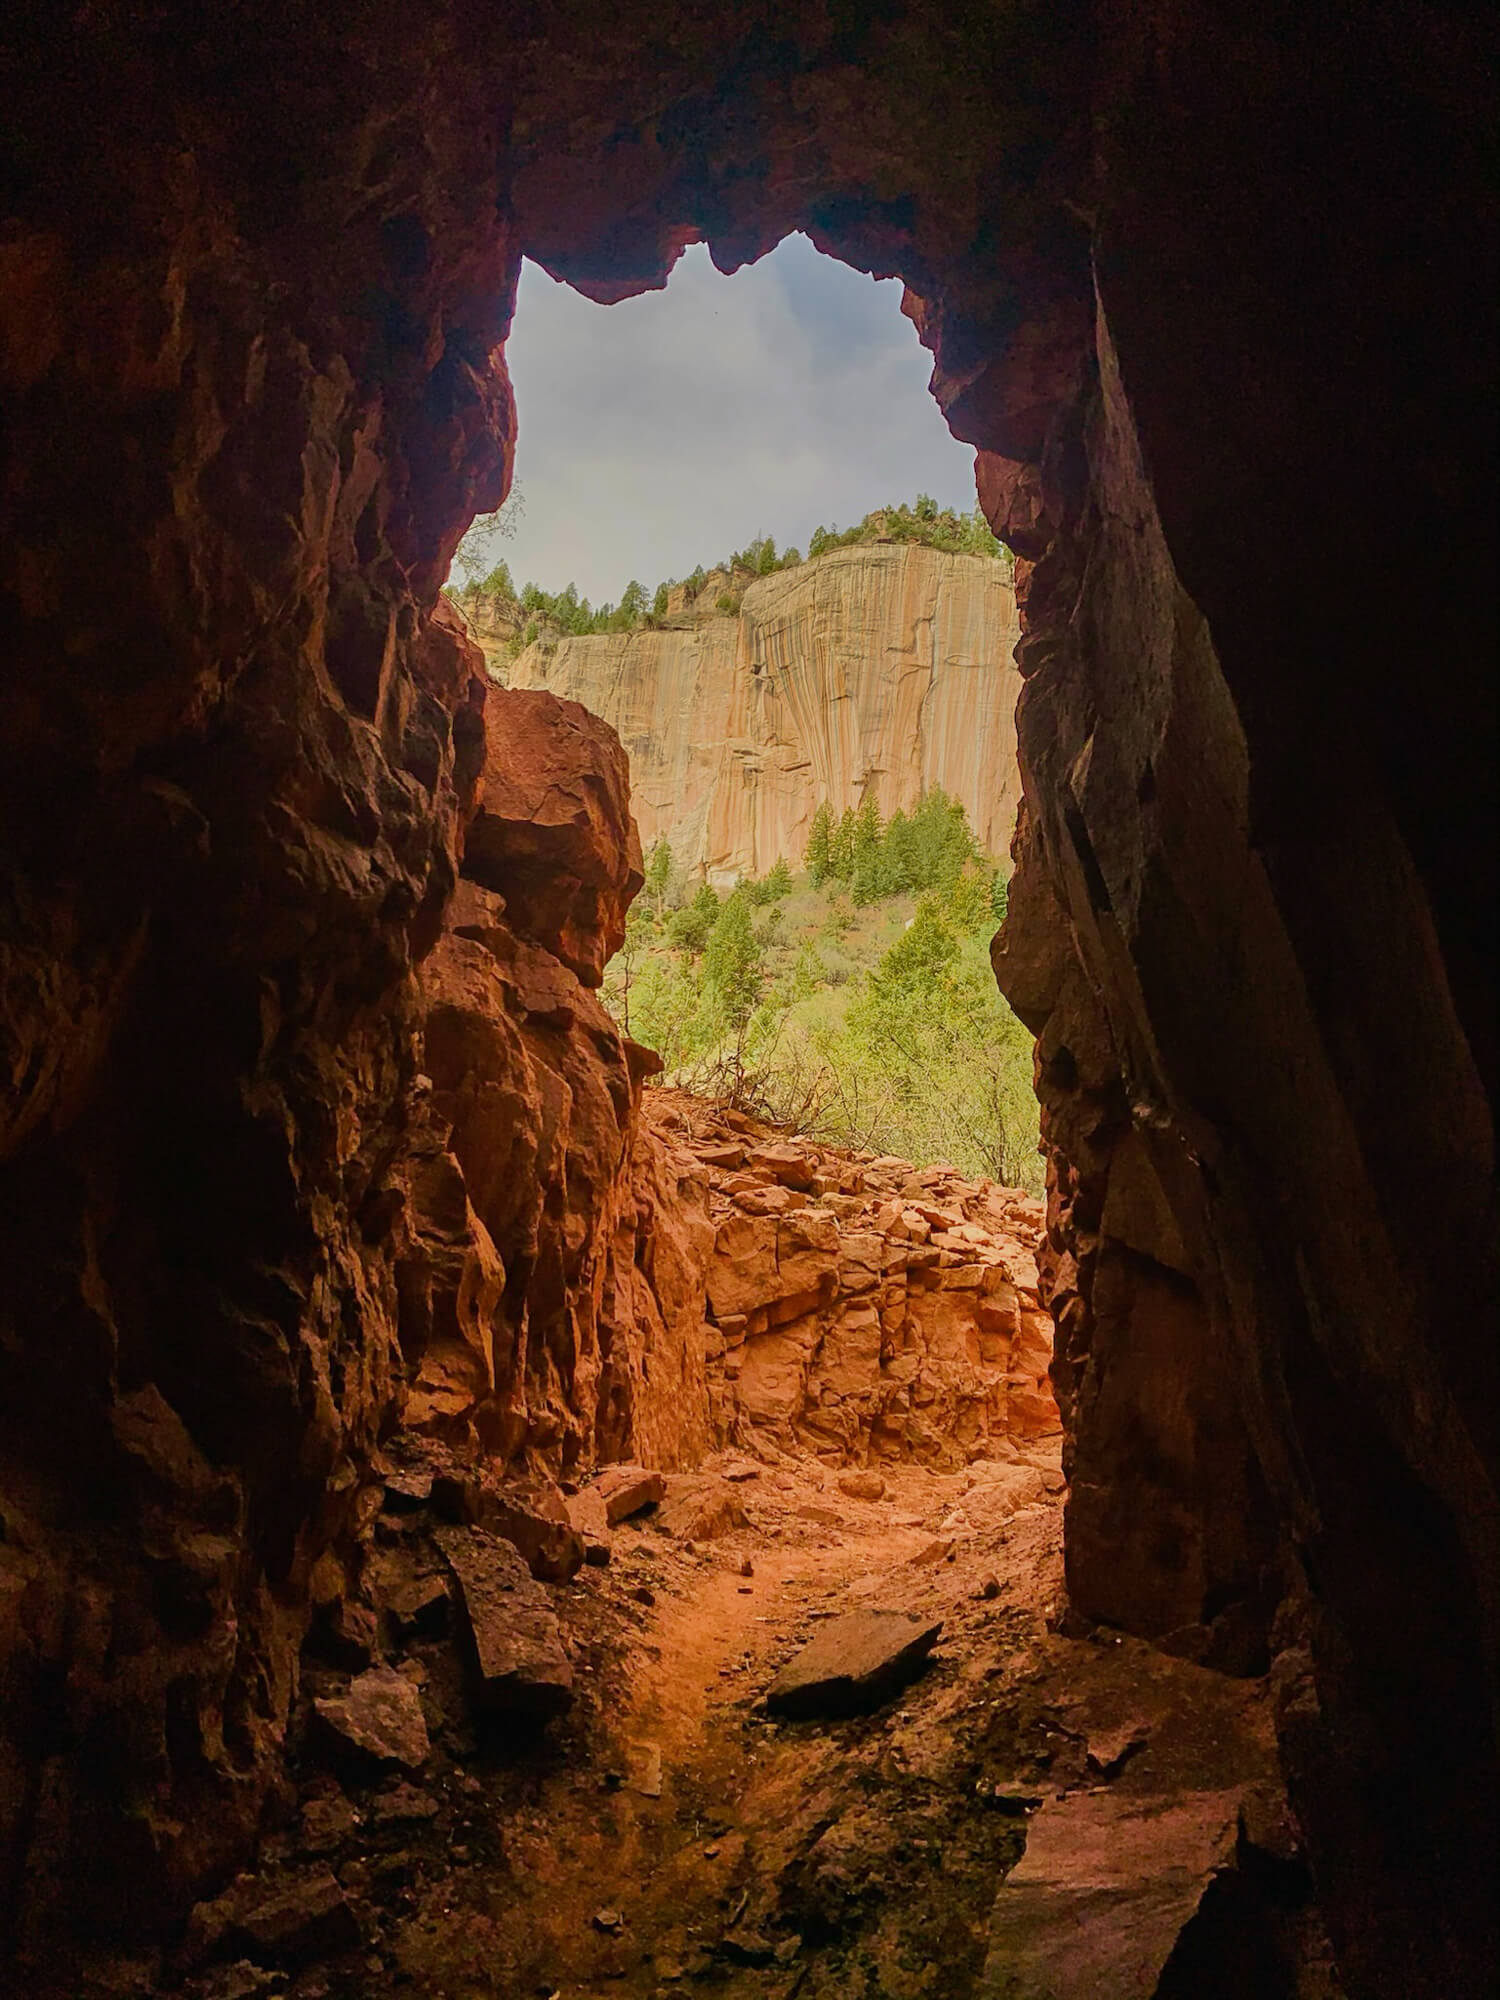
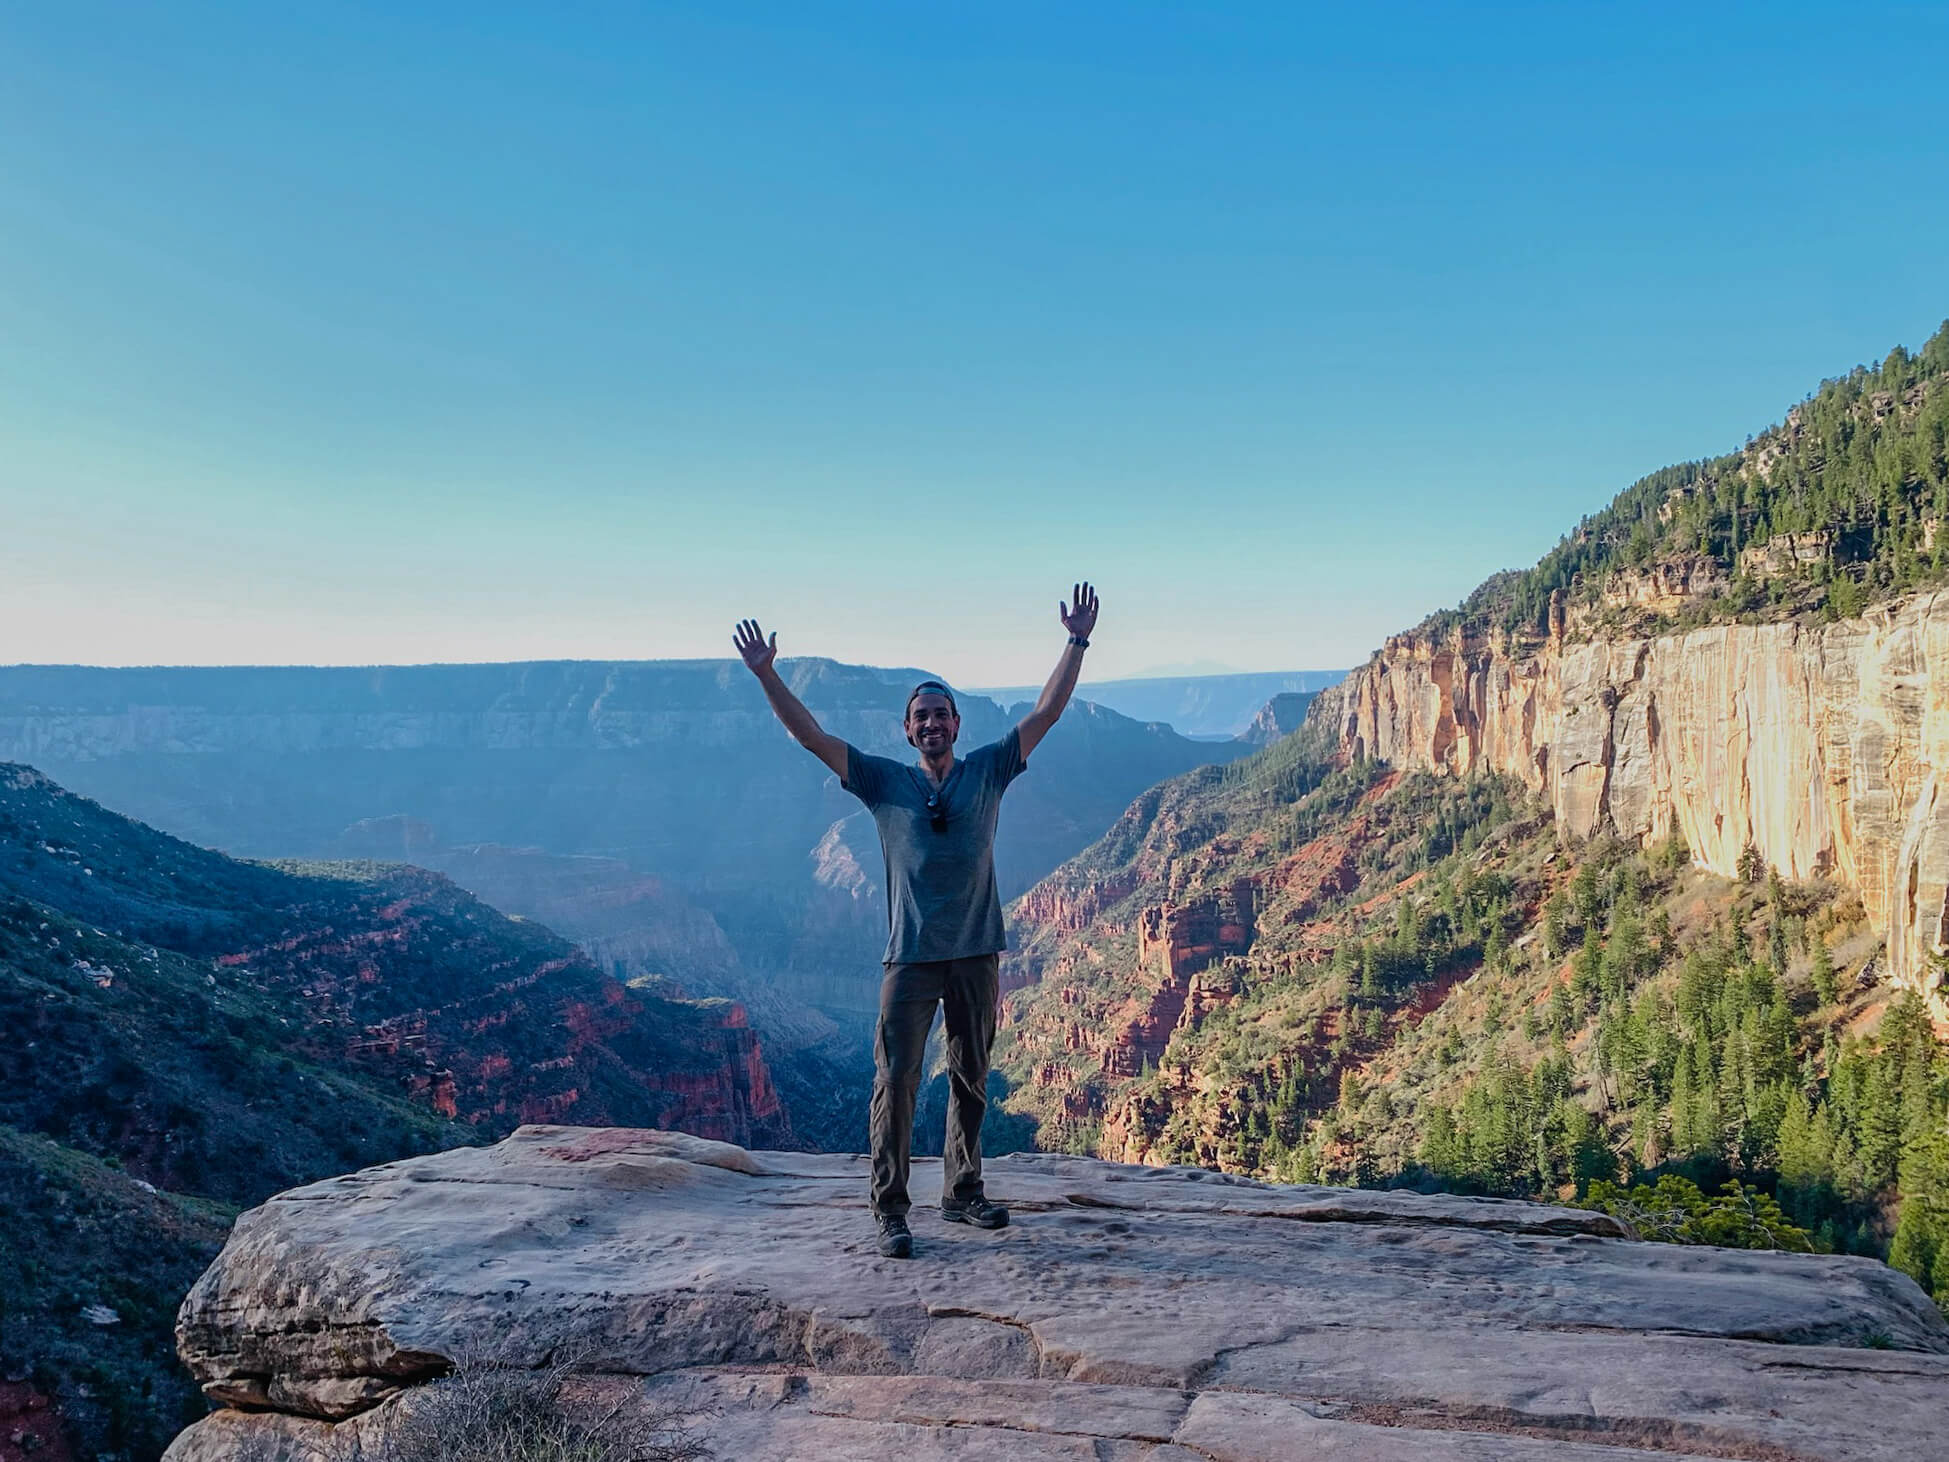
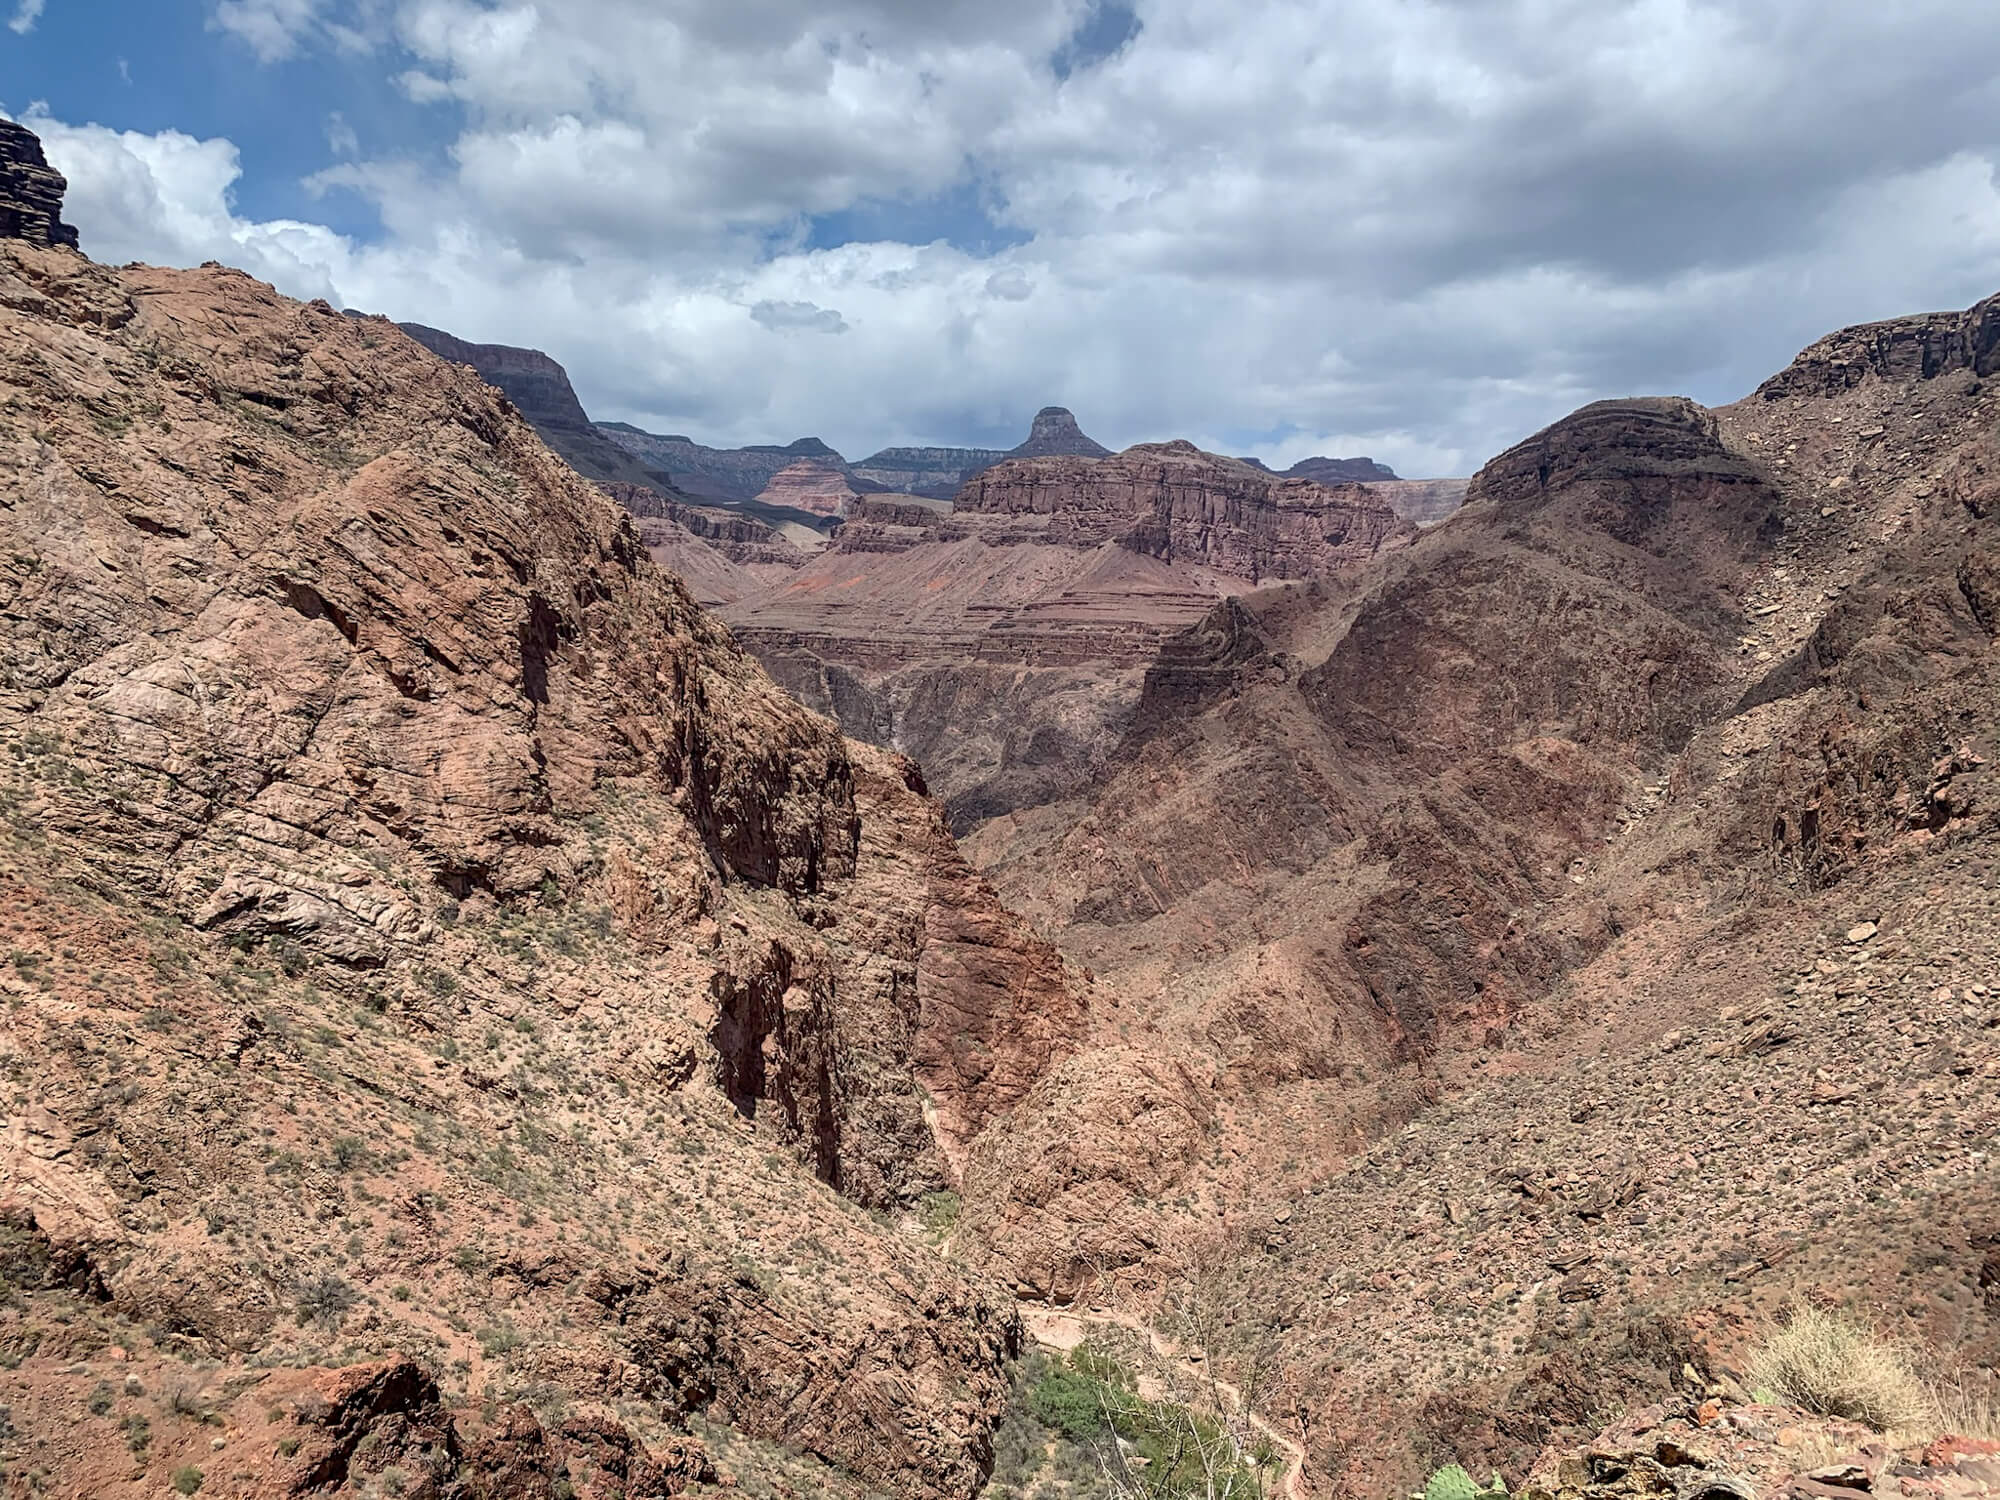
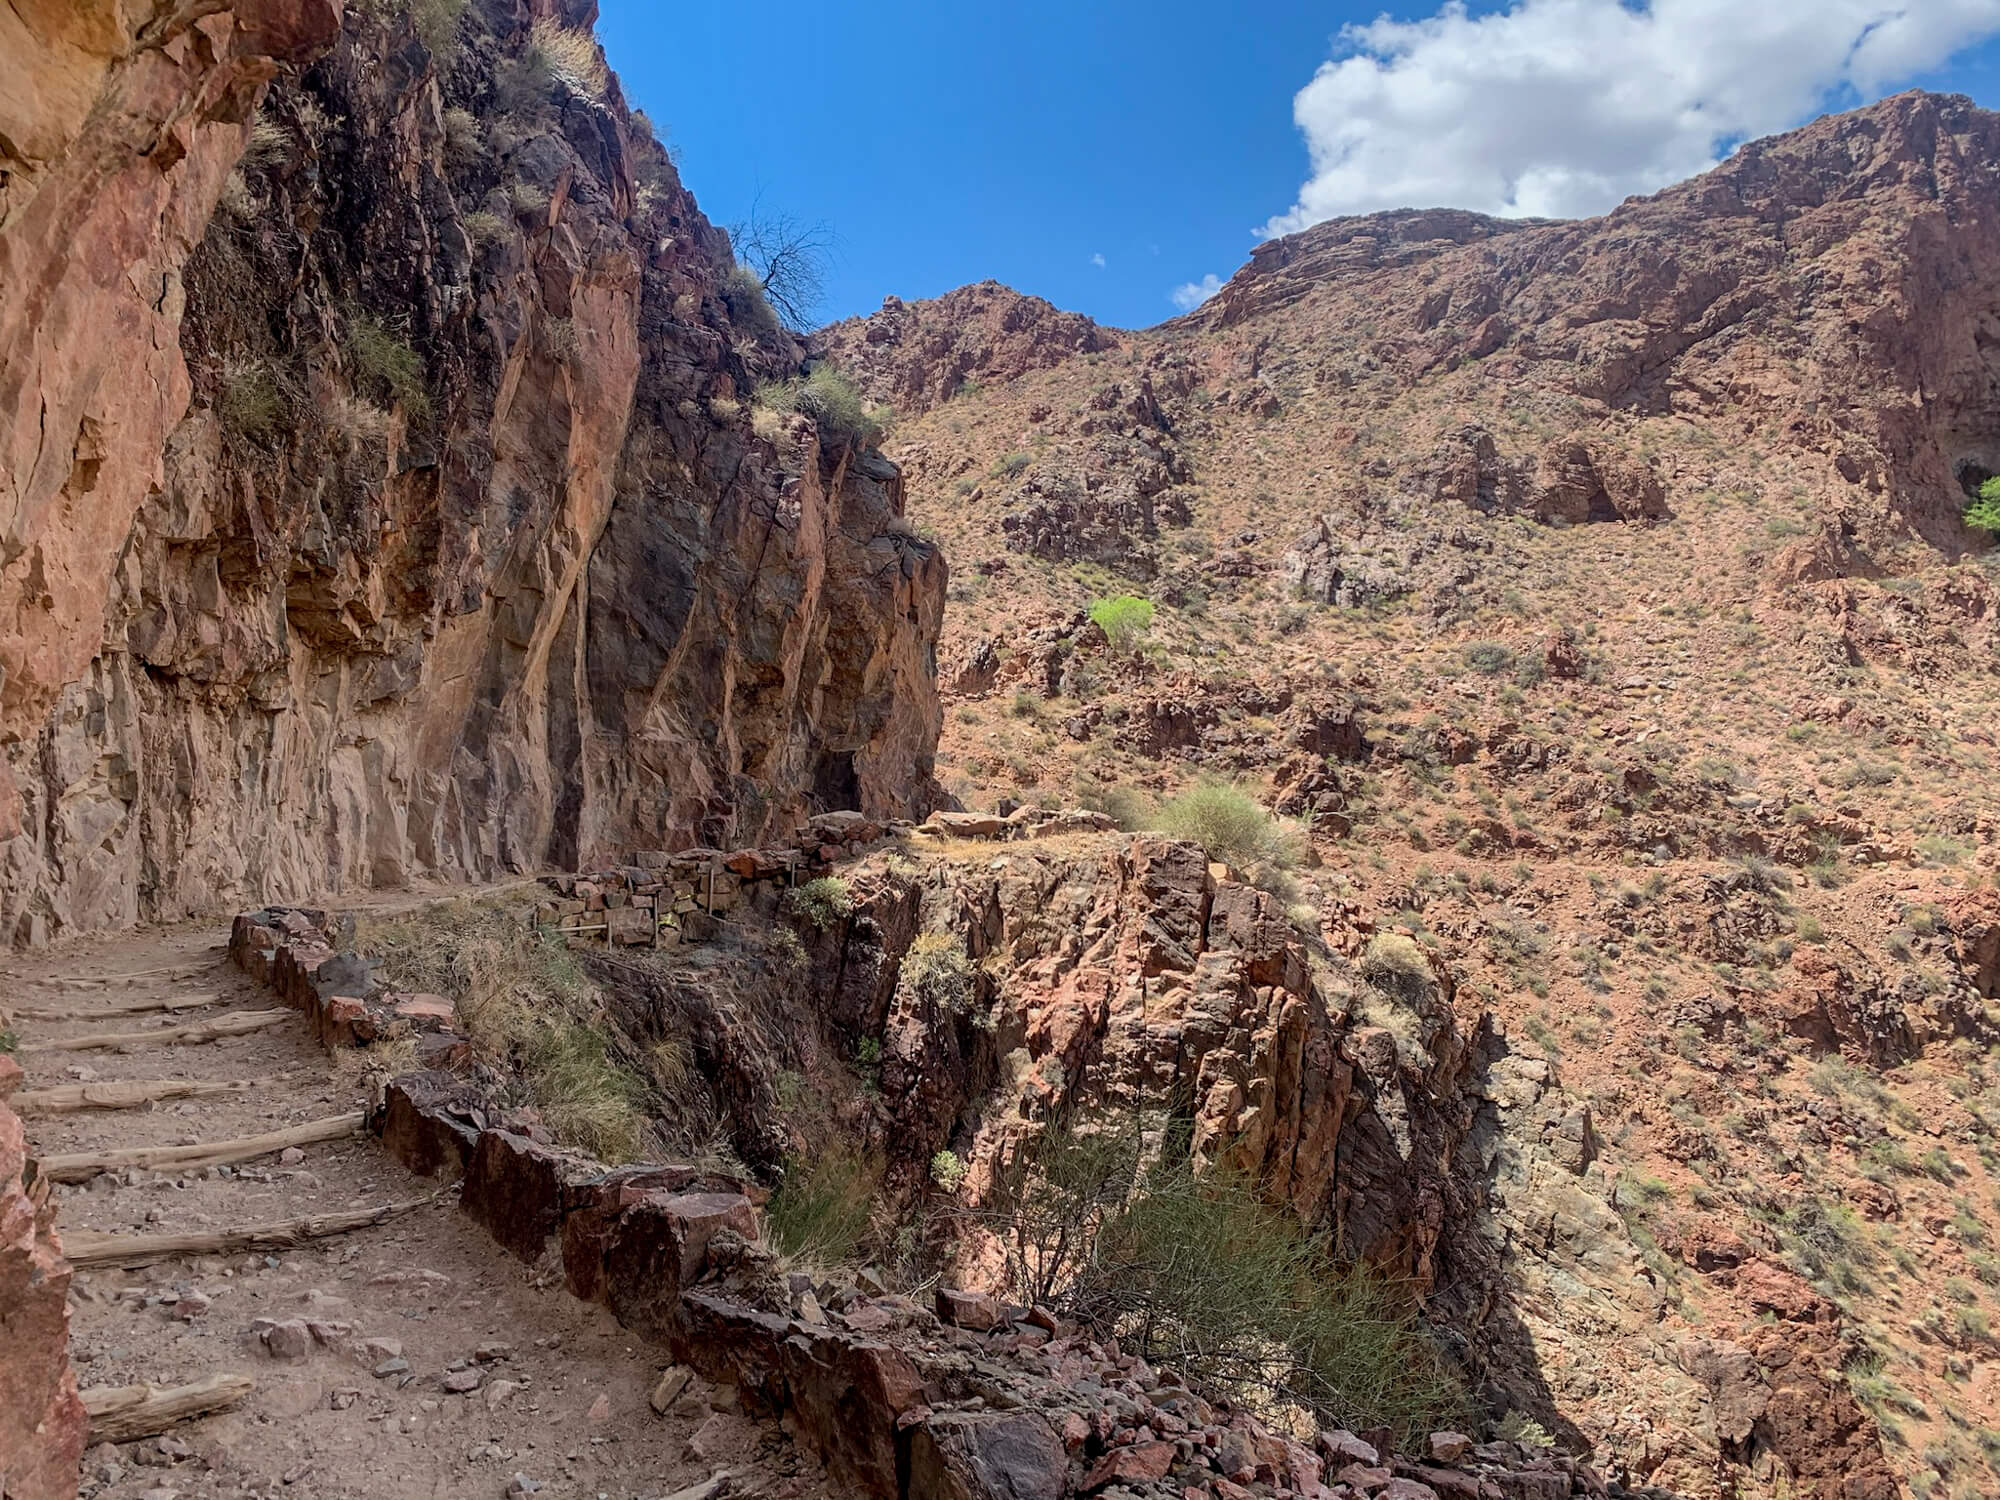
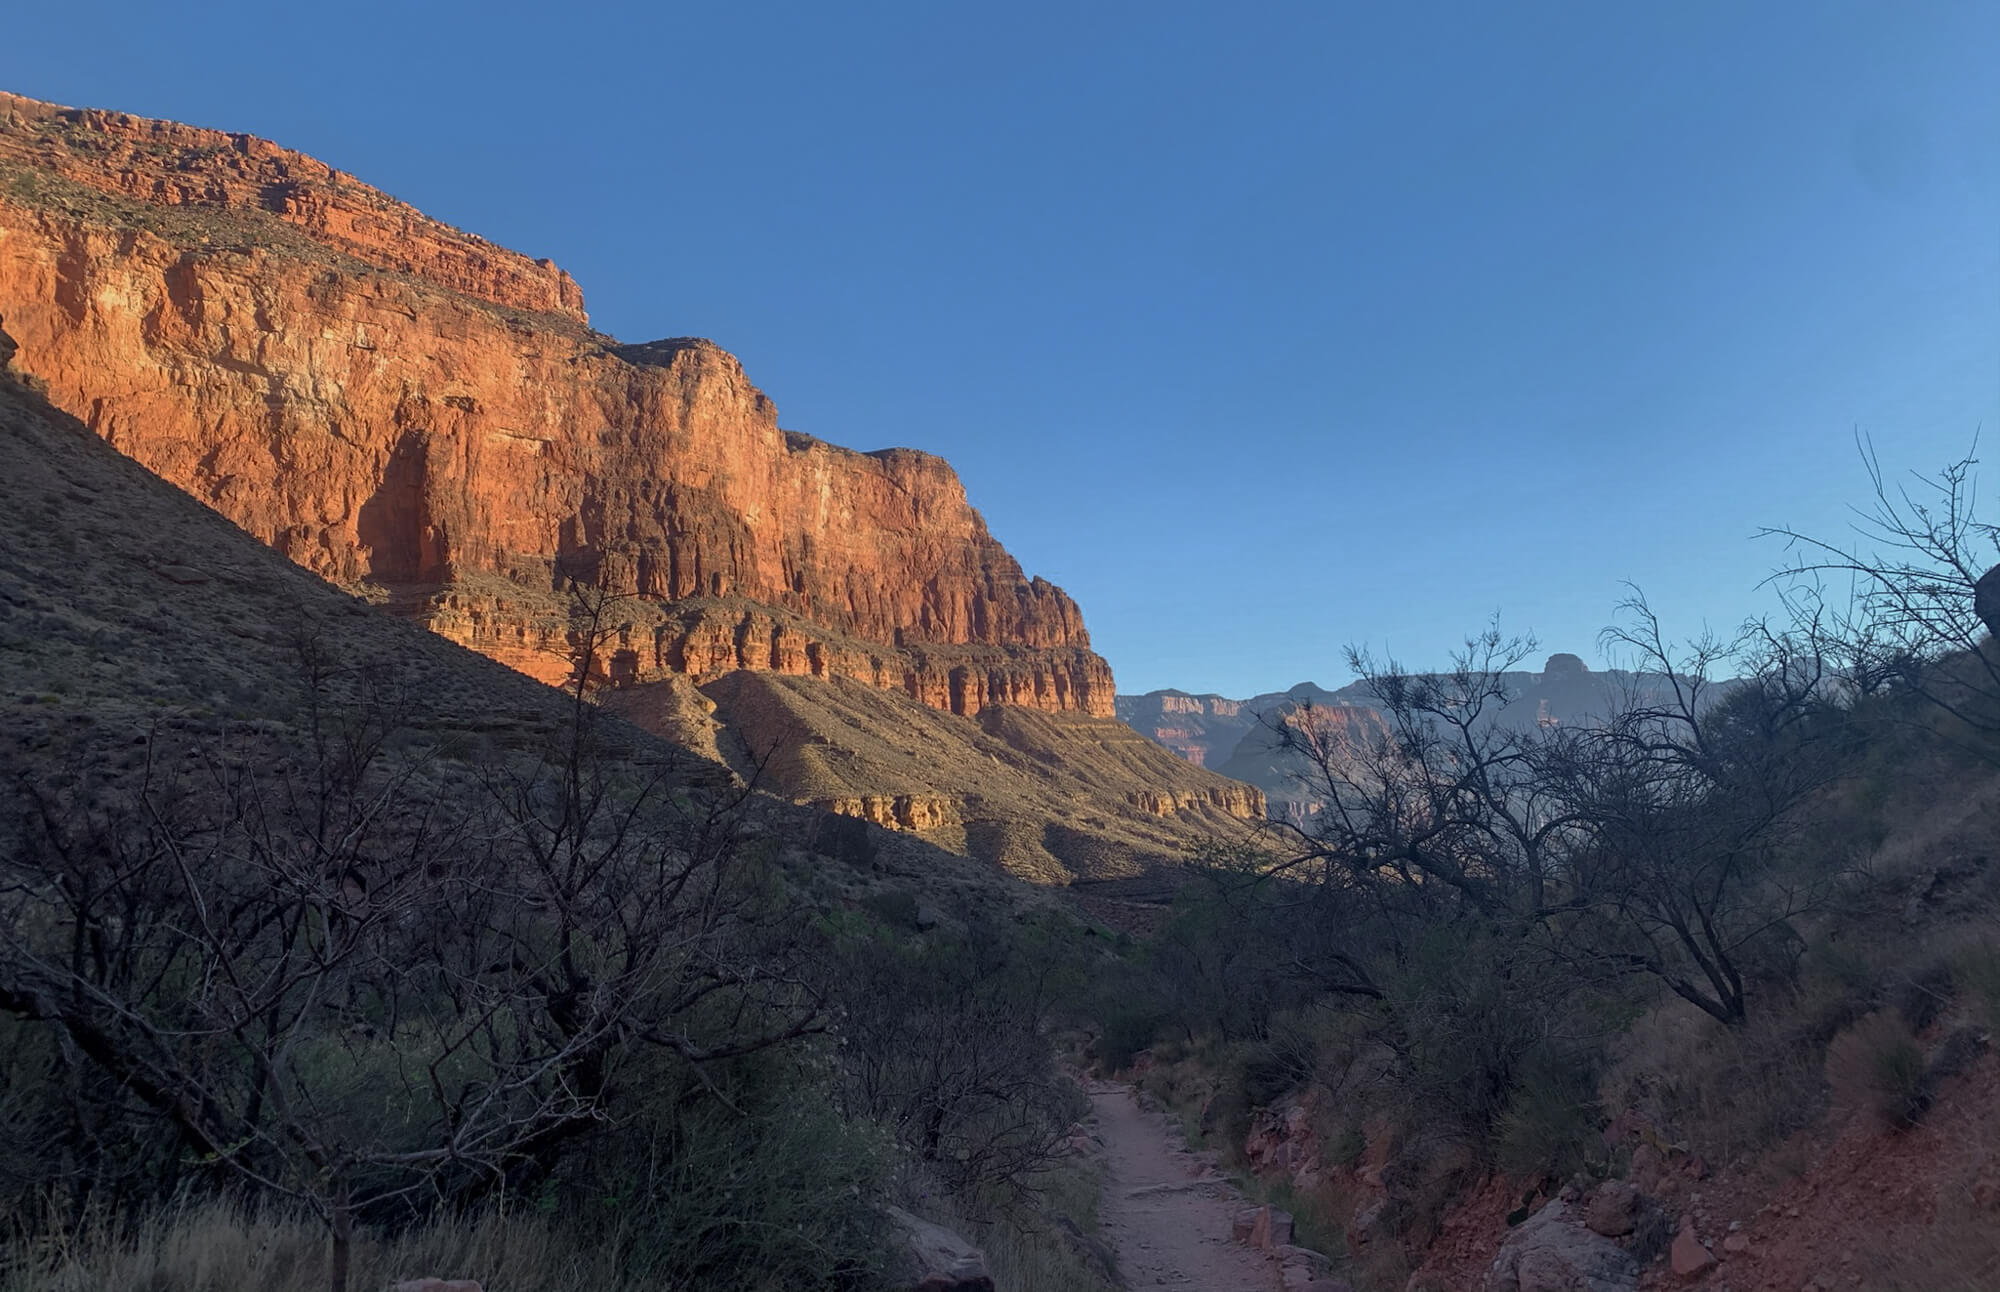
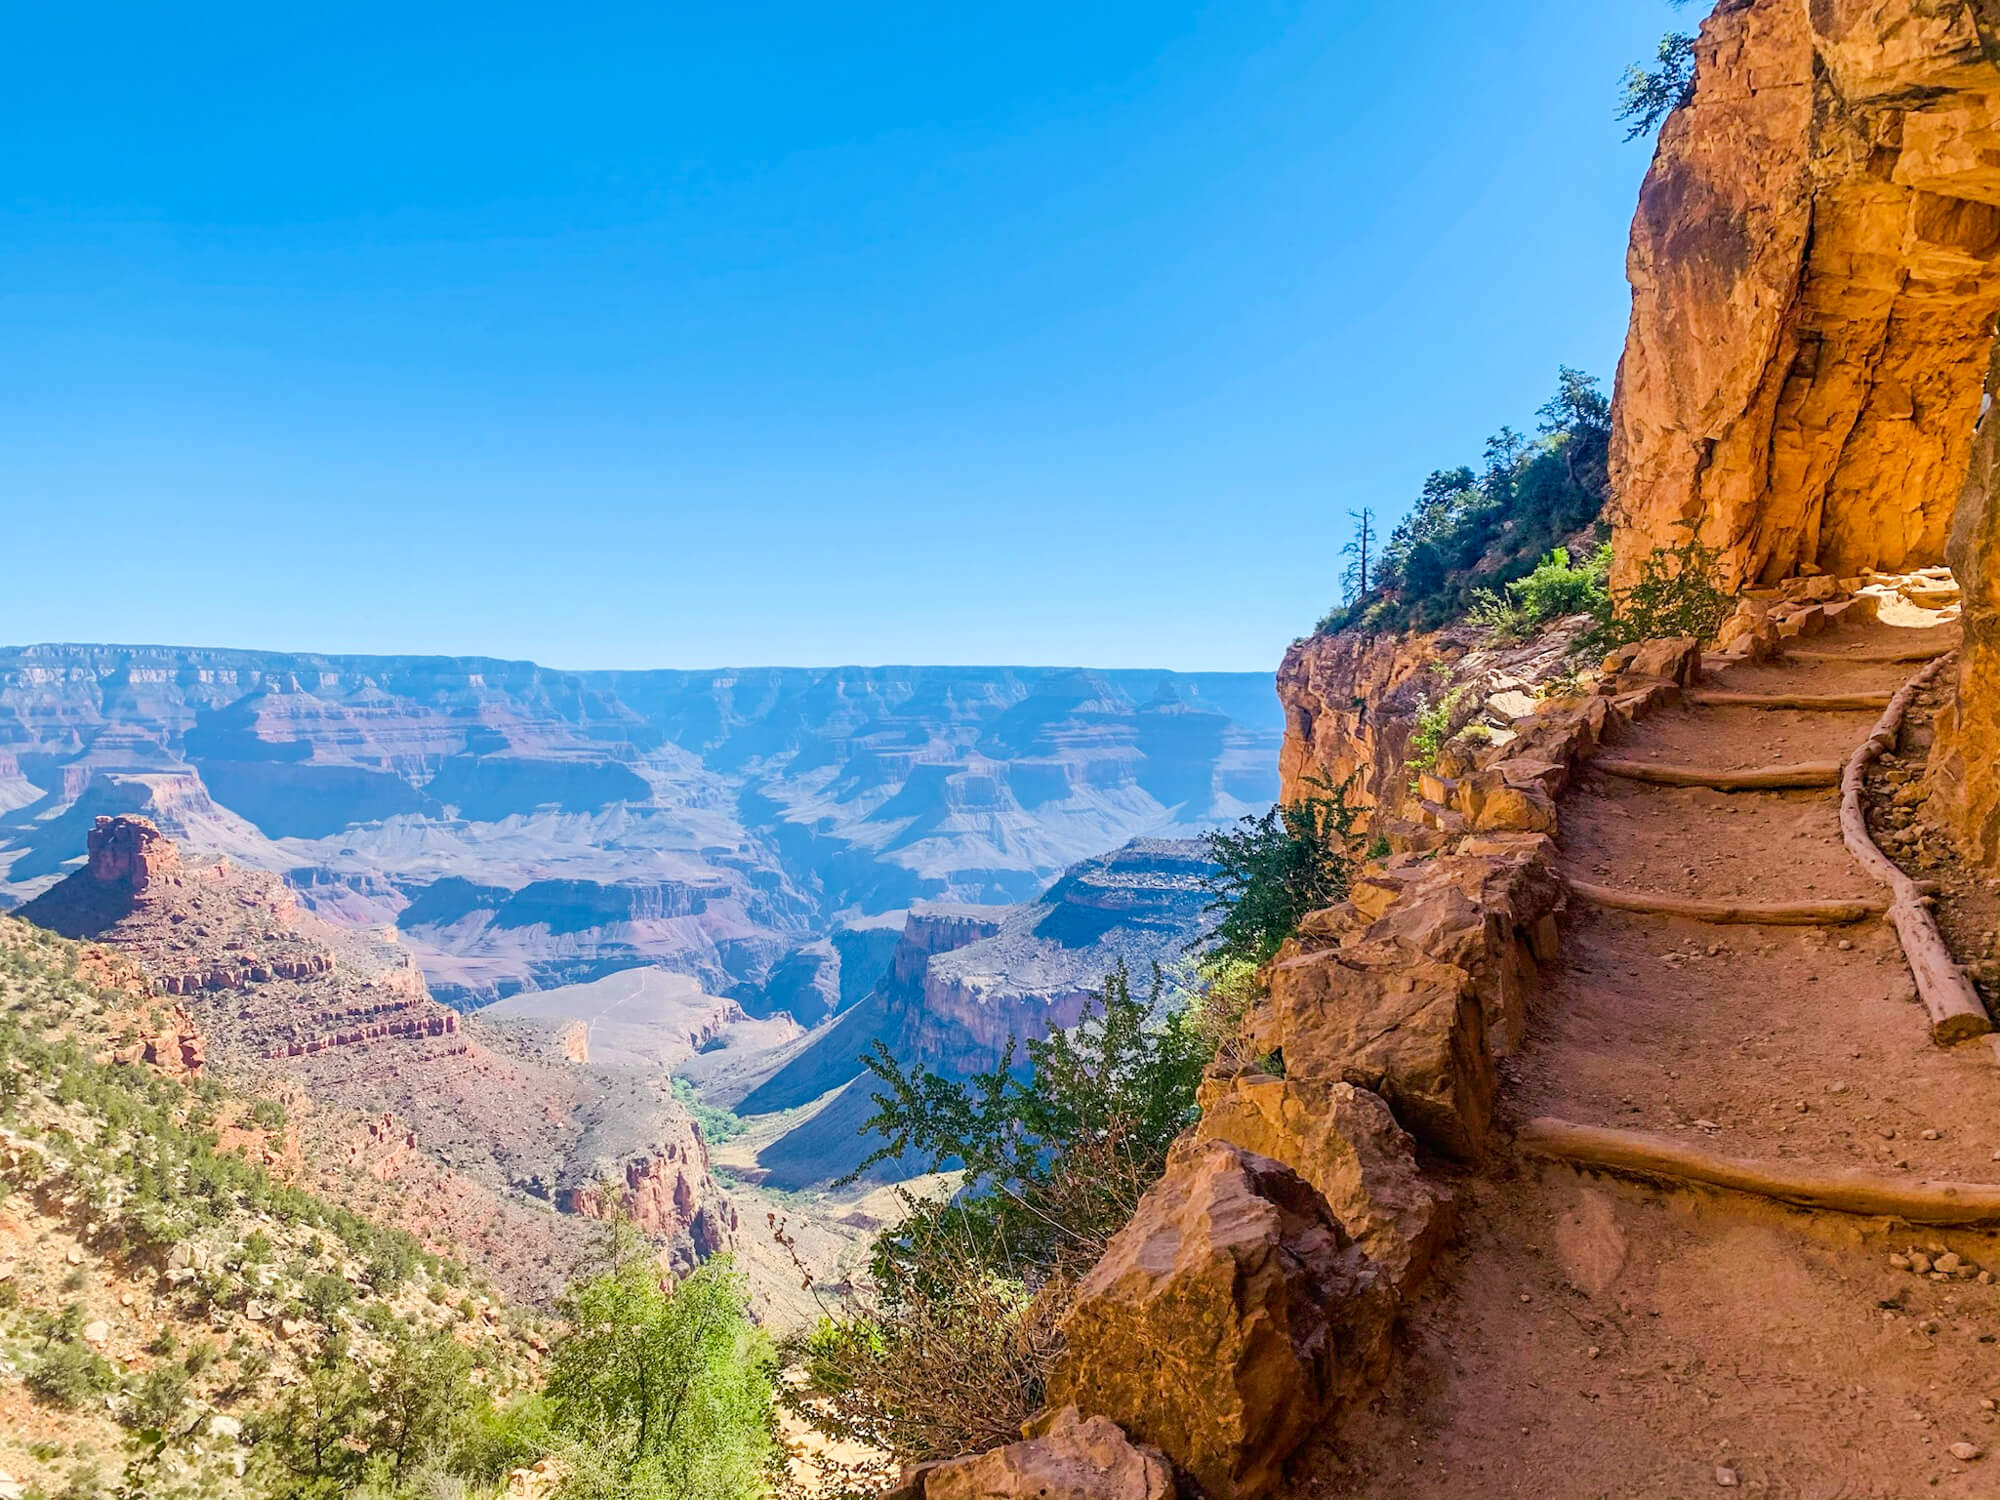
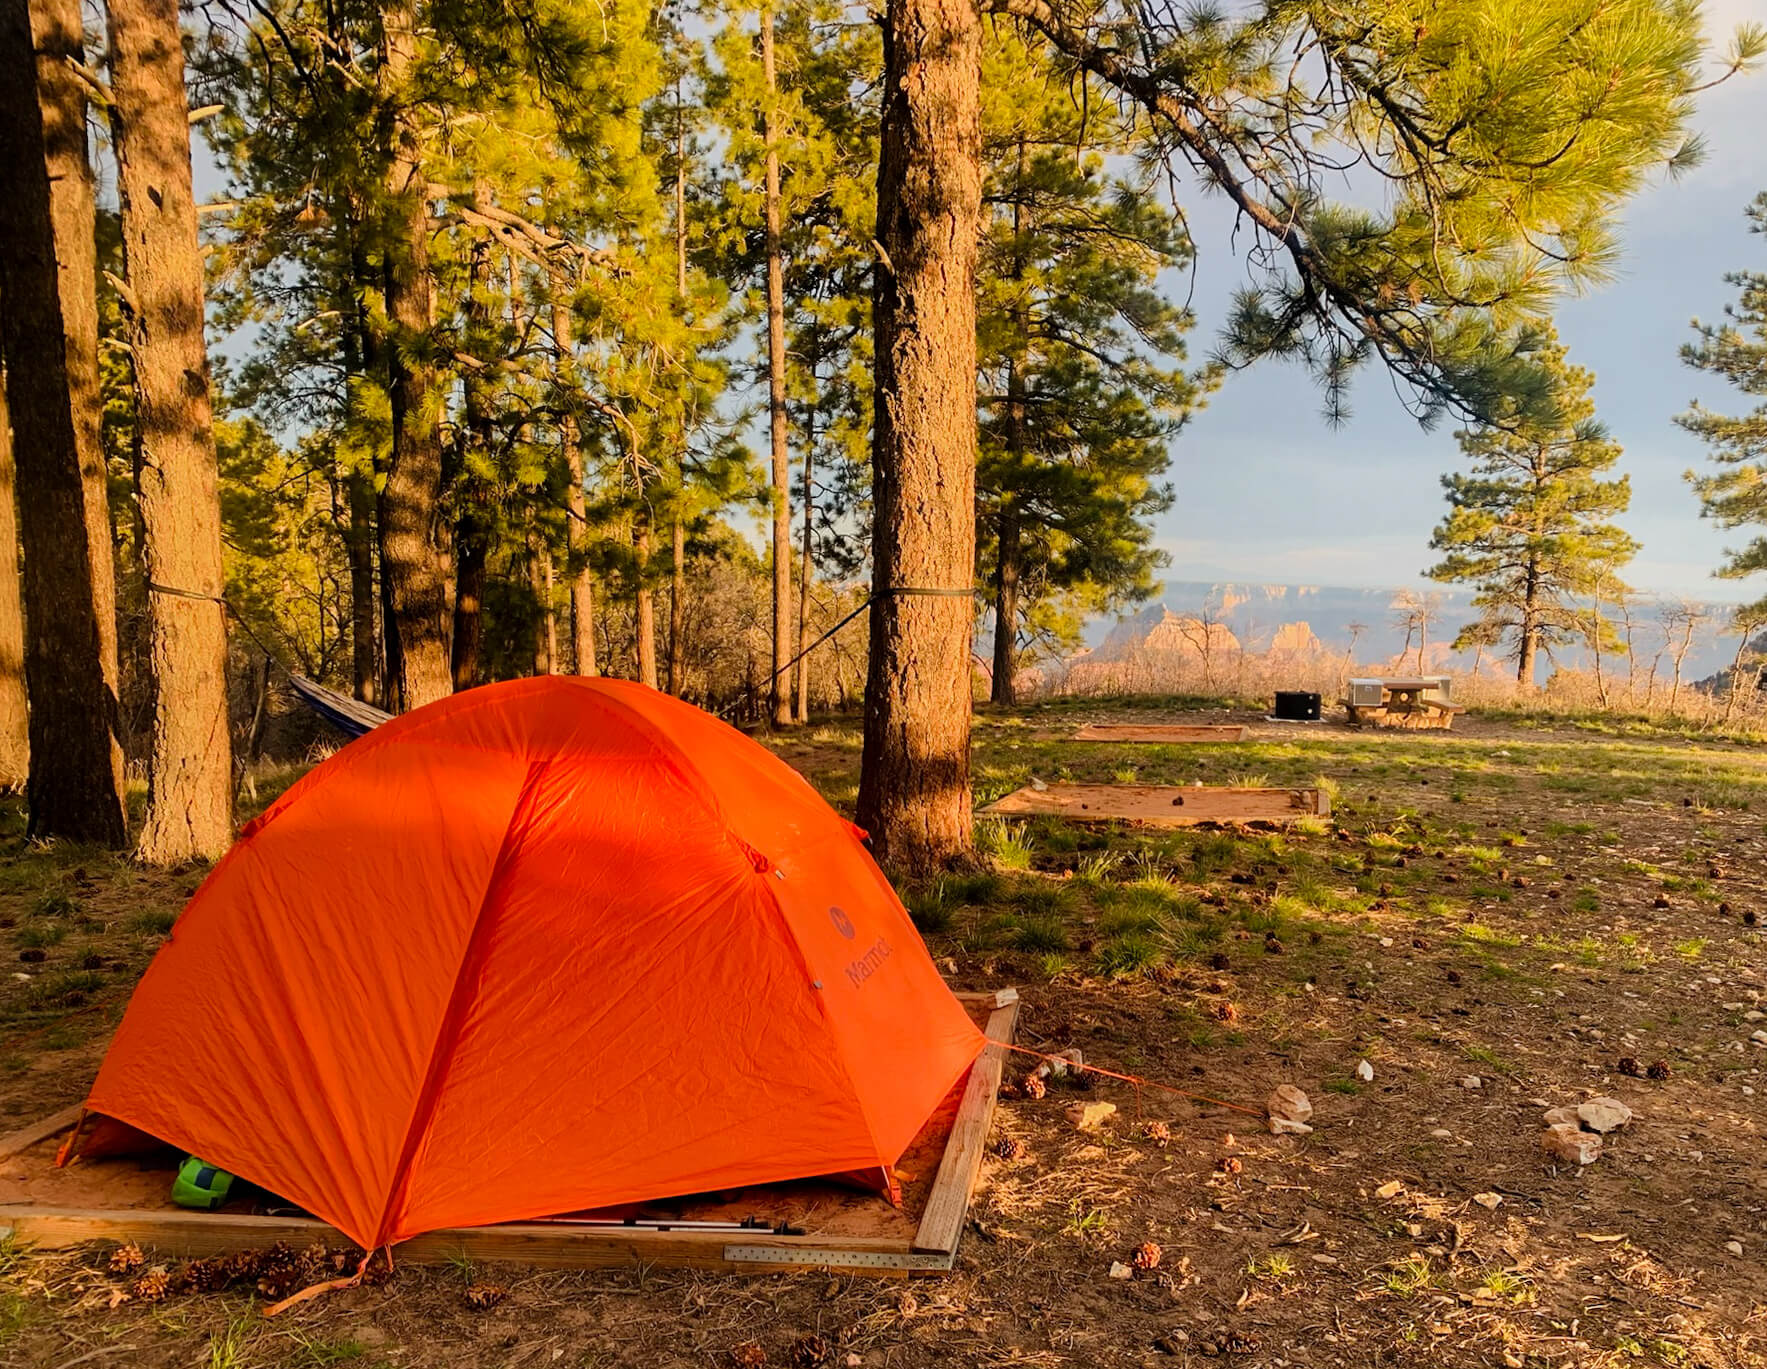
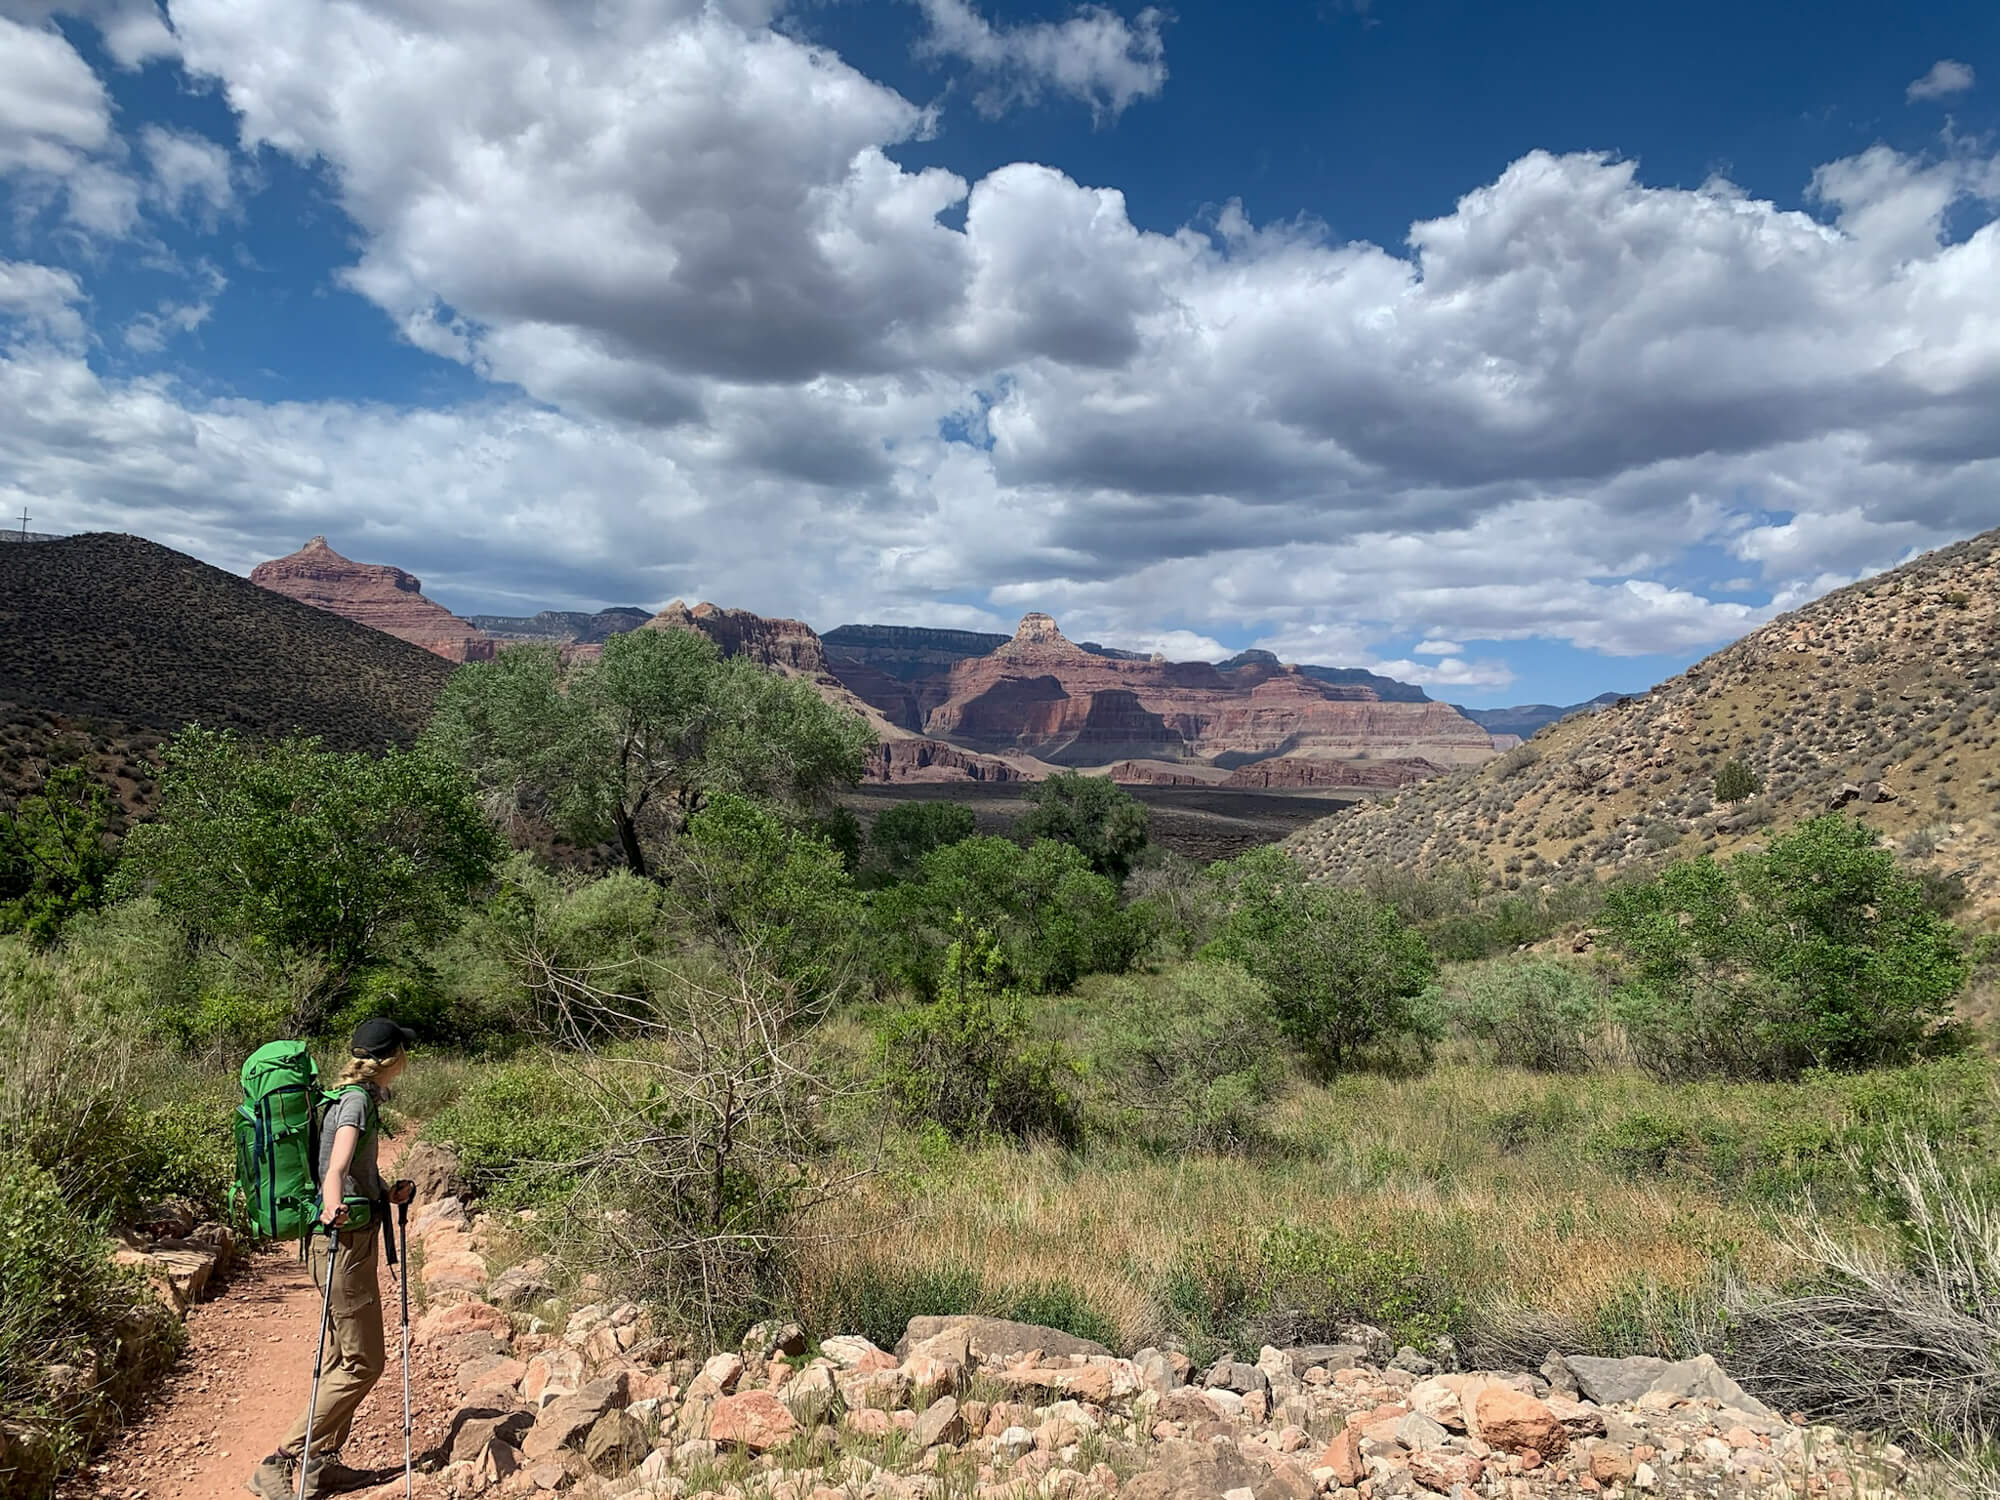
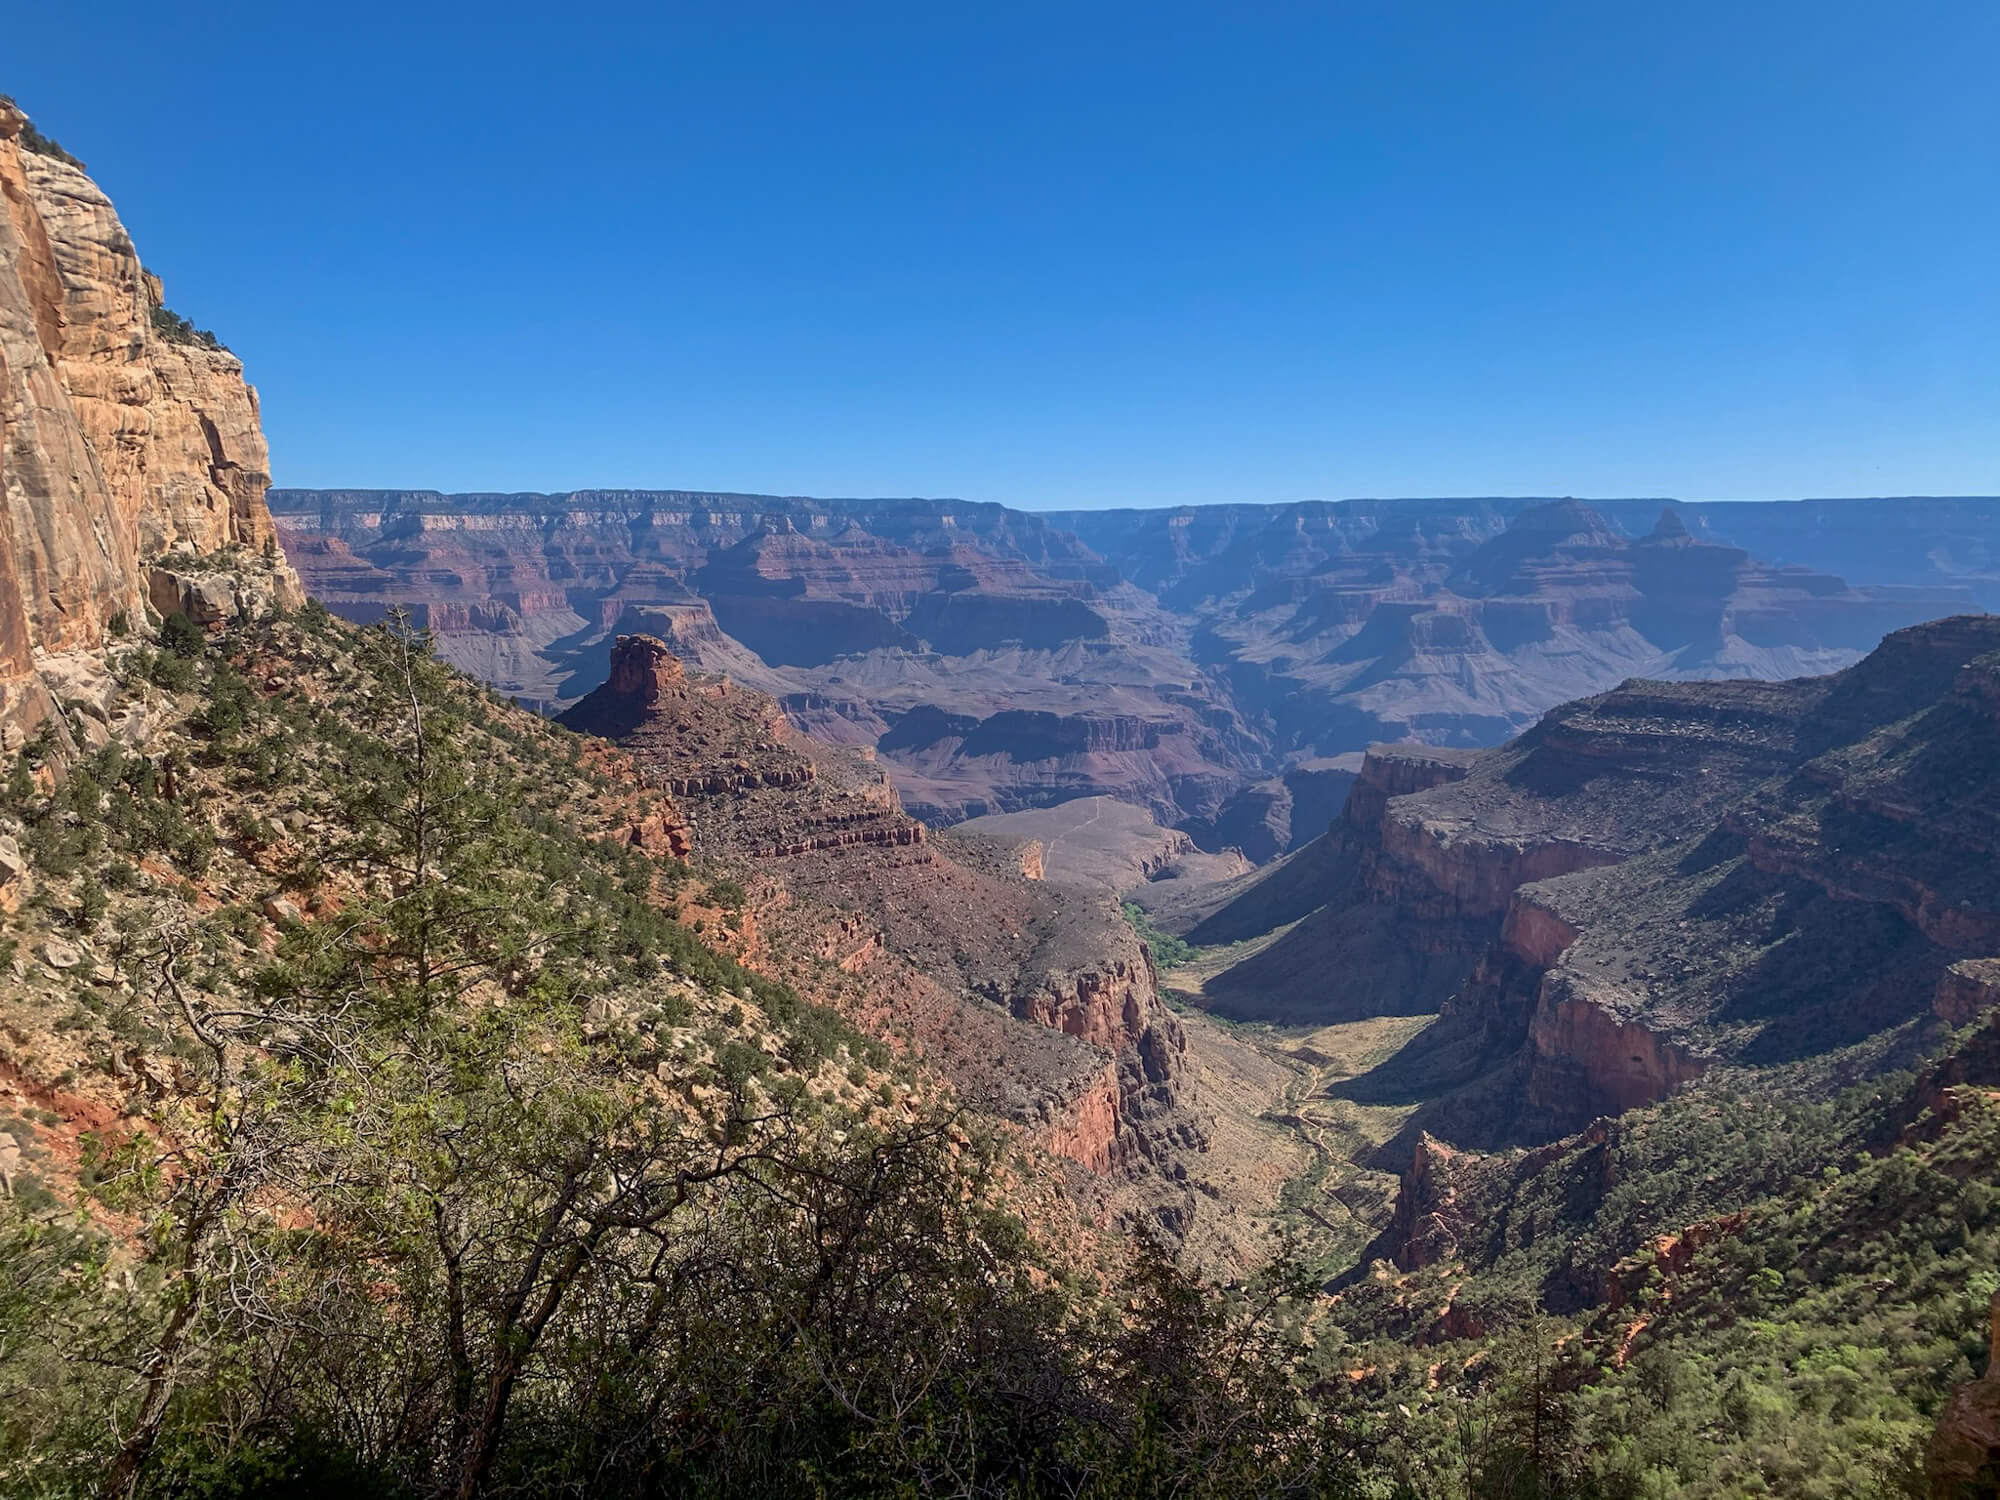
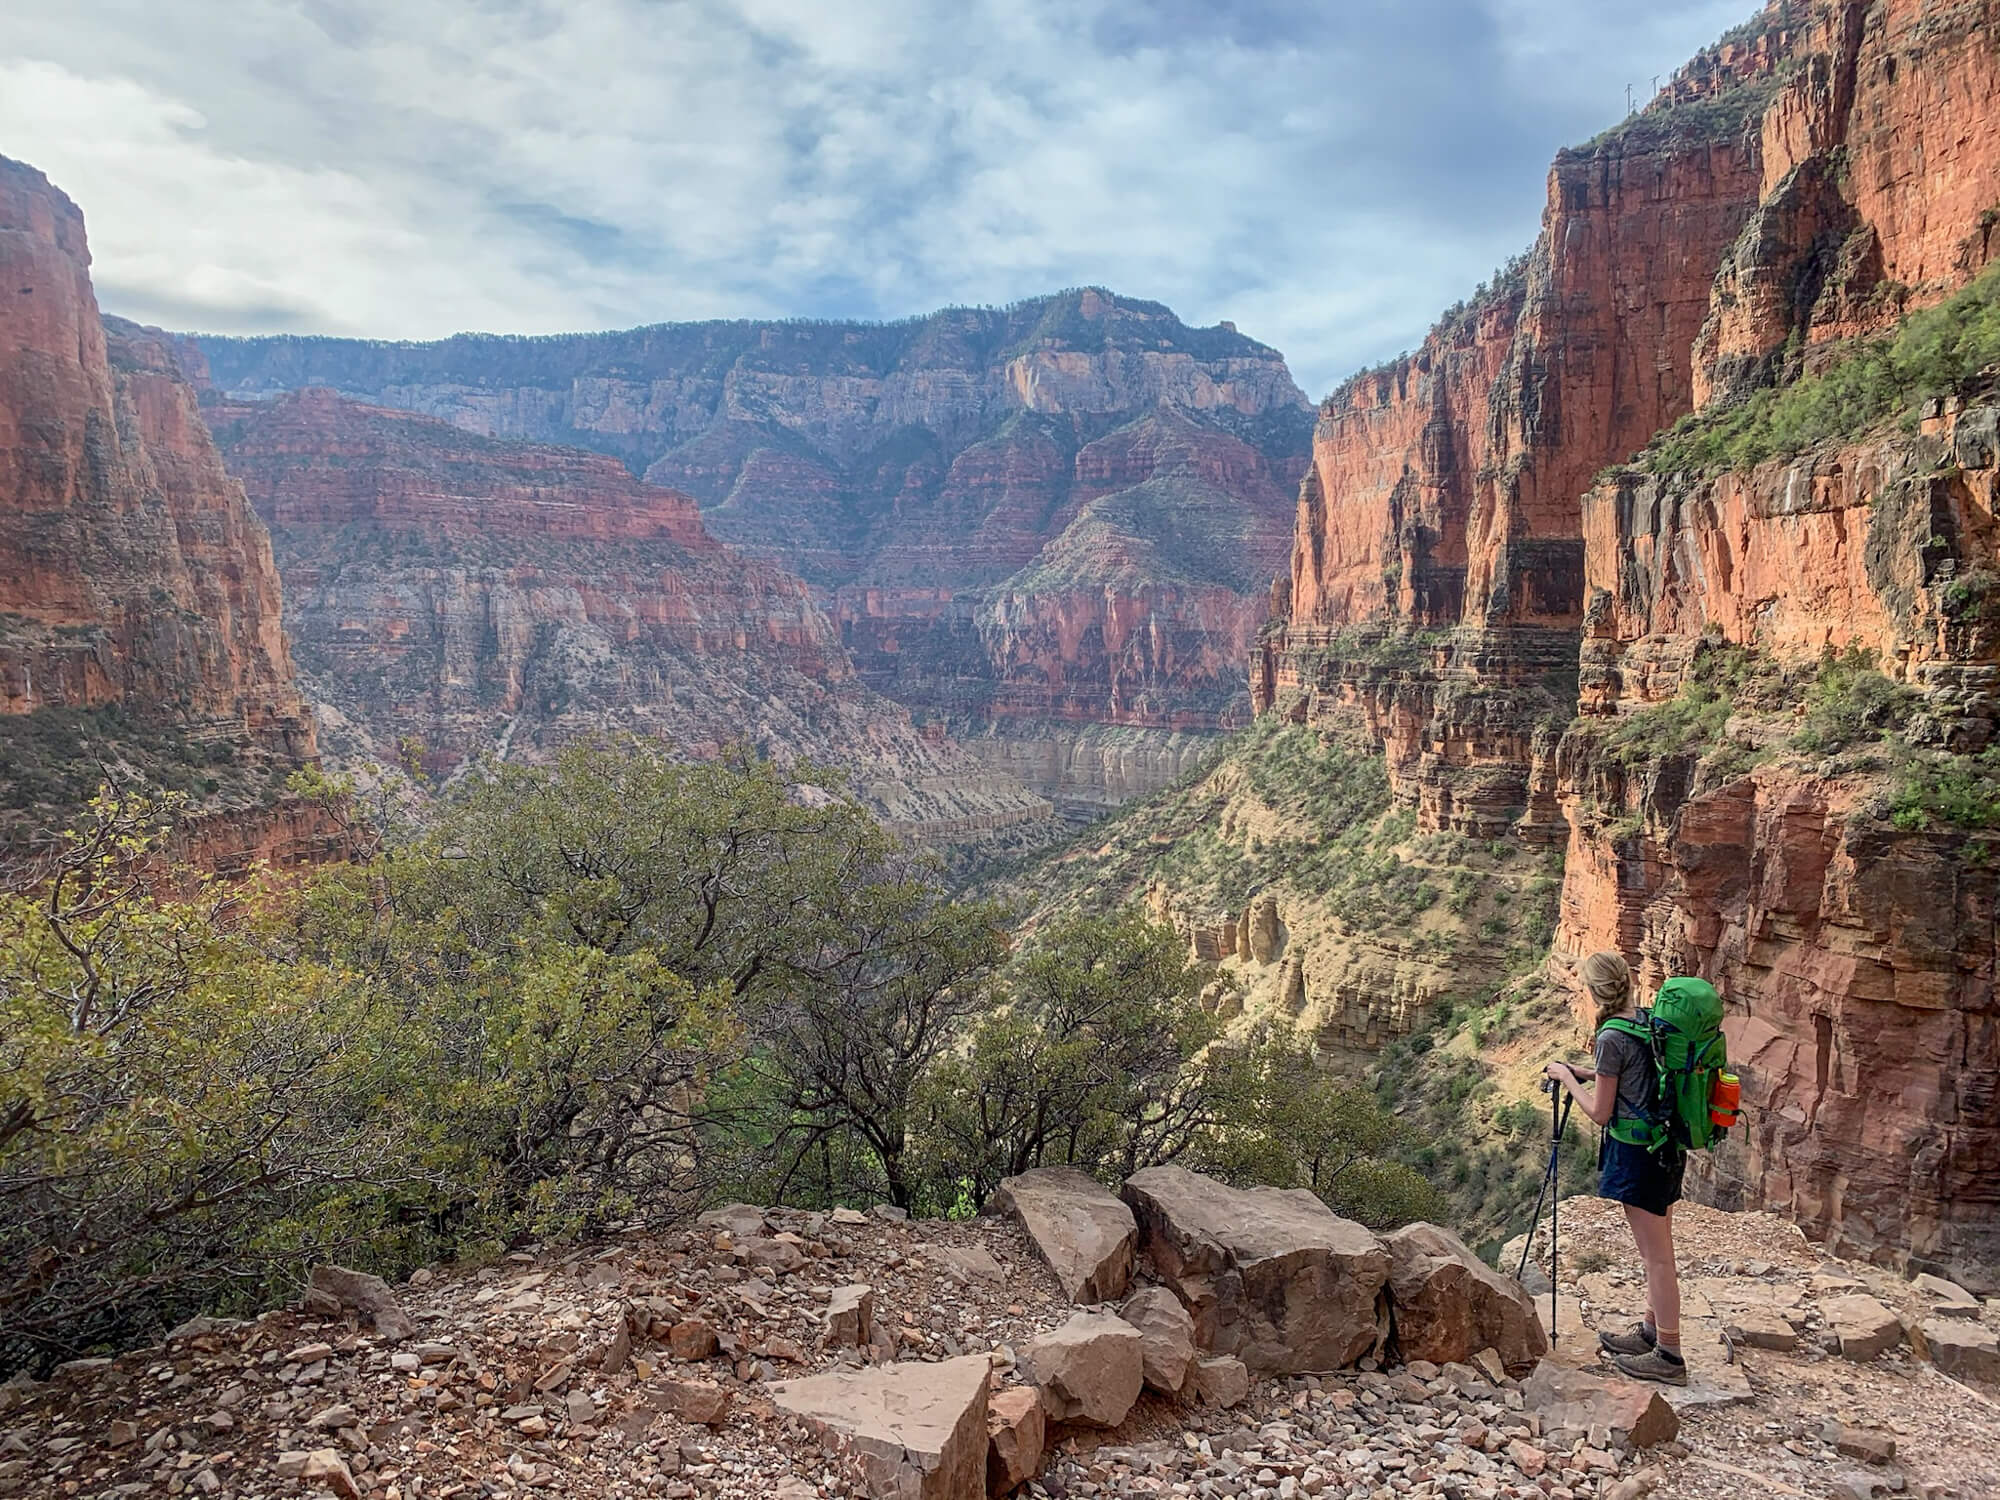
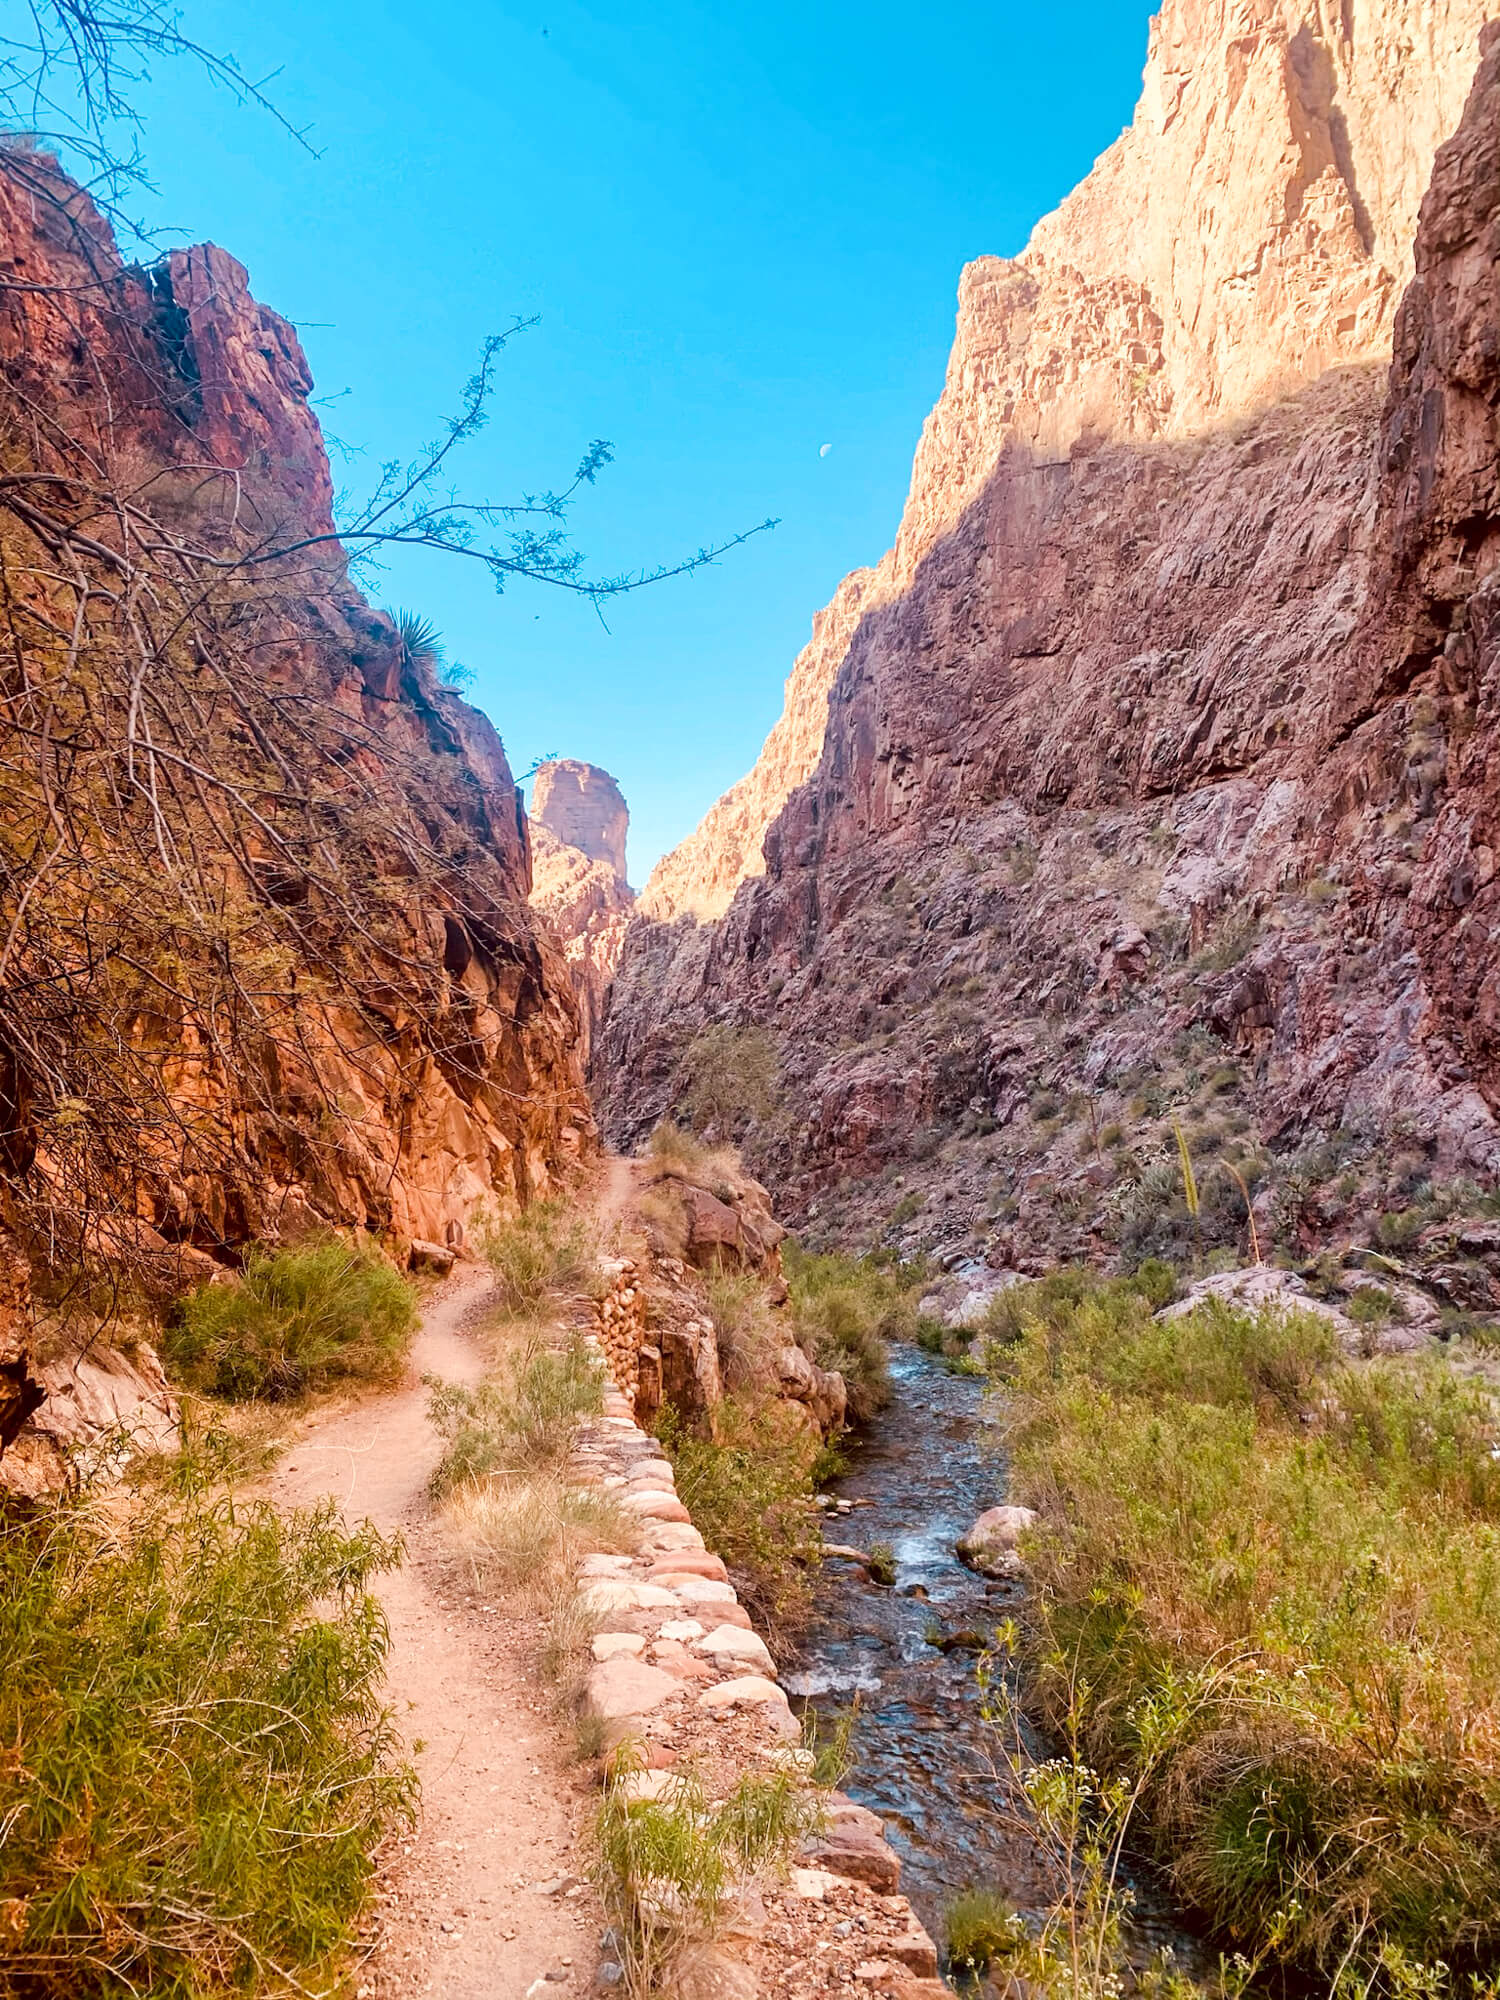
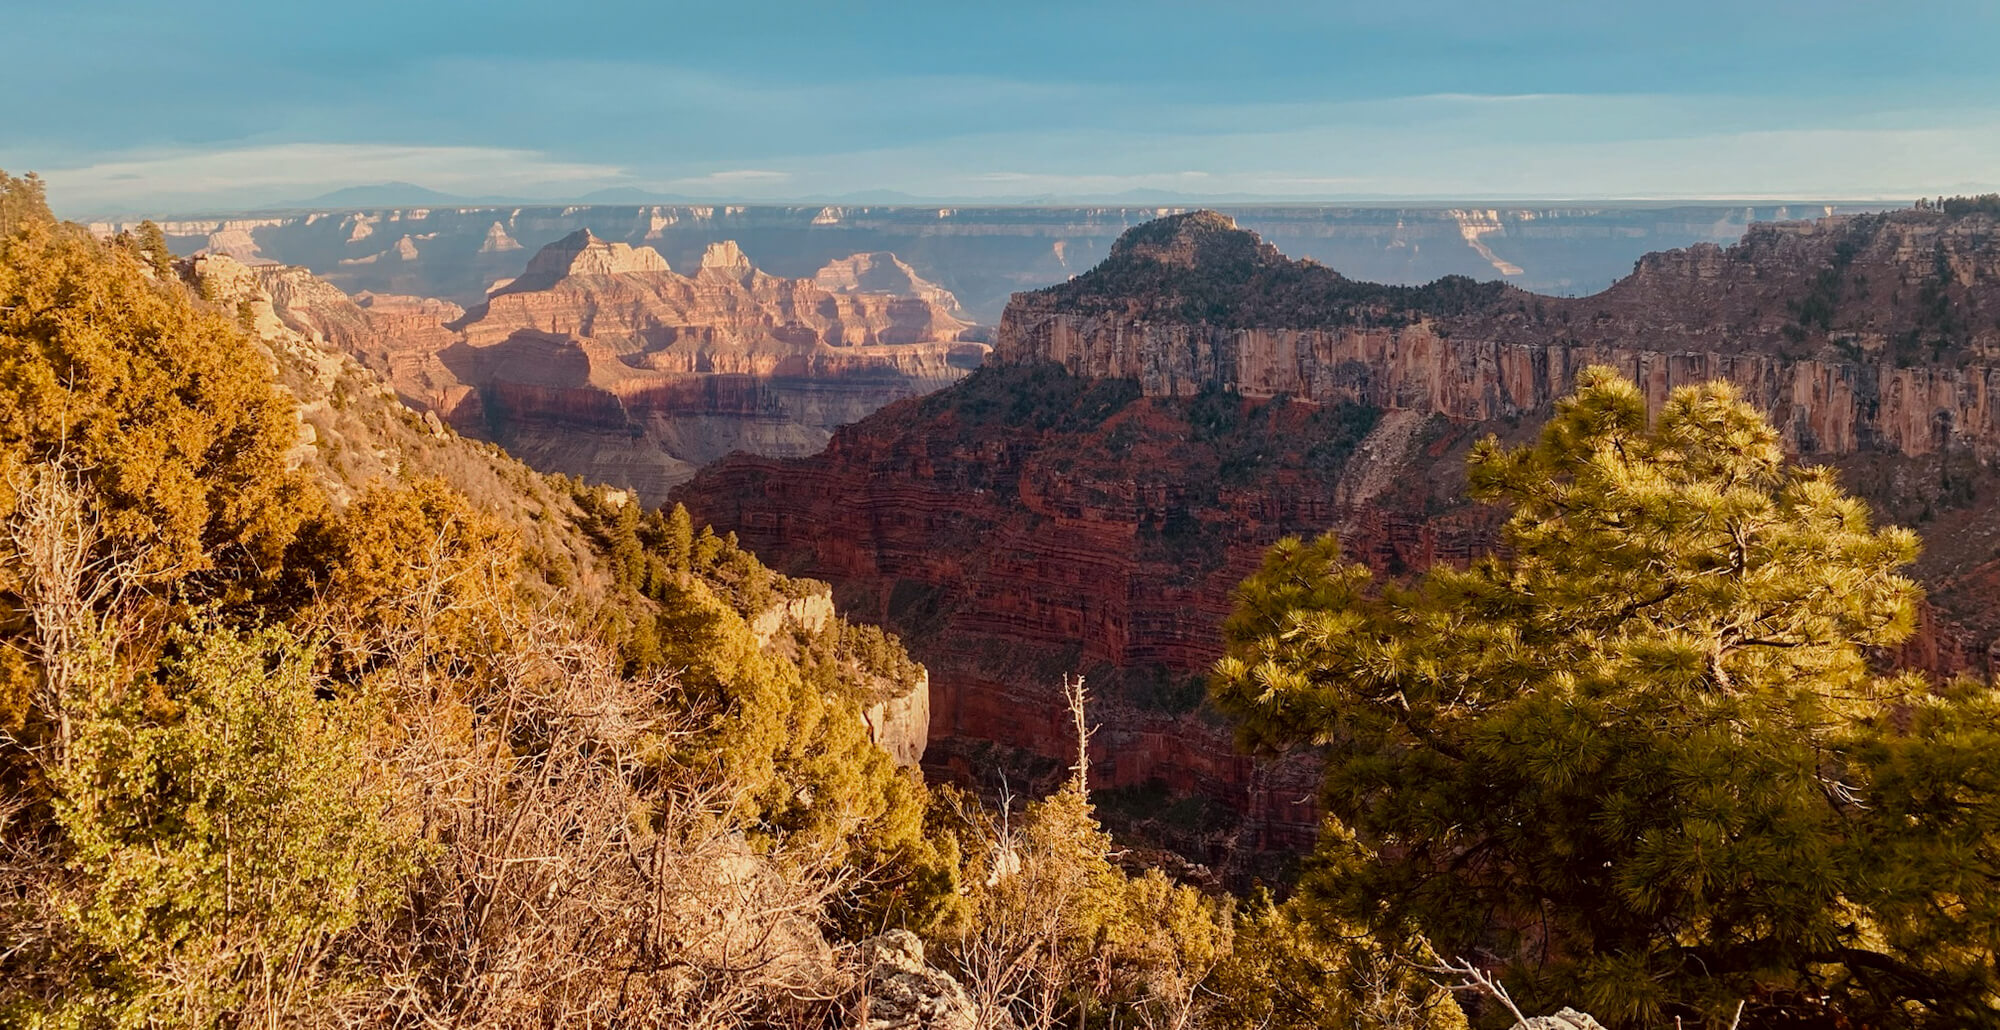
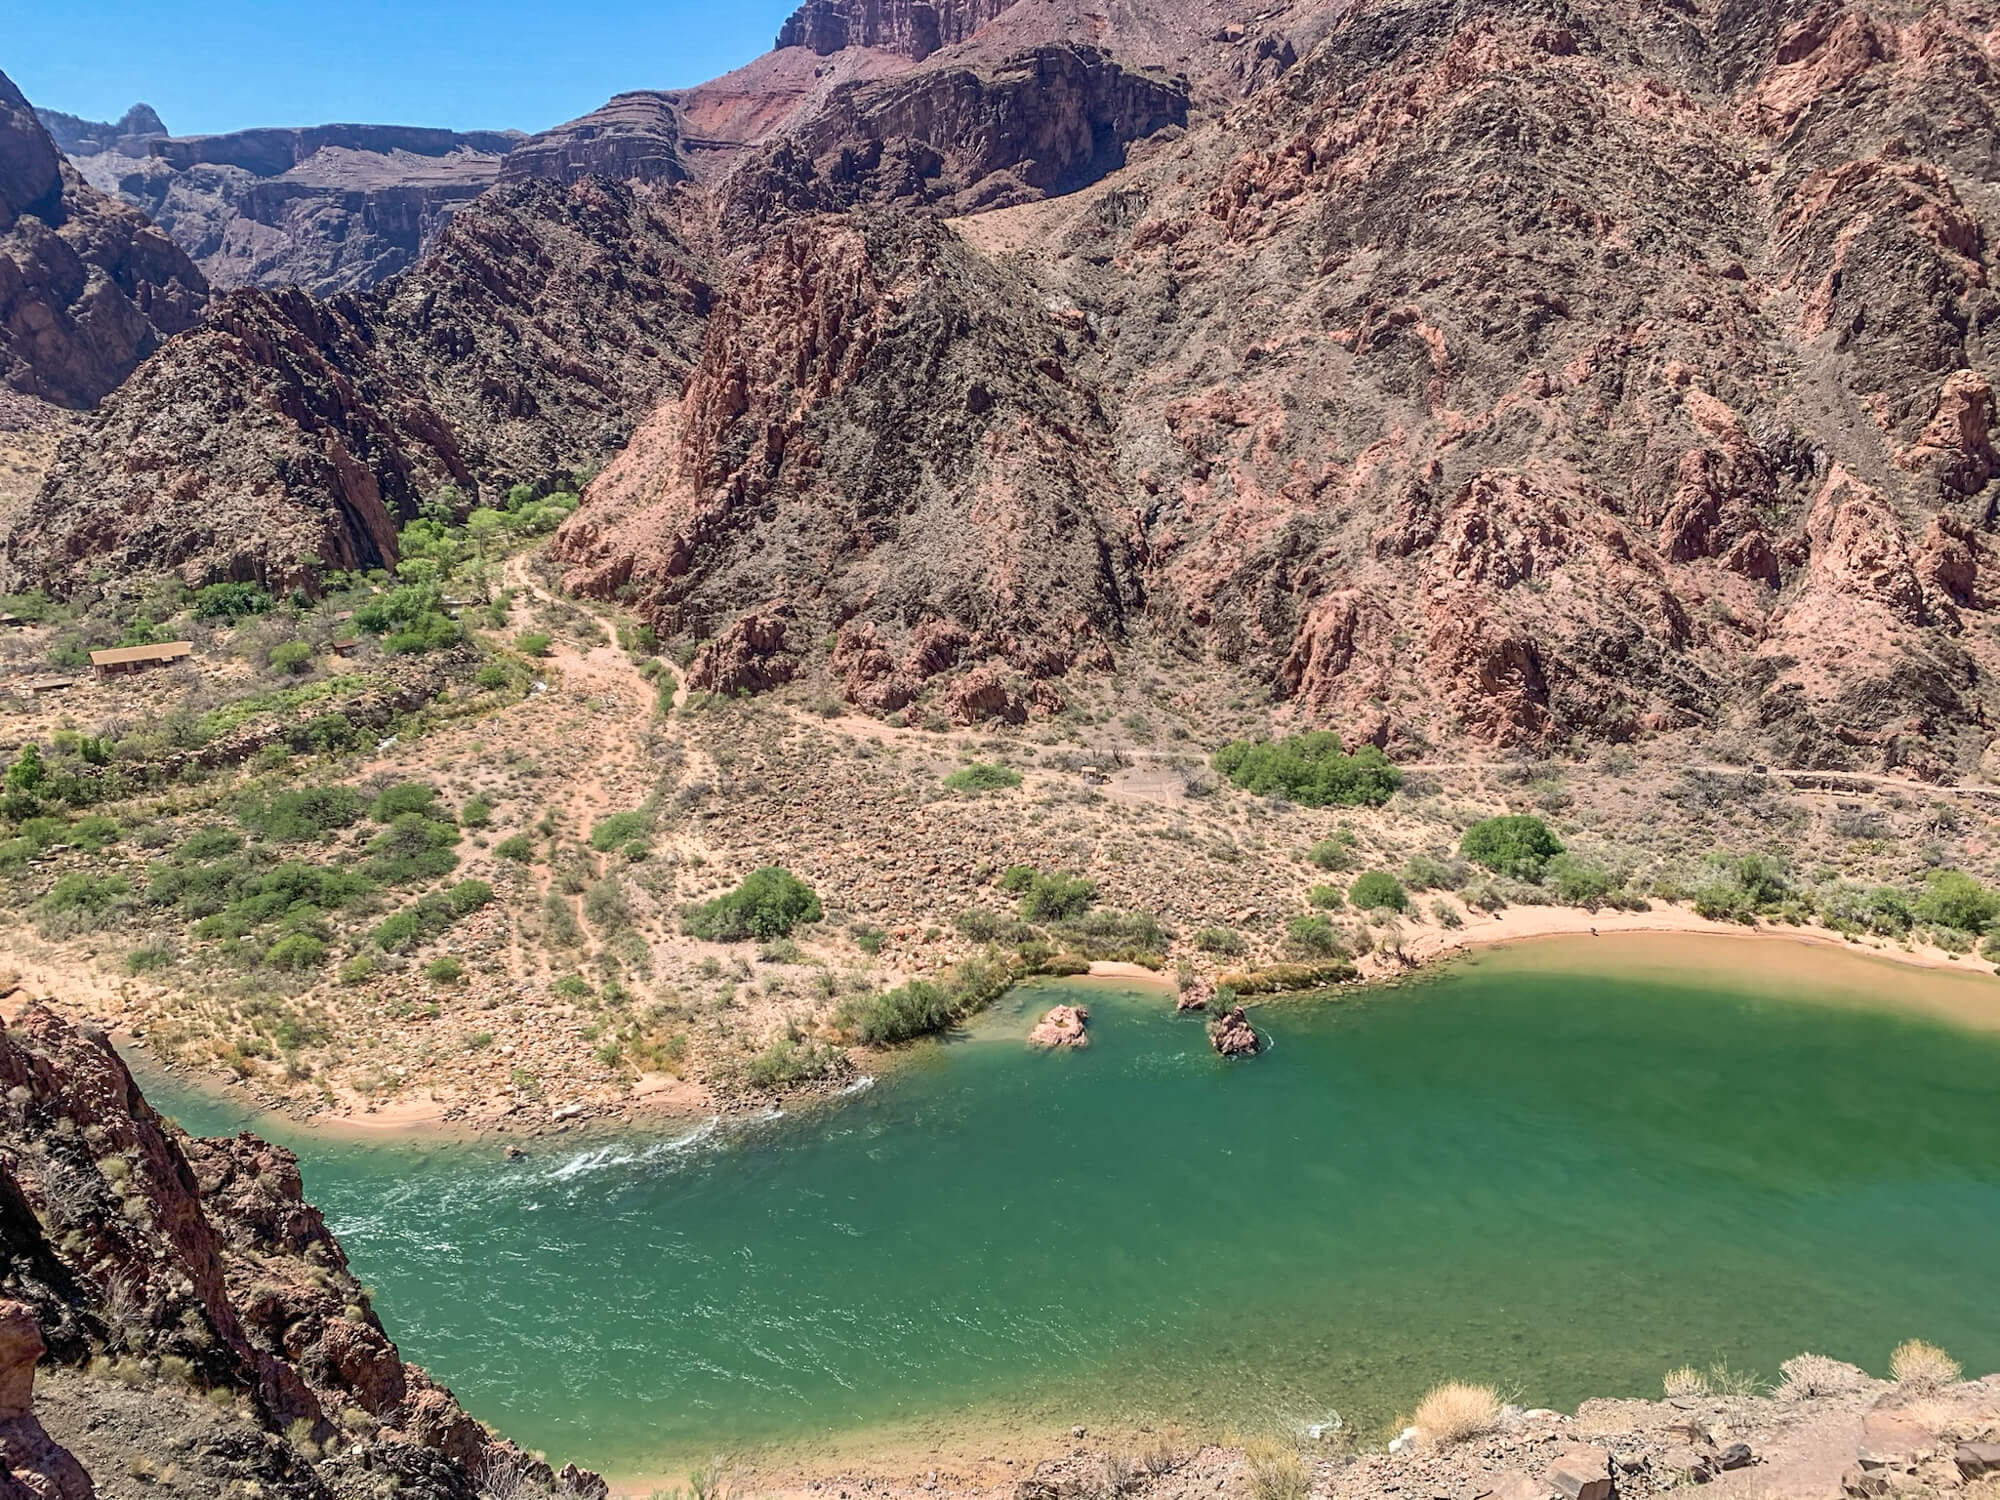
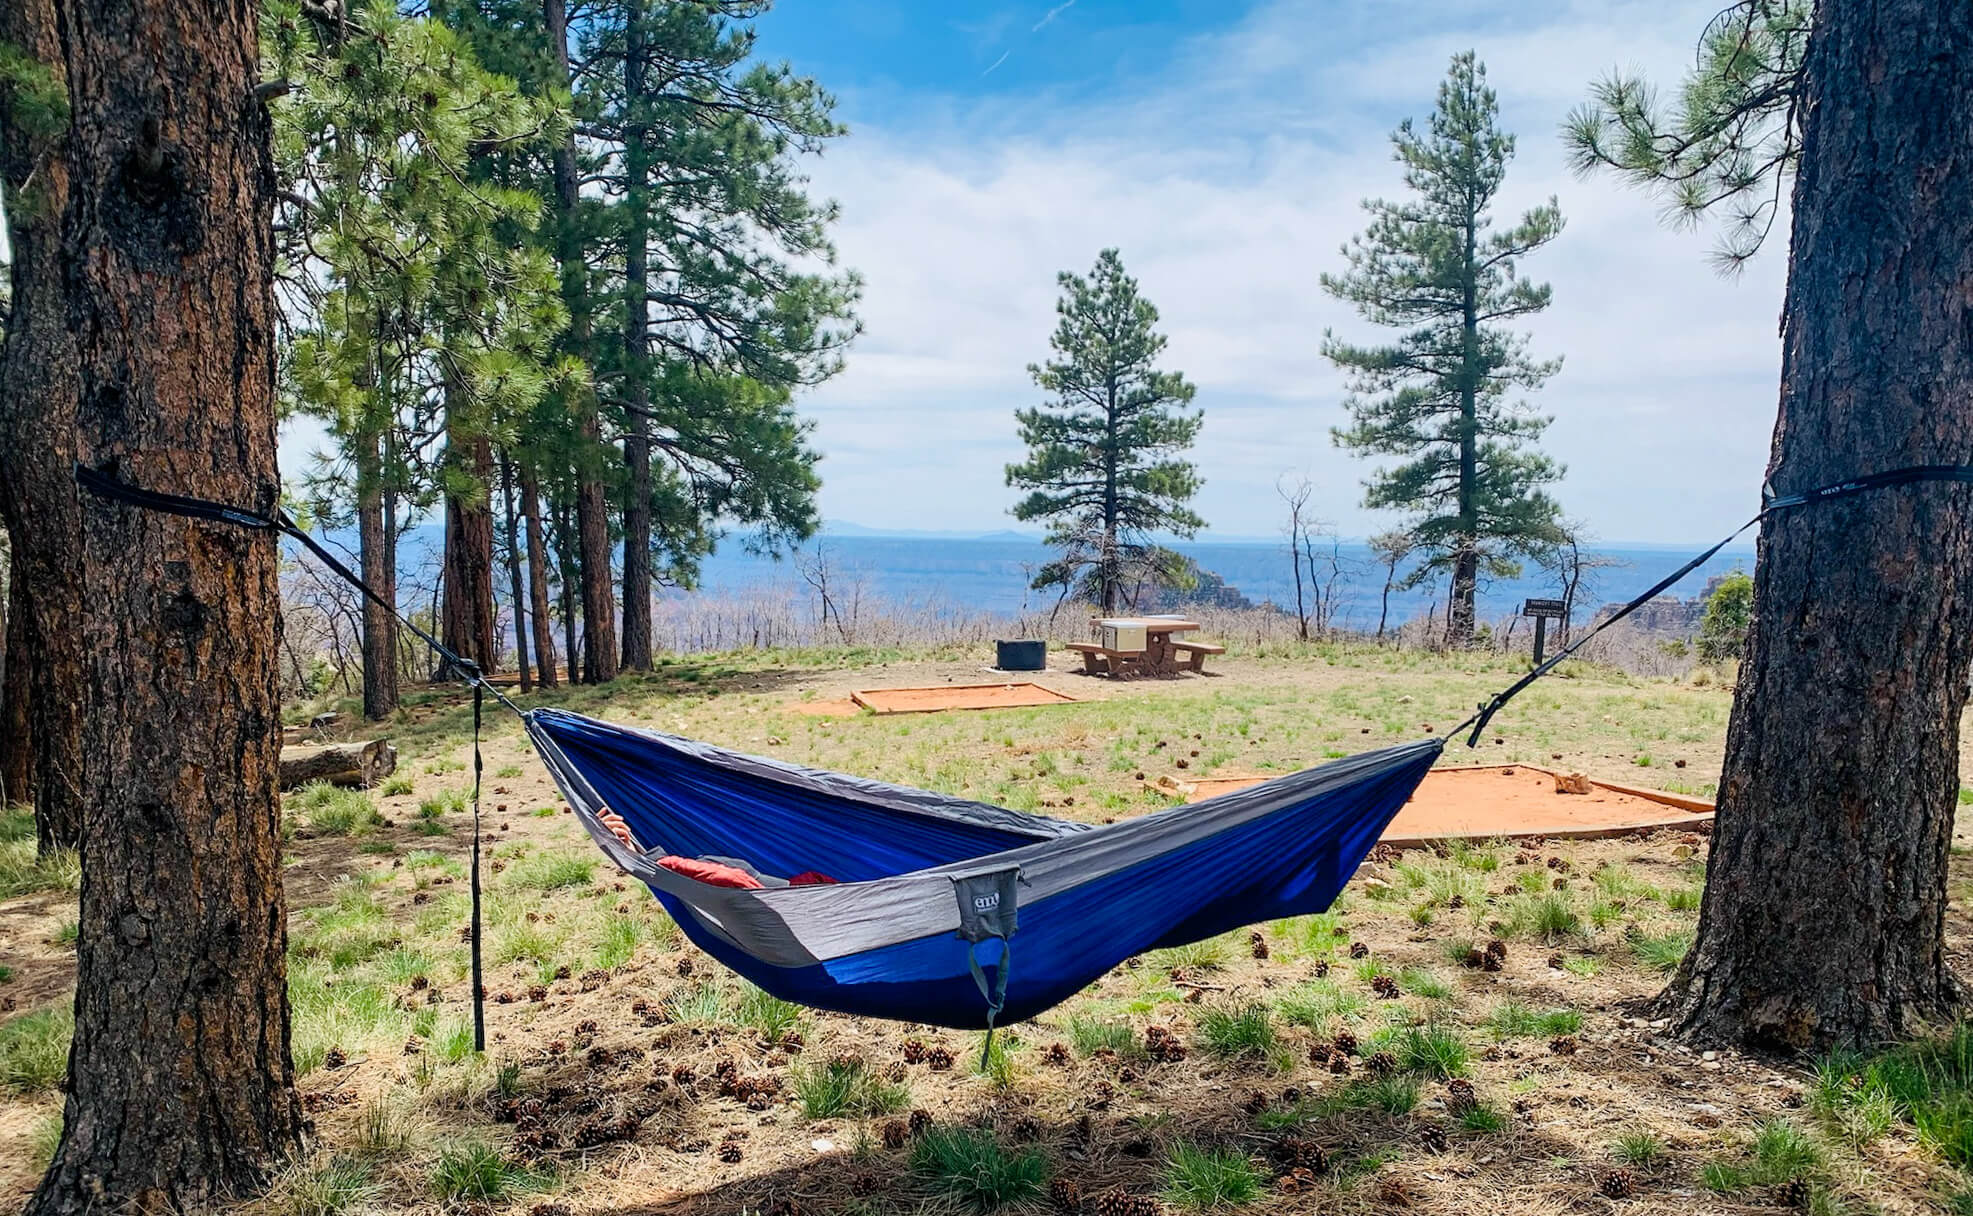
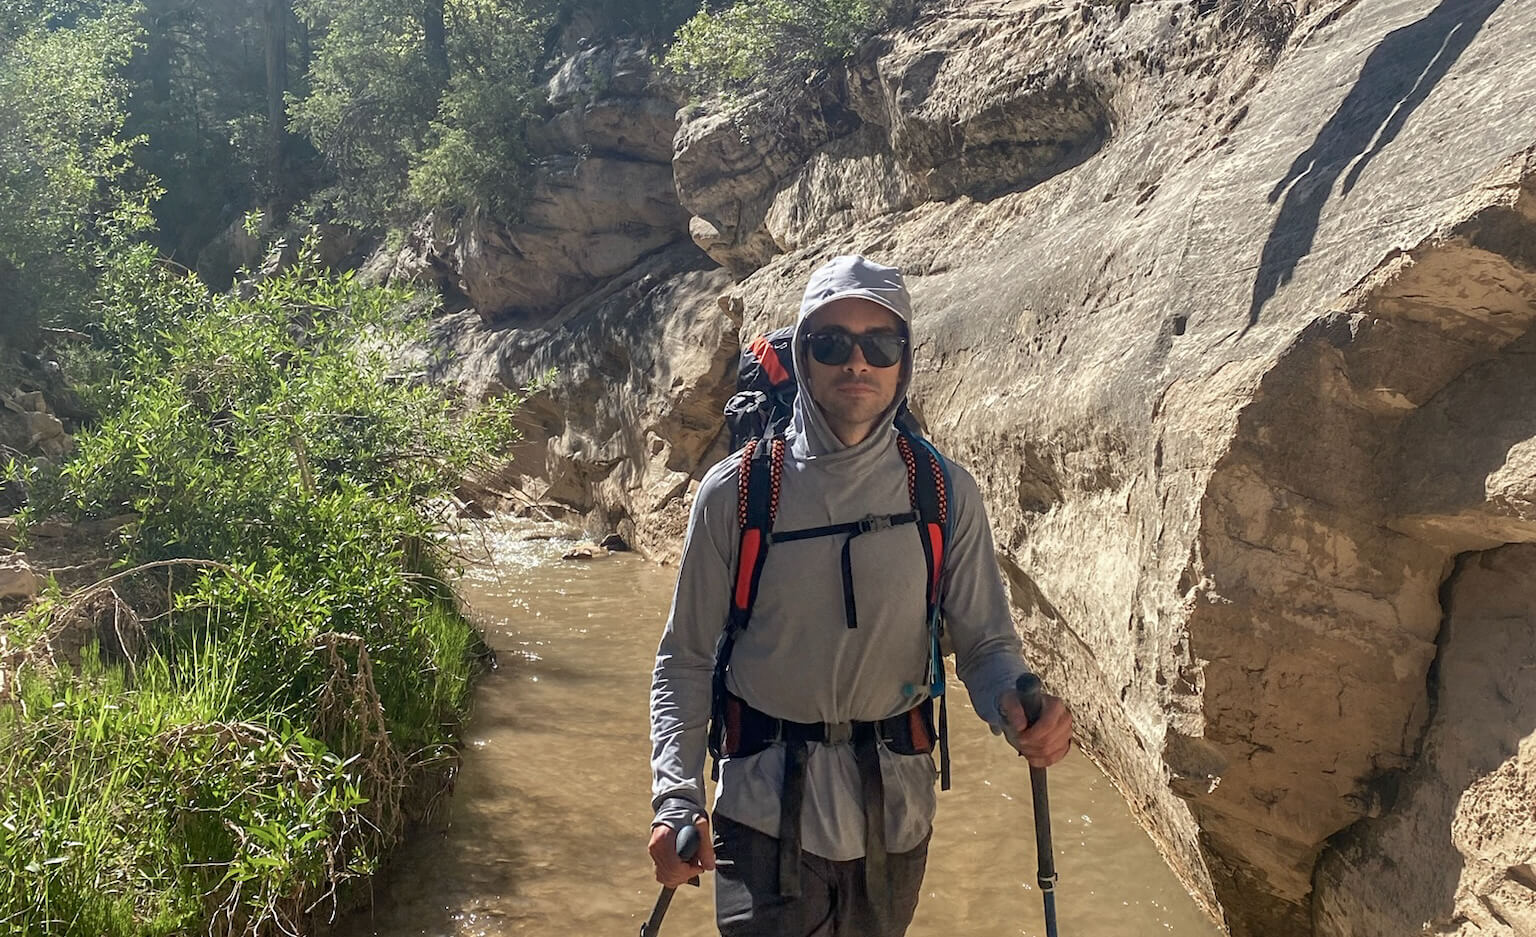
Grand Canyon Backpacking | Ultimate Rim to Rim to Rim Guide

North Kaibaba Trail on the Grand Canyon Rim to Rim to Rim

Backpacking the Grand Canyon inevitably ends up on every adventurer’s bucket list.  For a backpacker visiting the Grand Canyon for the first time, the 21 mile journey (33.8 km) from the South Rim to the North Rim is the ultimate trip to cut your teeth.   You’ll descend the South Kaibab Trail deep into the Grand Canyon to the Colorado River before climbing a punishing 5700ft (1700m) up the North Kaibab trail to the Grand Canyon’s quieter North Rim.

Perhaps, the only better way to backpack the Grand Canyon for the first time is to do it all over again in reverse  for an epic backpacking trip known as the rim to rim to rim (R2R2R2).  During the late spring, summer and fall when the North Rim is open and shuttles are available, this add-on makes limited sense.  However, when the North Rim shuts down backpacking the Grand Canyon this way is an incredible opportunity to find a level of solitude unimaginable at other times of the year.  If you’re thinking about this trip, dreaming of this trip, or have secured a permit, this epic guide to backpacking the Grand Canyon rim to rim to rim was written just for you. So, let’s stop with the formalities and dive right into it! 

There’s tons of detail in this post, so here is a quick, clickable summary of what you’ll find here:

** Some of the links in this post are affiliate links. If you click one of the links and make a purchase we’ll earn a small commission at no cost to you. We’re very particular about products and we only recommend products, services, or accommodation we trust and use ourselves.**

Need to know for backpacking the Grand Canyon rim to rim to rim

Days Required: 2 – 7 days
Difficulty: Moderate, but extreme heat and weather can increase difficulty dramatically. 
Distance: 44.5 miles (72 km)
Elevation Gain: 10, 141 ft (3,090 m)
Elevation Loss:  10, 541 ft (3,210 m)
Permit Required: Yes, competitive.
Navigation: Easy, trails are very well marked.
Water Sources: Frequent potable water sources available between May and December.  Large portions of the Bright Angel and North Kaibab trails have access to water for purification year during the rest of the year. South Kaibab trail has no water. 
Food Storage: Provided at designated campsites.
Best Campsite Walked Past or Stayed At: Cottonwood (below the rim), but read section on the ultimate hack for backpacking the rim to rim to rim for a special campsite tip.  

Deer on Bright Angel Trail in the Grand Canyon

Things you'll love about backpacking the rim to rim to rim

    • Remarkable geology and natural scenery that will leave you awestruck at every turn.
    • Incredible trail infrastructure.
    • Established trail with no navigation required. 
    • Readily available potable water via taps at numerous points (seasonal and not on the South Kaibab).
    • Numerous campsites allow for very manageable daily mileage and different itineraries.
    • Opportunity to camp on the seasonally isolated North Rim.

Things you won't love about backpacking the rim to rim to rim

    • The squirrels. Take your eye off your bag for a second and they are in it.
    • The heat can be the most challenging factor.
    • Competitive permit process that requires using a fax machine.
    • Navigating the throngs of day hikers at the beginning (and end).
    • Keeping a constant ear out for trail runners coming in hot. 
    • Busy campsites that are close together with limited privacy. 
    • Did I mention it can get deathly hot?

How many days does it take to backpack the Grand Canyon rim to rim to rim?

A backpacking trip of the Grand Canyon’s rim to rim to rim is typically done in 4-7 days.

That said, you’re likely to encounter many ambitious trail runners and a few speed hikers pushing to complete the 44.5 mile (72 km) rim to rim to rim in one very, very long day.

Fortunately, backpacking allows the benefit of time to enjoy the splendor of the Grand Canyon, not to mention some of the best night skies you’ll see in your life. So, less mileage is often more enjoyment. We spent 6 nights on the trail and that was absolutely perfect.  I’m not sure I would’ve wanted to move much faster since we had daily high temperatures approaching 110 Fahrenheit (45 degrees Celsius) on several occasions.

For fit, ultralight backpackers this trip could be done in as little as 2 days, spending 1 night on the North Rim. That said, the heat in the Grand Canyon adds a whole new variable that can force schedule interruptions on even upon the most determined hikers.

How hard is it to backpack the Grand Canyon?

The rim to rim to rim backpacking trip in the Grand Canyon is a deceivingly challenging hike.

On one hand, the corridor trails that make up the R2R2R2 route (South Kaibab, North Kaibab, and Bright Angel) are impeccably maintained, require no navigation skills, campsites feature numerous amenities, and potable water is readily available during many times of the year. 

On the other hand, the Canyon coaxes you into a false sense of security with its upside down mountain topography. You start with the ease of descending and gravity on your side, you finish working against it. You’ll descend 4780 ft (1450 m) from the top of the south rim only to climb 5700ft (1700m) up to the North Rim, before doing it all over again in reverse.

The biggest challenge you may face is the elements. The intense sun and searing heat, lack of shade (especially on the South Kaibab), and lack of water and requirement to haul extra (exacerbated during non-peak season when many taps are shut off) are variables unique to those unfamiliar with desert hiking. The heat can be so intense that you’ll find yourself kneeling with gratitude at the smallest amount of shade and setting your alarm earlier each day in a futile attempt to beat the worst of it. 

During the winter, fall and spring, cold weather is also a major part of the equation. Snow, ice and below freezing temperatures are commonplace higher on the South Rim and the North Rim. 

Ultimately,  backpacking the rim to rim to rim can be tough, but with proper planning and respect for the environmental conditions, most backpackers encounter no issues. 

North Kaibab Trail

How do you get a permit to backpack the Grand Canyon?

To backpack in the Grand Canyon you need a permit which is obtained through an antiquated process that involves either sending a fax, mailing the permit request or dropping it off at the North or South rim information center. 

Permit requests are accepted during the 10 day period, 4 months before the month of your desired start date.  If you wish to hike in November, you would submit your completed permit application anytime between June 20 and July 1. The order permits are received doesn’t matter, this period is simply the window in which applications are accepted. Once the deadline passes you’ll receive a response within a couple of weeks.

To complete the application one member of your group will need to complete the permit request form with your group size and desired itinerary (nightly camp location). Additional details and complete instructions on backcountry permits can be found here. 

To maximize your chances of obtaining a permit follow this common sense logic:

    • Maximize your flexibility by creating a first and second choice and selecting as many of the options in the additional choices section of the application as you can. That means:
      • Selecting a big window for alternative start dates or the entire month, if possible.
      • Selecting a lower minimum number of nights (know your limits and conditioning though).
      • Selecting a lower minimum group size. There’s always one friend you kinda want to drop anyways…

With this sage wisdom you’ll hopefully score a permit and ideally write an even better blog post than this after your epic backpack through the Grand Canyon, thereby saving future readers the misery you’re presently enduring in reading this one…


Do you need a park entrance pass if you have a backcountry permit for the Grand Canyon?

Yes, you require a park entrance pass even if you have a permit for backpacking the Grand Canyon. The lines to pay entrance fees at the gate can be long, so make sure to purchase your entrance pass in advance to save time. 

America the Beautiful Annual Pass if the best bet if you plan on visiting multiple parks or multiple times within the year of purchasing it. The Grand Canyon charges $35 per vehicle for a 7 day pass, so it doesn’t take many visits to National Parks or federal public lands to pay back the $80 dollar cost of the America the Beautiful Annual Pass. 

You can also pre-purchase your 7-day entrance fee at recreation.gov if this is the only time you’ll be visiting a National Park this year.

Which direction should you hike?

The rim to rim to rim trail is started from the South Rim, taking either Bright Angel Trail or the South Kaibab trail down before ascending the North Kaibab to the North Rim and then doubling back. The primary reason for this is the seasonal closure of the North Rim that typically begins on the 1st of December until May 15. 

Should you hike the Grand Canyon rim to rim or rim (R2R2R) to rim to rim (R2R)?

When the North Rim is closed to vehicles you’ll only have the option to hike the rim to rim to rim if you wish to complete this hike in its entirety. This provides a couple of advantages. You can camp on deserted North Rim (more on that below) and you will run into fewer and fewer people the further you get from the South Rim. Purely from a solitude perspective, the R2R2R takes the cake while the North Rim is closed to vehicle access.  It will take double the time thought, so this itinerary might not be feasible for everyone. 

During the later spring, summer and fall months when the North Rim is open, I’d gravitate towards doing the R2R as you get no real benefit from the extra days and mileage at this time of year aside from getting to look at the views in reverse, spending more time in the grand canyon, and avoiding a 4-hour shuttle ride.

View from the Bright Angel Trail

Which trails do you hike for the rim to rim to rim?

The most popular and recommended way to backpack (or hike) the R2R2R is to begin your hike by descending the South Kaibab trailhead. After climbing the North Kaibab and returning to Phantom Ranch you’ll be faced with a choice of climbing the South Kaibab or hiking up the Bright Angel Trail. Despite being 2 miles longer, Bright Angel is the wiser choice, especially if there is any kind of heat whatsoever. The South Kaibab is relentlessly exposed with virtually no shade and no opportunity for water. Descending it at the heat of the day on an unexpectedly hot day in April left us completely bagged, I couldn’t have imagined hiking up in these conditions. The smart choice here is to ascend Bright Angel as it provides numerous opportunities for water and shade making the already challenging experience of climbing out of the Grand Canyon significantly more enjoyable. 

When is the best time to hike the Grand Canyon rim to rim to rim?

If you can secure a permit, April is the ideal month to hike the Grand Canyon rim to rim to rim. The heat typically is not yet in full force (It did get to over 110, so extreme heat is still possible), the likelihood of winter conditions (ice, snow) at the higher elevations is reduced, the days are long, and the North Rim is still closed. Hiking the R2R2R while the North Rim is closed affords a couple key advantages. First, it reduces some of the day hiker traffic descending from the North Rim (although according to the park service only around 10% of visitors to the Grand Canyon visit the North Rim) and most importantly it provides an unprecedented way to obtain some solitude on what is a very busy trail by spending a night camping on the North Rim.

The ultimate rim to rim to rim backpacking hack : Book a night on the North Rim and beat the crowds

I was lucky enough to speak to an informative ranger before requesting our permit who was kind enough to advise me that despite the North Rim being closed, the campground remains open to backcountry travelers venturing from the Grand Canyon’s south side. As long as you’re equipped with warm enough gear for the high elevation of the North Rim, (the daily average low is 32F (0C) in April), this can be an incredible experience. With luck, you’ll have an empty campsite and the opportunity to explore the viewpoints of the North Rim in near isolation. 

Can you have campfires inside the Grand Canyon?

No, ​​fires are prohibited throughout the backcountry in Grand Canyon National Park. 

View from the South Kaibab Trailhead

How do you get to the South Kaibab Trailhead?

After parking your vehicle at the Backcountry Information Lot you’ll hop on the free Hikers’ Express shuttle bus to the South Kaibab trailhead. The hours change depending on the season, but they typically leave as early as possible to ensure hikers beat the heat. Check this page on the Grand Canyon’s site to determine the times the bus departs during your trip dates.

How do you get to the Bright Angel Trailhead?

The Bright Angel Trailhead is only a ¼ mile from the Backcountry Information Lot making a return to your vehicle seamless on completion of your trip. 

Food storage while backpacking the Grand Canyon

Metal food storage containers are provided at each campsite along the corridor trails of the Grand Canyon. If you’re planning an itinerary that includes campsites off the main corridor trails bring something to protect your food, like a ratsack. 

Squirrels in the Grand Canyon

Along the corridor trails one of the largest annoyances and potential dangers you’re likely to face is the Grand Canyon famous rock squirrels. It’s rumored that they hold the title for most dangerous animal in the Grand Canyon and this becomes immediately obvious after witnessing the behavior of the first squirrel you see. Extra caution is required! Do not leave your bag or clothing unattended and ensure all food is placed inside the metal food storage boxes. Leave your pack open and hanging from the metal bars at each campsite.  Apparently, this allows them to climb inside and take a look around before realizing there is nothing good to eat and thereby preventing them from chewing though your pack to investigate. Be extra aware of the squirrels nearest to the South Rim.  The high volume of day hiker traffic here seems to have further emboldened this cohort, likely due to many people feeding them. If you sit down and pull out a snack, you may look over to realize there is a squirrel uncomfortably close. You’ve been warned. 

How do I have dinner at Phantom Ranch?

In the middle of a long hard day of backpacking it’s only natural to have visions of your favorite dinner pop in and out of your head. Maybe it’s your favorite pizza, steak frites, or marinated tofu delight. Whatever your fancy, you’re usually constrained to dining on some form of dinner that involves adding boiling water to something dry. One benefit that comes with the sometimes diluted wilderness experience around Bright Angel Campground and Phantom Ranch is your ability to treat your hiking buddy (or have them treat you) to a sit down meal at the Phantom Ranch Canteen. You’ll have your choice of steak, stew or vegetarian option at the heart of the Grand Canyon. A great meal and backpack weight savings all at once! Like any good restaurant, reservations are required, so make a booking for dinner well in advance if this is something that tickles your fancy. 

View approaching the top of Bright Angel Trail

Where to stay before hiking or backpacking the Grand Canyon

To ensure an early start and guarantee you catch the Hikers’ Express Shuttle Bus from the Backcountry Information Center it’s most convenient to spend the night before your hike close to the South Rim of the Grand Canyon. The best option is to stay inside the park itself which allows for exploration of the rim area and historic district during the day before your hike. These options book up incredibly fast, so make your booking as soon as you’ve secured your permit. 

Best accommodation options inside Grand Canyon National Park

Camp at Mather Campground

The most economical option is to camp at one of the 327 campsites at Mather Campground in Grand Canyon Village. The campsites include all the amenities you’d expect plus flush toilets and potable water throughout the campground. If you’re tenting, Pine Loop is a tent-only area where generators are prohibited. Book a reservation on recreation.gov well in advance to secure a spot. 

Stay at one of the Grand Canyon’s historic lodges

Sometimes nothing beats a comfortable bed before (and after) multiple nights in the tent. Fortunately, the Grand Canyon offers numerous historic lodges to get a good night or two of sleep before heading out on your rim to rim to rim adventure. The majority of these are within easy walking distance of the Canyon Rim. 

El Tovar Hotel is considered to be the crown jewel of Historic National Park Lodges. Constructed in 1905 of local limestone and Oregon Pine, this historical hotel is located directly on the rim of the Grand Canyon. 

Bright Angel Lodge and Cabins – Another historic lodging option at the rim of the Grand Canyon. This lodge was originally constructed as a less expensive option to El Tovar. This National Historic Landmark features 90 rooms ranging from cozy lodge rooms (some with shared, some with private bathrooms) and several historic cabins. For one of a kind accommodation consider a stay at the historic Buckey O’Neill Cabin or Red Horse Cabin. You can find more information on these historic cabins and details on how to book them  here.

Kachina Lodge, Thunderbird Lodge, Yavapai Lodge and Maswik Lodge – These lodging options in Grand Canyon Village are slightly more contemporary than the first 2, but do offer more conventional hotel amenities still within easy access of the Canyon Rim. 

Hotels outside Grand Canyon National Park

If the options in the park are booked up there are several notable options just outside of the park gates in the small village of ​​Tusayan. Only 7 miles (11 km) south of the south rim is a suitable backup option that leaves a very manageable drive for the morning of your departure.The Grand Hotel at the Grand Canyon is most sought after choice here with several other decent chain hotel options available.

Trail sections and descriptions

The three trails that make up the rim to rim to rim of the Grand Canyon are referred to as the Corridor trails. These include the South Kaibab Trail, North Kaibab Trail, and Bright Angel Trail. The most common route for hiking rim to rim to rim is to descend the South Kaibab Trail to the Colorado River and Phantom Ranch. From there you’ll climb the North Kaibab trail to the North Rim before doubling back to Phantom Ranch and taking Bright Angel Trail back to the South Rim. The trail sections are broken down with descriptions in this order, 

Mule train coming up the South Kaibab Trail
If you encounter a mule train, move to the inside of the trail and listen for the mule driver's instructions

South Kaibab Trailhead to Bright Angel Campground

7 miles (11.3 KM)

4780 ft (1450 M) elevation loss

After disembarking from the Hikers’ Express Shuttle bus, take a moment to top up your water supplies (this tap is seasonal and may not be turned on until early May). This is your last chance to do so prior to reaching Phantom Ranch and you have 7 miles of very exposed hiking to get through with almost no shade.  After approaching the Canyon rim and dropping, in it doesn’t take long before you come across a series of switchbacks before traversing the slope in a straight shot until coming up on the sublime vista at the aptly named Ooh Ahh Point. You’re already 800ft  (250m) of descending in with plenty to go!

Hiker looks at the view from Ooh Ahh Point in the Grand Canyon

After Ooh’ing and Ahh’ing for as long as you feel is required, continue along the trail as it descends the ridgeline to Cedar Ridge where toilets (no water) are available to anyone feeling moved by the views… The South Kaibab continues its descent along the ridgeline before skirting around the west side of O’Neill Butte and descending to Skeleton Point. Depending on the season, you’ll likely be ready to de-layer by this point as you notice the substantial increase in temperature as you descend towards the canyon floor. After Skelton Point the trail drops down dramatically via a series of switchbacks which descend 650ft (200 m) of elevation in just over half a mile (1 km) towards the Tonto plateau.  By this section, hiker traffic thins substantially as all but the boldest, fittest or most naive day hikers have turned back.  After completing the switchbacks and continuing your descent at a rapid, but slightly more gradual pace you’ll reach the Tonto Plateau and a small rest stop at the Tipoff. The Tipoff has a shaded pavilion and toilers (no water) and is a terrific spot to have a snack, rehydrate, and embrace the shade before tackling the final leg of the South Kaibab. 

View looking down to the Colorado River on the South Kaibab Trail

The section following Tipoff can feel like a race against time, especially for those hiking in late spring, summer or during an unseasonably hot day.  In 1.5 miles (2.5 KM) from the Tipoff to the fork with River Trail you rapidly descends nearly 1280ft (390 m). Despite the rapid descent, you’ll do so without the major switchbacks you encountered earlier and almost no shade. We hiked during an unseasonably hot day in April where the temperature got to well over100 and this section felt like the most challenging of our entire hike.   The Park Service advises that everyone start hiking well before dawn or in the late afternoon during May to September and advises against being on the trail between 10 am – 3 pm to avoid medical risk and potential need for rescue.  So start early!   After reaching the fork with River trail continue to the right. head through the tunnel and across the Black bridge. 

Black Bridge Over the Colorado River from Boat Beach in the Grand Canyon

After crossing black bridge you’ll pass by Boat Beach ( a nice spot to check out on the Colorado River) before walking for another ½ mile to reach Bright Angel Campground, shade, and most importantly water.  

North Kaibab Trail

Bright Angel Campground to North Kaibab Trailhead or North Rim Campground

14 miles (22.5 KM)

5761 FT (1756 m) Elevation Gain

After leaving Bright Angel Campground and passing through Phantom Ranch the trail meanders alongside Bright Angel creek as the Grand Canyon enters one of its narrowest sections, the Inner Gorge or “the Box”. The hiking here is quite flat and easy, but with dark rock walls and low elevation this section can feel like the parking lot at a Phoenix Target in August, so once again, make sure to start early. 

the box area of the grand canyon

After leaving the Box, the trail remains a gradual incline for the entire 7.2 mi (11.6 km) stretch from Bright Angel to Cottonwood Campground. After negotiating a small hill around 5.5 miles from Bright Angel, you’ll have the option of making a wonderful side trip to the cool oasis of Ribbon Falls. 

This trip is well worth it and can also easily be made as a quick afternoon trip directly from Cottonwood campground, if you’re overnighting there. Going to Cottonwood first adds  a 1.6 miles (2.6 km) each way, but gets off the trail before the heat of the day and helps you secure a better campsite at Cottonwood by getting there early. 

To get to Ribbon Falls follow the path until you hit Bright Angel Creek before crossing and following the fork to the left to lower ribbon falls. If you have the energy, a longer trail (0.9 miles or 1.4 km)  forks right and climbs 330ft (100m) of elevation to the less visited Upper Ribbon Falls,   Note that at time of hiking the bridge to access to this trail was removed and an easy ford of Bright Angel Creek was required to access the trail to both upper and/or lower Ribbon Falls. 

Hiker rests by Ribbon Falls an Oasis in the Grand Canyon
taking in Ribbon Falls

After reaching Cottonwood campsite or overnighting there, you’ll hike for 1.4 miles (2.3KM) gaining about 390 ft (120 m) alongside Bright Angel Creek before crossing a final bridge to reach the Manzanita Rest Area.  Seasonal water taps are available at the Manzanita Rest area.  During the winter and spring months, you’ll a have a final opportunity to fill and treat water by taking the short, ÂĽ mile side trip to Roaring Springs which lies â…” mile (1.1 KM)  up from Manzanita Rest Area. Regardless of your water needs, the short side trip to Roaring springs is worthwhile as it brings you closer to the incredible stream of water that gushes out from the cliff above before making its way down to Bright Angel Creek below. Once you’re filled up and ready to get started, backtrack along Roaring Springs Trail back to the North Kaibab and take a breath. The big ascent is about to get started. 

For the next 1.7 miles (2.8 KM) after the junction with Roaring Springs the trail picks up nearly  1000ft (300 m) of elevation before reaching Redwall bridge. During this section you’ll pass along beautiful sections of trail with sheer cliff faces dropping off to the right hand side. For anyone afraid of heights, this section is the likeliest to potentially test your nerves. Fortunately, the wide trail provides ample room to hug the cliff wall so the exposure never feels truly frightening.  This section of the North Kaibab trail is stunning example of a time when trail construction involved blasting away giant sections of rock to accommodate a hiking trail.

Hiker takes in a view on the North Kaibab Trail

After descending slightly to Redwall Bridge you’ll begin another big uphill slog gaining close to 850ft (260 m) in 0.9 miles (1.4 KM) before reaching Supai Tunnel. Supai Tunnel offers a restroom and a seasonal water tap. At an elevation of 6800 ft (2073 m) you’ll begin to notice a change in both vegetation and temperature with large coniferous trees becoming more prevalent.

Redwall Bridge on the North Kaibab Trail
Supai Tunnel on the North Kaibab Trail

From the Supai tunnel the North Kaibab trail pushes on, snaking its way up another another 850ft (250m) of elevation with a dozen switchbacks over the next mile (1.6km) to the Coconino Overlook. Take a moment to savor the view here, as this is the last panoramic view you’ll get of the Canyon on the North Kaibab Trail. 

After enjoying the view, take a deep breath and crush out the final 0.6 mile (1 km) to the top of the North Kaibab Trailhead. Hopefully, you took a moment to enjoy the view from the Coconino Overlook, as the terminus of the North Kaibab is somewhat anticlimactic with no view to speak of. If time permits, consider the 2 mile (3.2 KM) easy trek to Bright Angel Point for a spectacular view back across the Grand Canyon. During the quiet months that North Rim is closed to vehicle traffic this trip is particularly worthwhile. If you’re fortunate enough to be camping on the North Rim, head west for just under a mile (1.4 KM) of easy walking to the BIker/Hiker section of the North Rim Campground on the far west side adjacent to the rim. After getting your site set up, ditch your big pack and take the 1.6 mile (2.6 KM) trail along the rim’s perimeter to Bright Angel Point. 

Hiker takes in the view from the Coconino Overlook
View from the Coconino Overlook

Return to Bright Angel Campground

14 miles (22.5 KM)​

5761 FT (1756 m) Elevation Loss

Double back the way that you came on the North Kaibab Trail following the same route until you reach Bright Angel Campground. Hopefully, you were able to enjoy a night on the North Rim. 

View down Bright Angel Trail to Indian Garden

Bright Angel Campground to Bright Angel Trailhead

9.5 miles (15.3 km)

4380 ft (1337 m) Elevation Gain

From Bright Angel Campground you’ll have the option to hike out on the South Kaibab Trail or take the recommended route out on Bright Angel Trail (see earlier section for the reasons why). From Bright Angel Campground  take the Silver Bridge to the west across the Colorado River. After crossing the river you’ll hike along sand dunes alongside the Colorado River for around 1.2 miles (1.9 km) until the trail begins its ascent back to the South Rim at the Pipe Creek drainage. At this point you’ll find the River Resthouse, a toilet and a convenient spot to fill up and treat water if you happened to forget to do so before leaving Bright Angel. 

You’ll begin your ascent up the Pipe Creek Drainage after departing the River Resthouse . For the first mile (1.6KM) the trail follows alongside Pipe Creek and picks up about 350ft of elevation (100m). After crossing the creek a final time, you’ll encounter a series of switchbacks called the Devil’ Corkscrew which rapidly gains another 500ft (150 M) of elevation. This section is likely to be one of the most unshaded parts you’ll encounter on Bright Angel Trail, so an early start (or late in the day) is recommended to ensure safe passage here. 

the Devils Corkscrew on Bright Angel Trail

The trail links up with Garden creek about a mile after starting the switchbacks of  Devil’s Corkscrew. From here, it’s a gradually elevated mile (1.6 KM) along the creek gully to Havasupai Gardens Campground.  Just before reaching Havasupai Gardens Campground the trail forks with an option to hike out to Plateau point or gain access to the westbound side of the Tonto Trail. The trip to see the view from Plateau Point (1.4 miles or 2.3 km one-way) is a worthwhile side trip if you have the time. 

After staying the night at Havasupai Gardens or stopping to refill and refuel, it’s time to buckle up for the final push back to the South Rim. Following the Garden Creek drainage the trail gains around 500ft (150 m) in the first mile before rapidly gaining another 330ft (100m) in a series of switchbacks to reach 3 Mile Resthouse.  Fortunately, the rest stop provides ample opportunity to catch your breath before the next big push. By this point of your hike, you’ll notice an increase in the trail traffic as you start to encounter a higher frequency of day hikers coming down from the South Rim. 

Morning light from Havasupai Gardens Campground

When you’re feeling re-energized and ready for more elevation push towards the 1.5 Mile Resthouse 1.5 Miles (2.4 KM) up the trail. Nearly a dozen switchbacks and nearly 1000 ft of elevation gain (300 m) separate you from the final rest stop on your rim to rim to rim journey. As you continue upward, take a look back and see where you’ve come from looking for Havasupai Gardens way down below. After the final rest stop of your adventure summon your legs for the final set of switchbacks that lead you up the last 1.5 miles and 1100 ft (340m) of elevation to the Bright Angel Trailhead.  


Congratulations, you’ve just completed the Grand Canyon rim to rim to rim.

Final part of Bright Angel Trail before the SOuth Rim

Campsites in the Grand Canyon on the rim to rim

Along the corridor trails you’re limited to camping in the established campsites which serve as a sufficient place to bunk down with some incredible dark sky views over the canyon walls. The night skies and sublime mesas and canyon walls that adorn every section of the Grand Canyon more than make up for the somewhat lackluster campsites themselves. Many of the sites are close together, with limited privacy. The vast majority of backpackers are respectful of lights out times and quiet time, but bring ear plugs for the one night you inevitably come across a snorer or someone that fails to observe the rules.

Bright Angel Campground

Located near historic Phantom Ranch and near the confluence of Bright Angel Creek and the Colorado River, this is the busiest campground along the Corridor trails. It is also my least favorite. The 30 small campsites are close together with limited privacy, the squirrels are relentless (unquestionably due to the constant prevalence of easy meals) and the cantina, restaurant, and lodging at Phantom Ranch take away slightly from the backpacking/backcountry experience. Not to mention the flush toilets and running water. The entire experience at Bright Angel Campground feels more analogous to car camping than backpacking. All this said, it still has many things to love especially for a one night stay. Bright Angel Creek runs right through it and the cold water is balm to any weary joints and muscles. The site also provides easy access to an incredible beach along the Colorado River that more than makes up for the sleep you’re likely to lose from your neighboring backpacker’s snoring. 

Havasupai Gardens Campground (f.k.a. Indian Gardens)

This is an excellent final night option if you plan on exciting your trip via the Bright Angel Trailhead. The 15 small group sites lie 4.8 miles from the South Rim and about halfway up the Bright Angel Trail making for a relaxed half day hike to exit. The campsites are quite close together with some offering more privacy than others. It’s situated in a beautiful cottonwood grove and adjacent to a small creek. Staying here also provides easy access to add on trips along the Tonto Trail or Plateau point. 

Cottonwood Camground

Camping at Cottonwood is a delight. It’s a smallish campground with 15 sites located 7.2 miles (11.6 km) from Bright Angel Campground on the North Kaibab Trail. This site feels a little more spacious and private than both Indian Garden and Bright Angel and this was definitely my favorite site below the rim. Bright Angel creek bubbles joyfully alongside providing several incredible spots to cool down or soak and relax. Sleeping here was a delight with mesas rising from all around the campground to provide an enchanting silhouettes in contrast to some of the most incredible stars you’ll ever see. Earplugs may still be required, but this site is not even on the same level as Bright Angel. Look for a couple sites on the left as you head toward the North Rim after passing the toilets.  Potable water is seasonal here, so ensure you have a treatment method if traveling between the middle of October and the middle of May. 

tent at the North Rim of the Grand Canyon
Camping at the North RIm - No one around!

North Rim Campground - Winter Camping

As I mentioned before, I believe staying a night on the North Rim is the ultimate hack for hiking the Grand Canyon rim to rim to rim. It can be very cold at night with the possibility of waking up to snow. That said, the solitude provided here is unmatched by any of the other campsites on the R2R2R2.  You need to be prepared with proper layers and sleeping gear. We camped here and had the entire place to ourselves which was quite the change from the chaos of Bright Angel Campground. You’ll set up camp in the section near the canyon rim at the west end of the campground about a 1 mile walk from the North Kaibab Trailhead.  The view here is breathtaking! Additionally, you can explore the lookout at Bright Angel Point without another person anywhere in sight. The entire experience of staying here in winter feels almost post-apocalyptic .Ultimately, I believe staying here also makes for a much more enjoyable experience hiking the North Kaibab Trail as it provides an epic conclusion to the day. Otherwise, you’ll reach the trailhead (which has no view) after the big push up and turn around.

Itinerary options for backpacking the Grand Canyon rim to rim to rim

There are numerous ways to structure an itinerary for backpacking the Grand Canyon rim rim to rim depending on your desired mileage, your fitness level, and the weather conditions/season. When planning your itinerary, note that both Havasupai Gardens Campground and Bright Angel Campground offer several great options for day hiking off the main corridor trails which may make them worthy of an extra night’s stay! Simply add another night or 2 to these campsites on your permit request. These base camp stops get you day hiking off the highly trafficked corridor trails, not to mention the reprieve of lightening your load for a day of exploration. 

Remember when planning your itinerary, it’s critical to recognize that the Grand Canyon is a place of extremes where both heat and snow/ice can impact trip feasibility. On our trek through the Grand Canyon at the end of April we watched our daily wakeup time increase to a nadir of 3:00 am in a futile effort to bike before the heat during an unseasonably warm spell. Best be prepared for the unexpected. 


With this in mind, let’s take a look at a few options:

hikere near Havasupai Gardens Campground

Grand Canyon rim to rim to rim in 2 days 1 night

    • Day 1 : South Rim to North Rim Campground via South Kaibab and North Kaibab Trails
      • 21 miles (33.8 KM)  (+ 0.9 miles (1.4 km) to Campground)
      • Approximate Elevation Gain 5761 ft (1750 m)
      • Approximate Elevation Loss 4780 ft (1457 m)
    • Day 2: North Rim Campground to South Rim via North Kaibab and Bright Angel Trails
      •  23.5 miles (37.8 km)  (+ 0.9 miles (1.4 km) from North Rim Campground to Trailhead)
      • Approximate Elevation Gain 4380 ft (1337 m)
      • Approximate Elevation Loss 5761 ft (1750 m)
 

Itinerary notes

This is an extreme itinerary that is not to be taken lightly and is only recommended for experienced backpackers and thru hikers that have experience with pushing 25+ mile days.  This length of mileage is challenging backpacking anywhere, but the climate and environment of the Grand Canyon may at times make these distances impossible, completely unenjoyable, and often dangerous.  In the late fall, winter and early spring, snow and ice cannot be ruled out and may dramatically slow down your pace. In the spring or fall, unseasonal temperatures have the potential to make the Grand Canyon dangerously hot, making hiking during mid-day hours nearly impossible. If you’re thinking about taking this on, recognize that you may be forced to spend a significant part of your trek hiking in the dark and know your limits. Less is often more in the Grand Canyon, but if you’re limited on time and have the experience and conditioning, this might be the itinerary for you. 

View looking down to Havasupai Gardens Campground

Grand Canyon rim to rim to rim in 3 days 2 night

    • Day 1 : South Rim to Cottonwood Campground via South Kaibab and North Kaibab Trail
      • 14.2 miles (22.9KM)
      • Approximate Elevation Gain 1600ft  (480 m)
      • Approximate Elevation Loss 4780 ft (1457 m)
    • Day 2 Cottonwood Campground to North Rim Trailhead and then Back to Bright Angel Campground
      • 20.8 miles (33.4 km)
      • Approximate Elevation Gain 4160 ft (1268 m)
      • Approximate Elevation Loss 5760 ft (1756m)
    • Day 3 Bright Angel Campground to South Rim via Bright Angel
      • 9.5 mi (15.3 km)
      • Approximate Elevation Gain 4380 ft (1337 m)
      • Approximate Elevation Loss negligible

Itinerary notes​

Completing a R2R2R backpacking trip in 3 days is no small feat with several tough days and one seriously long day. Similar to the sprint of doing it in 1 night, this trip is only recommended for individuals very comfortable with their backpacking abilities and some knowledge of the conditions/extremes one is likely to encounter here. The first day provides for an early morning descent down the South Kaibab and the opportunity to take some time to cool down and wait out the heat (as applicable) in the Phantom Ranch Area. In the later afternoon or on cooler days, the section between Phantom Ranch and Cottonwood is smooth sailing. Day 2 is the most challenging, requiring an early departure from Cottonwood on days where heat may be a factor. The final day features shorter mileage with significant elevation gain made manageable by the availability of water and shade along the Bright Angel Trail. The downside of this itinerary is the lack of time it affords to experience or camp at the North Rim. Additionally, I found Havasupai Gardens Campground to be nicer than Bright Angel, but this itinerary makes camping here for the last night logistically awkward. Or maybe it’s just a good excuse to get a dinner reservation at Phantom Ranch for your last night in the Grand Canyon.

Hiker on the North Kaibab Trail

Grand Canyon rim to rim to rim in 4 days 3 nights

    • Day 1: South Rim to Cottonwood Campground via South Kaibab and North Kaibab Trail
      • 14.2 miles (22.9KM)
      • Approximate Elevation Gain 1600ft  (480 m)
      • Approximate Elevation Loss 4780 ft (1457 m)
    • Day 2 Cottonwood Campground to North Rim Campground
      • 6.8 miles (10.9 KM)  (+ 0.9 miles (1.4 km) to North Rim Campground)
      • Approximate Elevation Gain 4161 ft (1268 m)
      • Approximate Elevation Loss Negligible
    • Day 3 North Rim Campground to Bright Angel Campground
      • 14 mi (22.5 km)  (+ 0.9 miles (1.4 km) from North Rim Campground to Trailhead)
      • Approximate Elevation Gain Negligible
      • Approximate Elevation Loss 5761 ft (1756 m)
    • Day 4 Bright Angel Campground to South Rim via Bright Angel
      • 9.5 mi (15.3 km)
      • Approximate Elevation Gain 4380 ft (1337 m)
      • Approximate Elevation Loss negligible 

Itinerary notes​

Completing the rim to rim to rim in 4 days and 3 nights is likely the choice for you if you seriously considered doing it in 2 days, but really wanted the opportunity to stay a night on the North Rim. This itinerary groups heavy mileage with heavy descending and low mileage with ascending. The only downside here is the requirement to stay at Bright Angel on the last night vs the nice Havasupai Gardens Campground. That said, get a dinner reservation at Phantom Ranch and it might be the perfect way to spend your last evening in the Grand Canyon. 

The North Kaibab Trail near the Box area

Grand Canyon rim to rim to rim in 5 days 4 nights

    • Day 1: South Rim to Cottonwood Campground via South Kaibab and North Kaibab Trail
      • 14.2 miles (22.9KM)
      • Approximate Elevation Gain 1600ft  (480 m)
      • Approximate Elevation Loss 4780 ft (1457 m)
    • Day 2 Cottonwood Campground to North Rim Campground
      • 6.8 miles (10.9 KM) to North Kaibab Trailhead (+ 0.9 miles (1.4 km) to Campground)
      • Approximate Elevation Gain 4161 ft (1268 m)
      • Approximate Elevation Loss Negligible
    • Day 3 North Rim Campground to Cottonwood Campground
      • 6.8 miles (10.9 KM) (+ 0.9 miles (1.4 km) from North Rim Campground to Trailhead)
      • Approximate Elevation Gain Negligible
      • Approximate Elevation Loss 5761 ft (1756 m)
    • Day 4 Cottonwood Campground to Havasupai Garden Campground (North Kaibab Trail & Bright Angel
      • 7.2 mi (11.6 km) + 4.7 mi (7.6 km) = 11.9 mi (19.2 km)
      • Approximate Elevation Gain 1320 ft (400 m)
      • Approximate Elevation Loss 1600 ft (480 m)
    • Day 5 Havasupai Garden to South Rim via Bright Angel Trail
      • 4.8 mi (7.7 km) 
      • Approximate Elevation Gain 3060 ft (930 m)
      • Approximate Elevation Loss negligible 

Itinerary notes​

This might just be the perfect itinerary for hiking the Grand Canyon Rim to Rim to Rim. The daily mileage is manageable with one long day that is primarily descending.  Additionally, you’ll avoid staying at my least favorite campground (Bright Angel), and have plenty of time to take in the splendor of the Grand Canyon. ’d likely choose this route, if I were to do this trip over again. The biggest consideration you’ll  here is ensuring you get a very early start on day 1. If you don’t start early enough and the heat becomes unbearable, you may be forced to pitstop for a couple hours at Phantom Ranch between 10 am – 3 pm. The same goes for Day 4 when you’ll hike from Cottonwood to Havasupai Garden.

View from the North Rim

Grand Canyon rim to rim to rim in 6 days 5 nights

    • Day 1: South Rim to Bright Angel Campground via South Kaibab Trail
      •  7.0 mi (11.3 km)
      • Approximate Elevation Gain Negligible
      • Approximate Elevation Loss 4780ft (1457 m)
    • Day 2 Bright Angel Campground to Cottonwood Campground
      •  7.2 mi (11.6 km)
      • Approximate Elevation Gain 1600 ft (480 m)
      • Approximate Elevation Loss Negligible
    • Day 3 Cottonwood Campground to North Rim Campground
      • 6.8 miles (10.9 KM) to North Kaibab Trailhead (+ 0.9 miles (1.4 km) to Campground)
      • Approximate Elevation Gain 4161 ft (1268 m)
      • Approximate Elevation Loss Negligible
    • Day 4 North Rim Campground to Cottonwood Campground
      • 6.8 miles (10.9 KM) (+ 0.9 miles (1.4 km) from North Rim Campground to Trailhead)
      • Approximate Elevation Gain Negligible
      • Approximate Elevation Loss 5761 ft (1756 m)
    • Day 5 Cottonwood Campground to Havasupai Garden Campground (North Kaibab Trail & Bright Angel)
      • 11.9 mi (19.2 km)
      • Approximate Elevation Gain 1320 ft (400 m)
      • Approximate Elevation Loss 1600 ft (480 m)
    • Day 6 Havasupai Garden to South Rim via Bright Angel Trail
      • 4.8 mi (7.7 km) 
      • Approximate Elevation Gain 3060 ft (930 m)
      • Approximate Elevation Loss negligible

Itinerary notes​

Daily mileage is very manageable and affords the ability to avoid hiking during hot temperatures if you encounter them. This was the itinerary that we hiked on our rim to rim to rim trek. In ideal hiking conditions it may have felt a little relaxed, but with unseasonal temperatures well over 100F, we were happy to have the time.  We’d start hiking shortly before sunrise and finish many days before 11am.  Day 2 will be short with limited elevation gain, but this provides the option of setting up camp and then using the afternoon to hike to and relax at nearby Ribbon Falls. 

View to Bright Angel Campground from the South Kaibab Trail

Grand Canyon rim to rim to rim in 7 days 6 nights

    • Day 1: South Rim to Bright Angel Campground via South Kaibab Trail
      •  7.0 mi (11.3 km)
      • Approximate Elevation Gain Negligible
      • Approximate Elevation Loss 4780ft (1457 m)
    • Day 2 Bright Angel Campground to Cottonwood Campground
      •  7.2 mi (11.6 km)
      • Approximate Elevation Gain 1600 ft (480 m)
      • Approximate Elevation Loss Negligible
    • Day 3 Cottonwood Campground to North Rim Campground
      • 6.8 miles (10.9 KM) to North Kaibab Trailhead (+ 0.9 miles (1.4 km) to Campground)
      • Approximate Elevation Gain 4161 ft (1268 m)
      • Approximate Elevation Loss Negligible
    • Day 4 North Rim Campground to Cottonwood Campground
      • 6.8 miles (10.9 KM) (+ 0.9 miles (1.4 km) from North Rim Campground to Trailhead)
      • Approximate Elevation Gain Negligible
      • Approximate Elevation Loss 5761 ft (1756 m)
    • Day 5 Cottonwood Campground to Bright Angel Campground
      • 7.2 mi (11.6 km) 
      • Approximate Elevation Gain negligible
      • Approximate Elevation Loss 1600 ft (480 m)
    • Day 6 Bright Angel Campground to Havasupai Garden Campground
      • 4.7 mi (7.6 km)
      • Approximate Elevation Gain 1320 ft (400 m)
      • Approximate Elevation Loss negligible
    • Day 6 Havasupai Garden to South Rim via Bright Angel Trail
      • 4.8 mi (7.7 km) 
      • Approximate Elevation Gain 3060 ft (930 m)
      • Approximate Elevation Loss negligible

Itinerary notes​

This option is like the 6 day option, but splits the trek up between Cottonwood and Havasupai Gardens. Doing it this way allows you to conquer the hottest part of your ascent up the South Rim first thing in the morning and takes significant mileage and elevation off your final day’s trek out. 


tent at the North Rim of the Grand Canyon
My old Marmot Catalyst tent 3P camping at the North Rim

What to pack for backpacking the Grand Canyon

The lighter your pack, the more enjoyable your backpacking trip in the Grand Canyon is going to be. A lighter backpack helps you cover more mileage and more elevation with way less effort making big days more realistic, not to mention more comfortable!

If you’re new to backpacking, don’t stress out about buying the latest and greatest equipment. Save money and use things you already own that can be repurposed for backpacking, rent gear or borrow stuff from a gear-head buddy. Later, when you’ve gained more experience, modify your kit and change out gear as you get a better understanding of what creature comforts you can and can’t live without. 

Here’s a complete list of gear to pack for backpacking the Grand Canyon. Click any item below to jump ahead in the post for a detailed recommendation. 

Mountain Hardwear Strato UL2 Tent in Sequoia National Park at Rae Lakes
This doesn't look like the Grand Canyon! I wish I had this tent for the Grand Canyon though! My Mountain Hardwear Strato UL2 at Rae Lakes in Sequoia National Park.

Best tent for backpacking the Grand Canyon

I upgraded to Mountain Hardwear Strato UL2 since backpacking the R2R2R2 and it’s been great, that’s it above at Rae Lakes in Sequoia National Park. It’s the perfect tent for backpacking the Grand Canyon as it’s semi-freestanding, double walled and weighs in at a mere 2.5 lbs. Unlike many 2-person tents, it doesn’t have a tapered floor and is able to fit 2 extra wide sleeping pads side-by-side with no overlap,  a rarity in this class of tent! It’s cozy for two, but palatial for one!  

If you’re looking for a completely freestanding tent that doesn’t need to be staked out to stand, check out the Big Agnes Copper Spur UL2. It’s unique blend of functionality, livability, weight, and durability earn high praise and Big Agnes’s customer service is outstanding!  

For an incredible ultralight option, check out the single wall Durston X-Mid Pro which weighs in at a mere 20 oz (565g). There’s a reason this tent has developed a serious cult following among ultralighters. 

osprey exos backpack
Using the Osprey Exos in Zion National Park

Best backpack for backpacking the Grand Canyon

If you’re just getting into backpacking, there is nothing wrong with using a large-size backpack with a decent suspension system (and good hipbelt) or borrowing one from a friend. Going this route gives you time to decide what features you need and whether or not backpacking (and the gear) is something you want to invest in.  Whatever backpack you use, make sure you have a good fit before by following this guide to backpack sizing.  When I first started backpacking, I used a 60L travel backpack, our Khmer Explorer Travel Set on Canada’s West Coast Trail.  While not designed for hiking, it worked great despite my ridiculous overpacking!  

If you’ve begun dialing in your backpacking kit and moving towards a lightweight set-up, check out either the Osprey Exos or Woman’s Eja. At under 3 lbs these packs provides a great compromise between barebones ultralight packs and the heavier feature-laden packs.  Their excellent suspension systems prevent the dreaded swampy/sweaty back on hot days. That’s my Exos hiking the Narrows in Zion in the photo above. 

Learn more about the Exos and Eja:

For a similar option that checks in even a little bit lighter in weight, check out the Gregory Focal and Facet (women’s) lineup:

If you’re an extreme gram counter, you might like the Hyperlite 3400 southwest. It’s 100% waterproof and constructed from ultralight dyneema fabric.  Being ultralight you’ll sacrifice features, so if you hate getting a swampy back (that’s me) you may prefer the Osprey or Gregory despite the weight penalty. Backpacking gear is always a zero sum game! 

Check the price of the Hyperlite 3400 southwest:

Sleeping mat

I used to have terrible sleeps in the backcountry until I switched to the Therm-a-Rest NeoAir X-lite. It’s incredibly lightweight, comfortable, and packs down to the size of a Nalgene bottle. This is probably one of my favorite backpacking items! Get one. You won’t regret it. Sleep well! 

Patagonia Sleeping Bag in a tent

Sleeping bag or quilt

My Patagonia Sleeping Bag kept me nice and toasty on the North Rim. Plus at only 822 g (29 oz)  it’s lightweight and packs down small!  I found the 30°F / -1°C  to be perfect for most outings – if it gets colder you can always layer up! Like all Patagonia products, it’s not cheap, but they stand behind their gear and the quality matches the price point. If you spend a lot of time in colder environments they also make a 20°F / -7°C version .  These bags are a worthwhile splurge! 

If you’re looking for an even lighter-weight option, consider going for a sleeping bag quilt. Feathered Friends  Flicker UL Quilt Sleeping Bag has won numerous awards and is a stalwart among ultralight backpackers. With a weight starting at  526g (1 lb 2.5 oz), I can see why! 

Backpacking pillow

Yes, you can sleep with a pillow not made of bunched up clothes in the backcountry. Check out the Nemo Fillo Elite. It packs down ultra small and provides a new level of comfort after long days on the trail. Once you try one you won’t imagine how you lived without! 

Water purification

Outside of the summer months you’ll need to bring something to purify your drinking water.  I love the Steripen. It’s light, portable and only takes minutes to purify a liter of water using only UV light. Press the button, place the pen in your bottle, and stir for a couple minutes it’s that easy!  

Make sure to bring tablets as a backup though should you run into any technical problems/dead battery with your Steripen.

Trowel & toilet Paper

The rim to rim to rim offers a number of toilet facilities along the way and you should do everything you can to make use of them and avoid the alternative! That said, it’s always a good idea to pack a trowel just incase nature urgently calls at an unexpected time. Follow minimum impact camping principles and be sure to go at least (650 ft) 200m away from any established trails, campsites, or water (creeks, lakes, rivers etc.), dig your cathole at least 6 inches deep, and pack tp out. 

Swiss army knife

For fixing gear or cutting food, make sure to bring swiss army knife.

Stove & fuel canister

Lightweight, convenient, and reliable, the MSR pocket rocket  has been my go-to backpacking stove for years. 

Lighter and matches

A little baby bic lighter is all you need. I often bring a small pack of matches wrapped in ziplock bag as well for backup or you could bring a small pack of waterproof ones.

Backcountry cookset

I love the GSI Halulite Microdualist II , two-person cookset. It’s lightweight and I can fit my MSR pocket rocket and a fuel canister inside.

If you’re looking to buy a minimalist stove and cookset check out the MSR PocketRocket Stove Kit  for an all-inclusive solution. 

Water bottle or reservoir

Nalgene are always a backcountry favorite. Check prices at Backcountry /REI. If you’re cutting weight or looking for a way to save a buck, a simple smart water is the go-to for ultralight backpackers.  

Alternatively, a hydration reservoir allows you to stay hydrated continuously without stopping to grab and open a bottle. 

Water storage container

Extra water capacity is important for safety on your hike of the rim to rim to rim. So make sure to bring a MSR DromLite Bag  or Dromedary for additional water storage.  They are also convenient to have around camp for cooking and cleaning up. 

First aid kit

From blisters, to scrapes, and cuts, a first aid kit is an essential item to have.  The pre-built kits from Adventure Medical Kits offer varying sizes for party size and trip length.  At the end of your trip write down any items you used and replace them right away so your kit is ready for your next adventure. 

trekking poles in the Grand Canyon
Using the Leki MCT Vario poles in the Grand Canyon

Trekking poles

The huge elevation gains and losses in the Grand Canyon make trekking poles an essential item in your kit!  I resisted getting them for years, but take it from a former skeptic, poles are incredible at reducing the strain of long, grueling descents and providing extra stability on exposed sections.  Leki makes some the best trekking poles on the market, I bought the Leki Micro Vario before doing the R2R2R and just look at how much fun I’m having with them in the photo above. If you’re looking for a premium hiking pole check out the new version, the MCT Vario. 

Headlamp with red light mode

The Grand Canyon is an International Dark Sky Park (IDSP) and you’re likely to encounter some of the most beautiful night skies you’ve ever seen. You’re also going to see numerous signs asking you to use the red light mode on your headlamp to preserve yours and others night vision. 

The Black Diamond Spot 350 is the way to go with 6 modes including the night vision saving red light! Red light mode takes a minute to get used to, but once you do it’s a total game changer trust me! Hello stars!!  

GPS, compass and map

The rim to rim to rim trail is extremely well marked and easy to navigate, but make sure to download the GAIA app for maps and gps. Additionally, I always bring a traditional compass and map for use in the case of technical problems or dead batteries.

Battery back-up and charging cable

Keep your phone charged for photos and gps. View options at REI.

Hammock at the North Rim Campground at the Grand Canyon

Luxury items to pack for backpacking the grand canyon

Should you pack a camp chair?

No need to bring a backpacking chair on the corridor trails as picnic tables are provided at every established campsite. Hello luxury!

If you’re heading to a more remote site and this item makes your weight cut, check out the Helinox Chair Zero.  At just over 1lb and is light enough to justify bringing on slower/easier backpacking trips where weight isn’t as big of consideration.

A hammock

A hammock can be the ultimate luxury item  or even a replacement to sleeping in a tent. Unfortunately, the Grand Canyon is hit and miss with spots to string one up.  Havasupai Gardens has a couple man-made options for hanging a hammock and it’s possible and allowed on the North RIm.  However, you are not allowed to use trees at Bright Angel or any of the other sites below the rim. 

If it’s worth it to get horizontal with some great reading material in the pre-dinner hours or take in an amazing sunset from your own outdoor couch, the ENO Double Nest has room for two and at ½ kg  it’s hardly even a splurge in weight to pack.  

P.S. don’t forget the straps are sold separately (view them at Backcountry / REI).

What to wear in the Grand Canyon

Staying sunsafe with the Sahara Sun Hoodie in Zion National Park

Sun hoodie - the best clothing item to pack for the Grand Canyon

When I did this hike a few years ago, I was shocked to see throngs of Arizona Trail thru-hikers wearing hoodies in the 100 degree (40 C) heat. Turns out they were onto something! A sun hoodie has been one of the best items I’ve added to my backpacking kit. They keep you burn free, are surprisingly cool, and let you get away with leaving the bottle of sunscreen at home (or bringing way less). The Sahara Sun Hoodie from REI is one of the best items I’ve added to my backpacking wardrobe and you can’t beat the price. 

Convertible hiking pants

I never thought I’d see the day I embraced the zip-off. But they really are the best of both worlds and can’t be beat for quickly changing Grand Canyon conditions and keeping warm in the evening  during the non-summer months when the temperature drops. Check out the Patagonia Quandary Pant.

They are also available in a women’s version. 

Should you hike in shorts or pants?
Should you wear shorts or leggings in the Grand Canyon?

Regardless of the season you’ll almost certainly get hotter as you descend. During many months of the year, that may mean going from near freezing temperatures to heat stroke temperatures all in the matter of hours. As we descended the South Kaibab Trail, a ranger took one look at my wife’s black leggings and said “You’re going to regret those”. Sure enough, an hour later she was making a trail side outfit change. To avoid this situation, just remember layers are key. If you have convertible hiking pants, wear those. If not, wear a pair of shorts underneath a pair of hiking pants. Layering makes it easy to adjust your temperature depending on the environment and how much you’re exerting yourself.

A pair of shorts

In addition to hiking pants, it’s nice to have a pair of shorts to change into after a long day on the trail or as a backup option. Trail running shorts are light and comfortable. 

Shell jacket

An essential piece for wind, rain, and snow. The Arc’teryx Beta shell is the best all around shell jacket. While you’re unlikely to encounter much rain here this shell performs in all adverse conditions and is the perfect outer layer for the North Rim. Arc’teryx gear is expensive, but impeccably designed. I was skeptical for years, until I purchased a few pieces of their trail running gear and got hooked. If you’re looking for the best reviewed hiking shell out there this is the one. 

For another excellent option that is more economical,  check out the Patagonia Torrentshell 3L. 

Staying warm in my puffy on a cold morning in the Canadian Rockies

Puff jacket

I’ve had the Patagonia Nano Puff Hoody for years and it works great on it’s own or underneath a shell for extra warmth. It’s a perfect multi-functional item for everyday, backpacking, and pretty much anything where you might need a bit of warmth. I’m still looking for an activity it doesn’t work for. This item likely won’t be needed in the summer months, but is ideal for cold nights on the North RIm.

Base layer top

In addition to a sun hoodie, I also bring one base layer top to change into after hiking or have as an alternate. The  Capilene Cool trail  t-shirts work great for me on long hikes and trail runs, but pretty much any athletic quick-dry top will work fine. 

Base layer bottom

A merino bottom baselayer is perfect for warming up at night or during chilly mornings especially during the non-summer months.

Underwear

I’ve had the best luck with these Patagonia underwear for hiking, trail running, mountain biking and skiing and found them to be more durable than the more expensive ones from lululemon. I usually bring a 2-3 pair depending on trip length. 

They also make women’s underwear, but I am unable to advise on fit, form, function, or durability on this front. Check them out for yourself at Backcountry/Patagonia.

Hiking socks 3 pairs

I typically bring 3 pairs of socks. 1 pair for hiking, 1 pair to change into at camp, and a reserve to throw into the rotation as needed.  Darn Tough Vermont makes the best hiking socks hands down. They’re guaranteed for life/replaced free of charge and they don’t stink. So go ahead and try to get holes in your socks. Really! 

Sun hat & warm hat (seasonal)

A ball cap or tilley hat keeps your face protected from the sun. Check out these options at REI / Patagonia/Backcountry. 

 For colder months, bring a winter hat or beanie to warm up during chilly mornings or evenings. 

Buff

This little item was super helpful on the rim to rim to rim.  It helped block sun exposure on my head and neck and worked great to cool down with by soaking it at every creek or water stop. 

Sunglasses

Don’t forget to pack your favorite pair! 

Gloves

I bring a thin weatherproof pair if you’re camping on the North Rim. 

Trail runners or hiking boots

Unless you’re hiking in the winter with the potential for snow and cold or you’re carrying the gear for your whole family, I’d choose trail runners for this hike. I’ve had great luck with the La Sportiva Bushido II.

The Altra Lone Peak are also a thru-hiker favorite and award winning trail shoe! 

I do have a larger more traditional hiking boot, the Scarpa Kailash that I occasionally use when I’m carrying more gear/weight or heading somewhere with lots of snow. I actually wore these on this hike as I didn’t have my pack weight nearly as dialed as do now. I prefer trail runners now, but these are still a great boot. 

Camp shoes

Crocs are back! Well for backpacking camp shoes they never left… They’re lightweight and ugly as ever. Many backpackers find them to be the perfect camp shoe for resting sore feat after a long day in boots/shoes. 

Personally, I still hate them. I have an old pair of Tom’s which I occasionally bring. They are light and less bulky than Crocs. If I’m wearing a trail runner, I’ll often ditch the camp shoe altogether and just loosen my laces. Your call!  

Additional items to pack for backpacking the Grand Canyon

Microspikes (season dependent)

Kahtoola Microspikes slip effortlessly over your boots and make walking on snow and ice a breeze. If you’re tackling this hike when snow and ice are possible, bring these! 

Low trail running gaiter (optional)

Low gaiters can be helpful for keeping rocks, sand, and snow out of your trail runners and saving you from blisters.

Duct tape (repairs and blisters)

Tooth brush & toothpaste

Food for backpacking the Grand Canyon

Everyone has different takes and caloric requirements, diets, and preferences so I won’t tell you exactly what to bring. I generally try to avoid/limit the just-add-water meals you find at REI . They’re overpriced and often don’t rehydrate as well as you’d like.  I usually head to the grocery store and search for things like lentil rice, ramen, or plant-based mac & cheese. They’re basically just add water/boil quickly meals and way cheaper. Always re-bag/re-pack this type of food, as there is no reason to carry unnecessary packaging on the trail. If you’re looking for convenience consider Patagonia Provisions soups and chilis. I’ve found them to be a better bet than the other just add water options. 

If you're coming from outside the US, don't forget this!

If you’re traveling from outside the US don’t forget to purchase comprehensive travel insurance that includes emergency evacuation. Check out World Nomads* for a quote. Hopefully, you never need to make a claim, but if you do you’ll be beyond happy you were prepared! I broke my collarbone traveling a few years ago, which hurt enough! I can’t imagine how much worse it would have hurt if I had to pay the $15,000 in medical bills out-of-pocket… 

*
*We receive a fee when you get a quote from World Nomads using this link. We do not represent World Nomads. This is not a recommendation to buy travel insurance.

Final thoughts on backpacking the Grand Canyon

    • Terrific first backpacking trip to the Grand Canyon that provides a great introduction to the nuances of backpacking here, not to mention the incredible scenery. 
    • First and last sections felt busy with day hikers from the South Rim.
    • The heat was unbearable at times and felt like the biggest obstacle to overcome, much more so than elevation gain. 
    • Would avoid staying at Bright Angel Campground if possible due to congestion. 
    • Would take the earliest possible Hikers Express on day 1. South Kaibab trail is much more enjoyable this way. 
    • Would love to camp at the North Rim again while it’s closed to vehicle traffic. 

Your Thoughts on backpacking the Grand Canyon

Have you backpacked the Grand Canyon rim to rim to rim? I’d love to hear from you. Questions about backpacking the rim to rim to rim? Drop me a line in the comments below and I’ll do my best to help! 

More adventures you might enjoy

View along the Rockwall Trail towards Floe Lake.

Rockwall Trail | The Ultimate Guide to Hiking the Rockwall

The Rockwall Trail is one of the Canadian Rockies’ premier backpacking trips. For 55km you’ll be treated to a seemingly unending supply of sublime Rocky Mountain scenery. Here’s how to make it happen with must-read tips for getting a permit and beating the crowds.