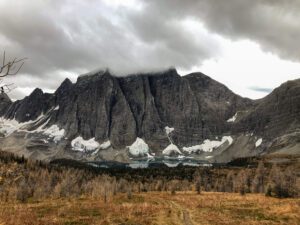
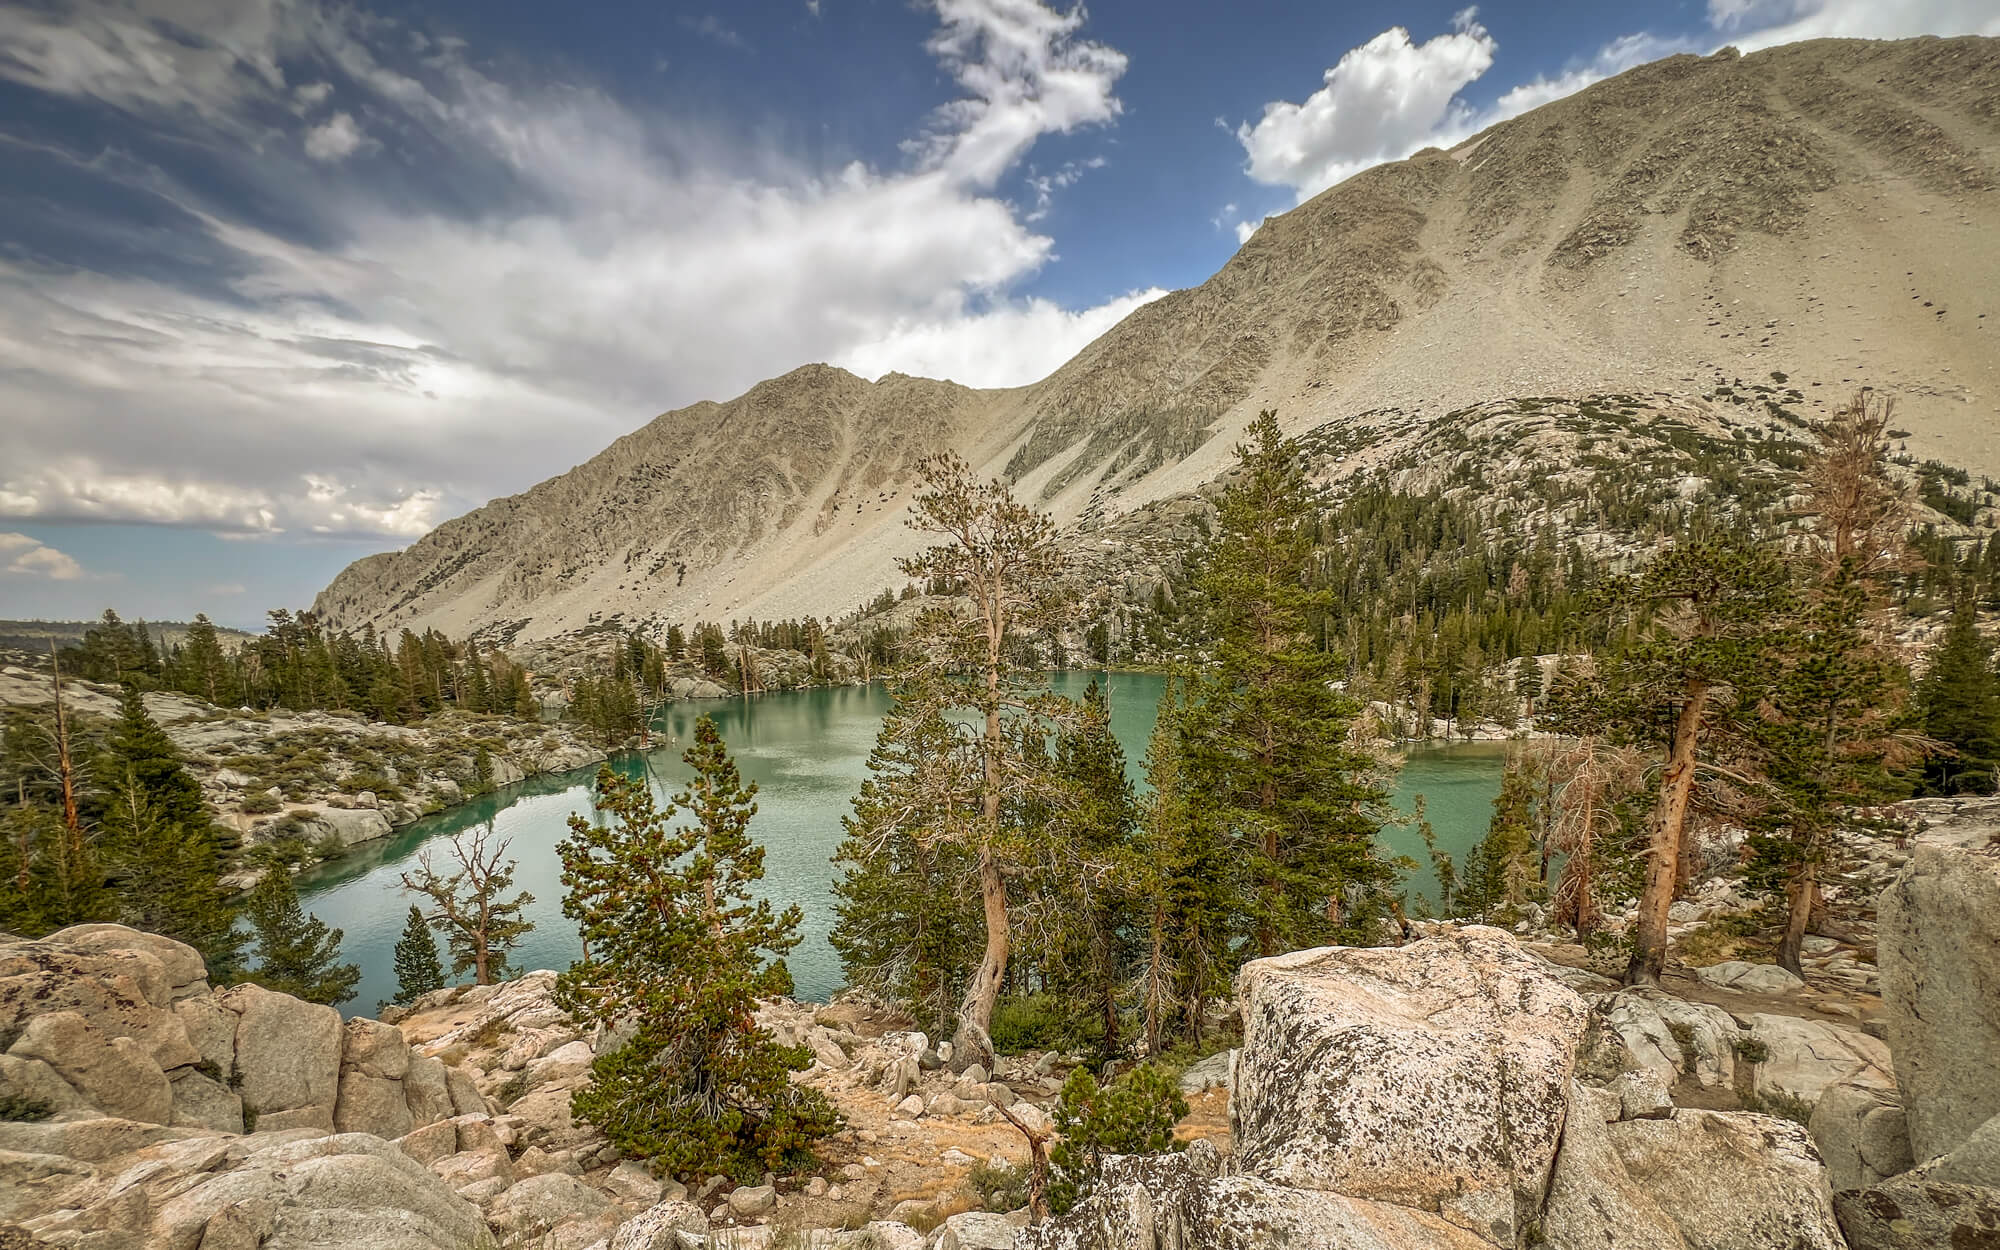
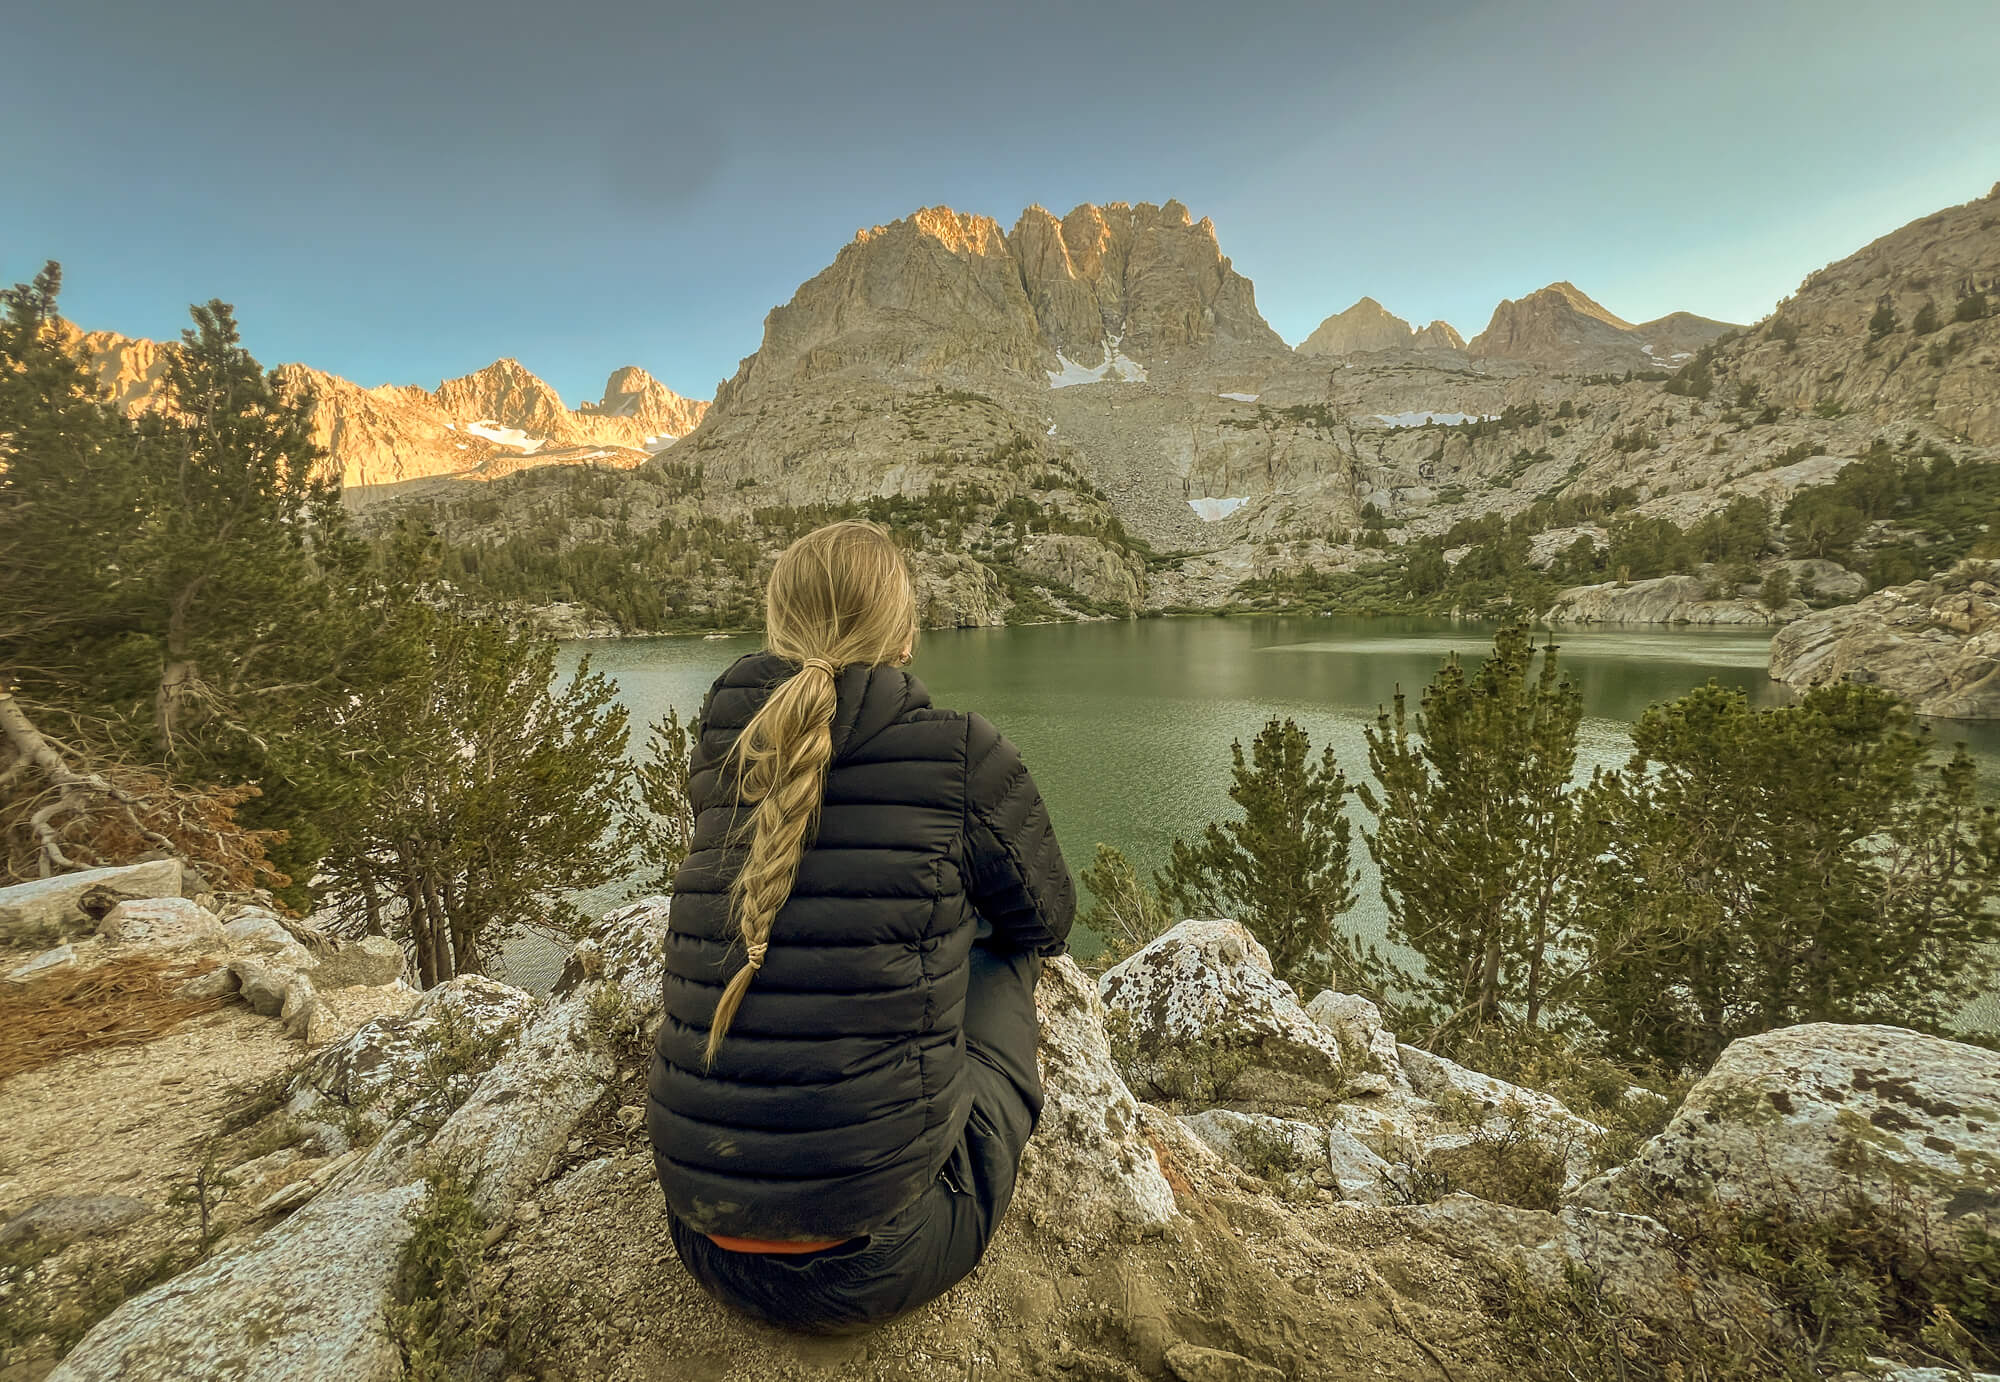
The Big Pine Lakes area showcases some of the Sierra Nevada’s most spectacular scenery with vistas of glimmering alpine lakes, cascading waterfalls, craggy peaks, and one of California’s few remaining glaciers. Over 4.5 miles (7.2 KM) the Big Pine Creek North Fork Trail gains over 2300 ft (700 m) of elevation before reaching the first of seven stunning alpine lakes. The Big Pine Lakes hike can be completed as epic day hike, but is best experienced as a 2-4 day backpacking trip. Set up a lakeside base camp, then swim, fish, peak bag, or hike, taking the time to fully immerse yourself in the dramatic Sierra Nevada scenery.
The biggest downside of the Big Pine Lakes hike is that it’s definitely insta-famous and ranks alongside Rae Lakes, Little Yosemite Valley, and Mount Whitney as one of the most popular permits in the Sierras. Securing a wilderness permit to hike the Big Pine Creek North Fork is the hiking equivalent of landing Taylor Swift tickets. This means, you have to know your dates, times, understand the process, and hope for a bit of luck. Fortunately for you, I’ve put together a few bonus tips to help optimize your probability of landing a permit.
First, let’s start with a few of the basics.
** Some of the links in this post are affiliate links. If you click one of the links and make a purchase we’ll earn a small commission at no cost to you. We’re very particular about products and we only recommend products, services, or accommodation we trust and use ourselves.**
Need to know for hiking Big Pine Lakes
- Days Required: 1-4 days.
- Difficulty: Moderate
- Distance: 15.5 miles round trip (to Seventh Lake and return via Black Lake Trail)
- Type: Lollipop Loop
- Elevation Gain: 4450 ft
- Elevation Loss: 4400 ft
- Permit Required: Yes (for overnight trips).
- Official Trail Name: Big Pine Creek North Fork Trail
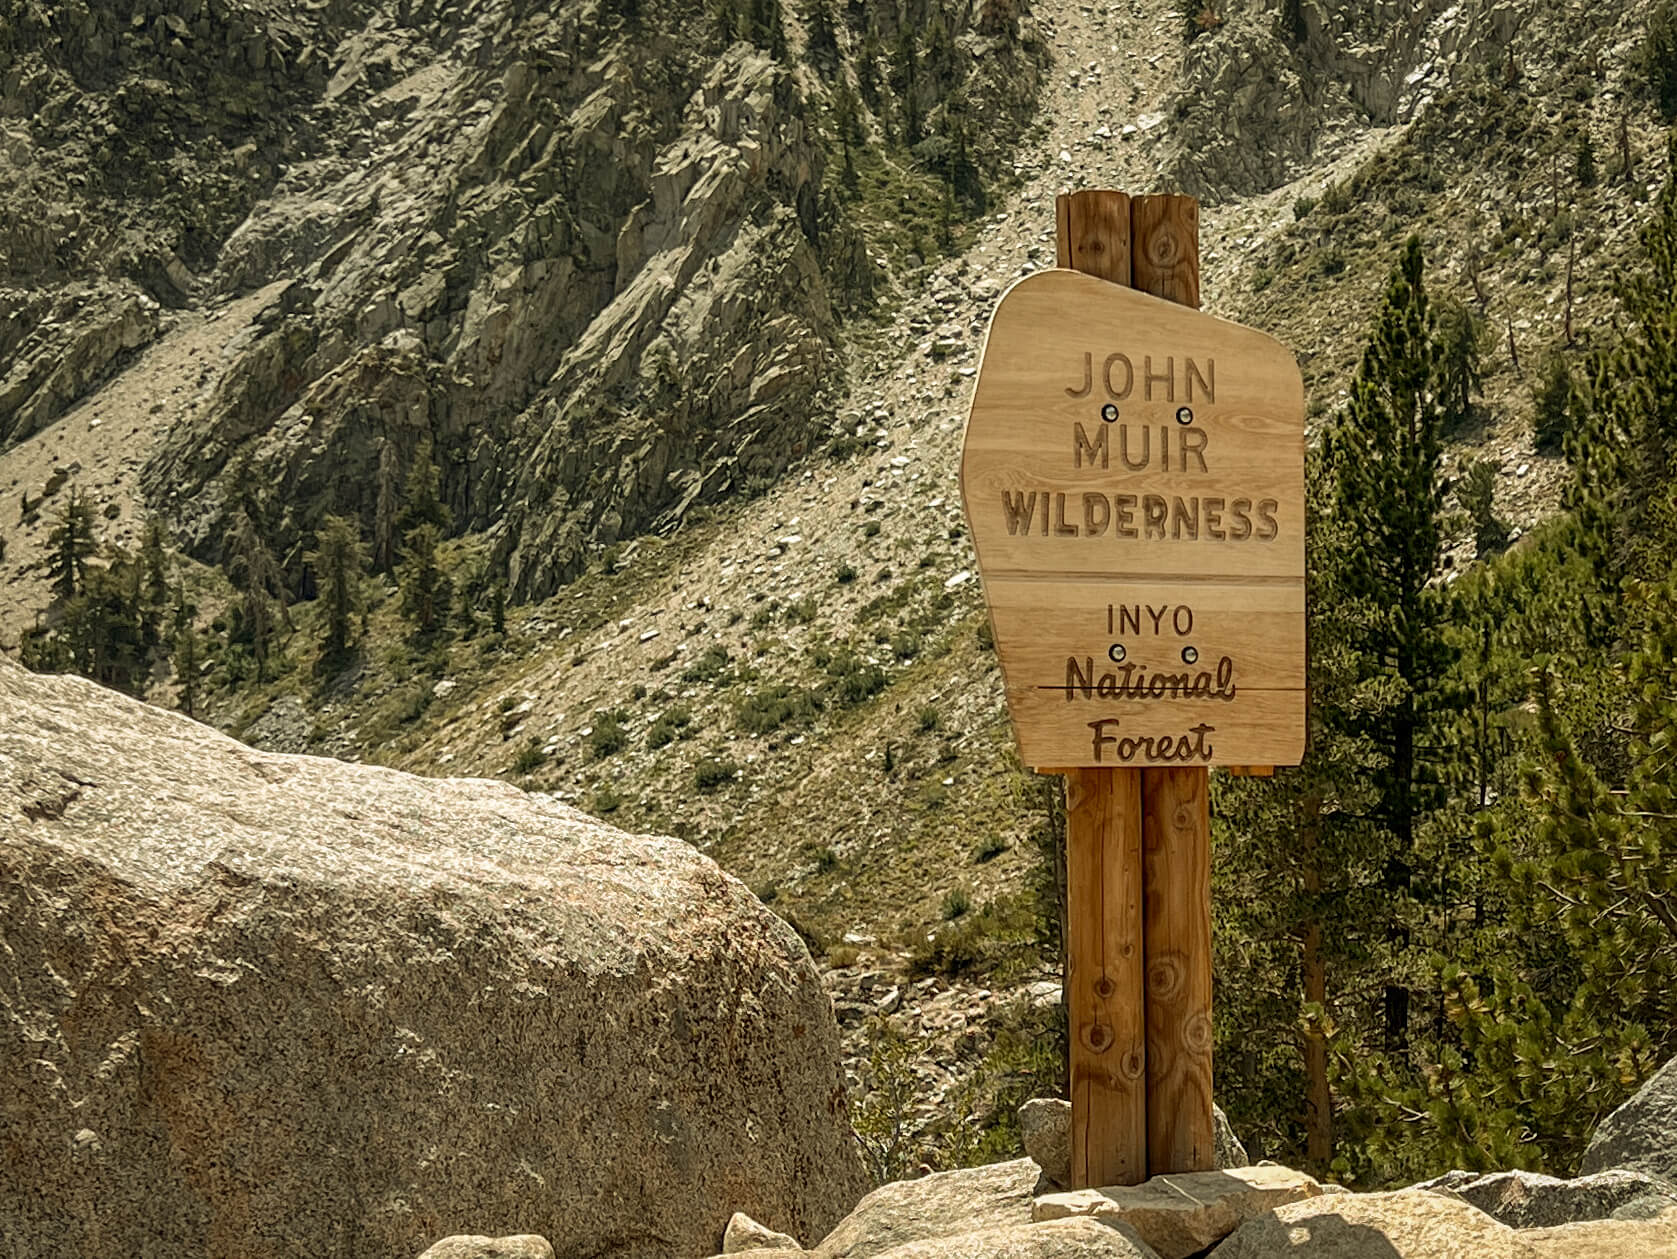
- Location: Inyo National Forest
- Navigation: Easy. Well signed trail.
- Water Sources: Plentiful. Trail parallels the Big Pine Creek North Fork Trail and lakes for vast majority.
- Food Storage: Bear Canister Recommended.
- Best Campsite Walked Past or Stayed At: Fifth Lake
Things you'll love about the Big Pine Lakes Hike
- Breathtaking High Sierra Scenery
- 9 Alpine Lakes! (Lakes 1-7, Summit Lake, and Black Lake)
- Amazing campsites
- Incredible Side Trip to Pallisades Glacier
- Plenty of Peak Bagging/Scrambling Opportunities
- Perfect Weekend Backpacking Trip
Things you won't love the Big Pine Lakes Hike
- Limited solitude with a highly competitive permit process
- First 2 miles (3.2 KM) are hot and sun exposed, if not started early
- Significant elevation gain at high elevation may require acclimatization (especially if coming from sea level)
What to pack for Big Pine Lakes
Here’s a quick hit list of what to pack for day hiking or backpacking to Big Pine Lakes. An uber thorough breakdown of the backpacking packing list with rational has been provided at the end of this post.
Backpacking
Don’t Forget
- Inyo National Forest Wilderness Permit for Big Pine Creek North Fork Trail (printed and signed)
- California Camp Fire Permit (required to use portable stove)
- Bear Canister
- Travel Insurance with Emergency Medical (if traveling from outside the US)
Essential Items
- Tent
- Backpack
- Sleeping Mat
- Backpacking Pillow
- Sleeping Bag or Quilt
- Steripen and Tablets (for backup)
- Trowel, TP, & Hand Sanitizer
- Swiss Army Knife
- Stove & Fuel Canister
- Lighter & Matches
- Compact Backcountry Cookset & Spork
- Water Bottle or Reservoir
- Extra Water Storage Container (optional)
- First Aid Kit
- Trekking Poles
- Headlamp with red light mode
- GPS (we like GAIA), Compass & Map
- Battery Back-Up & Charging Cable
- Packable Day Hiking Backpack (for dayhiking if you want to leave your big pack behind)
Clothing and Accessories
- Shell Jacket
- Puff Jacket
- Sun Hoodie
- Rainpants (optional)
- Convertible Hiking Pants
- Shorts (1 pair)
- Base Layer Top
- Base Layer Bottom
- Underwear (2-3 pair)
- Hiking Socks (3 pair)
- Hat & Beanie
- Sunglasses
- Gloves
- Trail Runners or Hiking Boots
- Camp Shoes (optional)
- Microspikes (season dependent)
- Low trail running gaiter (optional)
Additional Items
- Sunscreen
- SPF lim balm
- Bug Spray
- Tooth Brush
- Toothpaste tabs
- Duct Tape (for repairs and blisters)
- Food
Luxury Items (optional)
Dayhiking
- Steripen and Tablets (for backup)
- Sunscreen
- SPF lim balm
- Bug Spray
- Lighter/Matches (emergency use)
- Emergency Bivy
- Favorite Hiking Food/Snacks (plus a bit extra for emergency preparedness)
- Shell Jacket
- Puff Jacket
- Sun Hoodie
- Rainpants (optional)
- Hiking Pants/Shorts
- Hiking Socks
- Hat & Beanie
- Sunglasses
- Gloves
- Trail Runners or Hiking Boots
How to get to the Big Pine Lakes
Big Pine Creek Trailhead is located 11 miles from the town of Big Pine on the eastern side of the Sierra Nevada along US-395. The town of Big Pine is:
- 253 miles from Los Angeles
- 313 miles from San Fransisco
- 53 miles from Mammoth Yosemite Airport
Where to stay before this trip
The Big Pine Creek North Fork Trail climbs to an elevation of over 10,000ft and spending at least one night before your trip sleeping at higher elevation makes a big difference in acclimatizing. There are multiple great car camping sites near the trailhead, if sleeping in the car sounds unappealing.
The following sites are within a couple miles of the trailhead:
As an alternative option, Glacier lodge is situation near the trailhead and offers rustic cabins for rent.
For more cushy option, stay at the Wayfinder hotel in the town of Bishop, approximately a 40 minutes drive from the trailhead.
Big Pine Lakes permit information
Dayhiking
If you’re planning on hiking into the Big Pine Lakes area and returning to your car the same day, no wilderness permit is required. You’re required to have a valid interagency pass displayed on your vehicle when parking in Inyo National forest at the trailhead.
Backpacking
To backpack/overnight in the Big Pine Lakes area you need a permit reservation for the Big Pine Creek North Fork Trail. Please note that the Big Pine Creek South Fork is a completely different trail and does not provide access to the Big Pine Lakes area.
How to secure a wilderness permit
Obtaining a permit to backpack Big Pine Lakes via the Big Pine Creek North Fork trail is a challenge. 60% of permits are released 6 months before the trip start date. For instance, July 4 opens on January 4. The remaining 40% of permits are released two weeks before. All permits are available via the Inyo National Forest – Wilderness Permits page on recreation.gov and are released at 7am PST.
To give yourself the best chance at securing an overnight permit follow these steps:
- Be as flexible on start date as possible, this gives you multiple kicks at the can. If you can start your permit hunt 6 months before your desired start date.
- If you’re trying to land a permit 2 weeks before, flexibility is once again key. Multiple rolls of the dice equals higher likelihood of eventual success.
- If you try to get a permit at 7 am and it’s sold out, wait 15-20 minutes (i.e. 7:15 – 7:20 am) for the website’s timeout period, as individuals frequently do not complete their reservations after adding them to cart and they’ll be released back after the timeout window ends. This is actually how I landed our permit!
- If your dates are super flexible, flip through multiple weeks/months a couple times a day, you’ll often find a permit or two are available when following this method.
Once You Have Your Permit
- Print it and sign it before your trip and bring it along. If you don’t print it it’s not deemed to be activated.
- Read all instructions, there are important details about food storage, leave no trace, and important trail information.
- Remember that you can make chances to your exit date (not your entry date) and proposed camping locations anytime prior to printing your permit.
Do you need a national park pass?
No, to do this hike you only require a permit (as discussed above.
Are there Bears in the Big Pine Lakes area?
Black Bear’s are active in the Big Pine Lakes area and it’s critical to be prepared for an encounter. We had a bear come through our campsite and he throughly inspected our bear canisters. He was unfazed by our yelling, but took off immediately when I threw rocks in his direction.
Follow these tips to stay safe and help keep these creatures from associating humans with food:
- For backpackers, a bear proof canister is an essential piece of gear to pack for this trip. Keep all food and scented items secured inside at all times when not actively removing items from the canister.
- Use the triangle method. Cook at least 50ft from your campsite and store your bear canister 50ft from your cooking location and your campsite. The three areas should form a triangle with 50ft between each point.
- If you encounter a bear, stick together with your group. Make yourselves as big as possible by waving arms or trekking poles overhead. Yell “go away bear” and bang pots and pans. If these steps don’t frighten the bear away, you can also throw rocks.
Bears are generally uninterested in hikers or backpackers, but they’re very interested in your calorically dense food. This makes good food storage essential.
Don't forget a Bear Canister
Bear canister’s are bulky and annoying, but they’re easy to use and the best way to keep your food and scented items safe.
BearVault canisters are the most popular as their transparent design allows you what’s packed where.
- Go with the BV500 (view at REI / Backcountry) for 6-7 day solo trips or 3-4 days for 2 people.
- Go with the BV450 (view at REI / Backcountry) for 3-4 day solo trips or weekend trips for 2 people.

Are dogs allowed in the Big Pine Lakes area?
The Big Pine Creek North Fork Trail is dog friendly, so bring your furry friend along. The following rules apply:
- Keep your dog under strict leash or voice control.
- Leash your dog around horses, and stock animals.
- Store dog food in your bear canister.
- Pickup and bury dog waste 200 ft from water or trail, in a cathole at least 6 inches deep.
- Keep your dog in your tent at night.
Please note that the the upper portion of the trail to Pallisades Glacier is not dog friendly, due to several scramble sections.
Are there toilets at Big Pine Lakes? Where do you poop?
Big Pine Lakes in located in the John Muir Wilderness and there are no outhouse or toilets. This means you’ll be pooping in the woods, so pack your trowel and pack out all toilet paper. Make sure you follow these rules to help keep Big Pine Lakes pristine:
- Dig a cathole 6-8 inches deep at least 200ft from all water sources and trails.
- Poo in the cathole.
- Pack all your toiletpaper out. Or leave the TP at home and use smooth rocks or sticks (make sure to deposit them in the cathole).
- When you’re done fill the cathole with the dirt and tamp it down with your foot. Then add more dirt and cover it up with dead leaves or needles. If you’ve done this right, no one should be able to tell you just took a massive dump.
If you’re new to pooping in the woods, check out this in-depth post for everything you could possibly need and want to know.
Best Season for this hike
June – September is the ideal time to hike to Big Pine Lakes. Snow may be present on the trail well into June depending on the winter snowfall accumulation. Bugs are more of nuisance in the early season. Summer nights are comfortable with hot days and frequent afternoon thunderstorms. September can bring colder nights, but few bugs. Depending on snowfall this hike may be accessible into October, but snowfall and very cold temperatures are in the realm of possibility.
What direction should you hike?
The hike to Big Pine Lakes is best done as a lollipop loop in a clockwise direction ascending past first Second, Third and Forth Lakes, and descending down the Black Lake trail. This is preferred over counterclockwise (ascending Black Lake Trail and descending down past the lakes) due to the hot and exposed switchbacks that dominate Black Lake Trail.
How many days does it take?
Big Pine Lakes can be done as lengthy day hike, but it’s best enjoyed as a 2-4 day backpacking trip. See the itinerary section below for a a full discussion of options.
Can you day hike to Big Pine Lakes?
Yes. While I’d suggest taking the extra time to enjoy the Big Pine Lakes area by backpacking/overnight camping, this hike can also be completed as a long day hike. Many day hikers elect to hike the 5,5 miles (2800 ft of elevation gain) to Third Lake before doubling back along the same route passing Second and Third Lake along the way, making for an 11 mile round trip hike. For those wishing to visit all seven Lakes, add an extra 4 miles (round trip) and 1000ft of elevation gain. See the day hike itinerary section below for a list of itinerary options for day hiking.
Can you swim in the Big Pine Lakes?
The Big Lakes are cold, but make fantastic spots to take a dip in. If you’re going for a dip, make sure practice leave no trace by properly rinsing off any sunscreen, bug spray, makeup etc. off before jumping in and doing so well away (200ft+) from the lake.
Can you have campfires?
Campfires are not allowed in the Big Pine Lakes area. If you plan on cooking during your trip, you’ll require a portable canister stove. To legally operate this stove you require a California Campfire Permit. It’s free of charge and takes less then 10 minutes to watch the video and take the quiz.
Trail Sections
Trailhead to Second Falls
2.2 Miles 1300 ft Elevation Gain
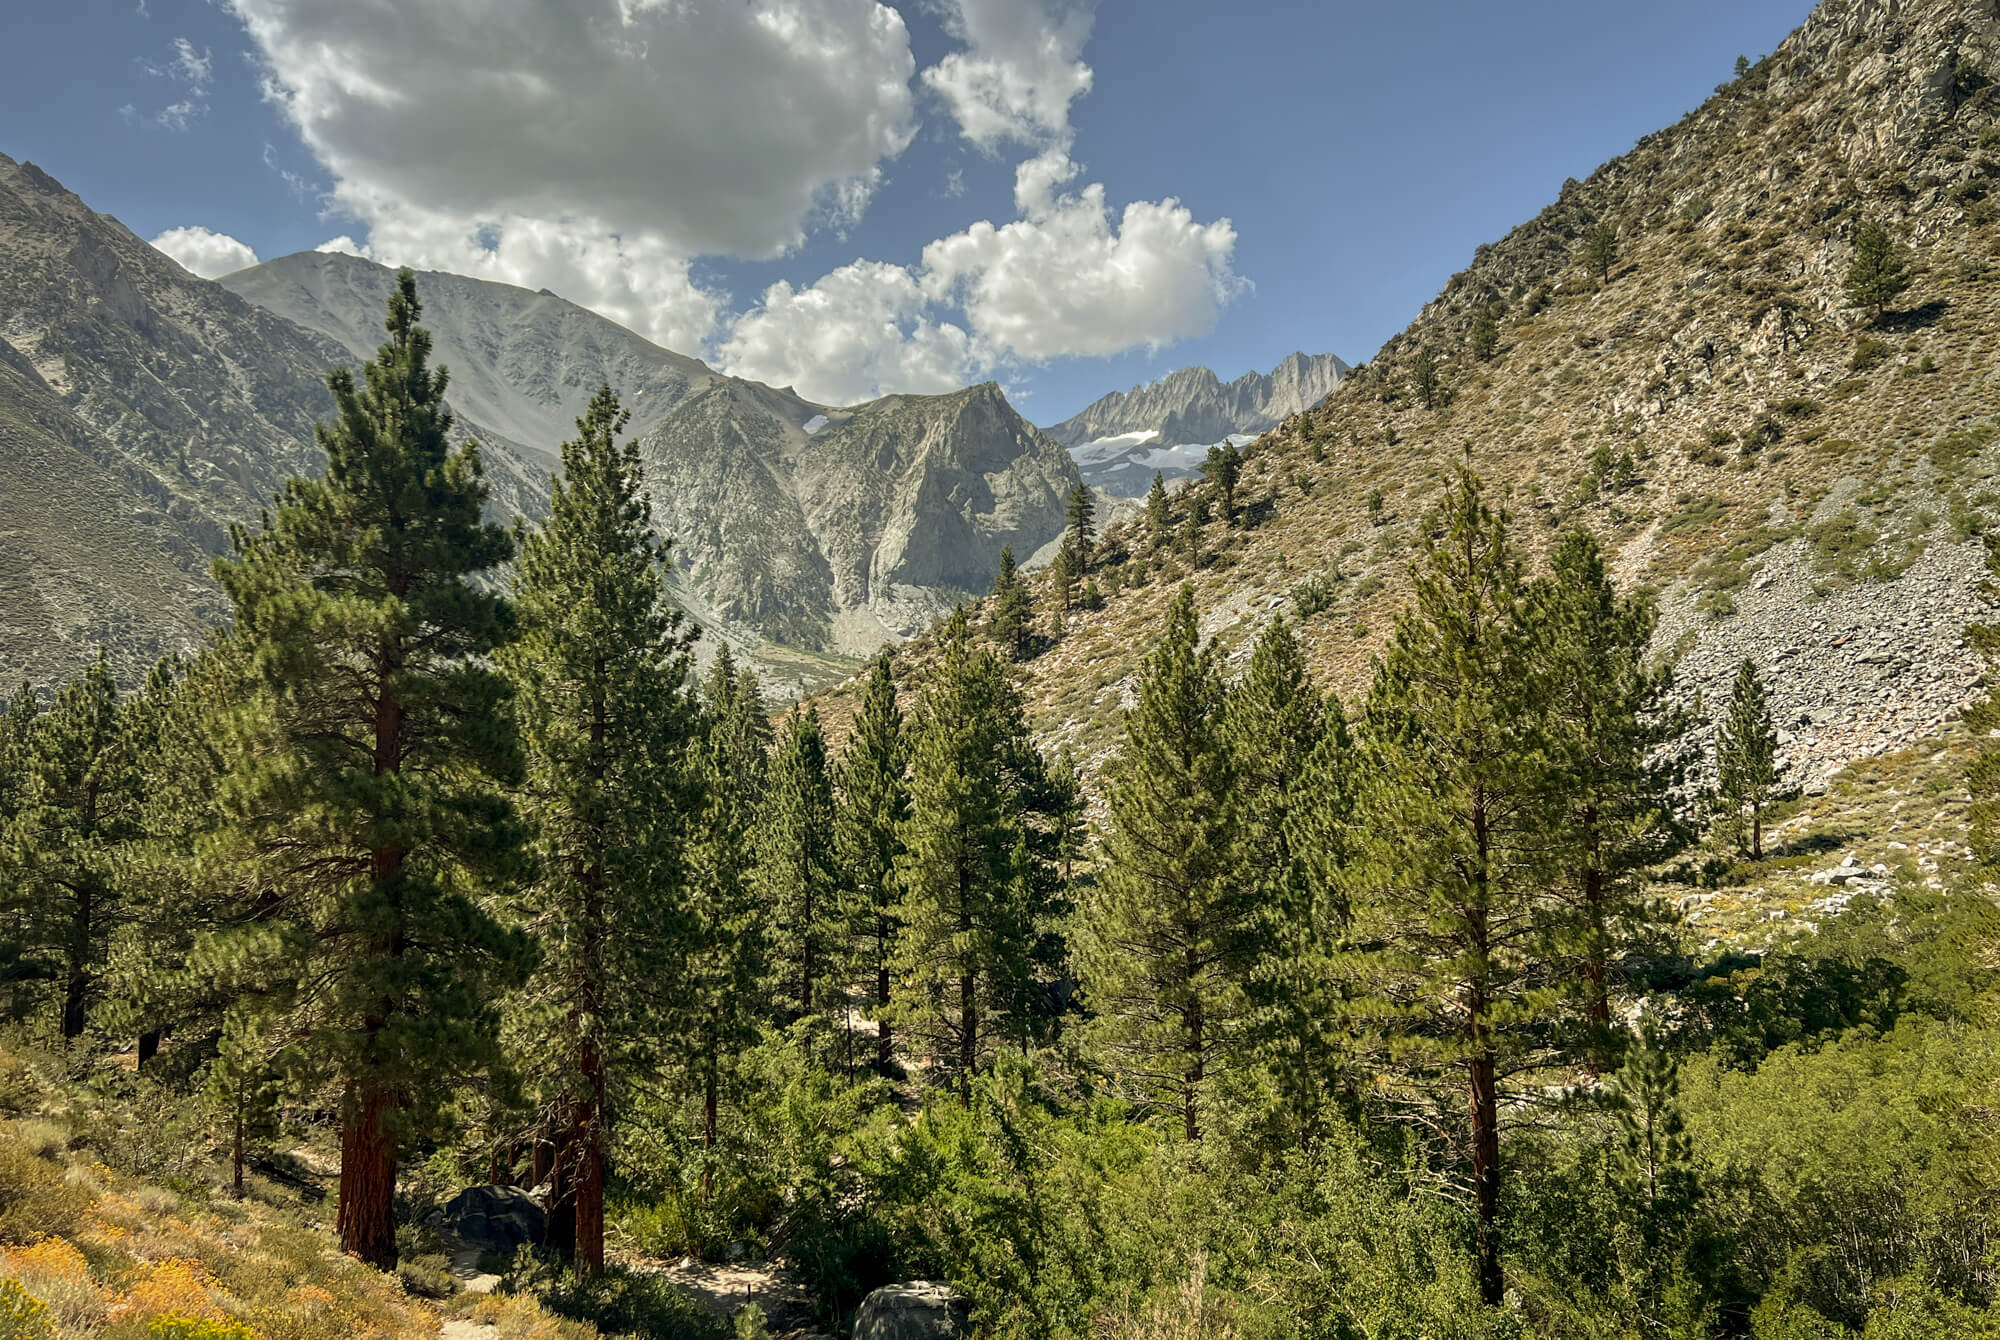
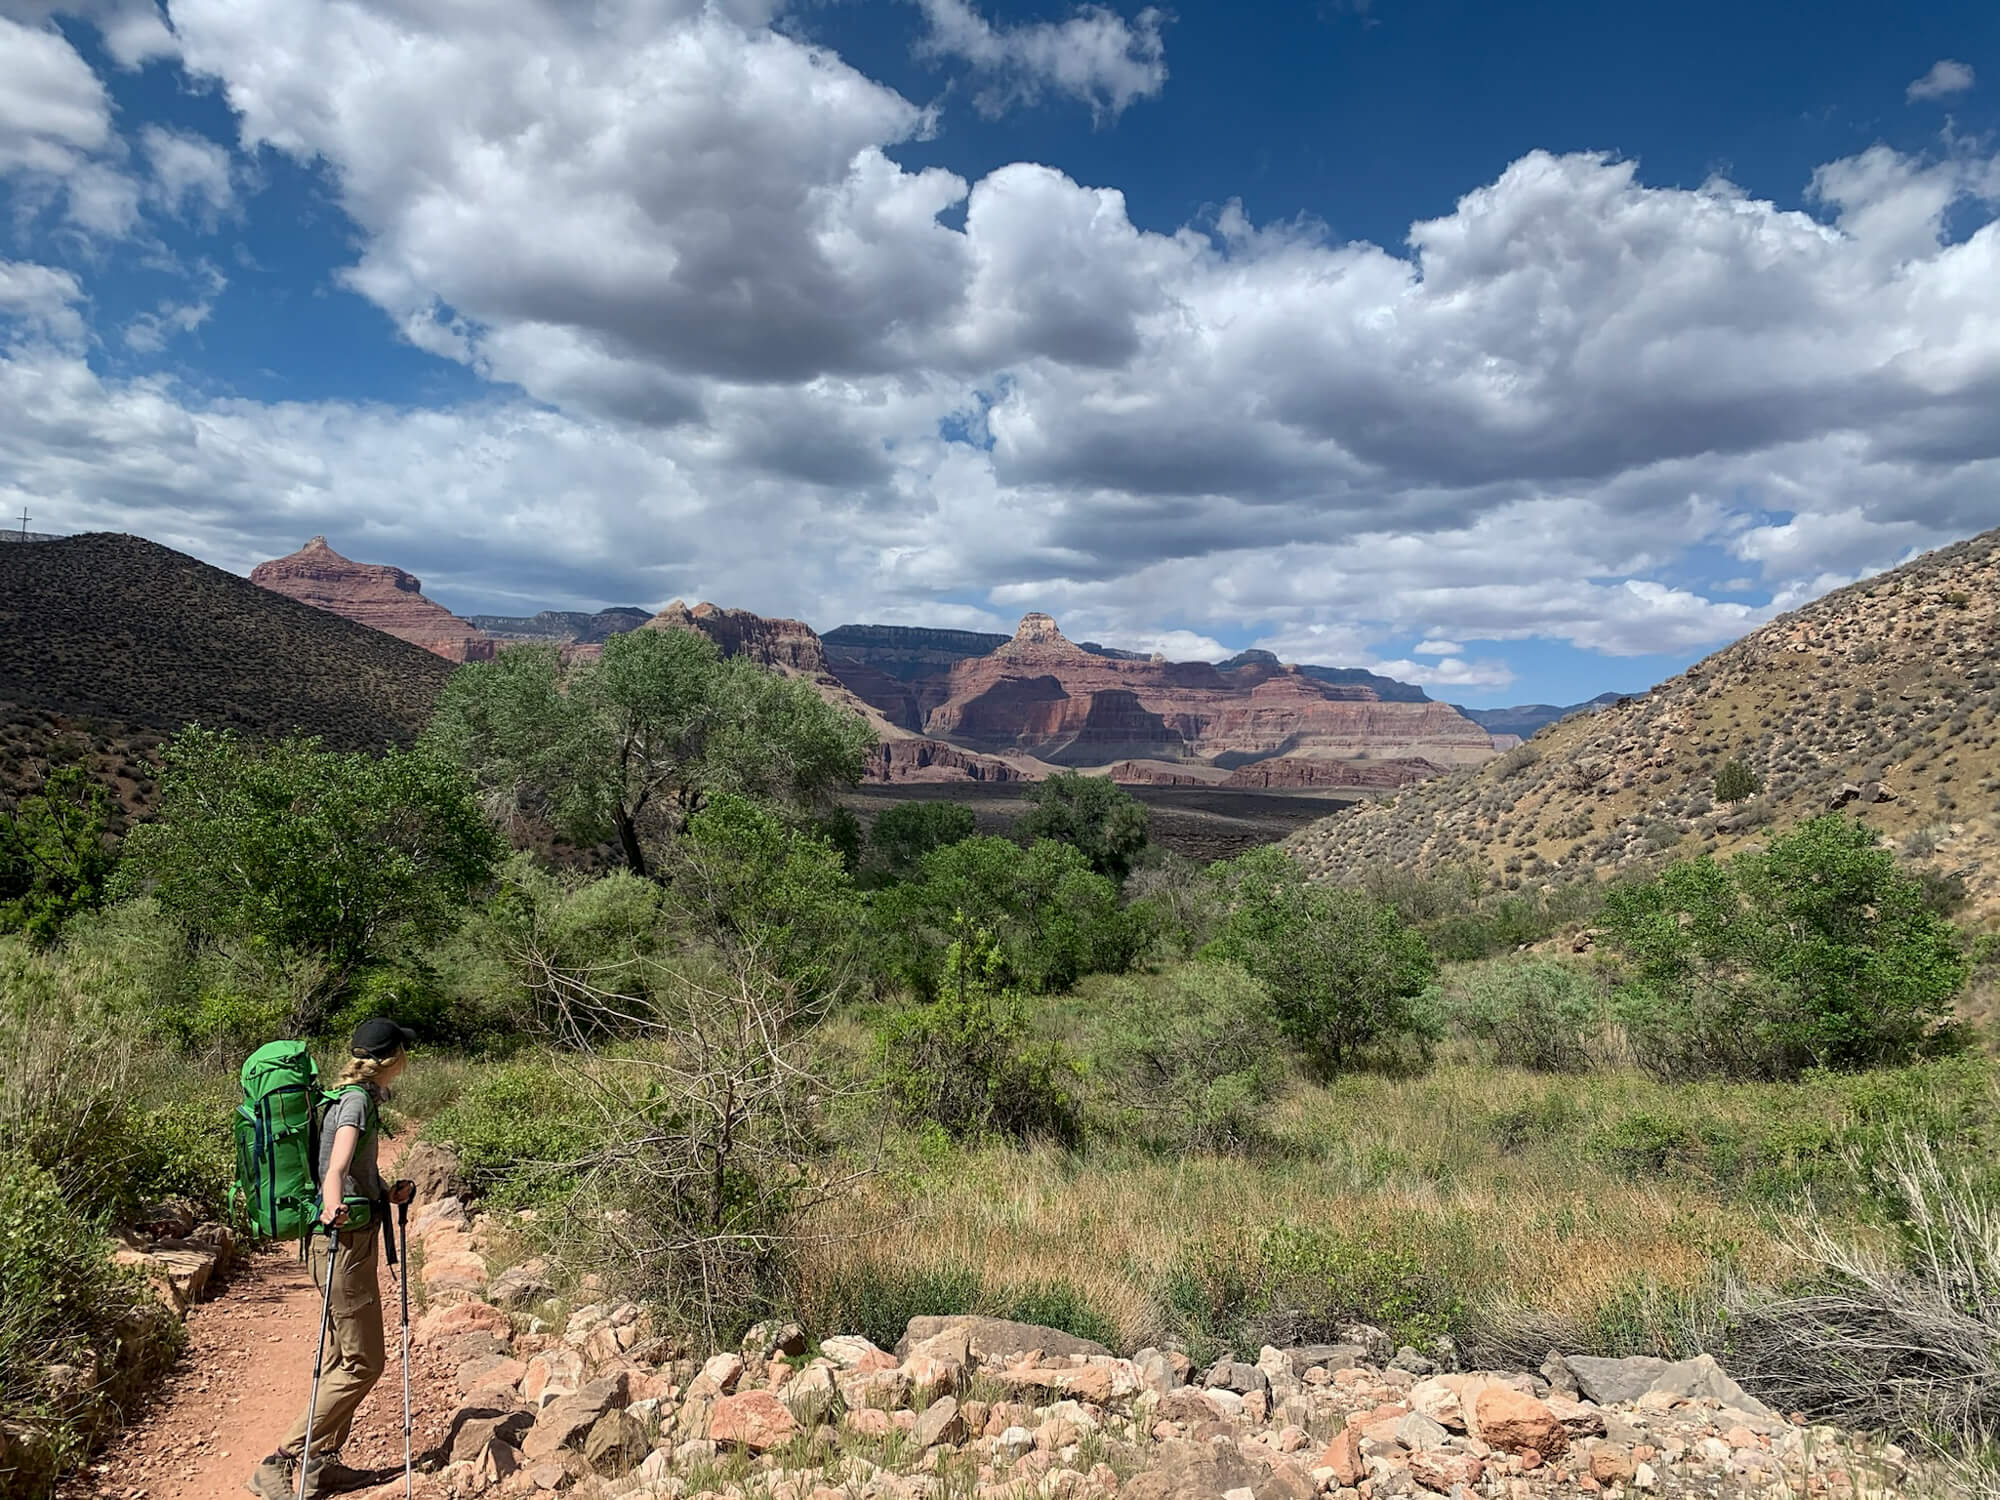
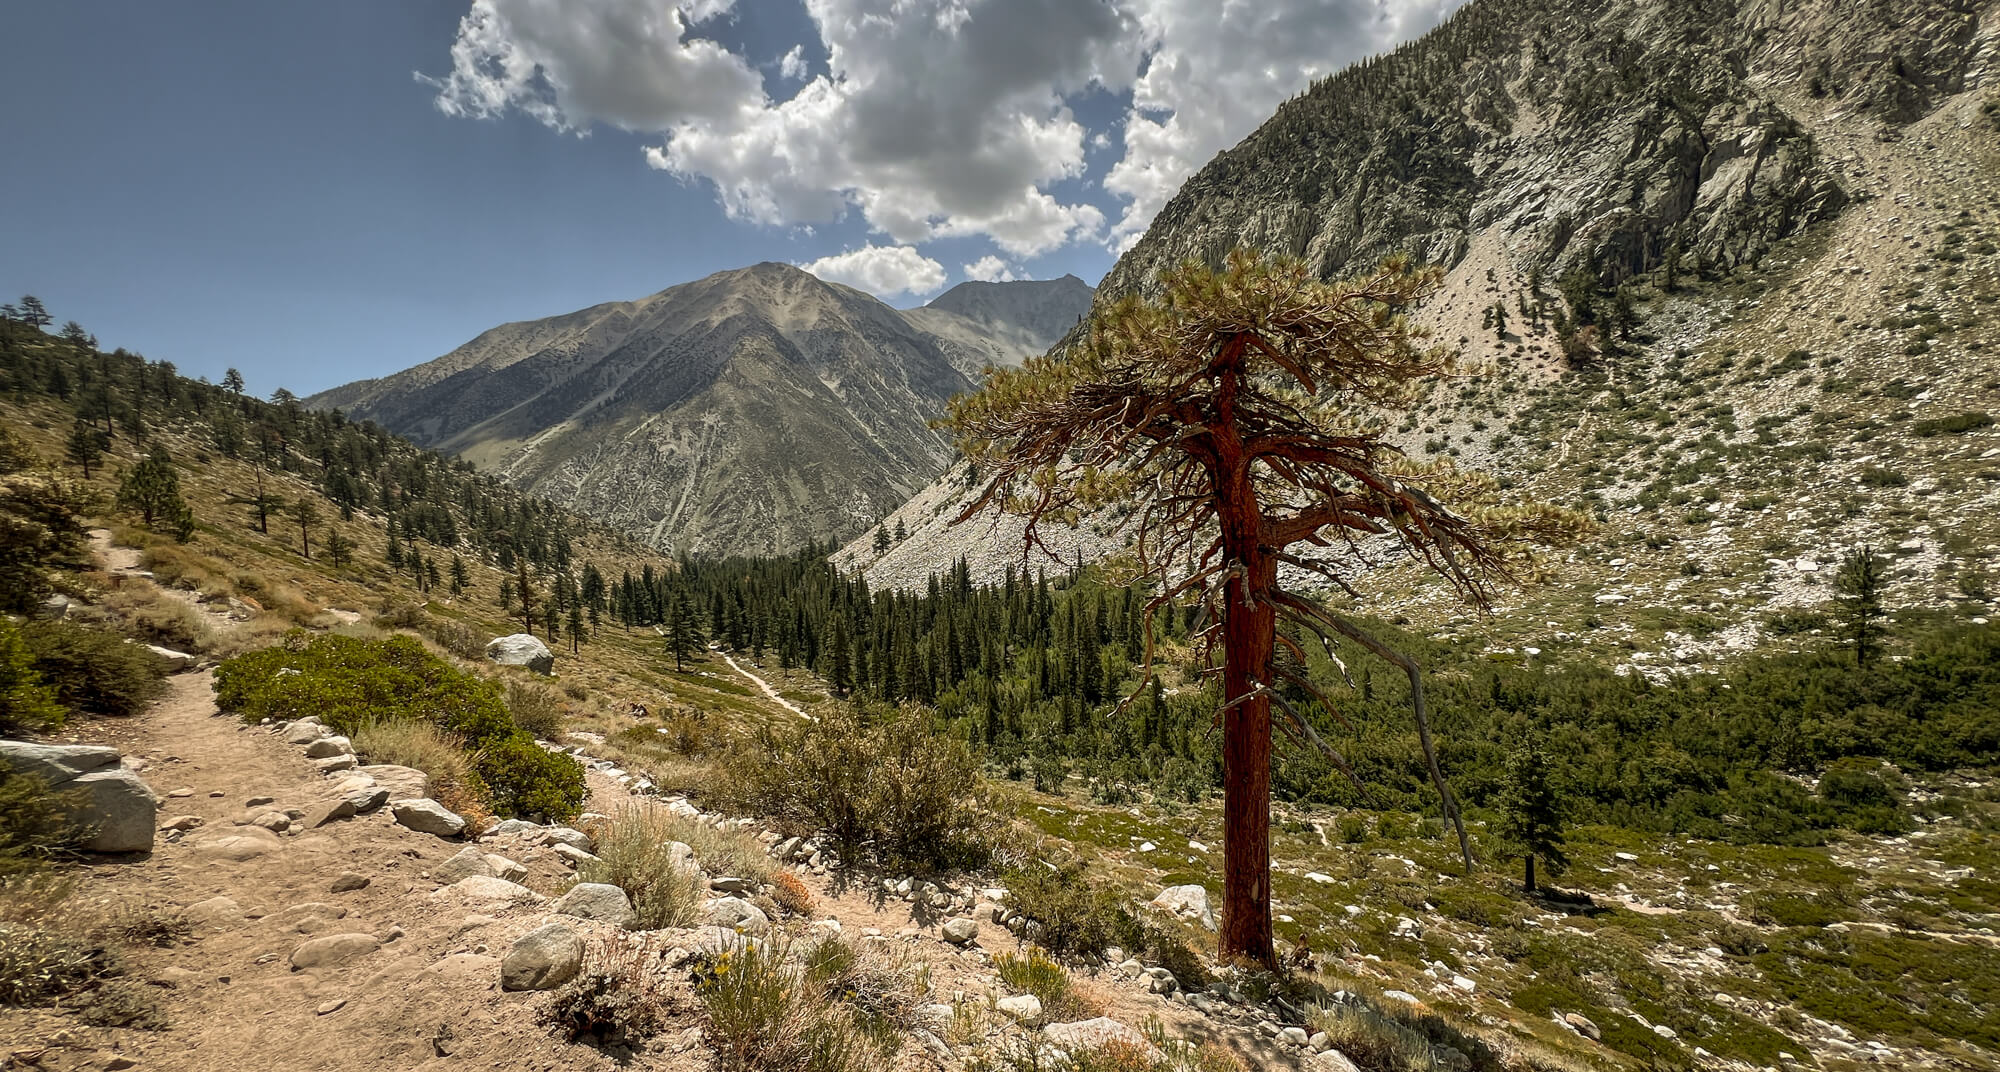
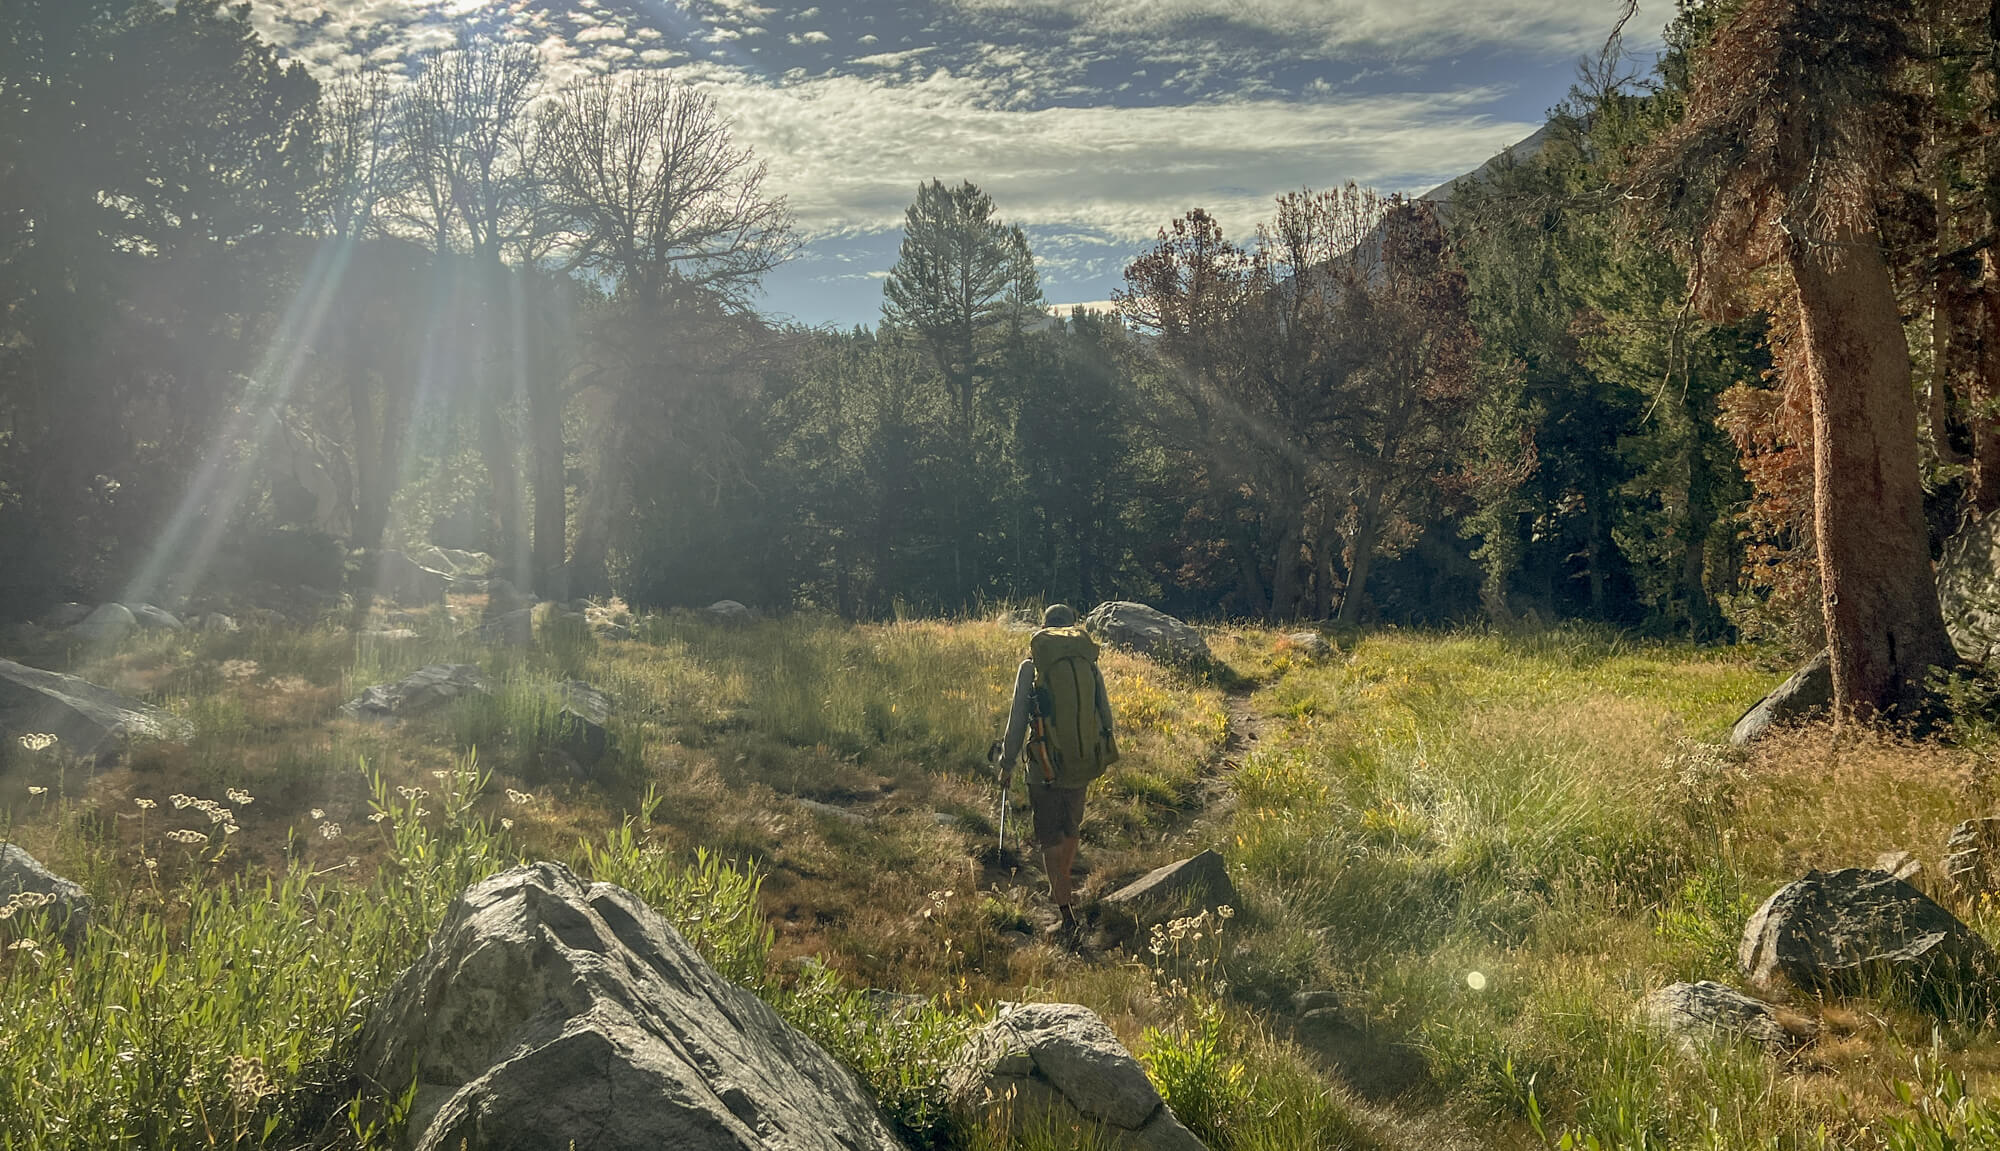
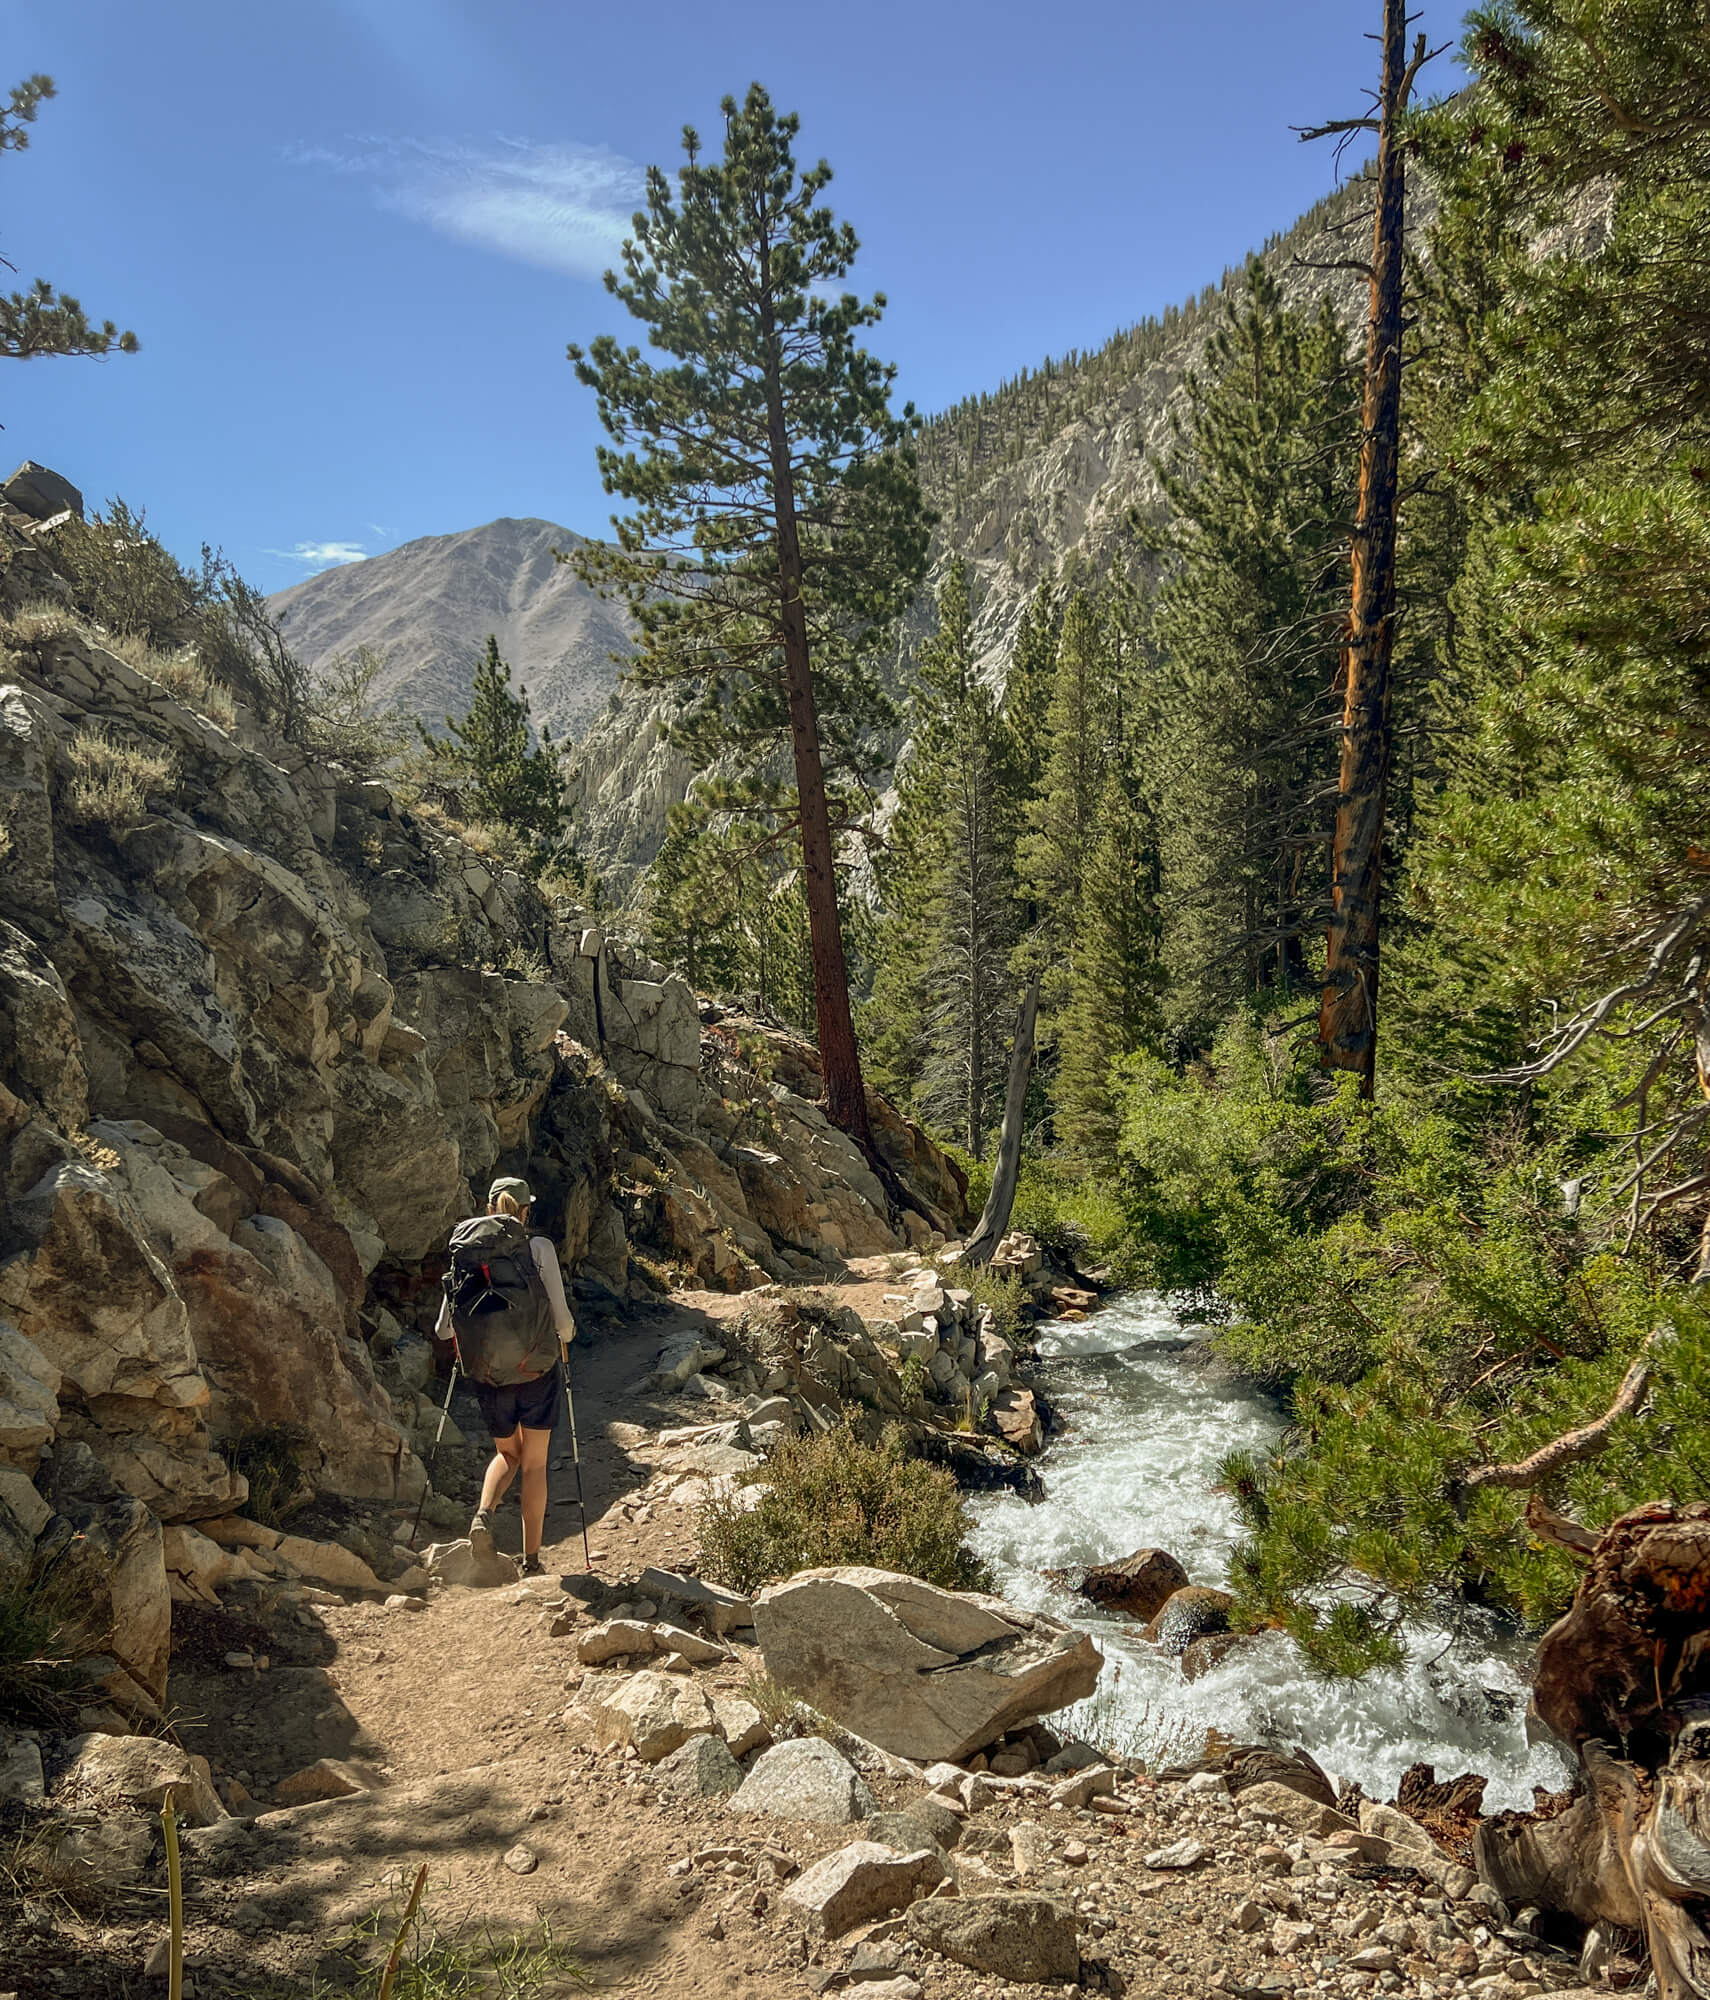
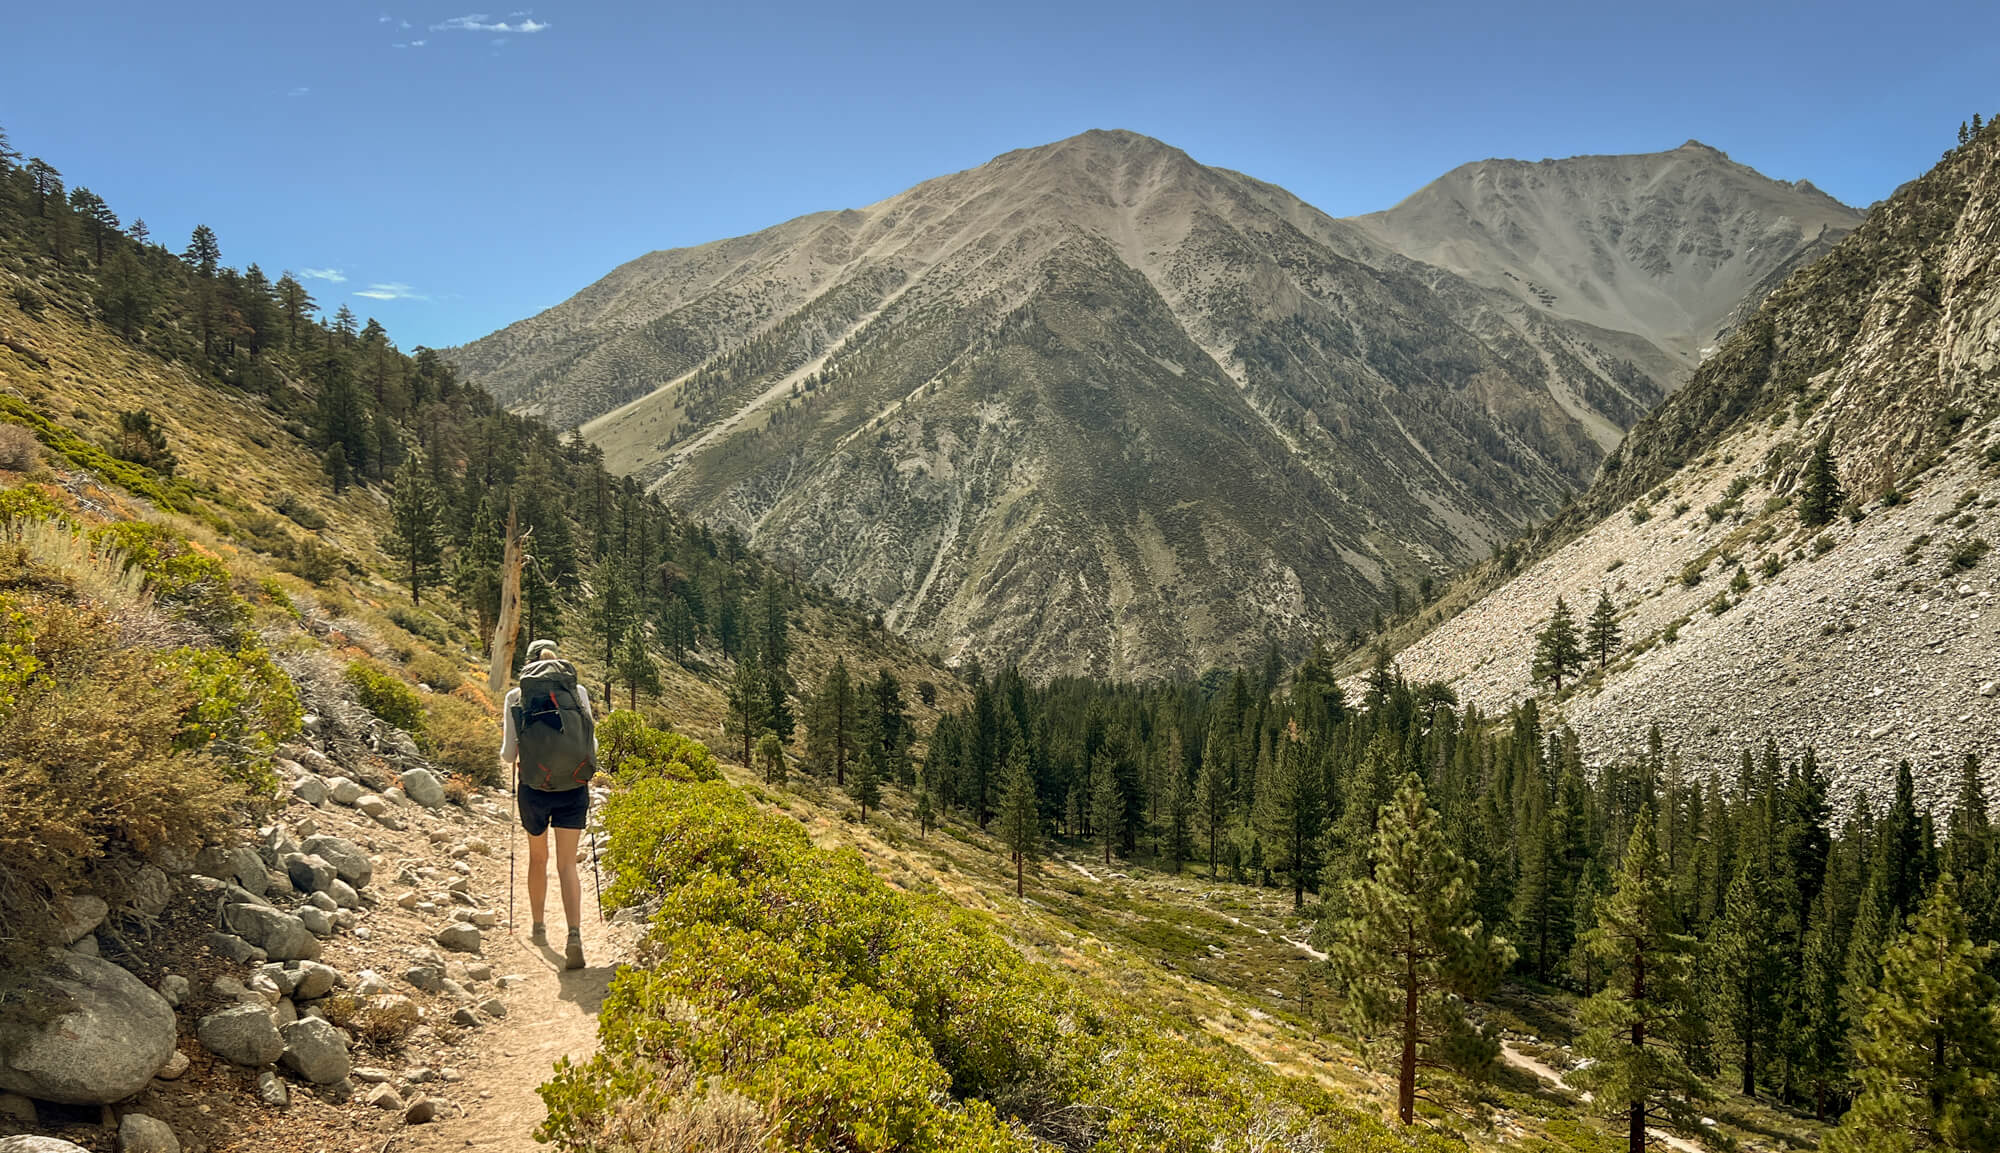
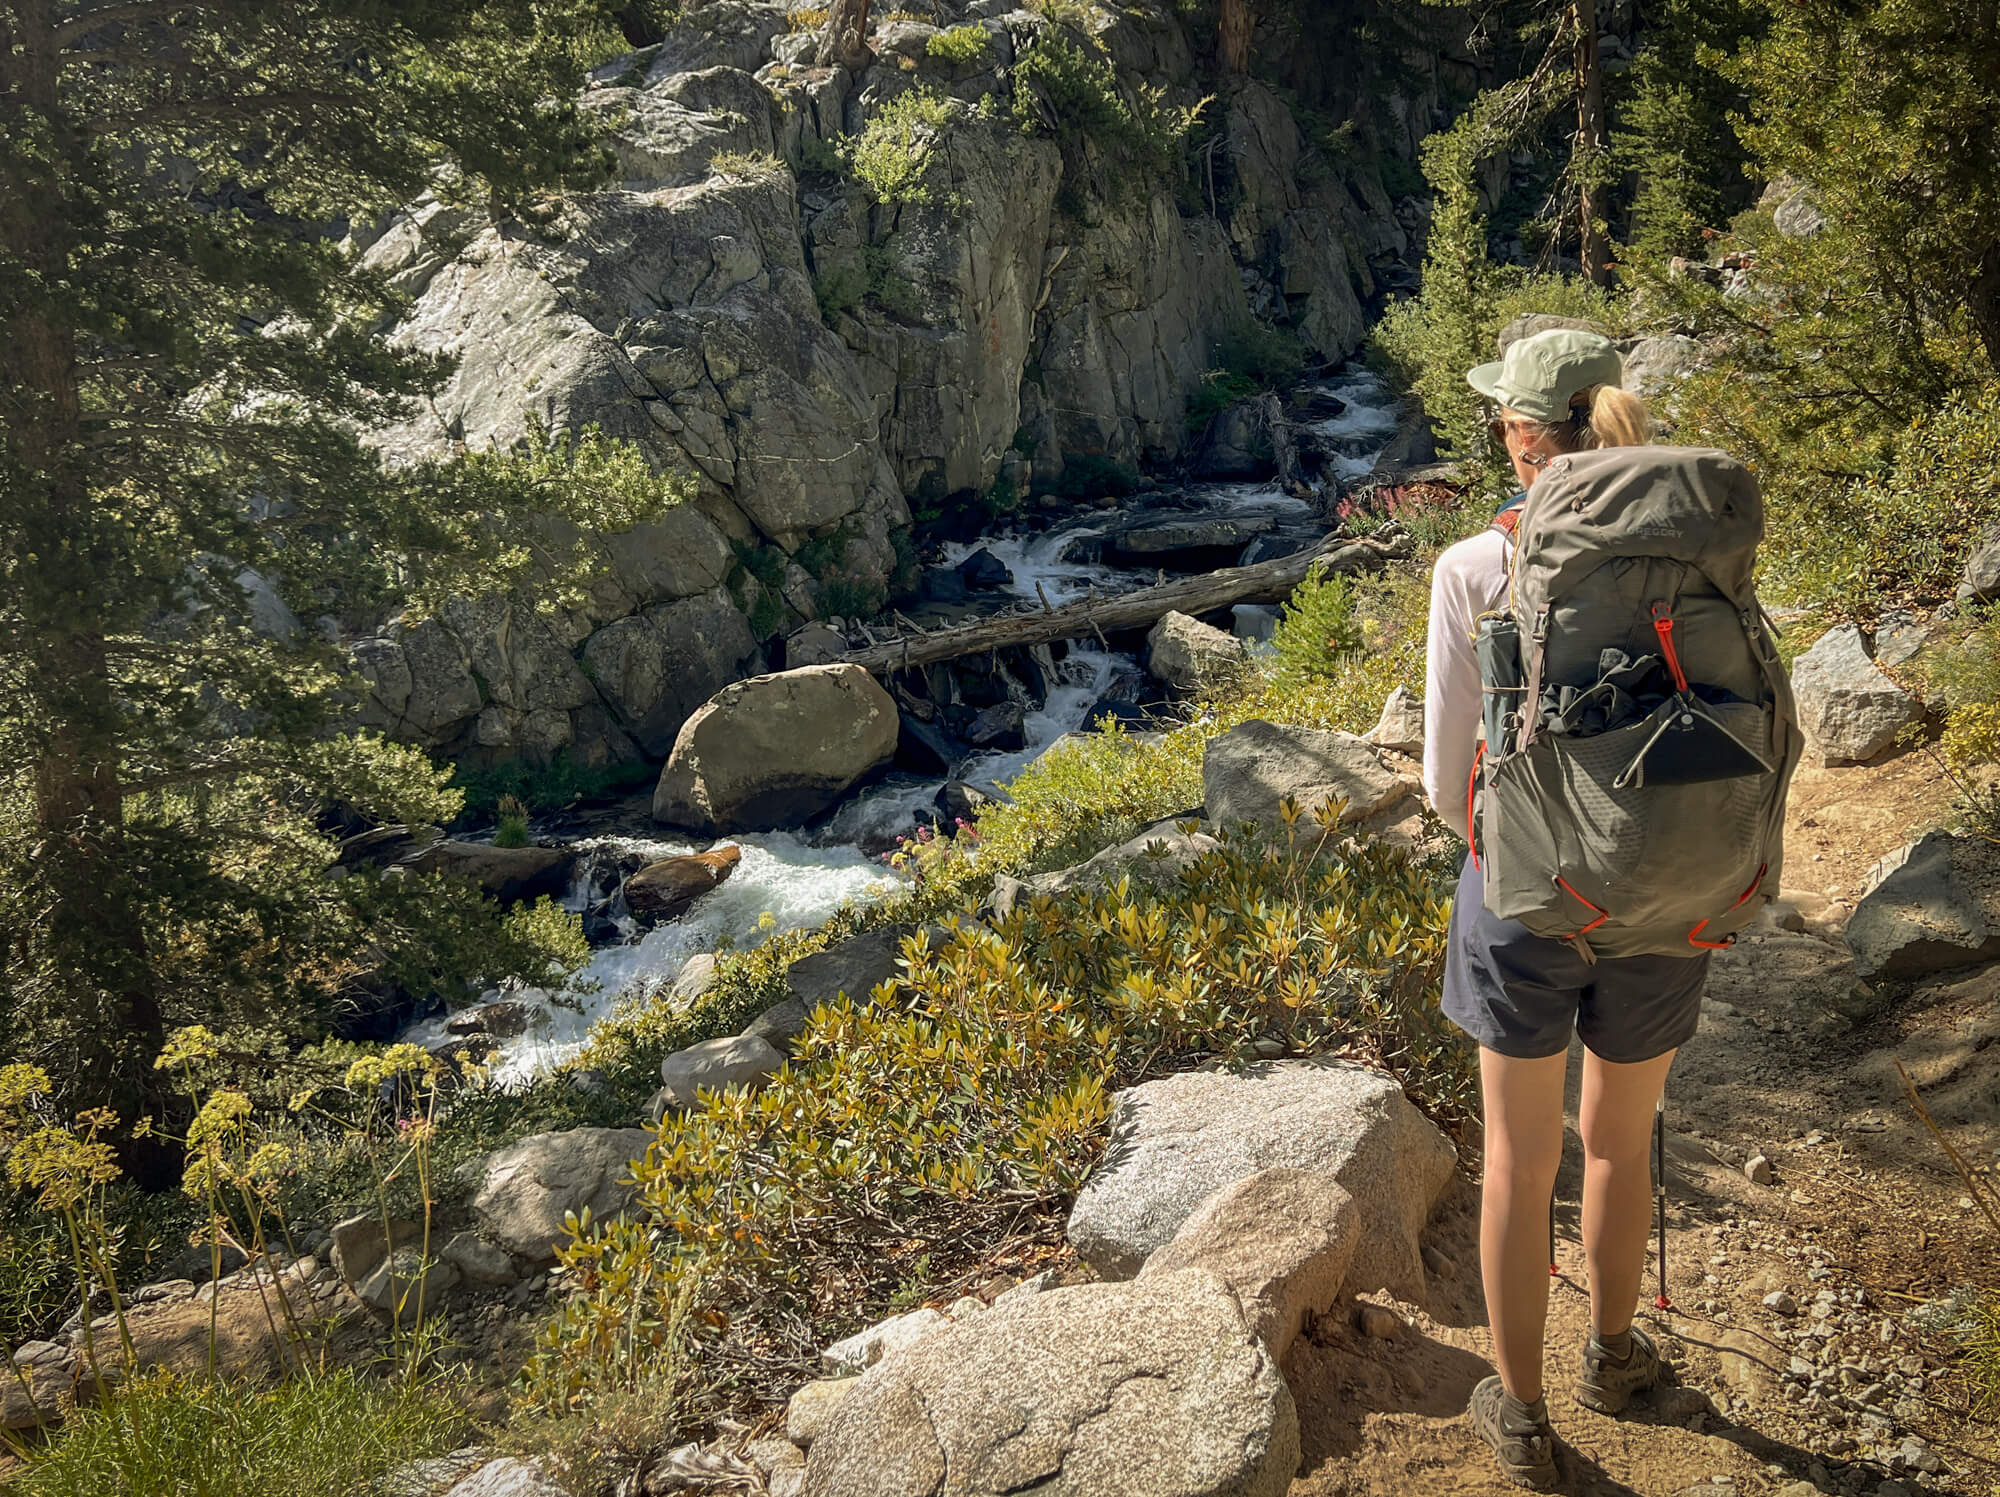
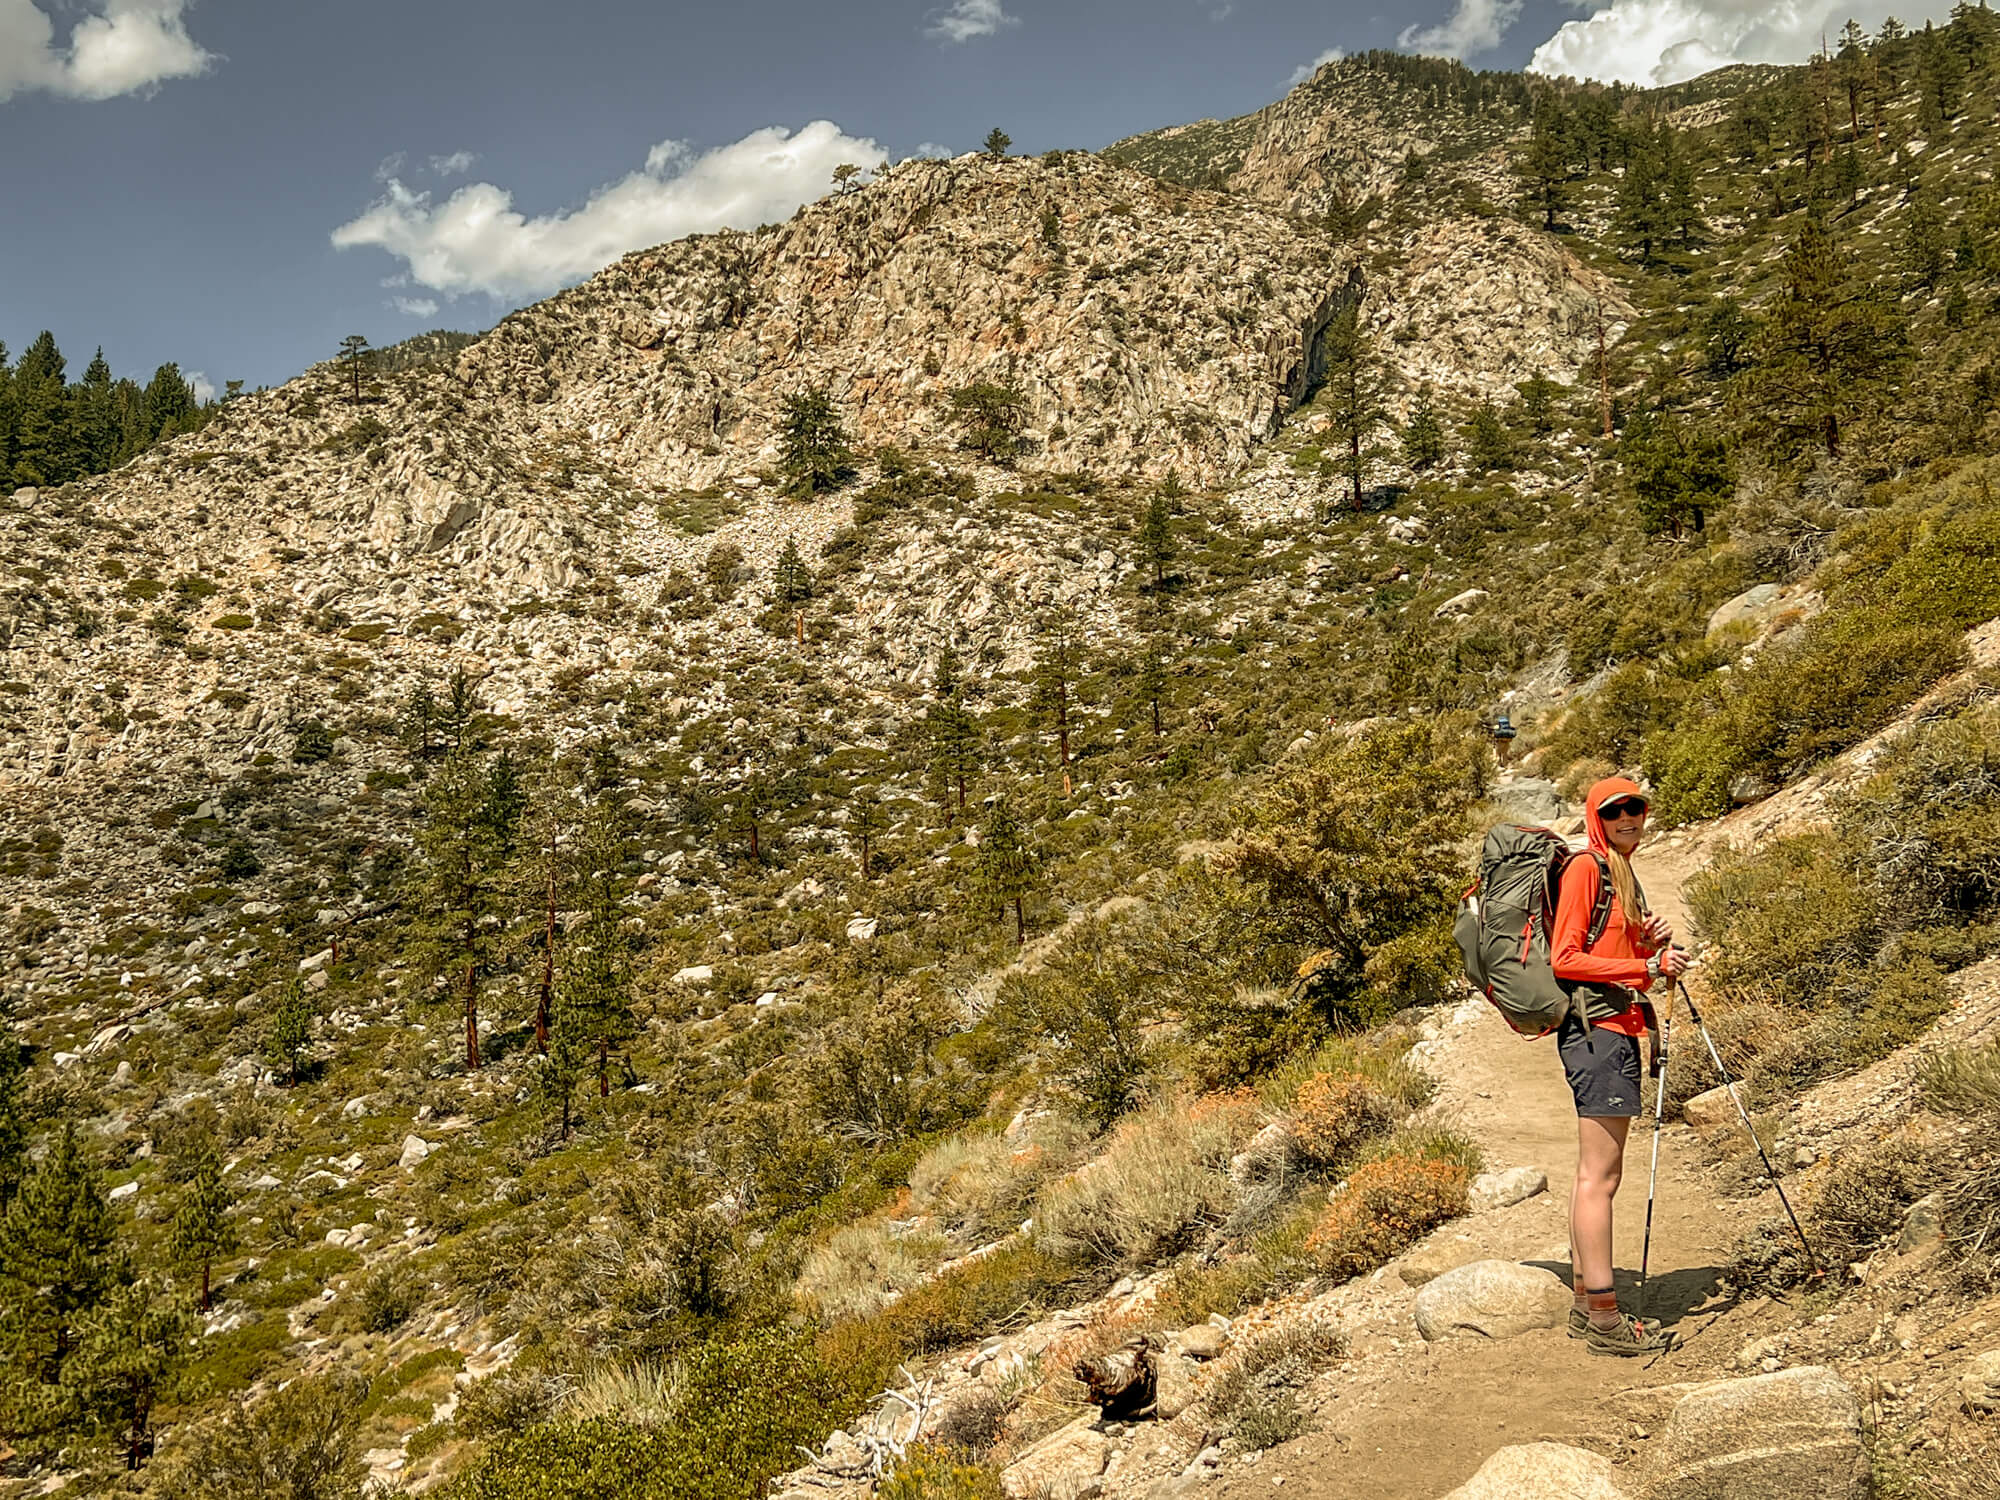
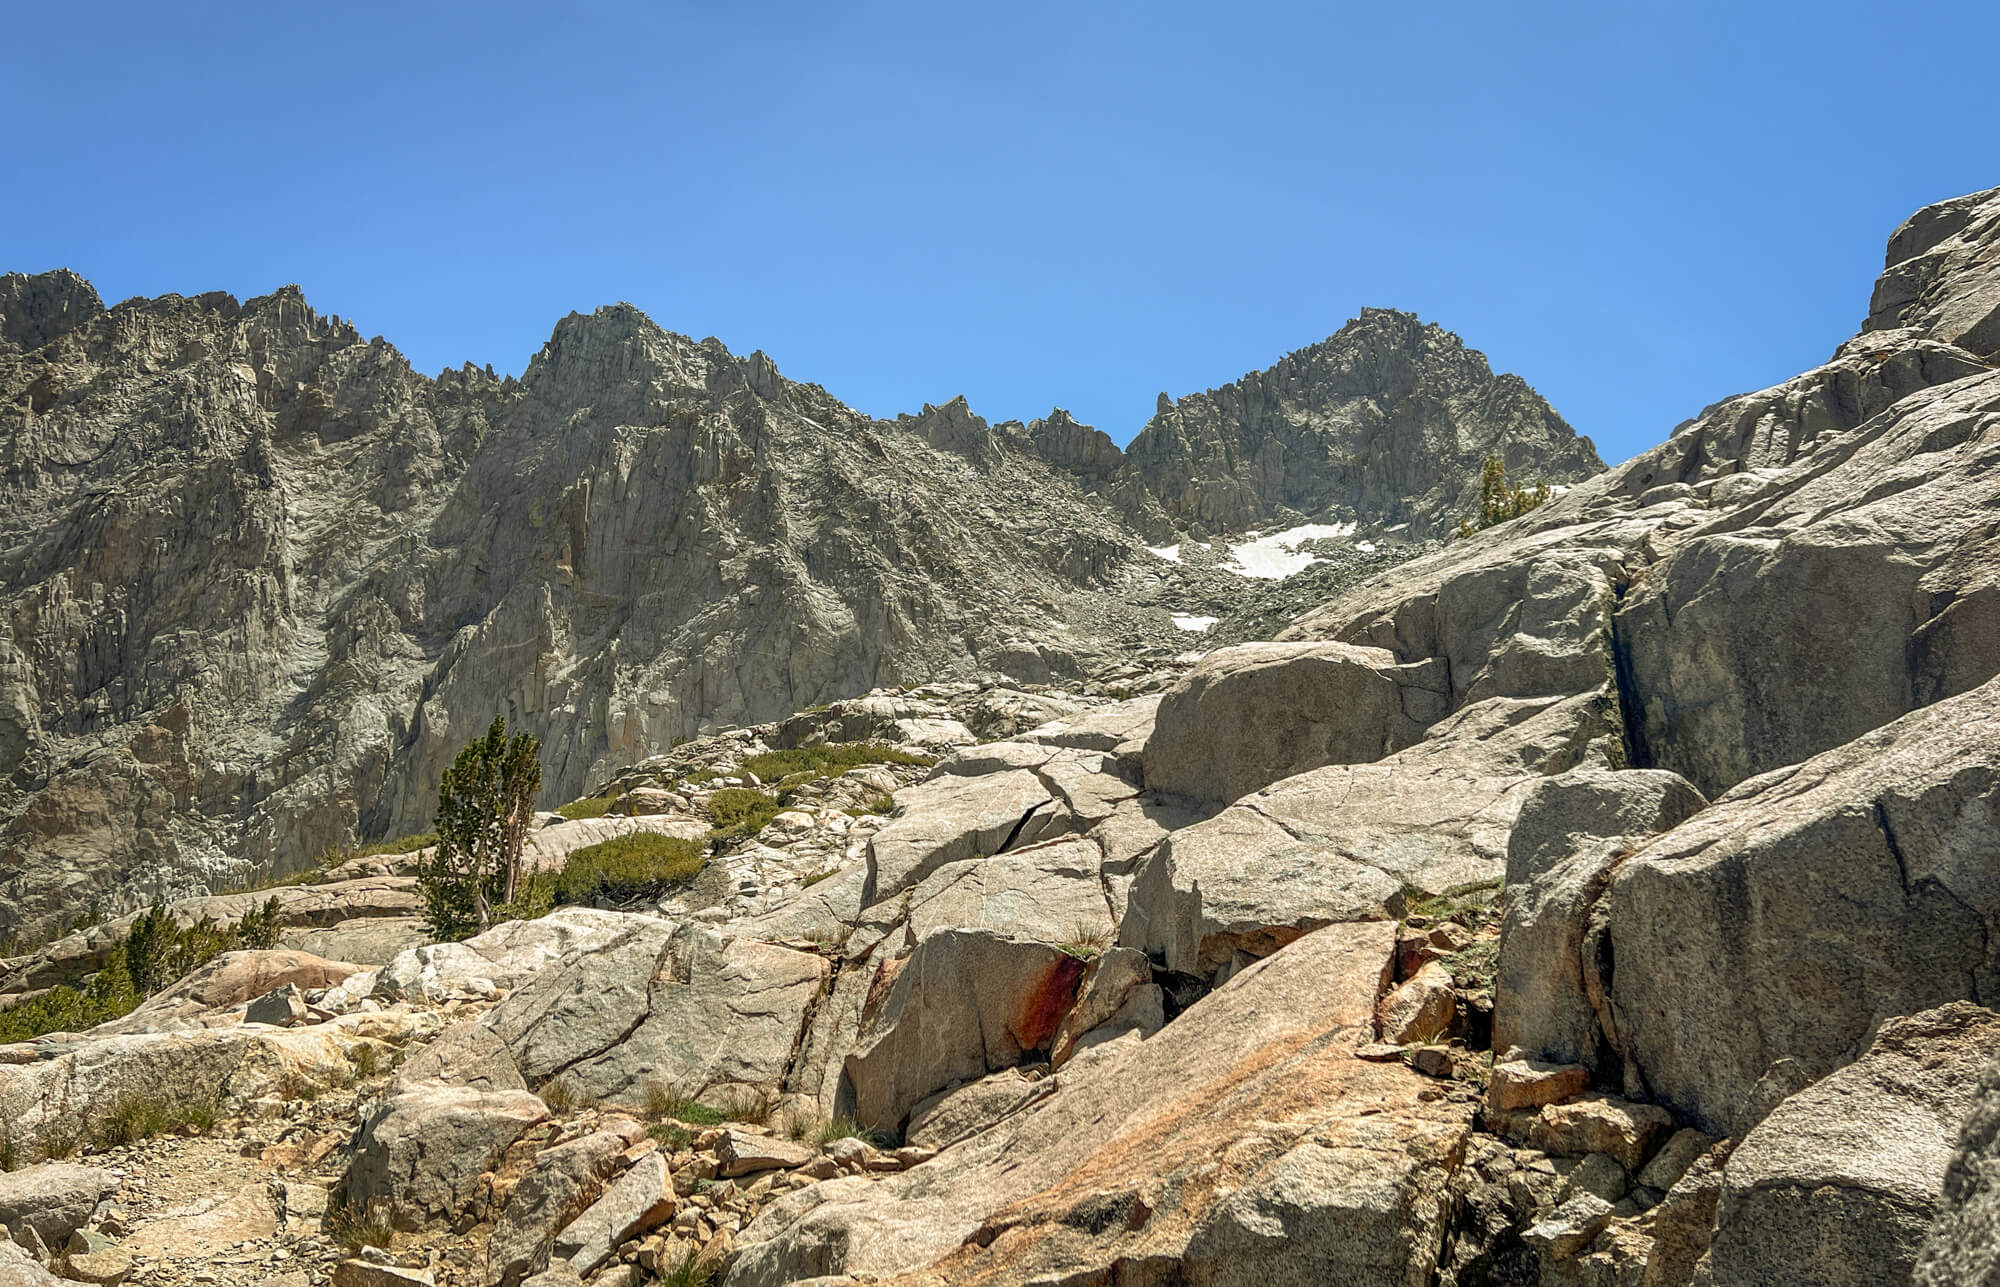
The hike up Big PIne Creek Nork Fork begins with a hot and exposed ascent from the parking lot that rapidly picks up elevation. For the first mile from the overnight parking lot to the junction with the South Fork Big Pine Creek trail, the trail parallels the Glacier Lodge road and the car camping sites below as it gains 600ft (200m) through desert-like, shadeless terrain. An early start to your hike is favorable here to avoid the overbearing heat that comes later in the day. While it can be hot, this section of the trail is an inspiring start to an epic adventure with views up the South Fork drainage and Norman Clyde Peak and Glacier in the distance. After 1 mile of hiking, you’ll reach signage at the junction that splits the North Fork and South Fork trails, keep right at the fork to continue up the Big Pine Creek North Fork Trail and towards Big Pine Lakes. If you require water or prefer a little more shade, another trail starts 30 ft closer to the creek below and runs parallel to the upper trail for approximately 0.6 mile. If you’re bottle is full and you don’t mind a bit of extra sun exposure, the upper trail is preferred as it follows a more direct path with more consistent elevation gain (the lower trail doubles back and rapidly gains elevation after 0.6 miles to join with the upper trail). After the two trails meet, the trail rapidly ascends for 0.4 mile via several switchbacks and gains 360ft of elevation as it negotiates the headwall adjacent to Second Falls.
Second Falls to First Lake
2.5 Miles 1200 ft Elevation Gain
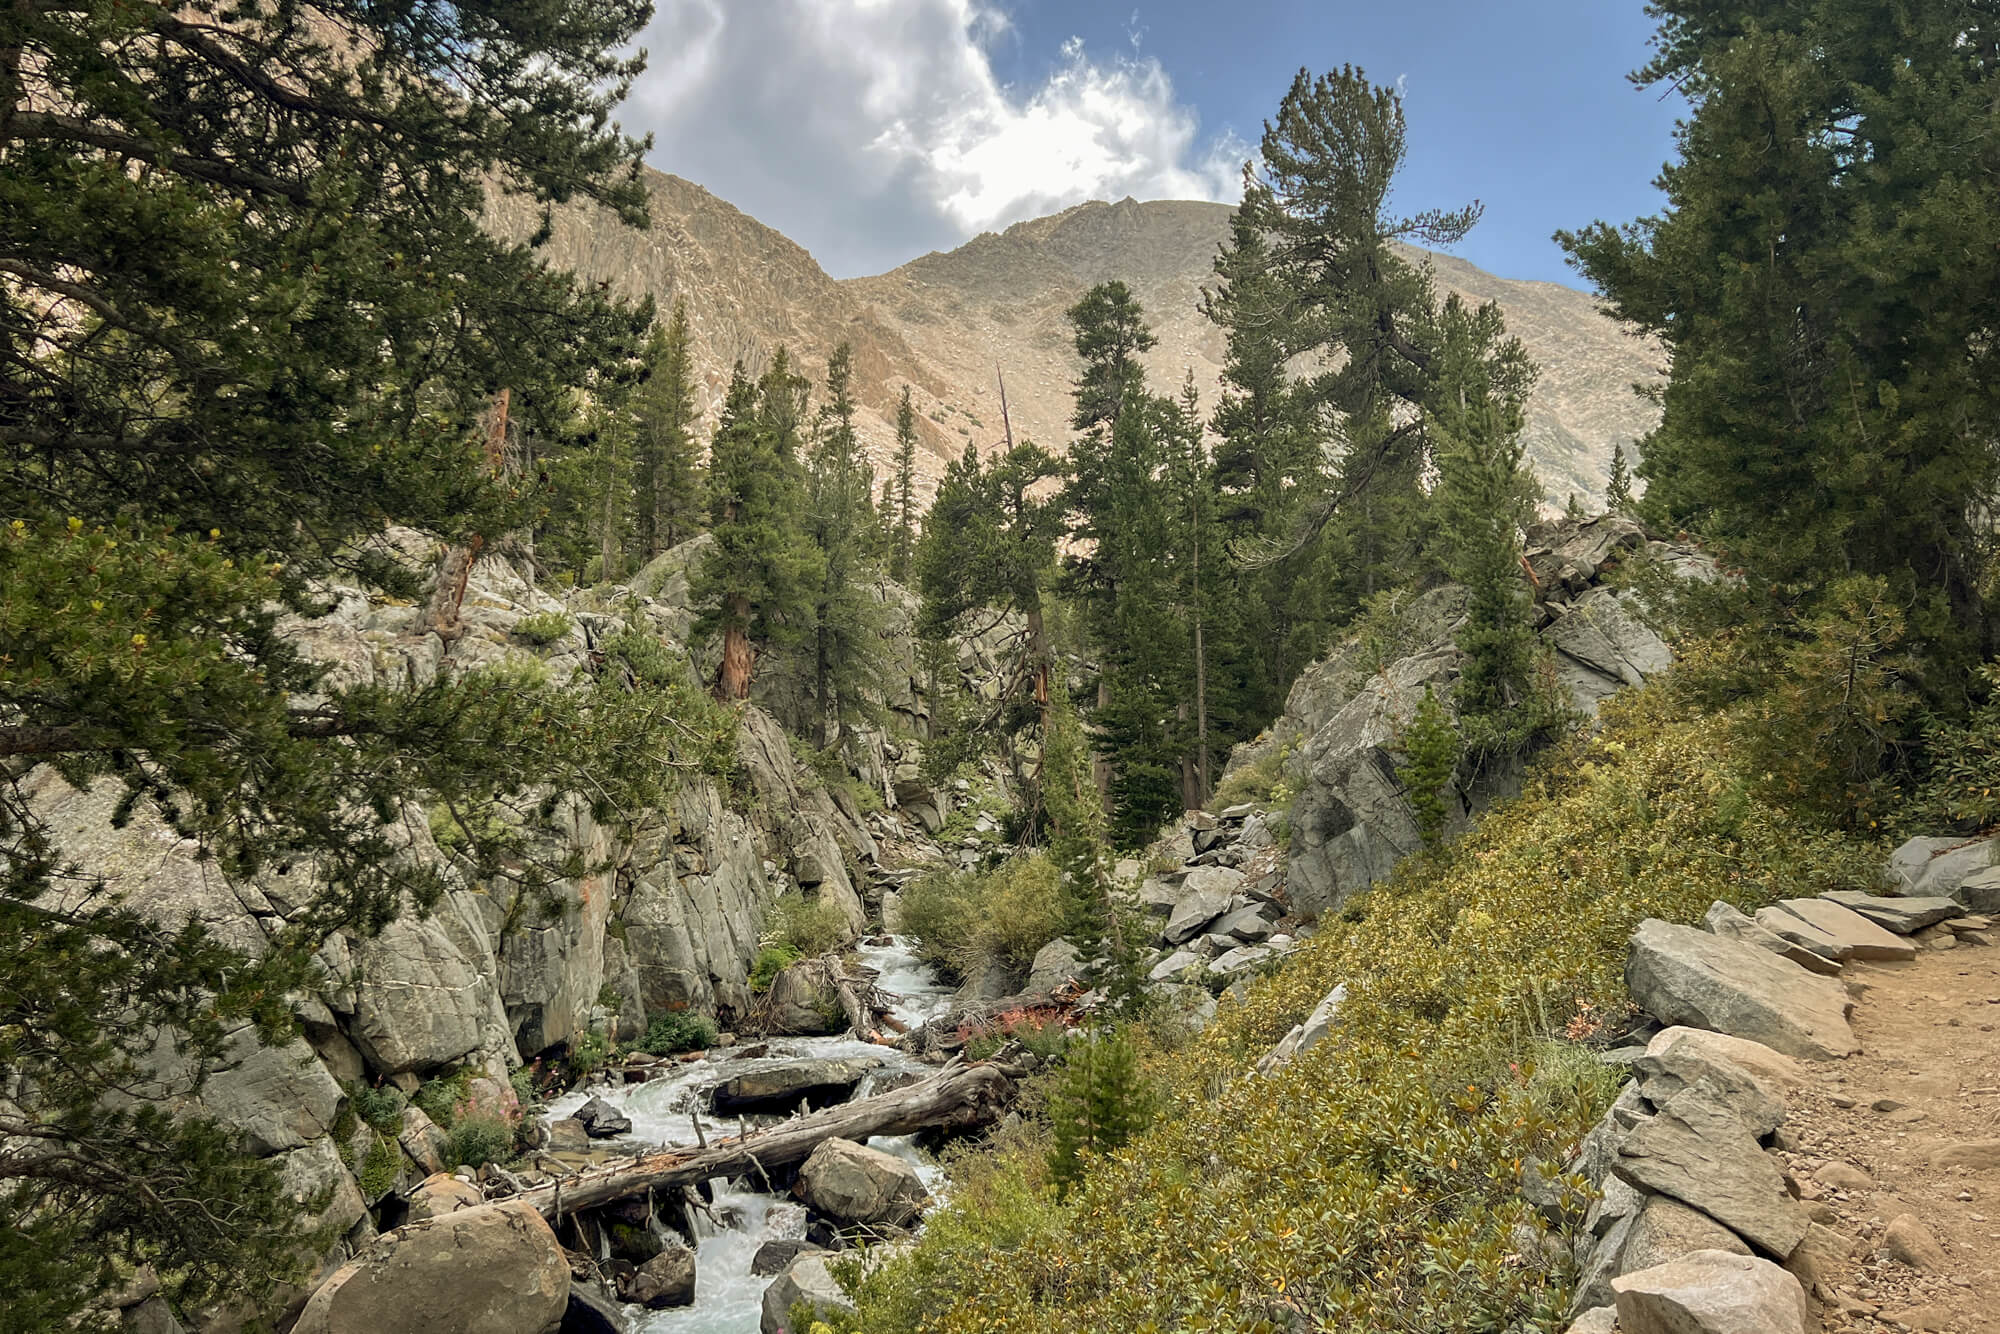
After passing Second Falls, the sun exposure is rapidly dissipates and you find yourself walking among mixed forest adjacent to the constant roar of the North Fork Big Pine Creek. The trail gains elevation a comfortable pace climbing 270ft for the next 0.7 miles before reaching the Lon Chaney cabin. This cabin was built in 1930 by the silent film star Lon Chaney and is currently used as a ranger station. It’s worth checking out the cabin, specifically the southeast facing side, which is an ideal spot to fill up your water bottle /resevoir if it’s run dry or a great place to stop for a snack.
When it’s time to carry on, the trail continues upwards meandering alongside the creek with the surrounding forest continuing to provide shade from the sun. Beautiful views of the cascading creek and occasional glimpses of the approaching Temple Crag adorn the walk up. After 1.7 more miles of hiking and 825ft of elevation gain you’ll reach the junction with the Black Lake Trail. As discussed in the section on what direction to hike, I recommend that you stay left here continuing towards First lake. The right trail and the ascent to Black lake is sun exposed with multiple switchbacks and far more enjoyable for descending should you choose to complete this hike as a lollipop loop.
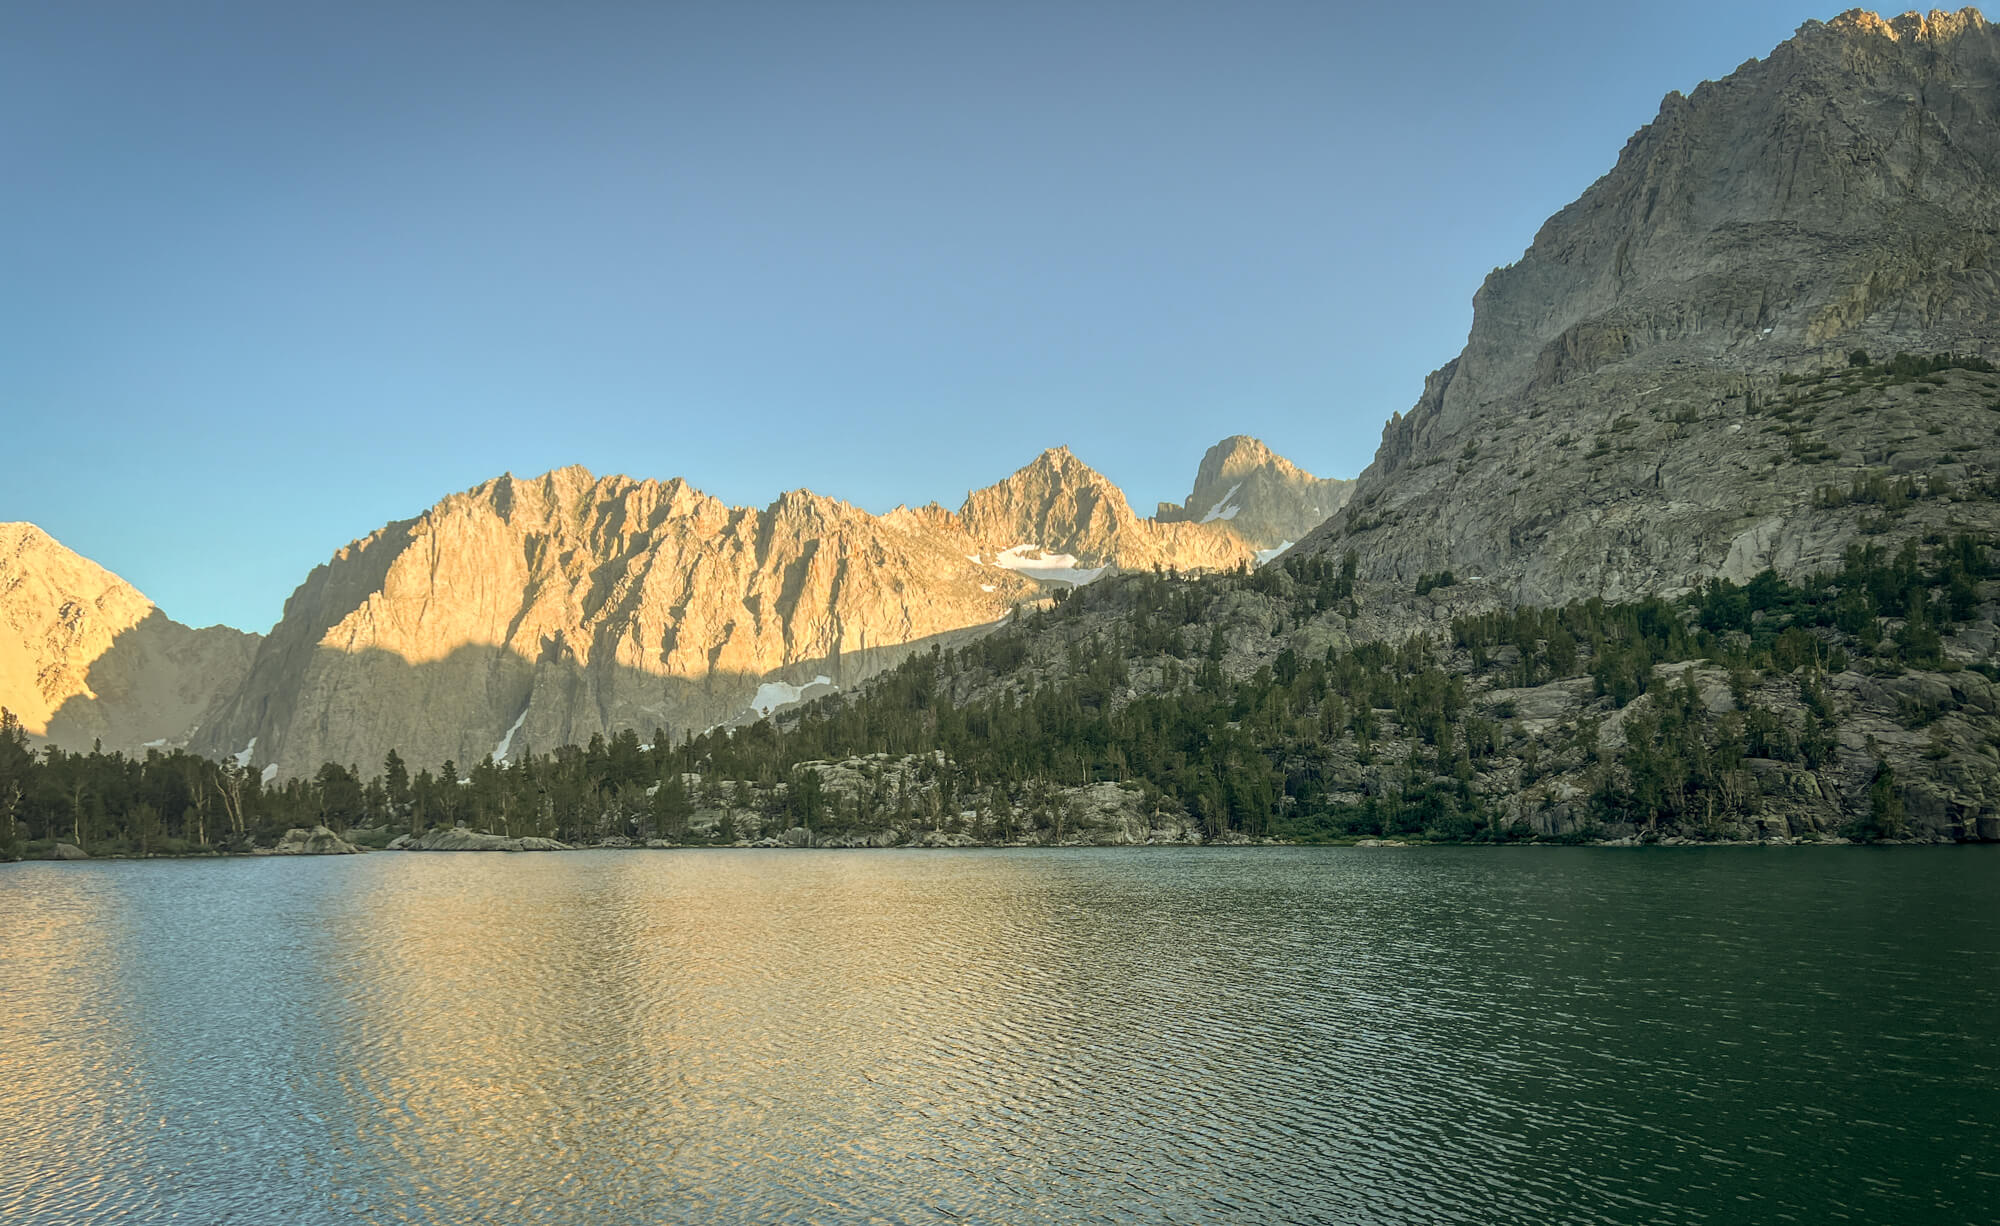
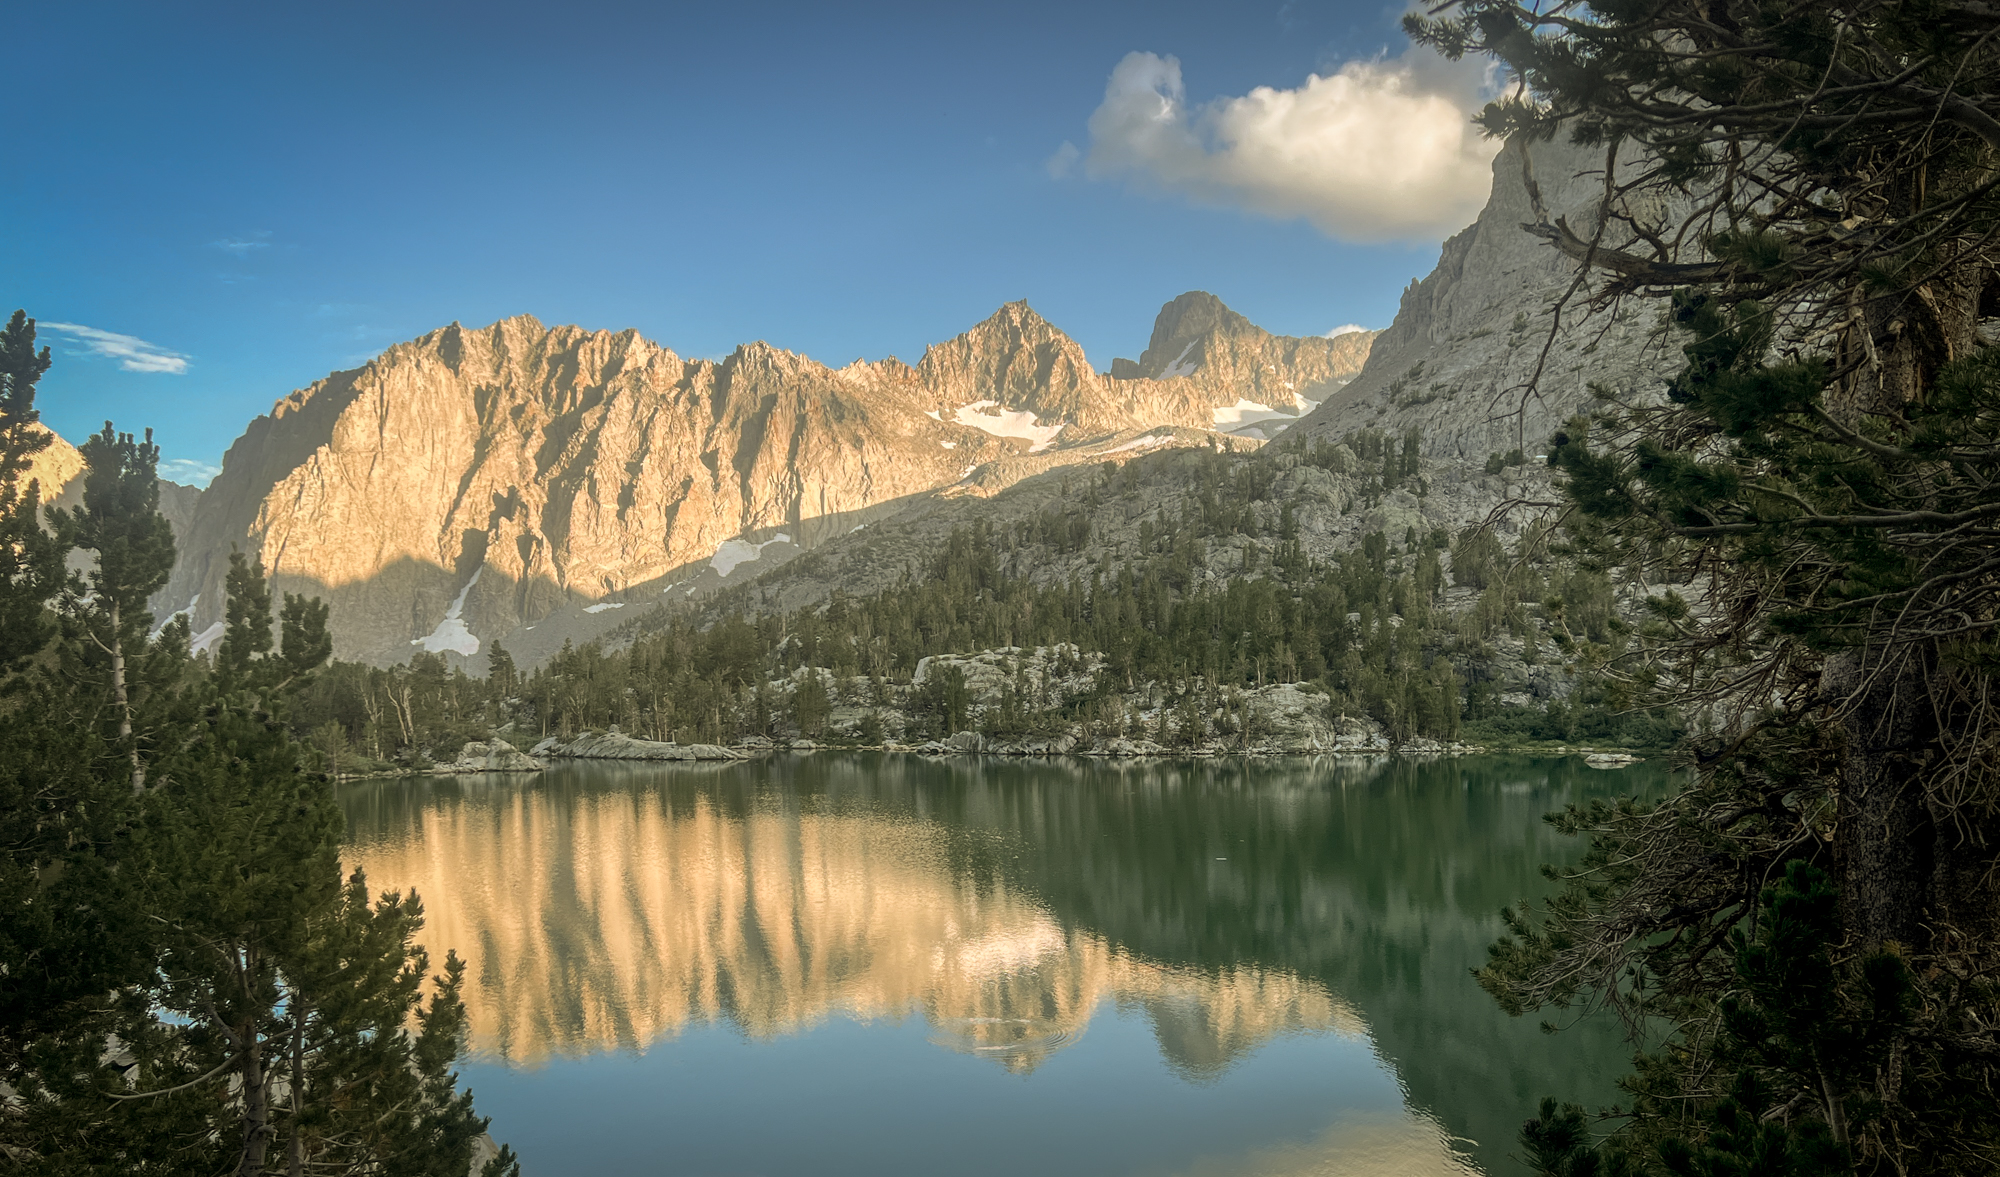
Approximately 1/4 of a mile after the junction with the Black Lake Trail, you’ll reach you the first of the Big Pine Lakes, aptly named First Lake. This gorgeous alpine lake nestled perfectly within the confines of a smooth Sierran granite basin, is a breathtaking introduction to the Big Pine Lakes. Scramble off trail to find a perfect spot to snack or enjoy lunch, before carrying on.
First Lake to Third Lake
0.7 Miles 200 ft Elevation Gain
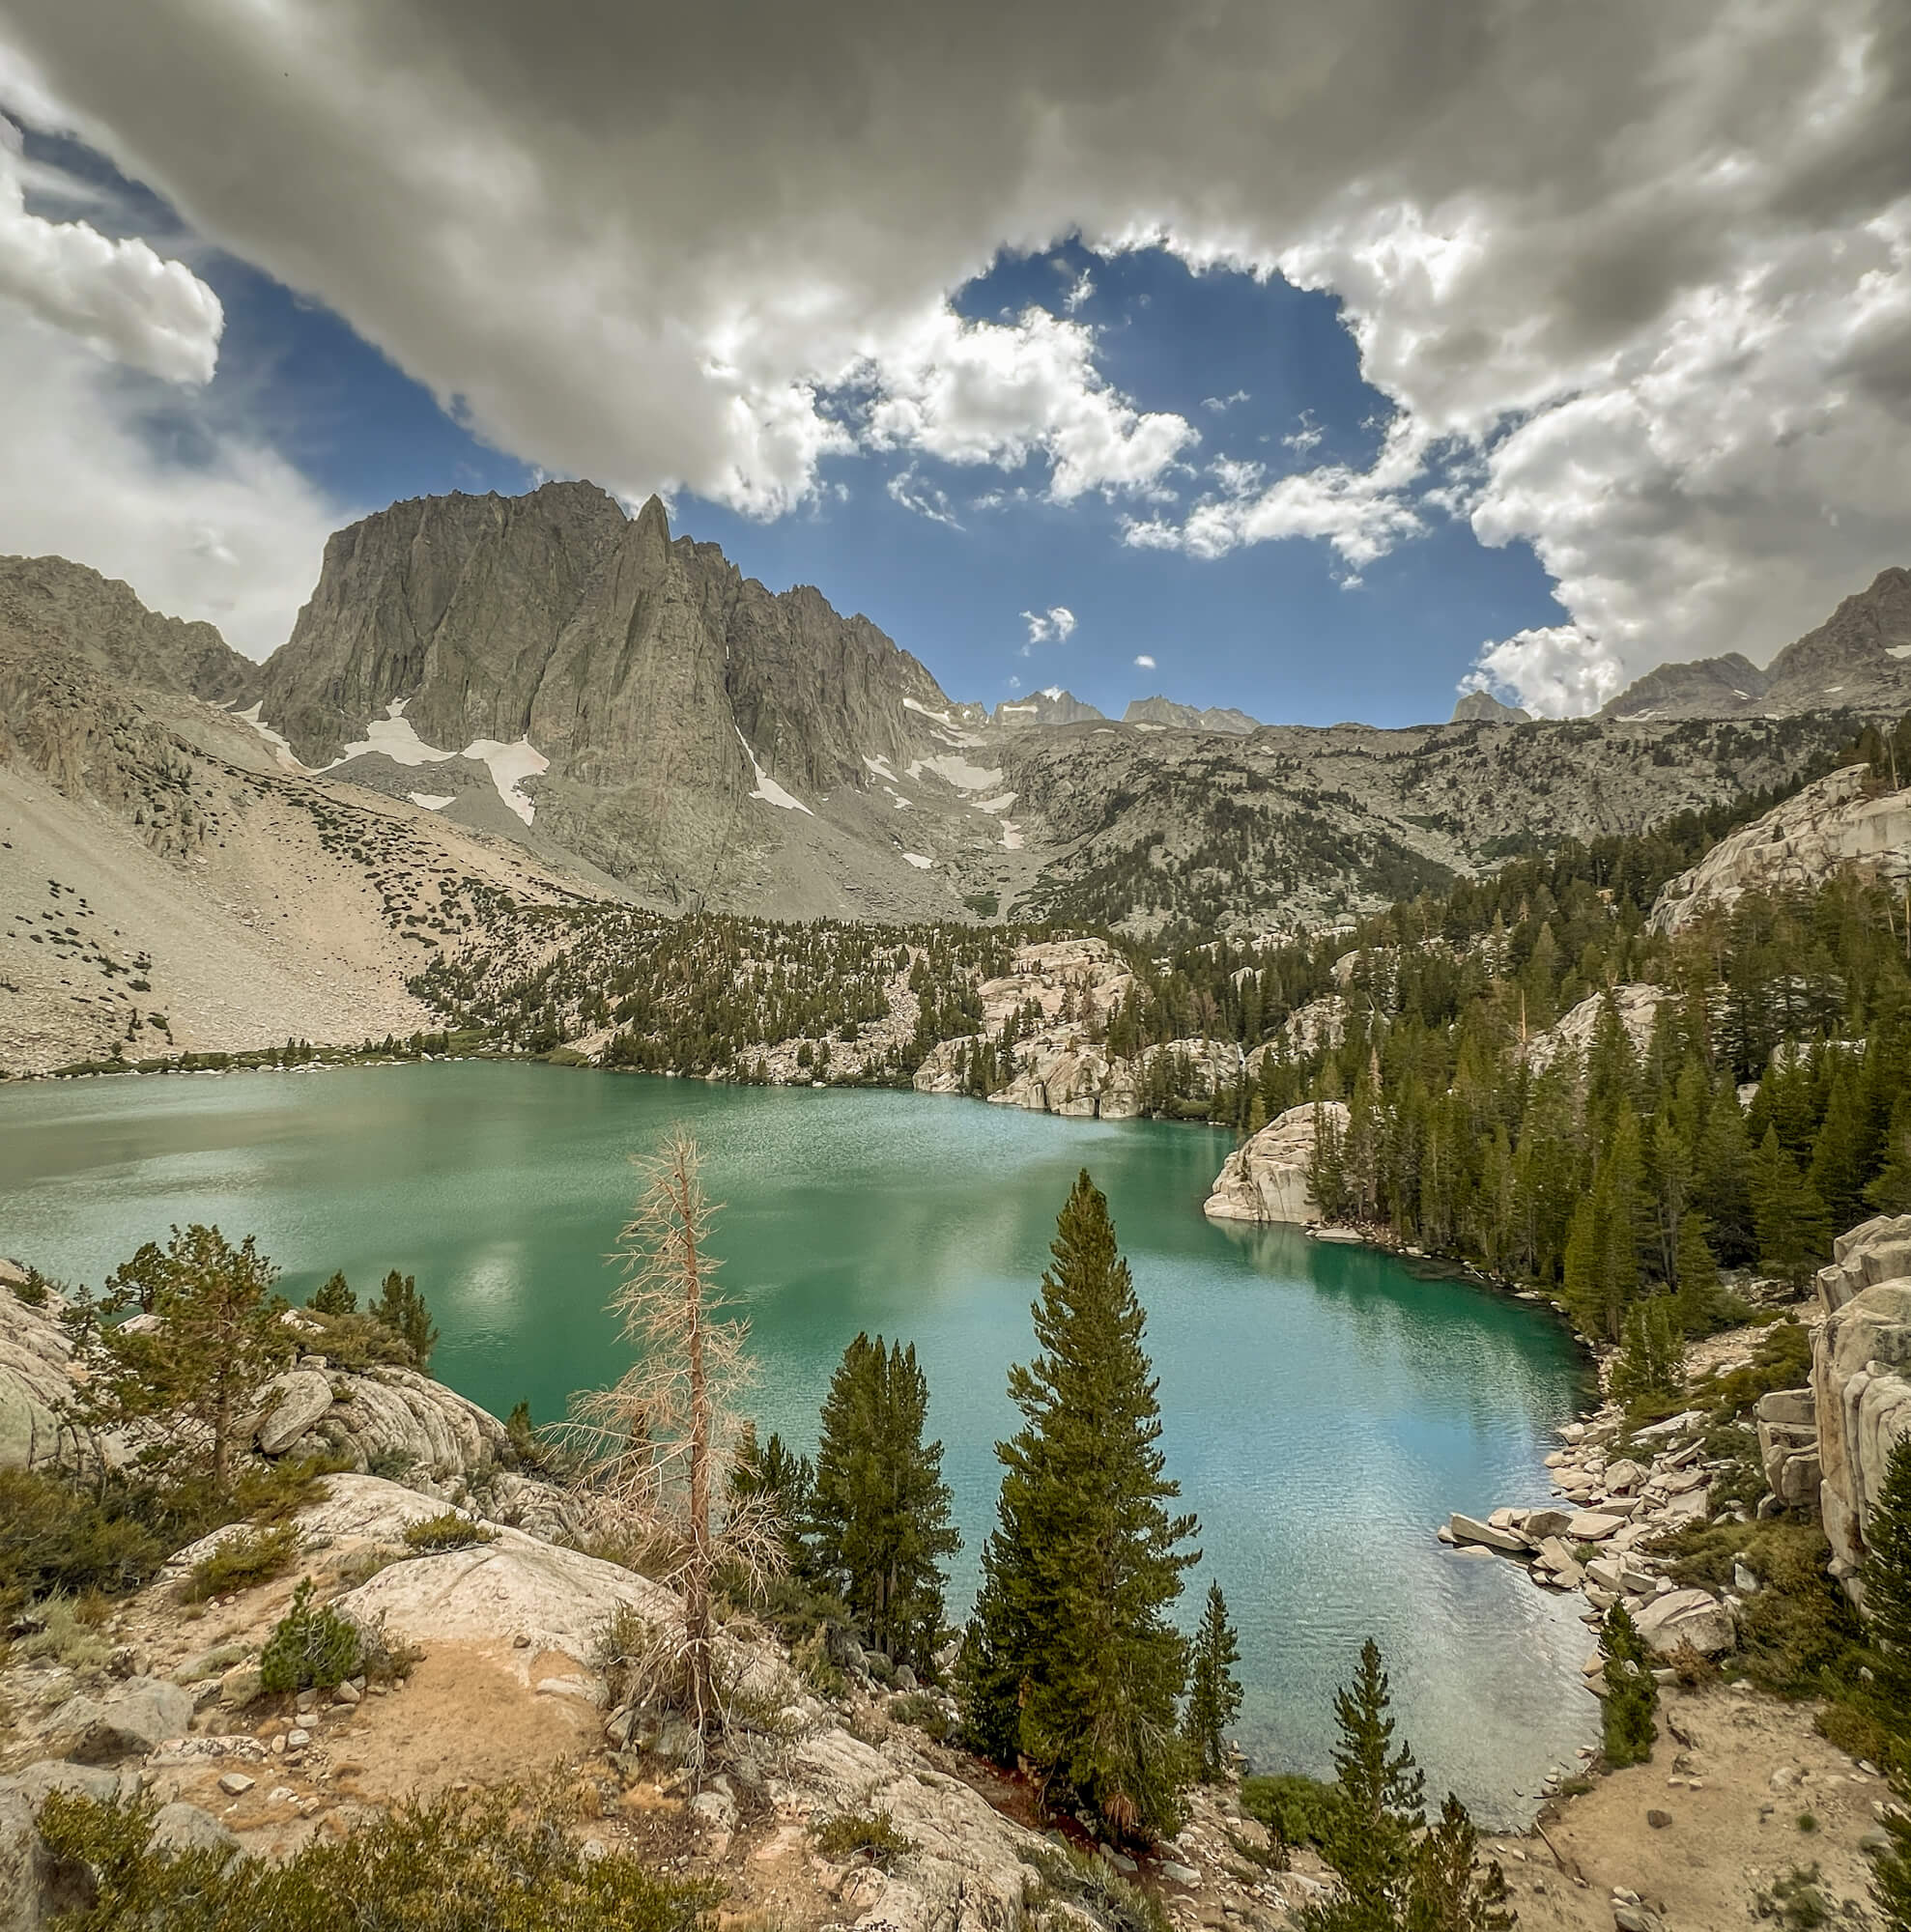
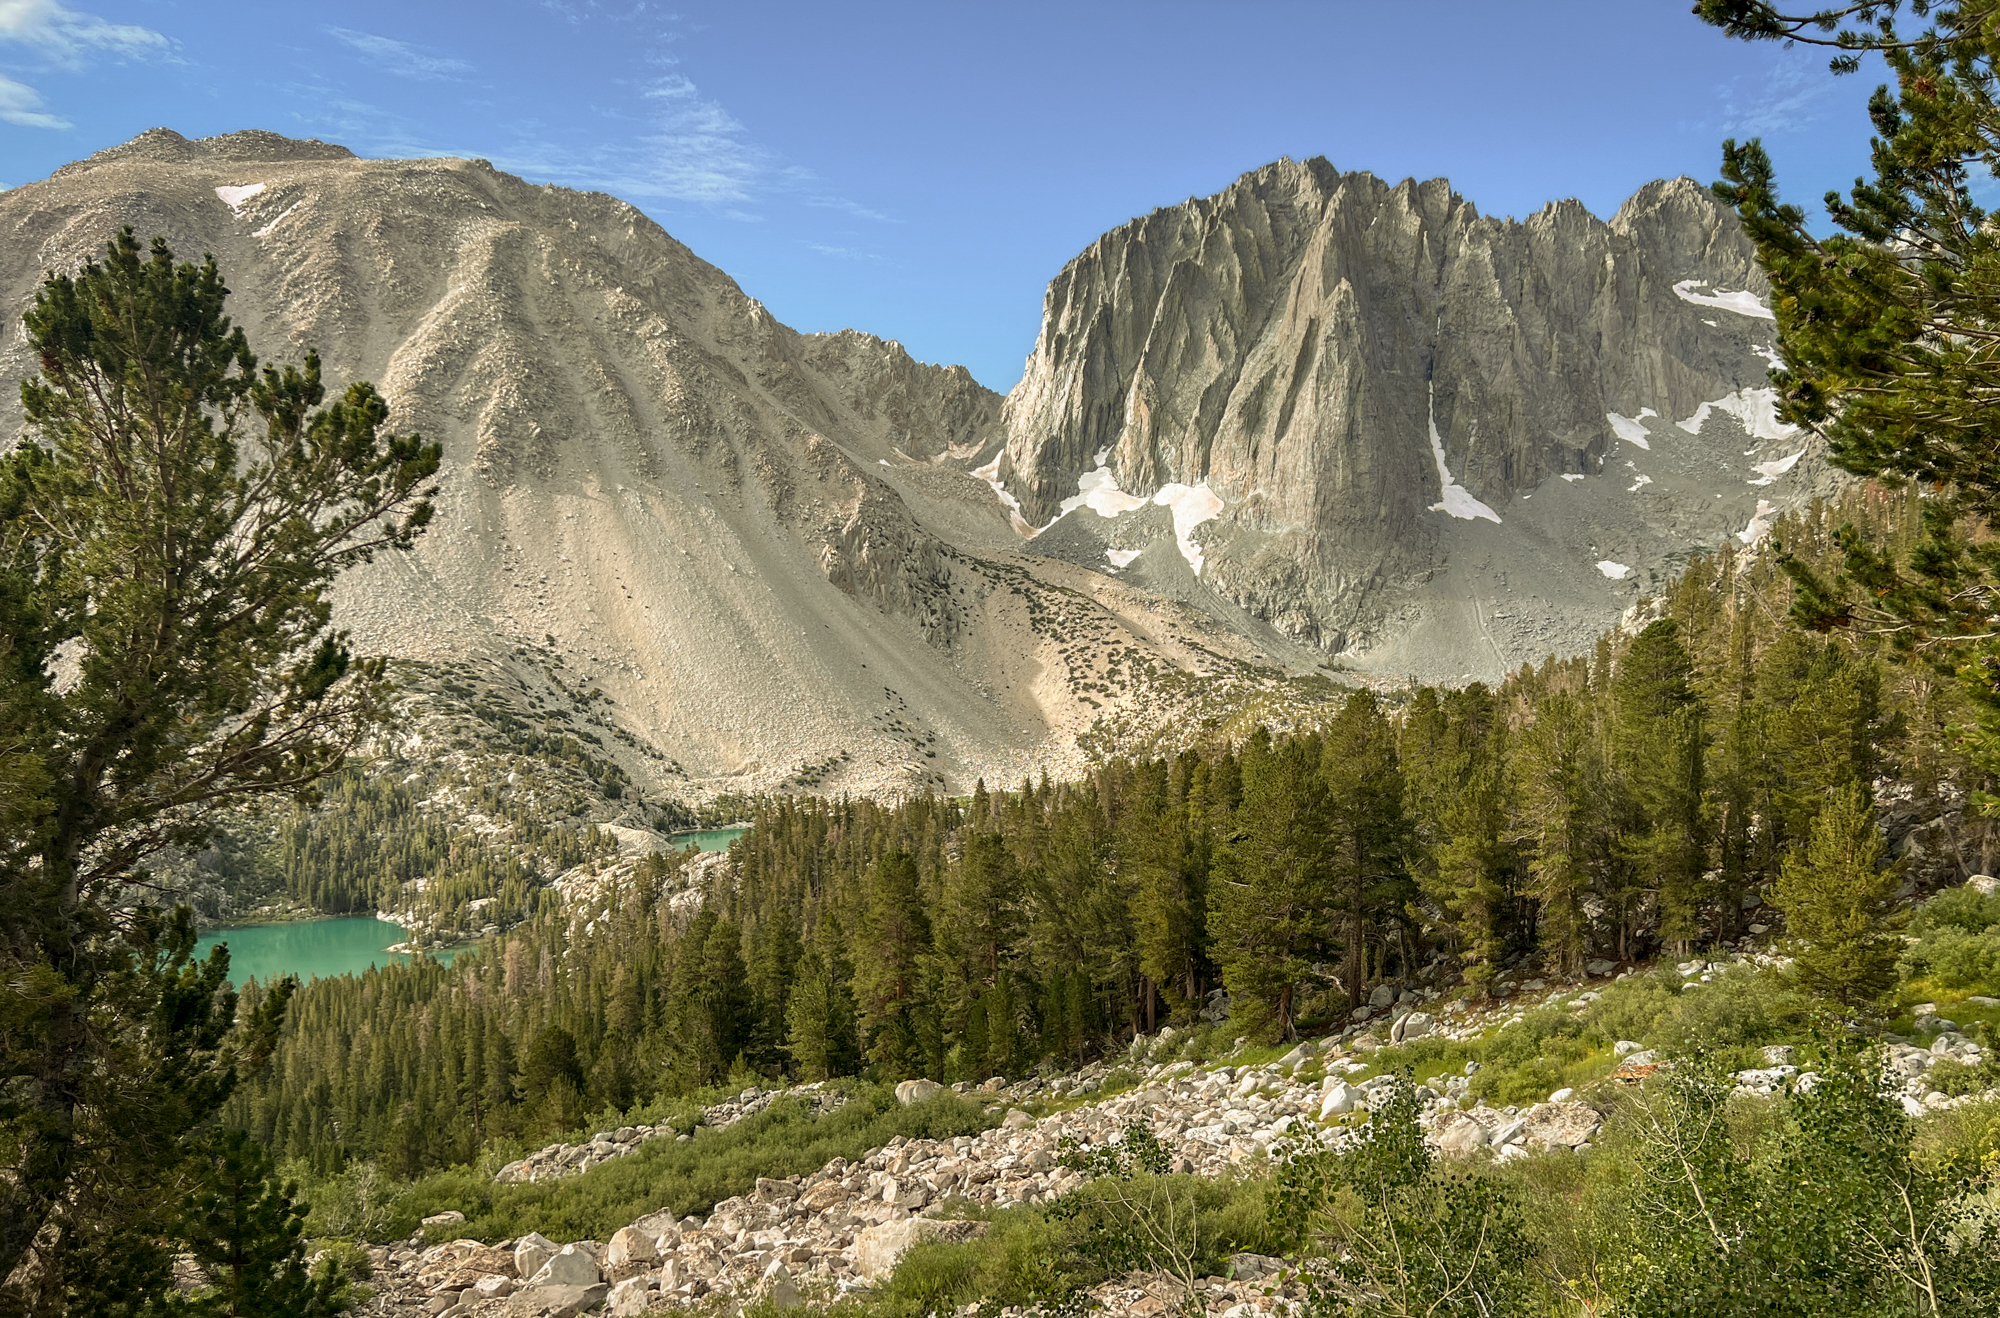
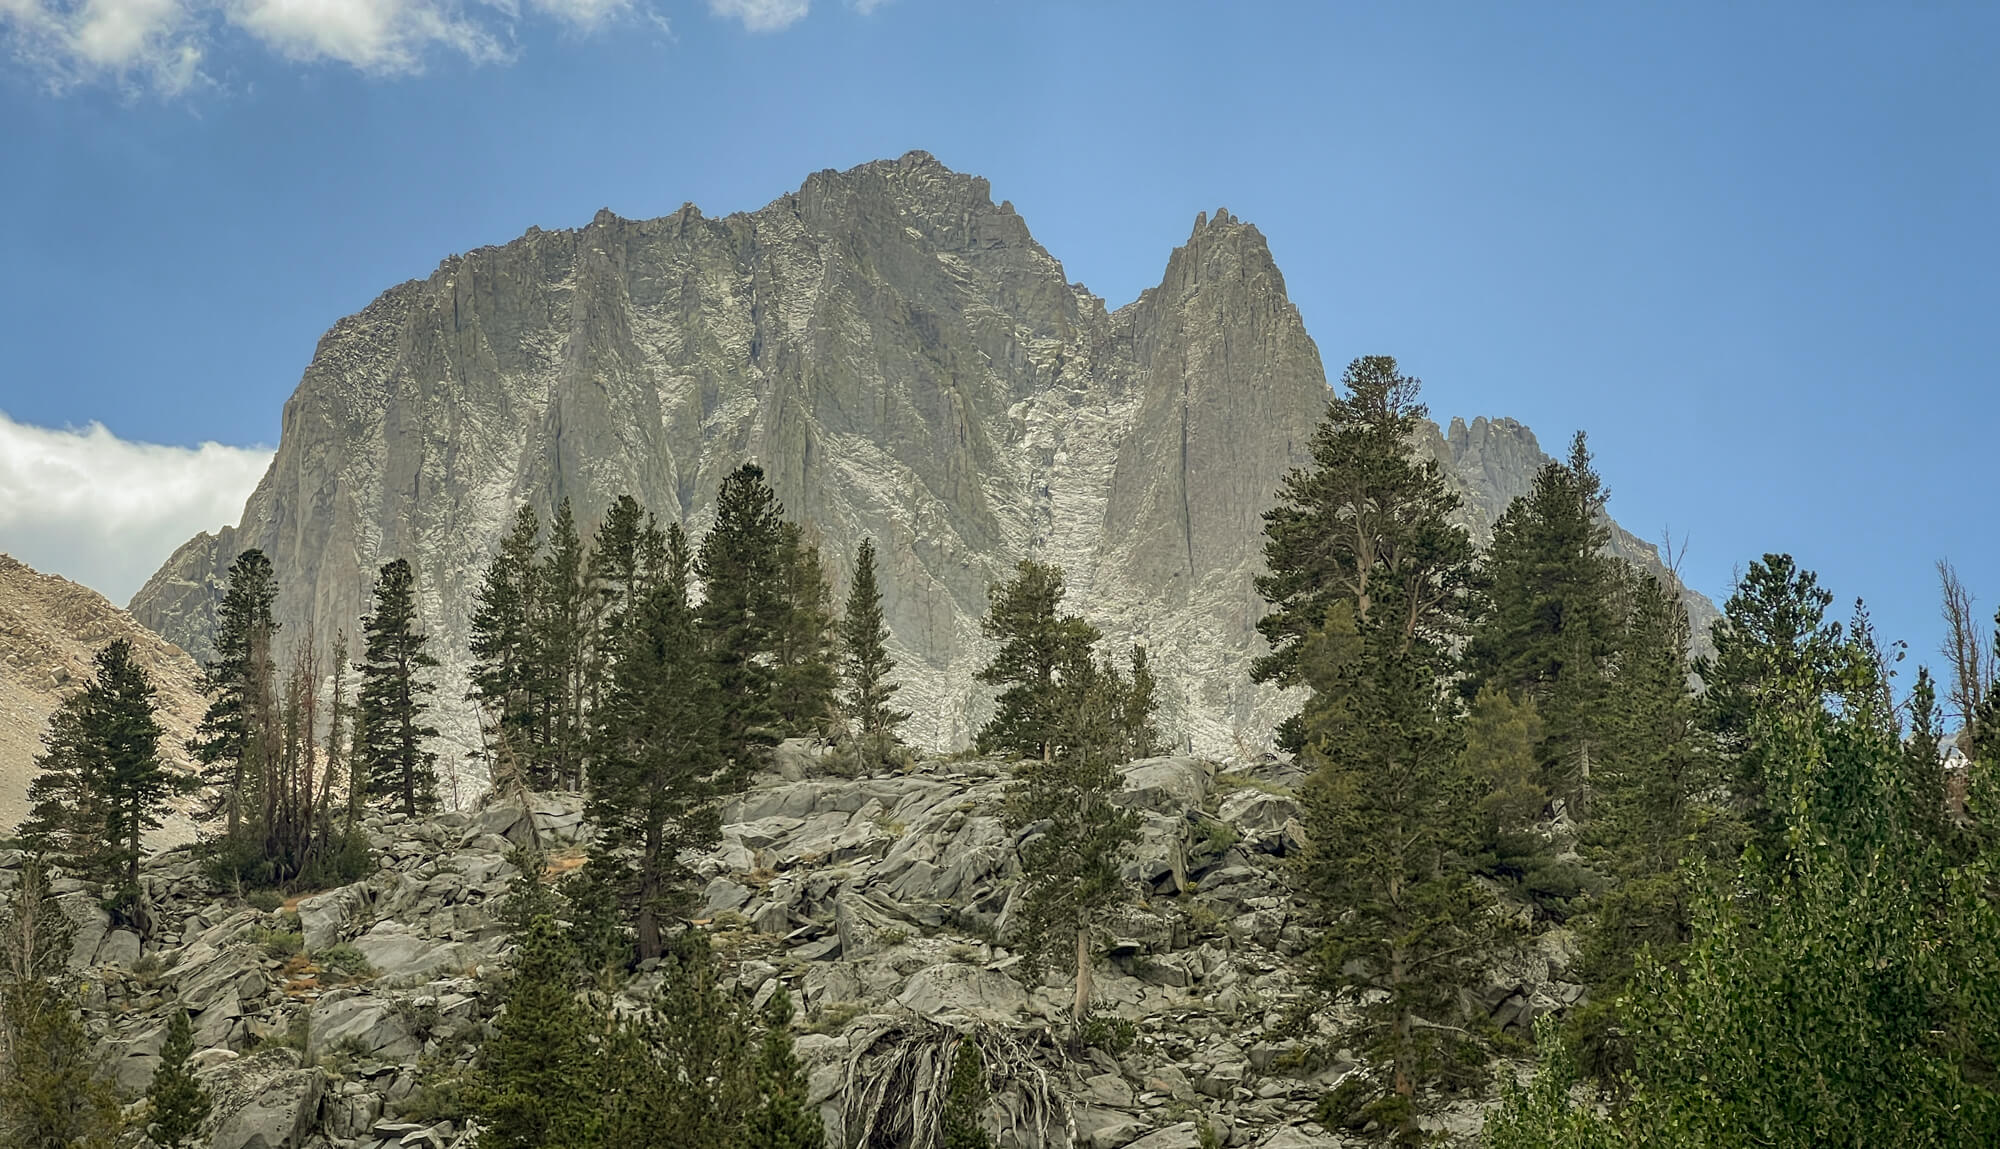
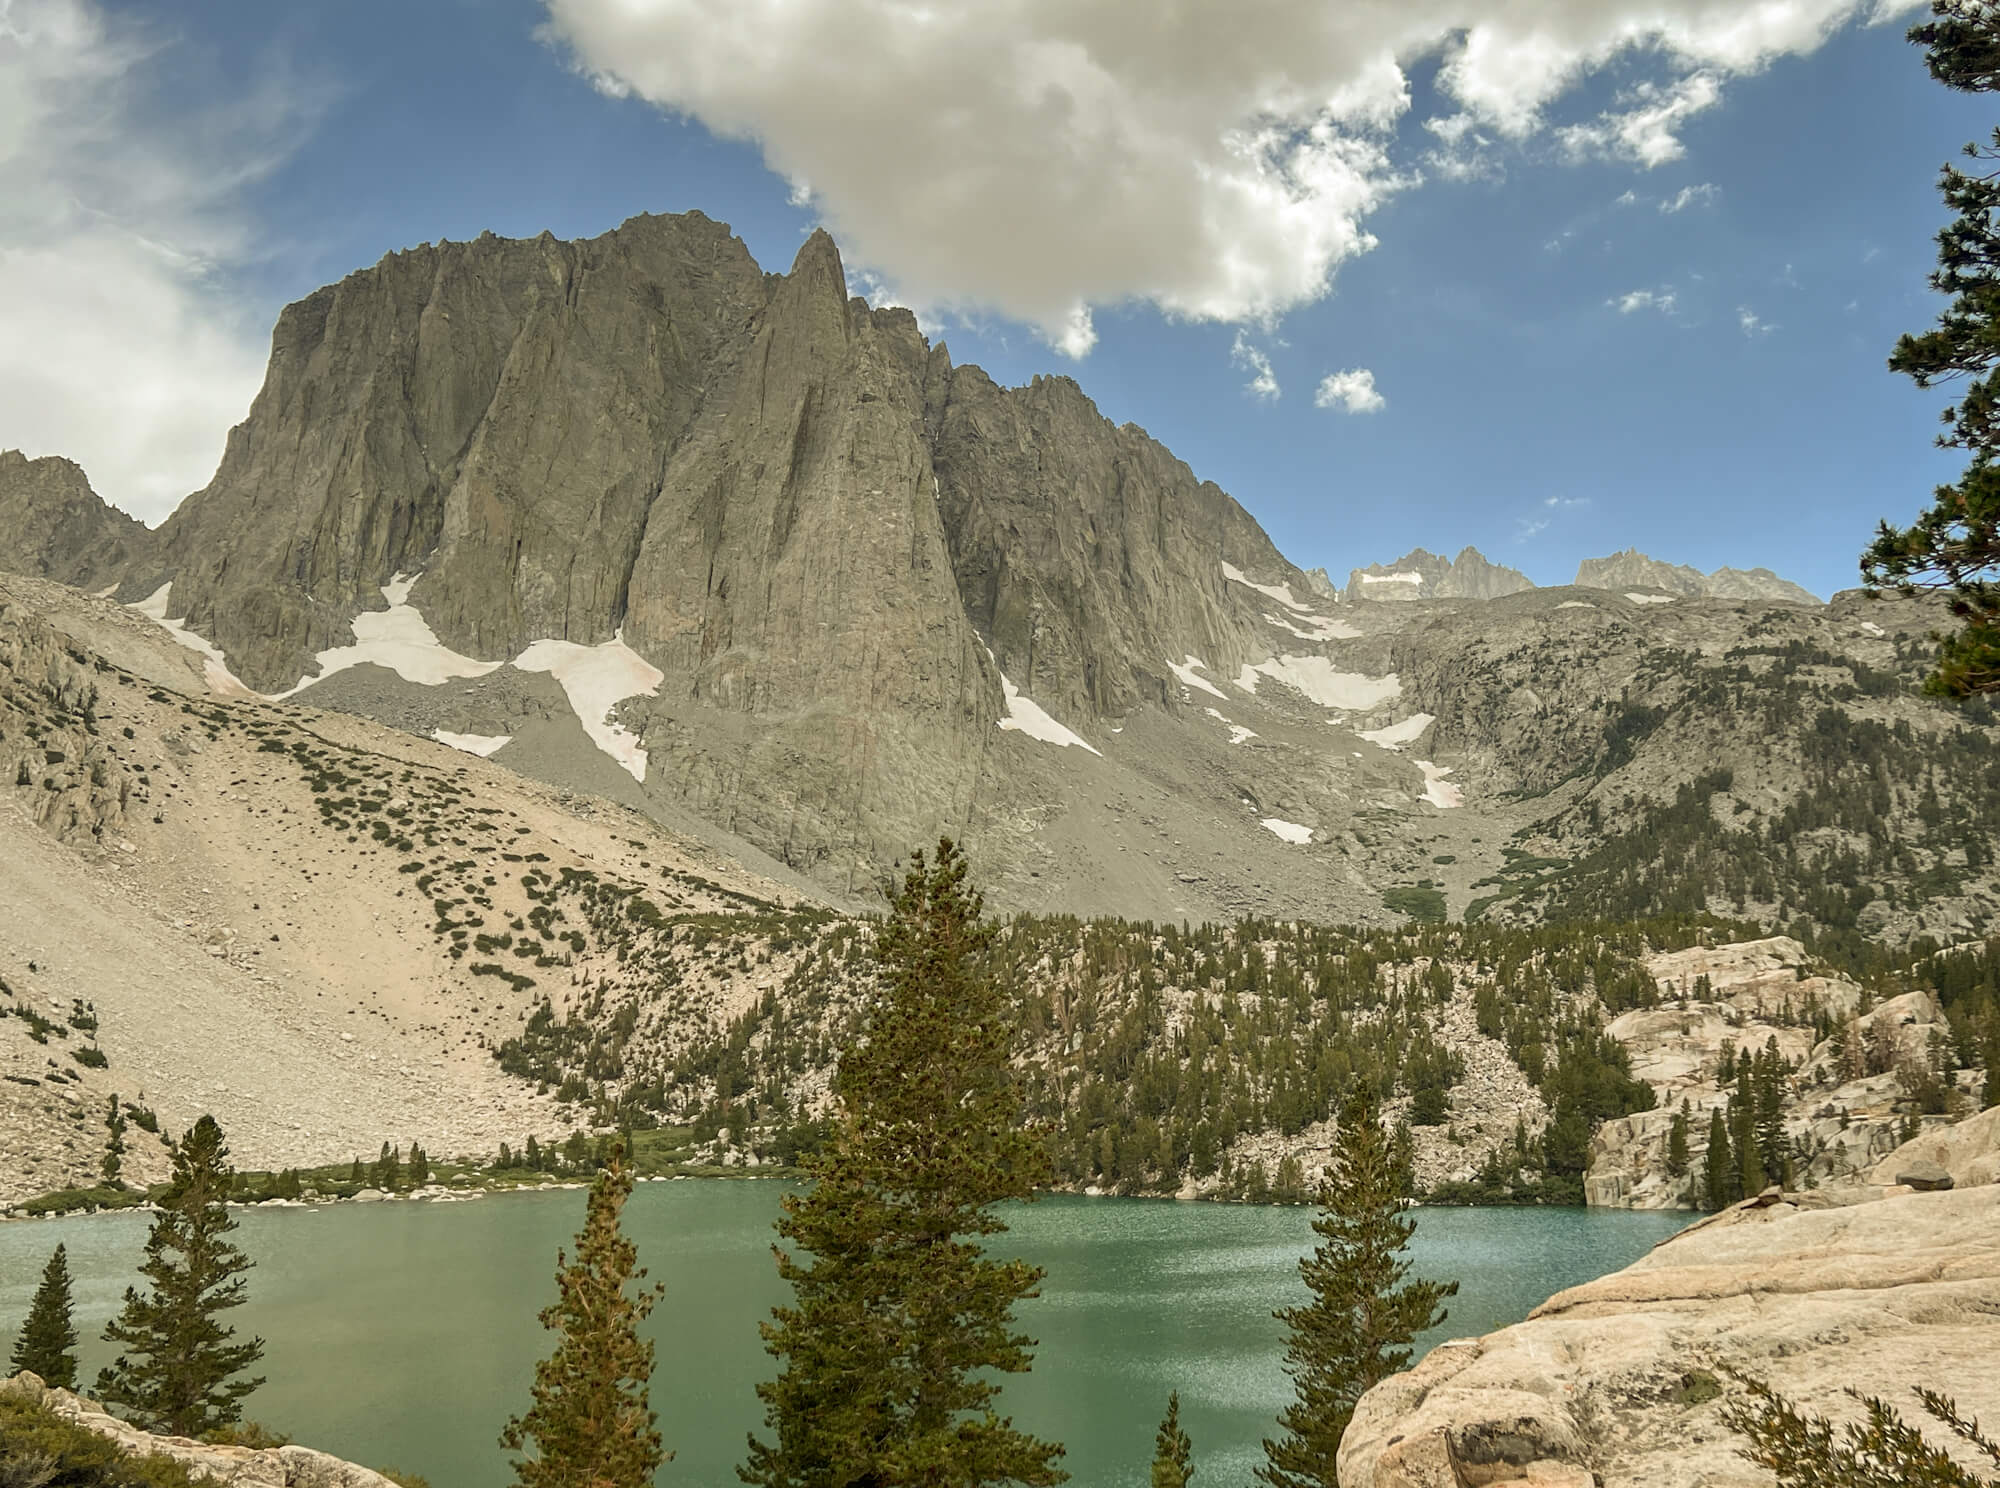
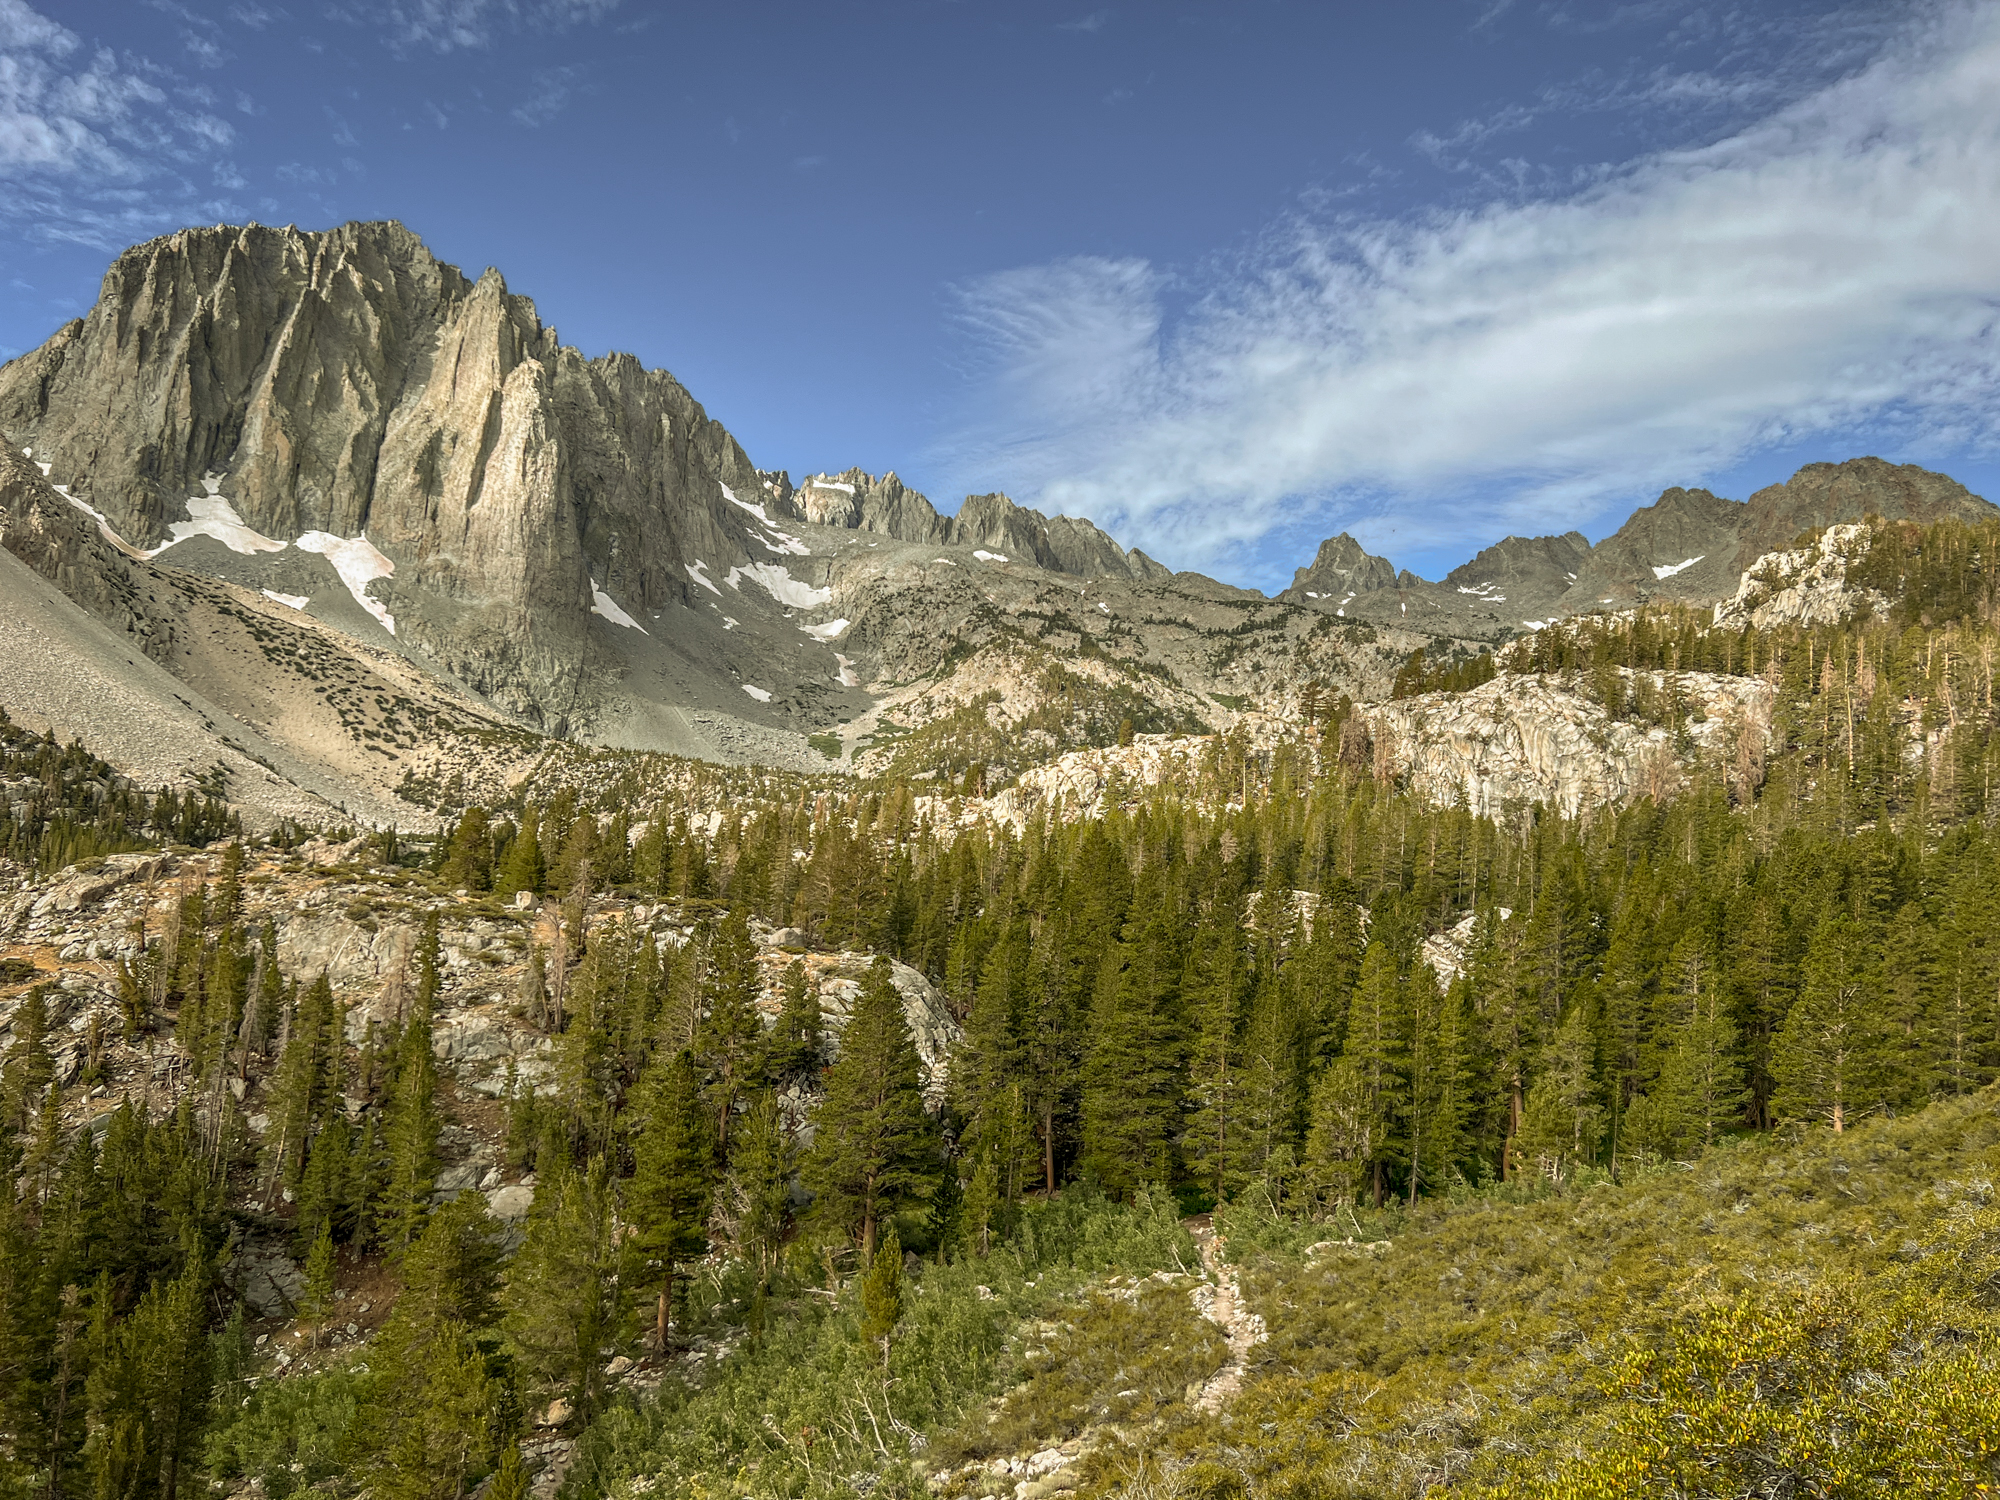
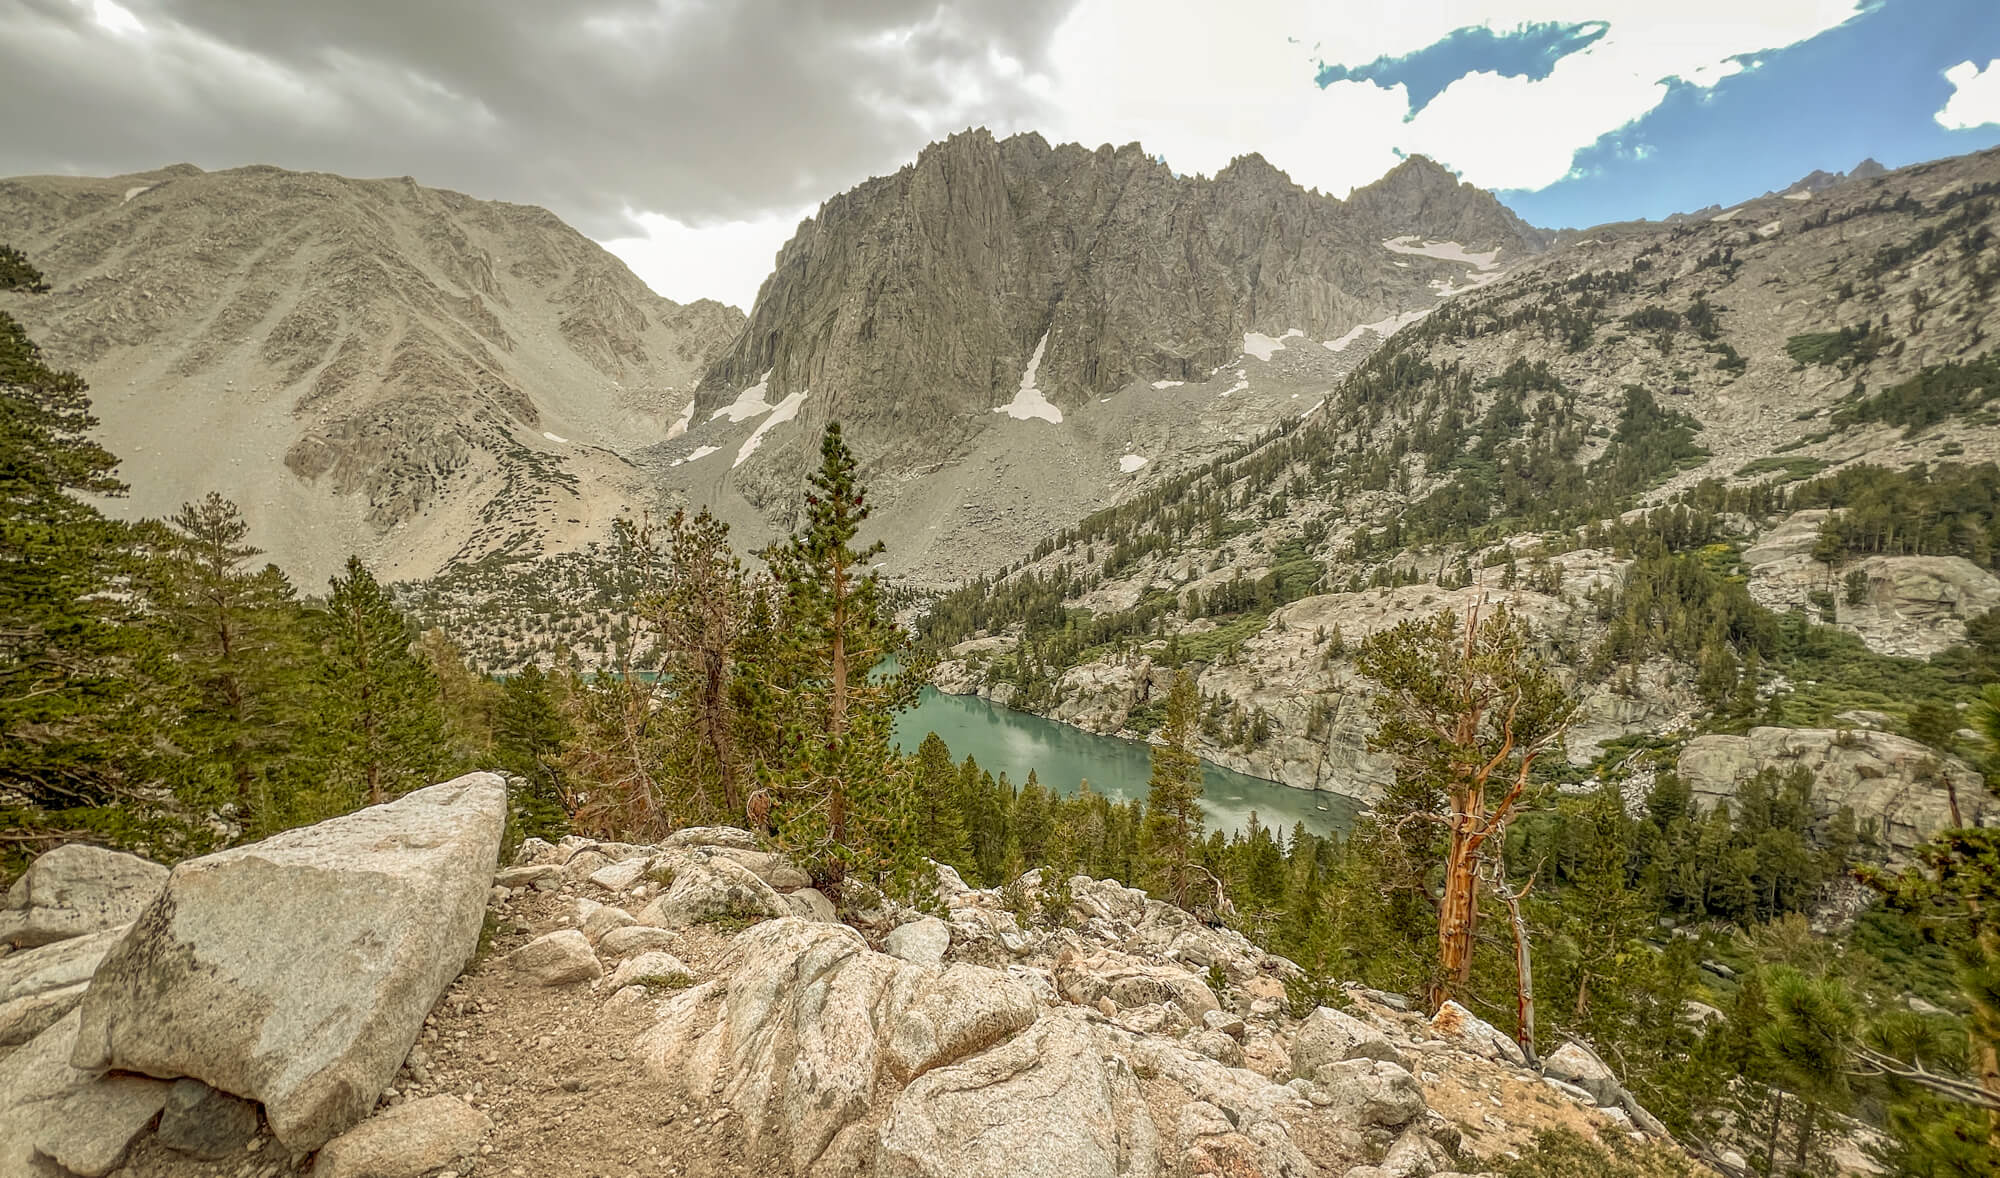
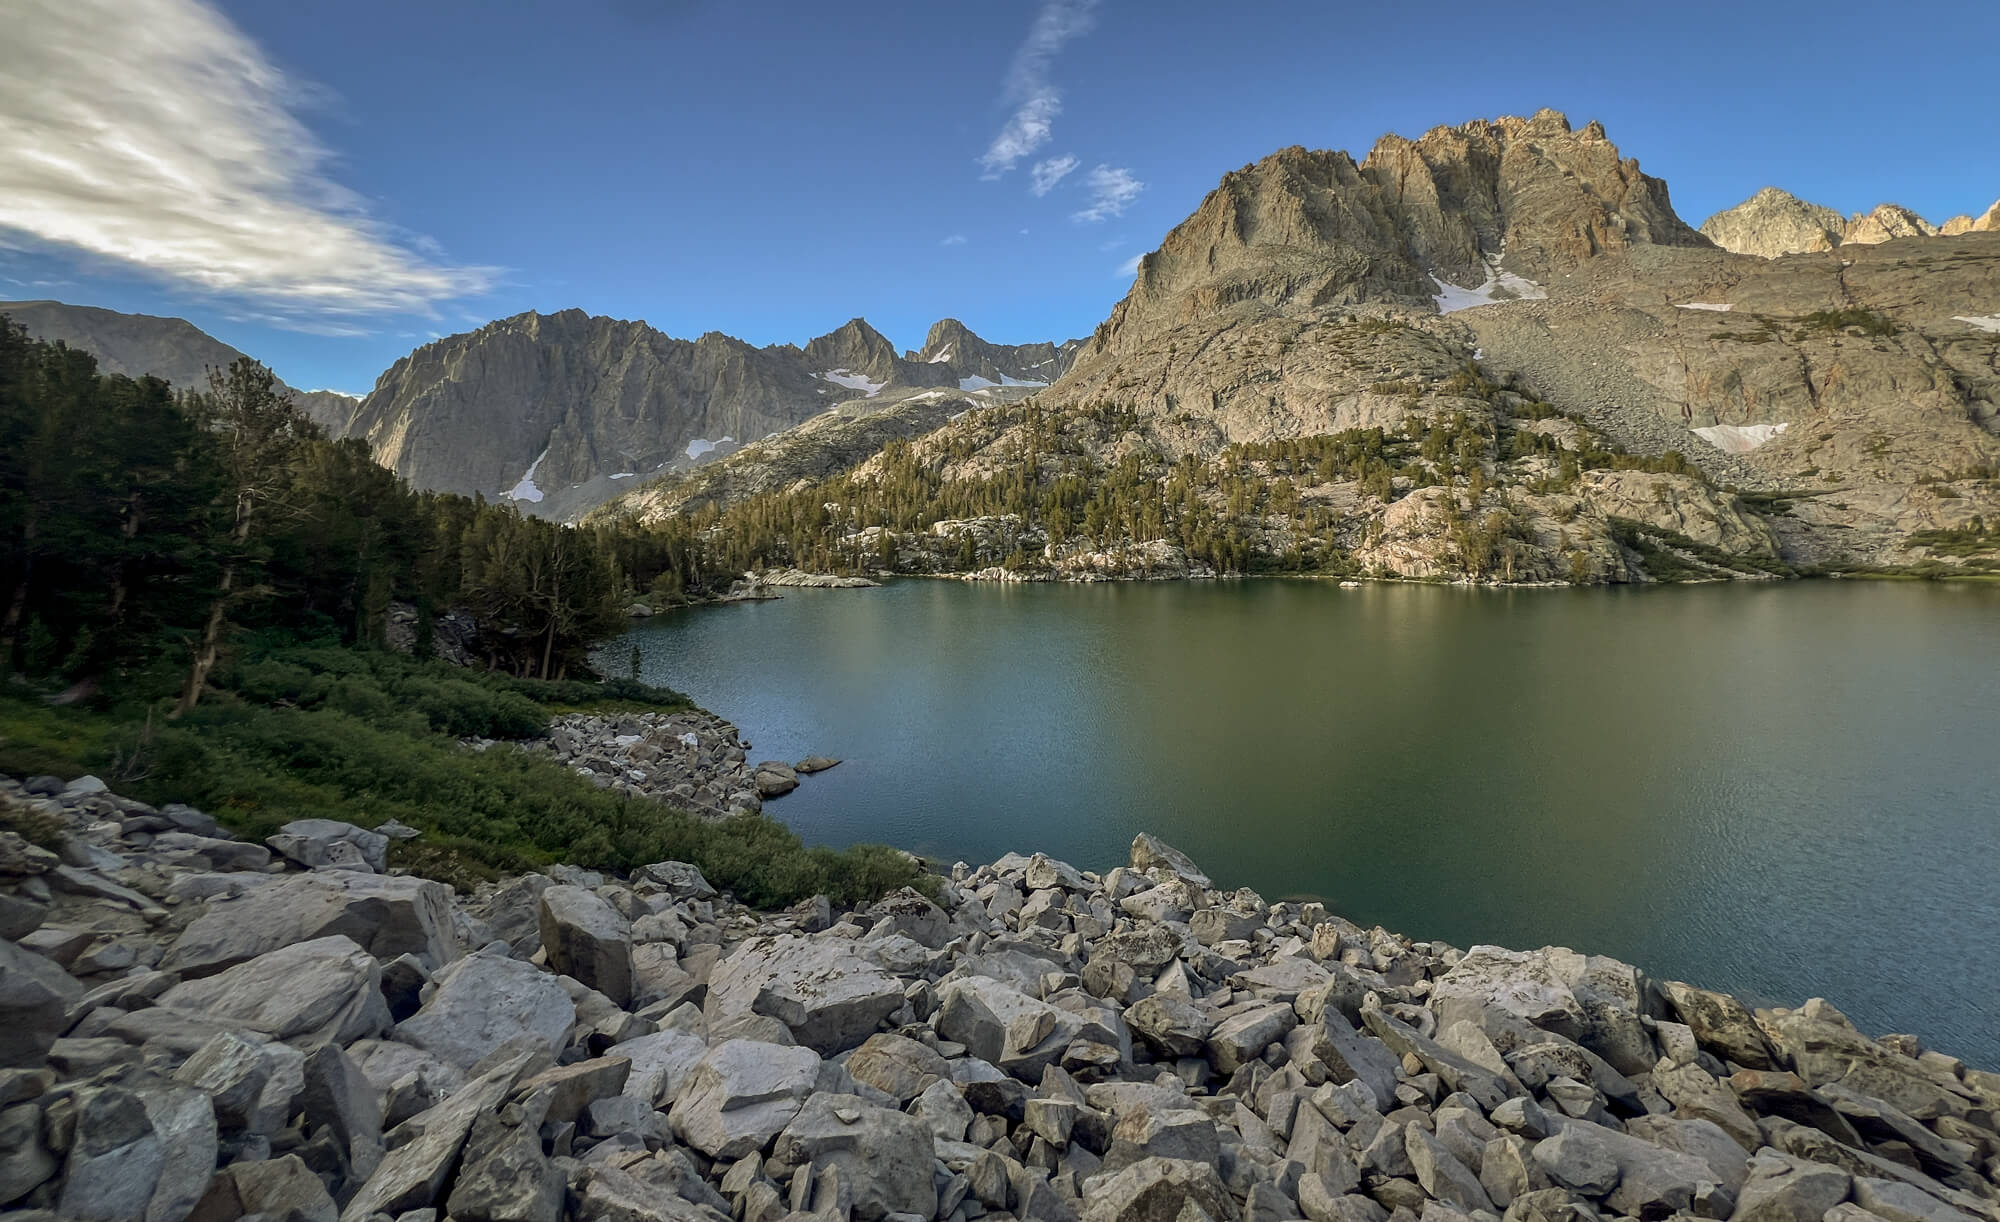
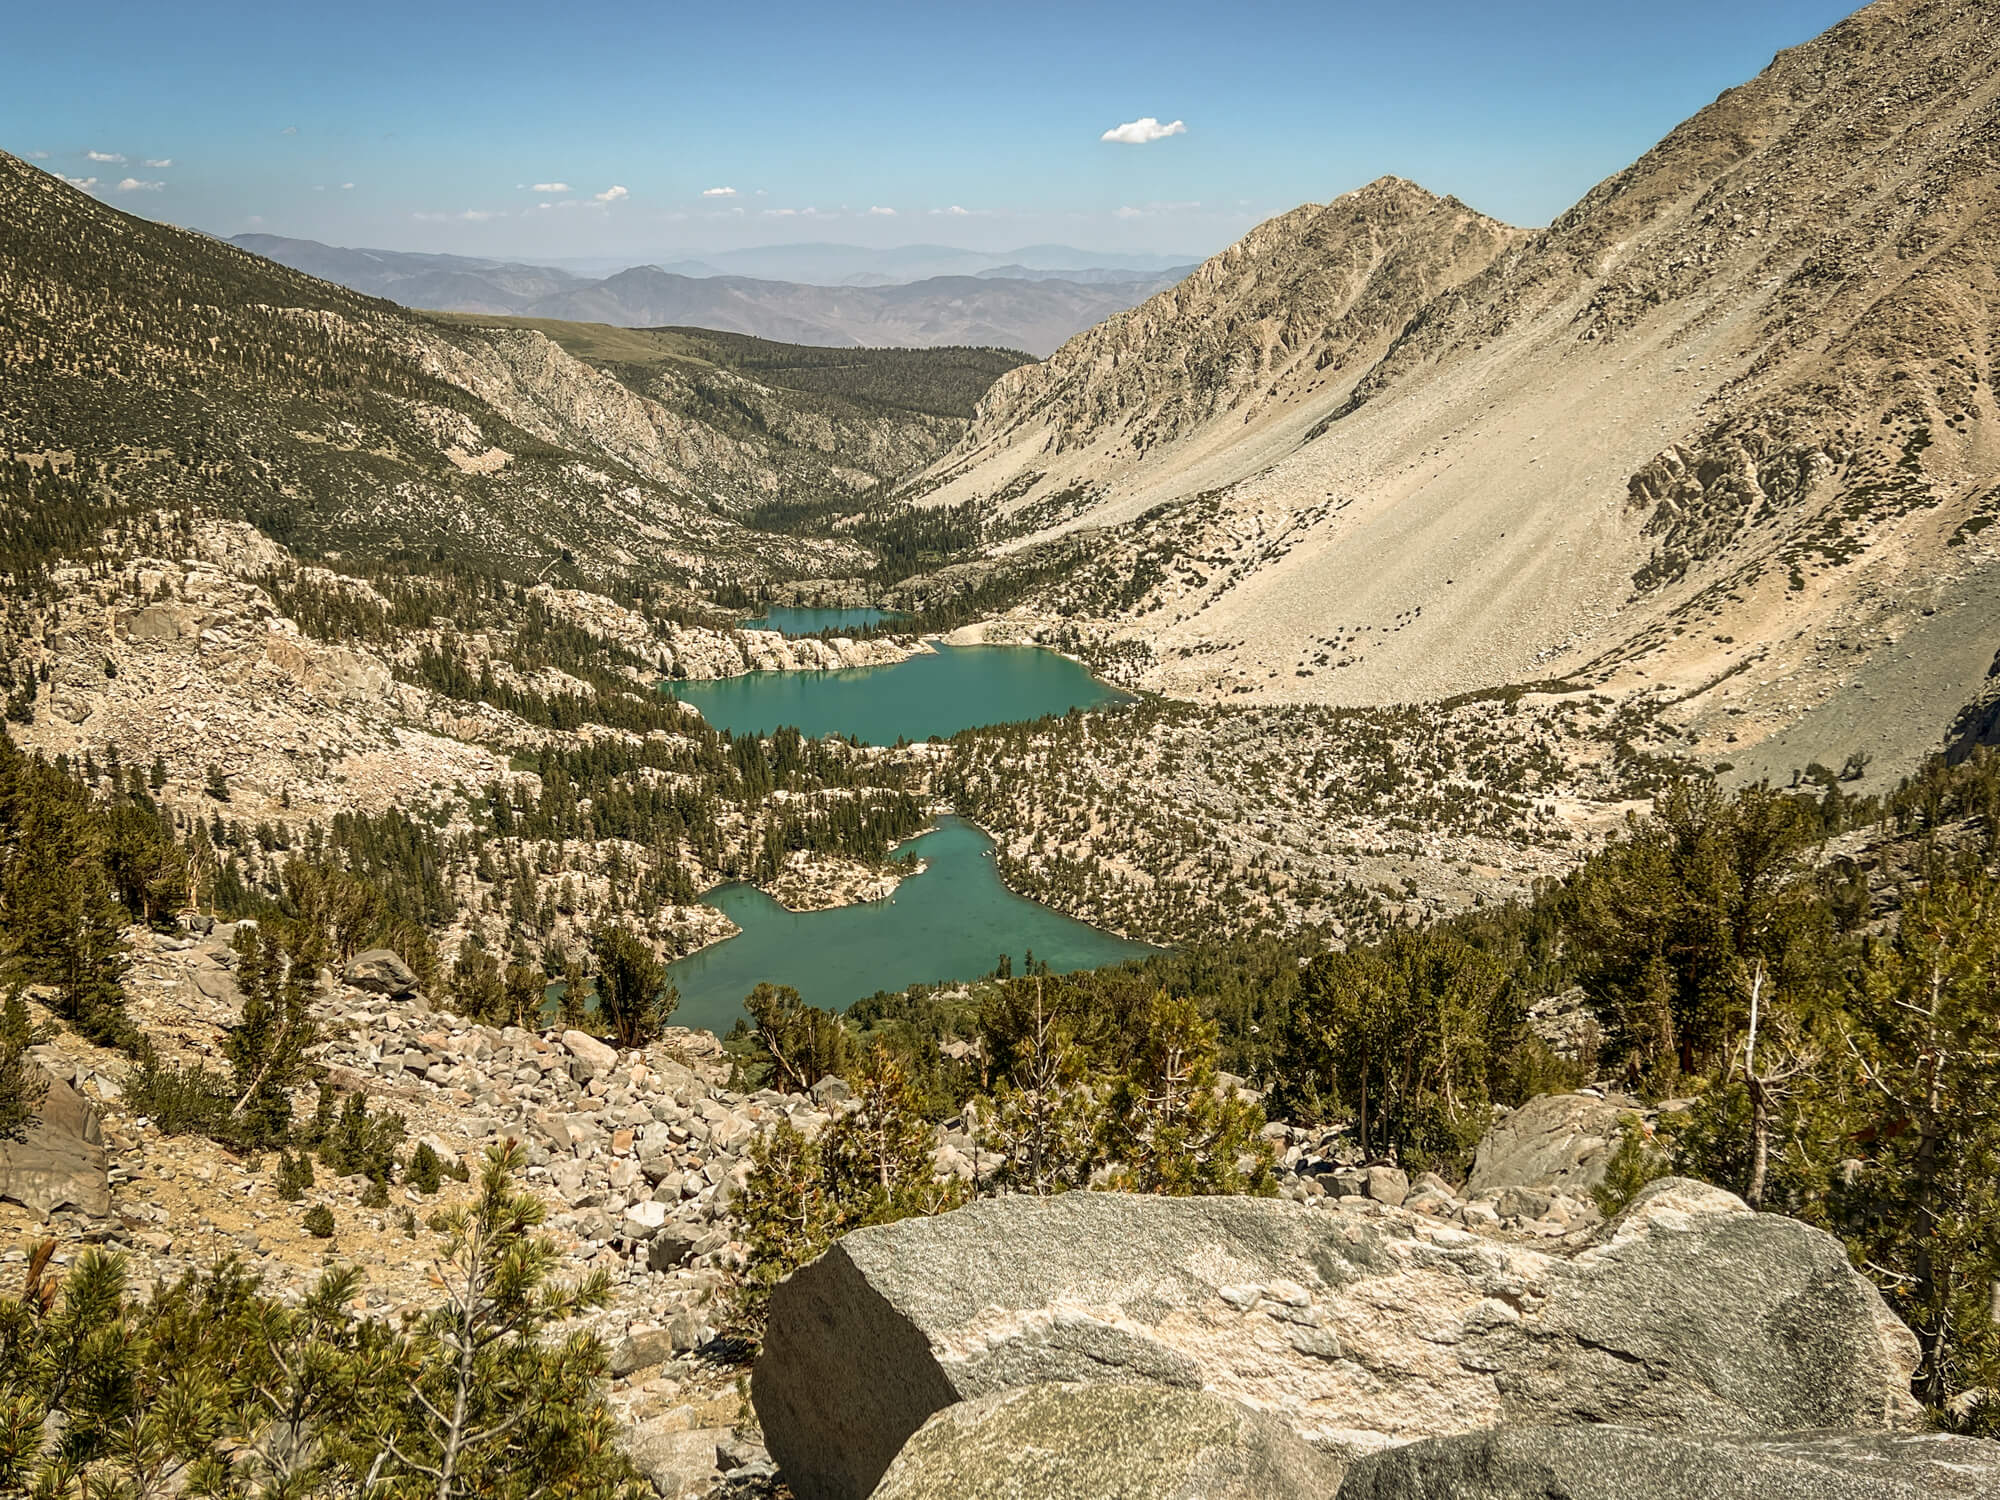
The Big Pine Lakes hike is so jam-packed with incredible scenery it takes a mere 0.1 of a mile before you reach Second Lake. You’re now reaping the rewards of your ascent into the Big Pine Lakes Basin as the jawdropping alpine lakes come one after the other. Larger in size than First lake, Second lake is truly breathtaking. . The Big Pine lakes are Insta-famous for a reason and the view from Second lake is a major reason why. Temple Crag towers to the south and the massive Palisades range looms further to the South west. Take a moment to soak in the view or consider carefully navigating off trail to the east to find a little more seclusion away from the hoards
After you’ve take then time to enjoy your time at Second Lake, continue to follow the main trail as it navigates above the north eastern shore of Second Lake before climbing 200ft to reach Third Lake, only 0.6 miles away. Third lake is a logical inflection point for deciding whether to hike on to the higher lakes, make camp (backpackers) or turn around (day hikers). Should you wish to carry on, Fourth and Fifth Lake are approximately 1.2 miles and 600ft of ascending up the trail. The crowds tends to thin out a bit afterThird lake with many day hikers turning around and backpackers electing to set up camp at one of the first three lakes.
Third Lake to Fifth Lake
1.2 Miles 650 ft Elevation Gain
If you’ve decided to carry on, continue following the trail above Third Lakes northern shore, up a short series of switchbacks and through forested section of trail for 0.8 mile until you reach the junction with Pallisades Glacier trail. If you have the time and energy, the trip along this trail to Sam Mack meadow and the Pallisades Glacier are spectacular (see side trips section below for full details on this trip) and well worth the time. To stay on the Big Pine Lakes trail take a right at the junction with the Glacier Trail and continue for another 0.3 miles until you reach another fork. The fork offers 3 different options:
- Left to Fifth Lake (0.4 miles)
- Straight to Fourth Lake (0.2 miles)
- Right to Black Lake (return route)
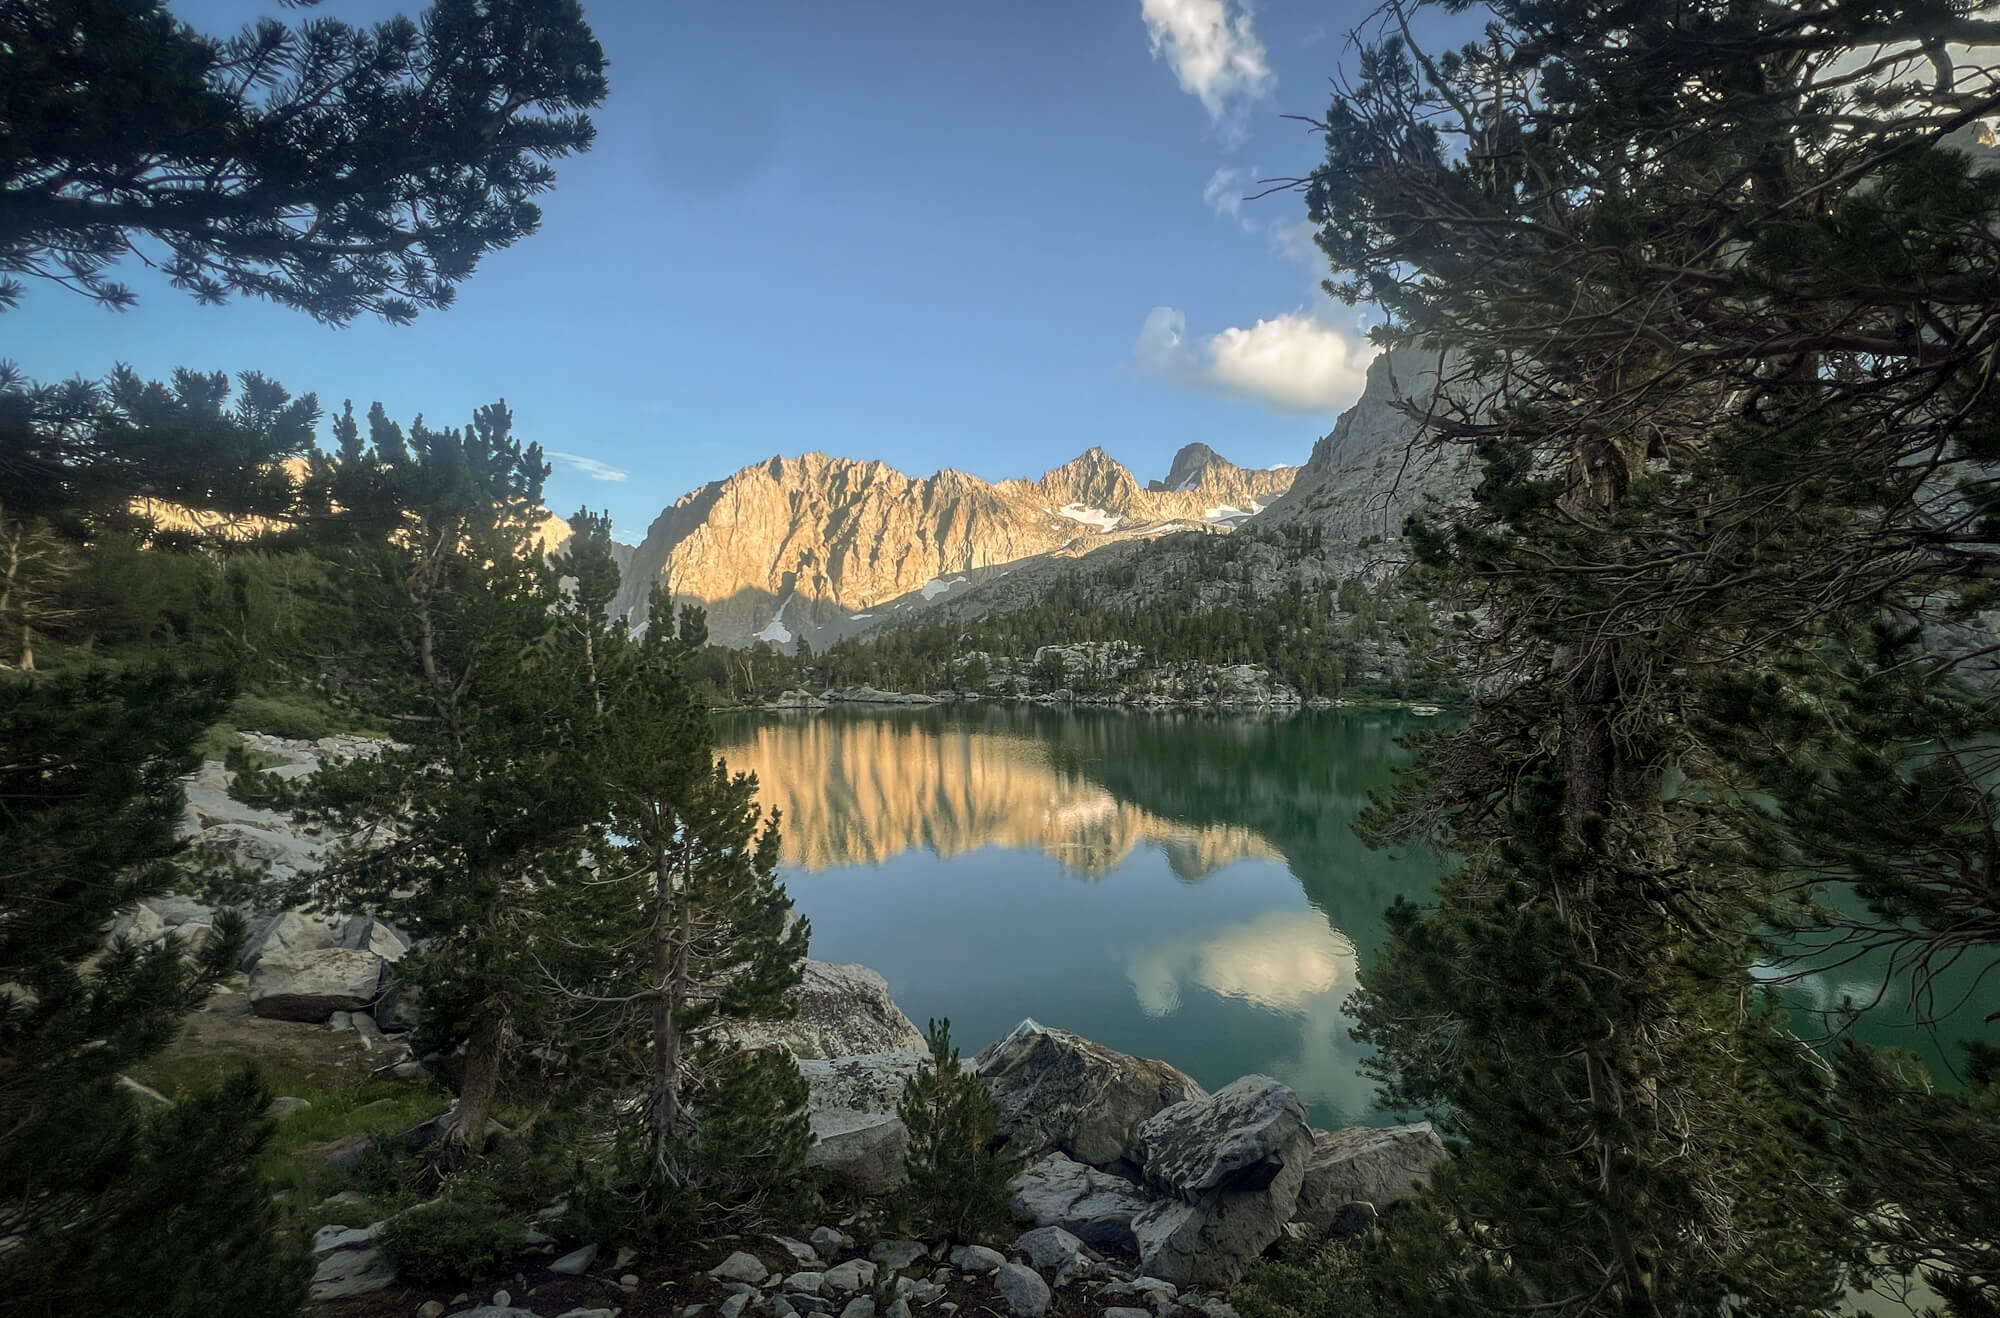
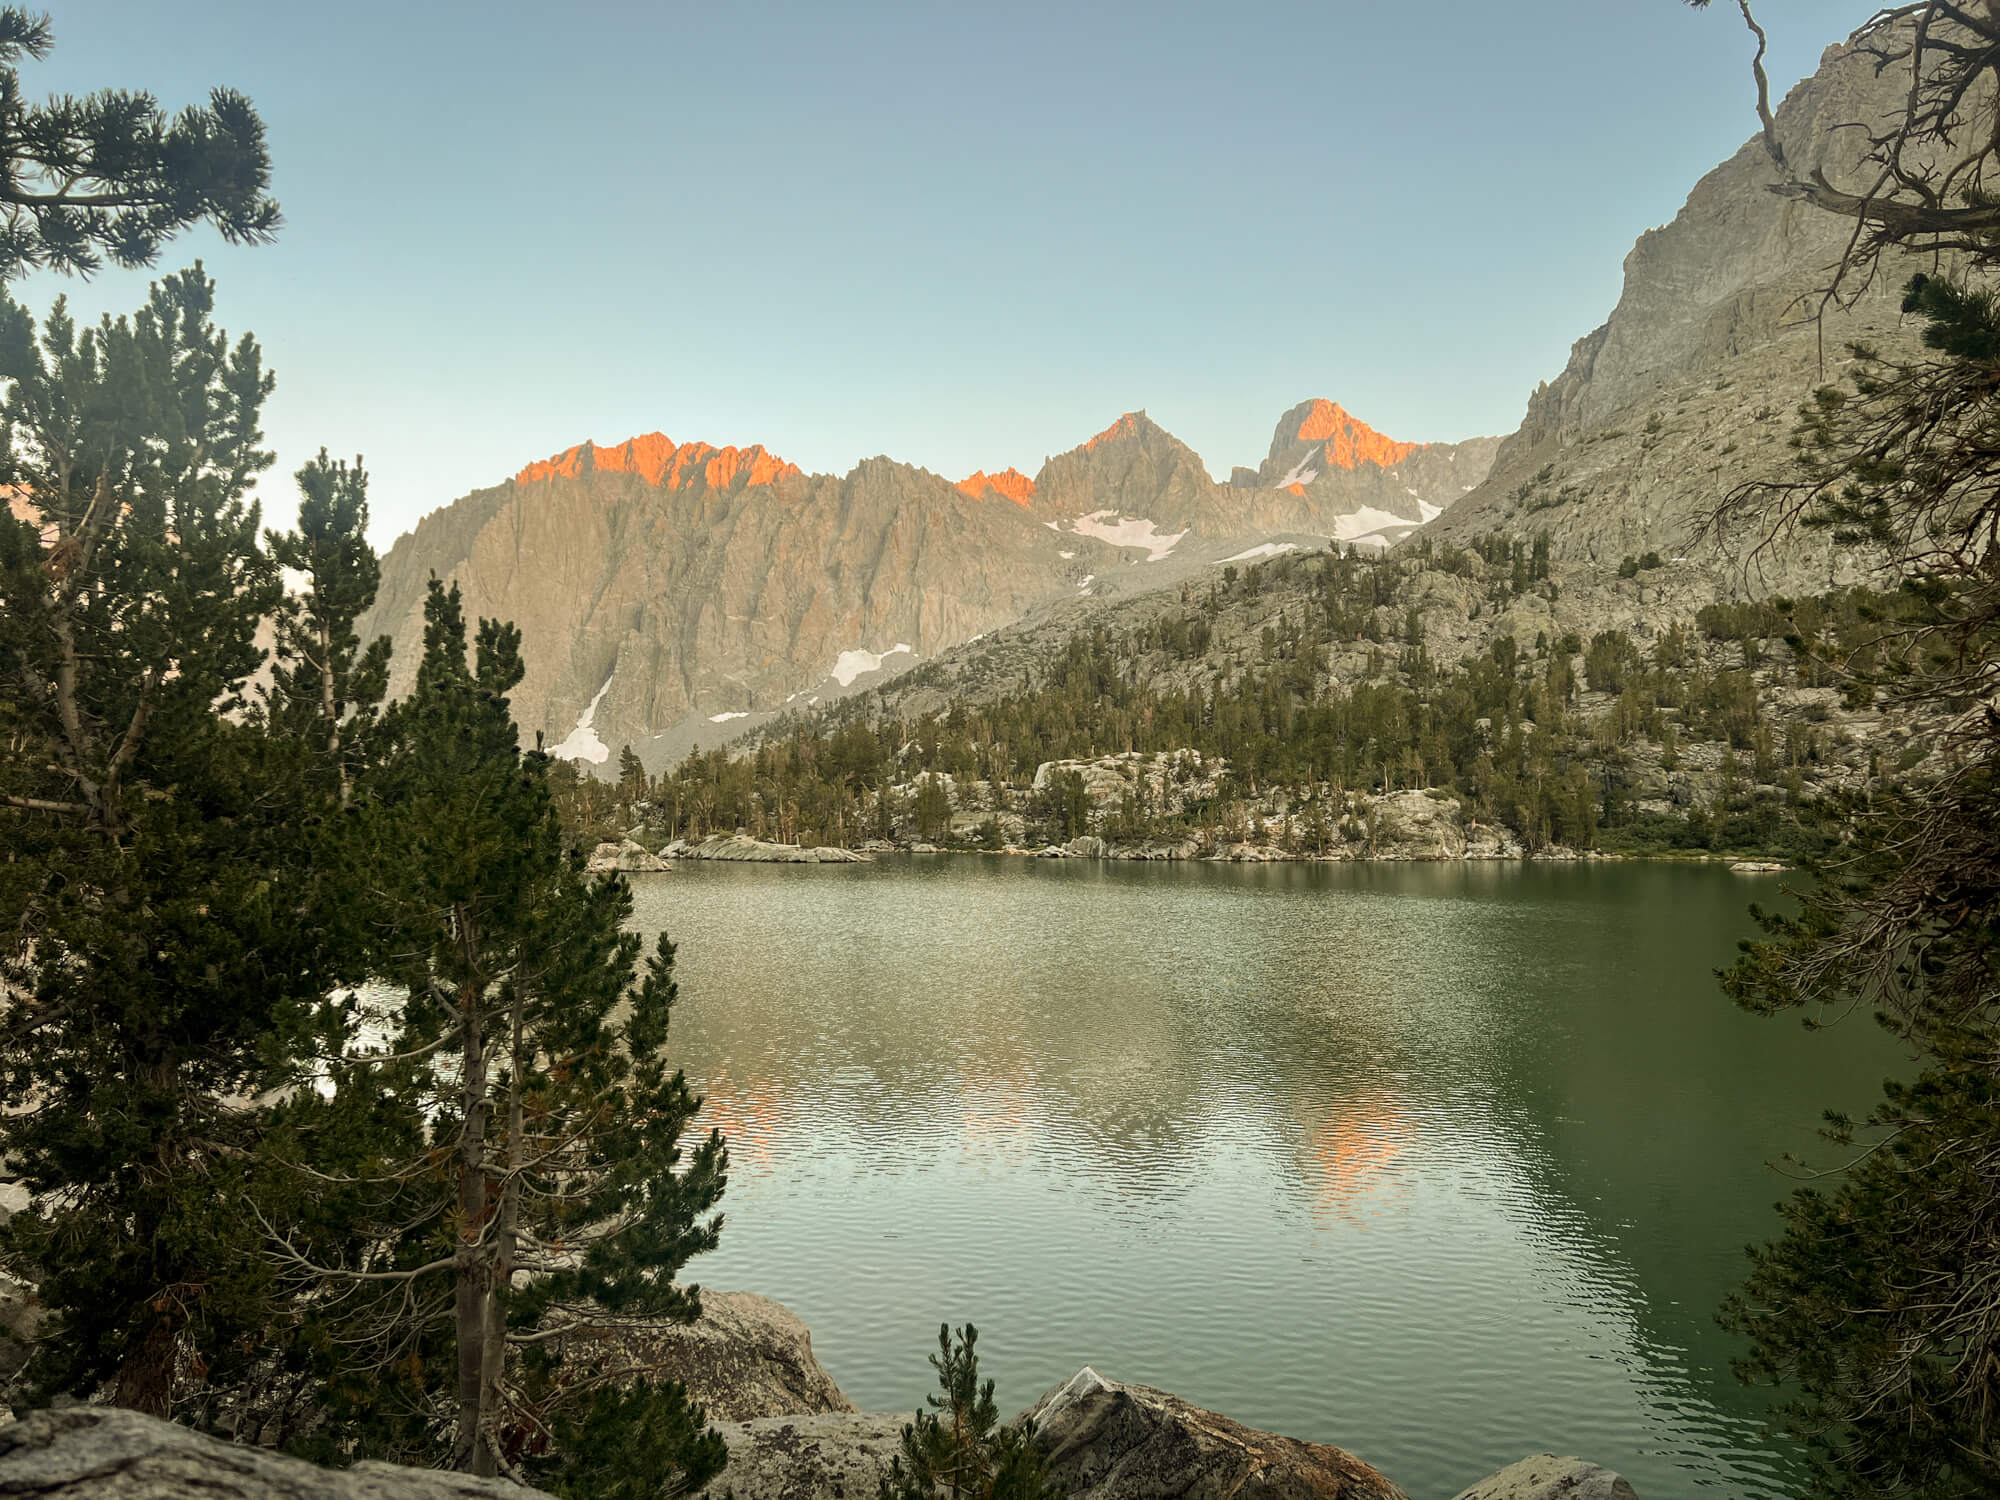
For those looking to complete the entire circuit of the Big Pine Lakes Area, my recommendation is to head left to Fifth Lake via the Fifth Lake spur (don’t worry you’ll still catch Forth Lake, it just comes out of order). After 0.2 miles, you’ll reach the eastern shore of Fifth Lake. Although Second and Third lake tend to be the lakes most gravitated to, Fifth Lake is the forgotten star of the Big Pine Lakes show. Two Eagle Peak and Mount Robinson bookmark a small cascade where North Fork Big Pine Creek descends from the Pallisades basin above. To the south Temple Crag, Mount Sill and Polemonium Peaks rise in the distance. The scenery here is sublime and is likely to be a highlight of your entire trip.
Fifth Lake to Summit Lake
0.5 Miles 220 ft Elevation Gain
After taking your time to enjoy Fifth Lake, continue northeast along the trail ascending briefly before descending briefly towards Forth Lake . The lake comes into view through the trees and after 0.1 miles, you’ll reach a fork, keep left to continue your journey to the remaining lakes. After a short climb and 0.2 miles, you’ll reach another fork with a trail to Summit Lake leading right and the trail to the left continuing on to Sixth and Seventh Lake. The trail to Summit lake is an easy 0.1 miles and leads to the small, but peaceful Summit lake.
Summit Lake to Seventh Lake
1.2 Miles 550 ft Elevation Gain
Should you wish to continue your journey to Sixth and/or Seventh Lakes return 0.1 miles to the main trail from Summit lake and take the fork to the right to continue to the final Big Pine Lakes. The path from the junction with Summit Lake trail gains 400ft of elevation in under a mile, but affords some beautiful views of Temple Crag, the Pallisades, Two Eagle Peak and Cloudripper. By this point you’ll have reached elevation over 11,000ft, so be patient with yourself if you’re feeling a bit short of breath. After passing over a small crest you’ll begin a short descent towards Sixth and Seventh Lake. The main trail ends somewhat unceremoniously to the north of Sixth lake. At this point you can head to the left and explore off trail to get a better view of Sixth Lake. If you’re looking to reach Seventh lake, follow the nondescript trail to the right (west) that leads through a marshy meadow and across the braiding stream. The trail is not always evident, but navigation is easy just continue to follow the drainage and in under a 1/4 mile you’ll come across Seventh Lake. Seventh lake is small, but beautiful with nice views of Cloudripper and Two Eagle Peak. Take a moment to savor the scenery and congratulate yourself for reaching the last of the Big Pine Lakes.
When you’re ready to return, head back the way you came until you reach a fork in the trail 0.1 miles after (south) passing the junction with Summit Lake trail.
Fourth Lake to Black Lake Junction via Black Lake
2.0 Miles 1000 ft Elevation Loss
At the Summit Lake trail junction to the north of Fourth Lake take the trail to the left which travels north of Fourth lake. After passing a small pond at the outlet of fourth lake and 0.4 miles after the fork, this trail merges with the Black Lake trail that started to the South of Fourth Lake. The trail climbs a small hill and then begins a short descent before reaching the south shore of Black Lake. Black Lake is a scenic spot to stop and enjoy lunch, a snack, or refill your water before starting the descent back towards the Big Pine North Fork Trail to complete the loop. From Black Lake, the trail descends rapidly, losing nearly 700 ft of elevation in 1 mile of distance over multiple sun-exposed switchbacks. This section offers hikers their final, awe-inspiring views of the distant Palisades, and the first two Big Pine Lakes from above. Take a moment to breathe these in the sky-scraping spires of Temple Crag and enjoy the dramatic alpine panorama one last time. When you hit the junction with the Big Bing Creek North Fork trail take a left to head out back the way you came on the Big PIne Creek Nork Fork Trail.
Side Trips in the Big Pine Lakes Area
The Big Pine Lakes areas offers several incredible side trips for hikers with the legs for a big day hike or backpackers looking to spend more time in the area. The hike to the Pallisades Glacier might be one of the best trips in the Sierra Nevada.
Pallisades Glacier Trail
4.3 Miles 2000 ft Elevation Gain (Round Trip)
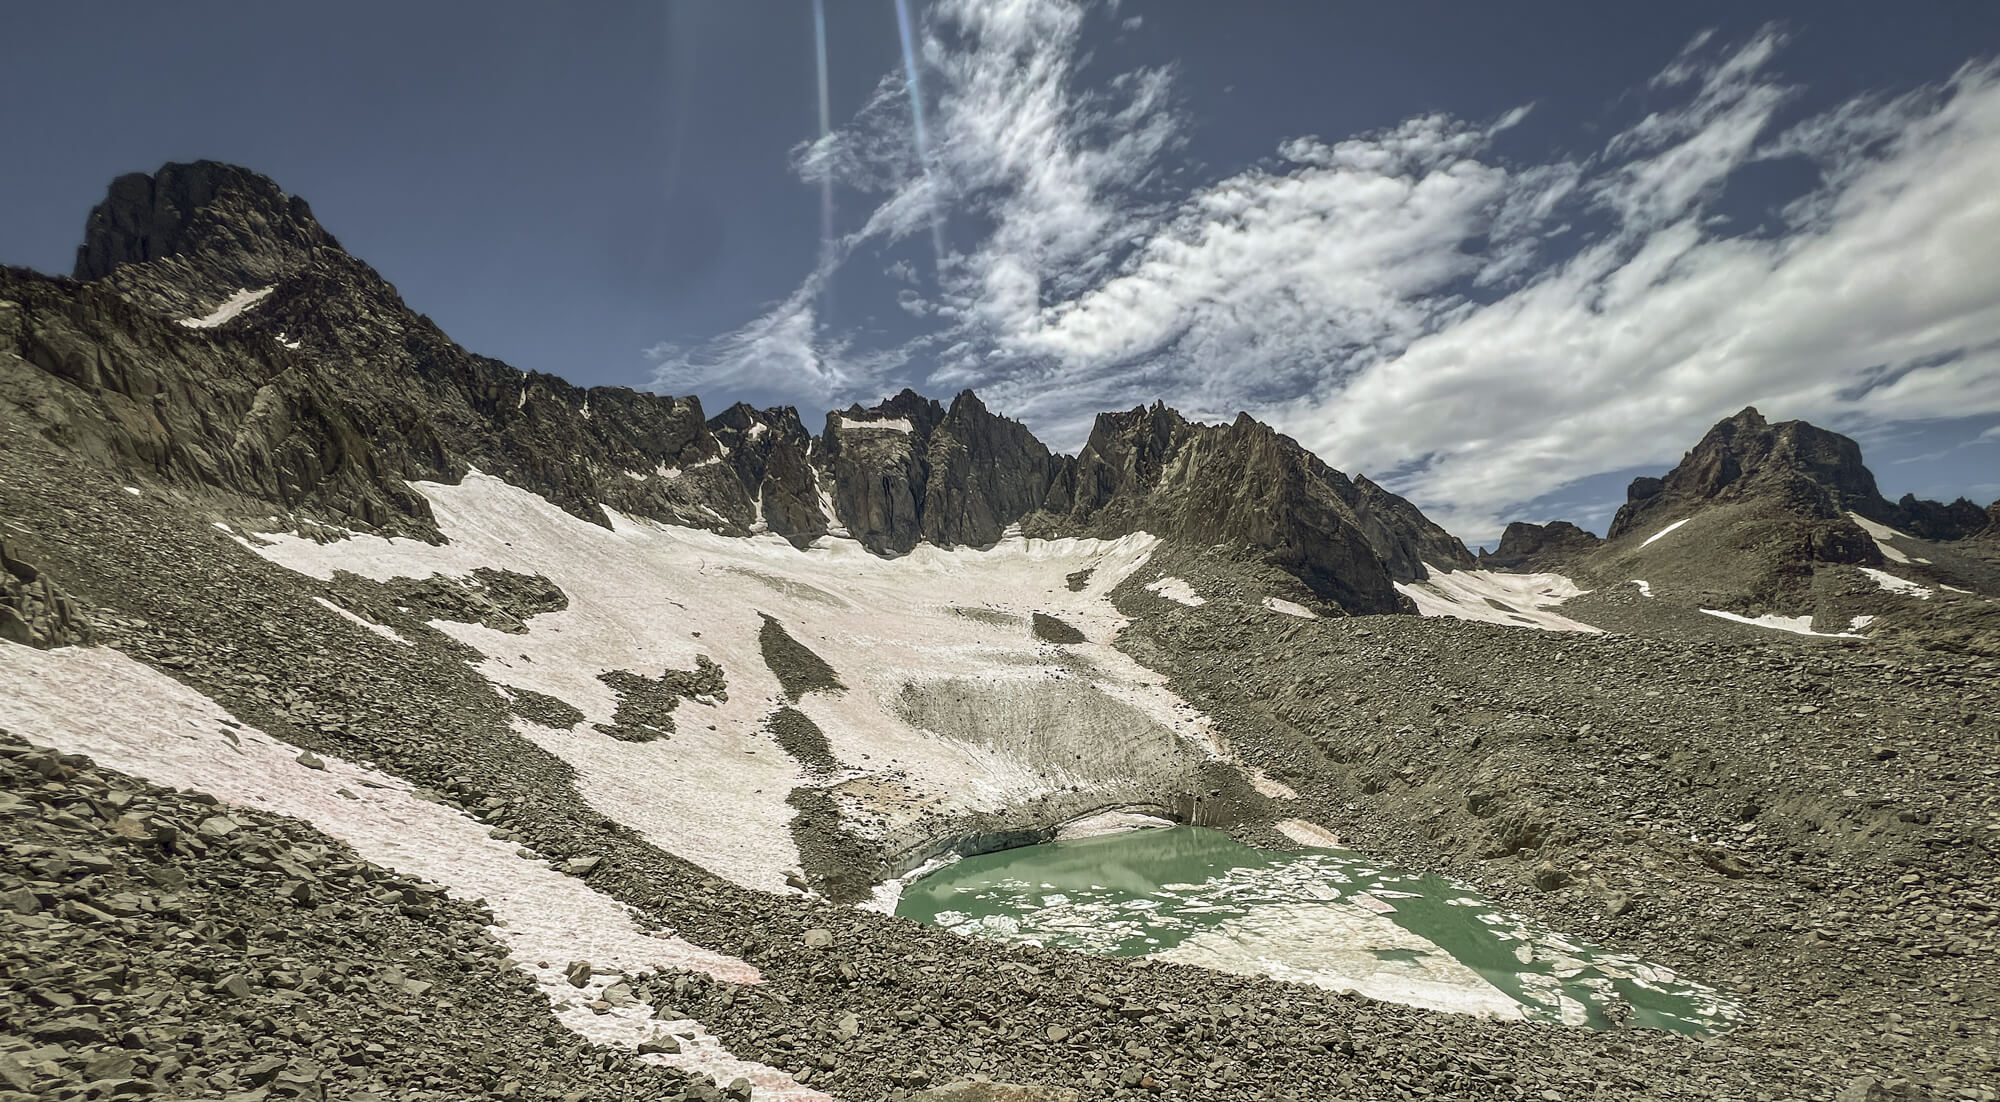
Climbing to an elevation over 12,000 ft, the trip to Palisade Glacier is not for the faint of heart. The journey involves traversing several loose talus fields, navigating rock shelves, occasional scrambling, and significant elevation gain. The effort rewards intrepid hikers with stunning views of the Palisades range and one of the few remaining glaciers in the Sierra Nevada.
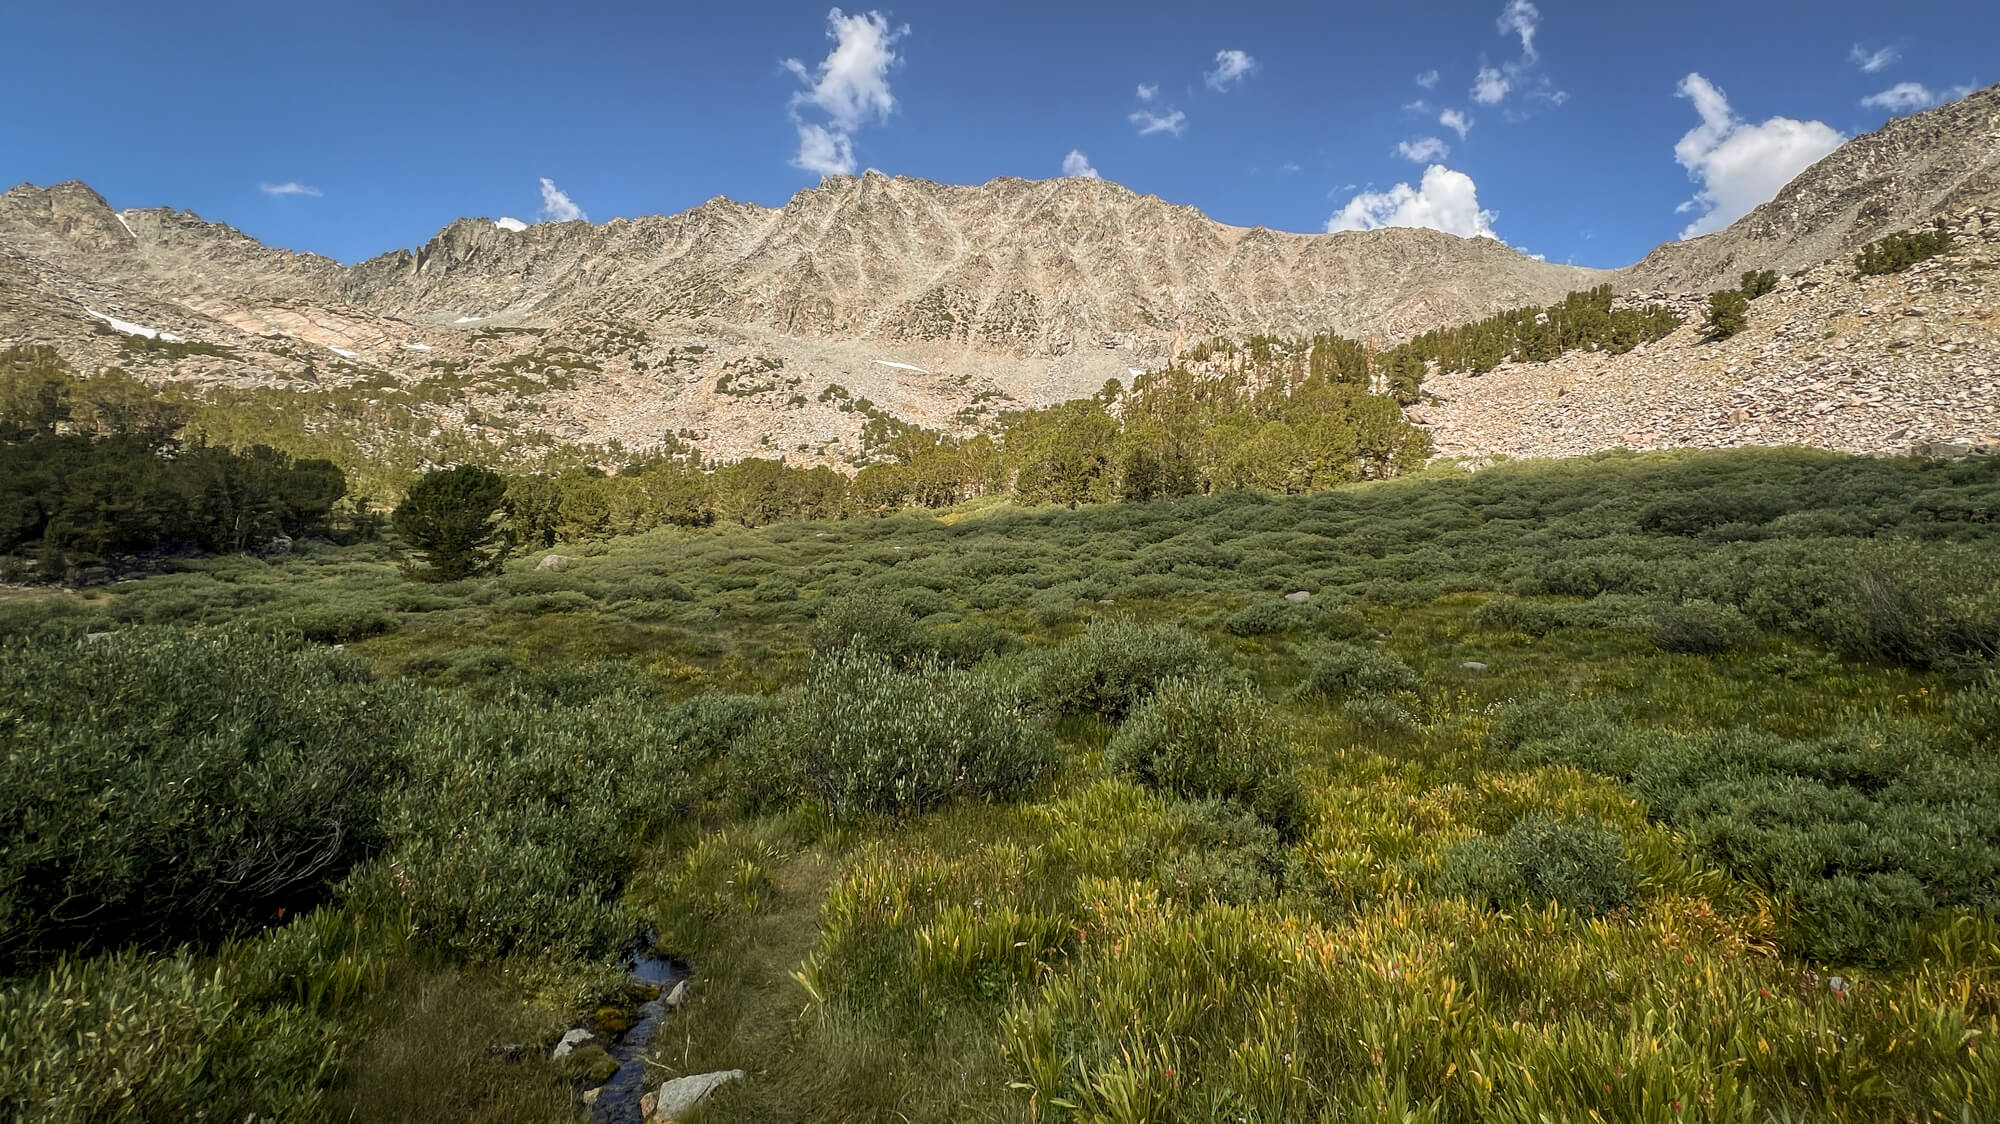
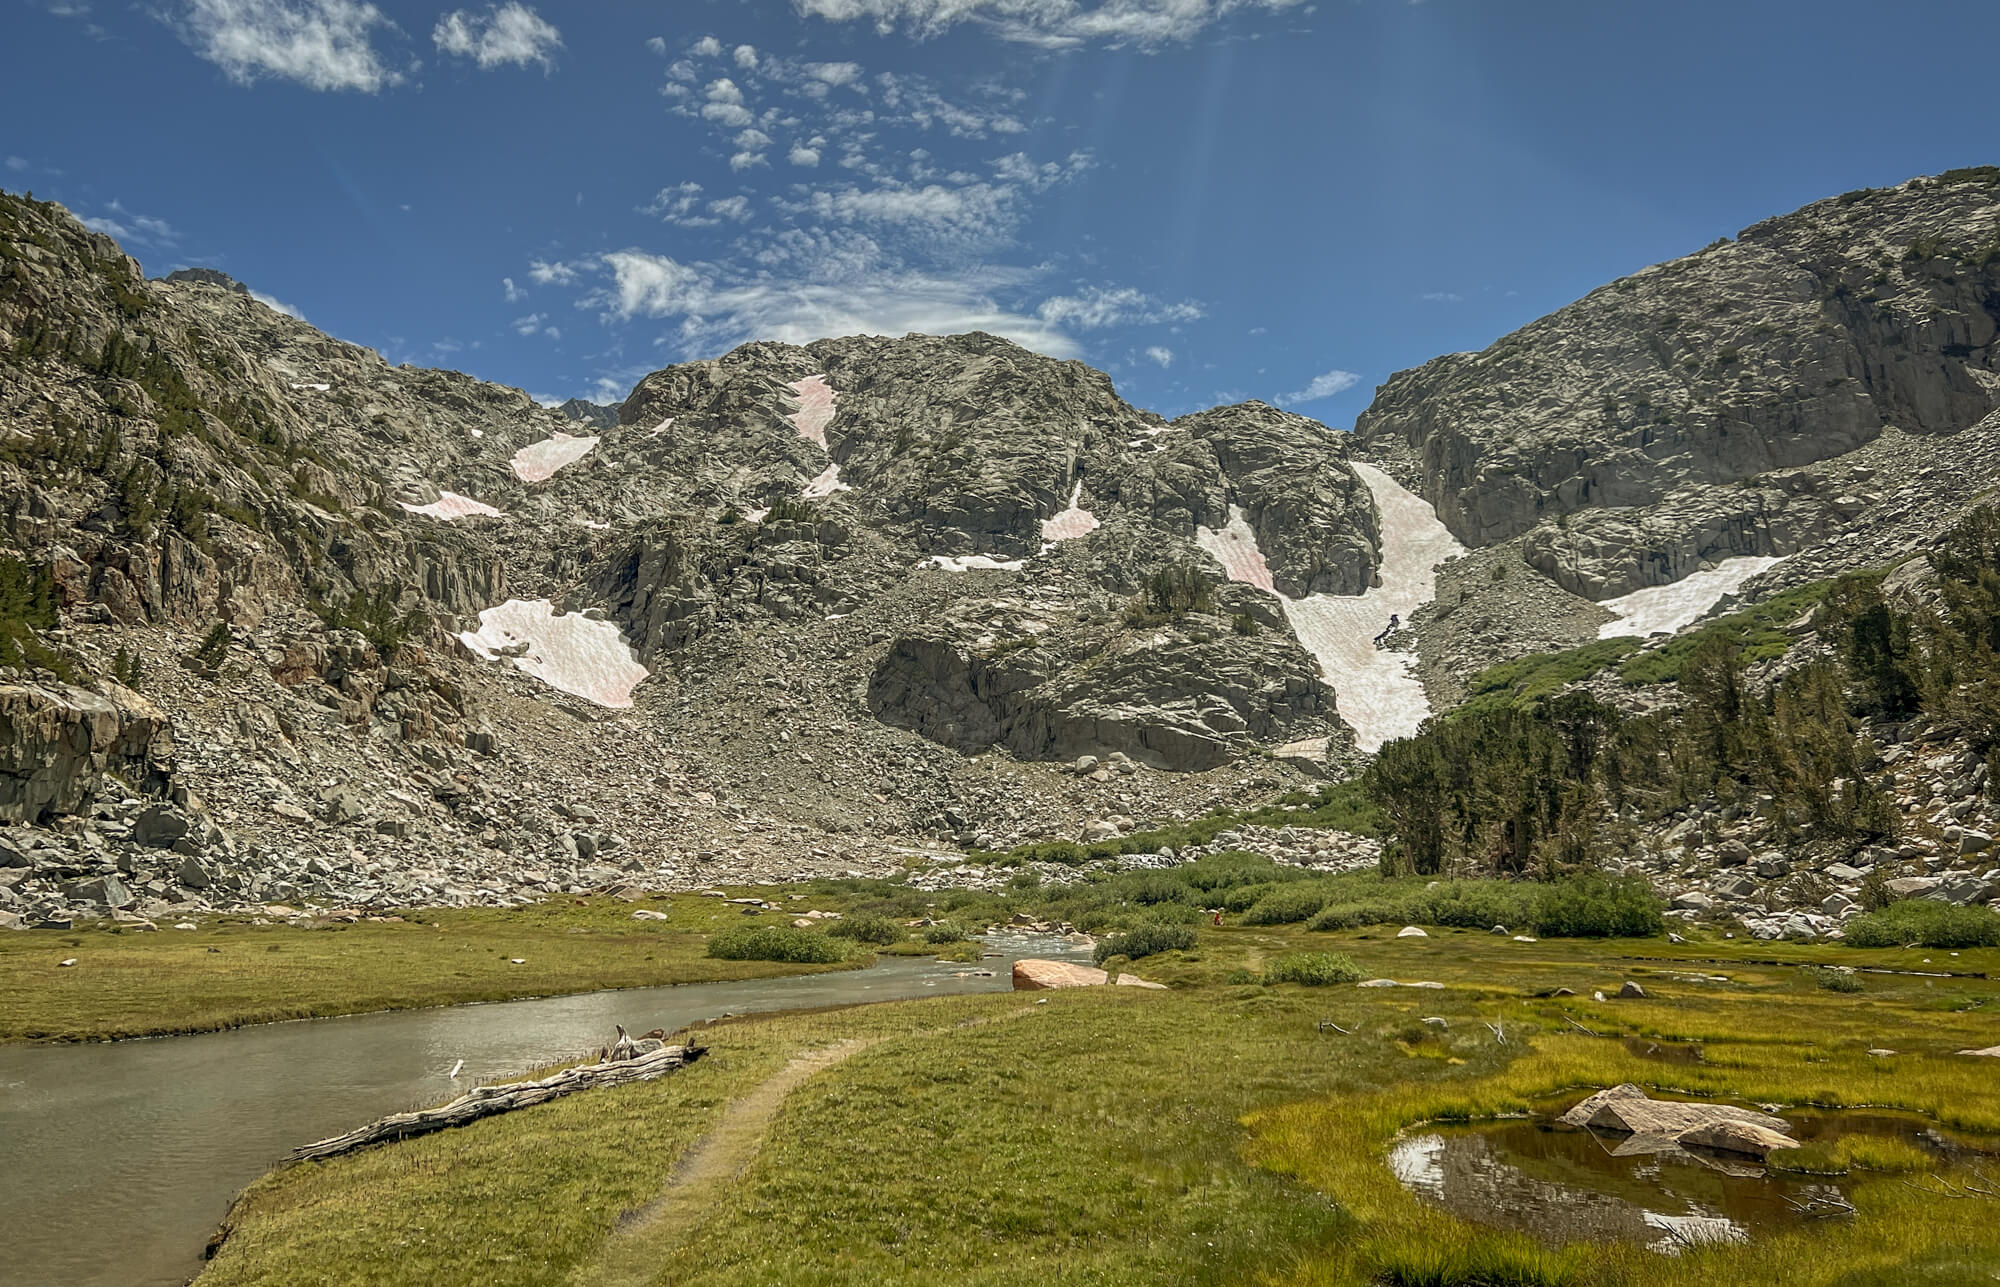
About 0.8 miles up the North Fork Big Pine Creek trail from Third lake take the trail to right to begin the climb to the Pallisades Glacier. The trail crosses a small log bridge over the North Fork Big Pine Creek, before starting a series of switchbacks that jog in and out of talus fields and treed sections to negotiate the headwall before Sam Mack meadow. The distance between the start of the Pallisades Glacier trail and Sam Mack Meadow is a mere 0.8 KM, but the 500ft of elevation gain beginning at 10,600ft feels much more strenuous than these numbers imply. Fortunately, your hard work is quickly rewarded as you clear the headwall and the trail enters Sam Mack Meadow. Situated in a high alpine cirque divided by a braiding creek and rimmed by the mighty Pallisades, the scenery hear is truly remarkable. Continue on the obvious trail to the southwest to explore the meadow further, and catch your breath. This is a great spot to fill your water bottle and treat some water before continuing the ascent. If you’re feeling tired or running short on time this a great to spot to call it day, if you’re ready to continue to the Glacier proceed back to the meadow’s entrance at the northeast where the Pallisades Glacier trail crosses the creek before beginning another steep ascent.
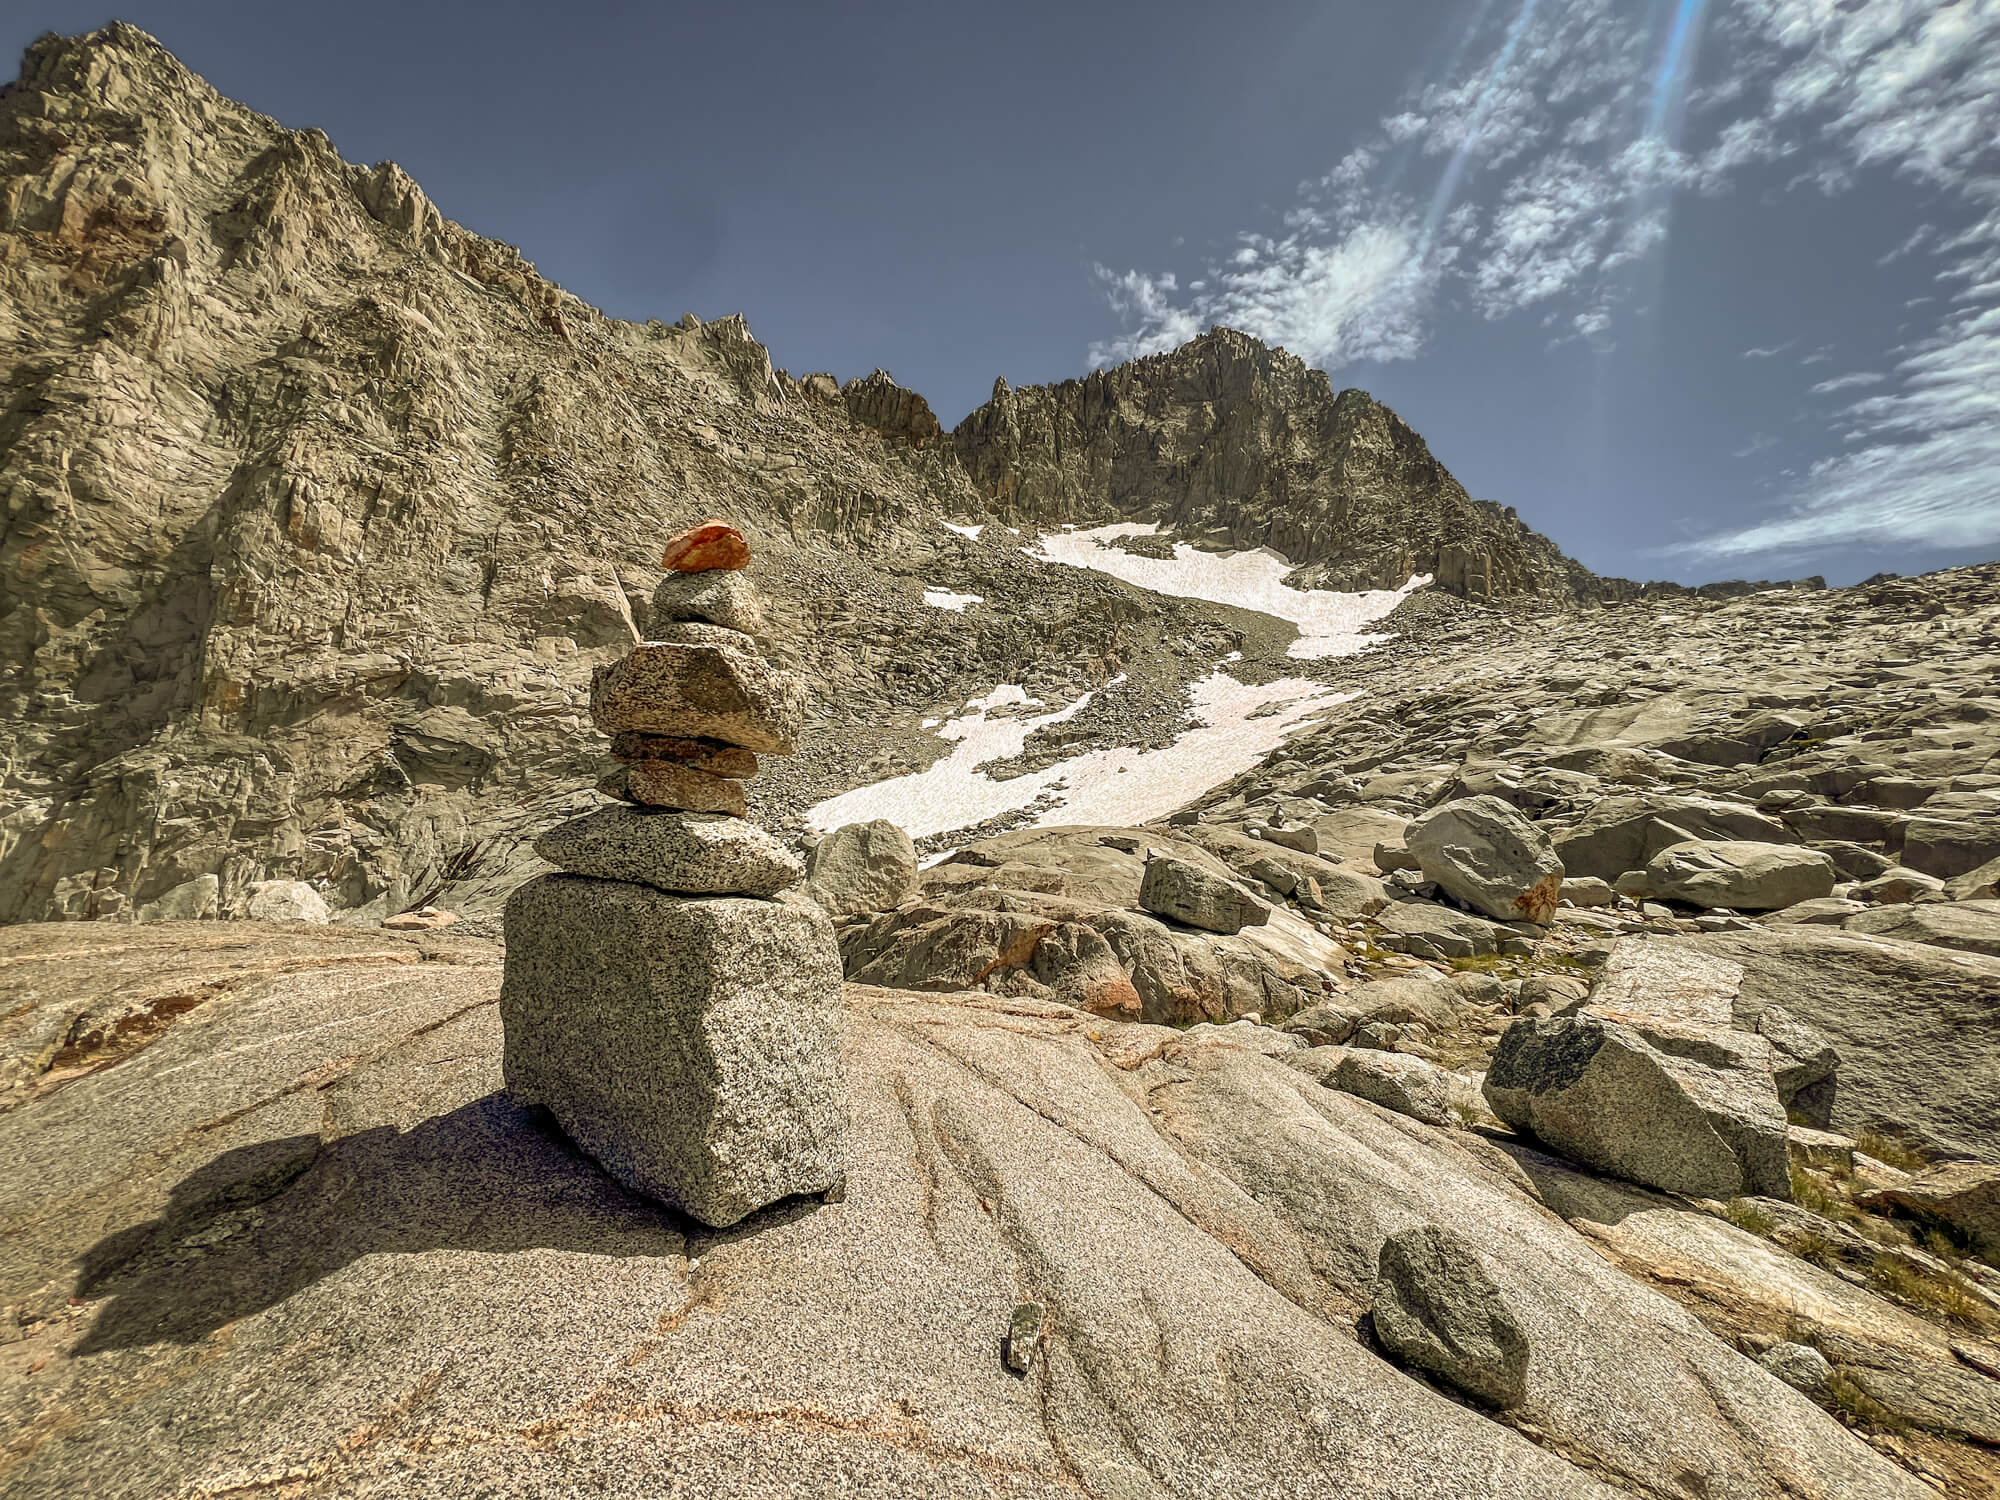
Depending on water levels and the length of your stride, this water crossing may involve wet feet. Once you’ve negotiated the creek crossing the trail begins another series of steep switchbacks to clear the headwall to the east of Sam Mack meadow. The trail here is sun exposed with limited shade, but the views down into the Big Pine Lakes basin below are gorgeous. After crossing several talus fields, gaining another 700ft of elevation and hiking for around a mile you’ll reach the end of the defined trail. The views up to this point are spectacular, but the glacier remains hidden from view.
Keep your eyes open for the series of cairns which mark the approximate direction of the unmaintained trail and use your GPS app/route finding abilities to stay on course. The hiking here is more challenging and and starts by navigating through several hundred meters of loose talus and scree. Step carefully here and watch your holds as there is lots of loose rock. Stay vigilant of falling rocks that may be freed by hikers moving parallel above you! This section is the most intimidating part of the entire hike to the glacier, but it is short and you’ll soon find yourself navigating a much more manageable combination of large talus and smooth glacially carved granite slabs. This final section of the hike gains over 600ft in 0.6 miles and may take you double the time it took you to get to the start of this section from Sam Mack Meadow (depending on your comfort level in this type of terrain). There are occasional parts of this section that may require four points of contact, but exposure is limited and most determined, patient hikers will have limited problem reaching the end. After all this hard work, you’ll eventually come up on top of terminal moraine of the Pallisades Glacier and be rewarded with incredible views of the glacier, lake, and Palisades range. Looking left to right you’re rewarded with up close view of 5 of California’s 14,000 ft mountains: Mount Sill, Polemonium Peak, North Palisade, Starlight Peak, and Thunderbolt Peak. Take a moment or an hour, drink in the thin air, savor the view, and give yourself a pat on the back. When you’ve had your fill of this incredible spot, double back the way you came.
Summit Lake/More Distant Numbered Lakes
Most backpackers elect to camp at either Second or Third lake, which makes the short hike to visit the other four numbered lakes and Summit lake a worthwhile side trip. If you’re camping at Third Lake, its a 5 mile round trip with 1500ft of elevation gain to visit the remaining lakes.
Scrambles and Peakbagging
Multiple scrambles and peak bagging opportunities are available in the Big Pine Lakes area. Cloudripper (13, 524 ft) can be scrambled by following the drainage behind seventh lake to the NE ridge. Two Eagle and Mount Aggassiz (via the Aggassiz Col) are also popular scrambles in the area. For more details on these and other peak bagging opportunities in the area, pick up R.J. Secor’s quintessential guide to the Sierra Nevada, The High Sierra: Peaks, Passes, Trails.

Campsites in the Big Pine Lakes Area
There are no designated campsites in the Big Pine Lakes area and all camping is dispersed camping. That means you’ll have to keep your eyes peeled for the perfect spot. Remember to keep the following rules in mind when picking your site:
- Select a campsite at least 200 feet from water.
- Camp on a cleared, durable surface with no vegetation. It will often be clear that someone has camped there before.
Tips for Choosing the Best Site
There are so many incredible campsites in the Big Pine Lakes area, that your biggest challenge is quelling the sense of doubt over whether you have found the best one. To find the best site, I always follow the principal that humans resist extra effort and frequently herd together. This means spots in close proximity to the trail and found shortly after a big climb are going to be more crowded than spots that require off trail exploration to access or another push up a big hill. Many backpackers are so eager to get their heavy pack off that they pick the first spot they see, so if you do a little bit more work you’re likely to be rewarded with fewer people. Either way, the competitive permit process here does keep the crowds manageable, even if you’re camping at the more popular spots. I recommend camping at Fifth Lake if you have the energy to make it up there.
First Lake
First Lake doesn’t get much love. Almost all groups marvel at their introduction to the Big Pine Lakes area, and then immediately press on to the showstopping Second Lake. For those looking for more solitude, there are likely some under the radar campsites here. The area surrounding the trail is a low angel slope with limited options, but a little off trail exploration of the northeastern corner may yield several workable campsites that don’t suffer from the popularity of those surrounding Second and Third Lake. Please note that I didn’t have the opportunity to directly check out this area and this is me speculating based on the look for afar and the topography. So, take this guidance with a grain of salt. The downside of camping here is you’ve selected the lake that is the furthest away from the side trips to the remaining lakes or up to Palisades Glacier.
Second Lake & Third Lake
These two lakes are the most popular spots to camp and for good reason, the views across the lakes to Temple Crag are breathtaking. Camping here saves you the effort of hiking up the additional elevation to the remaining lakes with your full backpacking pack, while keeping the remaining lakes (and the Palisades glacier trail) within easy day hiking distance.
Second Lake has several campsites on the granite bench of the north shore near the trail and if you don’t mind being so close to the trail the views here are terrific. These sites are very popular. Additional sites may be found by following a small unmaintained trail that traverses above the easter shore and forks to the left shortly after ascending from First Lake and along the flatter western shore.
Third Lake is another popular spot to camp and multiple well used sites lie in the forested area near the main trail on the northern shore. The scenery at this lake is also beautiful with a different view of Temple Crag, unfortunately the easily accessible spots here tend to be quite close to the trail and lacking privacy. For more solitude, consider exploring the area to the east of Third lake for spots to camp
Fourth Lake
Traveling with a larger group? Fourth lake is the perfect spot for you! Fourth lake offers several great campsites including a very large campsite along the eastern shore. If you’re looking for a site with room for 4 or more tents, and plenty of space for hanging hammocks, this lake is the spot for you. While Fourth Lake lacks the wide open views of the other lakes, it offers more shelter from the elements. This lake is an extra mile and 500ft of elevation up the trail from Third lake, which helps keep the crowds down.
Fifth Lake
Fifth lake might be my favorite of the Big Pine Lakes. The views from this lake are spectacular. If you have the time and the hiking legs to make it up here, I’d suggest you camp here. There are a few spots near the trail on the lake’s easter shore. Additionally, a few more secluded spots can be found along the southern and northern shores. The spots on the north shore reign supreme, but require crossing a tedious talus field and a bit off trail navigation to access. As always, the best sites go to those that put in the work! It’s an extra mile of hiking and 500ft of elevation gain to Fifth Lake from Third Lake.
Sixth Lake & Seventh Lake
If you’re looking for solitude these are the lakes for you. Backpackers making the extra 2.3 miles climb (1100 ft elevation gain) from Third Lake, will likely be rewarded with these lakes to themselves. Several well defined campsites lie to the north of Sixth Lake and multiple great options exist along Sixth Lake’s southern shore. Seventh lake is quite marshy, but there are likely a few viable spots to camp north of the lake. These are great sites for solitude, but the scenery is nicer at many of the earlier lakes.
Summit Lake
This small lake receives limited camper traffic. It’s quite marshy and the views are not spectacular, but there may be one or two decent camping sites to be found.
Black Lake
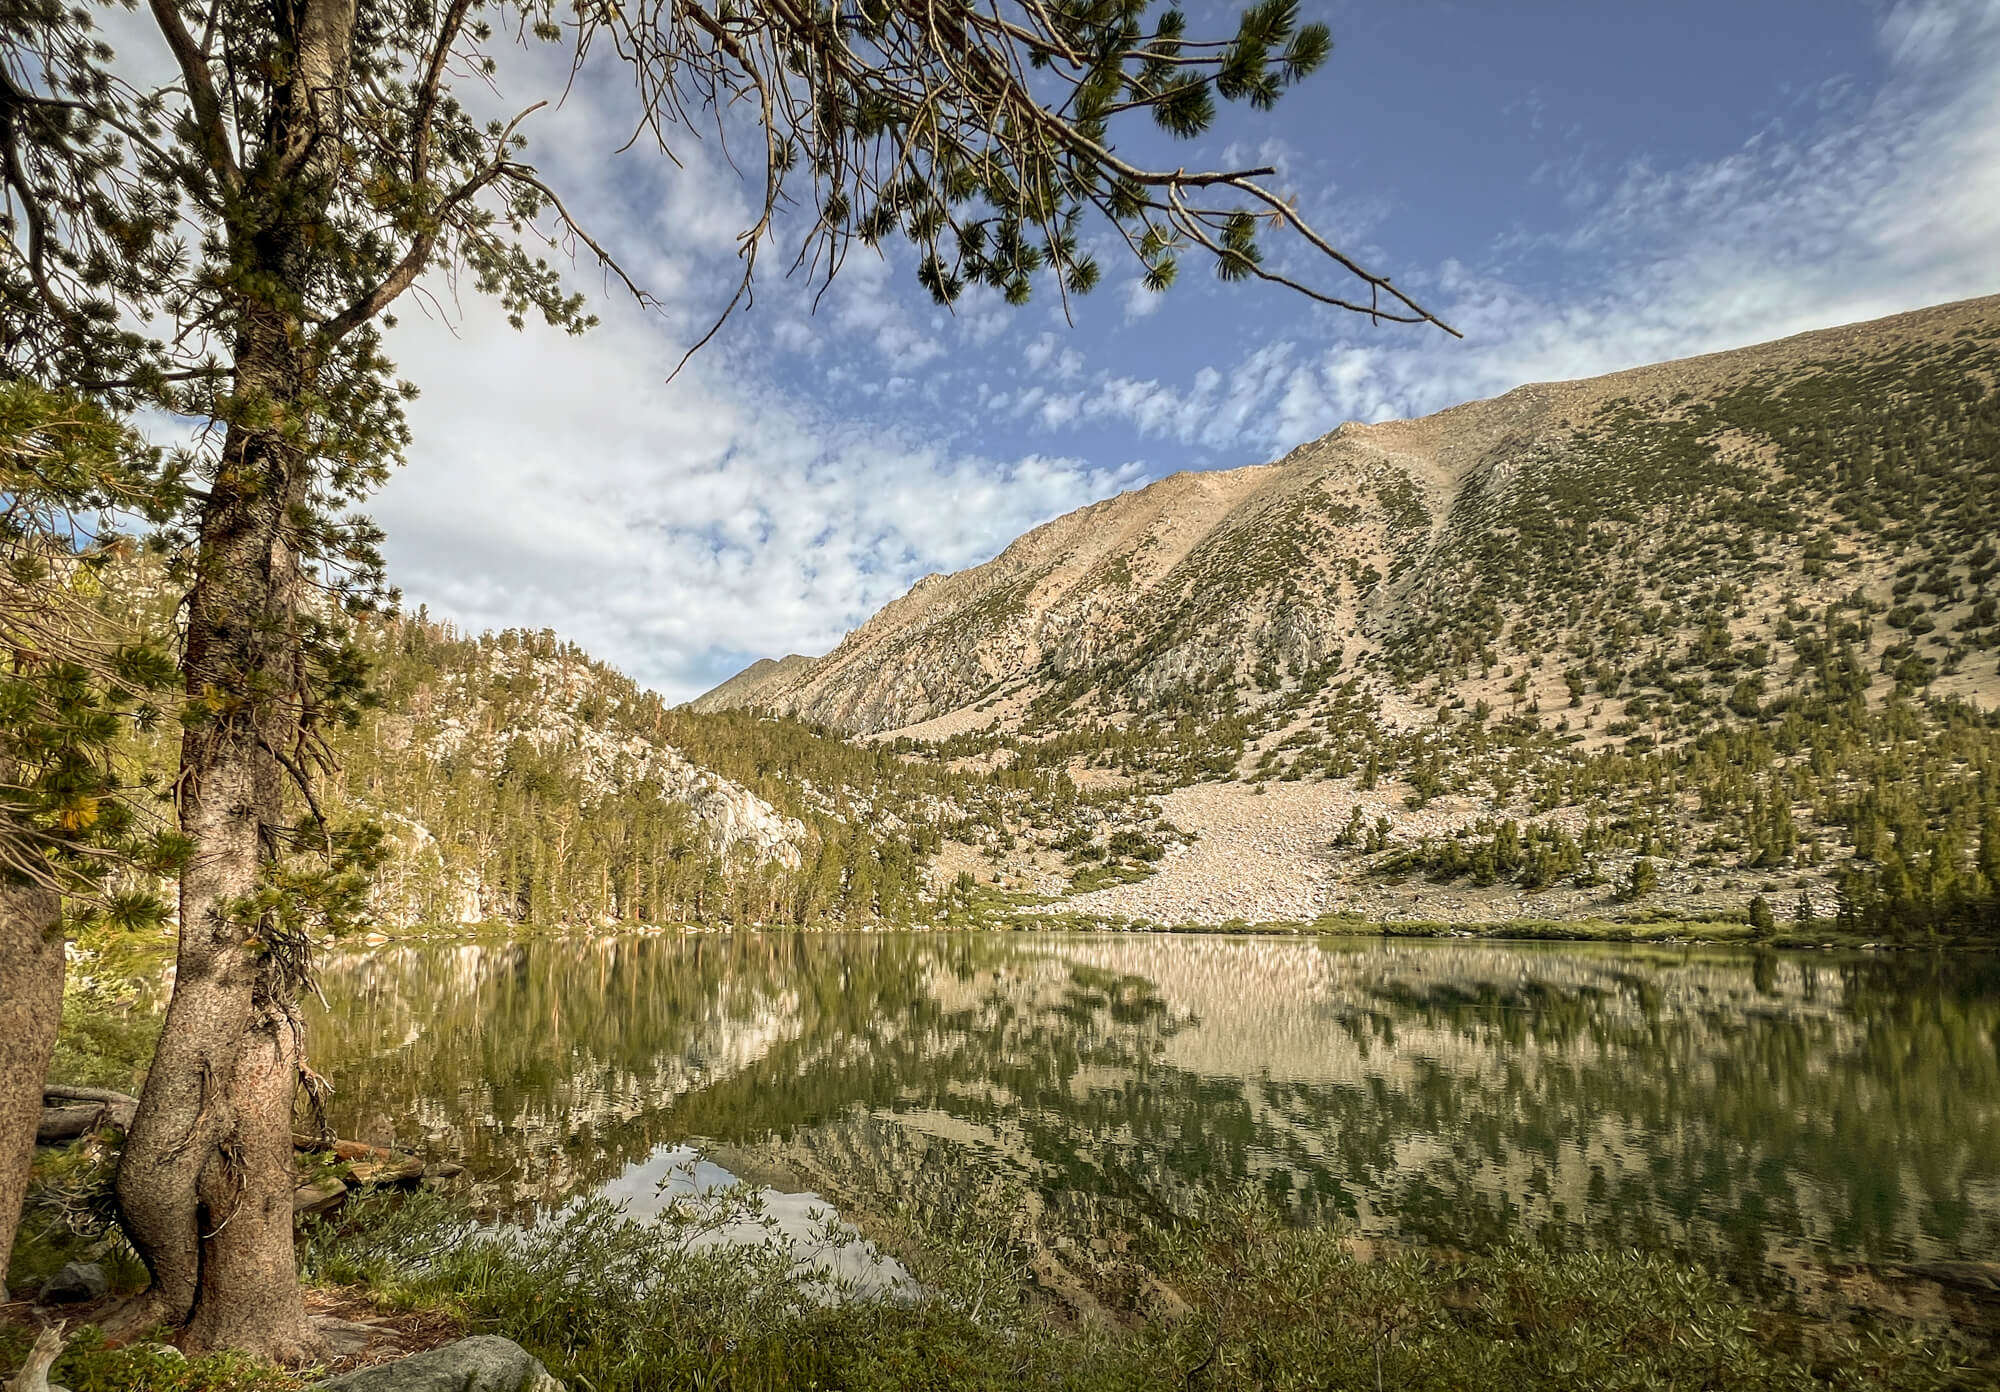
Black lake is well removed from the numbered lakes in the Big Pine Lakes area, making it a great spot to find a site to yourself. There are several good looking spots to camp near the creek drainage on the eastern shore. The views here are decent, but not as spectacular as many of the numbered Big Pine Lakes. Camping here is a good option for those looking to shorten the hike out, without staying at the busier First-Third Lakes.
Itinerary Options
Here a few itinerary recommendations for day hiking or backpacking to Big Pine Lakes with a brief discussion of each.
Day Hike
If you’re in the area and couldn’t land a permit or aren’t comfortable/equipped for backpacking. These options are manageable ways to visit the Big Pine Lakes as a day hike. You should be a confident hiker as the Big Pine Creek North Fork Trail gains significant elevation and starts from nearly 8000 ft.
Note that day hikers can park in the day use parking lot which saves ~0.7 miles of hiking.
Trailhead to Third Lake and back
10.4 mi ROUND TRIP DISTANCE - 2,960 ft ELEVATION GAIM
This is the least strenuous way to visit the Big Pine Lakes area hitting the highlights as a long, but manageable day hike.
Trailhead to Sixth/Seventh Lake return via Black Lake Trail
14.0 mi ROUND TRIP DISTANACE - 4,110 ft ELEVATION GAIN
Visit every one of the numbered Big Pine Lakes and return via the Black lake trail to make a lollipop loop.
Trailhead Hike to Pallisades Glacier return via Black Lake Trail
16.4 mi ROUND TRIP DISTANCE - 5,460 ft Elevation Gain
This tough, but spectacular day hike takes you past the first three Big Pine Lakes before climbing to Sam Mack Meadow and up to the Pallisades Glacier. On the way back you can make it a loop by ascending to fourth and fifth lake before descending the Black Lake Trail. If you only have one day in the area and have the conditioning, this is the day hike to do!
One Night - lower mileage option
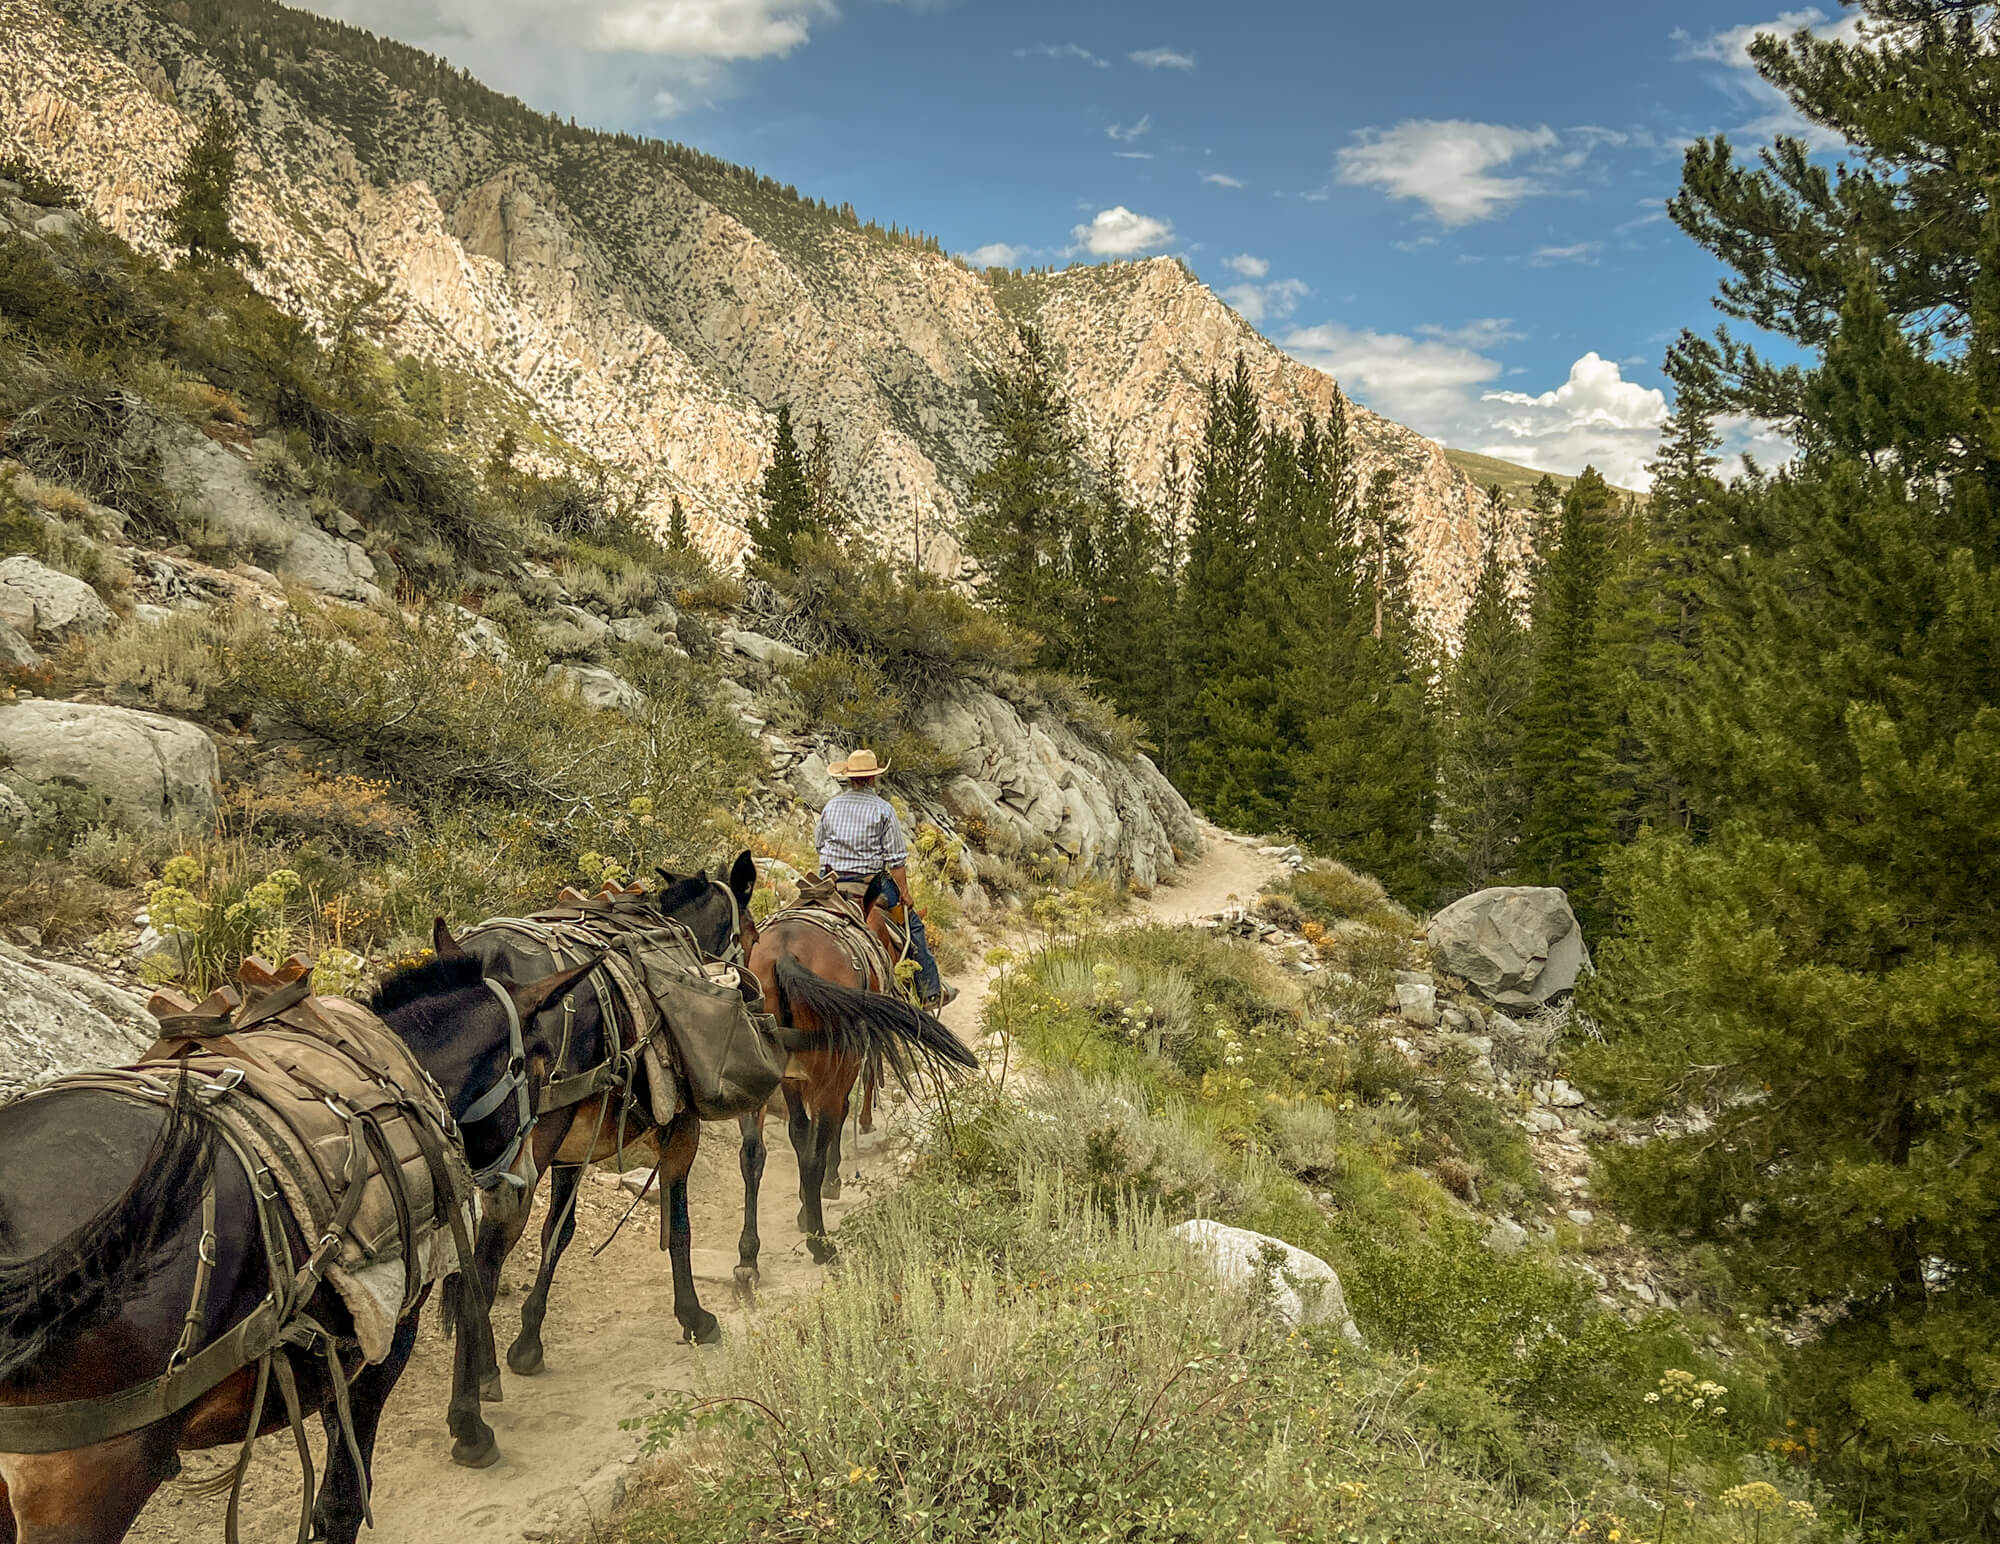
This trip is the most accessible way to explore the Big Pine Lakes area (aside from hitching a mule ride). Hike to Third Lake and then make a decision on whether you’d prefer to camp there or retreat back to Second lake (0.8 miles away).
Day 1: Trailhead to Third Lake
5.5 mi - 2,790 ft Elevation Gain
Camp: Second or Third Lake
Day 2: Hike Out
5.5 mi - 2,790 ft Elevation Loss
One Night - higher mileage option
If you have the hiking legs for it, I’d really suggest pressing on to camp at Fourth or Fifth Lake to beat the crowds and experience more of this area. These two lakes are very close together (0.3 miles) making it easy to check them both out and decide which one you prefer the look of. On your second day, you have the option of hiking up to Summit Lake and/or Sixth and Seventh Lake in the morning, before packing up and making the descent down the Black Lake trail to complete the lollipop loop.
Day 1: Trailhead to Fourth or Fifth Lake
6.5 mi - 3,386 ft Elevation Gain
Camp: Fourth or Fifth Lake
Day 2 (morning): Hike to remaining Lakes
2.5 mi (Round Trip)- 800 ft Elevation gain
Day 2: Hike Out via Black Lake Trail
6.2 mi- 3,340 ft Elevation Loss
Two Night
Two nights in the Big Pine Area is the perfect (long) weekend adventure! The short distances between lakes and the hassle that comes with packing up makes base camping the logical choice here and Fourth or Fifth Lake are the perfect staging grounds for your adventure. These two lakes lie in close proximity (0.3 miles) enabling you to check them both out before deciding on the best campsite. On your second day, get an early start and day hike to the Pallisades Glacier. Take the morning of day 3 to make the easy hike to Summit, Sixth and Seventh Lake, before packing up and heading out via the Black Lake Trail.
Day 1: Trailhead to Fourth or Fifth Lake
6.5 mi - 3,386 ft Elevation Gain
Day 2: Day Hike to Pallisades Glacier
5.3 mi (Round Trip) - 2,254 ft Elevation Gain
Day 3 (morning): Hike to Remaining Lakes
2.5 mi (Round Trip)- 800 ft Elevation gain
Day 3: Hike Out via Black Lake Trail
6.2 mi- 3,340 ft Elevation Loss

Three Night
If you’re looking to move at a more relaxed pace or do some scrambling in the area, 3 nights is the way to go. Base camp at Fourth or Fifth Lake. Enjoy a chill day 2, hiking to Summit, Sixth or Seventh Lake in the morning before relaxing lakeside in the afternoon. For a more strenuous second day, consider bagging Cloudripper, the prominent peak to the Northwest of Seventh Lake (get a copy of The High Sierra: Peaks, Passes, Trails for more beta on this). On day 3, hike to the Pallisades Glacier. Pack up on day 4 and exit out via the Black Lake Trail.
Day 1: Trailhead to Fourth or Fifth Lake
6.5 mi - 3,386 ft Elevation Gain
Day 2 (chill option): Hike to Remaining Lakes
2.5 mi (Round Trip)- 800 ft Elevation gain
Day 2 (strenuous option): Summit Cloudripper
~ 5.2 mi (Round Trip)- ~3000 ft Elevation gain
Day 3: Day Hike To Pallisades Glacier
5.3 mi (Round Trip) - 2,254 ft Elevation Gain
Day 4: Hike Out Via Black Lake Trail
6.2 mi- 3,340 ft Elevation Loss
Packing List Breakdown
Hikes like the Big Pine Creek North Fork trail are more enjoyable the lighter your pack. A lighter backpack helps you cover more mileage and more elevation with less effort which is perfect for a quad burning hike like this.
That said, If you’re new to backpacking, don’t stress out about buying the latest and greatest equipment. Save money and use things you already own that can be repurposed for backpacking, rent gear, or borrow stuff from a well-equipped friend. When you’ve gained more experience, modify your kit and change out gear as you get a better understanding of what is important to you.
Use the checklist below to click to navigate to my discussion of each individual item.
Permits & Red Tape
Essential Items
- Tent
- Backpack
- Packable Day HIking Backpack
- Sleeping mat
- Backpacking pillow
- Sleeping bag or quilt
- Water purification
- Trowel, TP, & Hand Sanitizer
- Swiss army knife
- Stove & fuel canister
- Lighter & Matches
- Backcountry cookset
- Water bottle or reservoir
- Water storage container
- First aid kit
- Trekking poles
- Bear Canister
- Headlamp with red light mode
- GPS, compass & map
- Battery back-up & charging cable
Luxury Items (optional)
Clothing and Accessories
Additional Items
Food
Permits & Red Tape
Wilderness permit for Big Pine Creek North Fork Trail
To backpack/overnight in the Big Pine Lakes area, you require a wilderness permit for the Big Pine Creek North Fork trail in Inyo National Forest. Print it, sign it, and bring it along.
California Campfire Permit
To use a portable stove in Inyo National Forest you require a California Campfire Permit. It takes 10 minutes to get and is free. Take 10 minutes to get yours now, before you forget.
Emergency Medical Insurance (for non-US persons)
If you’re traveling from outside the US don’t forget to purchase comprehensive travel insurance that includes emergency evacuation.
Check out World Nomads* for a quote. Hopefully, you never need to make a claim, but if you do you’ll be beyond happy you were prepared! I broke my collarbone traveling a few years ago, which hurt enough! I can’t imagine how much worse it would have hurt if I had to pay the $15,000 in medical bills out-of-pocket…
*We receive a fee when you get a quote from World Nomads using this link. We do not represent World Nomads. This is not a recommendation to buy travel insurance.
Essential Items
Tent
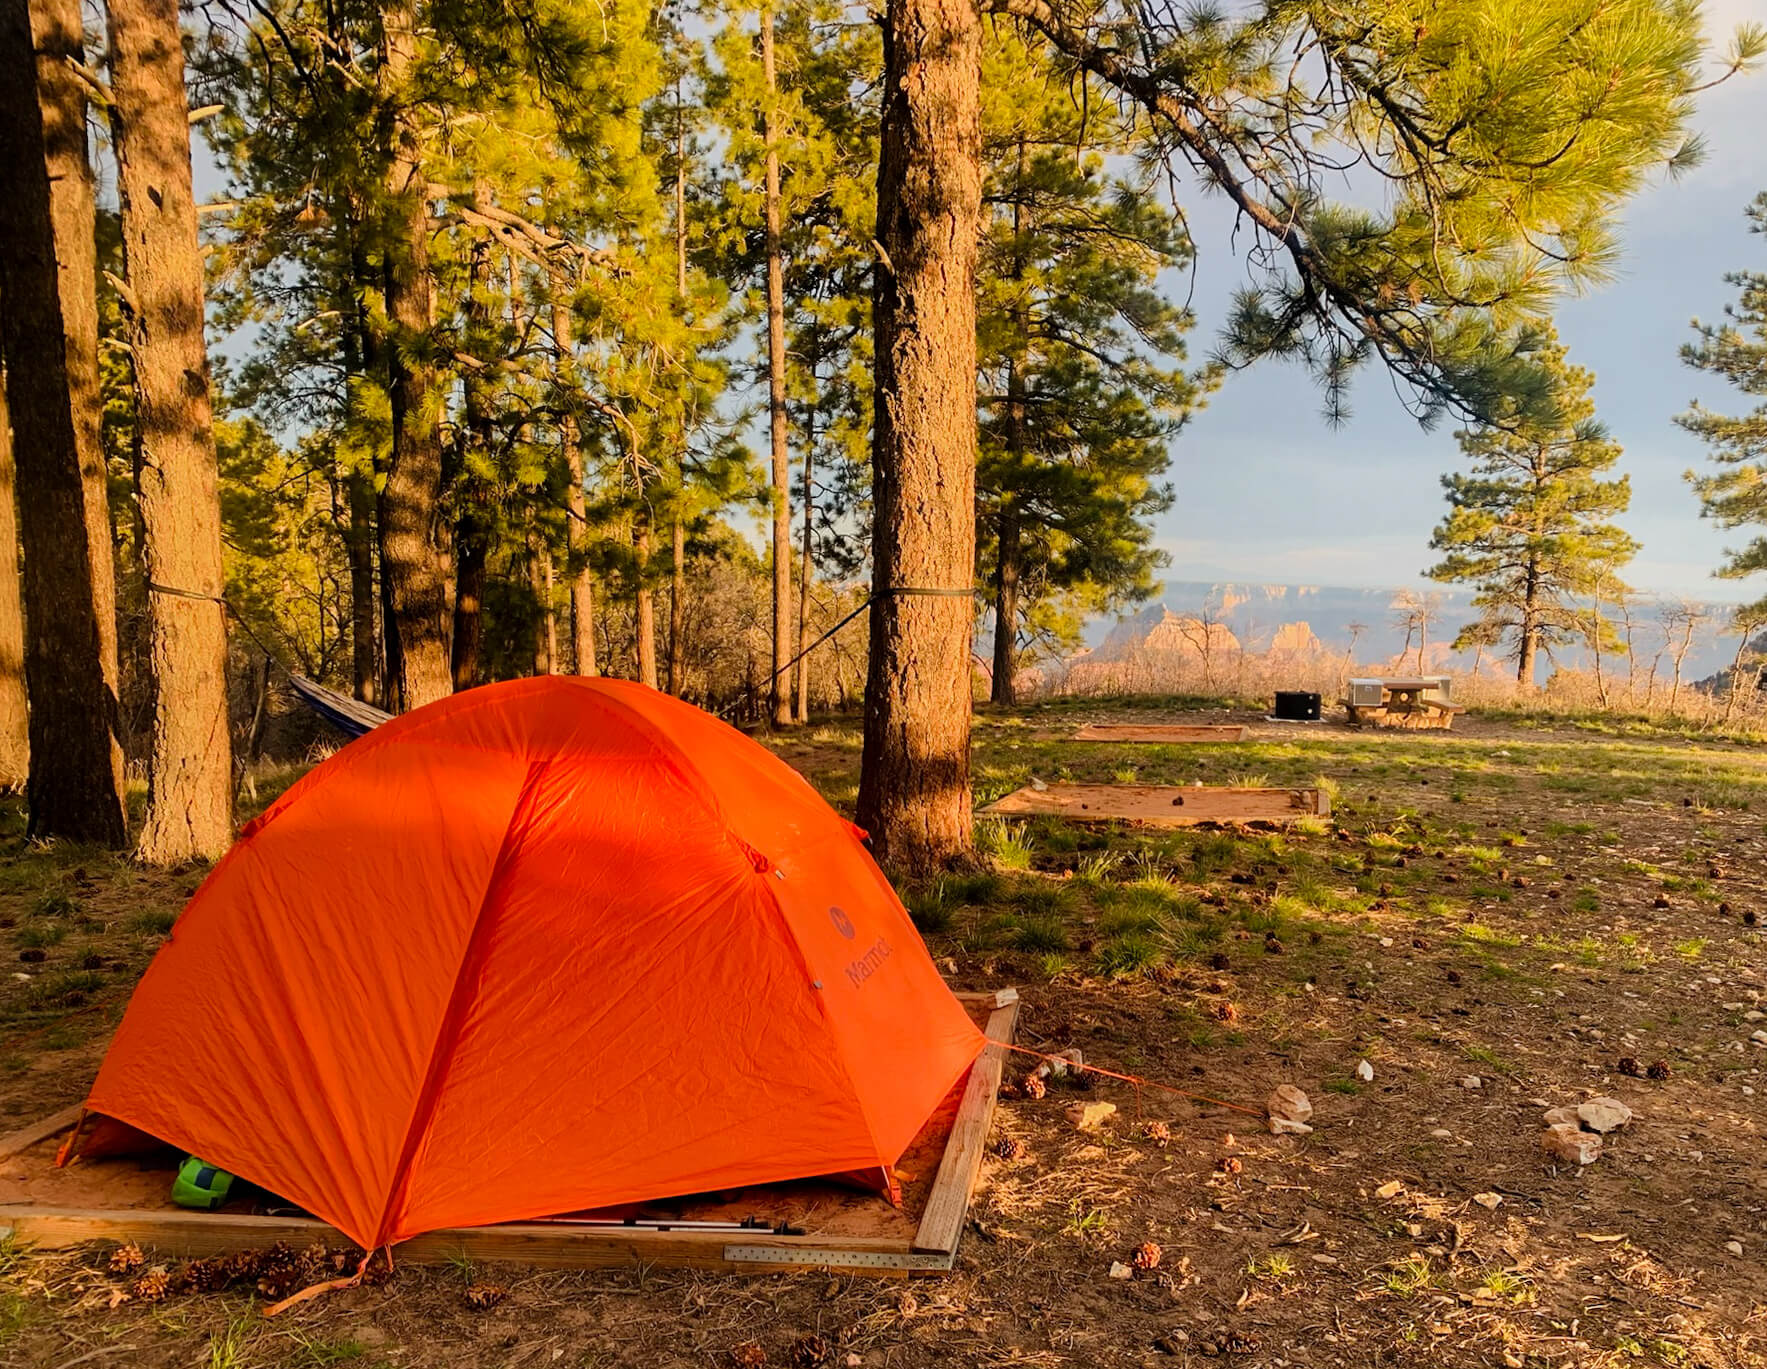
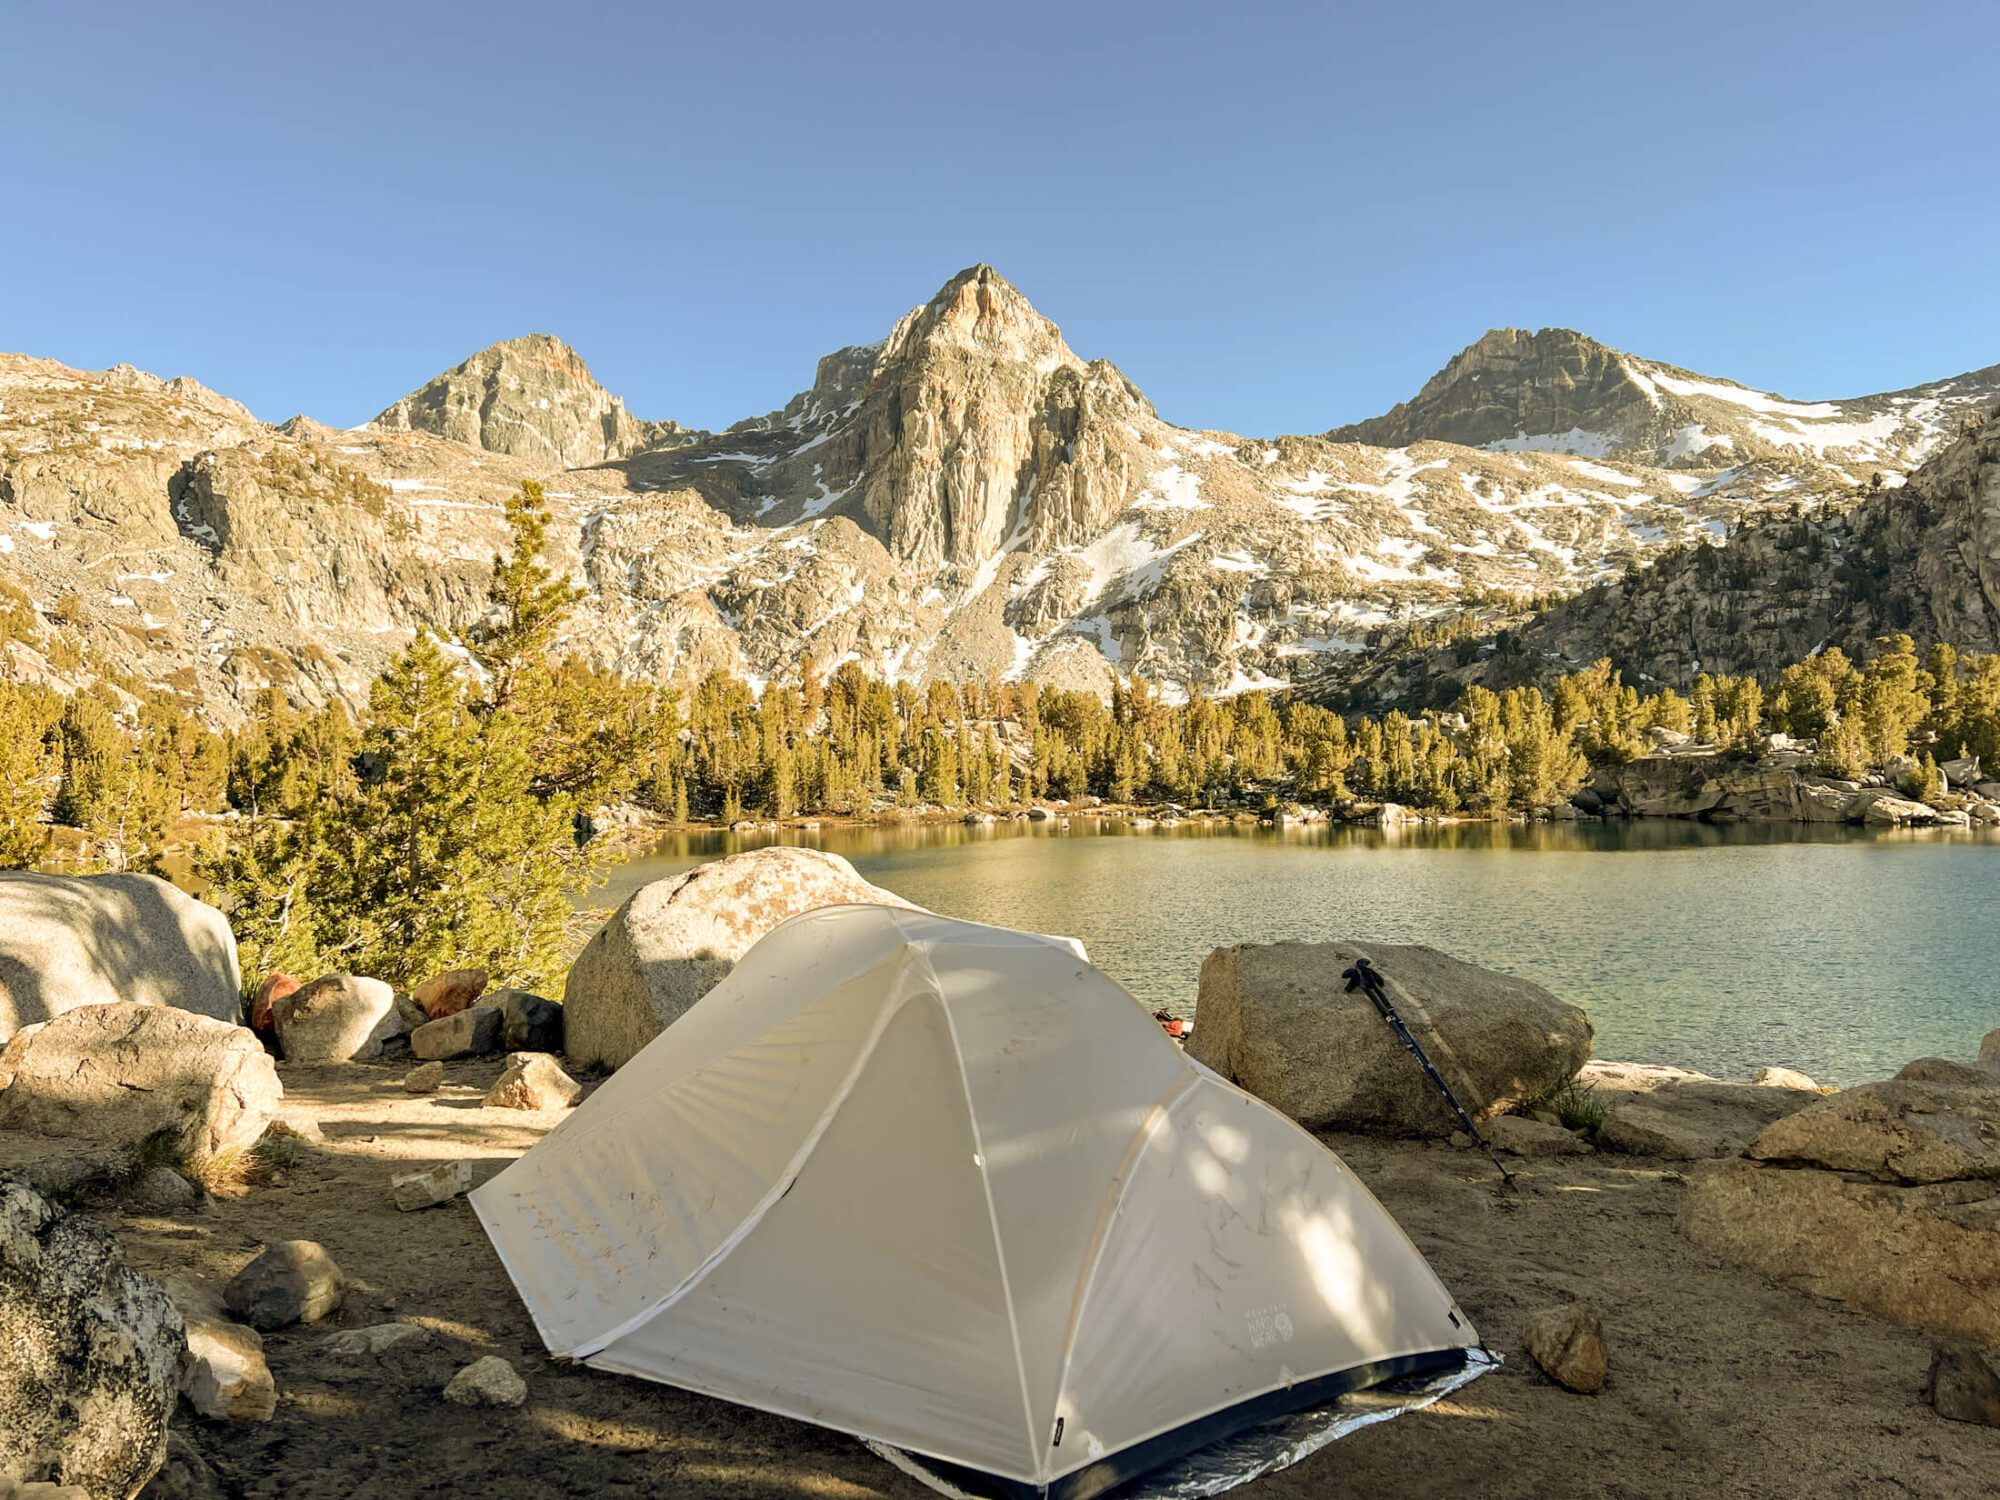
I’ve been using the Mountain Hardwear Strato UL2 (view at REI / Backcountry) for several years and it’s a great tent. It’s semi-freestanding, double walled and weighs in at a mere 2.5 lbs. Unlike many 2-person tents, it doesn’t have a tapered floor and can fit 2 extra wide sleeping pads side-by-side with no overlap. It’s cozy, but workable for two people and palatial for one! If you can’t find this tent, check out the Nemo Hornet Osmo for a similar, high quality semi-freestanding tent.
If you’re looking for a completely freestanding tent that offers a bit more space and durability, check out the Big Agnes Copper Spur UL2 (view at REI / Backcountry) . It’s unique blend of functionality, livability, weight, and durability earn high praise and Big Agnes’s customer service is outstanding!
For an incredible ultralight option, check out the single wall Durston X-Mid Pro which weighs in at a mere 20 oz (565g). There’s a reason this tent has developed a serious cult following among ultralighters.
Backpack
If you’re just getting into backpacking, use a large-size backpack with a decent suspension system (and good hipbelt) or borrow one from a friend. This gives you time to decide what features you need and whether or not backpacking (and the gear) is something you want to invest in. Whatever backpack you use, make sure you have a good fit before by following this guide to backpack sizing. When I first started backpacking, I used a 60L travel backpack, our Khmer Explorer Travel Set on Canada’s West Coast Trail. While not designed for hiking, it worked great despite my ridiculous overpacking!
If you’ve begun dialing in your backpacking kit and moving towards a lightweight set-up, check out either the Osprey Exos for men (view at REI/Backcountry) or Gregory’s Facet for women (view at REI / Backcountry). At under 3 lbs these packs are a great compromise between barebones ultralight packs and heavier feature-laden packs. Their excellent suspension systems prevent the dreaded swampy/sweaty back on hot days.
If you’re looking for the lightest option, check out the Hyperlite 3400 southwest (view at REI / Backcountry). It’s 100% waterproof and constructed from ultralight dyneema fabric. Being ultralight you’ll sacrifice features, so if you hate getting a swampy back (that’s me) you may prefer the Osprey despite the weight penalty. Backpacking gear is always a zero sum game!
Packable Day Hiking Backpack
Planning on spending a few days day hiking or peaking bagging from your base camp? Pack a small packable day pack, like the tried and tested REI Flash 18. This type of pack is perfect for carrying your day hiking essentials and lets you leave your bulky, heavy backpacking pack at camp.
Sleeping mat
I used to have terrible sleeps in the backcountry until I switched to the Therm-a-Rest NeoAir X-lite (view at REI / Backcountry / Thermarest). It’s incredibly lightweight, comfortable, and packs down to the size of a Nalgene bottle. This is probably one of my favorite backpacking items!
Sleeping bag or quilt
Patagonia’s sleeping bags are 5 star! I got one on sale several years ago and it has been nothing short of perfect. Weighing only 822 g (29 oz) it’s lightweight and packs down small! I found the 30°F / -1°C to be perfect for most outings – if it gets colder you can always layer up! Like all Patagonia products, it’s not cheap, but they stand behind their gear and the quality matches the price point. If you spend a lot of time in colder environments they also make a 20°F / -7°C version . These bags are a worthwhile splurge!
If you’re looking for an even lighter-weight option, consider going for a sleeping bag quilt. Feathered Friends Flicker UL Quilt Sleeping Bag has won numerous awards and is a stalwart among ultralight backpackers. With a weight starting at 526 g (1 lb 2.5 oz), I can see why!
For a budget friendly bag that will last you for years, check out these great options from Big Agnes & Nemo Equipment. Bags rated to 30°F / -1°C should be well suited to this trip.
Backpacking pillow
Yes, you can sleep with a pillow not made of bunched up clothes in the backcountry. Check out the Nemo Fillo Elite (view at REI / Backcountry). It packs down ultra small and provides an unprecedented level of comfort after a long day on the trail. Once you try one you won’t imagine how you lived without!
Water purification
Trowel, Toilet Paper & Hand Sanitizer
We had an extensive discussion of pooping in the BIg Pine Lakes area earlier in this post, but don’t forget to. bring your trowel, dig a cathole a minimum of 6 inches deep and at least (200ft) away from any established trails, campsites, or water (creeks, lakes, rivers etc.). Pack out your TP.
Don’t forget a small bottle (1 oz) of hand sanitizer.
Swiss army knife
For fixing gear or cutting food, make sure to bring swiss army knife.
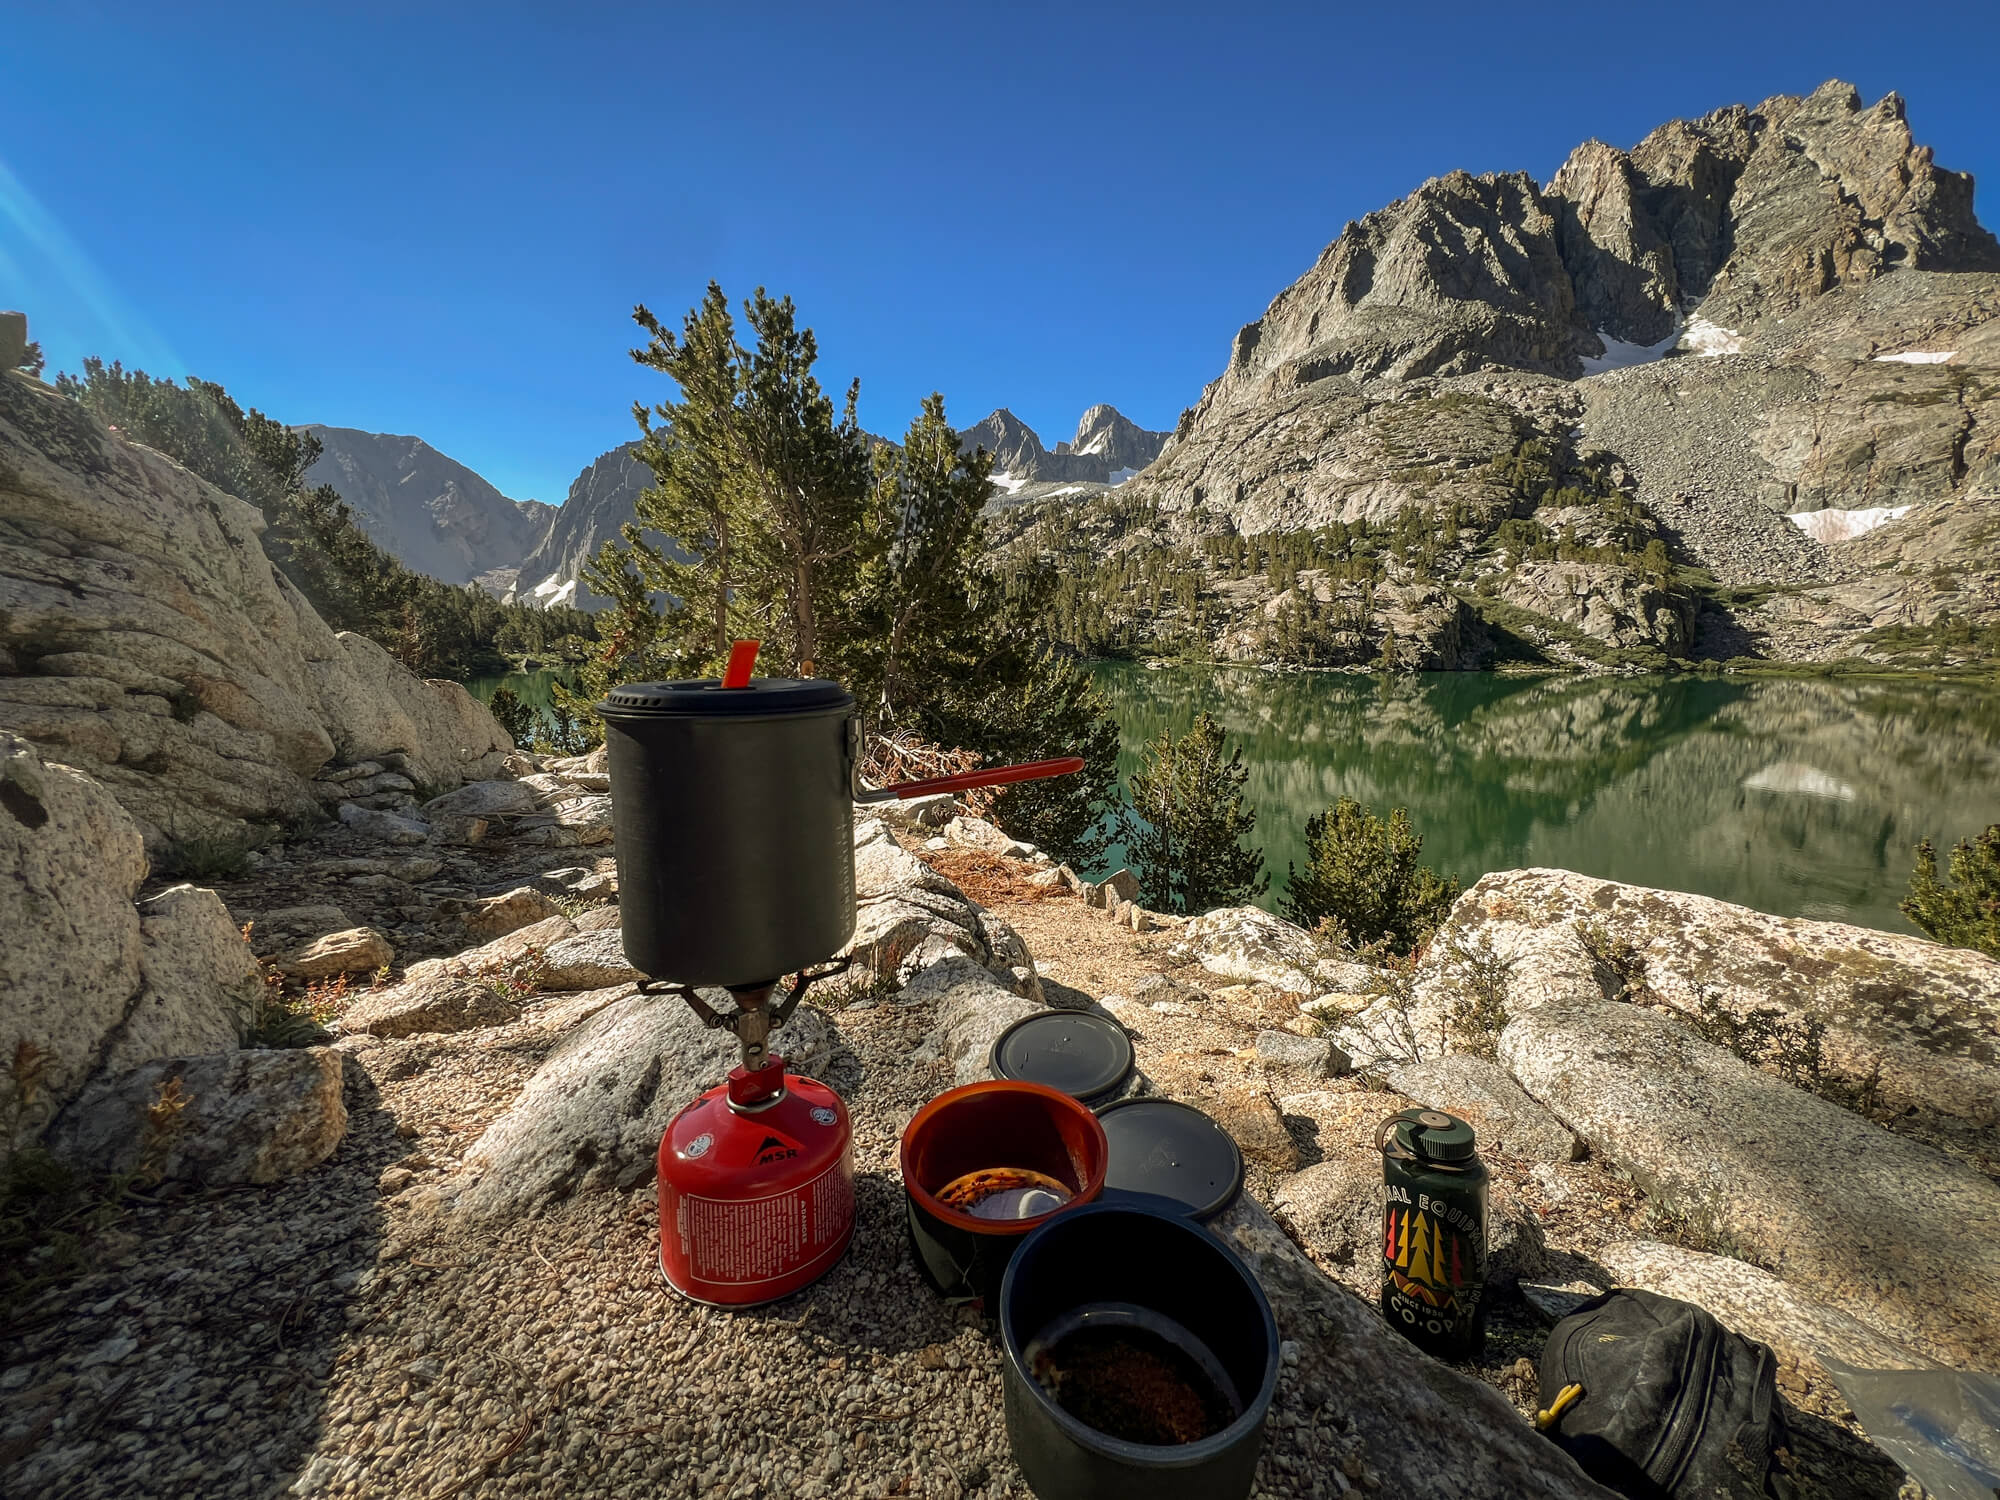
Stove & fuel canister
Lightweight, convenient, and reliable, the MSR pocket rocket (view at REI / Backcountry / MSR) has been my go-to backpacking stove for years.
Backcountry cookset
The GSI Halulite Microdualist II is a compact, lightweight two-person cookset that can fit an MSR pocket rocket and fuel canister inside. If you’re looking to buy a minimalist stove and cookset the MSR PocketRocket Stove Kit (view at REI / Backcountry / MSR) is an all-inclusive solution.
Lighter and matches
A baby bic lighter is all you need. I often bring a small pack of matches wrapped in ziplock bag for backup or waterproof ones.
Water bottle or reservoir
Nalgene (Check options at Backcountry / REI) are the standard hiking bottle.. If you’re cutting weight or looking for a way to save a buck, a simple smart water is the go-to for ultralight backpackers.
Alternatively, a hydration reservoir (view options at REI / Backcountry) allows you to stay hydrated continuously without stopping to grab and open a bottle. The hoses sometimes leak though and they freeze up during chilly nights.
Water container
Extra water storage bags like the MSR Dromedary or Dromlite (view options at REI / Backcountry / MSR ) help make cooking and treating water easier by saving walks repetitive water gathering missions.
First aid kit
A first aid kit is a must for treating blisters, scrapes, and cuts. The pre-built kits from Adventure Medical Kits (view at REI / Backcountry / Adventure Medical Kits) offer many options for party size and trip length. At the end of your trip, write down any items you used and replace them immediately so your kit is ready for your next adventure.
Hiking poles
Trekking poles help with the the big elevation changes on this hike! I resisted getting them for years, but take it from a former skeptic, poles are incredible at reducing the strain of long, grueling descents. Plus they providing extra stability on exposed sections. Do yourself a favor and get a pair of poles. I prefer the poles that fold up into a Z shape for their packability and weight. Leki (view options at REI) and Black Diamond (view options at REI) both make excellent options.
Headlamp
The Spot 400 (view at REI / Backcountry) has 6 modes including the night vision saving red light. Red light mode takes a minute to get used to, but once you do it’s a total game changer. Hello stars!!
GPS, compass & map
Download the GAIA app for maps and gps. I always bring a traditional compass and map as well in the case of technical problems or dead batteries.
Battery Back-up & Charging Cables
Keep your phone charged for photos and gps. One of these Zendure powerbanks is sufficient for 3-4 day trips.
Don't forget a Bear Canister
Bear canister’s are bulky and annoying, but they’re easy to use and the best way to keep your food and scented items bear safe. A bear came through our site at Fifth lake and thoroughly played with our canisters before I was able to scare him off. Fortunately, the canisters did their job.
BearVault canisters are the most popular as their transparent design allows you what’s packed where.
- Go with the BV500 (view at REI / Backcountry) for 6-7 day solo trips or 3-4 days for 2 people.
- Go with the BV450 (view at REI / Backcountry) for 3-4 day solo trips or weekend trips for 2 people.
Optional Luxury Items
These items are luxuries that add weight, but may be worth for a trip like this where you’re setting up a basecamp for a few nights.
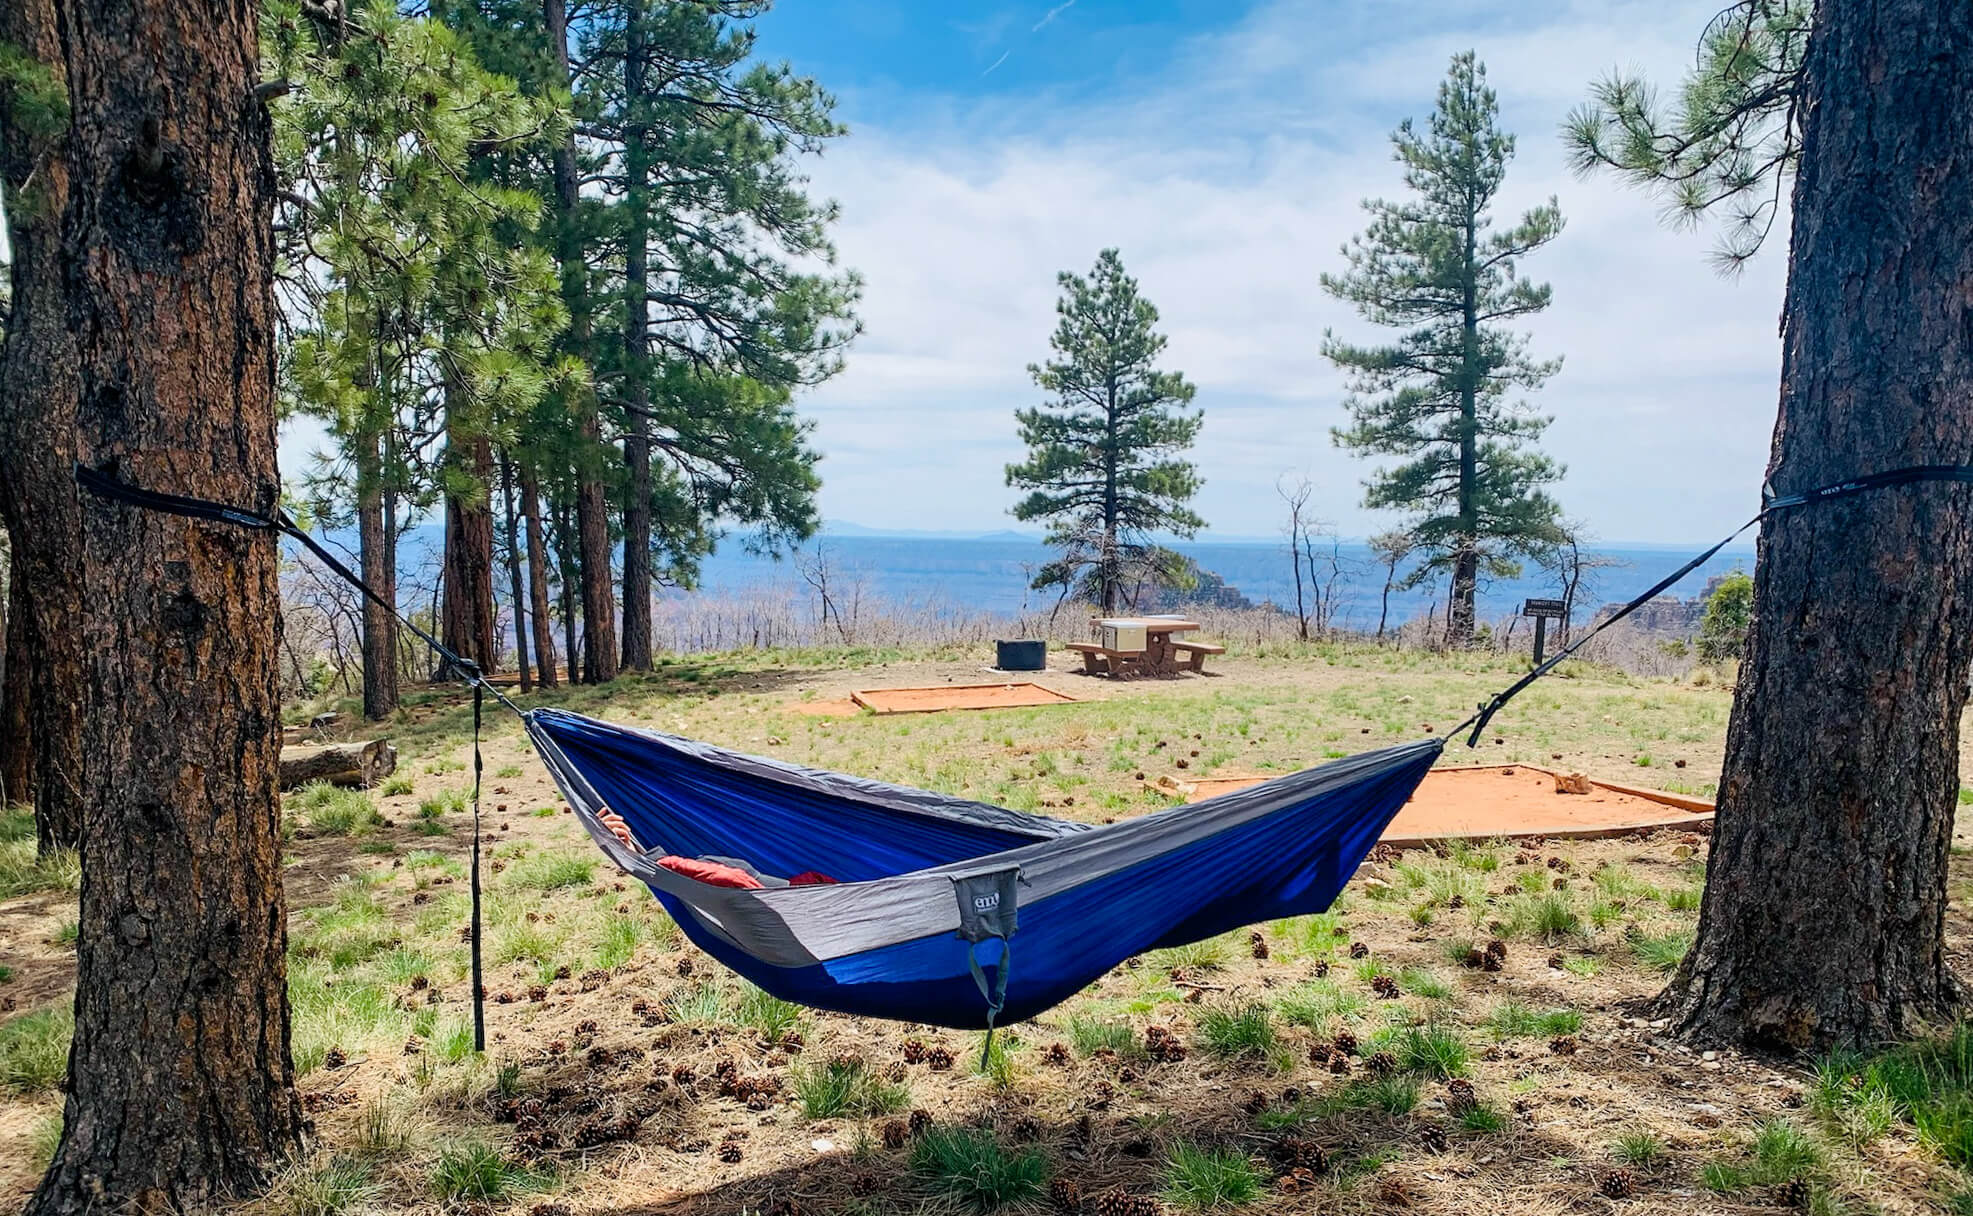
Hammock
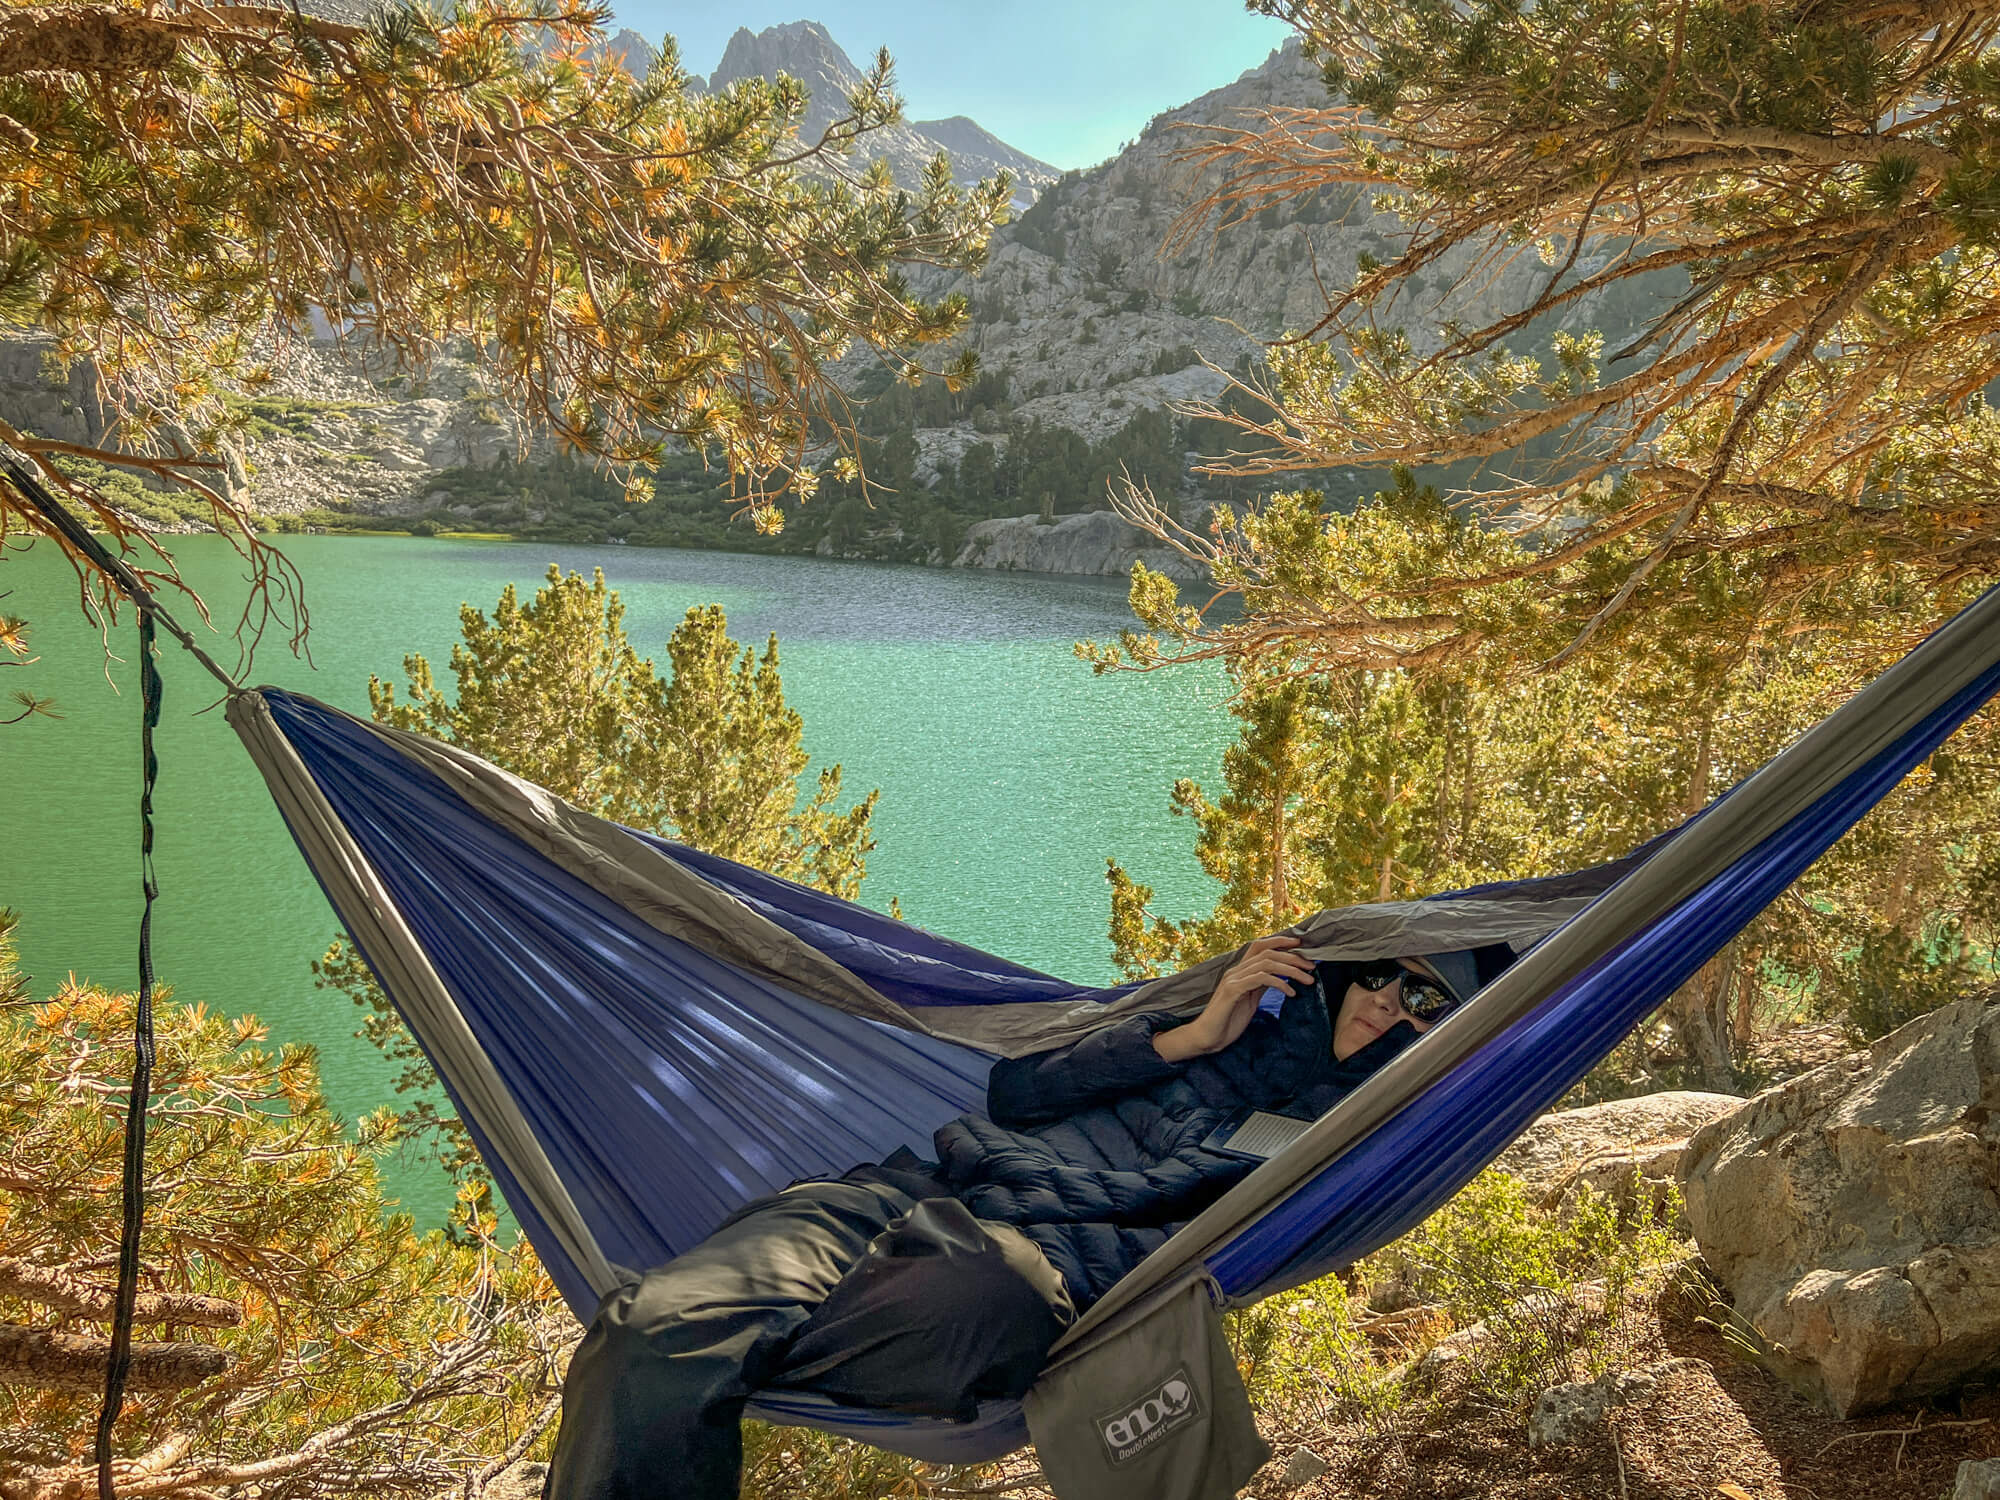
If you’ve never strung up a hammock between two trees deep in the backcountry, you’re missing out! Nothing beats getting horizontal with some great reading material in the pre-dinner hours or taking in an amazing sunset from your own outdoor couch. The ENO Double Nest (view at Backcountry / REI) has room for two and at ½ kg is easy to justify on this trip! Don’t forget the straps are sold separately (view them at Backcountry / REI).
Camp Chair
After a long day on the trail there’s nothing better than finding a nice comfortable spot to rest your weary glutes. The Helinox Chair Zero (view at REI) is a great option and at just over 1lb, it’s light enough to justify bringing on slower/easier backpacking trips where weight isn’t as big of consideration or for trips from an established base camp.
Clothing & Accessories
Shell jacket
An essential piece for wind, rain, and snow. The Arc’teryx Beta shell (view men’s / women’s) is the best all around shell jacket. This shell performs in adverse conditions and is the perfect outer layer for cool Sierra nights or common afternoon thundershowers. Arc’teryx gear is expensive, but impeccably designed. I was skeptical for years, until I purchased a few pieces of their trail running gear and got hooked. If you’re looking for the best reviewed hiking shell out there, this is the one.
For another excellent option that is more economical, check out the Patagonia Torrentshell 3L. (view men’s / women’s)
Puff jacket
I’ve had the Patagonia Nano Puff Hoody (view at REI / Backcountry / Patagonia) for years and it works great on it’s own or underneath a shell for extra warmth. It’s a perfect multi-functional item for everyday, backpacking, and pretty much anything where you might need a bit of warmth. I’m still looking for an activity it doesn’t work for.
Rainpants
Mountain weather changes fast and rain pants can be a lifesaver. I used mine multiple times on this hike when afternoon thundershowers came rolling in. I’ve been happy with the Black Diamond StormLine Rain Pants (view at REI / Backcountry) For a budget option check out the REI branded rain pants.
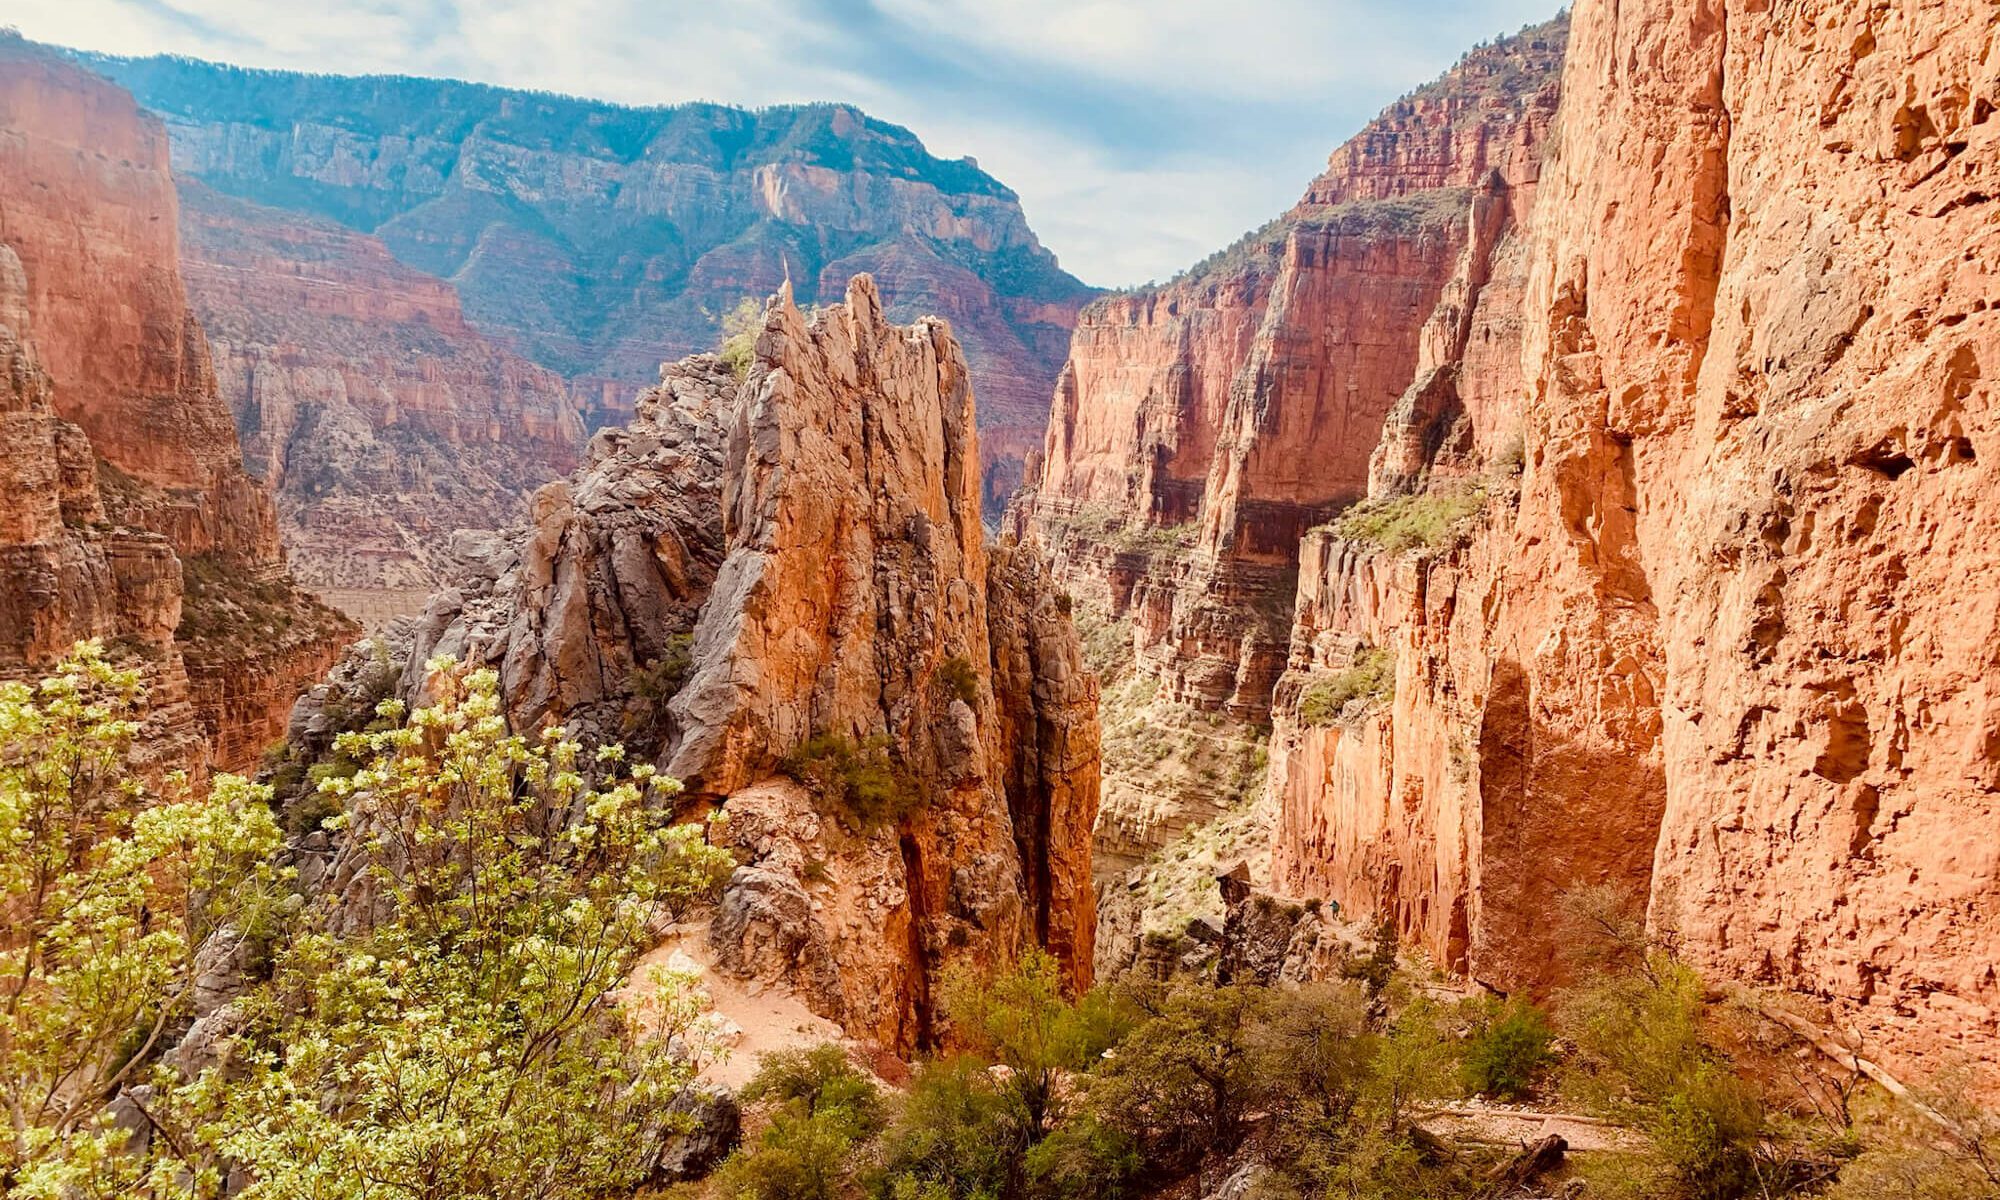
Sun hoodie
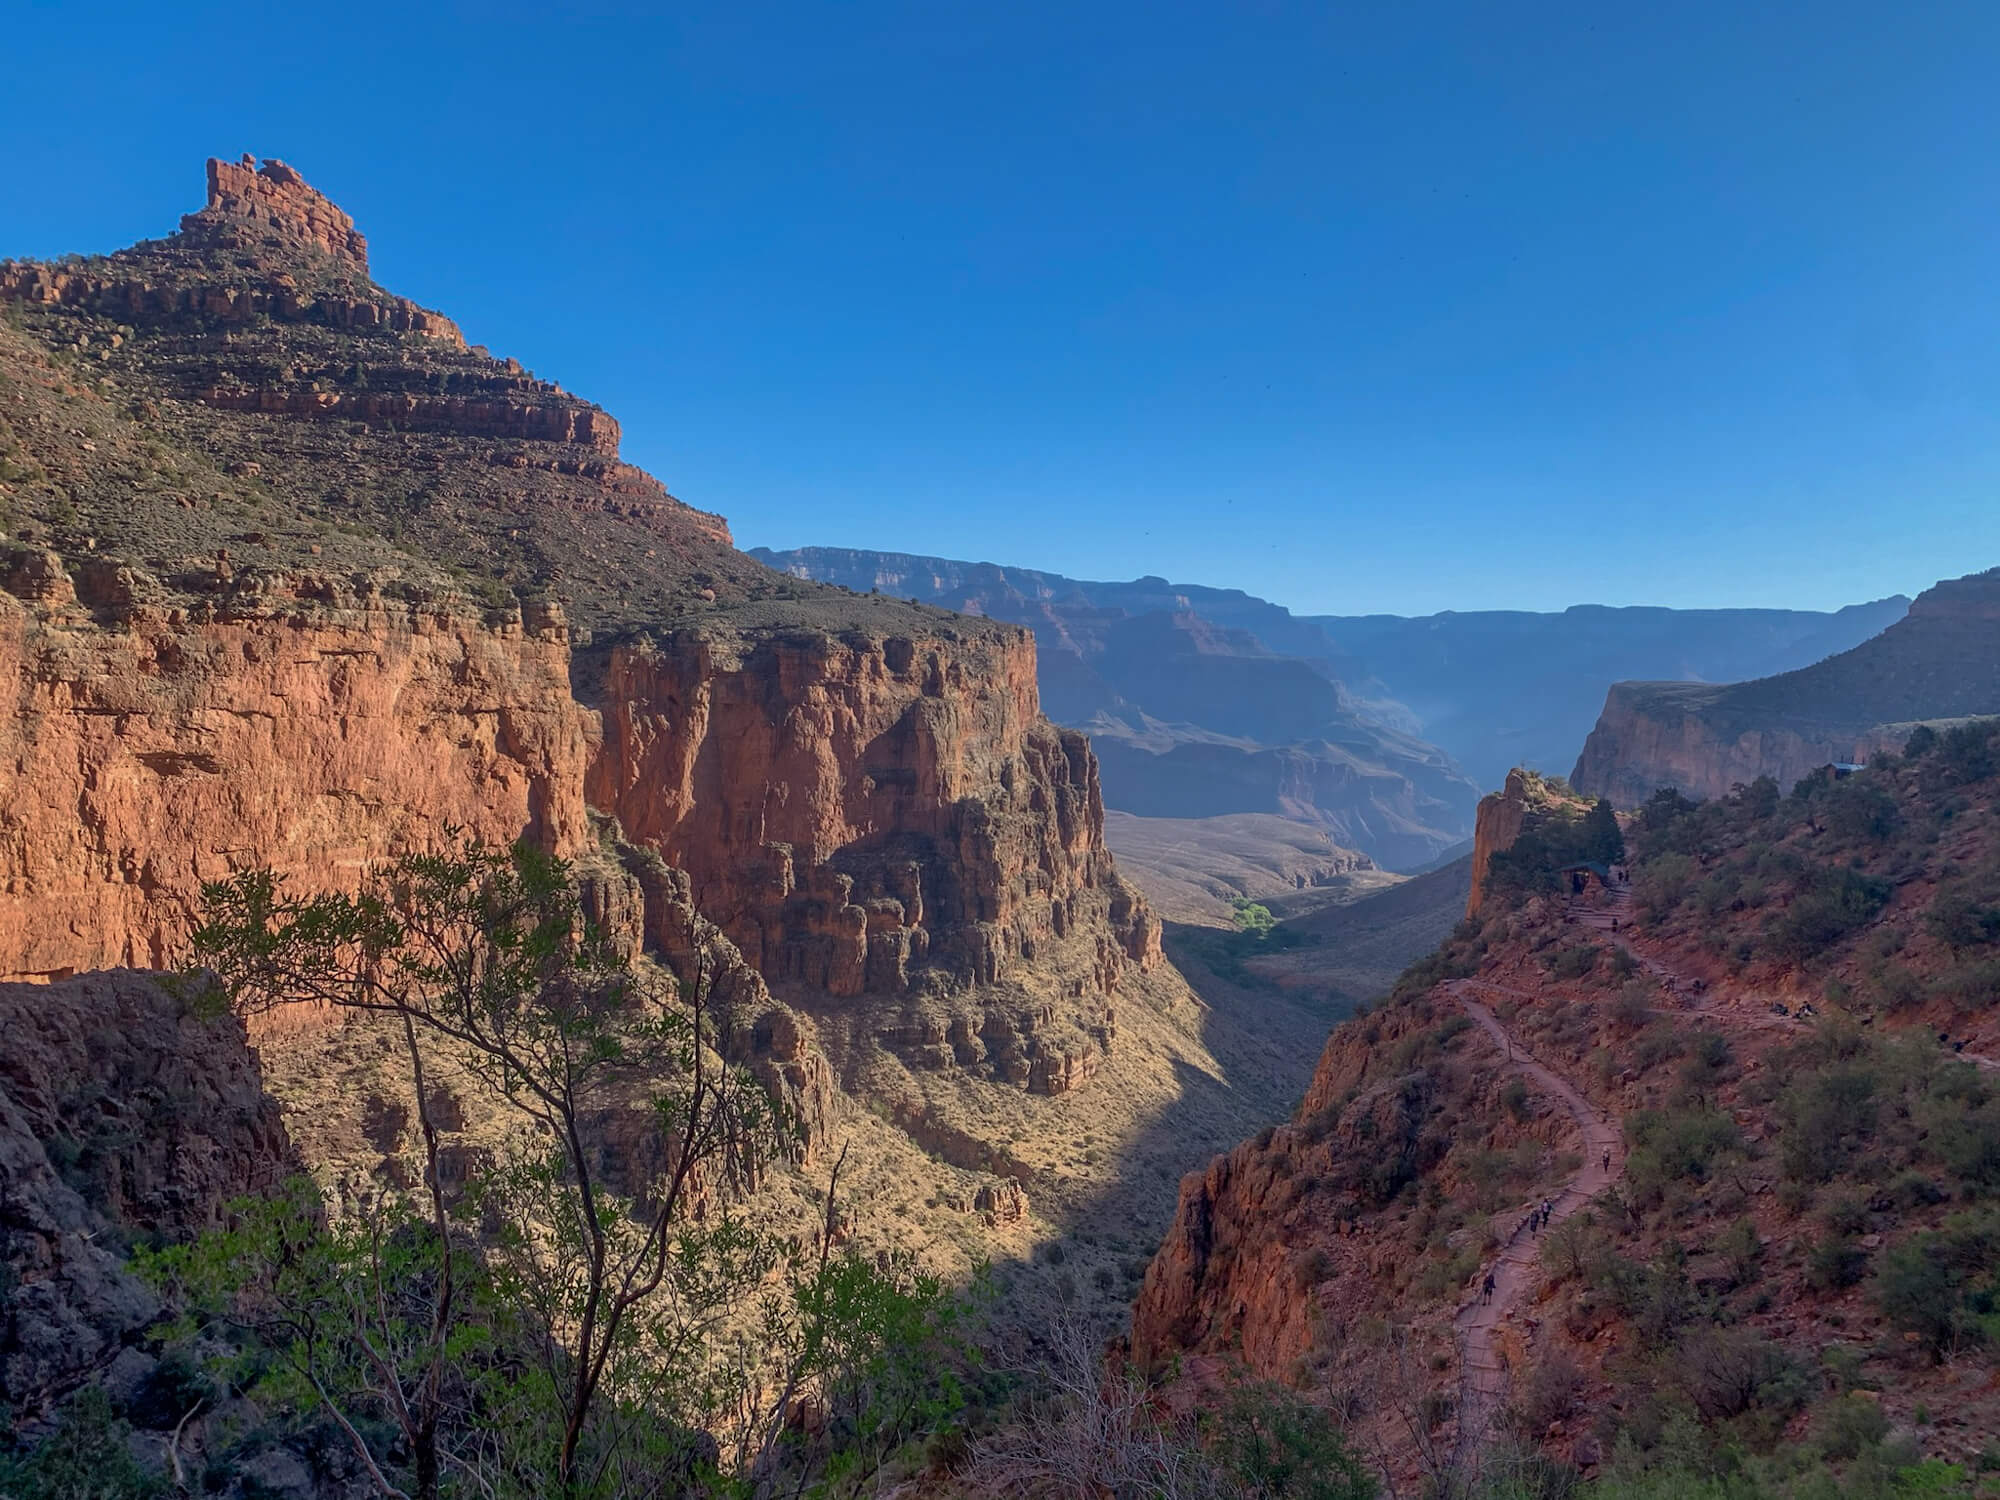
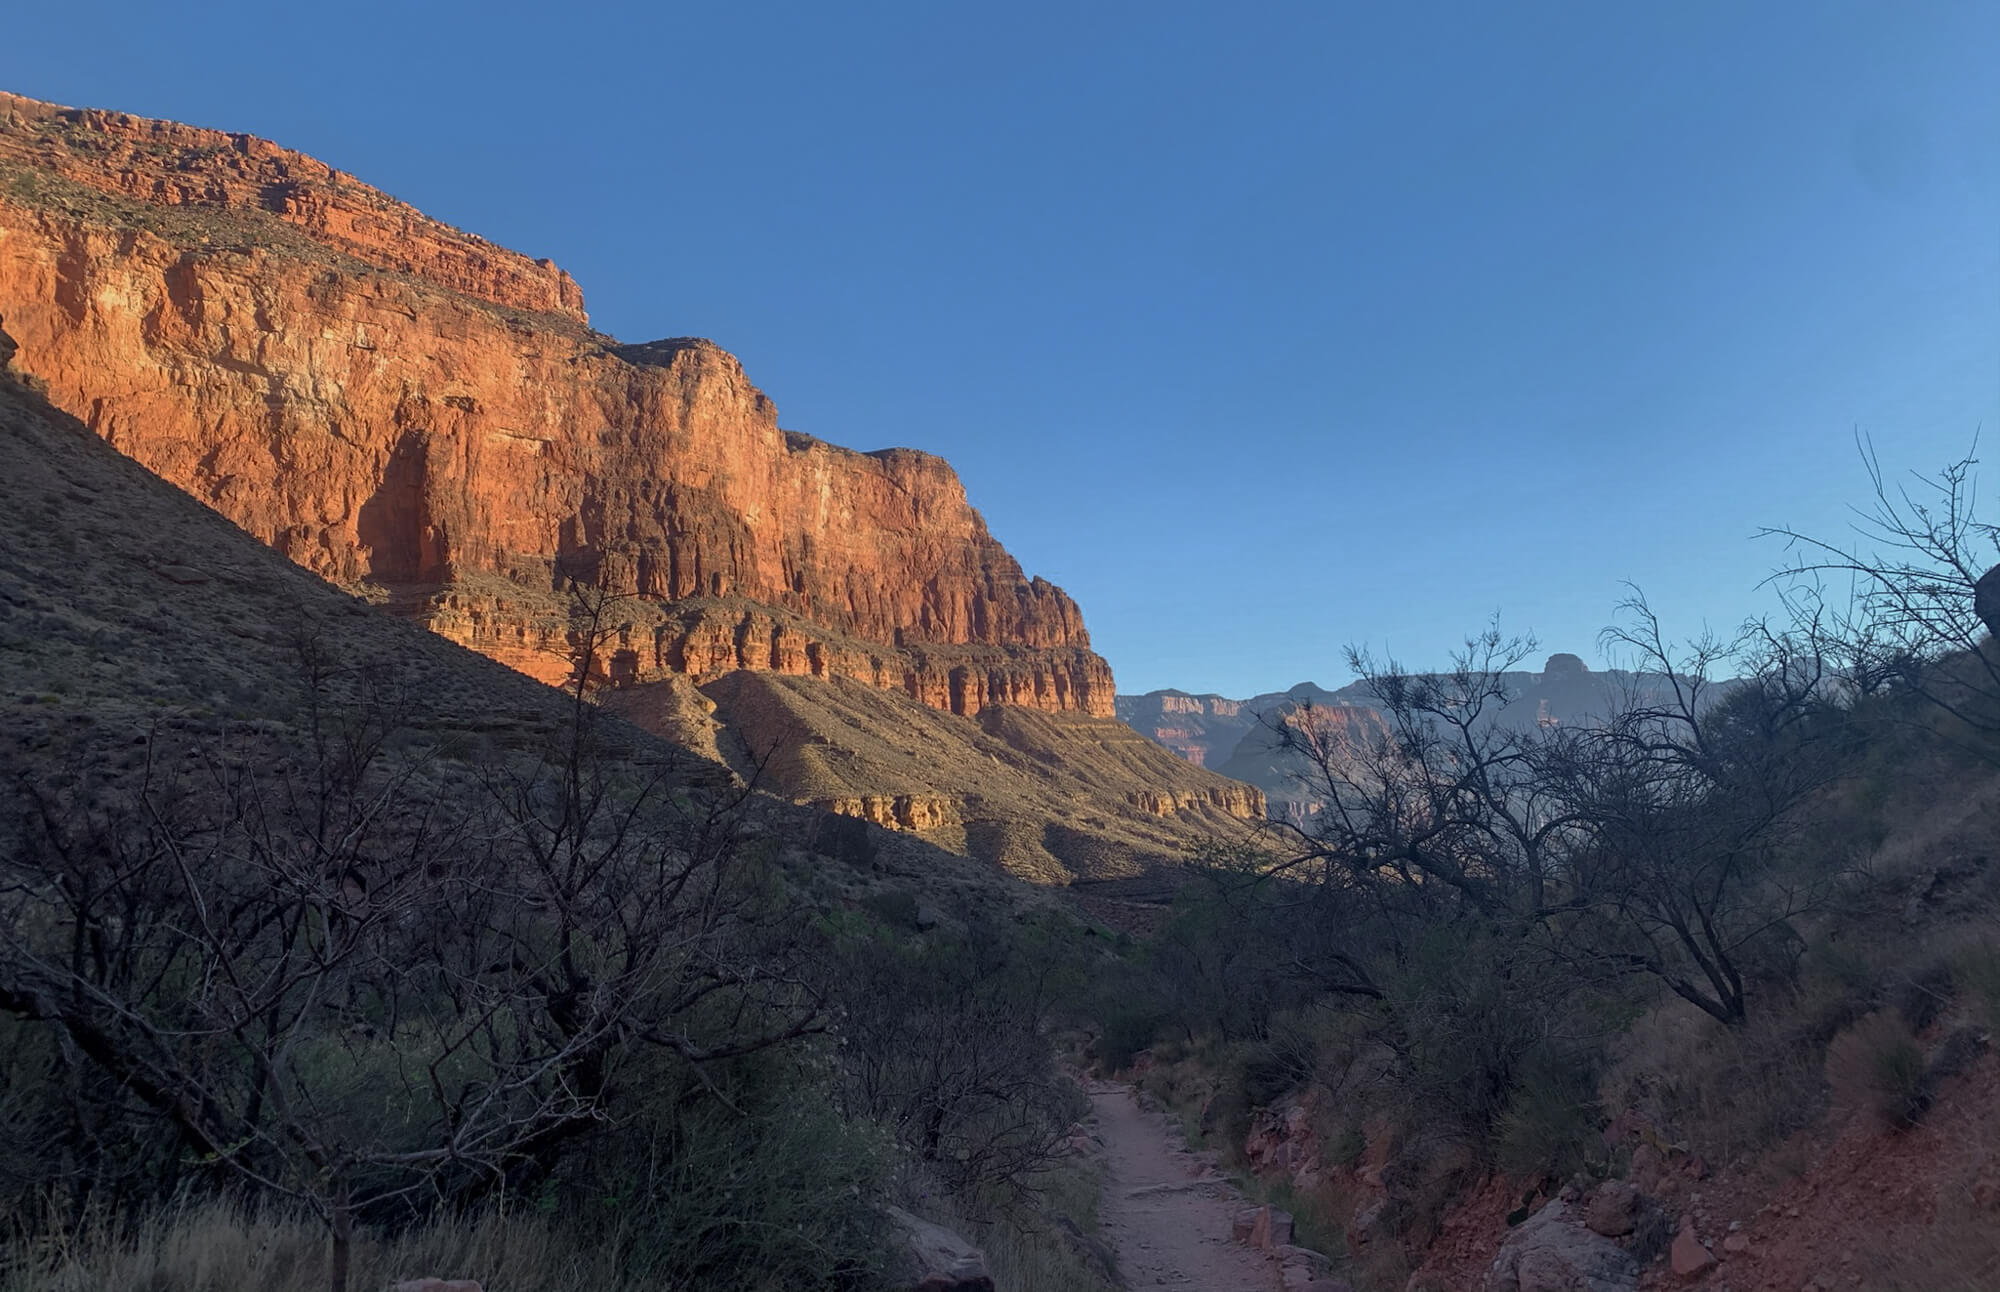
When I was backpacking the Grand Canyon a few years back, I was shocked to see throngs of Arizona Trail thru-hikers wearing hoodies in the 100 degree (40 C) heat. Turns out they weren’t lost tech bros in the Grand Canyon, they were onto something! A sun hoodie has been one of the best items I’ve added to my backpacking kit. They keep you burn free, are surprisingly cool, and let you get away with leaving the bottle of sunscreen at home (or bringing way less). The Sahara Sun Hoodie from REI is literally the only shirt I wear backpacking now.
Convertible hiking pants
Personally, I like zip-off pants. They’re goofy, some people complain about the zippers, but you don’t know until you try! Try the Patagonia Quandary Convertible Pant (view at REI / Backcountry / Pataognia) and find out for yourself.
For women, check out the non-convertible Gamma Pants by Arc’teryx for a great all around hiking and mountain pant (my wife loves them).
A pair of shorts
In addition to hiking pants, it’s nice to have a pair of shorts to change into after a long day on the trail or as a backup option. Trail running shorts are light and comfortable.
Base layer top
Base Layer Bottom
A merino bottom baselayer is perfect for warming up at night or during chilly mornings.
Underwear
These underwear work well for hiking, trail running, mountain biking and skiing. They dry fast and I’ve found them to be more durable than the more expensive ones from lululemon. I usually bring a 2-3 pair depending on trip length.
Patagonia also makes women’s underwear, but I am unable to advise on fit, form, function, or durability on this front.
Hiking socks 3 pairs
I pack 3 pairs of socks. 1 pair for hiking, 1 pair to change into at camp, and a reserve to throw into the rotation as needed. Darn Tough Vermont make the best hiking socks hands down. They’re guaranteed for life/replaced free of charge and they don’t stink. So go ahead and try to get holes in your socks, they’ll give you new ones.
Hat
A ball cap (view at REI / Backcountry) or tilley hat keeps your face protected from the intense mountain sun.
Beanie
Bring a beanie for variable mountain weather, they’re perfect for chilly mornings or evenings.
Sunglasses
Don’t forget to pack your favorite pair, the sun gets intense at these elevations!
Gloves
I bring a thin weatherproof pair of trail running gloves, the Black Diamond Mount Blanc.
Trail runners or hiking boots
Unless you’re hiking in the winter with the potential for snow and cold or you’re carrying the gear for your whole family, I’d choose trail runners for this hike. I’ve had great luck with the both the La Sportiva Bushido II (view at REI / Backcountry) and the Altra Mount Blanc Trail Shoe. The Altra’s are supremely comfortable and my current favorite hiking shoe, but take some time transitioning into them before doing a major hike. These are a zero-drop shoe and diving in headfirst is likely to cause abnormal muscle soreness.
If you insist on sticking to a hiking boot, consider a lightweight model like the Scarpa Rush.
Camp shoes
Crocs (view at Backcountry / REI) are back! Well for backpacking camp shoes they never left… They’re lightweight and ugly as ever. I usually just loosen my trail runners to avoid packing camp shoes, but many backpackers find them to be the perfect camp shoe for resting sore feet after a long day in boots/shoes.
Low gaiters
Low gaiters can help keep rocks, sand, and snow out of your trail runners and save you the blisters.
Microspikes (Season Dependent)
Kahtoola Microspikes (view at Backcountry / REI) slip effortlessly over your boots and make walking on snow and ice a breeze. If you’re tackling this hike early in the season bring a pair along.
Additional Items to Pack
Sunscreen
The sun is extra intense at these high elevations, so don’t forget sunscreen! If you’ve followed my advice about using a sun hoodie, you won’t need to pack much. I prefer mineral based sunscreen, like this one. Plus they’re small, easy to pack and won’t leak all over your gear. If you need even less, they offer a face stick as well.
SPF lip balm
Burnt and dry lips aren’t fun. Avoid the misery by packing SPF lip balm.
Bug Spray
In early season the bugs can be brutal on this hike, so don’t forget bug spray. I hate how DEET bug repellent feels on your skin and how it easily one leaking bottle can destroy your expensive outdoor gear, use this Picaridin Insect Repellent instead!
Toothbrush
If you start contemplating cutting down the shaft of your toothbrush handle to shave a few grams of weight off, you’ve now become a maniacal gram counting ultralighter.
Toothpaste tabs
No need to carry a tube of toothpaste, save weight by counting out the exact number of toothbrushing sessions your hike requires then pack that number of toothpaste tabs.
Duct tape
Duct tape isn’t just your dad’s favorite tool, it also works great for gear repairs and blisters! Take some off a big roll and wrap it around a toothpick or buy this small pack.
Food
I try to avoid the pre-packaged, just add boiling water meals to save a few bucks. However, if you’re strapped for time or just getting into backpacking, they do serve a purpose. If you go this route, I’d suggest the meals from GOOD TO-GO, they use fantastic ingredients with no additives or preservatives.
As another option, head to the grocery store and search for things like lentil rice, ramen, or mac & cheese. Pretty much any item at the grocery store that is dried and requires only boiling water is an easy and less expensive route to go. Always repack this type of food as there is no reason to carry unnecessary packaging/weight on the trail.
If you want to take your backcountry culinary experience to a whole new level, make your own food from scratch. This let’s you control portion sizes. protein content, nutrition, and flavor. It’s also surprisingly easy with a bit of planning. Pickup this dehydrator and a copy of The Dehydrator Cookbook for Outdoor Adventurers and you’ll be a gourmet backcountry chef in no time!
How to pack the right amount of food
To pack the right amount of food for backpacking pre-planning is critical. These are the steps I follow to get my menu organized before a trip:
- Create a list with each day you’ll be on the trail as a header. Ex. Monday, Tuesday, Wednesday
- Create sub headers within each day for the following categories: Breakfast, Snack 1, Lunch, Snack 2, Dinner
- Purchase/make food to fill in every blank on the list and write each item down as you accumulate it. Add a couple extra bars or an extra dinner as buffer for emergencies.
- Repackage all bulky food. Puncture large air pockets and place items in ziplocks.
- Lay everything out by day and subcategory in your kitchen, living room, or wherever you have room. This serves as a final check against forgetting anything and makes packing easy.
- Once you’ve confirmed you have everything, load it into your bear can in reverse chronological order (last day goes in first to the bottom of the can). This helps minimizes digging through your bear can on the trail.
Final Thoughts
- The hike up the Big Pine Creek North Fork trail to the Big Pine Lakes is a truly remarkable backpacking trip that provides easy access to some iconic Sierra Nevada scenery.
- Although the permit is hard to get and this hike is popular, it never seemed overly crowded especially camping at the higher lakes.
- Pallisades Glacier trail was a highlight.
- 2-3 nights is the perfect trip length.
Questions about hiking the Big Pine Creek North Fork trail? Drop me a line in the comments below and I’ll do what I can to get back to you. Happy trails!
Michael