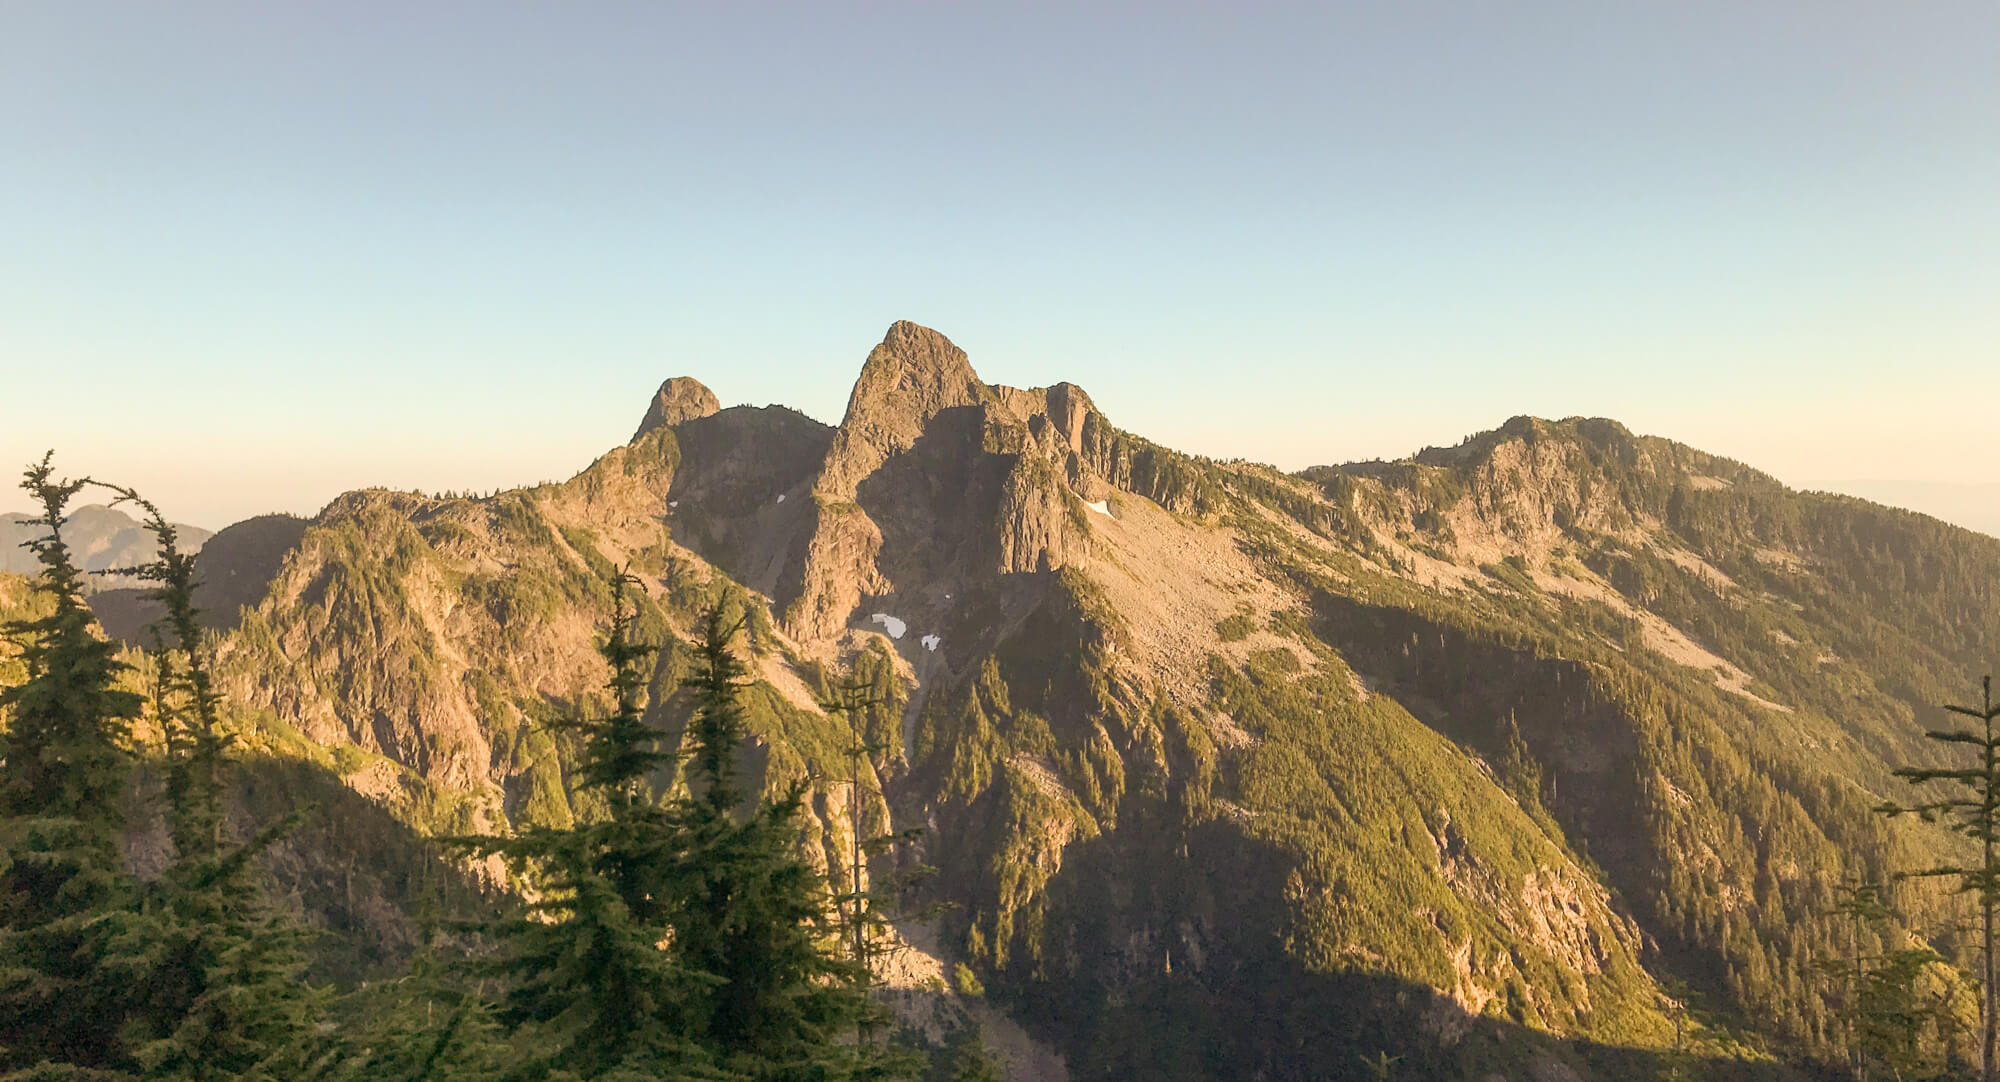
The Howe Sound Crest Trail (HSCT) serves up a taste of incredible BC backcountry only minutes from downtown Vancouver! For over 29 km the trail rapidly climbs and descends along the spine of the Howe Sound Crest past iconic peaks like the Lions, James Peak, Mt. Harvey, and Brunswick Mountain. Along this epic hike you’ll be inundated with stunning vistas of the Coast Mountain Range and the Howe Sound far below. The Howe Sound Crest Trail is ambitious 1-2 night backpacking trip (or epic trail run) that features several small scrambles, mild exposure, and a few precarious spots with chains/ropes. If you’re expecting tent pads, bear lockers, toilets or anything that feels remotely similar to established backpacking trips like Elfin lakes, this isn’t the hike for you. That said, the HSCT rewards intrepid backpackers with a trip unmatched by anything with this proximity to Vancouver.
* Some of the links in this post may be affiliate links. If you click one of the links and make a purchase we’ll earn a small commission at no cost to you. We’re very particular about products and we only recommend products, services, or accommodation we trust and use ourselves.*
Need to know for hiking the Howe Sound Crest Trail
- Difficulty: Tough
- Distance: 29 km Official Distance from BC Parks (28 km according to my GPS)
- Elevation Gain: 1700 m (Cypress Mountain to Porteau Cove)
- Elevation Loss: 2500 m (Cypress Mountain to Porteau Cove)
- Permit Required: Not required
- Navigation: Established trail that is relatively easy to follow
- Water Sources: First ~ 1/2 can be dry particularly in late season. Carry enough water to reach the tarn at Magnesia Meadows
- Food Storage/Bears: Bear canister or Ursack needed. No established bear caches on trail.
- Best Campsite walked past or stayed at: Magnesia Meadows.
- Trail advisories and info link: BC Parks Cypress
Things you’ll love about backpacking the HSCT
- Easy access from Vancouver.
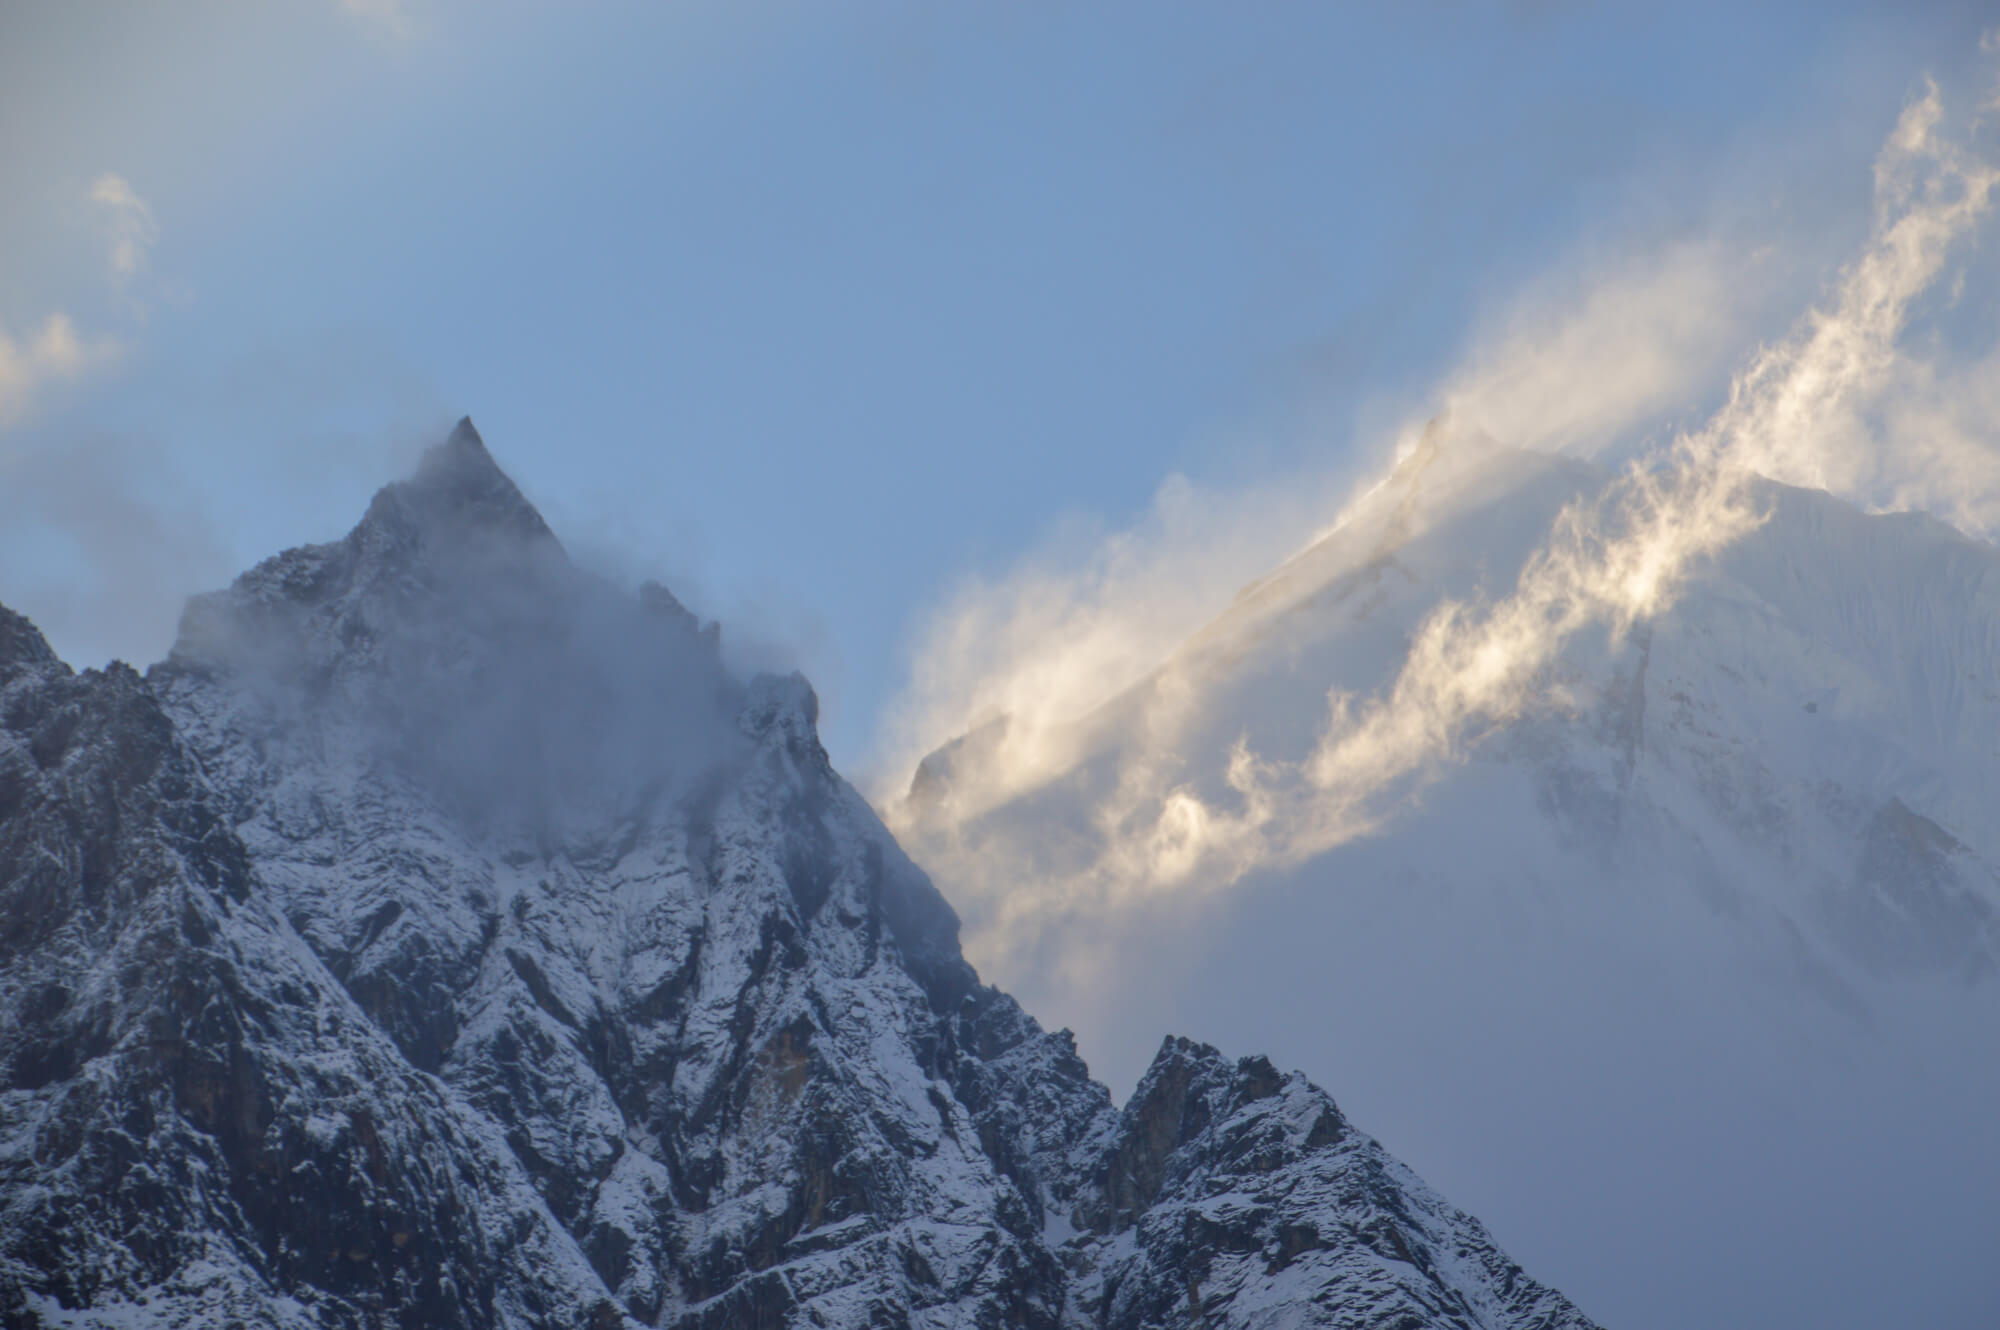
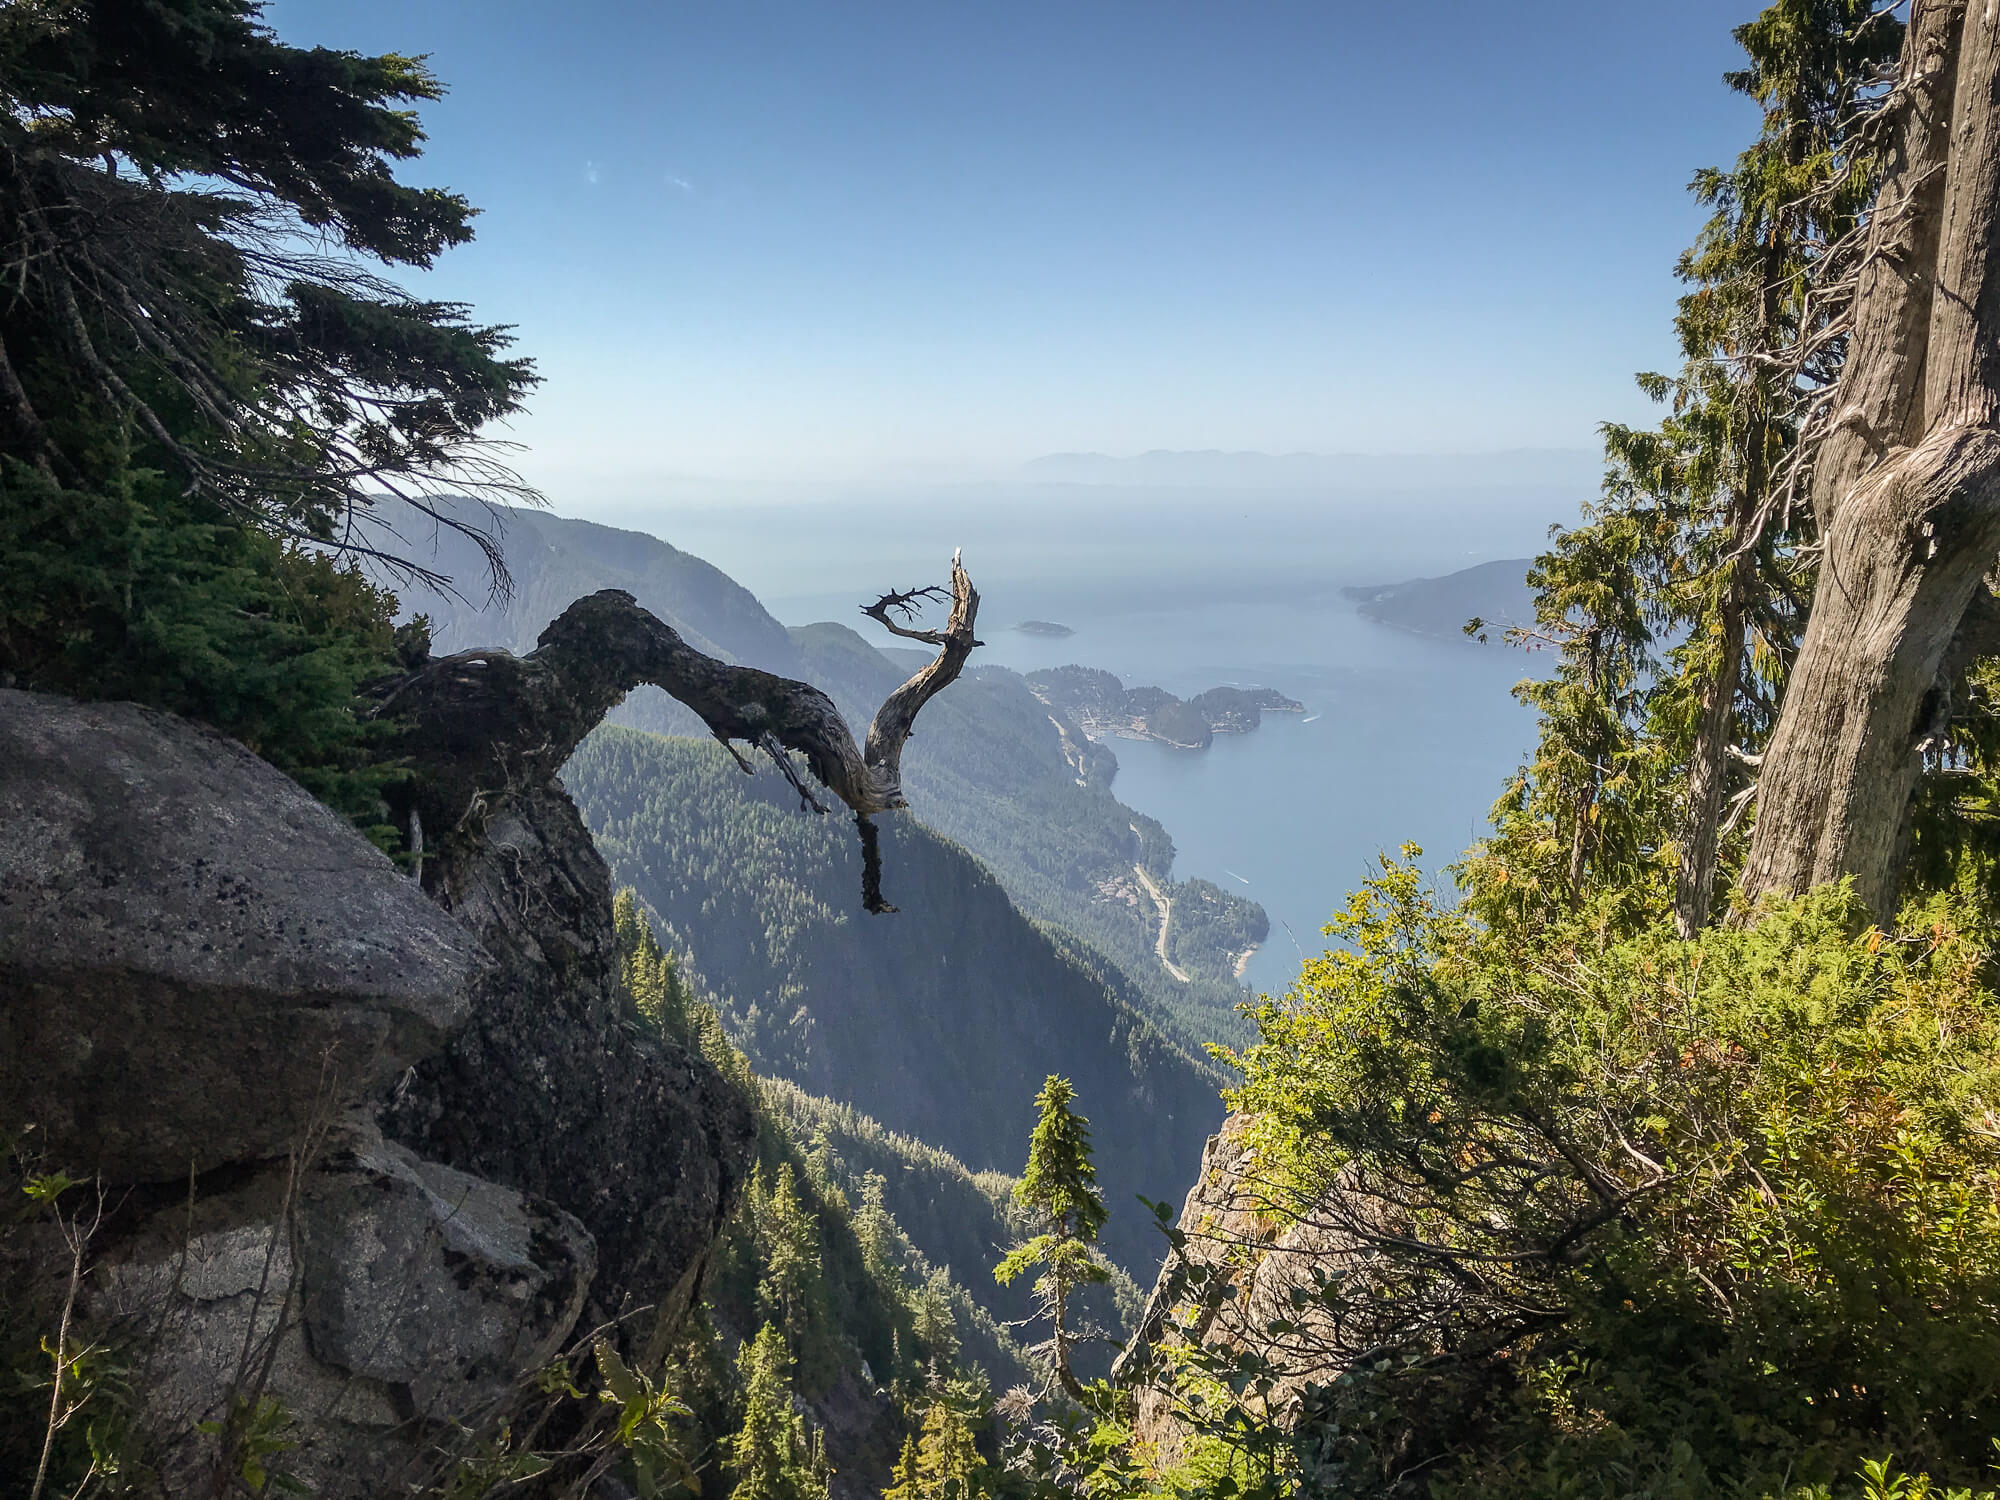
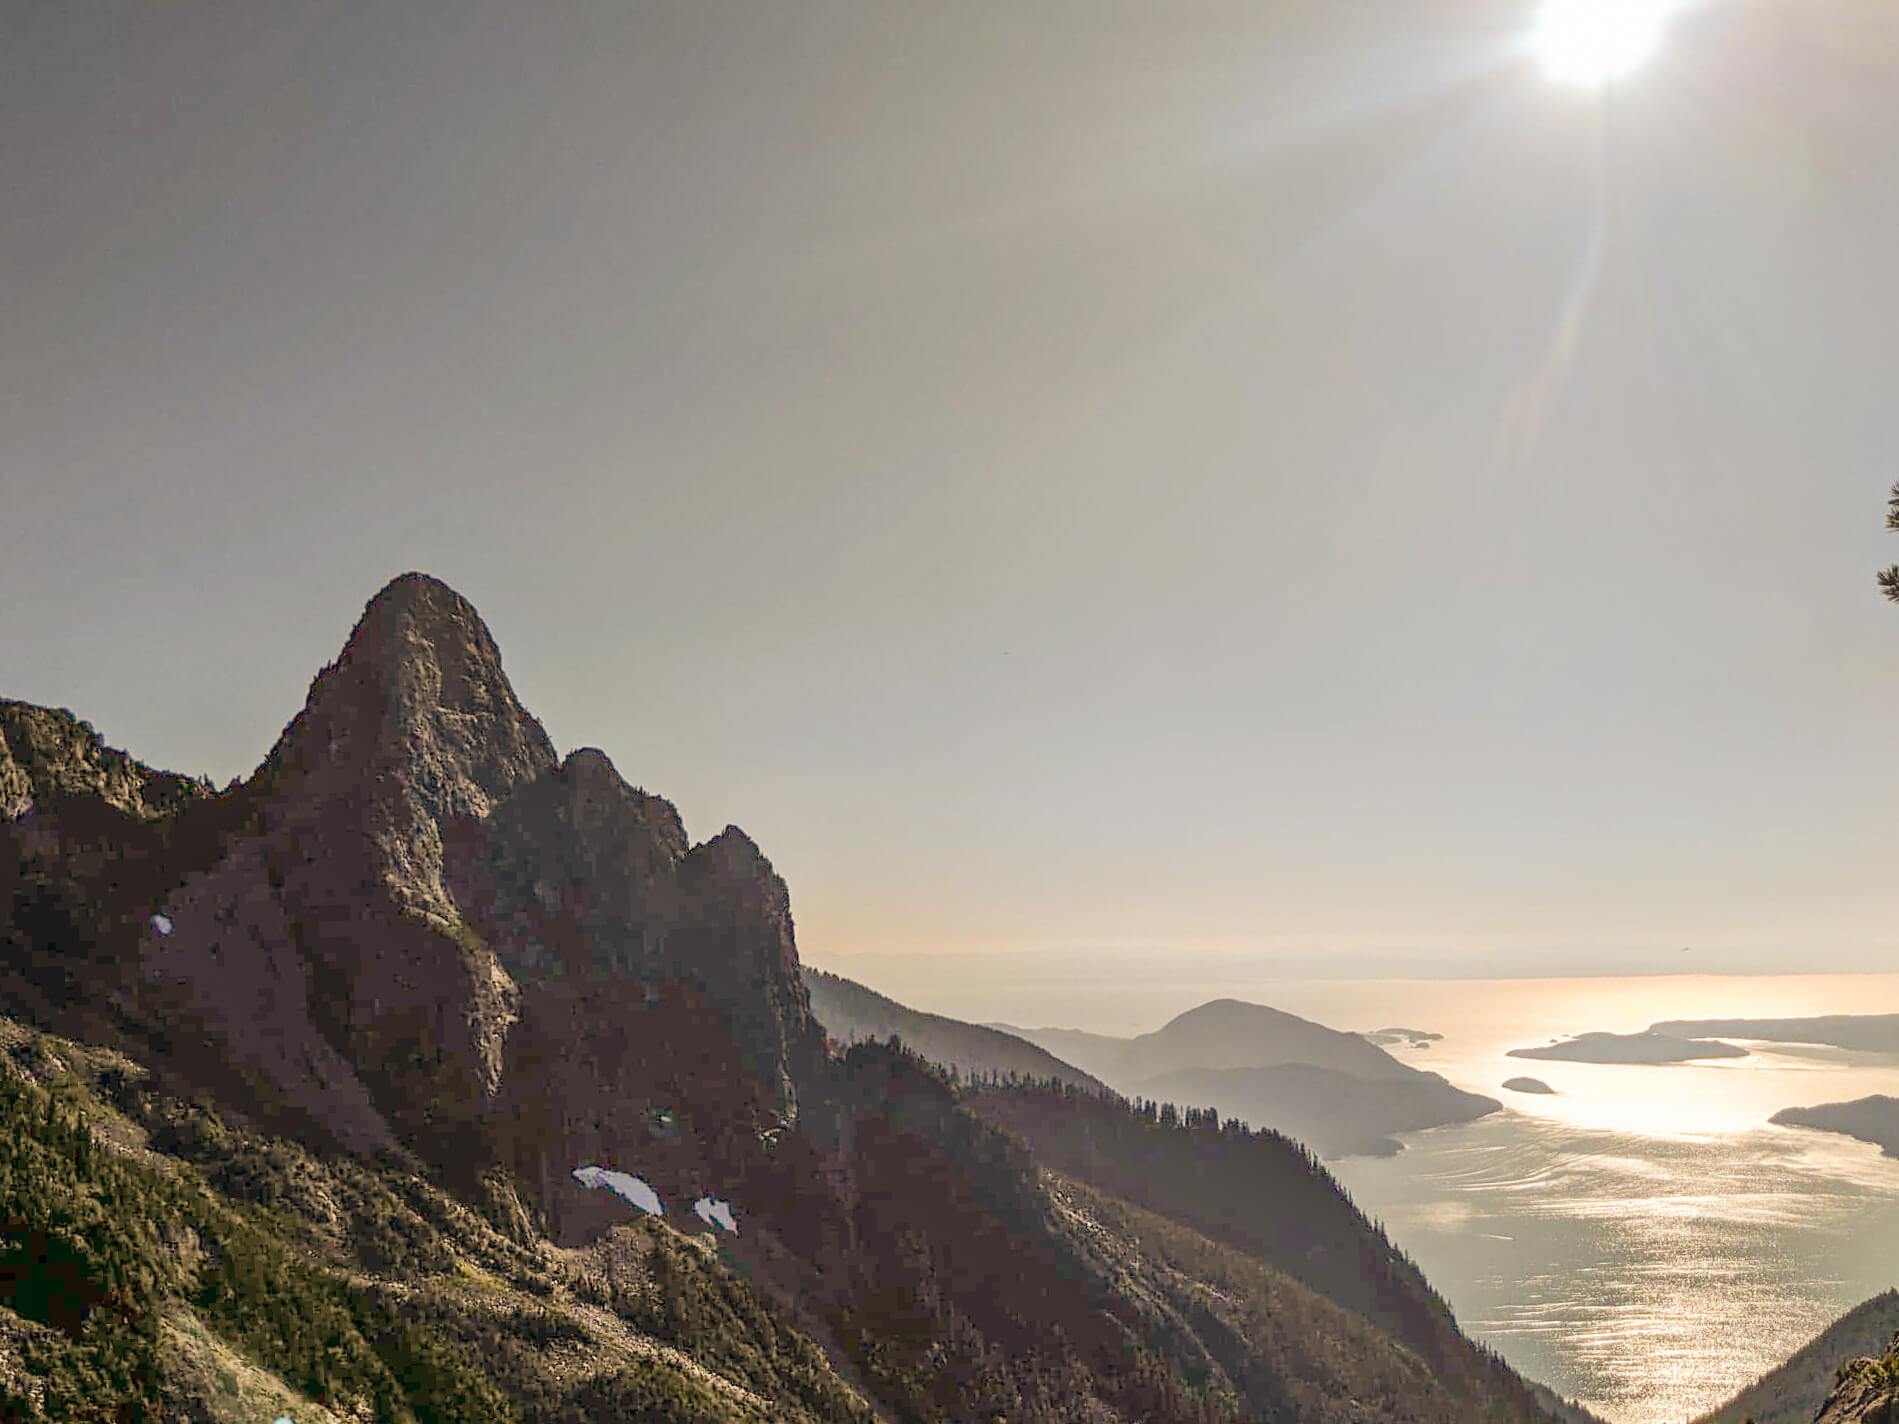
- Incredible scenery with the hike traversing the crest of the Howe Sound.
- True backcountry experience with no established campsites.
- Incredible lakes and peak bagging opportunities.
- Easily manageable weekend trip.
Things you won’t love about backpacking the HSCT
- Requires shuttling cars or arranging a pickup/drop-off from Porteau Cove
- Steep descents and rope sections can be tricky with a heavy pack.
- Limited water availability on first half of hike (heading south to north) in summer and fall.
- Having to hike with/past the throngs of day hikers to St. Marks Summit.
- The last 3.5km to Porteau Cover are an anticlimactic trudge along a road.
What to pack for backpacking the Howe Sound Crest Trail
Here’s a quick summary of what to pack for backpacking the Howe Sound Crest Trail. You’ll find a detailed breakdown of each item at the end of the post with rational, alternatives and quick links to check prices.
Don’t Forget
- Bear canister or Ursack for food storage,
- Travel Insurance with Emergency Medical (if travelling from outside Canada)*
- Bear Spray
Essential Items
- Tent
- Backpack
- Sleeping pad
- Backpacking Pillow
- Sleeping Bag or Quilt
- Water Purification
- Trowel, TP, & Hand Sanitizer
- Swiss Army Knife
- Stove & Fuel Canister
- Lighter & Matches
- Compact Backcountry Cookset & Spork
- Water Bottle or Reservoir
- Extra Water Storage Container
- First Aid Kit
- Trekking Poles
- Headlamp with red light mode
- GPS, Compass & Map
- Battery Back-Up & Charging Cable
Clothing and Accessories
Additional Items
- Microspikes (early season only)
- Sunscreen & SPF lim balm
- Bug Spray
- Tooth Brush & Toothpaste tabs in ziplock
- Duct Tape (for repairs and blisters)
- Food (I love these soups/chilis)
Luxury Items (very optional)
How to get to the Howe Sound Crest Trail
The Howe Sound Crest Trail is typically done as a point-to-point hike from south to north starting from Cypress mountain near West Vancouver and finishing at Porteau cove. North to south navigation is also possible, but adds significant elevation gain to your hike (see below).
There is no Translink (public bus) available to Cypress mountain or Porteau cove, but Cypress Coach Lines does offer transportation to the Cypress Provincial Park during the summer months and into the middle of September. You can also take an Uber/Lyft directly to Cypress mountain.
The HSCT is a point-to-point hike and you need a solution for returning (or getting to) from Porteau Cove. For this you’ll either need to bribe someone to pick you up, drop a car in advance, or be forced to try your luck hitchhiking.
If you wan’t to beat yourself up with even more elevation, you can take Translink (public transit) to Horseshoe Bay and hike up the Baden Powell to Cypress Mountain . This adds an extra 9km and over 1000 meters of elevation gain to an already long and strenuous adventure. I did this in 2019 when ride-share apps or the private bus were not available. It made for a long, brutal day with close to 3000 meters of elevation gain.
Should you hike the HSCT North to South or South to North?
The Howe Sound Crest Trail is typically hiked from South to North (Cypress Mountain to Porteau Cove) as going this route decreases your net elevation gain. Choosing this direction, you’ll climb 1700 m and descend 2500 m vs the reverse on North to South itineraries.
Either way you slice it, the beginning and end are somewhat anticlimactic bookends to this amazing hike. You’ll either be slogging your way down a gravel road for 4km to finish or pushing past throngs of day hikers on the ever popular Saint Marks Summit.
Can you bring dogs on the Howe Sound Crest Trail?
No, BC parks states that Backcountry areas are not suitable for dogs or other pets due to wildlife issues and the potential for problems with bears. Additionally, there are several segments of the HSCT that your dog will not be able to negotiate. Every year there are several forced evacuations as a result of people trying, so leave your dog at home for this one
Can you have campfires?
No, campfires are not allowed on the HSCT.
Campsites on the Howe Sound Crest Trail
Only wilderness camping is available on the HSCT. That means you will not find any amenities like outhouses, tent pads or bear hangs/caches. Rules for minimum impact camping must be adhered to. Make sure to:
- Properly store all food using either a Bear canister or Ursack.
- Bring a trowel and dig a cathole a minimum of 6 inches deep and at least 200m away from any established trails, campsites, or water (creeks, lakes, rivers etc.). Pack out your TP.
While no established campsites exist there are several locations that are frequently used and incredible spots to spend the night.
Magnesia Meadows
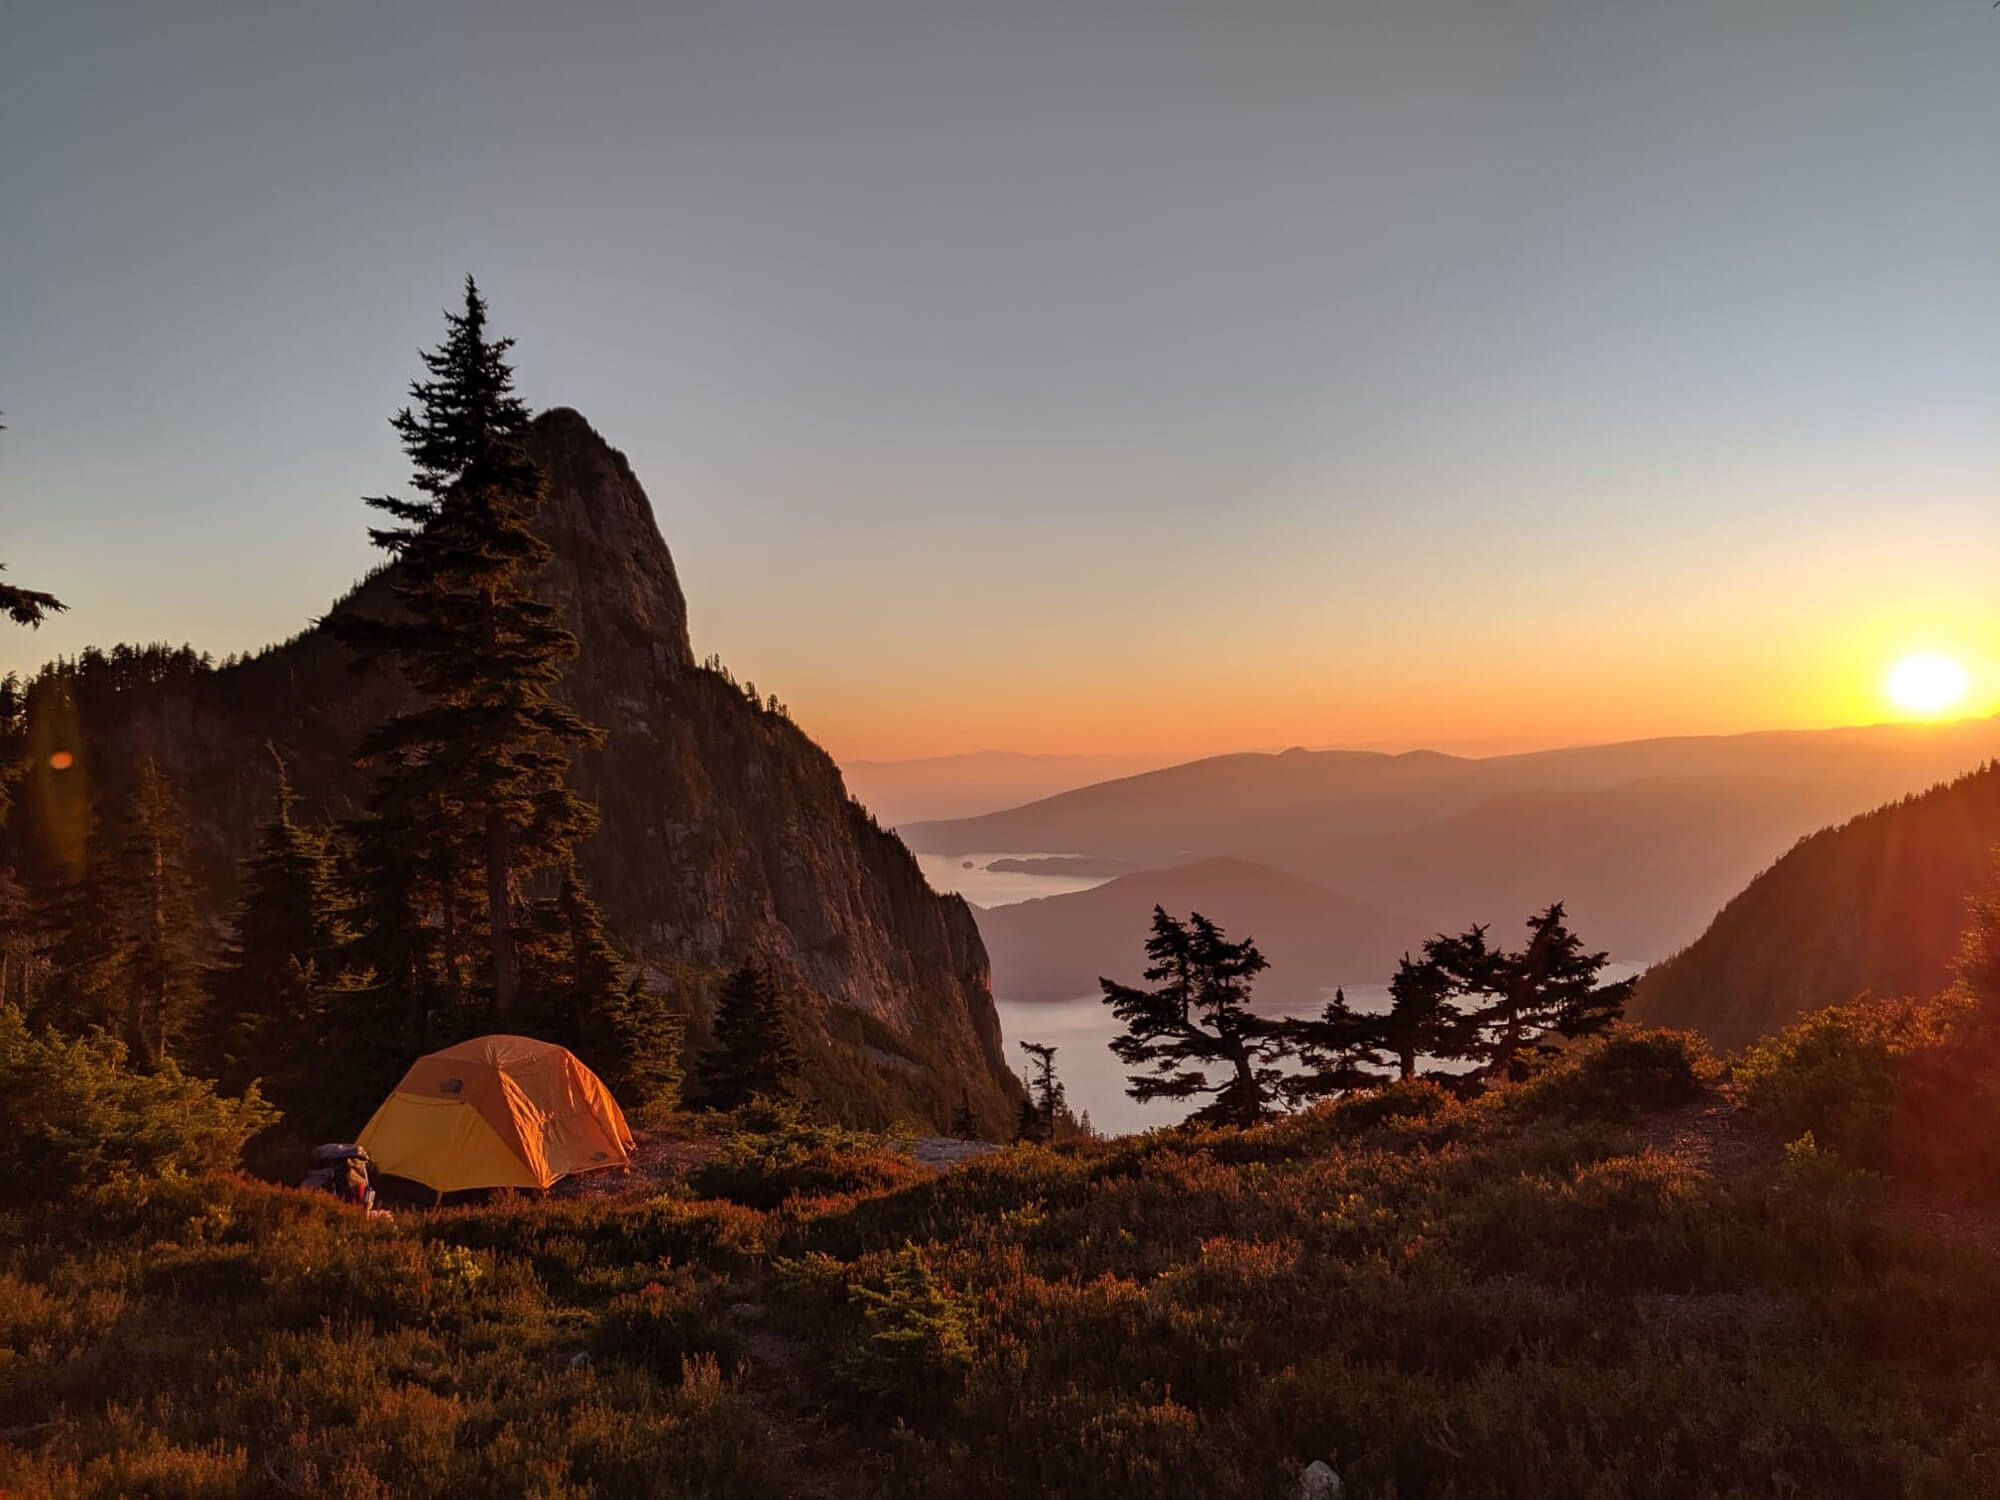
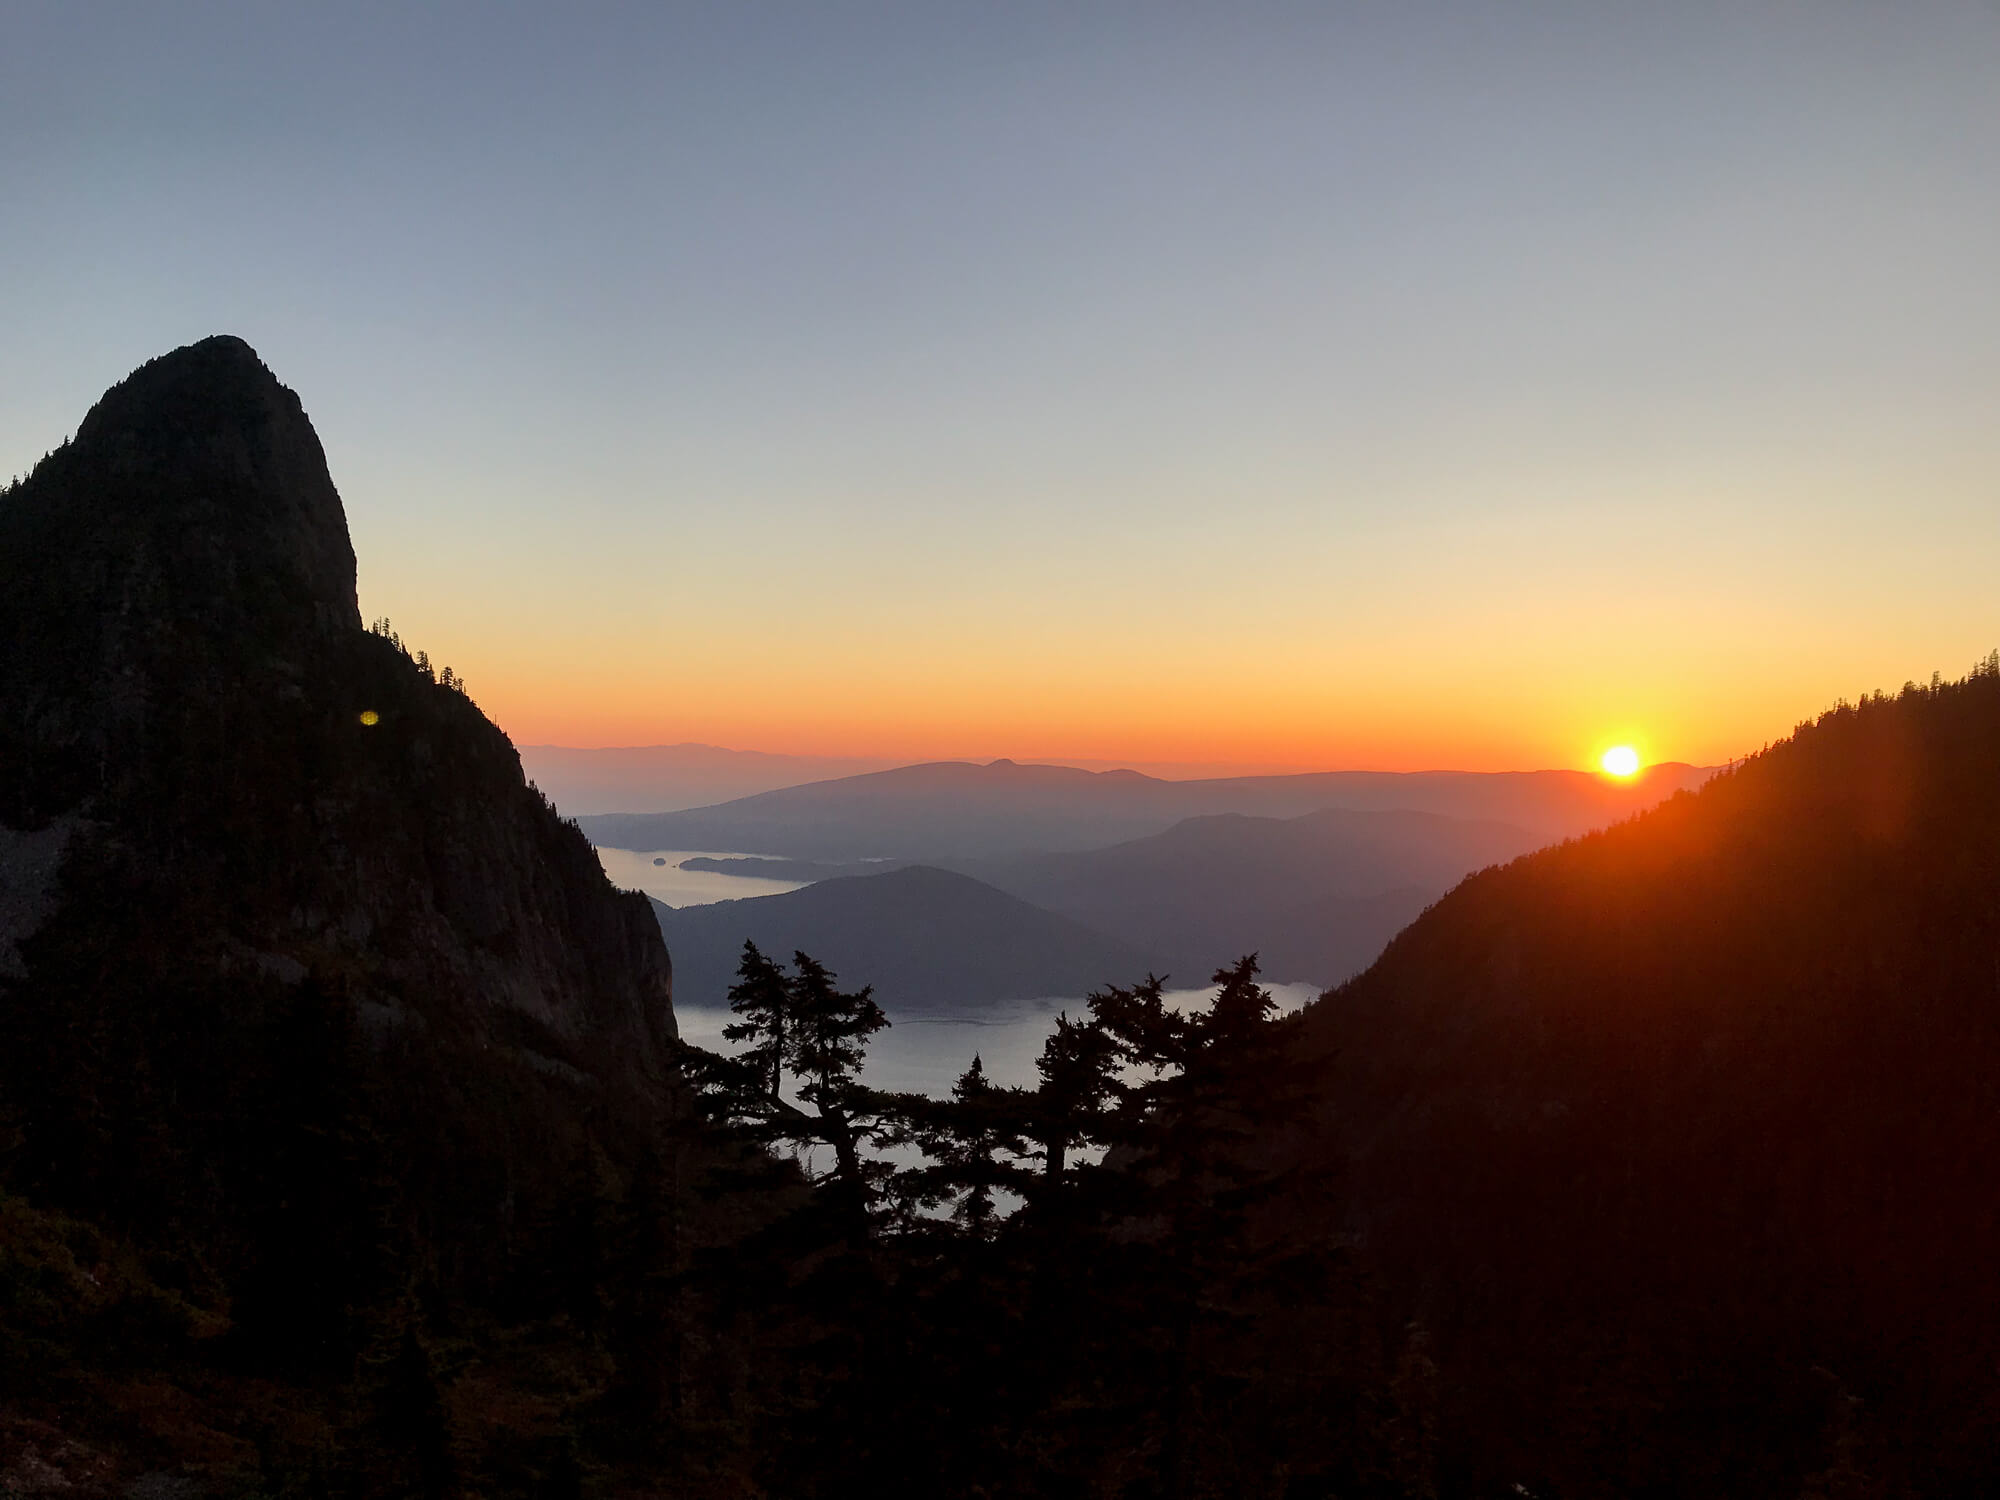
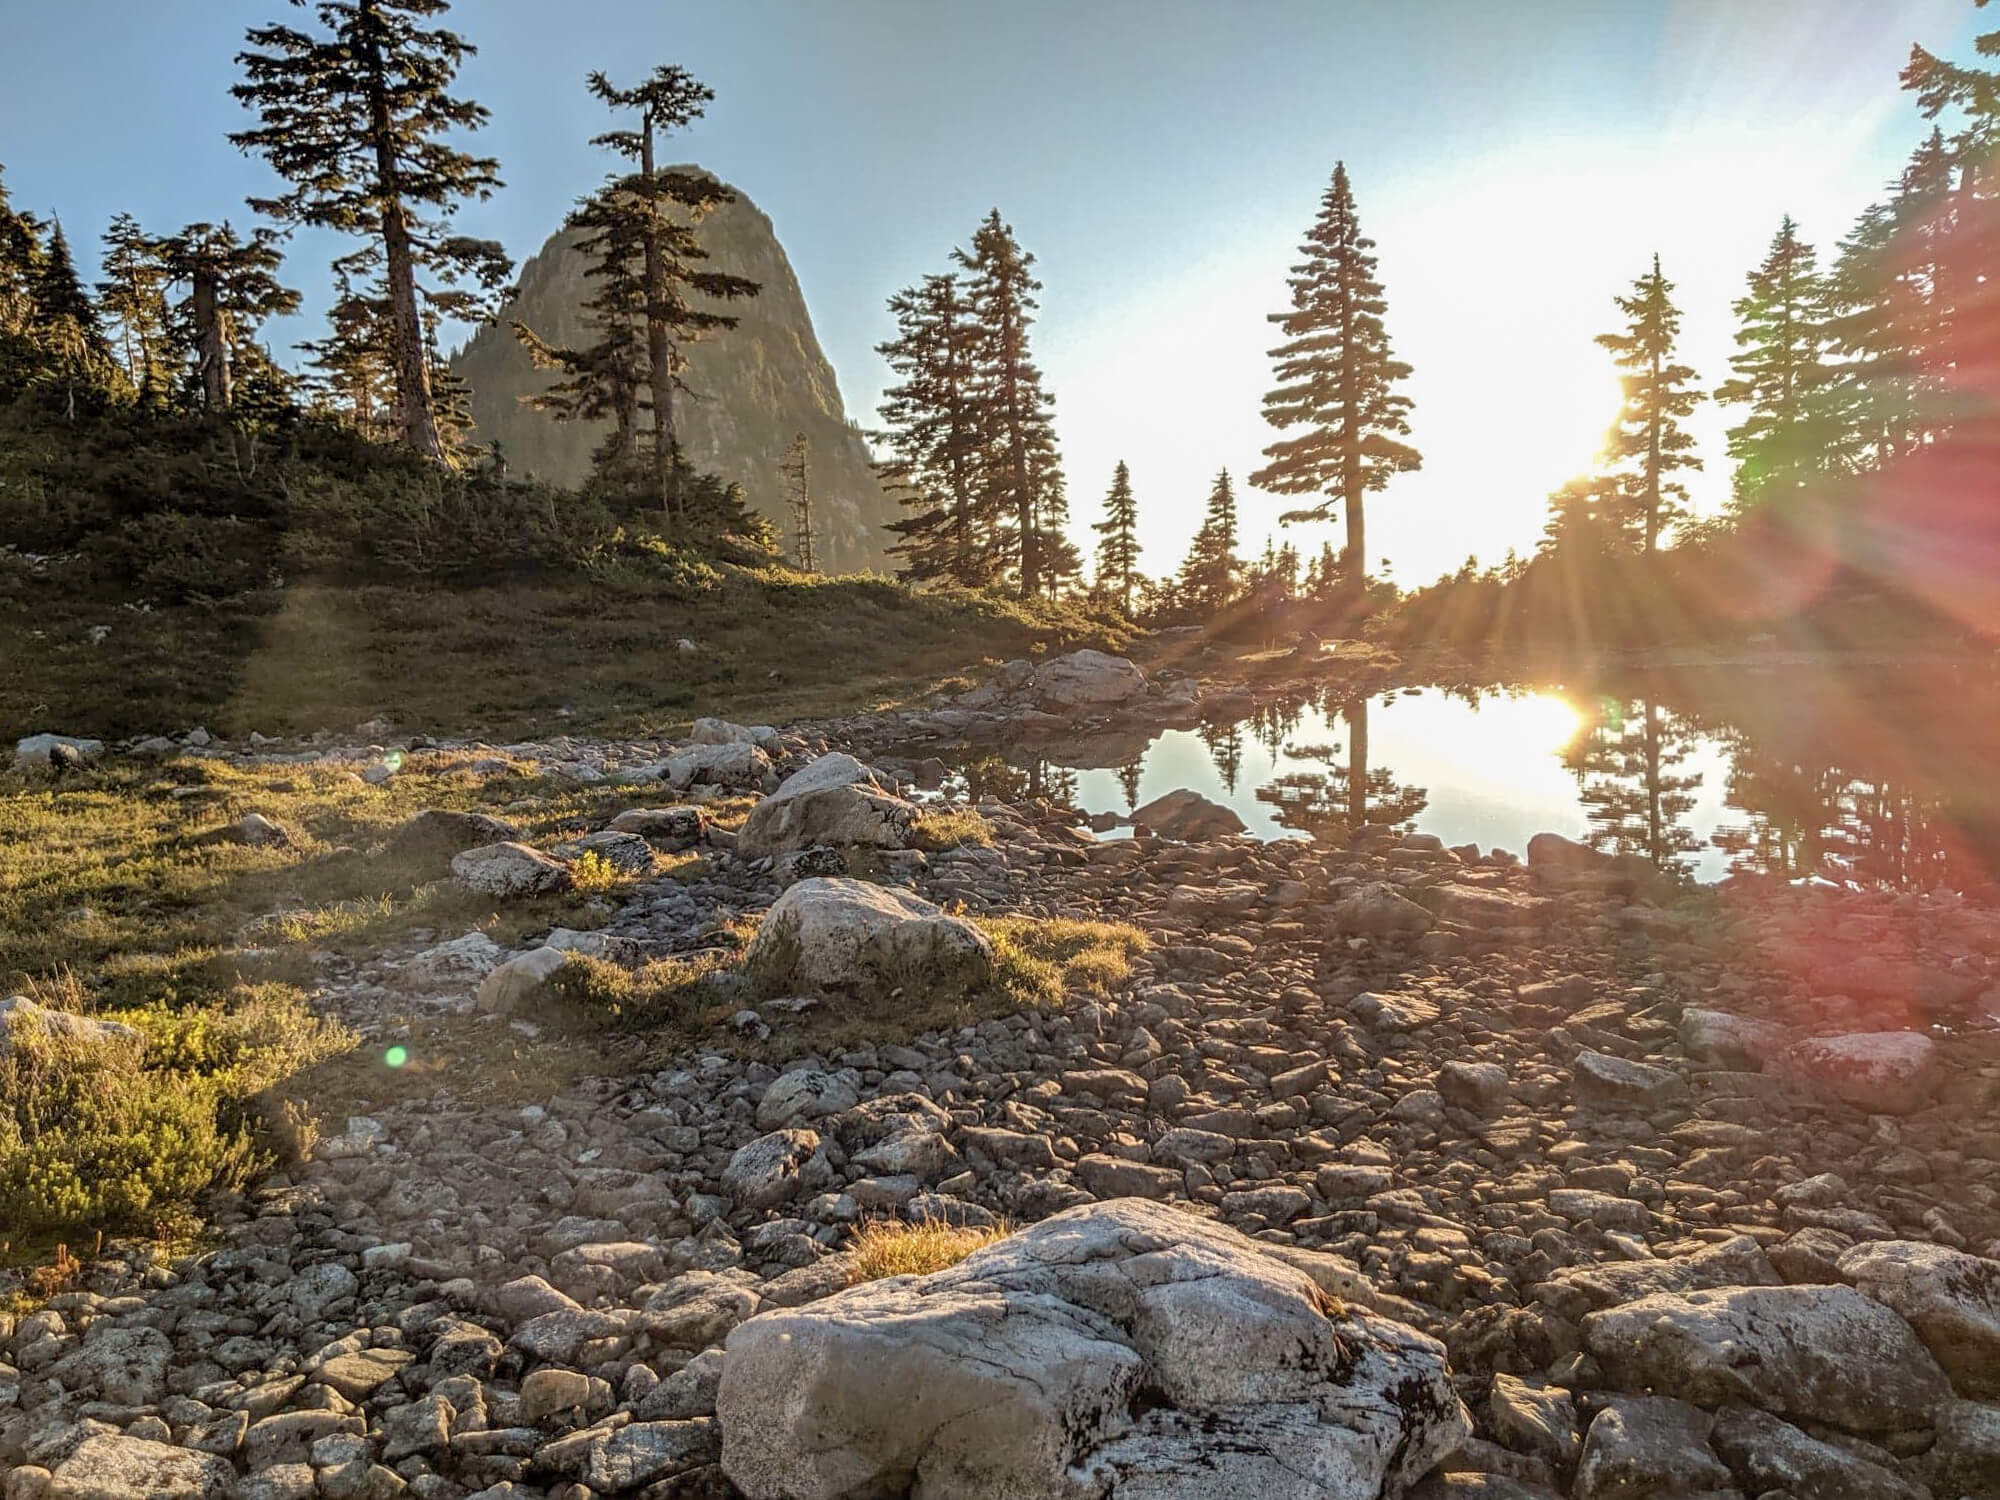
About 15 km from the start of the Howe Sound Crest Trail, Magnesia Meadows is a logical camping spot for a 1 night trip. Situated in a beautiful alpine meadow the sublime sunset views of Mt. Harvey and the Howe Sound (see photo above) are the perfect balm for aching legs. There is a good water source here provided by a small tarn, that is close walk from the emergency shelter area where most people camp.
Brunswick Lake
19 km from the start of the trail Brunswick Lake is another excellent spot to camp and works particularly well for those looking to shorten their second day on the trail (and lengthen their first day). Brunswick lake is picturesque and a great spot to cool off on a hot summers day! Continue past the emergency shelter at Brunswick Lake before taking a right at the fork (South to North hikers) and head towards the lakes south shore for the best camping spots.
Deeks Lake
22 km from the start of the trail, Deeks Lake is your final (appealing) option to camp on the HSCT. After this point, the trail follows along Deeks creek before becoming quite uneventful. While both Brunswick and Magnesia are far better camping options, this site placement may be convenient for North to South hikers looking for a spot to camp on night 1 after a late start.
Near the Tarn by Unnecessary Mountain
For those looking to complete the HSCT in a couple nights, via a South to North traverse, you have to get a bit creative. Look for a faint trail leading to several small tarns in the basin to the South of the HSCT after descending slightly from Unnecessary Mountain. You’ll be forced to drop about 50m of elevation off the main trail and the route here is not always clear, but there are few other options for camping (with water) before Magnesia meadows.
How long will it take to hike the Howe Sound Crest Trail
To give you an approximate idea, here’s my rough timing for the Howe Sound Crest Trail done as 2 days and 1 night. I added several hours by hiking up the Baden Powell trail to Cypress Mountain from Horseshoe Bay to start my first day (wouldn’t recommend).
As a baseline, I’d classify my pace on the faster side, but my gear setup was alot heavier when I did this hike, so ultra-lighters can definitely shave some time off. Either way, leave early on day one to avoid hiking in the dark, especially in the fall as the days grow shorter. This is a tough hike with lots of elevation gain and loss and numerous sections that are very slow going. The kilometer distance is deceiving and it feels way longer than it is.
These were my approximate times:
Horseshoe Bay to Cypress Mountain via Baden Powell Trail – 2.5 hrs
Cypress Mountain to Magnesia Meadows (with a couple quick stops and maybe 20-30 minute lunch) – 9 hours
Magnesia Meadows to Highway 99 (including add on up Brunswick Mountain, swim in Brunswick lake and lunch) – 7 hours
Sections of the Howe Sound Crest Trail
I’ve broken this trip down into sections with approximate distance and elevation gains/loss based on the standard South to North route. Note there is a 1km variance between my GPS measured distance and BC stated distance for the Howe Sound Crest Trail..
Cypress Mountain to St. Marks Summit
500 m Elevation Gain (50M loss)
6 km
From the overnight parking lot at Cypress Mountain hike to the main ski area until you see the day lodge is on your left hand side, then head toward the main wooden sign post for the ski resort. You should see several sign posts indicating St. Marks summit and the Howe Sound Crest Trail, this is where your hike begins.
The first 5ish km of the Howe Sound Crest Trail meander through the trees before making several switchbacks to the top of St. Marks summit. The first part of the trail is relatively uneventful and can be busy. St. Marks Summit is a hugely popular day-hike and the throngs of running shoe, jean clad, hikers may leave you wondering if you’ve somehow gotten lost … Fear not, following St. Marks the crowds thin and the hike becomes a lot quieter (and more enjoyable).
Once you’ve reached the summit of St. Marks, follow the path off to the left to find the best view spots and take a moment to savor your first great vista. You likely won’t have the view to yourself, but it’s gorgeous nonetheless and worthy of a snack stop.
Once you’ve savored the views, the trail drop steeply down the backside of St. Marks before beginning the steep ascent up the appropriately named Mt. Unnecessary.
St. Marks to Mt. Unnecessary
350 m Elevation Gain (150M loss)
3 km
I found the ascent up Unnecessary to be the most mentally taxing, although far from the most technically challenging. It’s in the trees, your pack is at its heaviest (assuming you haven’t already eaten too much food) and the toll of descending St. Marks just to make an unnecessary up again is a slog. Fortunately, after grunting your way up for a while, the trees begin to thin out and you’re granted an incredible view of the Howe Sound – the perfect antidote to unnecessary suffering!
Unnecessary Mountain to West Lion
150 m Elevation Gain (100M loss)
1.5 km
From the top of Unnecessary mountain you’ll make a scramble down a steep roped section before the grade eases briefly as you continue towards the base of the Lions. Keep your eyes peeled for a small trail to the right that provides a detour and option to fill up your water via steep descent to the tarns below. If you’re planning a multi-nighter, there are also a few spots in here to camp within reach of the tarns.
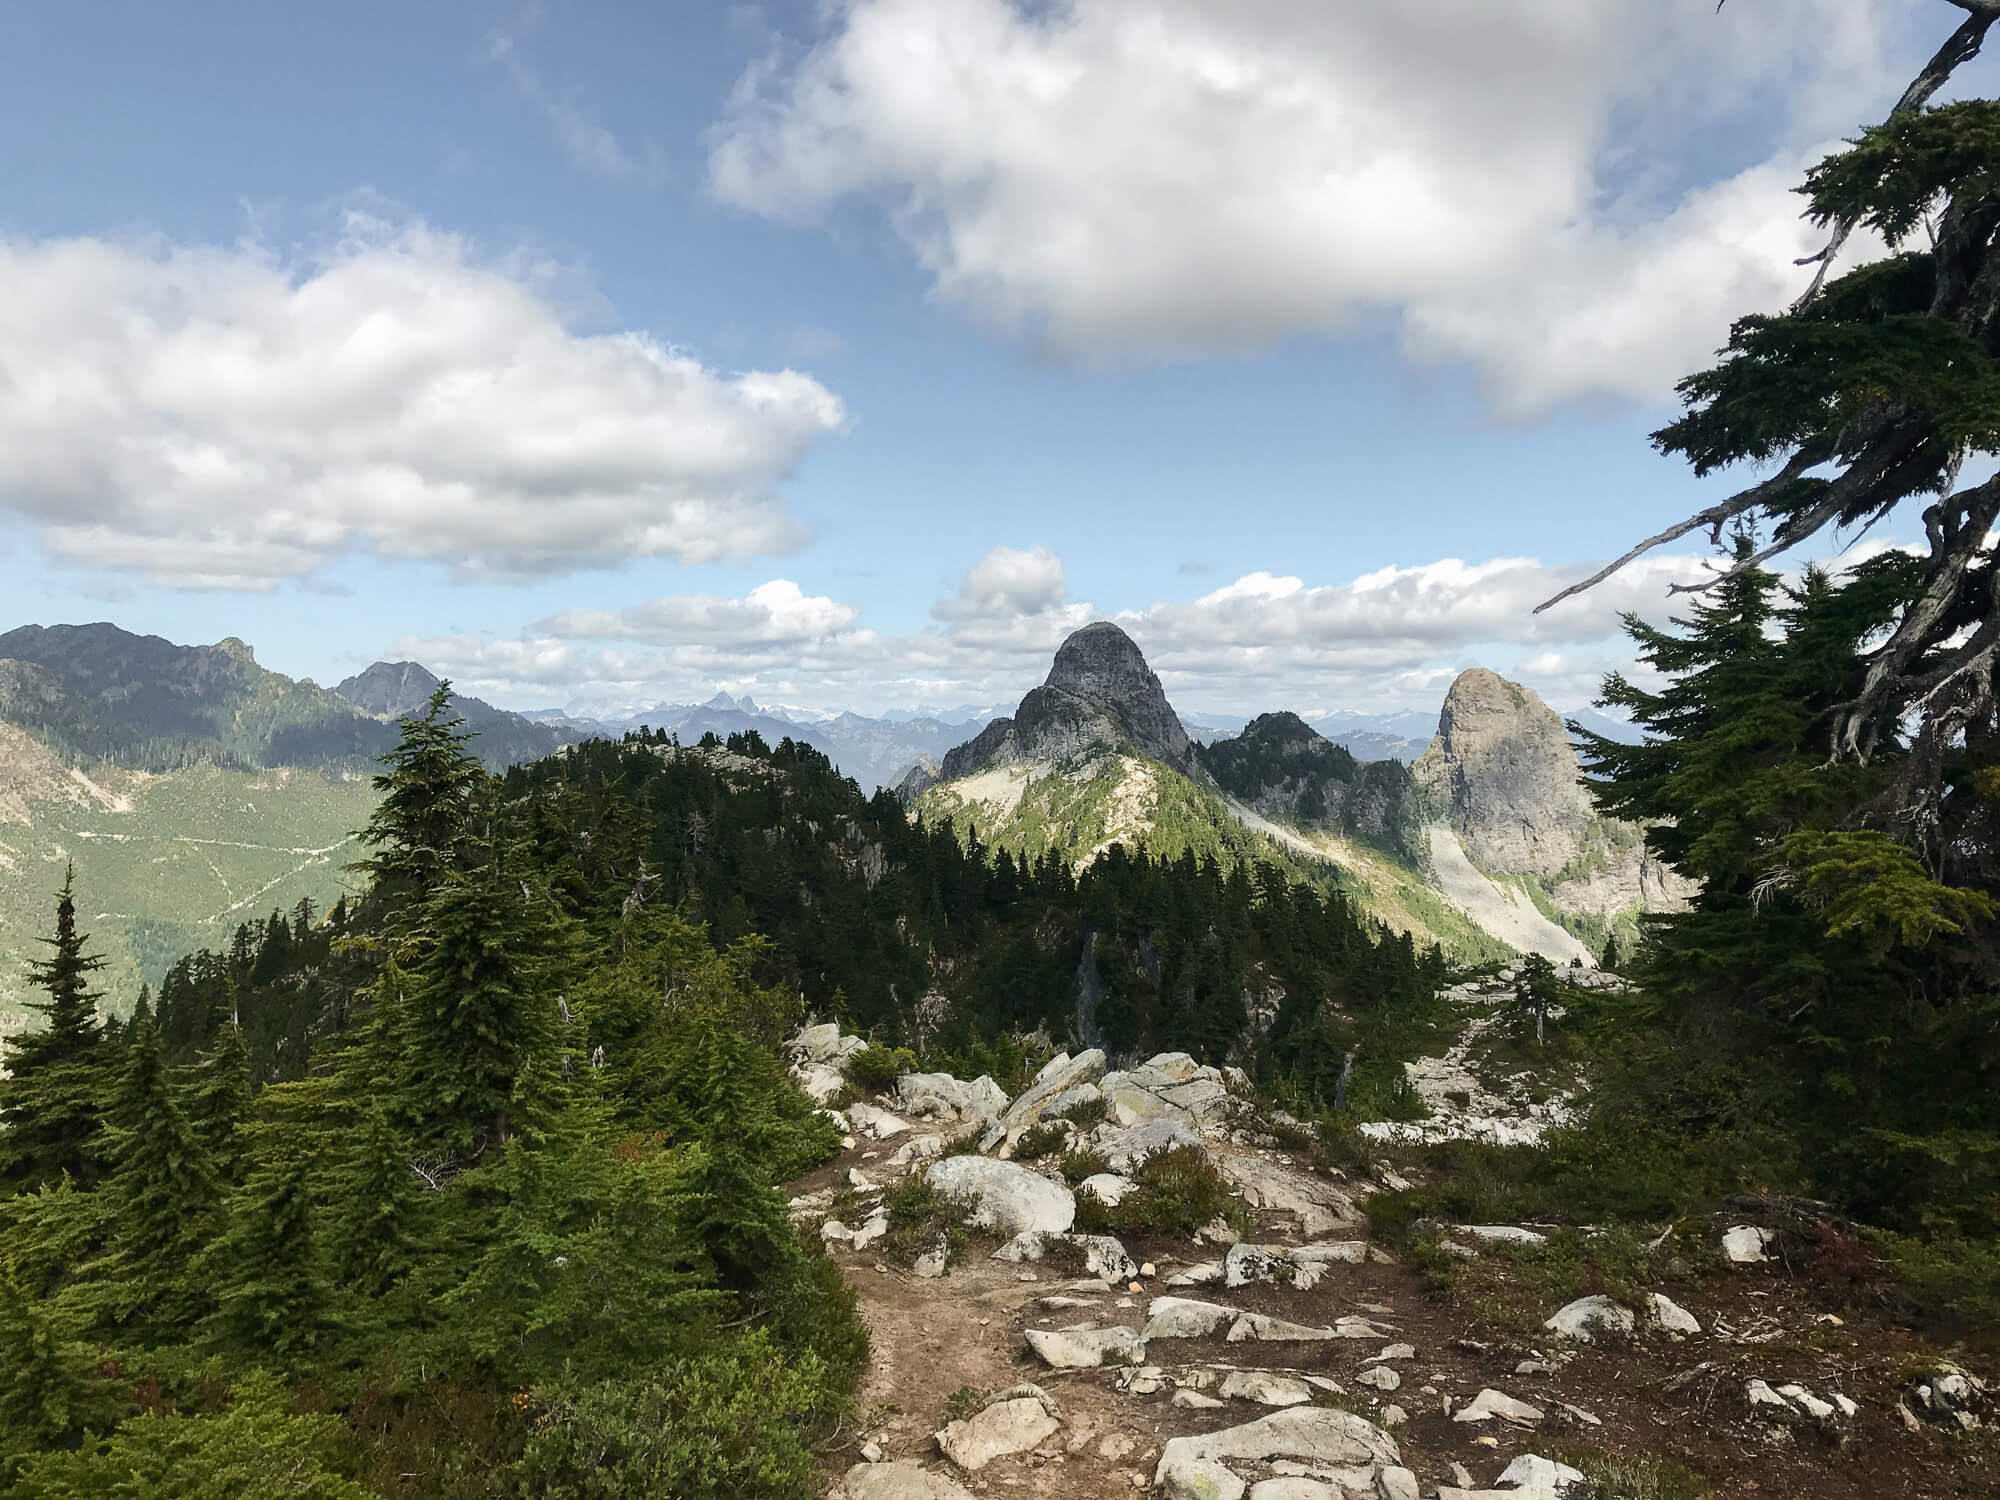
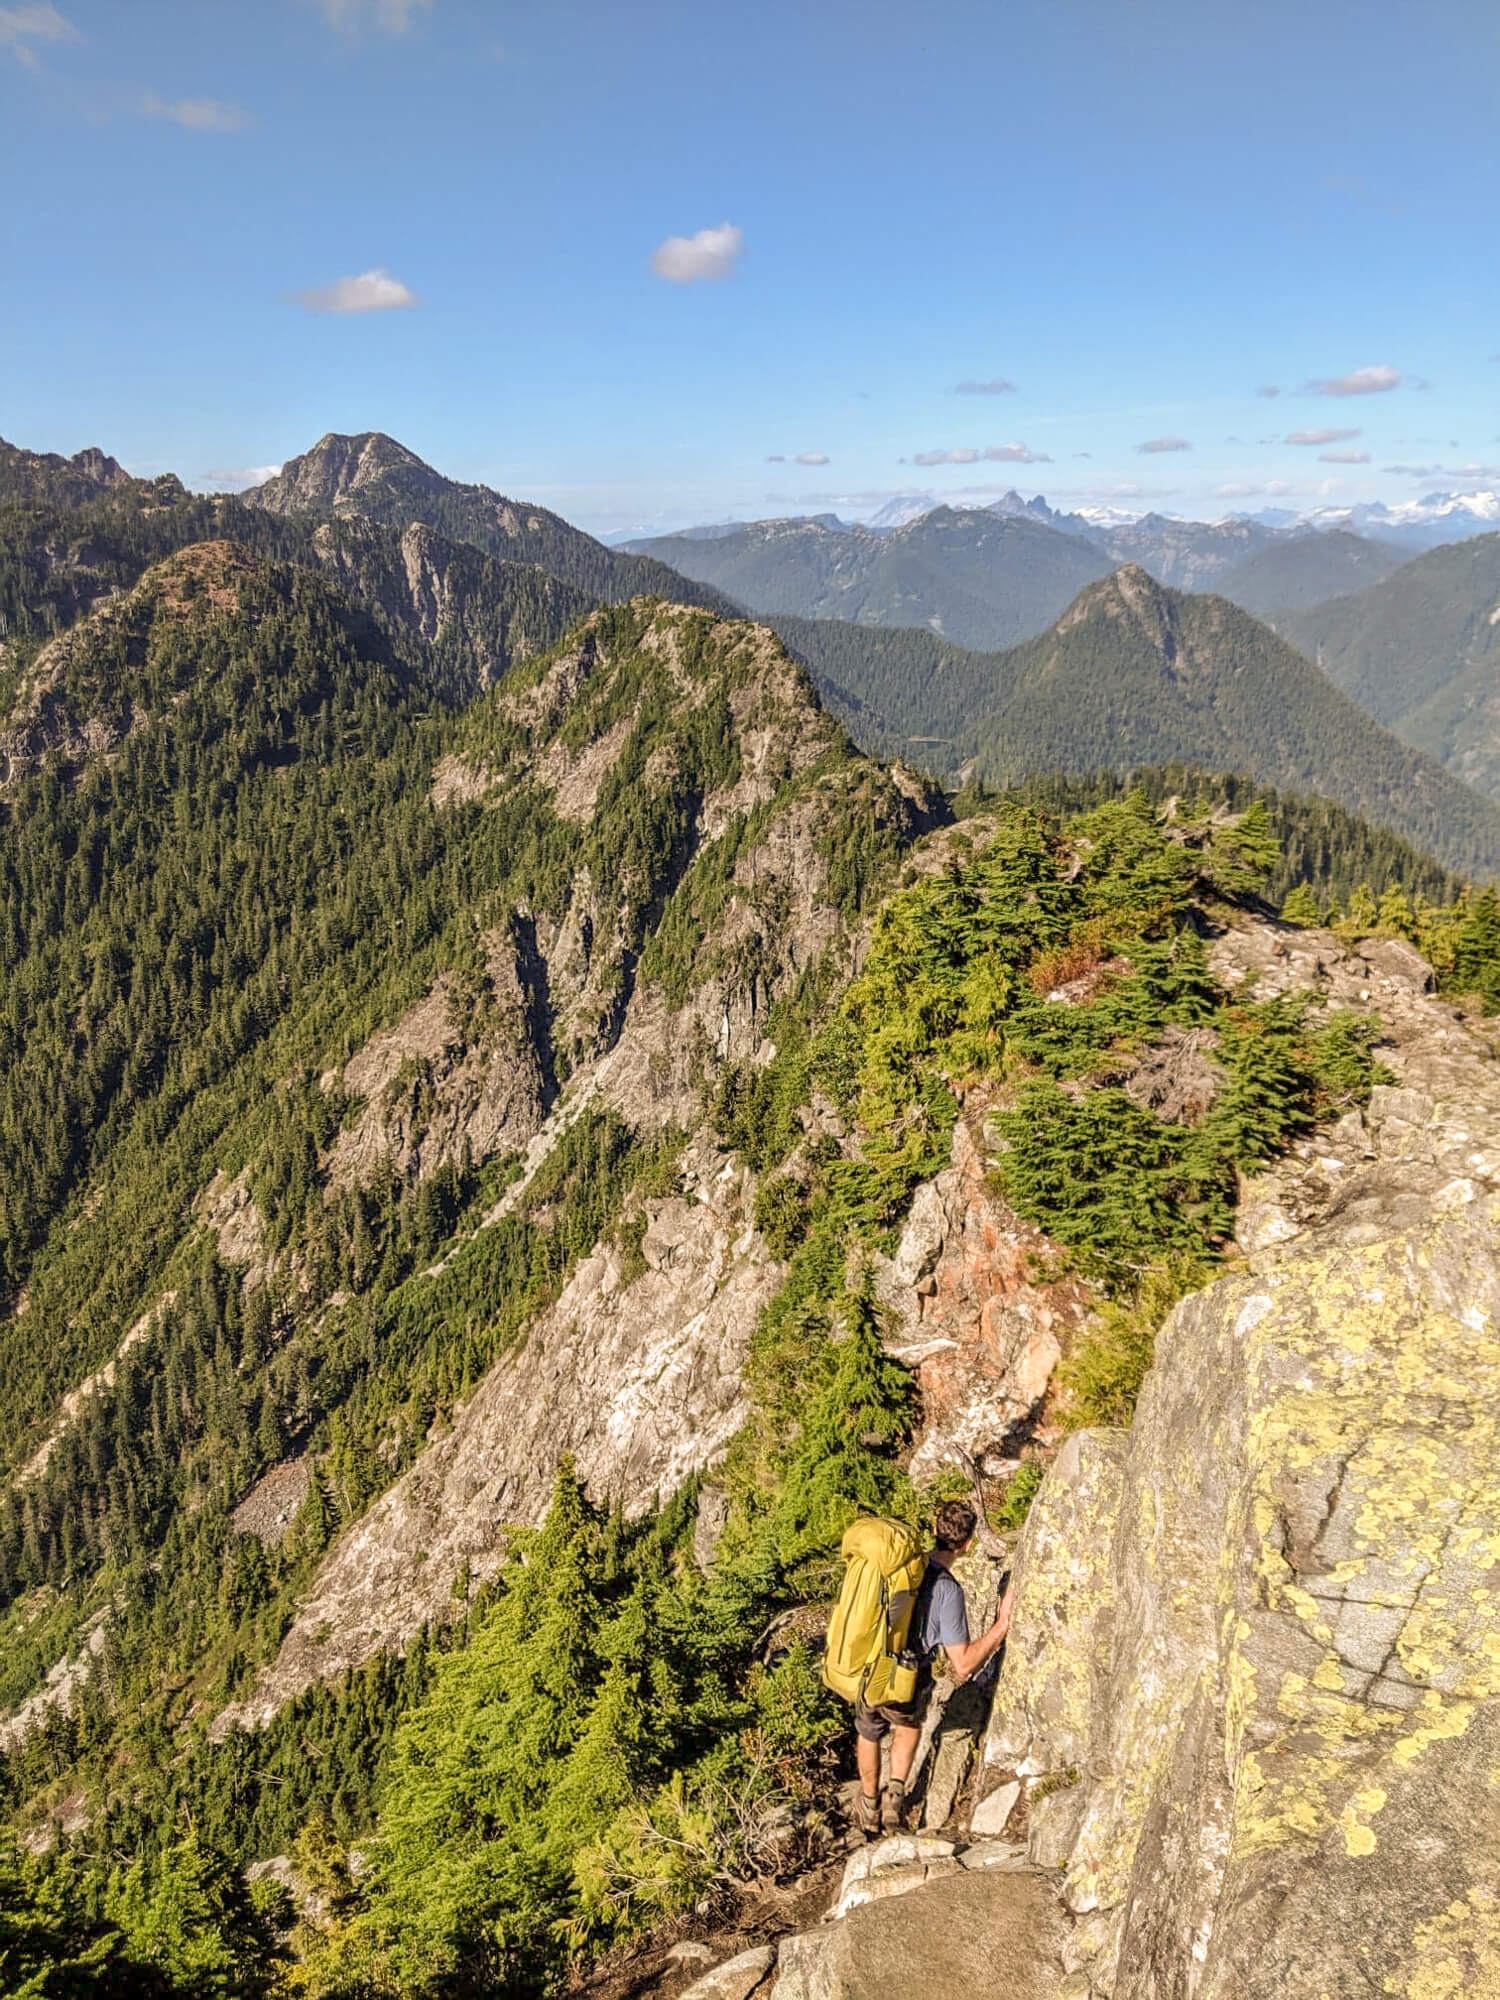
From this point, the trail begins to ascend steeply giving you a taste of the scrambling and challenges to come! Near the top of the ridge a stunning view awaits with huge cliffs dropping off around you! If you’re spending several nights on the trail, or if time allows, the West Lion provides an opportunity for a scramble and the chance to bag another summit on your epic Howe Sound Crest Trail adventure.
Near the intersection with the trail to the top of the West Lion, the HSCT cuts down to the right and the more technical part begins!
West Lion to James Peak
200 m Elevation Gain (350M loss)
2 km
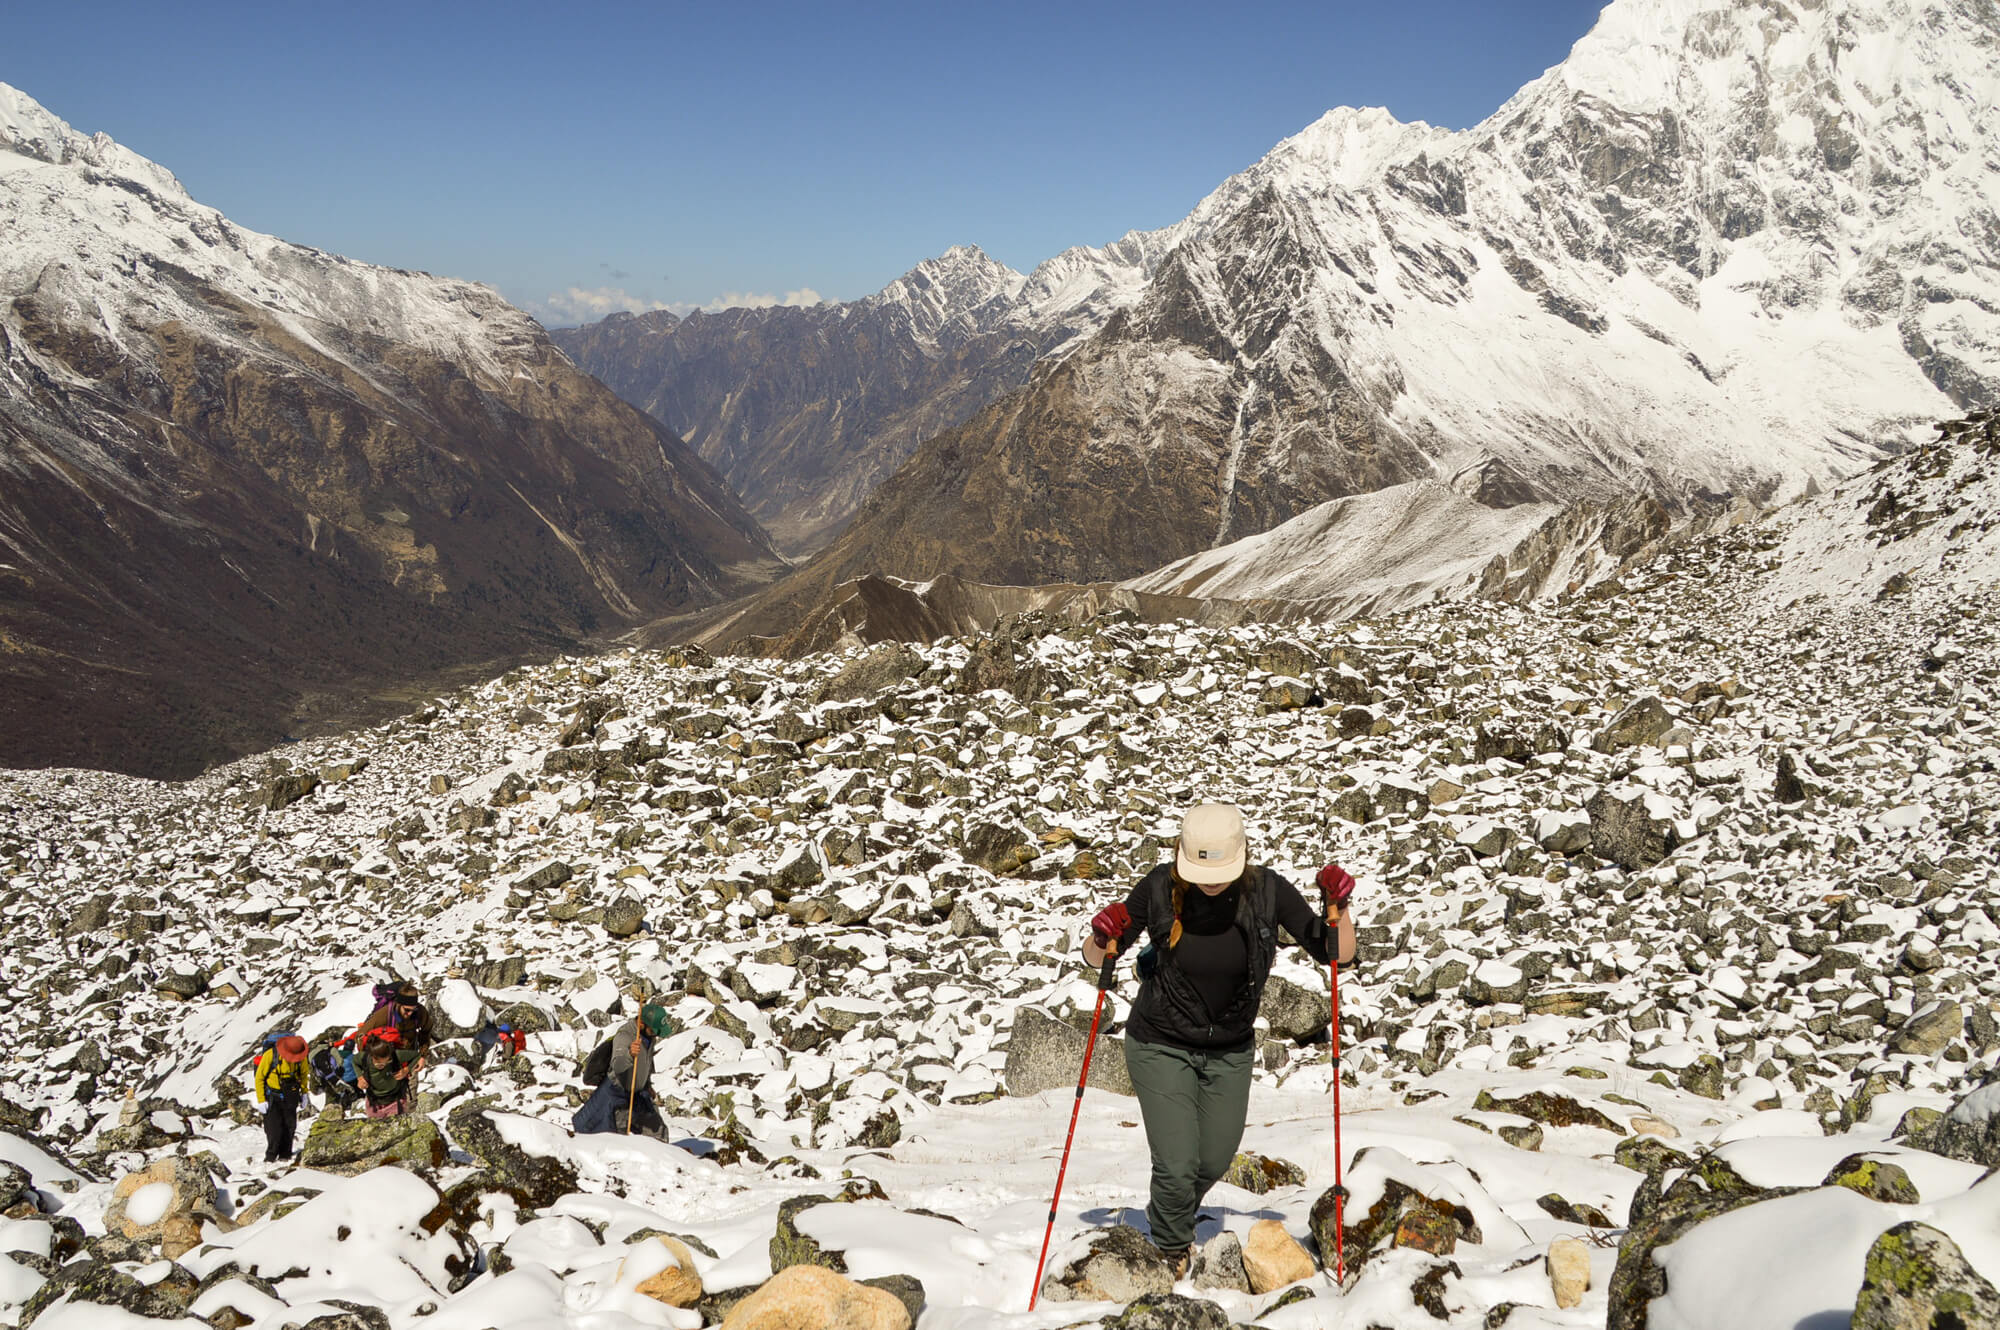
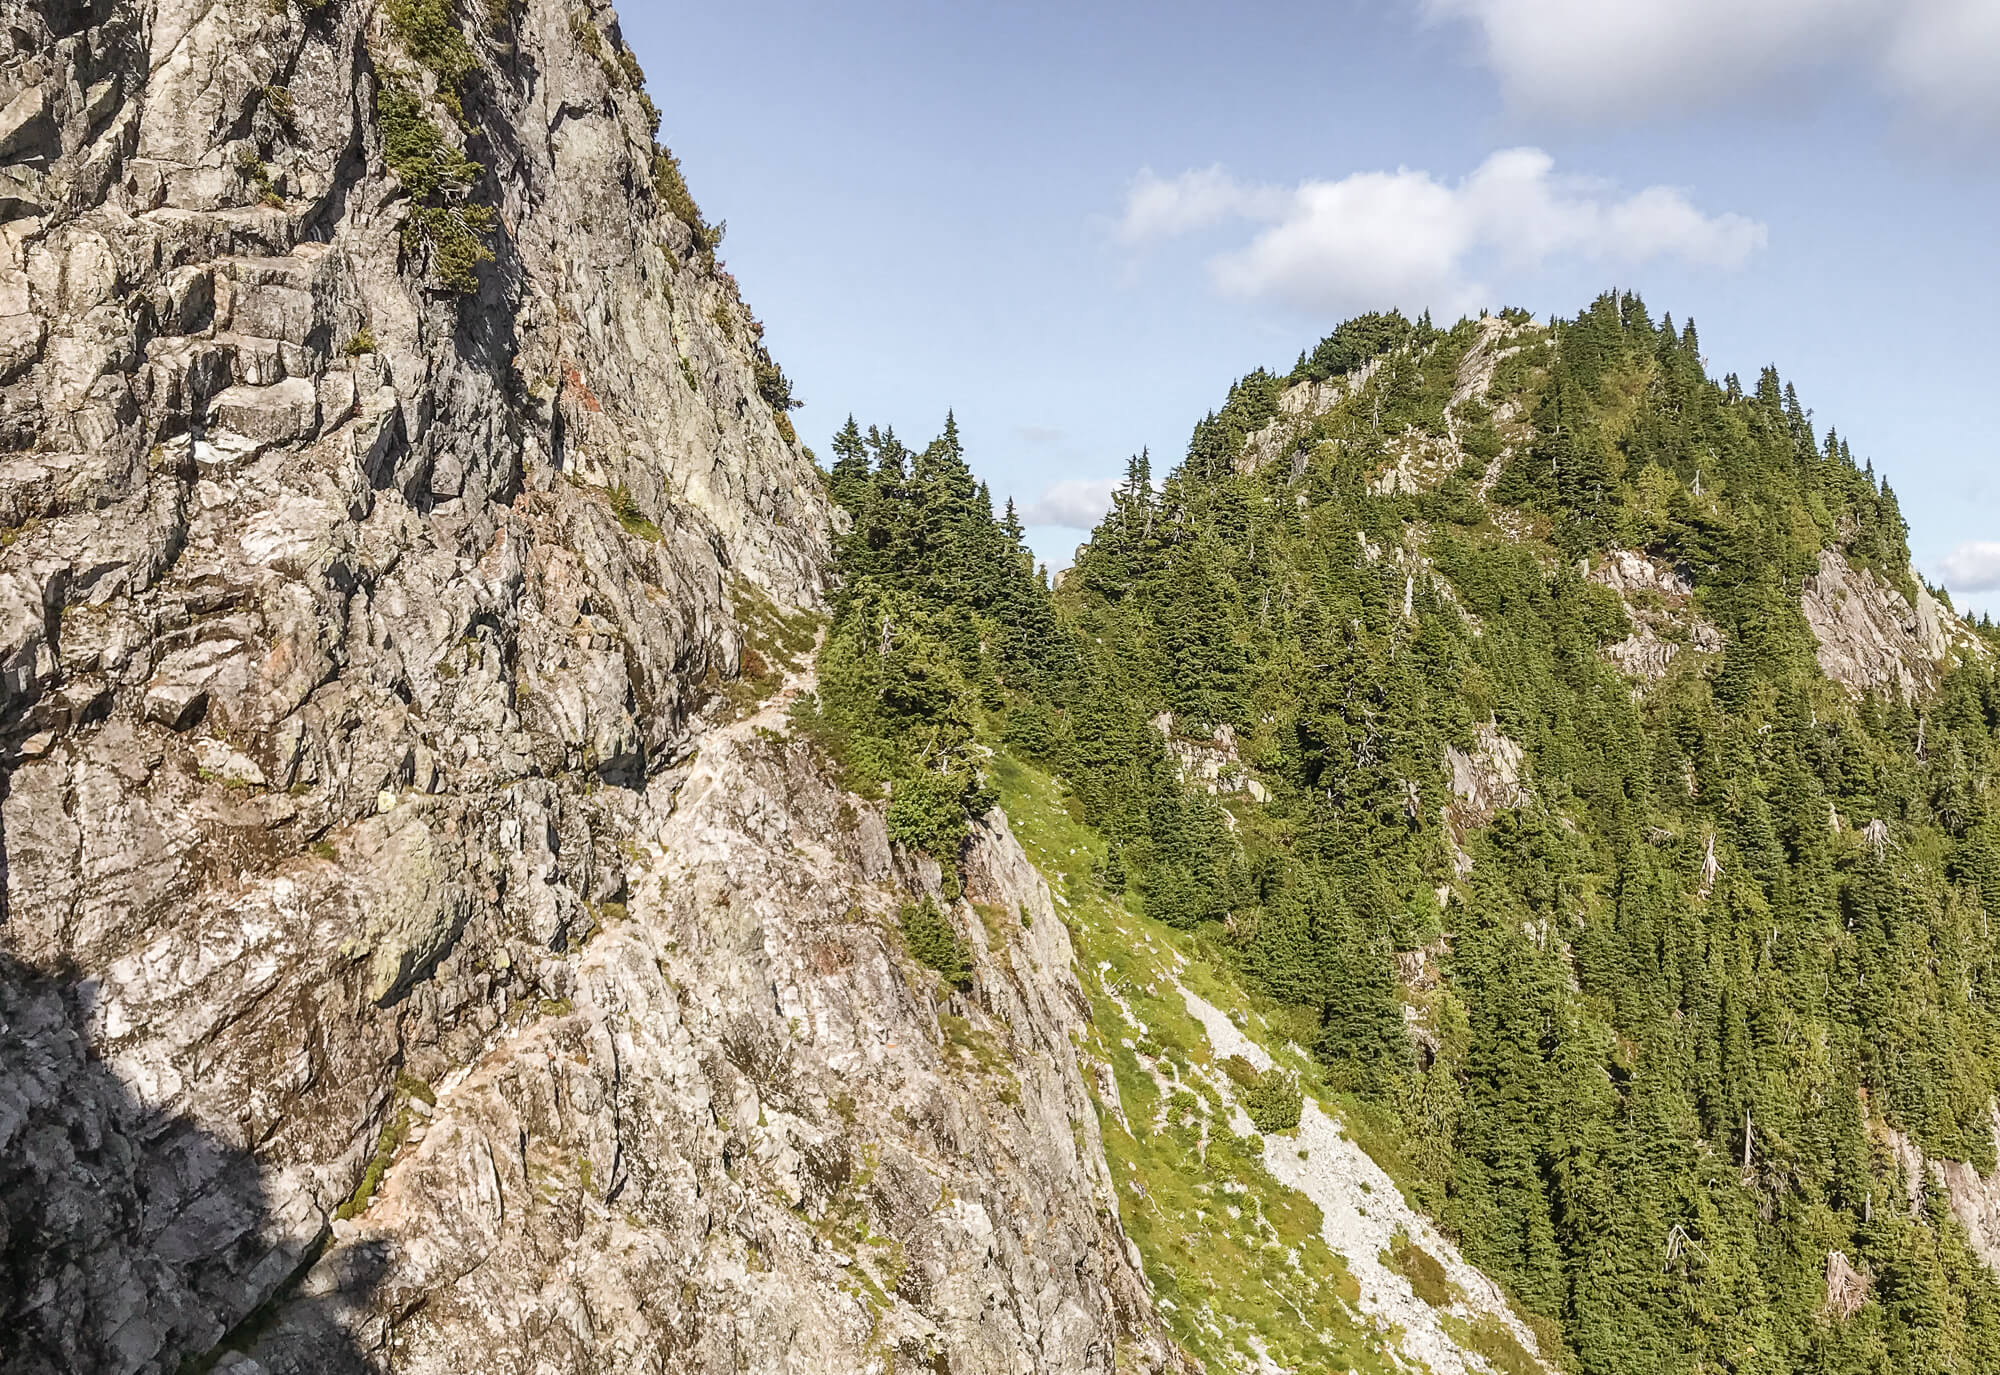
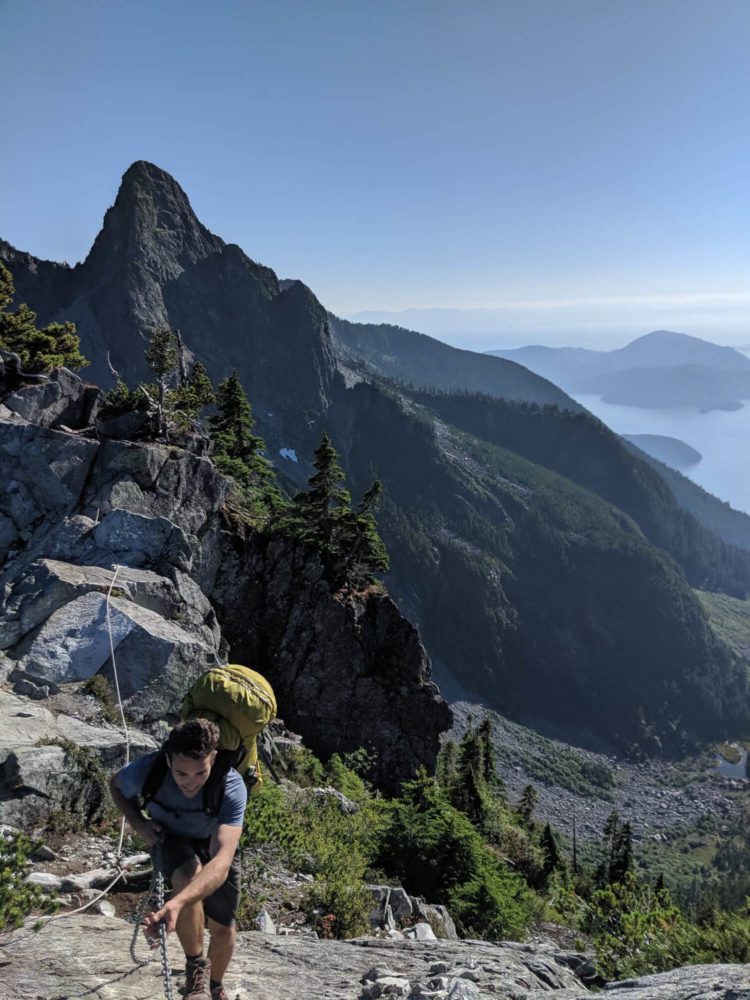
After losing 50 meters of elevation the trail climbs a rock ledges around the south side of the West Lion, giving you your first taste of some exposure . Following this traverse, you descend briefly into a gully between the West Lion and Thomas peak before climbing back up towards Thomas Peak. After the viewpoint near Thomas Peak, you’ll descend steeply losing significant elevation partially through a talus field full of ankle twisters. Keep your eyes peeled for the occasional orange trail marker indicating that you’re on the right path. Towards the left side of the field you’ll exit and begin a steep journey to Enchantment Pass and James Peak. On the summit of James Peak, you’ll find a chain rope that can be used to help you cross a thrilling ridge! Once across, James peak opens up into a meadow – a great spot to stop and catch your breath!
James Peak to David Peak to Magnesia Meadows:
250 m Elevation Gain (200M loss)
2.5 km
When you’re ready to continue, look for orange markers that descend through the meadow towards the left side. Avoid the false trails leading straight, they end abruptly in a descent suitable only for those equipped with a squirrel suit!
Once you’ve completed your descent through the meadow afterJames peak, you’ll come to a fork in the road. The left fork leads up and over David peak with a steep scramble through the bush and several roped sections. To the right, the trail circumnavigates David peak, losing significant elevation before forcing you to regain it. At time of hiking, the route to the left over David peak appeared to be the only option and was clearly marked as the main route.
After ascending and steeply descending David peak the trail veers to the left towards Harvey pass and through a field of berry bushes. Make lots of noise in this area, as tons of ripe berries make this prime prime bear feeding territory late in the season. I spooked a black bear here on my hike.
Once you’ve ascended through the berry-lane you’ll reach a fork in the trail with a path to Mount Harvey on the left and the HSCT continuing right. Breathe a sigh of relief, as you spot the Magnesia Meadows emergency shelter 0.5 km up the trail. Magnesia Meadows is a stunning location to spend the night. The views here of Mount Harvey and the Howe Sound are nothing short of spectacular! Set up camp, savour the sunset and rest well, the hardest part of the Howe Sound is now behind you!
Magnesia Meadows to Brunswick Mountain trail:
150 m Elevation Gain (100M loss)
2 km
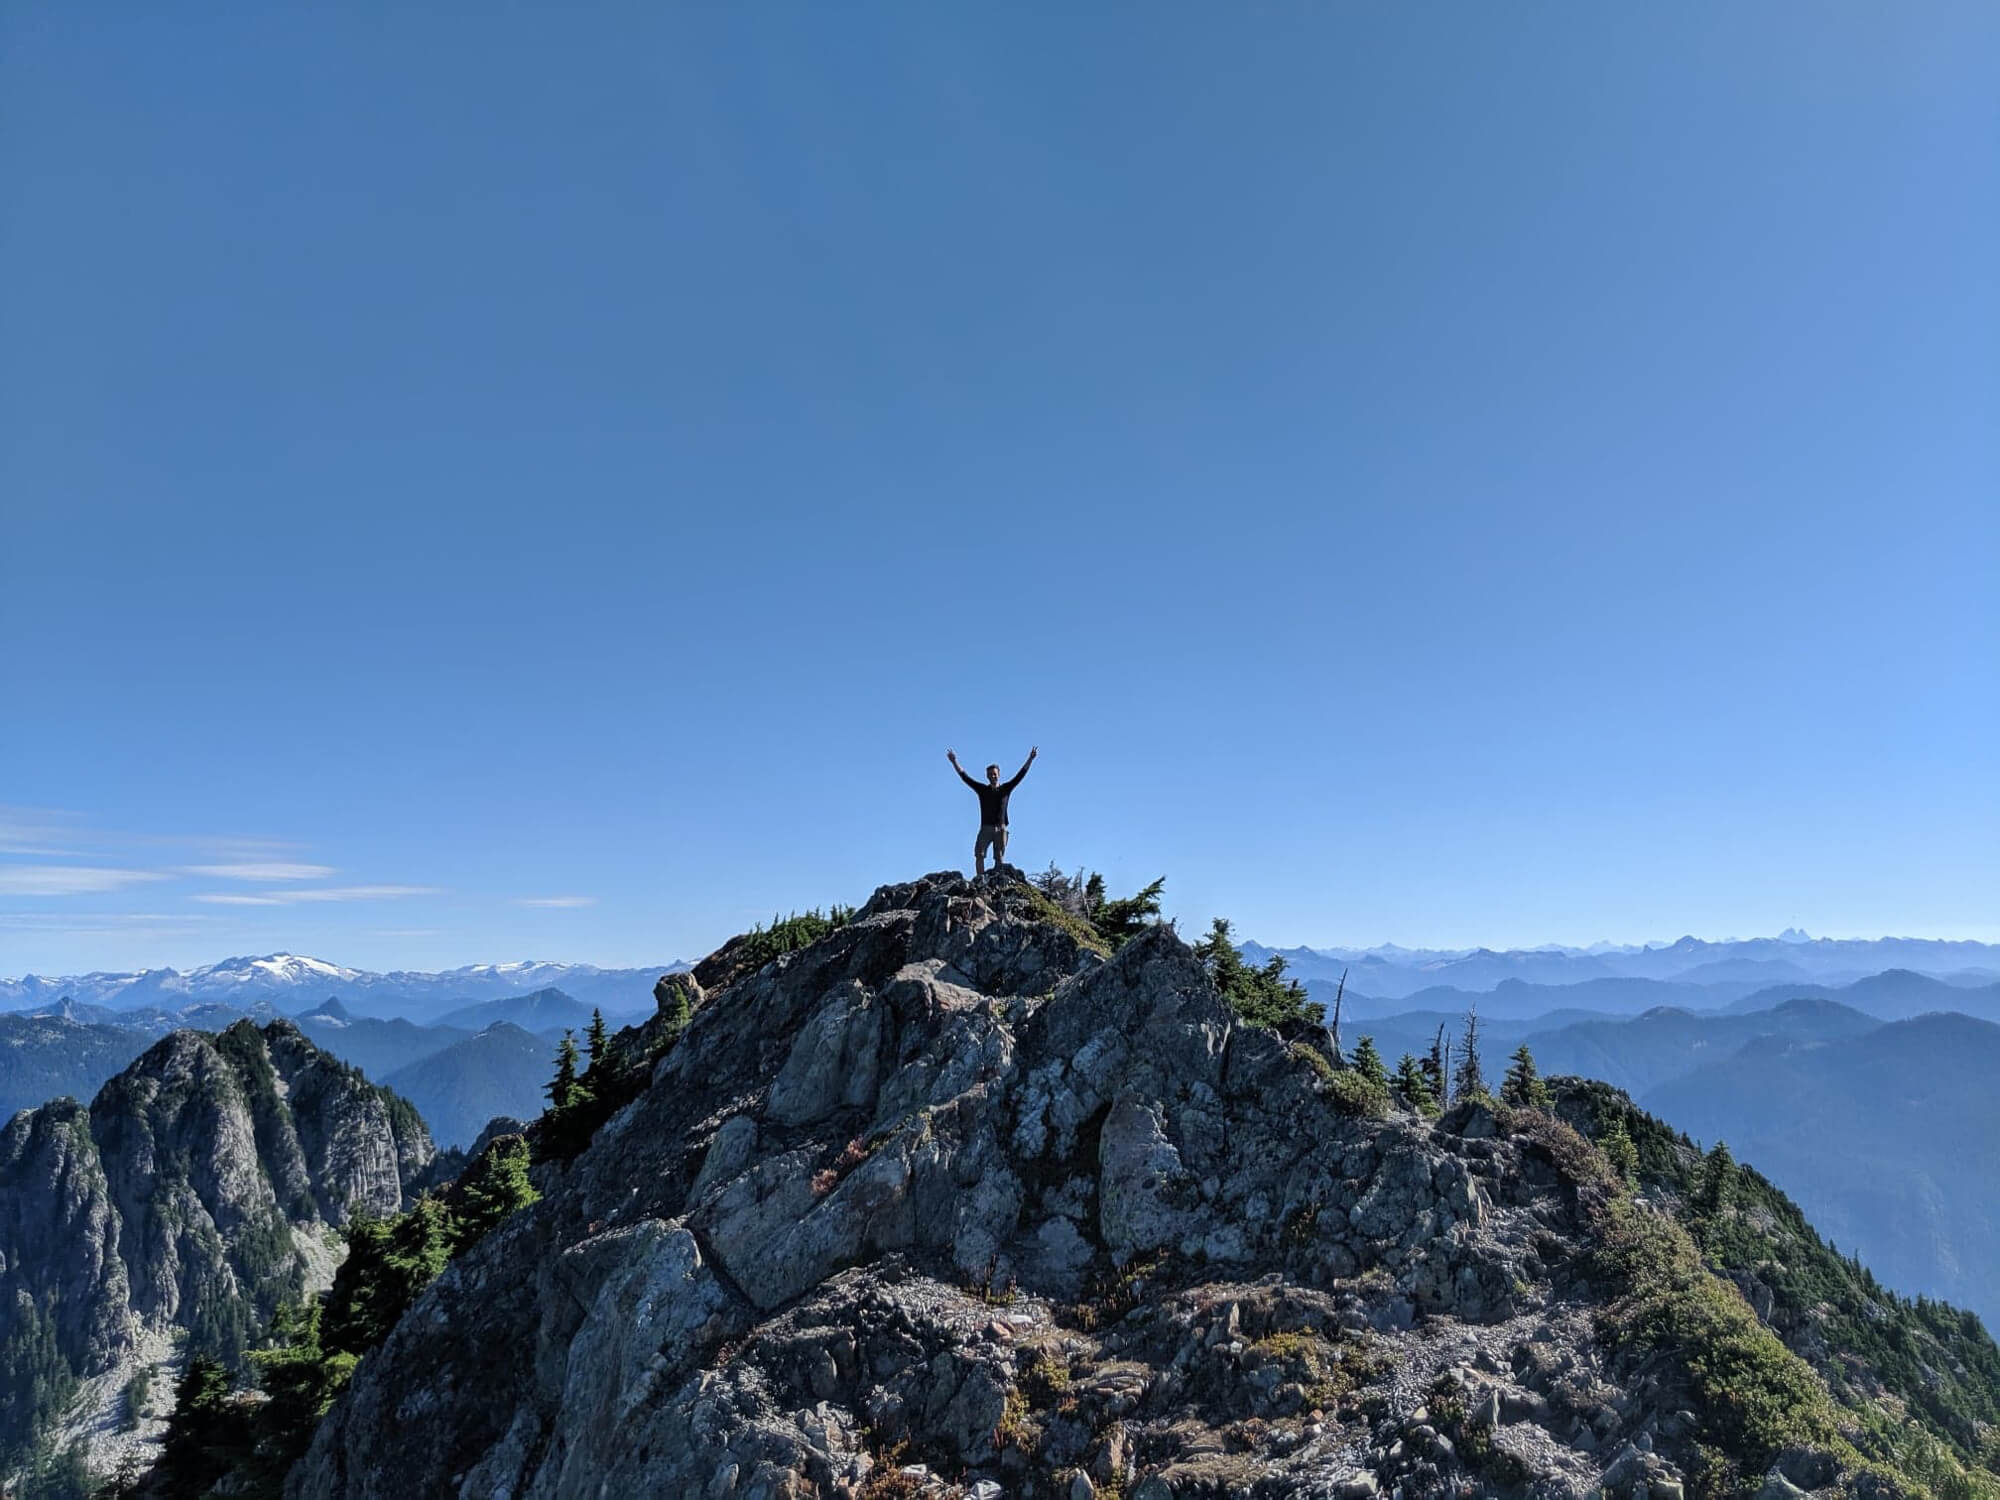
After packing up camp or taking a break at Magnesia Meadows, continue past the emergency shelter before following the trail as it veers to the left below Brunswick Mountain. The trail moves through the trees and several meadows offer views of Mt. Harvey. to the left. After 2km you’ll encounter a fork in the road where the HSCT meets Brunswick Mountain trail. If you’re up for it, dump your pack (remove your bear can from your backpack) and scramble up 250 meters of elevation in 0.7 km to bag Brunswick Mountain. From the top of Brunswick you’ll enjoy incredible views of the Howe Sound, a now small seeming Mt. Harvey, and the Coast mountain range that stretches for miles into the distance.
Brunswick Mountain to Brunswick lake:
Negligible Elevation Gain (300M loss)
2 kM
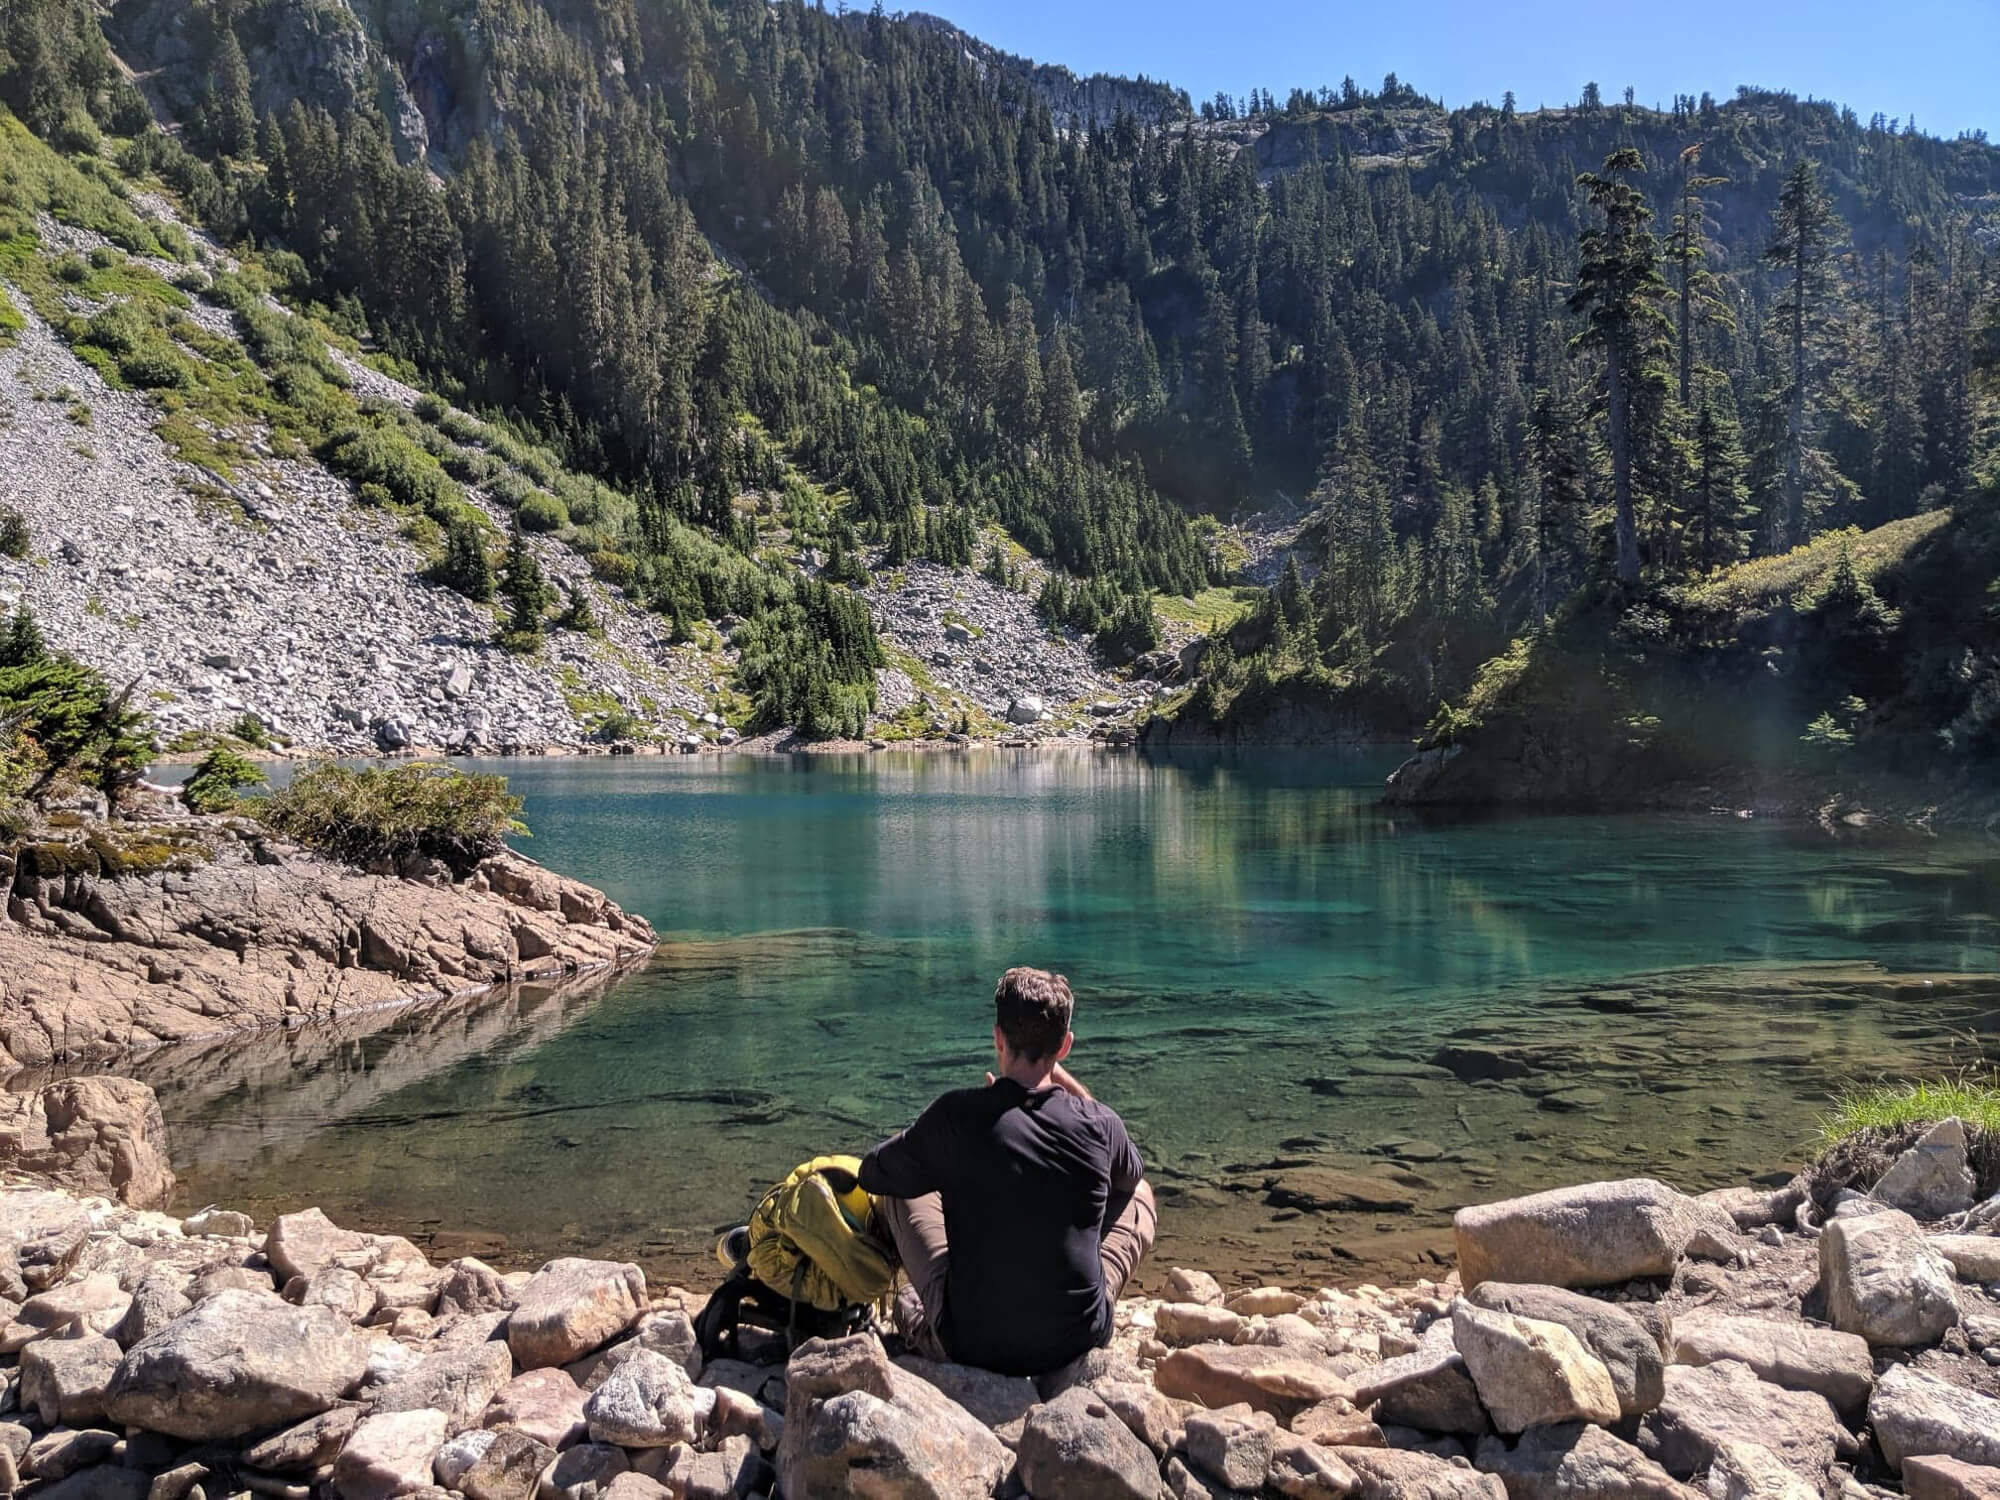
When you’ve finished the detour up Brunswick mountain, continue along the trail towards Hat Pass. After reaching Hat Pass your big ascents are finished and it’s time for nearly 2500m of bone crunching descent back to Highway 99. Just past Hat Pass and a large pond, the trail make the rapid descent towards Brunswick Lake, losing nearly 300m of elevation in just over one kilometer. Brunswick lake is a great spot for a refreshing dip to help cool those aching muscles and joints before continuing the bone crunching descent, just make sure you’re sunscreen and bug spray free before going in!
Brunswick Lake to Deeks Lake
50 m Elevation Gain (250M loss)
3 km
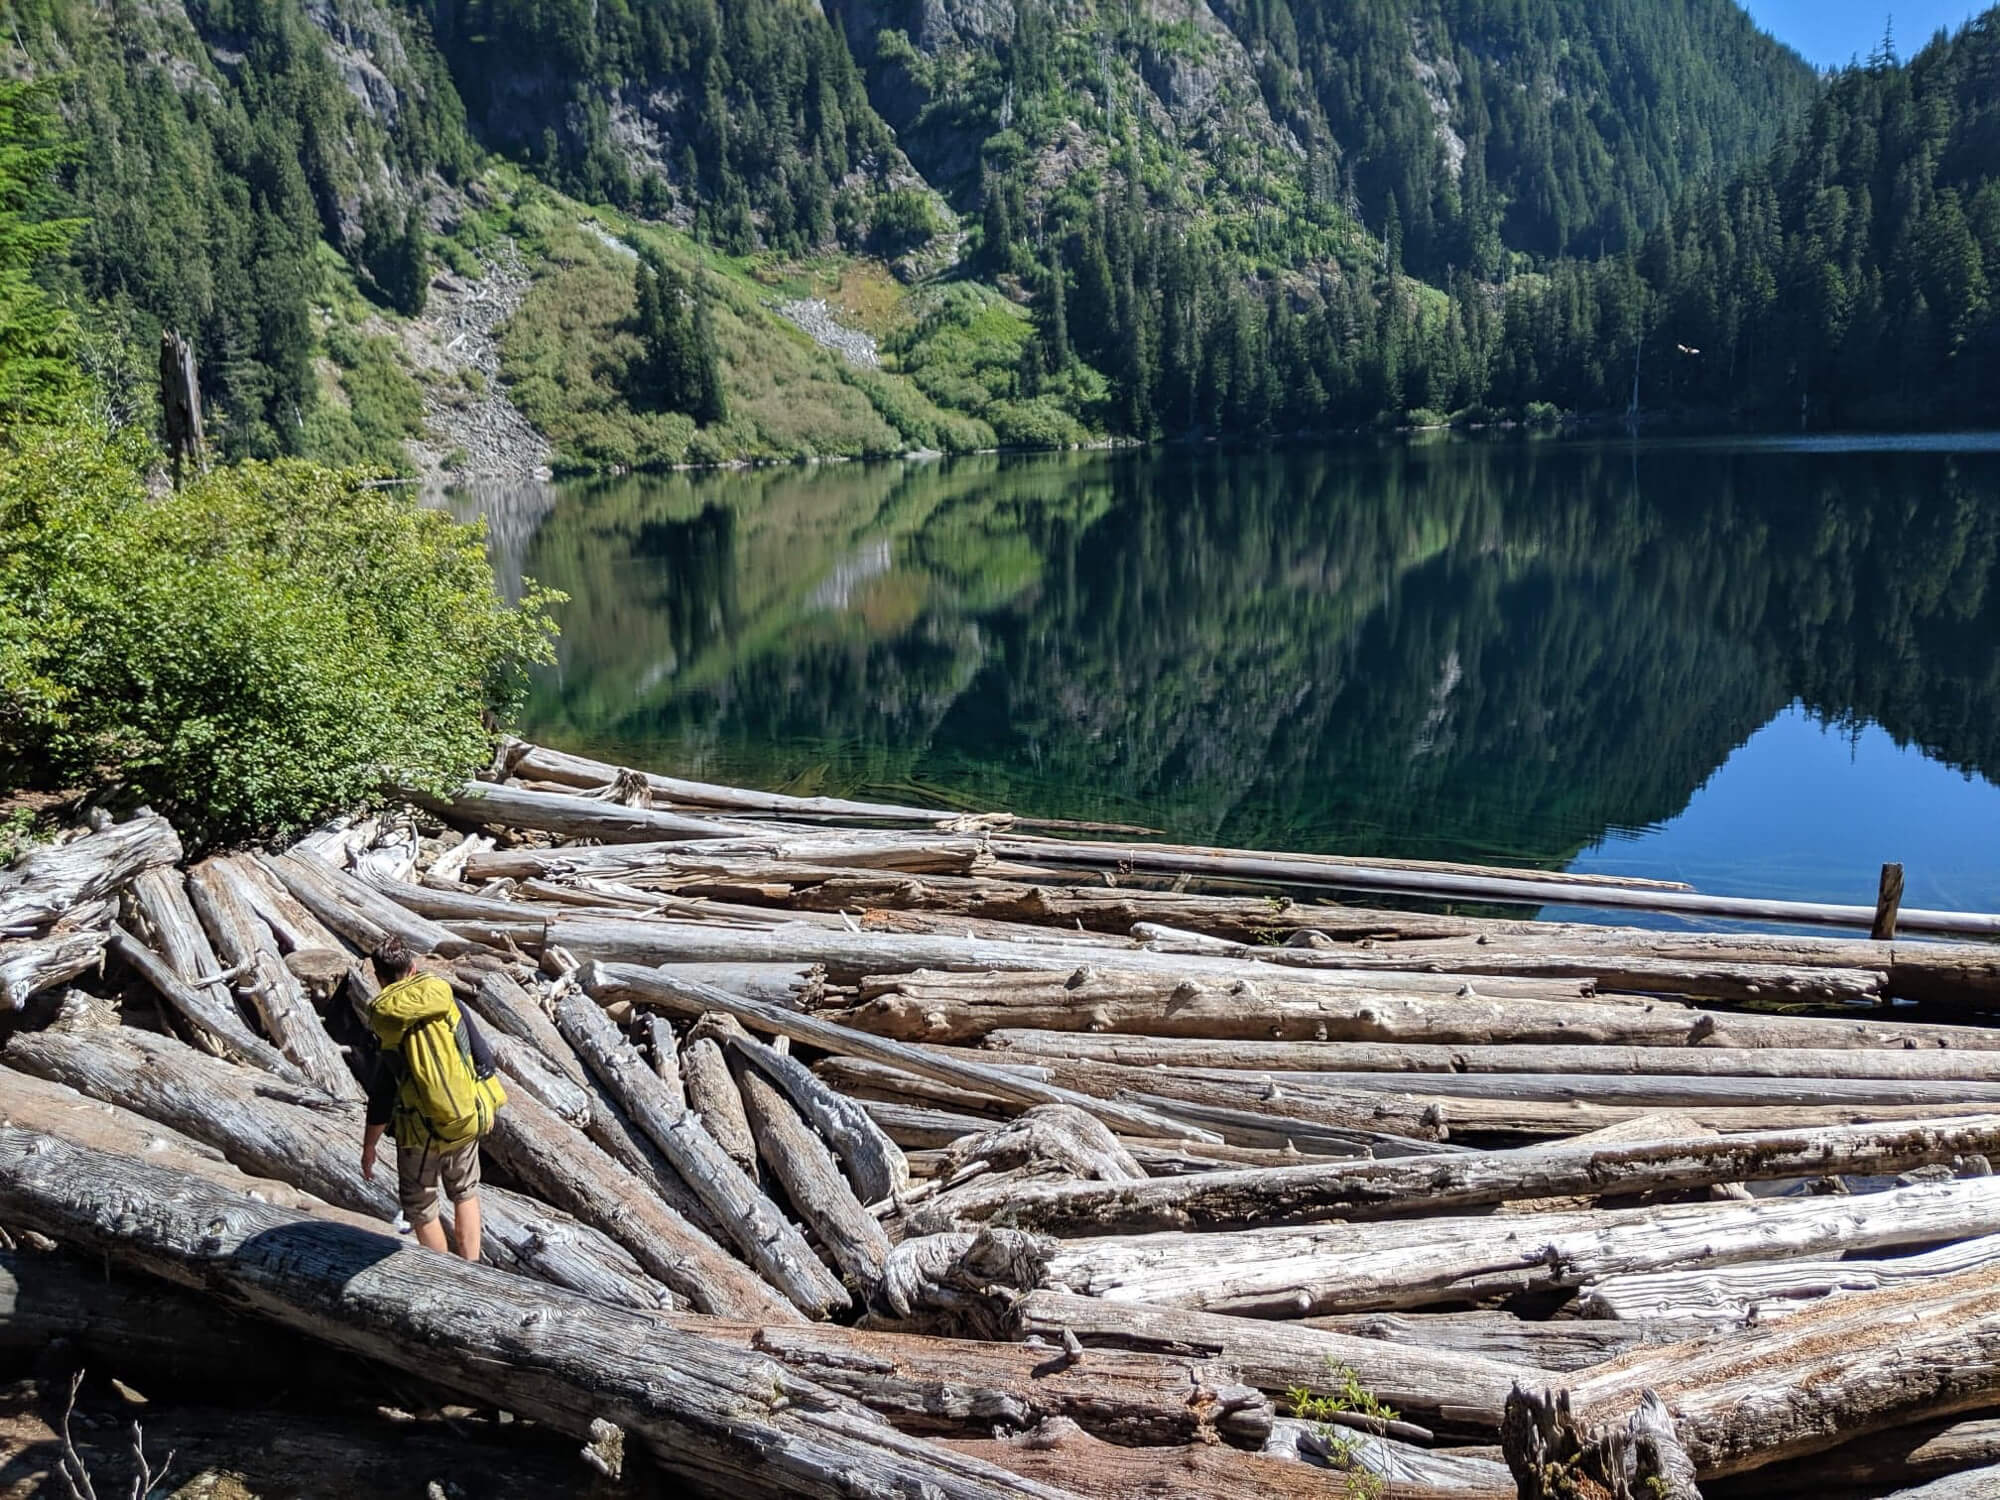
After you’ve enjoyed some time relaxing at Brunswick lake follow the fork to the left and cross a small rock bridge (another great spot to swim). The trail links up with Deeks creek and follows it for most of the way down to Deeks lake. You’ll make several cress crossings and navigate one small roped section on the way down passing Hanover Lake along the way. Upon reaching Deeks lake you’ll traverse the lakes western side through beautiful forest and mossy grounds until reaching a log jammed area and campsite on the lake’s southern end.
Deeks Lake to Highway 99
50 m Elevation Gain (1000 M loss)
6 km
From Deeks Lake the trail continues its descent and passes a small waterfall before continuing on what becomes an evermore uneventful descent through the forest. From the boundary of Cypress Provincial Park, you’ll slog the last 3.5km along a gravel road before shooting out near Porteau Road and Highway 99 to call it a wrap.
Chuck off your pack, pat yourself on the back and drive down the road for a celebratory brew or post adventure feast in Squamish!
Itinerary Options for the Howe Sound Crest Trail
There a few ways to hike the HSCT, so let’s take a look. These itineraries are in the standard South to North direction popular with most hikers.
*Note my GPS calculated mileage is about a km shorter than the listed distance provided by BC parks, so be aware of the potential for slight variance in these estimates.
Howe Sound Crest Trail in 1 Night 2 Days - South to North Option 1
- Day 1: Cypress Mountain to Magnesia Meadows
- 15 km
- 1450 m Elevation Gain
- 850 m Elevation Loss
- Day 2: Magnesia Meadows to Porteau Cove (Highway 99)
- 13 km
- 250 m Elevation Gain
- 1650 m Elevation Loss
- Day 1: Cypress Mountain to Magnesia Meadows
Notes & Thoughts
This is my preferred itinerary for this trip. The first day is tough with some sections that feel extremely slow going. The trail on the second day moves much faster. The views from Magnesia Meadows are sublime making it a perfect spot to camp that’s conveniently just past the half-way mark of the trip. The side. trip up Brunswick Mountain is worthwhile and easily completed early on the 2nd day with this trip plan (mileage and elevation of this side-trip is not included in the above).
Howe Sound Crest Trail in 1 Night 2 Days - South to North Option 2
- Day 1: Cypress Mountain to Brunswick Lake
- 19 km
- 1600 m Elevation Gain
- 1250 m Elevation Loss
- Day 2: Brunswick Lake to Porteau Cove (Highway 99)
- 9 km
- 100 m Elevation Gain
- 1250 m Elevation Loss
- Day 1: Cypress Mountain to Brunswick Lake
Notes & Thoughts
If you still have your legs and want to push on past Magnesia Meadows, Brunswick Lake is another great spot to camp only 4km further down the trail. It’s easier going after reaching Magnesia Meadows and almost all downhill and not technical. An early start on day 1 makes this itinerary feasible, if a shorter day is preferred/required on day 2.
Howe Sound Crest Trail in 2 Night 3 Days
- Day 1: Cypress Mountain to between Unnecessary Mountain and the Lions.
- Approx. 9 to10 km
- Approx. ~850 m to1000 m Elevation Gain
- Approx. 300 m Elevation Loss
- Day 2: Between Unnecessary Mountain and the Lions to Brunswick Lake
- Approx. ~ 8.5 km to 10 km
- Approx. 600 m to 800 m Elevation Gain
- Approx. 650 m Loss
- Day 3: Brunswick Lake to Porteau Cove (Highway 99)
- 9 km
- 100 m Elevation Gain
- 1250 m Loss
- Day 1: Cypress Mountain to between Unnecessary Mountain and the Lions.
Notes & Thoughts
Campsite selection is a bit janky when we add an extra day and attempt to even out the mileage. Ultimately, you’re forced to seek out a site somewhere between Unnecessary Mountain and the West Lion, ideally near the couple tarns to the south of the main trail. Despite the small mileage, day 2 may still feel challenging as you navigate the more challenging sections of the trail. The lower km count is helpful here (vs. the one night itineraries). The hike out on Day 3 is smooth sailing from Brunswick Lake to the highway.
Packing List Breakdown for the Howe Sound Crest Trail
Since I first hiked the Howe Sound Crest Trail, I’ve changed my gear setup quite a bit and moved towards a lightweight setup. Backpacking trips like this or the Rockwall Trail are a lot more enjoyable when you’re carrying less weight, making it easier to cover more distance in less time.
That said, if you’re new to backpacking, don’t stress out about buying the latest and greatest equipment. Save money and use things you already own or borrow things from a friend. Later, when you’ve gained more experience, modify your kit and change out gear as you get a better understanding of what creature comforts you can and can’t live without.
With this in mind, here’s a list of gear suggestions for taking this trip.
Essential Gear to Pack
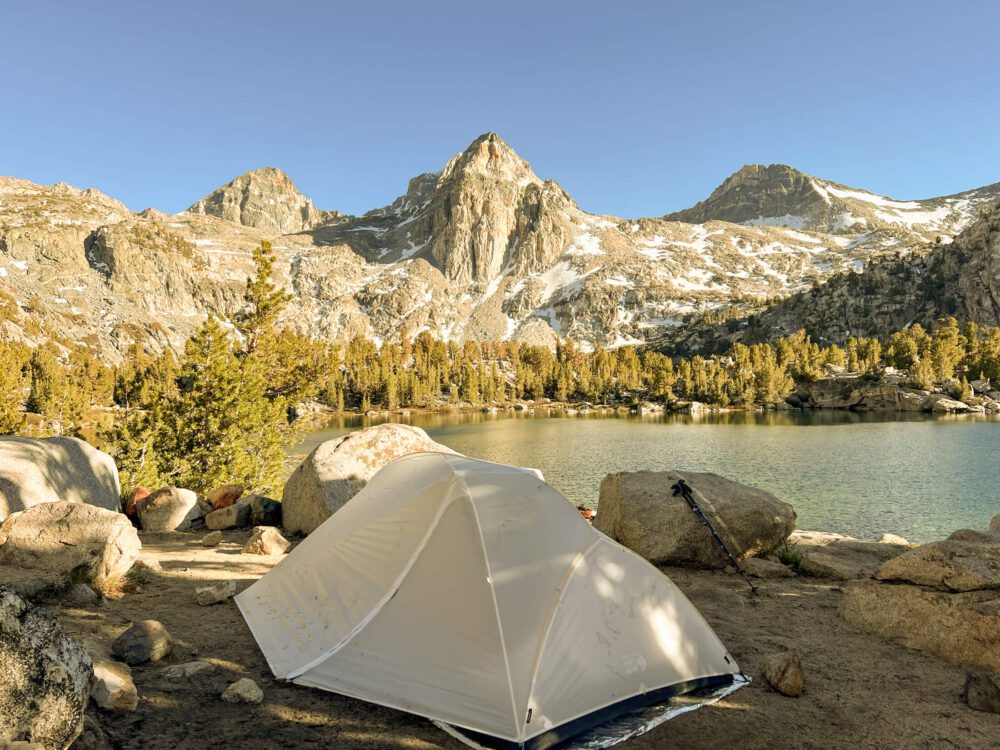
Tent
I upgraded to Mountain Hardwear Strato UL2 last year. It’s semi-freestanding (needs to be staked), double walled and weighs in at a mere 2.5 lbs. Unlike many 2-person tents, it doesn’t have a tapered floor and can fit 2 extra wide sleeping pads side-by-side with no overlap. A rare feature in this class of tent! It’s cozy, but workable for two and palatial for one! I debated between this tent and the MSR Freelite and ultimately chose the MH as it was in-stock. The MH Strato doesn’t seem to be as readily available in Canada, so you may want to go for the MSR Freelite to avoid the risk of paying duty shipping the MH from a retailer in the US. Ultimately, both are a great lightweight tents with similar features, but feel very fragile given their lightweight components. If you’re looking for more durability/resilience these aren’t the tents for you.
If you’re looking for a completely freestanding tent that offers more durability, check out the Big Agnes Copper Spur UL2. It’s unique blend of functionality, livability, weight, and durability earn high praise and Big Agnes’s customer service is outstanding!
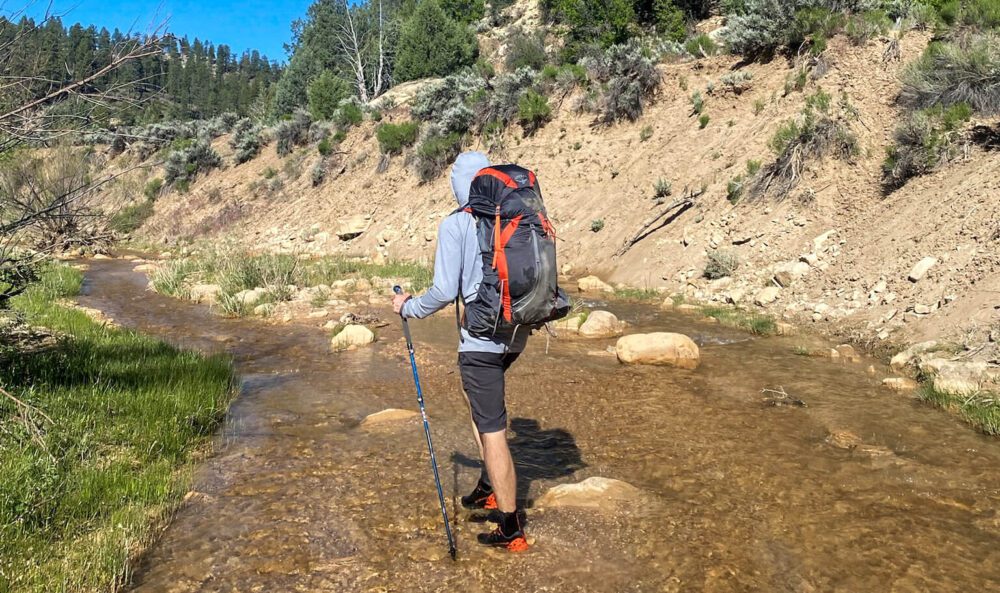
Hiking Backpack
If you’re relatively new to backpacking and building out your kit slowly, there is nothing wrong with using a large size travel backpack with a decent suspension system and padded hipbelt or borrowing a pack from a friend. This gives you time to decide what features you need and whether or not backpacking (and the gear) is something you’re going to invest in. When I first started backpacking, I used my Khmer Explorer Travel Set on the West Coast Trail and Sunshine Coast Trail which worked great despite my poor packing skills (don’t recommend backpacking with 55lbs…)!
If you’ve begun dialing in your backpacking kit, check out the Gregory Focal or Women’s specific Facet. At ~2.5lbs these packs provide a great compromise between barebones ultralight packs and the heavier feature laden packs. The Osprey Exos (men’s) & Eja (women’s) backpacks are also great packs comparable in features and weight.
If you’re ready to go to an extreme level of gram counting and have eliminated all creature comforts check out the Hyperlite 3400 southwest. It’s 100% waterproof and constructed from ultra light dyneema fabric. Being ultralight, you’ll sacrifice features, so if you hate getting a swampy back (that’s me) you may prefer the Osprey or Gregory despite the weight penalty. Backpacking gear is always a zero sum game!
Sleeping Mat
I used to have terrible sleeps in the backcountry until I switched to the Therm-a-Rest NeoAir Xlite. It’s incredibly lightweight, comfortable and packs down to the size of a Nalgene bottle. This is probably one of my favorite backpacking items! Try it out. You won’t regret it. Sleep well!
Backpacking Pillow
Yes, you can sleep with a pillow not made of bunched up clothes in the backcountry. I love the Nemo Fillo Elite, but they’re harder to find in Canada. Fortunately, the Therm-a-Rest Head Down Pillow is a similar concept, weight and size.
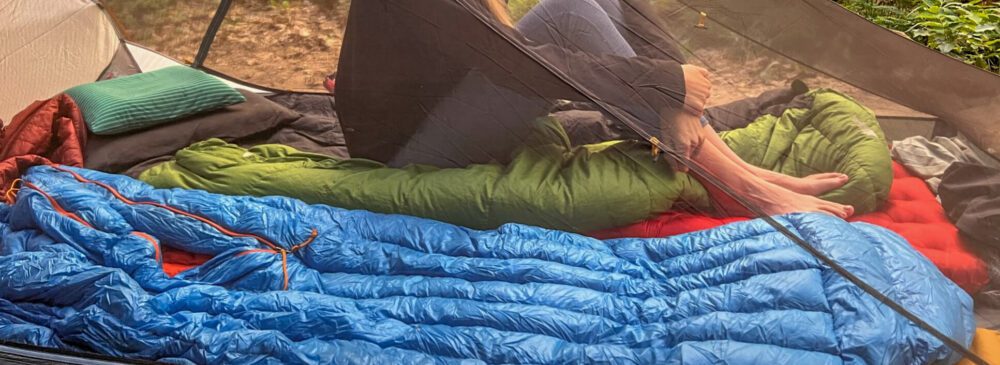
Sleeping Bag
I can’t speak highly enough of Patagonia’s Fitz Roy sleeping bags I invested in one several years ago. It’s unbelievably lightweight and packs down small. I found the 30°F / -1°C to be perfect for most outings. Like all Patagonia products, it’s not cheap, but they stand behind their gear and the quality matches the price point. If you spend a lot of time in colder environments they also make a 20°F / -7°C version. These bags are a very worthwhile splurge you won’t be disappointed in.
If you’re looking for an even lighter-weight option, consider going for a sleeping bag quilt. Feathered Friends Flicker UL Quilt Sleeping Bag has won numerous awards and is a stalwart among ultralight backpackers. With a weight starting at 526 g (1 lb 2.5 oz), I can see why!
Water Purification
I love the Steripen. It’s light, portable and only takes minutes to purify a liter of water in a Nalgene. Press the button, place the pen in your bottle, and stir for a couple minutes. It’s like magic! Make sure to bring a few purification tablets as a backup should you run into any technical problems/dead battery with your Steripen.
Swiss Army Knife
Fixing gear, cutting food, a swiss army knife is your go to everything too for backpacking.
Stove & Fuel
Lightweight, convenient, and reliable, the MSR pocket rocket has been my go to backpacking stove for years.
Lighter & Matches
A bring a small baby Bic lighter (in a mini-ziplock to keep it dry) & a few matches as a failsafe.
Cookset
I love the GSI Halulite Microdualist II, Two-person cookset. It’s lightweight and I can fit my MSR pocket rocket and a fuel canister inside. If you don’t already have a stove, consider the MSR PocketRocket Stove Kit for an all-inclusive solution.
Water Bottle
Nalgenes are always a backcountry favorite. If you’re cutting weight or looking for a way to save a buck, a simple smart water is the go-to for ultralight backpackers. I’ve recently moved to a hydration reservoir as it allows me to stay hydrated continuously without stopping to grab and open a bottle.
Extra Water storage
Extra water storage capacity makes cooking that much easier and camp life more enjoyable so make sure to invest in something like the MSR DromLite Bag V2. It’s also a must for a trip without reliable water sources like the Howe Sound Crest Trail (later in the year) where hauling more water may be essential.
First Aid Kit
From blisters, to scrapes, and cuts. A first aid kit is an essential item to have. The pre-built kits from Adventure Medical Kits have served me well on many adventurers. At the end of your trip write down any items you used and replace them so they’re ready for your next adventure.
Trowel, Toilet Paper, & Hand Sanitizer
The HSCT does not have any established outhouses, so you’ll need a trowel to dig a cathole when nature calls. Follow minimum impact camping principals and go at least 200m away from any established trails, campsites, or water (creeks, lakes, rivers etc.). Pack your TP out, I know it’s gross, but just do it.
Don’t forget a small bottle (1 oz) of hand sanitizer.
Hiking Poles
I thought poles where only used by retirees trekking the Swiss Alps, then I completed the Howe Sound Crest Trail and my knees screamed at me for the next week. My overweight pack and lack of poles were to blame. Poles are great for reducing the strain of long grueling descents and providing extra stability on exposed sections. They let you hike faster and further with less pain and strain! Invest in a pair and you’ll never go back. Poles vary widely in price and style with weight/material having the largest influence on price. Even an inexpensive pair will be helpful! I’ve had great luck with these Leki’s, but Black Diamond poles are also great.
Headlamp
The Spot 500-R is the way to go with 9 modes including the night vision saving red light! Red light mode takes a minute to get used to, but once you do it’s a total game changer trust me! The stars never looked so good! The Spot 500-R is rechargable, but with a batter life of over 19 hrs on medium and 7hrs on high it should get you through the trip!
Bear Spray
When traveling in bear country, Bear Spray is a must. Make sure to remove the packaging and check the expiration date before heading out.
Bear Canister or Ursack * Don't Forget
Keeping your food safe from bears is an essential part of keeping you safe and being a responsible backpacker. The Howe Sound Crest Trail doesn’t offer any food storage so bring a bear canister to keep your food safe. They’re bulky, they’re annoying to pack, but they work well as stools and are far more convenient and effective than hanging your food. For several people go with the BV500 for solo adventures the BV450 works great. To save weight Ursacks are also a great option, but they need to be tied to a tree and don’t prevent your food from being crushed and smashed by a hungry bear.
Don”t overlook safe food storage, as if a bear gets into your food it will need to be destroyed. End of story.
GPS, Compass & Map
Download the GAIA app for maps and gps. I always bring a traditional compass and topographic map as well in the case of technical problems or dead batteries.
Luxury Items to Pack
These items are extreme luxuries, but may be worth it depending on your weight priorities and the distance you plan to cover. I’d only consider these items on a low distance or base camp style hike given their added weight and bulk.
Backpacking Chair
After a long day on the trail there’s nothing better than finding a nice comfortable spot to rest your weary glutes. Check out the Big Agnes Mica Basin Camp Chair or the Helinox Chair One. Both weigh around 1kg, and are light enough to justify bringing on slower/easier backpacking trips where weight isn’t as big of consideration or for trips where you’re taking day trips from an established base camp.
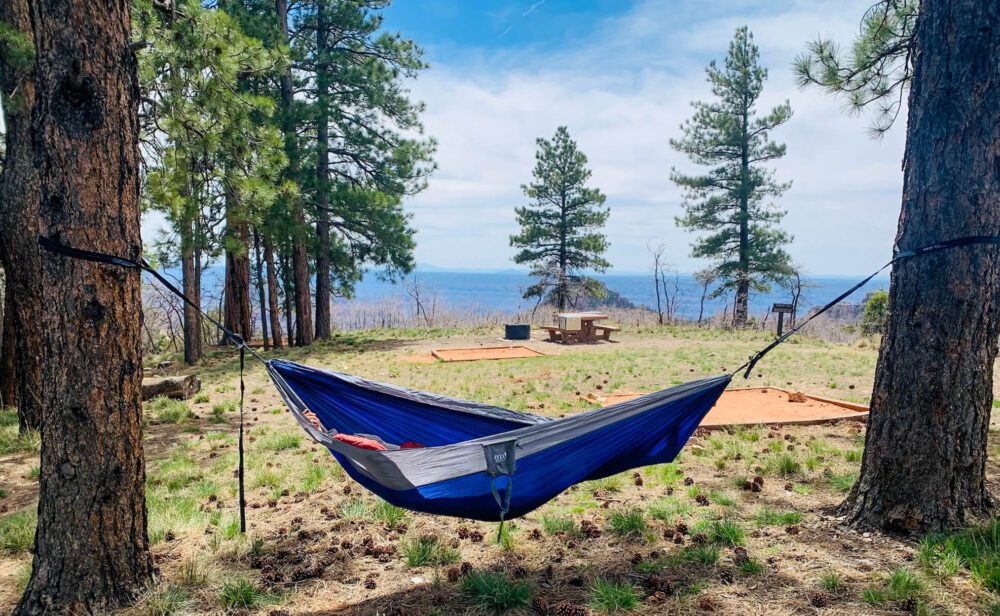
Hammock
If you’ve never strung up a hammock between two trees deep in the backcountry you’re missing out! Nothing beats getting horizontal with some great reading material in the pre-dinner hours or taking in an amazing sunset from your own outdoor couch. The ENO Double Nest has room for two and at ½ kg it’s hardly even a splurge to pack. P.S don’t forget the straps to hang it.
Clothing & Accessories to Pack
Shell Jacket
An essential piece for wind, rain, and snow. The Arc’teryx Beta shell is the best all around shell jacket. This shell performs in all adverse conditions and is the perfect outer layer for rainy days, or cool nights. Arc’teryx gear is expensive, but impeccably designed. I was skeptical for years, until I purchased a few pieces of their trail running gear and got hooked. If you’re looking for the best reviewed hiking shell out there, this is the one.
For another excellent option that is more economical, check out the Patagonia Torrentshell 3L.
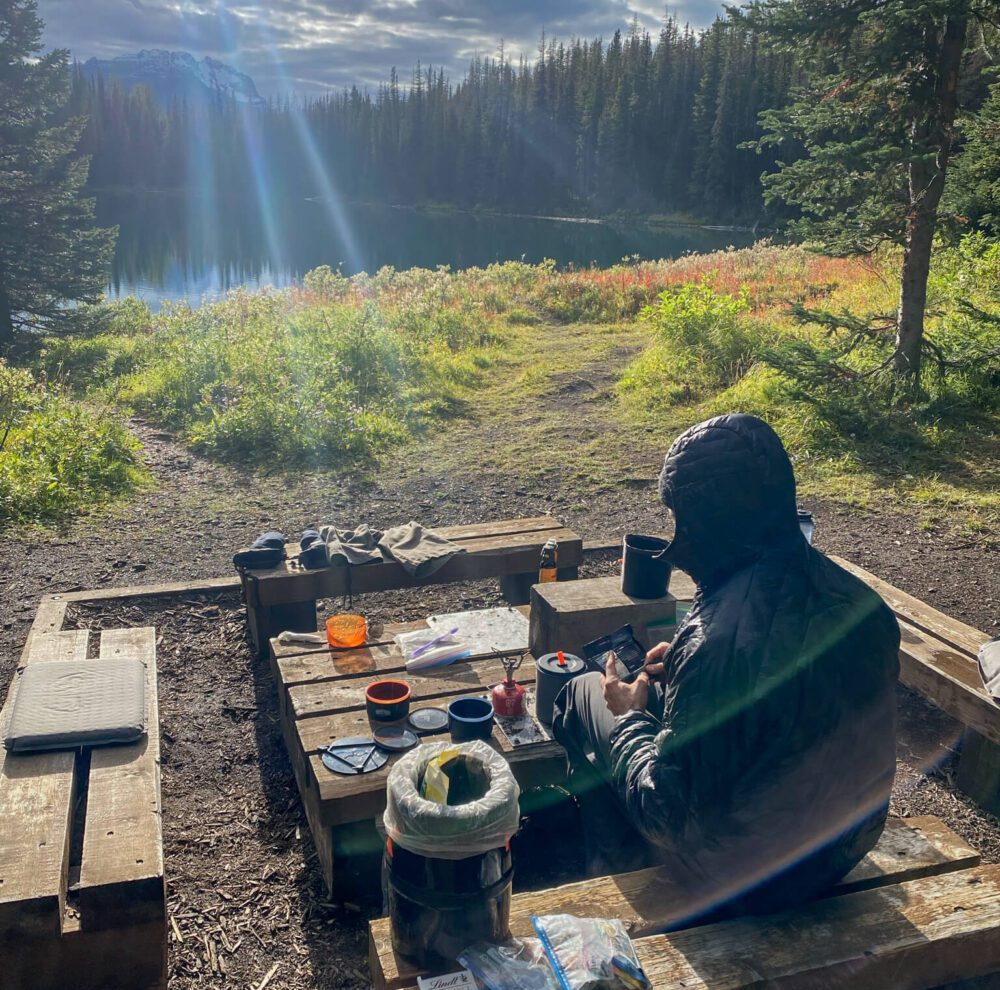
Puff Jacket
I’ve had the Patagonia Nano Puff Hoody for years and it works great on it’s own or underneath a shell for extra warmth. It’s a perfect multi-functional item for everyday, backpacking, and pretty much anything where you might need a bit of warmth. I’m still looking for an activity it doesn’t work for.
Rainpants
You leave camp on sunny day breaking sweat over a pass, only to have storm clouds roll in an hour later and dump sleet on you. Rainpants are lifesaver for rapidly changing mountain weather! Many have the functionality for quickly taking them on and off without removing your shoes/boots allowing you to stay comfortable even if you get caught in a sudden downpour. I’ve been happy with the Black Diamond StormLine Rain Pants. The Patagonia Torrentshell pants are also a great option.
Sun hoodie
When I went backpacking in the Grand Canyon a few years back, I was shocked to see throngs of Arizona Trail thru-hikers wearing hoodies in the 40 C heat. Turns out they weren’t just lost tech bros in the Grand Canyon, they were really onto something! A sun hoodie has been one of the best items I’ve added to my backpacking kit. They keep you burn free, are surprisingly cool, and let you get away with leaving the bottle of sunscreen at home (or bringing way less). The Sahara Sun Hoodie from REI is one of the best items I’ve added to my backpacking wardrobe and you can’t beat the price.
Zip Off / Convertible Hiking Pants
I never thought I’d see the day I embraced the zip-off pant. But hey, they’re really the best of both worlds for rapidly changing mountain environments and keeping warm in the evening when the temperature drops. Check out the Quandary Pant for a great option.
A pair of shorts
In addition to hiking pants, it’s nice to have a pair of shorts to change into after a long day on the trail or as a backup option. Trail running shorts are light and comfortable.
Base layer top
In addition to a sun hoodie, I also bring one base layer top to change into at camp or have as an alternate. The Capilene Cool trail t-shirts work great for me on long hikes and trail runs, but pretty much any athletic quick-dry top will work fine.
Base Layer Bottom
A merino wool or synthetic bottom baselayer is perfect for warming up at night or during chilly mornings.
Underwear
I’ve had the best luck with Patagonia underwear for hiking, trail running, mountain biking and skiing and found them to be more durable than the more expensive ones from lululemon. I usually bring a 2-3 pair depending on trip length.
3 Pairs of Hiking Socks
Darn Tough Vermont makes the best hiking socks hands down. They’re guaranteed for life/replaced free of charge and they don’t stink. Really! I typically bring 3 pair. 1 pair for hiking, 1 pair to change into at camp, and a reserve to throw into the rotation as needed.
Gloves
I typically bring a thin weatherproof pair of trail running gloves, like these.
Sun Hat & Winter Hat/Toque
A cap or Tilley hat keeps your face protected from the intense mountain sun. A toque is great for warming up during chilly mornings or evenings.
Sunglasses
Protect your eyes, don’t forget to bring your Sunglasses!
Trail Runners or Boots - Are Trail Runners or Hiking Boots Better for the HSCT?
The answer here is it depends! If you have your backpack weight down to less than 20-25lbs and have a decent amount of backpacking experience, trail runners are the way to go during the summer months. If you’re going at a time when snowfall and colder weather are a possibility go with boots. Boots are also a better choice if you have a heavier pack and are newer to backpacking as they provide more stability and sturdiness. You also feel rough sections of the trail substantially less on the base of your feet!
For cold weather or if I need to carry more weight I’ll use my Scarpa Kailash Hiking Boots. During the summer months and with a light load I’d wear my La Sportiva Bushido II.
Camp Shoes
Crocs are back! Well for backpacking camp shoes they never left… They’re lightweight and ugly as ever. Many backpackers find them to be the perfect camp shoe for resting sore feat after a long day in boots/shoes.
Personally, I still hate them. I have an old pair of Tom’s which I occasionally bring. They are light and less bulky than Crocs. If going with a trail runner, I’ll often ditch the camp shoe altogether and just loosen my laces. Your call!
Microspikes
Kahtoola Microspikes slip effortlessly over your boots and make walking on snow and ice a breeze. These are absolutely essential for early season travel.
Low Gaiters
Low gaiters are perfect for keeping rocks, sand, and snow out of your trail runners/boots and preventing blisters.
Toothbrush & Toothpaste
I recently started packing these toothpaste tabs in a tiny plastic bag/ziplock to save more space.
Duct Tape (For Repairs and Blisters)
Food
Everyone has different takes and caloric requirements, so I’m not going to tell you exactly what to bring. I generally avoid the just add water meals you find at REI or MEC. They’re overpriced and often don’t rehydrate as you’d like. Check out these incredible soups and chilis they taste better, are made with better ingredients, and are less expensive. As another option, I head to the grocery store and search for things like lentil rice, ramen, or plant-based mac & cheese. They’re basically just add/boil quickly meals and taste like real food. Always rebag/repack this type of food as there is no reason to carry unnecessary packaging on the trail.
Final thoughts on hiking the Howe Sound Crest Trail
The Howe Sound Crest Trail offers an incredible backcountry experience to properly prepared adventurers. If you have questions drop me a note in the comments below and I’ll do my best to help you out! Happy hiking friend!
More adventures you might enjoy
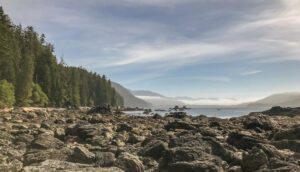
The West Coast Trail Packing List You MUST Read Before Hiking
Don’t mess up packing for the West Coast Trail like I did. Learn from my mistakes with this ultimate guide to packing for the West Coast Trail!.
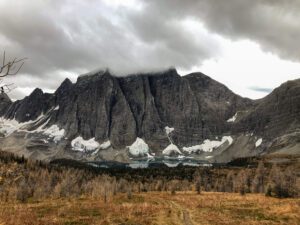
Rockwall Trail | The Ultimate Guide to Hiking the Rockwall
The Rockwall Trail is one of the Canadian Rockies’ premier backpacking trips. For 55km you’ll be treated to a seemingly unending supply of sublime Rocky Mountain scenery. Here’s how to make it happen with must-read tips for getting a permit and beating the crowds.
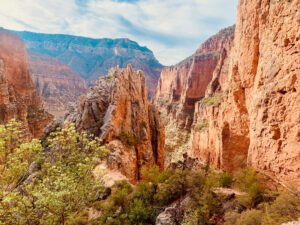
Grand Canyon Backpacking | Ultimate Rim to Rim to Rim Guide
Backpacking the Grand Canyon from rim to rim to rim is the perfect adventure to get introduced to this natural wonder of the world. We’ve put together the ultimate guide to help you make it happen.
Michael